

Page 1
ASSEMBLY INSTRUCTION
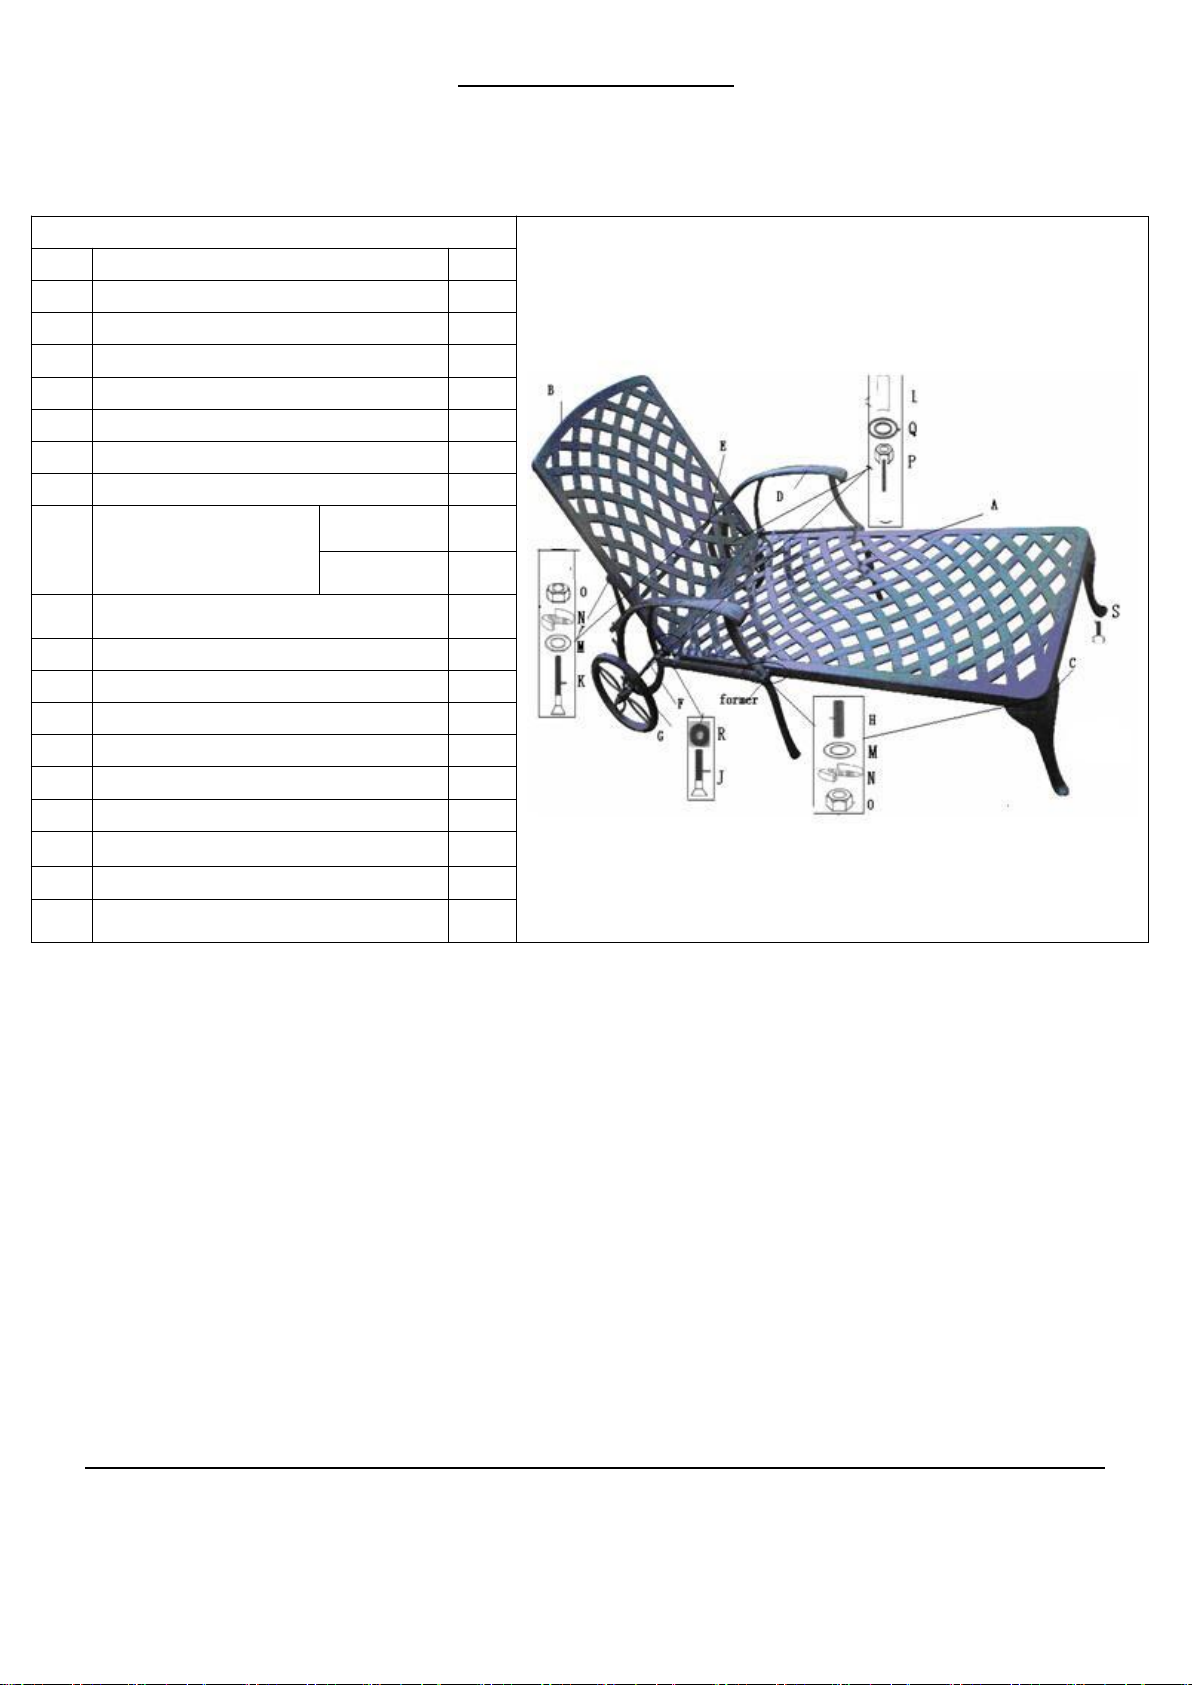
PARTS&HARDWARE LIST
No.
DESCRIPTION
QTY
A
Seat
1
B
Back
1
C
Leg
2
D
Arm (Left&Right)
2
E
Lever Back
1
F
Linking Strip Of Type
1
G
Type
2
H
M8 Headless
Screws
M8*45
4
M8*32
4
J
M8*55 Flat Head Screws
2
K
M8*45 Flat Head Screws
2
L
Copper Ringer
2
M
M8 Washer
10
N
M8 Spring Washer
10
O
M8 Nut
8
P
M10 Hexagon Screws
2
Q
Big Washer M10*25
2
R
Plastic Washer
2
S
Feet Pads
4
CAUTION:
1. Please read these instructions carefully before assembling. Count and organize all parts before you begin.
2. Assemble product on clean soft surface, such as a piece of carpet, so as to prevent the surface paint of parts from
scratching off.
ASSEMBLY:
1. Connect seat (A) to the left or right arms (D) with (H, N, M, O). Pls note that former use M8*45 headless screw and
the behind one use M8*45 headless screw.
2. Fix legs (C) to seat with ((H, N, M, O). Pls don’t over tighten the screws.
3. Connect left or right arms (D) to the linking strip or tire, then insert copper (L) into the ends of the (F), then slip (G)
on and fixed with (Q, R). Pls don’t over tighten the screws.
4. Then put the installed lounger even on the ground, that is to adjust the legs, arms to the same place, then tighten the
screws. It’s more important!
5. Connect back (B) and (E) with (K, M, N, O), pls use the flat head screw of M8*45 and do not over tighten.
6. Connect back (B) to the left or right arms (D) with (J, S), if you find some gap between the armrests and back, pls
insert plastic washers (R) between (D) and (B).
8. Put the bolt cap (I) onto the M8 nuts and big washer M10.
9. If not even, adjust feet pad (S).
Over tightening can damage aluminum parts!
PLEASE DO NOT OVER TIGHTEN
(Aluminum is soft metal, over tightening may strip thread or break parts)
 Loading...