

Page 1

Chapter 1 Installation
█ For USB 2.0 device
Installation
1. Please plug the power adapter and USB cable then turn on the switch.
2. Once connections are complete, Windows will automatically enumerate (establish a
drive letter for the device), and the blue LED on the device will start blinking.
3. After a few seconds, when the blue LED stops blinking, the device is ready for use.
Then a pop-up window will appear, as in the diagram below, to indicate the presence
of the USB device. This device will be recognized by the computer as a USB device.
Safely Removal
1. Please right click the green icon in the control bar and safety removal the hardware.
Page 2
█ For ESATA device
Installation
1. Please plug the power adapter and ESATA cable then turn on the switch.
2. Once connections are complete, Windows will automatically enumerate (establish a
drive letter for the device), and the blue LED on the device will start blinking.
3. After a few seconds, when the blue LED stops blinking, the device is ready for use.
Please click on “My Computer” and you will see the new drive letter to indicate the
presence of the ESATA device.
4. If the driver of the host can support removal icon you can see the removal icon in the
control bar.
Safely Removal
1. If the driver of the host can support REMOVAL icon you can see it in the control bar.
Follow the instruction same as the USB device to safely remove the device.
2. The removal icon doesn’t appear in the control bar if the driver of the host cannot
support. Please follow the step to safely removal the diver:
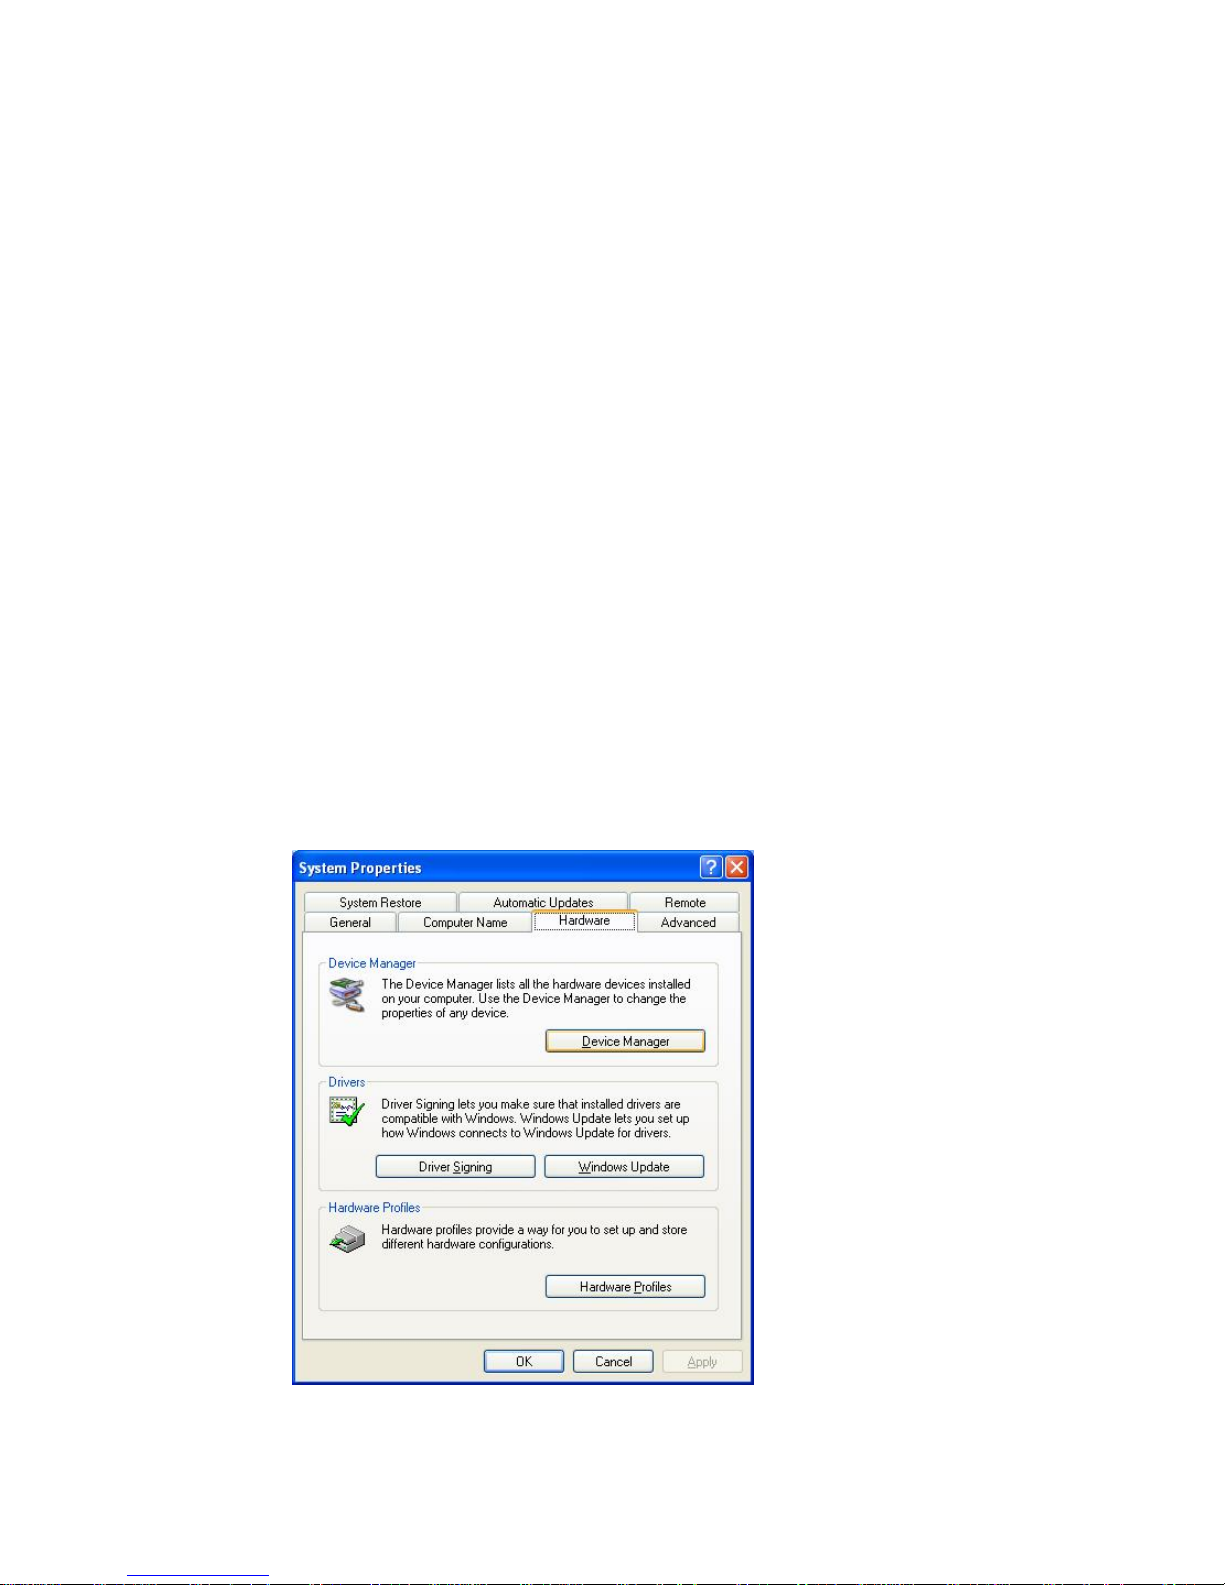
2-a. Right click on “My Computer” and enter into “ Properties”. Then click on “Device
Manager”
Page 3
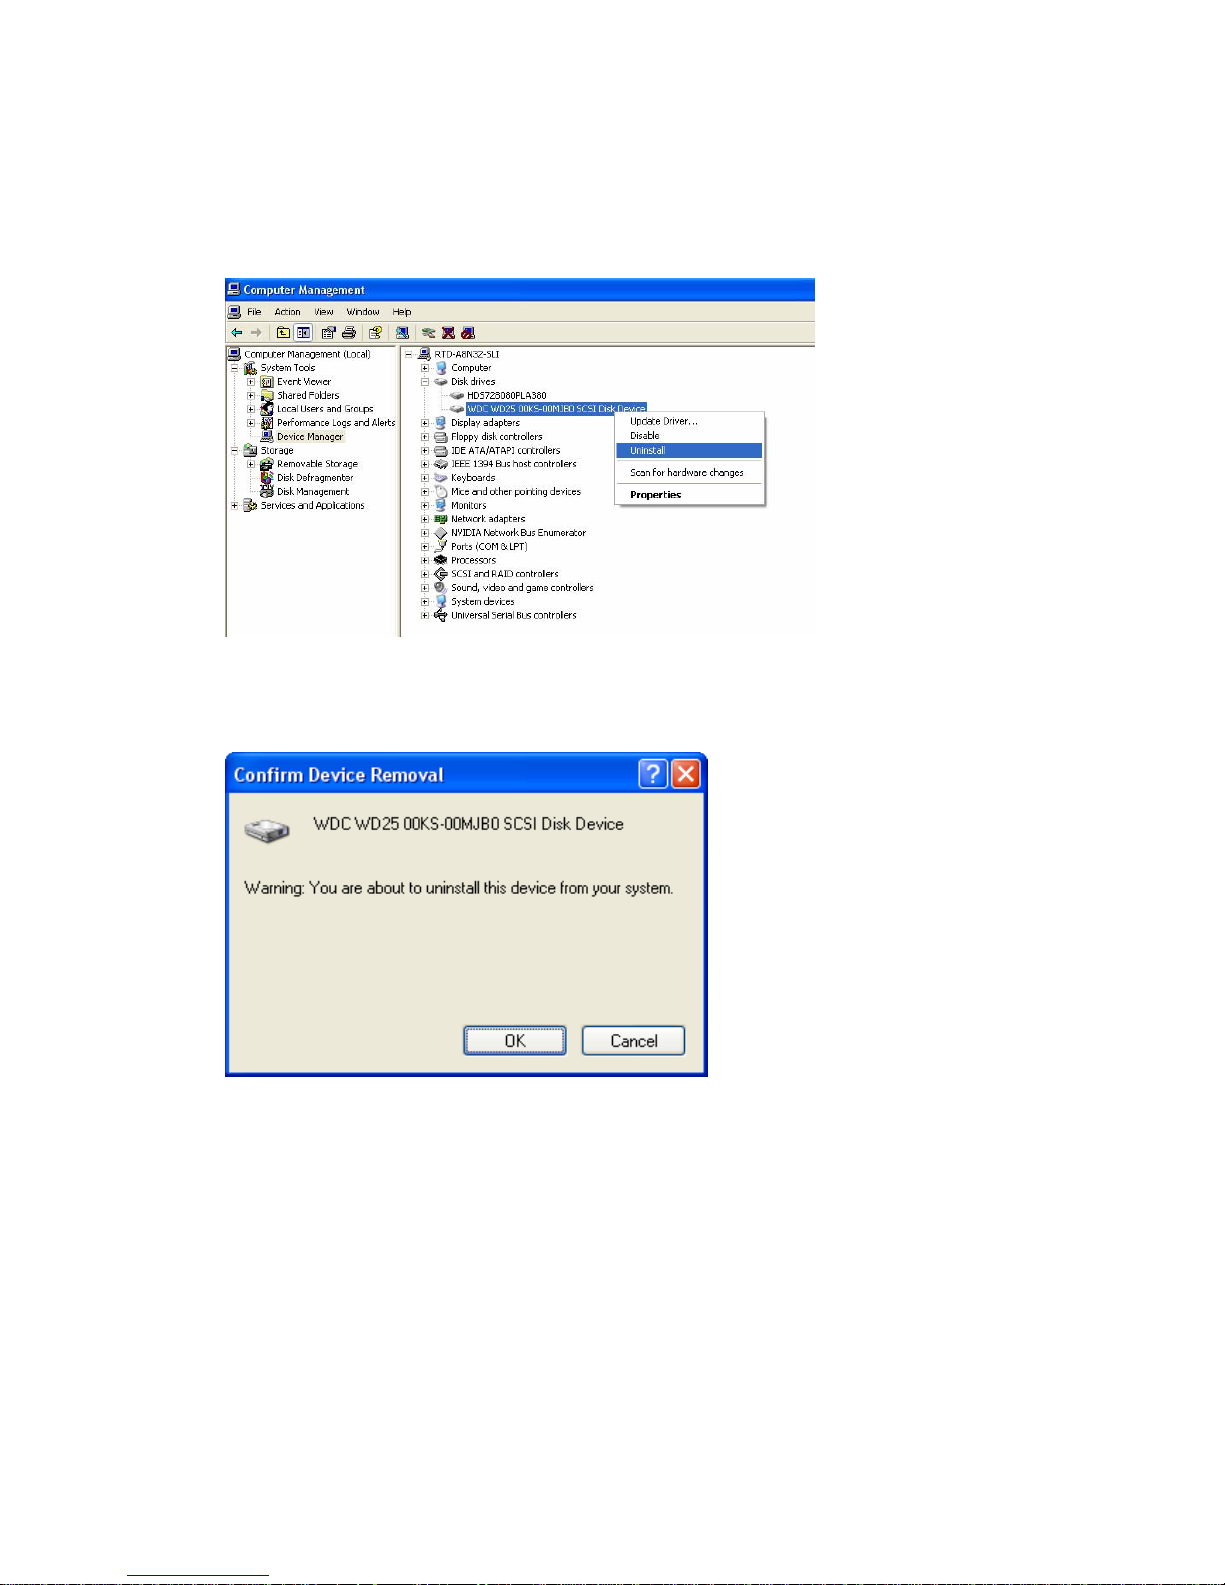
2-b. Please find the model name of HDD that you used in the “Disk drives”. Right click
and choose “Uninstall” to safely remove the device.
Notice: Please note that the string “SCSI Disk Device” represented E SATA device.
2-c. Click on “OK” to remove.
Page 4
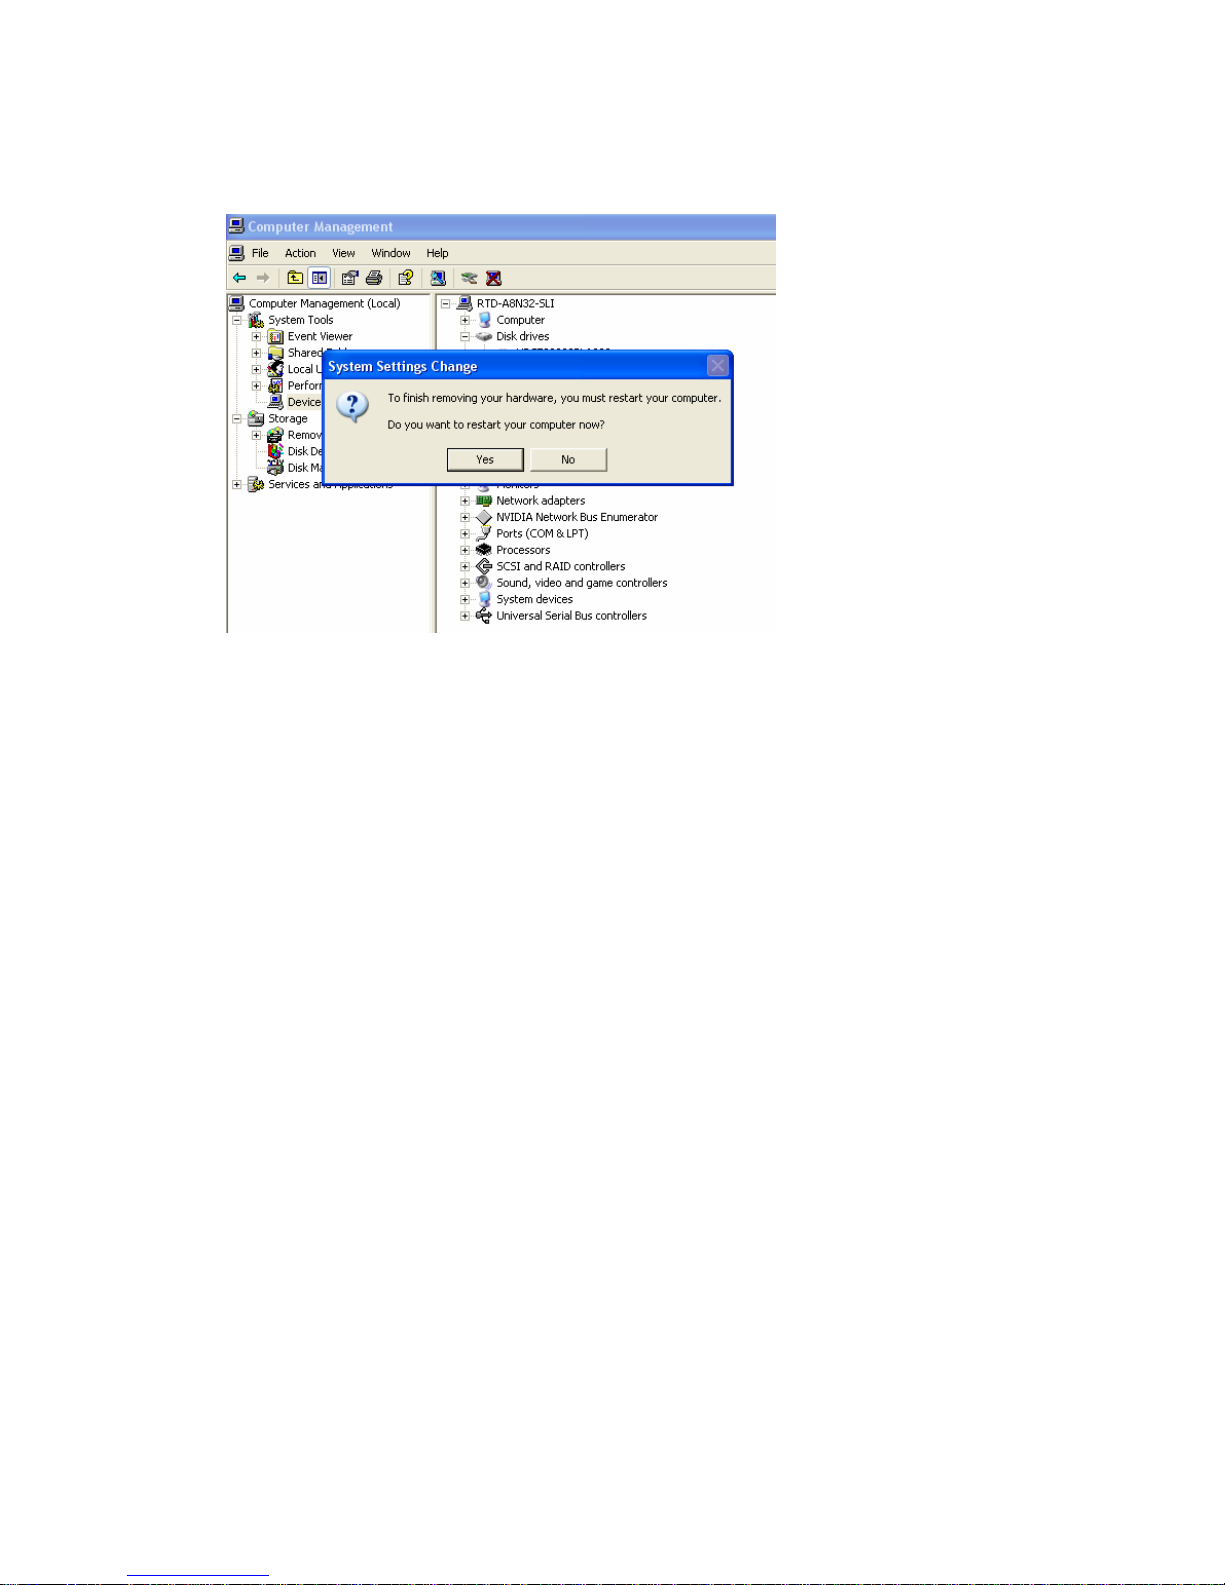
2-d. Click on “Yes” to restart your system and the drive will be removed
Page 5

Chapter 2 FAQ
1. The system could not detect the device. What should I do?
Ans:Please follow the step to check the issue.
a. Please make sure the BIOS are setting to “Default“and then restart the system. Or you can content
the system provider.
b. Please make sure the system can support USB device if you connect with USB interface device.
Please go to “Device Management" and review the item“Universal Serial Bus controllers". To
check the details below this item and if it appear an exclamation mark or red question mark please
content the system provider.
c. Please check the HDD status. If the HDD is new please do partition and format it. Then you will see
new drive letter in “My Computer".
 Loading...