

Cool-Icam CIC-101, Stylus 1000 User Manual

1
TM
User’s Manual
1. Introduction
Congratulations on purchasing the Stylus 1000. Using the latest innovations in technology the Stylus 1000 offers fun,
affordable and easy to use digital imaging.
Although you probably want to get started right away, please take a few minutes to read this guide and familiarise yourself
with your new Stylus 1000. Your new Stylus 1000 will take approximately 20 Hi-Res (High Resolution) or 80 Low-Res
(Low Resolution) images, which you upload to your PC (Personal Computer) running Windows® 98 and Windows® Me or
Macintosh™ running OS 8.6 - 9.1 via the USB (Universal Serial Bus) port.
You can also use your Stylus 1000 to capture not only snaps of your family and friends, but also video of them in action.
Your Stylus 1000 can also be used as a Web Cam. If you have an internet connection and microphone (not supplied) you
can chat face-to-face with friends and colleagues, conferencing in real time.
Please note that your images are stored on your Stylus 1000’s internal memory. When you have taken your images, the
Stylus 1000 will wait for 30 seconds and then automatically switch to Stand-by mode, which draws a constant trickle of
power from the battery.
www.coolicam.com

2
2. Table of Contents
1. Introduction 1
2. Table of Contents 2
3. System Requirements 3
4. Package Contents 3
5. Software Installation 3
For Windows® Users:
PC
5.1 How to install the Digital Camera Manager Software 3
5.2 How to install ArcSoft® Softwares 4
5.3 How to install Microsoft® NetMeeting™ 4
5.4 How to install Adobe® Acrobat® Reader 5
For Macintosh™ Users:
MAC
5.5 How to install the Digital Camera Driver Software 5
5.6 How to install ArcSoft® Softwares 6
5.7 How to install CU-SeeMe™ 6
5.8 How to install Adobe® Acrobat® Reader 6
6. Battery Installation 6
6.1 Batteries Replacement 6
7. Getting to Know Your Stylus 1000 7
7.1 Shutter Button 7
7.2 Viewnder 7
7.3 Mode Button 7
7.4 LCD Display 7
7.5 Power 8
7.6 Stylus 1000 Stand 8
8. Getting Started 8
8.1 Switching the Stylus 1000 On from Stand-by Mode 8
8.2 Taking an Image 8
8.3 Continuous Mode 8
8.4 Self-Timer Mode 9
8.5 Clearing the Stored Images/Movie Clips 9
8.6 Changing the Image Resolution 9
9. Connecting your Stylus 1000 to your Computer 9
10. Uploading Images to Your Computer 9
For Windows® Users:
PC
10.1 Running the Digital Camera Manager 9
10.2 Quick Reference 10
10.3 Uploading Images 10
10.4 Creating & Uploading Movie Clips 11
10.5 Creating Live Movie Clips 11
For Macintosh™ Users:
MAC
10.6 Uploading Images and movie clips 12
11. How to Use Other Software 13
For Windows® Users:
PC
11.1 How to use PhotoStudio® 2000 13
11.2 How to use ArcSoft PhotoFantasy™ 2000 13
11.3 How to use ArcSoft PhotoPrinter® 2000 14
11.4 How to use ArcSoft VideoImpression™ 1.6 14
11.5 How to use Microsoft® NetMeeting™ 14
11.6 How to use Adobe® Acrobat® Reader 15
For Macintosh™ Users:
MAC
11.7 How to use PhotoStudio® 2000 15
11.8 How to use ArcSoft PhotoFantasy™ 2000 15
11.9 How to use ArcSoft PhotoPrinter® 2000 15
11.10 How to use ArcSoft VideoImpression™ 1.5 16
11.11 How to use CU-SeeMe™ 16
11.12 How to use Adobe® Acrobat® Reader 16
12. Customer Support 17
13. ArcSoft® WorldWide Customer Support 17
14. Troubleshooting 18
15. Battery Guidance 19
16. Technical Specications 20
17. FCC Notice 20
3
3. System Requirements
For Windows® Users
PC
• Compatible with Microsoft® Windows® 98, 98SE and Me
• Pentium® 333Mhz or Pentium® compatible processor
• 128MB RAM or higher
• USB Port
• 200MB free disk space
• CD-ROM Drive
• Color Monitor with High Color (16-bit) graphic capability or higher
• Standard mouse and keyboard
For Macintosh™ Users
MAC
• PowerPC® Processor
• Mac™ OS version 8.6 - 9.2
• USB port
• 32MB RAM
• 150MB Free disk space
• Color Monitor with High Color (16-bit) graphic capability or higher
• CD-ROM Drive
• Standard mouse and keyboard
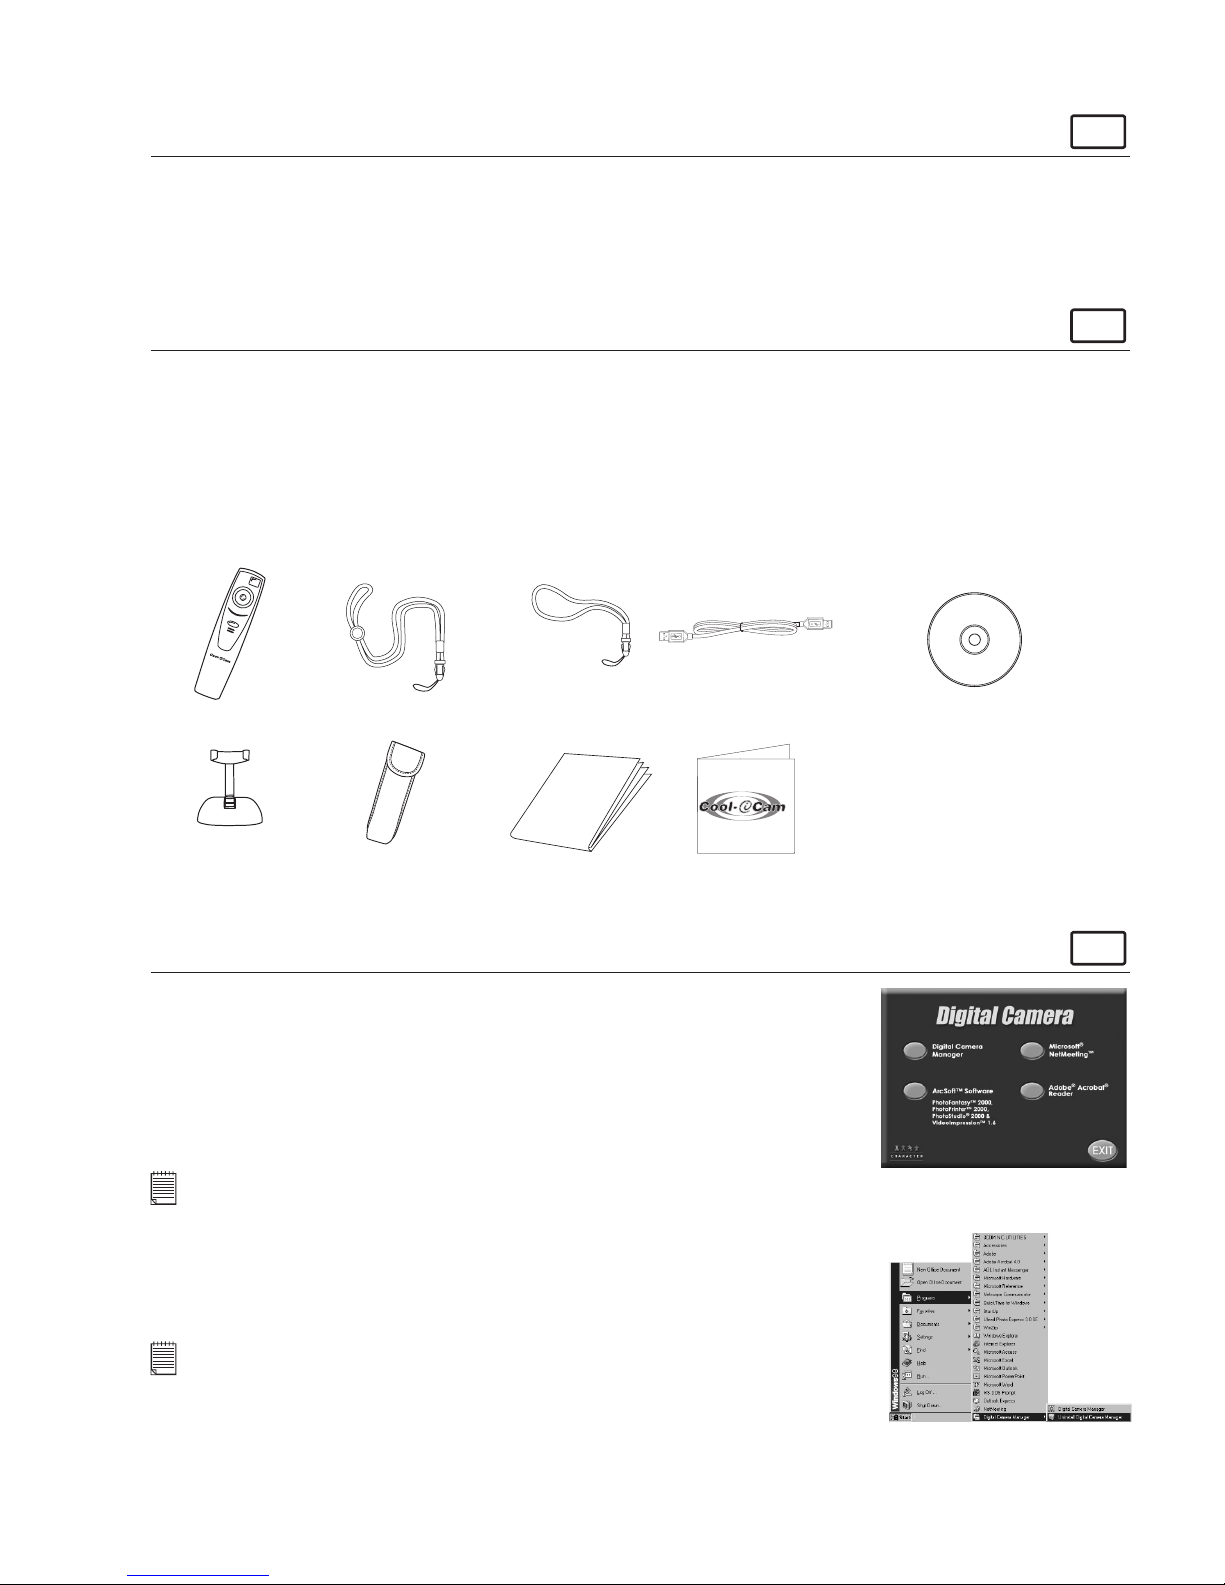
4. Package Contents
Registration Card
P
l
e
a
s
e
t
a
k
e
a
m
o
m
e
n
t
t
o
f
i
l
l
o
u
t
a
n
d
r
e
t
u
r
n
t
h
i
s
R
e
g
i
s
t
r
a
t
i
o
n
C
a
r
d
.
Y
o
u
r
v
a
l
u
a
b
le
i
n
p
u
t
w
i
l
l
h
e
l
p
u
s
t
o
s
e
r
v
e
y
o
u
b
e
t
t
e
r
.
P
r
o
d
u
c
t
R
e
g
is
t
r
a
t
io
n
C
a
r
d
™
Stylus 1000
Stylus 1000 Stand
Neck Strap with Clip
Cool-iCam Pouch
USB Cable
Wrist Strap with Clip
Stylus 1000 Software CD-ROM
(includes Digital Camera Manager,
ArcSoft™ PhotoStudio® 2000 (PC & Mac),
ArcSoft™ PhotoFantasy™ 2000 (PC & Mac),
ArcSoft™ PhotoPrinter™ 2000 (PC & Mac),
ArcSoft™ VideoImpression™ 1.6 (PC) & 1.5 (Mac),
Microsoft® NetMeeting™ (PC), CU-SeeMe™ (Mac) &
Adobe® Acrobat® Reader (PC & Mac)).
User’s Manual
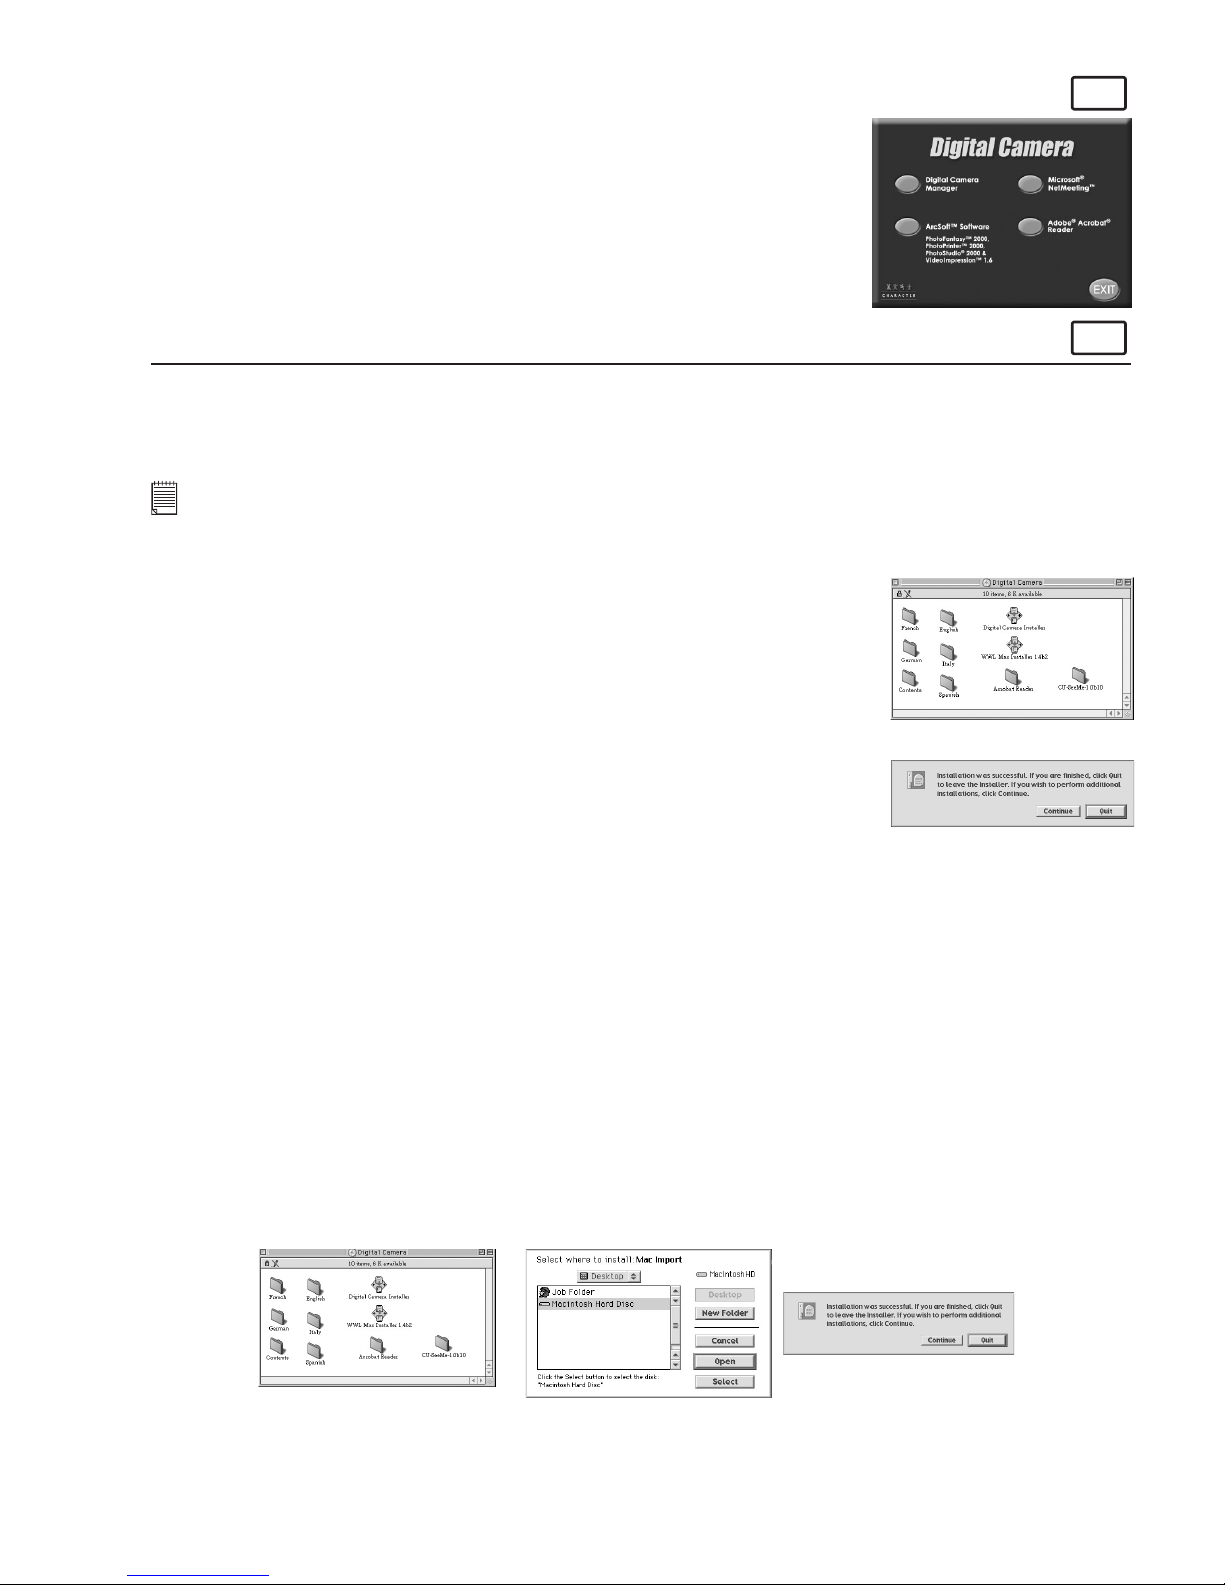
5. Software Installation
For Windows® Users:
PC
5.1 How to Install Digital Camera Software
5.1.1 How to Install Digital Camera Manager Software
Your Digital Camera Manager should be installed rst.
1. Insert the CD-ROM disc into the CD-ROM drive and close the CD-ROM drawer.
2. An installation wizard will automatically launch.
3. Click “Digital Camera Manager” icon.
4. Follow the instructions presented on the screen to complete the installation.
5. Click “OK” to restart your computer and wait for your PC to restart automatically.
6. Now go to Section 5.2.
Notes:
If the setup screen doesn’t appear after loading the CD, then you can manually start it by double clicking the “My Computer” Icon on your
desktop, then double-clicking the icon for the CD-ROM drive. When the CD-ROM window opens, double-click the “digital camera” icon.
5.1.2 Uninstalling your Digital Camera Manager
To uninstall Digital Camera Manager, click the “Start Menu” on your Windows® desktop,
choose Digital Camera Manager folder under Program and choose “Uninstall Digital
Camera Manager”. Follow the onscreen instructions.
Notes:
Uninstalling your Digital Camera Manager does not delete your album folders and therefore all images
transferred into your default or created albums will be preserved. You will be able to access these
folders on your system desktop.

4
5.2 How to Install ArcSoft® Software
Introduction to the Software
PC
PhotoStudio® 2000
PhotoStudio® 2000 is a full-featured, easy-to-use digital image-editing program that provides a complete set of photo
editing and retouching tools, plus a wide selection of special effects and enhancements. Its powerful features include a
wide variety of input and output options, layers, multiple undo and redo functions, image management tools, editable text,
multiple le format support and a lot more.
ArcSoft PhotoFantasy™ 2000
ArcSoft PhotoFantasy™ is an image entertainment application that enables users to create “photo fantasies” by combining
their personal photos with a wide variety of fantasy backgrounds. Users can get their own images from digital cameras,
scanners, disk drives and Photo CDs, and seamlessly combine them with just a few clicks of the mouse. The fantasy
backgrounds include ctional characters, classic works of art, Olympic heroes, 50’s funnies, bathing beauties, muscle men
and a lot more.
ArcSoft PhotoPrinter® 2000
ArcSoft PhotoPrinter® is an easy-to-use printing utility that enables the user to layout and print multiple images in different
sizes quickly and easily on a single sheet of paper. The program offers a large selection of printing templates, including
Kodak Digital Science Inkjet Photo Paper Templates and Avery-brand paper products. It also includes commonly used
image-editing tools and a wide selection of templates for frames, edges and backgrounds for enhancing images.
ArcSoft VideoImpression™ 1.6
ArcSoft VideoImpression™ is an easy-to-use video and image editing software program.
The program enables users to create and edit new videos using existing video and image
les - making desktop video presentations for home, business, and the Web.
Visit http://www.arcsoft.com for all your FAQ’s, tips and technical support see Section
12 for more details.
5.2.1 How to Install ArcSoft® Software
1. Re-insert the CD-ROM disc into the CD-ROM drive and close the CD-ROM drawer.
2. An installation wizard will automatically launch.
3. Click the “ArcSoft® Software” icon.
4. Select the language for the installation and click “OK”.
5. Follow the on-screen prompts.
6. Select the software you want or you do not want installed
by clicking on the tick boxes next to the software title.
Click “Next >” to continue.
7. Follow the instructions presented on the screen to complete
the installation.
Notes:
Don’t worry if you made a mistake and want to add in ArcSoft® titles you did not tick. Reinsert the CD-ROM and follow steps 1 - 6 ticking
only the software you want to add.
5.3 How to install Microsoft® NetMeeting™
NetMeeting™ provides the most complete conferencing solution for the Internet and corporate intranet. Powerful features
let you communicate with both audio and video, collaborate on virtually any Windows-based application, exchange graphics
on an electronic whiteboard, transfer les, use the text-based chat program, and much more. Using your PC and the
Internet, you can now hold face-to-face conversations with friends and family around the world.
To install the Microsoft® NetMeeting™:
1. Insert the CD-ROM disc into the CD-ROM drive and close the CD- ROM drawer.
2. An installation wizard will automatically launch.
3. Click the “Microsoft® NetMeeting™” icon.
4. Follow the instructions presented on the screen to complete the installation.
5. You will have a choice during installation to place a desktop icon on your desktop for
easy access directly to the software.
6. For further installation details, please visit the following website:
http://www.microsoft.com/windows/netmeeting
Notes:
• You need to enter your name, your e-mail address and country details during installation.
• You need to adjust the playback volume and your record volume.
5
5.4 How to install Adobe® Acrobat® Reader
PC
Adobe® Acrobat® Reader lets you view and print Adobe Portable Document format
(PDF) les on all major computer platforms, as well as ll in an submit Adobe PDF forms
online.
To install the Adobe® Acrobat® Reader:
1. Reinsert the CD-ROM disc into the CD-ROM drive and close the CD-ROM drawer.
2. An installation wizard will automatically launch.
3. Click the “Adobe® Acrobat® Reader 4.05” icon.
4. Follow the instructions presented on the screen to complete the installation.
5. Visit http://www.adobe.com/ for all your FAQ’s, tips and technical support.
For Macintosh™ Users:
MAC
You are now able to enhance the resolution of your taken images by using the Digital Camera Driver. The images can be
converted to higher resolution automatically by using a driver named “WWL Mac Installer”. Or you can use the “Digital
Camera Driver” if you want the resolution remain unchanged.
5.5 How to Install Digital Camera Driver Software
Notes:
Macintosh™ Users may only choose one type of driver at a time to install (digital camera driver without enhancement or with enhancement).
The driver cannot run properly if both drivers are installed.
5.5.1 How to Install Digital Camera Driver (without enhancement):
1. Insert the CD-ROM disc into the CD-ROM drive and close the CD-ROM drawer.
2. Double click the CD-ROM icon “Digital Camera”.
3. Double click the “Digital Camera Installer” icon.
4. Click “Continue”.
5. Please disconnect all USB camera before continuing.
6. Choose a folder to install “STV0680 Capture” Plug-in le and click “Choose” to conrm.
Locate the “STV0680 Capture” Plug-ins le in Hard Disk if you have not install any
Photo-retouching software.
If you already installed ArcSoft™ PhotoStudio® 2000 and you want to use it as a
default software to retrieve the images from Stylus 1000, go to “Plug-ins” folder in the
“PhotoStudio® 2000” folder and click “Select”.
7. Click “Quit” to nish the installation.
8. A folder named “STV0680 Camera Snapshots” will appear in your Hard Disk after your
Stylus 1000 is connected to your Mac via the USB cable for collecting images and
movies.
5.5.2 How to Uninstall Digital Camera Driver (without enhancement):
To uninstall the Digital Camera Driver (without enhancement), you have to remove 3 les located in different folders and
restart your Mac. The 3 les are listed below.
“STV0680 Camera” in Control Panel Folder
“STV0680 Downloader” in Extensions Folder in System Folder
“STV0680 Capture” in Plug-ins Folder in the PhotoStudio® 2000
5.5.3 How to install Digital Camera Driver (with enhancement):
1. Insert the CD-ROM disc into the CD-ROM drive and close the CD-ROM drawer.
2. Double click the CD-ROM icon “Digital Camera”.
3. Double click the “WWL Mac Installer 1.4b2” icon.
4. Click “Continue”.
5. Choose a folder to install “WWL Mac Import” Plug-in le and click “Choose” to conrm. Locate the “WWL Mac Import”
Plug-ins le in Hard Disk if you have not install any Photo-retouching software.
If you already installed ArcSoft™ PhotoStudio® 2000 and you want to use it as a default software to retrieve the images
from Stylus 1000, go to “Plug-ins” folder in the “PhotoStudio® 2000” folder and click “Select”.
6. Click “Quit” to nish the installation.
7. A folder named “WWL Mac Snapshots” will appear in your Hard Disk after your Stylus 1000 is connected to your Mac
via the USB cable for collecting images and movies.
6
5.5.4 How to Uninstall Digital Camera Driver (with enhancement):
To uninstall the Digital Camera Driver (with enhancement), you have to remove 3 les located in different folders and
restart your Mac. The 3 les are listed below.
“WWL Mac” in Control Panel Folder
“WWL Mac” in Extensions Folder in System Folder
“WWL Mac Import” in Plug-ins Folder in the PhotoStudio® 2000
5.6 How to Install ArcSoft® Software
MAC
5.6.1 How to Install PhotoStudio® 2000
1. Insert the CD-ROM disc into the CD-ROM drive and close the CD-ROM drawer.
2. Double click the CD-ROM icon “Digital Camera”.
3. Double click the “PhotoStudio® 2000 Installer” icon in English folder.
4. Follow the instructions presented on the screen to complete the installation.
5.6.2 How to Install ArcSoft PhotoFantasy™ 2000
1. Insert the CD-ROM disc into the CD-ROM drive and close the CD-ROM drawer.
2. Double click the CD-ROM icon “Digital Camera”.
3. Double click the “PhotoFantasy™ 2000” icon in English folder.
4. Follow the instructions presented on the screen to complete the installation.
5.6.3 How to Install ArcSoft PhotoPrinter® 2000
1. Insert the CD-ROM disc into the CD-ROM drive and close the CD-ROM drawer.
2. Double click the CD-ROM icon “Digital Camera”.
3. Double click the “PhotoPrinter® 2000” icon in English folder.
4. Follow the instructions presented on the screen to complete the installation.
5.6.4 How to Install ArcSoft VideoImpression™ 1.5
1. Insert the CD-ROM disc into the CD-ROM drive and close the CD-ROM drawer.
2. Double click the CD-ROM icon “Digital Camera”.
3. Double click the “VideoImp™ 1.5 installer” icon in English folder.
4. Follow the instructions presented on the screen to complete the installation.
5.7 How to Install CU-SeeMe™
CU-SeeMe™ started the craze for videochat on the Internet and it’s still the most popular, full-featured software for seeing,
hearing and sharing. It can be used over the Internet or any TCP/IP network. With CU-SeeMe™, you can make new
friends, expand your professional and social networks, nd people with similar interests, watch informative and entertaining
cybercast events, and much more.
1. Insert the CD-ROM disc into the CD-ROM drive and
close the CD-ROM drawer.
2. Double click the CD-ROM icon “Digital Camera”.
3. Double click the “CU-SeeMe™1.0B10” folder followed by
“CU-SeeMe™1.0B10” icon.
4. Follow the instructions presented on the screen to complete
the installation.
5.8 How to Install Adobe® Acrobat® Reader
1. Insert the CD-ROM disc into the CD-ROM drive and close the
CD-ROM drawer.
2. Double click the CD-ROM icon “Digital Camera”.
3. Double click the “Acrobat® Reader” folder and select the
language you wish to install.
4. Follow the instructions presented on the screen to complete
the installation.
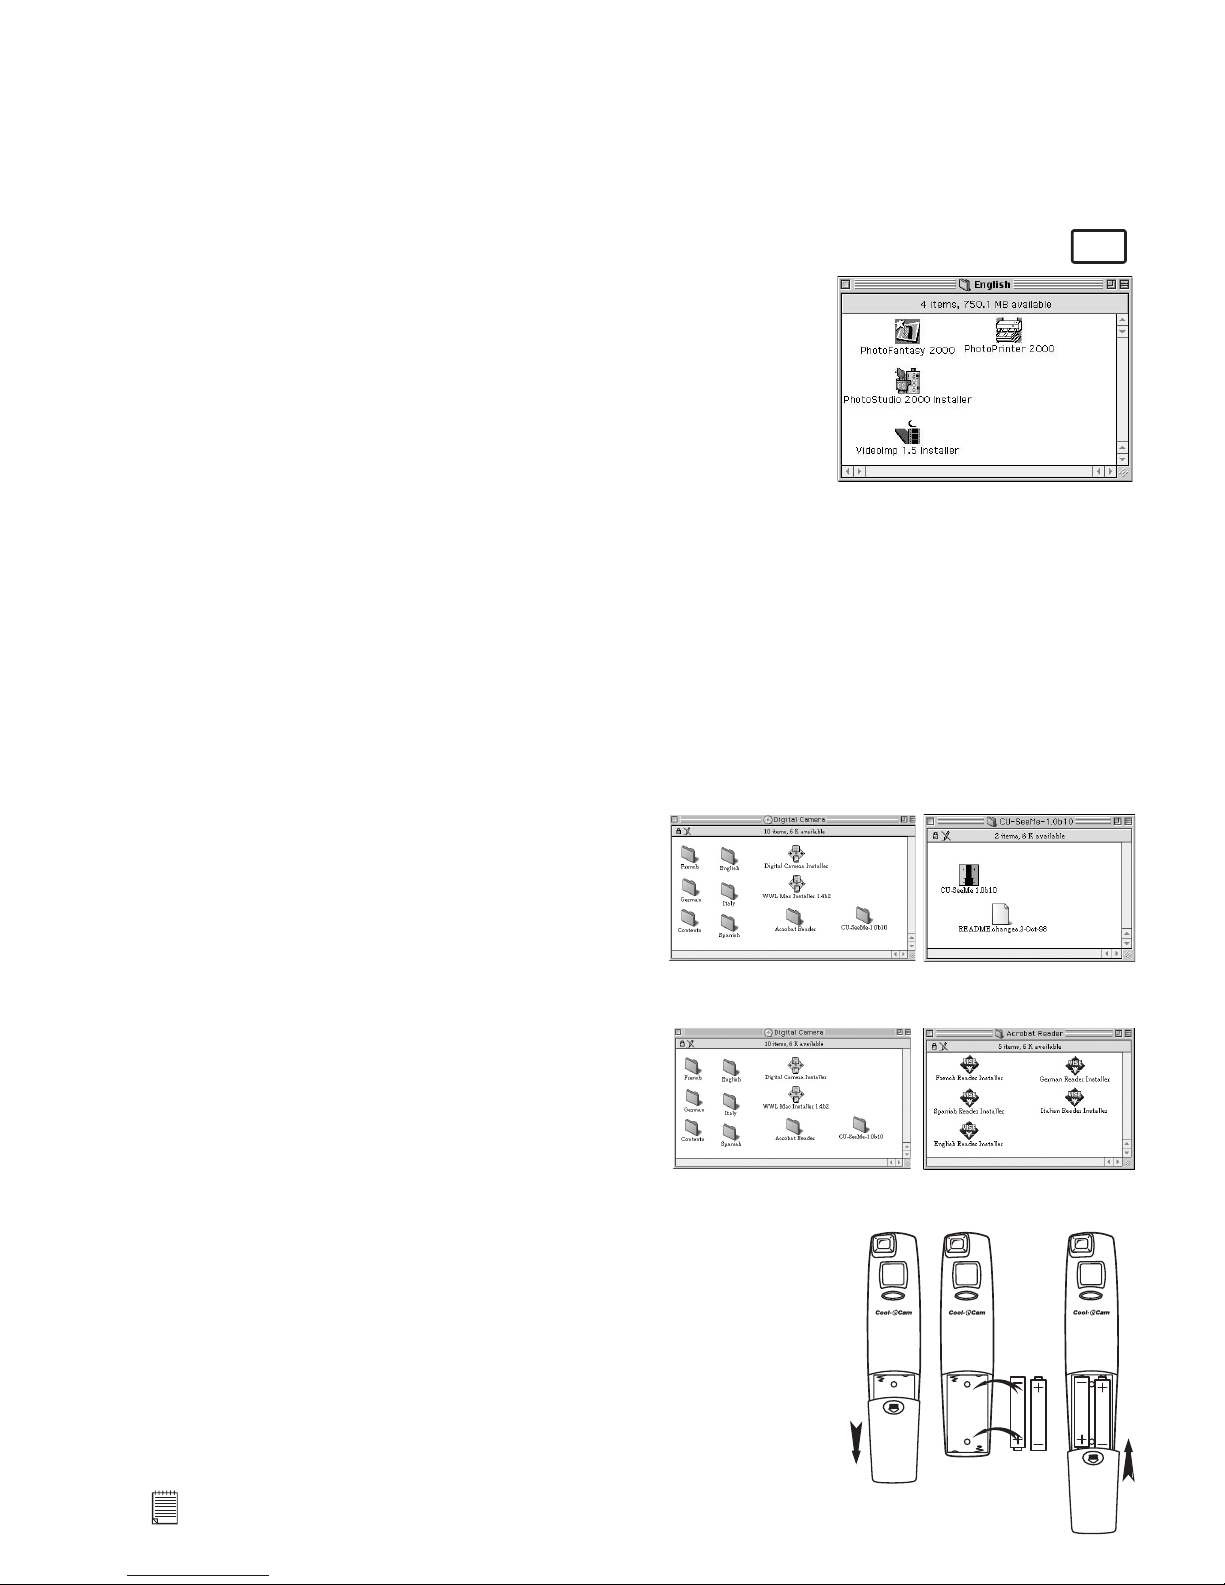
6. Battery Installation
6.1 Batteries Replacement
1. Press and slide the battery door downwards (as shown on the diagram below).
Insert the 2 fresh AAA alkaline batteries into the battery compartment (Make sure
you follow the correct polarity (+) (-) as indicated).
2. Push and slide the battery door upwards to close the battery door.
AAA
AAA
2
AAA
AAA
Important Note:
• Upload any images stored in your Stylus 1000 to your computer before removing the battery.
 Loading...