

Page 1
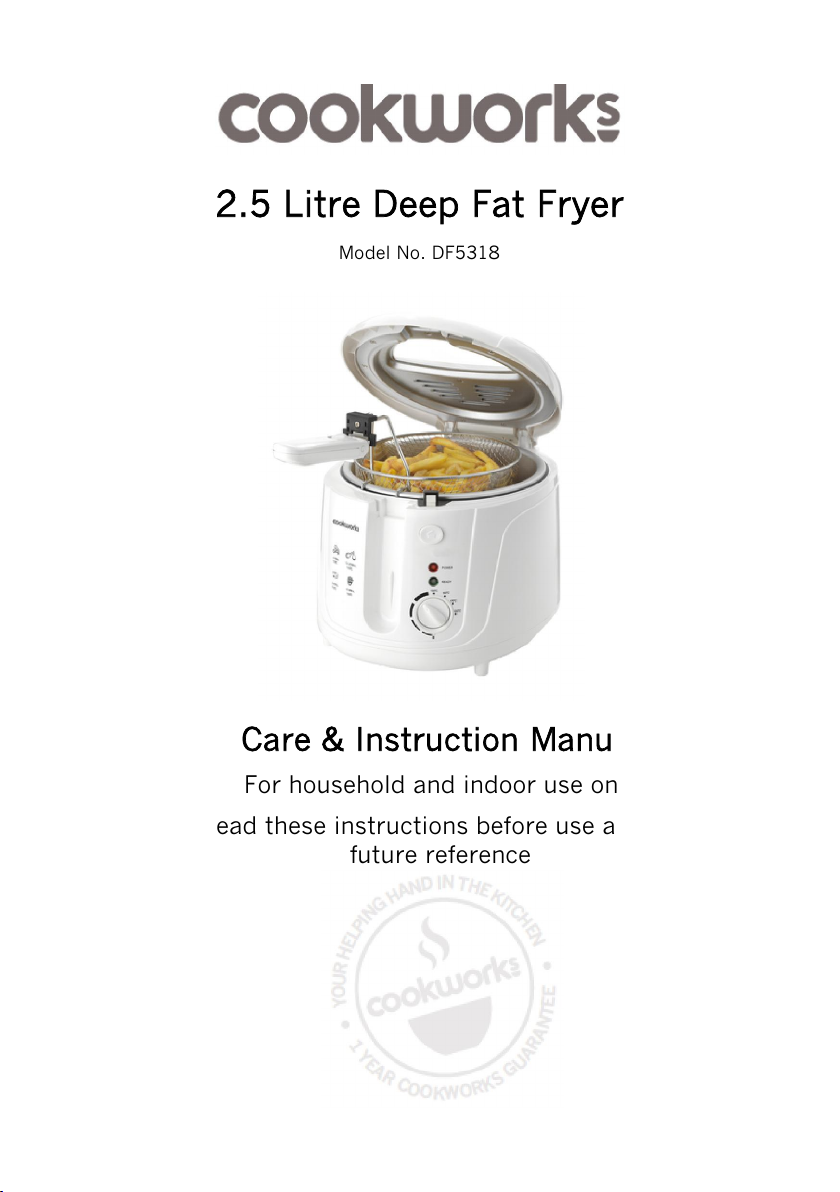
2.5 Litre Deep Fat Fryer
Model No. DF5318
Care & Instruction Manual
For household and indoor use only
Please read these instructions before use and retain for
future reference
ISSUE-1 30/10/2017 1
Page 2

Electrical safety
You should only plug the appliance into a 220V‐240V AC, 50Hz
supply. Connecting it to other power sources may damage the
appliance and will invalidate the guarantee.
Switch off and unplug when not in use and before cleaning the
appliance.
Keep the appliance and its cord out of reach of children less than
8 years.
This appliance shall not be used by children from year 0 to 8
years. This appliance can be used by children aged from 8 years
if they are continuously supervised. The appliance can be used
by people with reduced physical, sensory or mental capabilities
or lack of experience and knowledge if they have been given
supervision or instruction concerning use of the appliance in a
safe way and understand the hazards involved. Cleaning and user
maintenance shall not be made by children.
Keep cooker housing, cable, and plug dry and away from areas
where it is likely to get splashed. Never immerse in water.
Do not pull on the cable to disconnect from the mains supply.
Do not operate the appliance if damaged or after it malfunctions.
In the event the supply cord is damaged, it must only be replaced
by a qualified service engineer, with a suitably approved part.
This appliance must be positioned so that the plug is accessible
and the plug socket is within easy reach of the power cord.
This appliance must be plugged in to an earthed socket outlet.
ISSUE-1 30/10/2017 2
Page 3

Warning!
This appliance is intended exclusively for use in domestic
households. It is not suitable for commercial use.
Cooking appliances should be positioned in a stable situation
with handles positioned to avoid spillage of hot liquids.
Never leave the fryer unattended during use or move the fryer
when the oil is hot.
The surfaces of the fryer will become hot during use. Do not
touch; wear oven gloves when handling the appliance during and
immediately after use and use long handled utensils when
checking the food.
Do not use the fryer on, near or under surfaces that are heat
sensitive or those that may be damaged by steam.
Do not fill the oil tank above maximum level marked or below the
minimum level. Check the oil level before each use.
Do not over fill the frying basket. Take care not to fill beyond 2/3
full for most foods and a maximum of 500g of chips.
To help prevent burns; always close the lid whilst the food is
cooking and stand back when raising the lid and allow the steam
to escape. Do not reach over the appliance while it is in
operation.
Only use with the parts provided and to heat cooking oil.
Do not operate the fryer using a timer or separate remote
control.
Do not mix different types of oil.
Do not cover and allow the fryer to cool completely before
storing.
In the unlikely event that a fat fire occurs, close the lid. Unplug
the fryer and smother the flames with a damp cloth.
ISSUE-1 30/10/2017 3
Page 4

Food safety
Thoroughly defrost frozen meat, poultry, fish and seafood in the
refrigerator before cooking unless cooking from frozen advice is
provided by the food packaging.
Keep raw meat and poultry separate from cooked foods.
Always wash hands after handling raw meat and poultry, before
handling any ready to eat foods.
Wipe and disinfect surfaces that have been in contact with raw
meat and poultry.
Use separate utensils for handling raw meat/poultry and cooked
food or wash them thoroughly between use.
To check whether meat, particularly poultry, is cooked, pierce
the flesh with a skewer or fork; the juices should run clear.
Ensure the product is piping hot throughout.
Fish is cooked when it appears opaque and can be flaked easily.
ISSUE-1 30/10/2017 4
Page 5

Parts
1
2
11
10
9
8
7
6
1. Lid (removable)
2. Viewing window
3. Frying basket (removable)
4. Frying basket hooks
5. Cooker housing
6. Temperature knob
7. Ready / temperature indicator
8. Power indicator
9. Lid release button
10. Frying basket handle (foldable)
11. Handle catch
12. Filter cover
ISSUE-1 30/10/2017 5
3
4
5
12
Page 6

Before first use
1. Clean all detachable parts in accordance with the cleaning
section of these instructions.
2. Become familiar with -
The parts of the fryer – See page 4
How to open and close the lid – See fig. 1
How to open and fold the frying basket handle – See figs. 2
& 8
The drainage position for the frying basket - See fig. 4
How to remove and refit the lid – See fig. 7
How to remove and refit the filter – See figs 5 & 6.
To use
1. Press the lid release button to open the lid (fig.1), lift the handle
of the frying basket (fig. 2) and lift out the basket. Clean
thoroughly before use. Check that the lid is securely fitted after
cleaning.
Lift
Press
Fig. 1 Fig. 2
Place the fryer on a stable, flat, heat resistant surface and away
2.
from flammable materials and surfaces that may be damaged by
steam. Check that the plug will reach a socket and that it can be
accessed without reaching over the fryer.
ISSUE-1 30/10/2017 6
Page 7

To use (continued)
3. Fill the tank with cooking oil to the
required level marked inside the oil
AX
M
M
tank. Do not fill past the maximum
(2.5 litre) or below the minimum (2
litre) level.
4. To help prevent the build up of
condensation during frying, smear
a little cold oil onto the underside
of the viewing window.
Fig.3
5. Close the lid.
6. Rotate the temperature control knob and set the temperature to
the required cooking temperature.
7. Fully unwind the cable, plug in and switch on. For your safety do
not allow the cable to dangle over the edge of units. The power
and temperature indicators will illuminate.
8. When the oil has reached the required cooking temperature the
temperature indicator will extinguish.
9. Place the food to be cooked into the frying basket taking care not
to fill beyond 2/3 full for most foods and a maximum of 500g of
chips.
10. Open the lid of the fryer, place the basket slowly into the fryer
and close the lid.
11. Frying progress can be viewed via the viewing window.
Alternatively, open the lid (taking care to observe the safety
advice), and lift the frying basket to check.
12. If the food requires further cooking, replace the basket and food
back into the oil and close the lid.
13. When frying is complete, open the
lid and hook the basket onto the
front lip of the oil tank (fig. 4) to
permit the oil to drain back into the
oil tank for a short while.
14. When cooking has been completed,
switch off at the mains and close
the lid.
15. Allow the oil to cool fully (at least 3
hours) before emptying and
cleaning the fryer.
ISSUE-1 30/10/2017 7
Fig.4
N
I
Page 8

Tips for successful frying
Choose oil that can withstand high temperatures.
Do not mix different types of oils.
Change the oil regularly (8-12 uses) or when it discolours. Some
cooking oils (e.g. sunflower oils) need to be changed more
frequently.
Dry food thoroughly before frying and remove any ice from frozen
foods to prevent oil overflowing and to extend the life of the oil.
Rinse raw starchy foods (e.g. potatoes) with water and pat dry to
help prevent them from sticking together.
Do not over fill the frying basket and separate food where
possible. Take care not to fill the basket beyond 2/3 full for most
foods and a maximum of 500g of chips.
After frying do not leave the food draining in the frying basket for
too long as the steam will soften any coatings.
Raw foods usually require frying at a lower temperature than
cooked or partially cooked foods.
Smaller quantities of food will cook faster than larger quantities.
The cooking time will vary according to the shape, thickness and
composition of the food.
Smaller pieces will cook quicker than larger pieces. For best
results, ensure pieces of food are similar in size.
Arrange the food with spaces between the pieces to allow even
frying.
Cook foods with a lighter flavour before those with stronger
flavours to help prevent flavour taint.
Frying chart
All the times stated in the table are a guide only - always check
that the centre of the food is piping hot.
The times will vary according to personal choice, the type of oil
used size or thickness of food being cooked (e.g. one large piece
will take longer to cook than several smaller pieces of an
equivalent weight).
Always check food packaging for suitability for frying and use any
recommended cooking times and temperatures stated on the
packaging.
ISSUE-1 30/10/2017 8
Page 9

Frying chart (continued)
Food Quantity Frying
temp.
(°C)
Fresh foods
French fries / Chips* 500g * 190* 6 – 9
Potato croquettes 6 - 8 pieces 190 8 – 9
Mushrooms (button) Single layer / 215g 150 4 – 5
Onion rings (battered) 6 – 8 pieces 190 4 – 6
Apple fritters 4 pieces 170 4 – 6
Breaded fish fillets (e.g. plaice,
sole)
Battered fish fillets (e.g. cod ,
haddock)
Camembert wedges (breaded) 3 – 4 pieces 190 1 – 2
Breaded chicken filets
Frozen food
Chips 500g 175 4 - 5
Potato croquettes 6 - 8 pieces 190 5 - 6
Mushrooms (breaded whole) 10 pieces 190 4 – 5
Fried onion rings 6 – 8 pieces 190 3 – 4
Breaded scampi 16 pieces / 250g 180 4 – 5
Fish fillets (e.g. cod, haddock) 2 fillets 190 8 - 10
Fish fingers 8 pieces 190 4 – 5
Chicken nuggets 8 – 10 pieces 190 3 – 5
1- 2 fillets / 300g
8 – 9 small pieces /
250g
360g
160
175
175
Time
(min)
4 – 6
7 – 9
4 - 5
If cooking thicker chips or larger quantities of fresh chips,
partially cook the chips in small batches ahead of the required
time. Cook chips at 150 °C until soft to the feel and light golden
colour and then remove the chips from the fryer (place on a plate
lined with kitchen towel) and allow to cool. When the chips are
required, heat the oil to 190°C and fry until crisp and a mid
golden colour. Each batch will take about a minute until crisp
and allows batches of chips to be ready to eat in a short time.
ISSUE-1 30/10/2017 9
Page 10

Cleaning
Filter cover
Filters
To maximize the efficiency of the fryer, clean regularly.
1. Switch off and unplug the fryer and allow it and the oil to cool
completely.
2. Press the filter cover lever (fig 5), lift off the filter cover and
remove the filters (fig.6). Wash filters in hot soapy water.
Press
Fig. 5 Fig 6 Fig 7
3. Open and remove the lid (fig. 7) and lift out the frying basket.
4. Wash the lid, frying basket and filter cover in hot water with a
little washing up liquid. Rinse and dry thoroughly. Do not use
detergent or abrasives as these may scratch the surface. Not
suitable for the dishwasher.
5. Carefully lift the cooker housing and using a funnel pour the cold
cooking oil into a storage container. It is not recommended that
the oil is stored in the fryer between uses.
6. Wipe the inside of oil tank with kitchen towel until most of the oil
has been removed before wiping all of the cooker housing with a
soft damp cloth soaked in soapy water. Rinse and dry surfaces
with a soft dry cloth. Do not use detergent or abrasives as these
may scratch the surface. Never immerse the cooker housing in
water.
ISSUE-1 30/10/2017 10
Page 11

7. After cleaning,
reassemble the fryer,
Slide
refit the filters (white
filter first) and fold the
frying basket handle (fig.
8) for storage (fig 9).
Fold
Fig 8 Fig 9
Technical specification
Rated voltage 220-240V AC, 50/60Hz
Power consumption 1500 - 1800W
Class rating I (Earthed)
BS 1362 fuse 13A
Capacity 2.5 litre
ISSUE-1 30/10/2017 11
Page 12

Plug / Wiring advice
If you encounter any problems
Produced in China for
The wires in this mains lead are coloured in accordance with the
following UK electrical code: BLUE = NEUTRAL
BROWN = LIVE
GREEN + YELLOW = EARTH
Non-rewireable plug
This appliance may be fitted with a “non‐rewireable” plug. If you
need to change the fuse in a “non‐rewireable” plug, the fuse cover
must be refitted. If the fuse cover is lost or damaged, the appliance
must not be used.
Rewireable plug
The colours of the wires in the mains lead of this appliance may not
correspond with the coloured markings identifying the terminals in a
rewireable plug. Rewireable plugs should only be replaced by a
suitably competent person. If in doubt, consult a qualified
electrician.
The BLUE wire must be connected to the
terminal marked with the letter N
The BROWN wire must be connected to the
terminal marked with the letter L
The GREEN & YELLOW wire must be
connecting to the terminal marked with the
letter E or the earth symbol .
Recycling electrical products
This marking indicates that this product should not be
disposed with other household wastes throughout the EU. To
prevent possible harm to the environment or human health
from uncontrolled waste disposal, recycle it responsibly to
promote the sustainable reuse of material resources. To return
your used device, please use the return and collection systems
or contact the retailer where the product was purchased. They
can take this product for environmental safe recycling.
with this product please call our
customer care team on
0345 640 30 30
ISSUE-1 30/10/2017 12
Argos Limited,
489 – 499 Avebury Boulevard
Central Milton Keynes
MK9 2NW. UK.
Page 13

ISSUE-1 30/10/2017 13
 Loading...