

Page 1
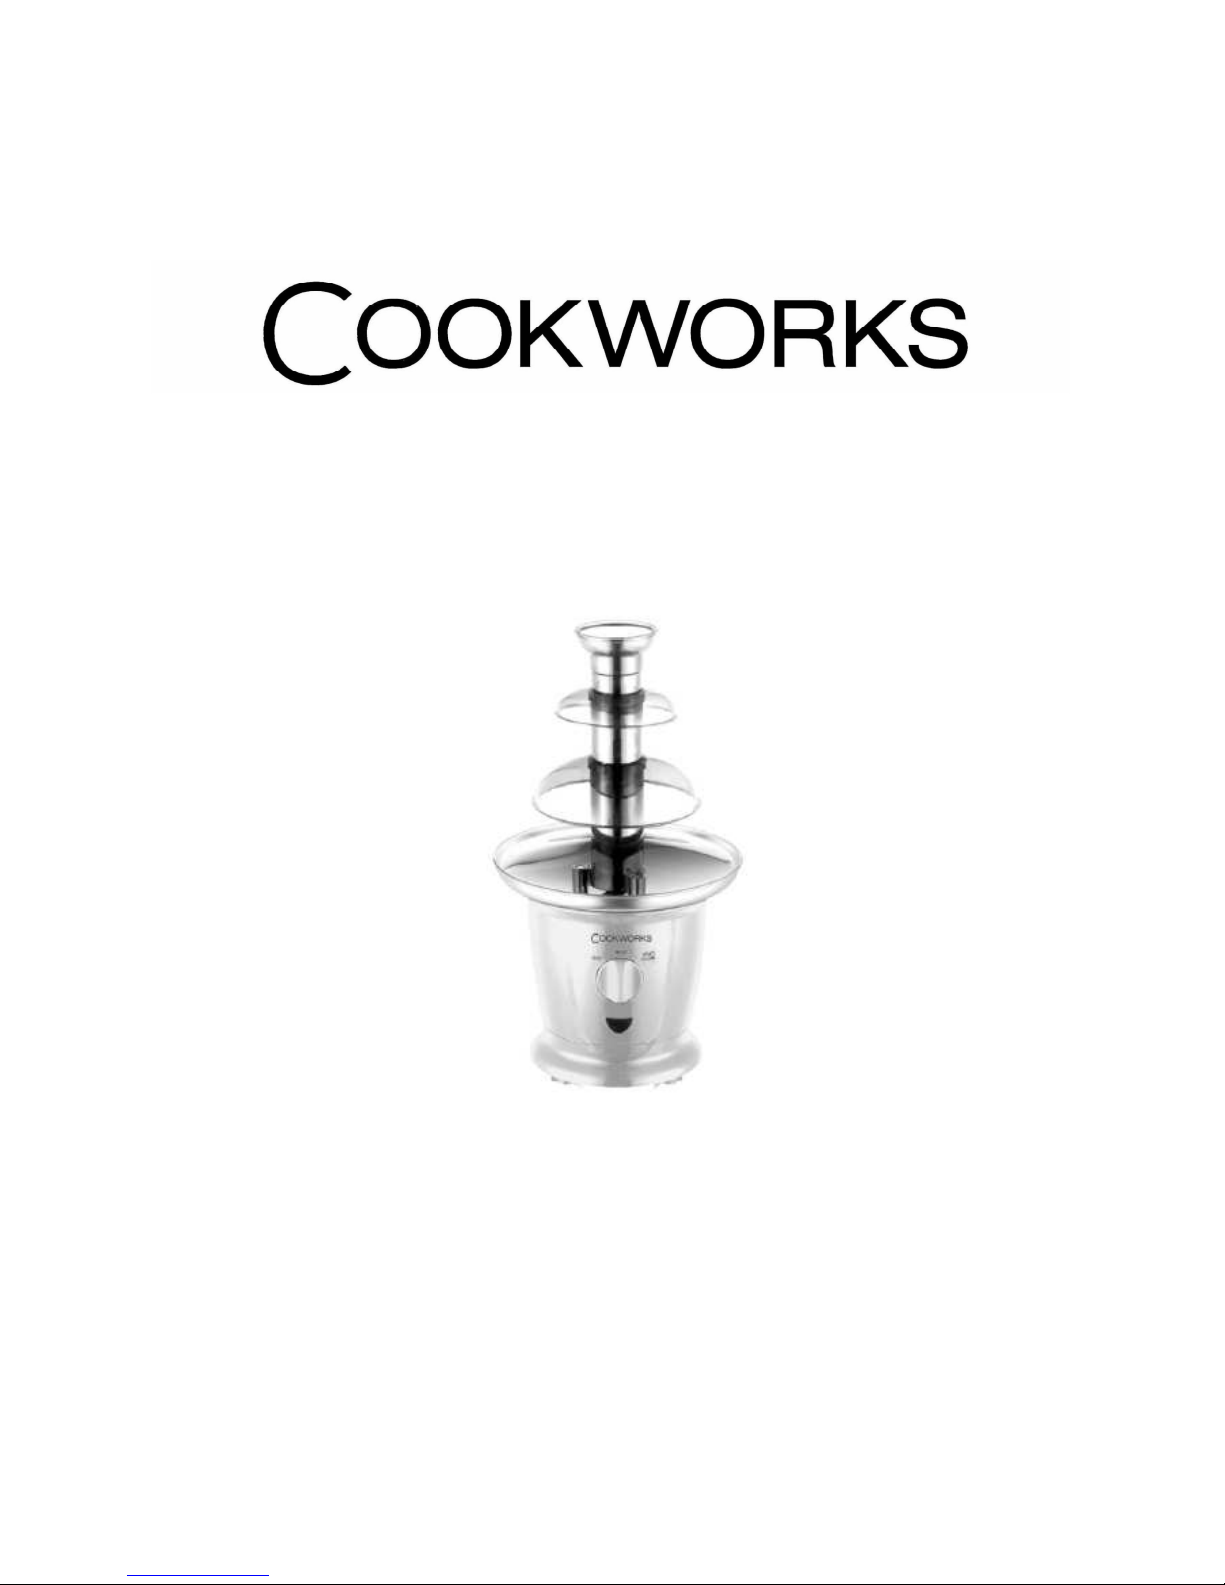
Chocolate Fountain
INSTRUCTION MANUAL
This is an attended appliance. Do not leave the appliance
unattended when in use.
Page 2

1
IMPORTANT SAFETY WARNINGS
Read all the instructions carefully before
using and please retain this instruction
manual for further reference.
Never leave the appliance unattended while
in use.
This appliance can be used by children aged
from 8 years and above and persons with
reduced physical, sensory or mental
capabilities or lack of experience and
knowledge if they have been given
supervision or instruction concerning use of
the appliance in a safe way and understand
the hazards involved. Children shall not play
with the appliance. Cleaning and user
maintenance shall not be made by children
unless they are older than 8 and supervised.
Keep the appliance and its cord out of reach
of children less than 8 years.
That the appliance is not intended to be
operated by means of an external timer or
separate remote control system.
The surfaces are liable to get hot during
use.
Page 3

2
The temperature of accessible surfaces may be high when the
appliance is operating especially the metal top area.
Do not touch hot surfaces. Use handles or knobs.
To protect against risk of electrical shock, do not immerse cord,
plugs or cooking unit in water or other liquid.
Close supervision is necessary when any appliance is used by or
near children.
Unplug from outlet when not in use and before cleaning. Allow
to cool before putting on or taking off parts and before cleaning
the appliance.
Keep the power cord away from hot surface. Never let the cord
hang down where a child could grab it.
Do not operate any appliance with a damaged cord or plug or
after the appliance malfunctions, or is dropped or damaged in
any manner. Return appliance to the nearest authorized service
facility for examination, repair or electrical or mechanical
adjustment.
The use of accessory attachments, not recommended or sold by
the appliance manufacturer, may cause hazards. NEVER use
unauthorized attachment or accessory.
Use extreme caution when moving an appliance containing hot
liquids.
Do not use outdoors.
Do not let cord hang over edge of a table or counter, or touch
hot surfaces.
Do not place on or near a hot gas or electric burner, or in a
heated oven.
To disconnect, remove plug from wall outlet.
Do not use appliance for other intended use.
This product is intended for melting chocolate for human
consumption only. Do not use the product for any other
purpose.
Always place the product on a flat, level, stable, heat resistant
Page 4
3
surface.
Children should be supervised to ensure that they do not play
with the appliance.
For household use only.
No user-serviceable parts inside. Refer servicing to qualified
service personnel.
A short power-supply cord is provided to reduce the hazards
resulting from entanglement or tripping over a long cord. A
longer power cord or extension cord is not recommended for
use with this product.
Ensure switch off the appliance after each use. Make sure the
motor stops completely before disassembled.
KNOWING YOUR PRODUCT
Page 5

4
LOCATION
Always operate this product on a flat horizontal surface.
Do not operate under or near curtains or other combustible
materials. Do not place under cupboards or close to a wall as
scorching of wall or cupboard may occur.
Lay out power cord to desired length and secure excess power
cord to avoid grabbing by children.
BEFORE USING YOUR APPLIANCE
As with all new heating elements, your appliance may emit a slight
burning smell when it is first switched on. This is normal and not a
cause for concern. This will reduce the unpleasant smells when
several uses.
USING YOUR APPLIANCE
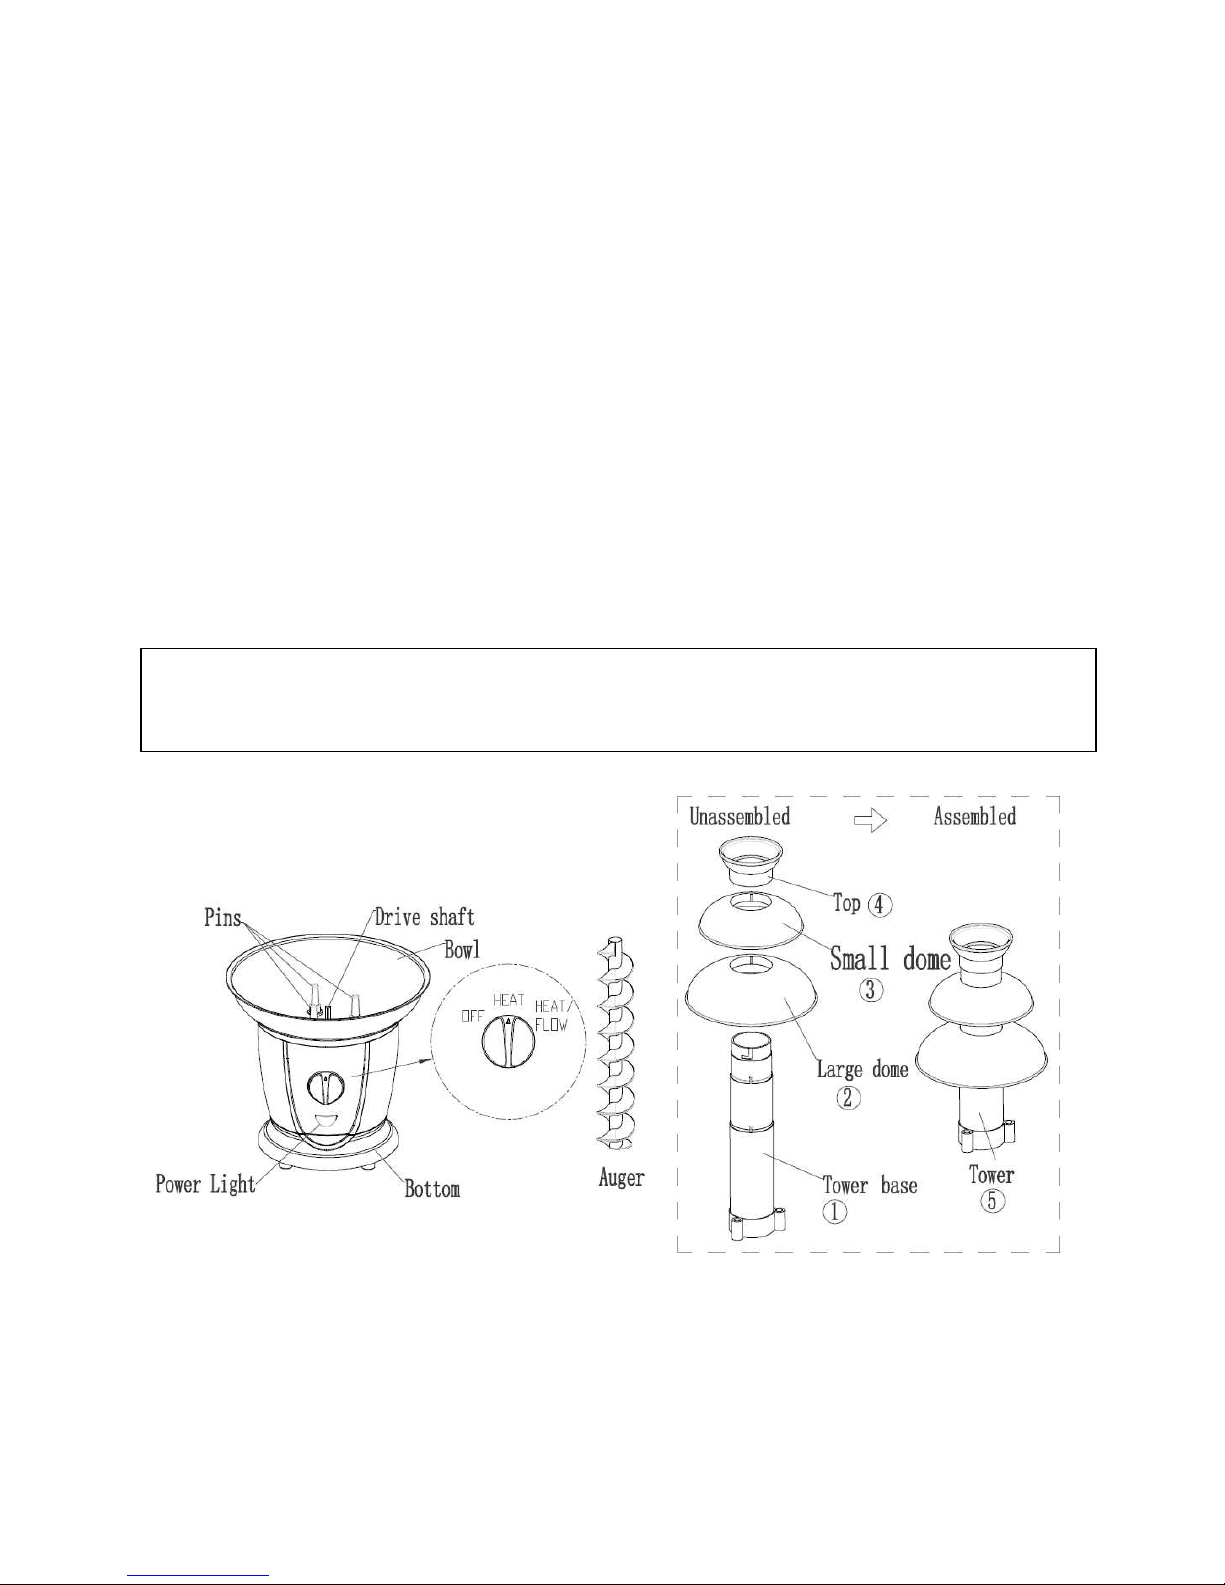
TO ASSEMBLE
1. Before using for the firstly time, wash the disassembled parts
(Except the motor base) in warm water.
2. Wipe the bowl with a damp cloth and let dry.
3. Attach Auger to Base by inserting the triangular hole in the
bottom of the Auger onto the Driveshaft. Do not attempt to
place Auger or Tower onto Base or remove from Base while
product is operating.
4. To assemble tower;
Page 6

5
a. Attach large dome to Tower base by aligning the center
hole around Tower base and snap the two ribs of Tower
base to the two slots of the large dome.
b. Attach Small dome to Tower base by aligning the center
hole around Tower base and snap the two ribs of Tower
base to the two slots of the Small dome.
c. Attach Top to Tower base by aligning the center hole
around Tower base and snap the two ribs of Top to the two
slots of the Tower base.
d. Attach assembled Tower to Base by aligning the three holes
around the bottom of the Tower with the three pins in the
Bowl.
5. Plug the power cord into a standard 220-240V AC electrical
outlet.
TO USE
1. Place the Fountain on a flat, level, and stable surface. Unit
must be level to operate properly.
2. Turn the Power Switch to "HEAT' to preheat the bowl.
NOTE: let the unit warm up for at least three minutes before
adding melted chocolate.
3. Prepare Chocolate:
Page 7

6
NOTE: Use chocolate that is maximum of 60% cocoa Any
higher percentage ("stronger") chocolate may require the
addition of too much oil to obtain proper flow. Also, if you are
using a chocolate specifically formulated for making fondue,
just follow the instructions on the packaging.
For all other types, use the following instructions.
a. Place 900g chocolate chips, pieces and 150ml vegetable oil
in a microwave-safe container and use the microwave oven
to cooking until the chocolate full melted Carefully pour
the chocolate mixture into the Bowl up to 1/4 inch from the
top of the Bowl.
NOTE: milk chocolate, dark semi-sweet chocolate, or white
chocolate may also be used.
b. Heat the chocolate in a microwave oven on high (100%) for
two minutes.
c. If necessary, heat mixture again for an additional 20-30
seconds until completely melted and smooth. Stir the
mixture well and add a tablespoon or more of oil if the
mixture is not thin,
d. Repeat the heating process if necessary. The chocolate
must be of a thin enough consistency to flow properly.
e. If desired, other liquids such as liqueurs may now be added
(approximately 1/4 cup of liqueur, depending on your
taste).
f. Carefully pour the chocolate mixture into the bowl up to
1/4 inch from the top. CAUTION: DO NOT overfill the bowl.
4. When the chocolate is completely melted, turn the power
switch to "HEAT/FLOW" to begin Auger rotation and chocolate
flow.
CAUTION: To prevent clogging, do not drop food pieces or
objects into the chocolate. Also, do not add cold liquids to the
chocolate mixture or it may thicken and prevent proper
fountain operation.
Page 8

7
NOTE: if chocolate flow becomes inconsistent, turn the power
switch to "HEAT" and allow a few seconds for the chocolate to
settle; then turn the power switch back to "HEAT/FLOW".
5. You can now dip strawberries, marshmallows, sliced bananas,
pineapples, apple wedge, pretzels, cookies, cake pieces, or
peanut butter balls into the chocolate mixture.
CAUTION: the Bowl will be hot, use oven mitts or other hand
protection to help prevent a burn hazard.
6. Refill the Bowl as needed, maintaining a 1/4 inch space at the
top.
CARE AND MAINTENANCE
•
WARNING: Always unplug the product from the electrical
outlet and allow it to cool completely before handling,
relocating, or cleaning it.
•
Make sure unit is switched off and unplugged. Allow parts to
cool to the touch. The Tower, Auger, and Base can get very hot.
•
Before first use and after each use, wash the Tower and Auger
thoroughly. Do not wash parts in an automatic dishwasher
•
To simplify cleaning of the chocolate fountain, carefully remove
the Tower and Auger (after cooling) Wipe off remaining
chocolate with paper towels Soak Tower and Auger in hot
water for five minutes, then wash in warm soapy water, rinse,
and let dry.
•
Carefully remove as much remaining chocolate from the Bowl
as possible Use a damp sponge cloth to wipe the inside and
outside of the bowl. To clean the exterior, wipe with a soft, dry
towel.
•
WARNING: to prevent an electrical shock hazard, do not
immerse Base in water or other liquid as the Base contains
Page 9

8
the electrical components.
•
Clean the reservoir bowl and motor base only with a damp
cloth
•
Cleaning must be carried out while the chocolate is still warm.
Do not wait unit the chocolate has hardened.
CAUTION:
•
DO NOT immerse in water or any liquid.
•
DO NOT pour excess/leftover chocolate down drain or into a
toilet. Pour in plastic bag or disposable container and place in
garbage.
•
DO NOT use steel wool pads or other abrasive cleaners to
clean the product, never spray or apply cleaners directly to
the product.
•
NOTE: To prolong product life, follow the cleaning instructions
after every use.
CONNECTION TO POWER
•
Before connecting, check that the voltage indicated on the
appliance (bottom of the appliance) corresponds with the main
voltage in your home. If this is not the case, consult your dealer
and do not use.
•
This appliance may be fitted with a non-rewirable plug. If you
need to change the fuse in a non-rewirable plug, the fuse cover
must be refitted. If the fuse cover is lost or damaged, the plug
must not be used until a replacement is obtained (available
from the appliance manufacturer).
•
If the plug has to be changed because it is not suitable for your
socket, or becomes damaged, it should be cut off and
appropriate plug fitted following the wiring instructions. The
plug removed must be disposed of safely as insertion into a
Page 10

9
mains socket is likely to cause an electrical hazard.
•
This unit must be earthed. This equipment must be
disconnected from the mains when not in use. Do not allow
this unit to be exposed to rain or moisture.
For your own safety read the following instructions carefully
before attempting to connect this unit to the mains.
You should only plug the appliance into a 230V-240V AC, 50Hz
supply. Connecting it to other power sources may damage the
appliance.
The wires in this mains lead are
colored in accordance with the
following code:
BLUE = NEUTRAL
BROWN = LIVE
GREEN + YELLOW = EARTH
Page 11

10
IMPORTANT
The colors of the wires in the mains lead of this appliance may
not correspond with the colored markings identifying the
terminals in your plug, proceed as follows:
The blue wire must be connected to the terminal marked with
the letter N or colored black.
The brown wire must be connected to the terminal marked
with the letter L or colored red.
The green and yellow wire must be connecting to the terminal
marked with the letter E or the earth symbol. ( ).
If a 13 Amp (BS1363) fused plug is used it must be fitted with a 13A
fuse conforming to BS1362 and be ASTA approved.
If in doubt contact a qualified electrician
DISPOSAL INFORMATION
Waste electrical products should not be disposed of with
household waste. Please recycle where facilities exist.
Check with your local authority for recycling advice.
Caution
To prevent electric shock disconnect from
the mains before removing the cover
Page 12

11
GUARANTEE
This product is guaranteed against manufacturing defects for a
period of
1 year
This does not cover the product where the fault is due to misuse,
abuse, use in contravention of the instructions, or where the
product has been the subject of unauthorised modifications or
alterations, or has been the subject of commercial use
In the event of a problem with the product within the guarantee
period please return it to your nearest Argos store
If the item is shown to have had an inherent defect present at the
time of sale, the store will provide you with a replacement
Your statutory rights remain unaffected
Guarantor; Argos Ltd
489 – 499 Avebury Boulevard
Central Milton Keynes
MK9 2NW
 Loading...