

Page 1

Instruction Manual
alpha pressure cooker
Page 2
• healthy cooking for the entire family – steaming in an enclosed
system preserves vitamins, trace elements and flavour in the food
and is also perfectly suitable for preparing baby food.
• a design which combines functionality with aesthetics – the
attractive finish makes it enjoyable to cook and to serve.
alpha has already convinced the professionals: awarded
the accolades of „Kitchen innovation of the Year“ as well as
the „Gourmet Gold“, alpha by cookvision is an example for
contemporary pressure cooking. We hope that you too will be
inspired by your new alpha and wish you long-lasting enjoyment
with it.
alpha
Pressure cooking with system
You have opted for an outstanding product, and we thank you for
your trust. From this moment, alpha will revolutionise your pressure
cooking habits in the nicest possible way. In the future, you‘ll even
enjoy cooking. You‘ll benefit from a mature technology, simplicity
of use and a well-thought-out system created as a result of years of
experience and development work.
Pressure cooking with system – this is a claim we at cookvision take
seriously. It‘s all the same if you are cooking for yourself or for family
or friends and want to pressure-cook, roast, braise, simmer, sweat,
defrost, warm up or boil down, with alpha you always have the right
partner at your side.
The patented pressure-lid fits all alpha series pots of the same diameter
and thus can be used for different purposes, really making it a pot for
everyday use. In addition, thanks to a wide range of accessories such
as a glass lid, steamer and pasta insert, a braising disc through to a
double boiler, you can let your imagination run riot.
The alpha-design is reminiscent of the functional and aesthetic
‚Bauhaus‘ style and will impress not only you but your guests too
when you serve them your delicious cuisine.
alpha gives you
• a flexible pressure-cooking system – different pots and sizes can
be combined in modular fashion just as you need them.
• a comprehensive range of accessories for different uses –
various types of preparation from warming up in a double
boiler to noodles in a pasta insert, from preservation under
vacuum to roasting, sweating or braising are all possible without
complications.
• more enjoyment in your cooking due to ease of handling – the
patented single-handed action offers safety and convenience.
Contents
Safety instructions 04
Quick information 06
Description of the Parts 07
Pressure cooking with alpha 09 - 12
Important notes 13
Cleaning, Care, Maintenance 14
Questions and answers 15
alpha -range 16
Recycling/Spare parts 17
Cooking times 18 - 19
Peter and Verena Rommerskirchen
Managing Partners B/R/K Group
2
Page 3

Safety instructions
Please read these instructions through carefully before first using your
pressure cooker and keep them in a safe place for future reference.
• Never let anyone who is not familiar with these instructions use
the pressure cooker.
• The pressure cooker may never be left unattended when it is
under pressure.
• Never allow children in the vicinity of the pressure cooker when
it is being used.
• Only use the pressure cooker for its intended purpose of cooking
food under pressure.
• Before each occasion on which it is used, check that the safety
valve, pressure regulator and sealing ring are all clean and
working properly.
• Pressure is generated when cooking. It is therefore impor tant to
close the lid of the cooker securely and to read thoroughly and
follow the instructions for use and on safety, since misuse of the
pot can lead to personal injury or to damage to the pot.
• Please observe when steam escapes from the pressure regulator
– this is the sign that pressure is building up successfully inside
the pot.
• Do not underfill the pot below the minimum level indicated, and
do not overfill it above the maximum limit indicated.
(Filling amount = liquid + food to be cooked).
• Only use the sources of heat shown in the instructions for use.
• Under pressure, the pressure cooker must never be used for
roasting or frying with oil.
• The pressure cooker must never be used in the oven, as this may
damage the pot.
• Lift the pot when hot only by the handles.
• Observe the instructions on filling and the preparation of special
foodstuffs shown on page 10.
• The pressure cooker must never be forced open. Before opening
it, make sure that the pressure has subsided completely (see
page 12 of the instructions for use)
• When letting off steam, keep hands, head and other parts of the
body out of the steam.
• Never put the pressure lid or parts of it in the dishwasher for
cleaning.
• Only use original spare and replacement parts (page17) and
if your pot needs to be repaired, please refer to our customer
services section (for details see back page).
• Marks on the bottom of the pot are easy to remove with lemon
juice or a little vinegar.
• Never use abrasives or wire wool for cleaning.
• Take good care of the instructions for use.
• Never leave hot fat or oil unattended, as it may catch fire. Do not
attempt to extinguish burning fat or oil with water, but use either a
suitable wet cloth or class F fire extinguisher.
We wish you much enjoyment and tasty results from your pressure
cooker.
4
Page 4
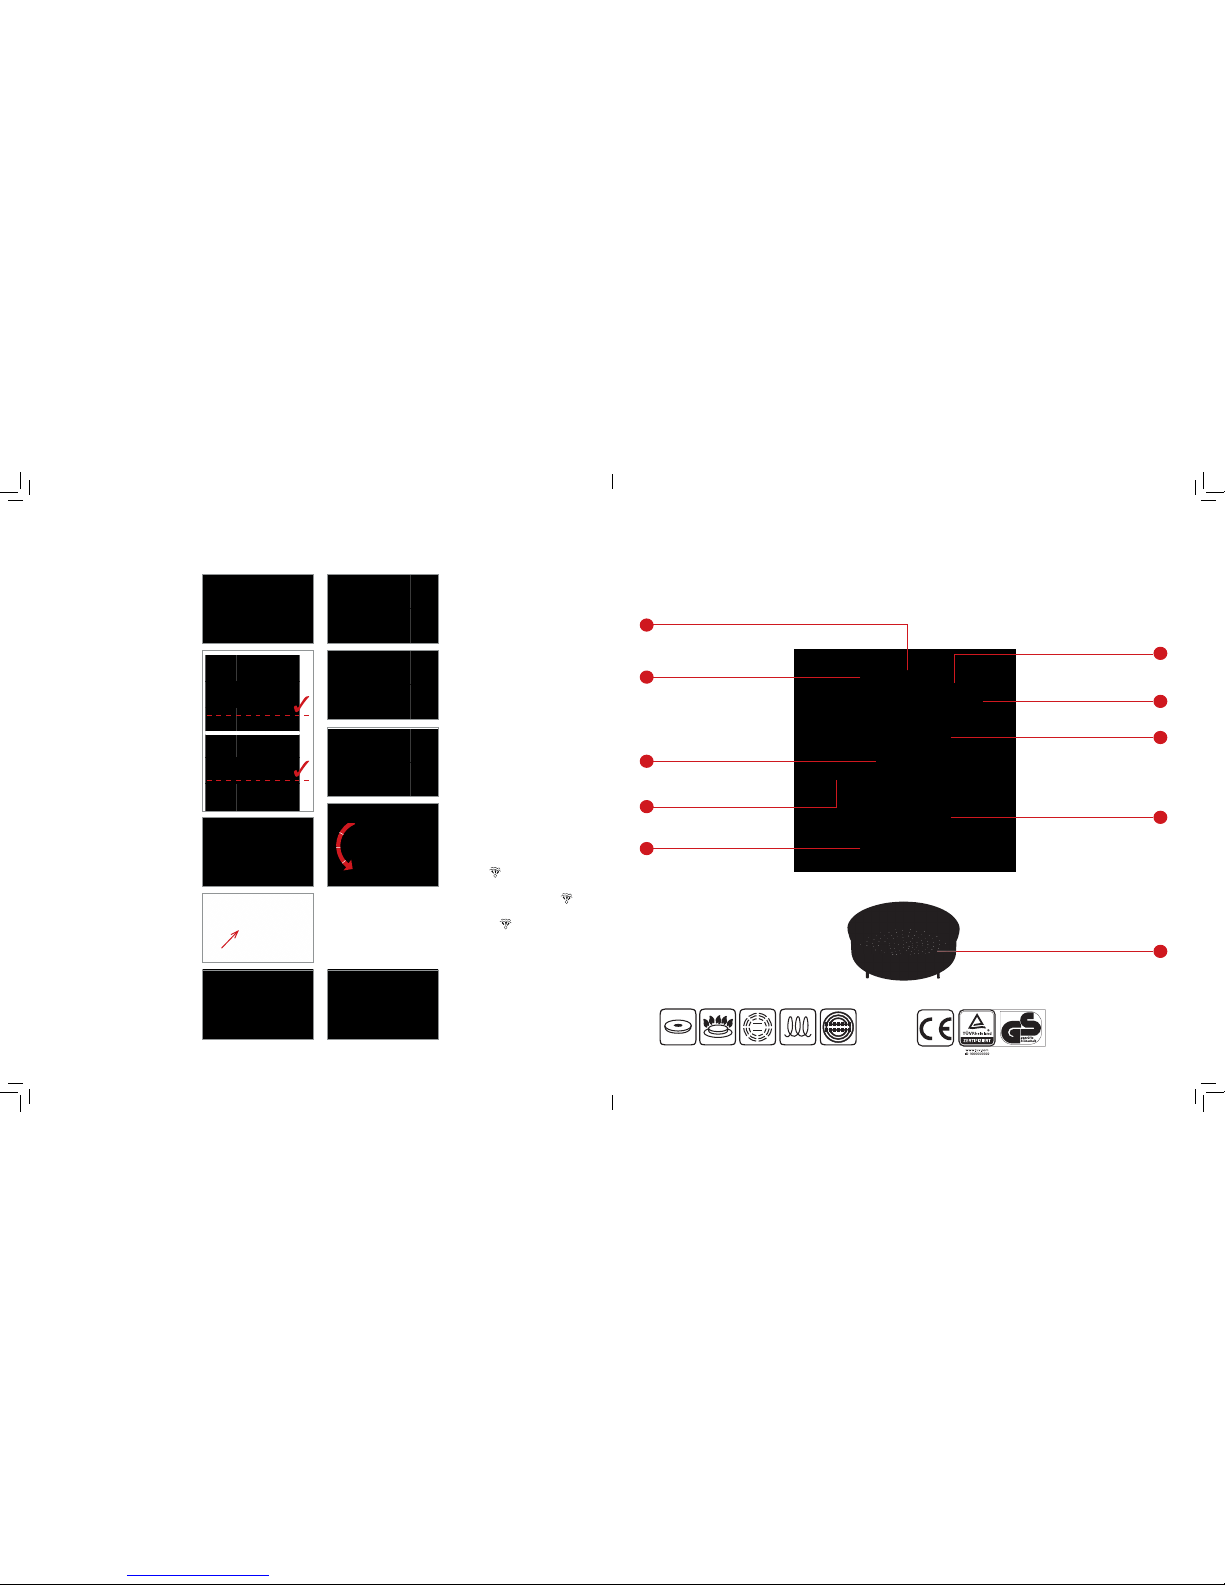
Quick information Description of the Parts
1
3
5
7
9
2
4
6
8
Pot handles with fl ame-guard
The filling scale shows minimum and
maximum filling levels.
The continuously-adjustable pressure
regulator keeps pressure and
temperature at the desired setting
automatically.
The patented single-handed locking system makes it
possible to remove the lid from the pot with one hand
and replace it in any position.
B/R/K thermal sandwich base is a
super-strong cartridge base for use on
all types of hotplate, it has optimum
heat characteristics and saves energy.
The patented safety valve
The safety window
The lid with sealing ring
seals the pot hermetically.
Body of the pot is made of top
quality 18/10 stainless steel.
10
Steamer insert (optional) -
stackable
5. Set hotplate on highest setting
6. Quick pressure cooking begins
When steam escapes from the valve,
turn the hotplate down to minimum.
Now the cooking time begins.
7. Cooking time ended
Turn off the hotplate.
1. Opening
Press both buttons together, and lift off
the lid. Suitable for all types of
hotplate.
suitable for all types of stove
1.
9.
5.
6.
7.
8.
2.
3.a
3.b
4.
MIN
MAX
3. Closing
3.a Keep the buttons pressed, place
the lid in any position on the pot. Press
down gently on the lid until you hear
the mechanism click into place, and
the lid is closed.
3.b The lid is marked with arrows for
checking. When these are no longer
visible, the lid is closed.
2. Filling
Now add the food to be cooked. The
minimum fi lling level is 1/3 the volume
of the pot, with a minimum of 250 ml
of liquid.
With food which swells, fi ll the pot no
more than 1/2 full, and with all other
foods fi ll to a maximum of 2/3 full. The
fi lling amounts all refer to food to be
cooked + liquid.
4. Set the pressure stage
1 = gentle cooking
2 = quick pressure cooking
9. Open the pot
When the red valve has disappeared
out of sight again, the pot can be
opened.
The lid can be removed (see Point 1)
Warning: never force the lid open.
8. Let the steam off slowly in
stages …
… or wait until the pressure has
subsided.
Never turn directly from Position 2
to Position
, sbut fi rst of all from
Position 2 to Position 1, wait a few
seconds, then turn to Position
. If
you used pressure setting 1, you can
turn directly to
.
Warning: the steam is extremely hot!
electro gas
ceramic induction
halogen
arrows
6 7
Page 5

Pressure cooking with alpha
The continuously-adjustable pressure regulator
Instructions in recipes and tables of cooking times can only ever be
rough guidelines. This is why we have developed a pressure regulator
which you can set at any point between positions 1 and 2. This has
the advantage that you can use the valve to adjust the pressure in the
pot individually according to the amount and size of the food to be
cooked.
Position 1 for gentle cooking
Position 2 for fast cooking
Position
for gradual release of pressure
Position
for removing and cleaning the valve
Maximum permitted pressure for this pressure cooker: 3.0 bar /
300 kPa
Basic settings will be found in the table of cooking times at the end
of these instructions.
Cook more healthily
Due to cooking in steam without oxygen and more quickly, your
food is especially gently prepared. Every minute you save in cooking
time means a gain in terms of important vitamins, nutrients and trace
elements.
Cook more tastily
Thanks to cooking without oxygen, the flavour and natural colouring
of vegetables will very largely be preserved
Cook more quickly and save both time and energy
With this pressure cooker you will save up to 70 % of the time your
cooking used to take. And you save energy too: up to 60 % for meals
which take a long time to cook, between 30 and 40 % for meals with
shorter cooking times. You also cook to a great extent without a smell
or cooking vapours.
Read these instructions through carefully before first using the pot
Clean the pot with water and a proprietary washing-up liquid and
dry it thoroughly.
On no account may abrasives or wire wool be used for cleaning; this
applies to cleaning outside surfaces as well.
9
Page 6

This method of preparation keeps the food tender and juicy. Using
the steamer insert makes a valuable contribution to healthier nutrition.
Since water-soluble vitamins and nutrients are preserved, steaming
is strongly recommended in connection with calorie-conscious diets.
Pressure cooking is so easy
Select the required pressure, using the pressure regulator: see the table
of cooking times on pages 18/19.
Set the required pressure
Position 1 = gentle cooking
For steaming delicate foods such as vegetables or fish
Position 2 = fast cooking
Fast cooking stage for cooking and braising e.g. meat,
soups, stews, ...
Pressure cooking with alpha
Before cooking
Before each occasion on which it is used, check that the safety valve,
pressure regulator and sealing ring are all clean and working properly.
Pay particular attention to the safety valve on the underside of the lid.
The pin should be checked with the fi nger for freedom of movement
(against spring pressure) before each cooking process.
Add the necessary liquid for steam generation (water, gravy or stock)
to the pot – a minimum of about 250-300 ml, no matter how much
food is to be cooked.
Warning: always add suffi cient liquid. The pot must not be allowed
to cook dry.
Now add the food to be cooked.
Liquid and food together must fi ll at least 1/3 of the volume of the pot.
Maximum 1/2-full for foods which swell or tend to foam, maximum
2/3-full for all other foods. Please observe the fi lling scale in the pot.
Note
To avoid the base of the pot being attacked, only add salt to water
which is already boiling and stir it in. Now you can put the lid on.
Hold both buttons pressed and set it down straight on the pot. The
jaws snap audibly into place and the control arrows are no longer
seen.
The steamer insert
(Not supplied, but available as an accessory.)
Place the steamer insert on the base of the pot. Add liquid up to the
fl oor of the steamer. Food which is to be steamed can now be placed
in the steamer and will cook in the steam generated.
Set the hotplate on its highest setting
Place the pressure cooker with preset pressure setting on a suitable
hotplate and set this on its highest setting.
As pressure increases, the red safety valve becomes visible. Now the
pot can no longer be opened.
According to how full the pot is, it will take a few minutes for it to reach
the set pressure. This is as soon as steam escapes continuously from
the pressure regulator.
This is the moment at which the cooking time starts.
Now the hotplate must be turned down low. You thus avoid using
unnecessary energy as well as the danger of the pot boiling dry.
Pressure cooking with alpha
MIN
MAX
10 11
Page 7
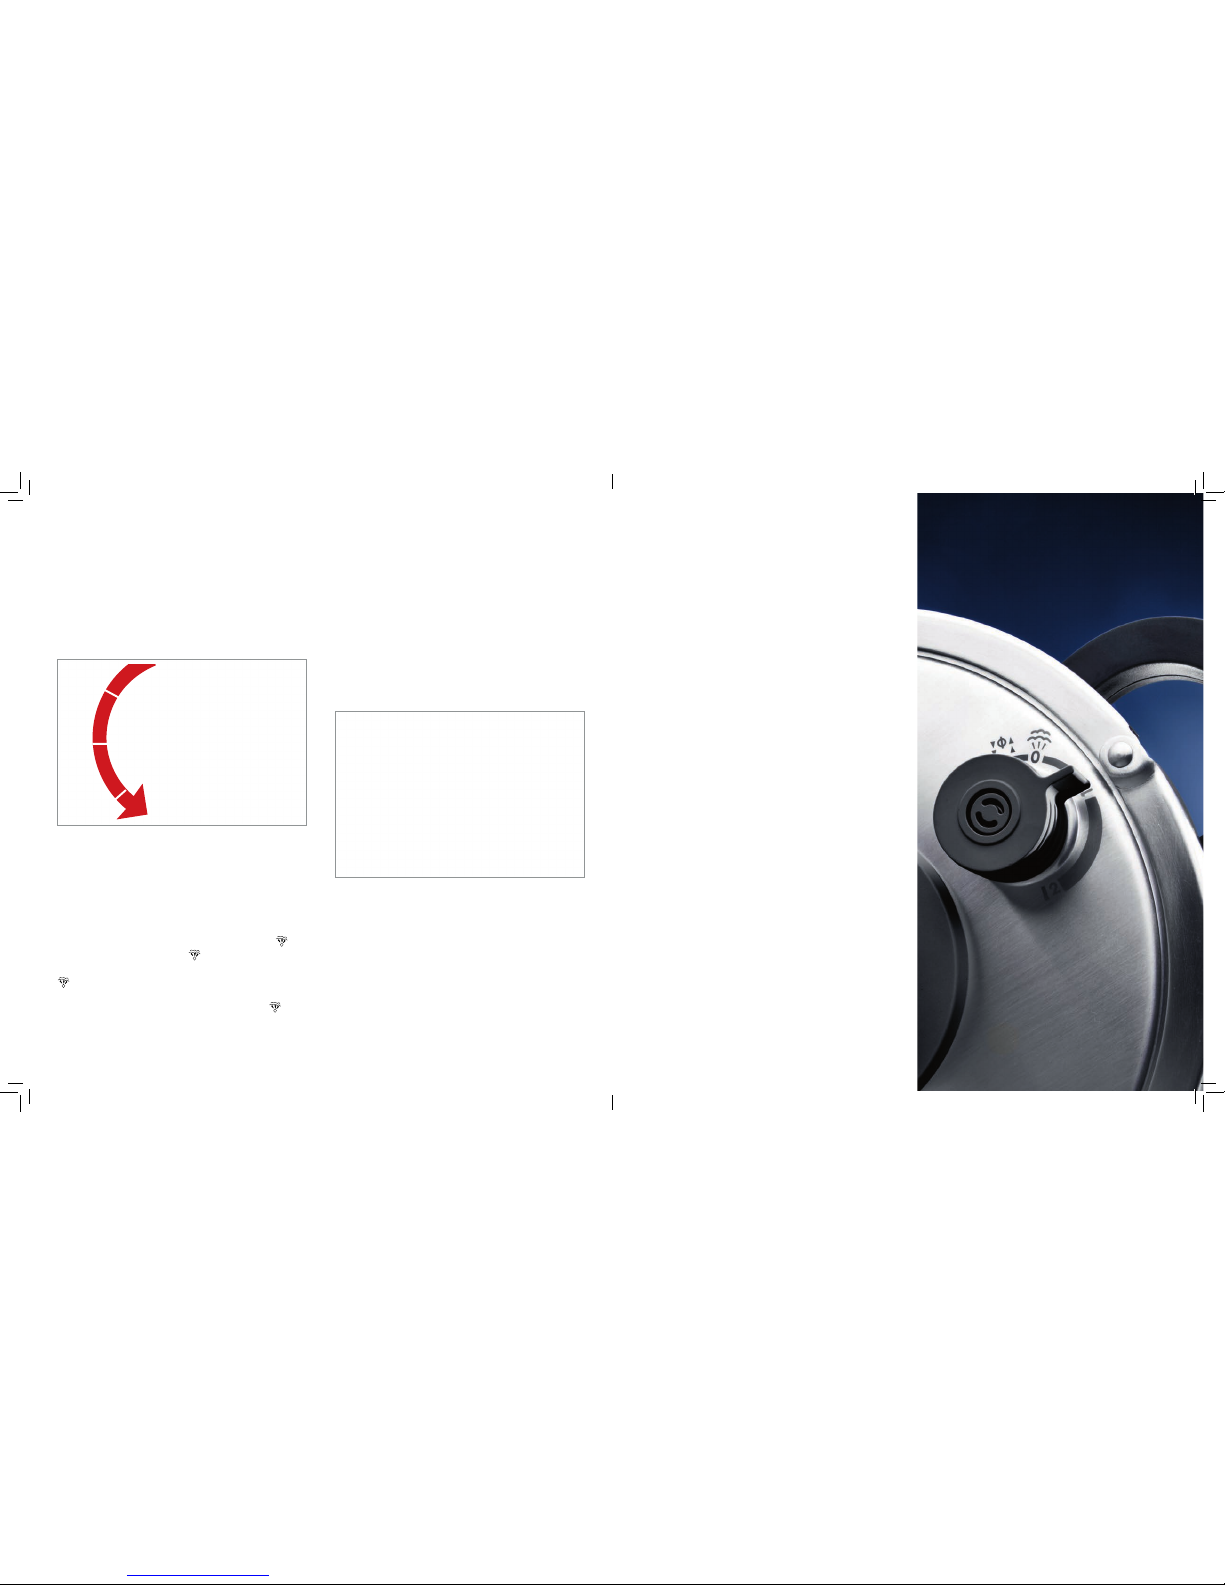
Cooking time is finished
The heat source is switched off and pressure in the pot must be
dissipated. Remove the pot from the hotplate and put it on a suitable
surface. There are the following possibilities for reducing the pressure:
1.) Allow the pot to cool down
Wait until the red safety valve has completely disappeared. This is
recommended for foaming and mushy foods.
2.) Slow pressure reduction
Turn the pressure regulator gradually in stages to Position
, not
directly from Position 2 to Position
, but in gradual steps from
Position 2 first to Position 1, wait a few seconds, then turn to Position
.
If cooking at pressure setting 1 it can be turned directly to
.
Pressure cooking with alpha
• When preparing sausages with artificial skins, these must be
pierced before cooking. If the skin is not pierced, it may blow
up under pressure and can burst. The splashes which then occur
may cause scalding.
• If you cook meat with skin on and this has swollen up, do not
pierce this but allow it to contract. If it is pierced, burns or scalds
may be caused.
• Do not boil any foods which tend to foam, such as apple purée,
rhubarb, pasta, rolled oats or other cereal products. Since these
foods tend to swirl up when boiling, there is a risk of the pressure
regulator becoming blocked.
• If the contents are mushy, the (depressurised) cooker must be
gently agitated before it is opened.
• On reaching cooking temperature, bursts of steam will be given
off vertically from the centre of the regulator valve.
Important notes
Warning: the steam escaping is extremely hot. Steam escapes
upwards, so do not hold your hands over the valve. Wait until no more
steam escapes and the pressure indicator is no longer visible.
Open the pot
When no more steam escapes, the pot can be opened. The lid can
now be removed.
Warning: never force the lid open, and never interfere with the safet y
system settings. The pot can only be opened when it is no longer
under pressure.
12
Page 8

Cleaning, Care, Maintenance
Clean your pressure cooker after every use with hot water and
washing-up liquid. Do not use any scratching, abrasive or caustic
cleaners, or any containing chlorine. The pot can also be cleaned
in the dishwasher without its lid. Please do not clean the pot lid in the
dishwasher!
Cleaning and replacing the sealing ring
Wipe over the sealing ring and rinse it under hot running water and
dry it.
Under conditions of normal use, the sealing ring should be replaced
once a year, or at the latest when it becomes hard or starts to turn
brown.
The safety valve
The safety valve – in conjunction with cleaning the lid – only needs
to be flushed through and rinsed with running water. Check its free
movement by pressing the metal pin with the finger.
When it takes a long time to come to the boil:
• the source of heat is not hot enough
• turn up the heat source to maximum
If the red safety valve has not risen, and no steam is escaping
from the valve during cooking:
• This is normal in the first few minutes (pressure build-up)
• If it persists, check if:
• the source of heat is hot enough; if not, turn it up
• there is suff icient liquid in the cooker
• the pressure regulator valve is (incorrectly!) set to
• the pressure cooker lid is properly closed
• the sealing ring or the rim of the cooker is damaged
When the safety valve has risen and during cooking no steam
is escaping from the pressure regulator:
• hold the pressure cooker under running water to release the
pressure,
• open the pot,
• clean the pressure regulator and the safety valve
When steam escapes all around the lid, check:
• whether the lid is properly closed
• whether the sealing ring is properly fitted
• the condition of the sealing ring (if necessary, change it)
• cleanliness of the lid, the safety valve, and the pressure
regulator
• that the rim of the cooker is in good order
When the lid cannot be opened:
• check that the safety valve has dropped completely; if not,
release the pressure
• if necessary, cool the pot under cold running water
When the food being cooked is either under- or overcooked,
check:
• the cooking time (too short or too long)
• the hotplate output
• that the pressure regulator is correctly set
• the amount of liquid
When the handles on the pot are loose:
• retighten the screws using a screwdriver
When the food being cooked is burned on in the pot:
• leave the pot to soak for a good time before cleaning it
• do not use caustic cleaners or those containing chlorine
When one of the safety devices is triggered:
• turn off the heat
• allow the pressure cooker to cool down
• open it
• check and clean the pressure regulator, safety valve and
the sealing ring
Questions and answers
Cleaning the pressure regulator
Remove the plastic cover from the pot lid. To do this, press the valve
and turn it completely to the left to Position
The cover can now be lifted
off, and the valve removed
and cleaned under running
water.
Please make sure that the
grooves in the valve fit into
the matching slots
The cleaned and dried pressure cooker should now be stored in a
clean, dry and protected place. Do not put the lid on the pot, but lay
it upside-down on the pot.
Handles
Check regularly to ensure the handles are tight. Should the handles
have become loose, retighten them with a suitable screwdriver.
14 15
Page 9
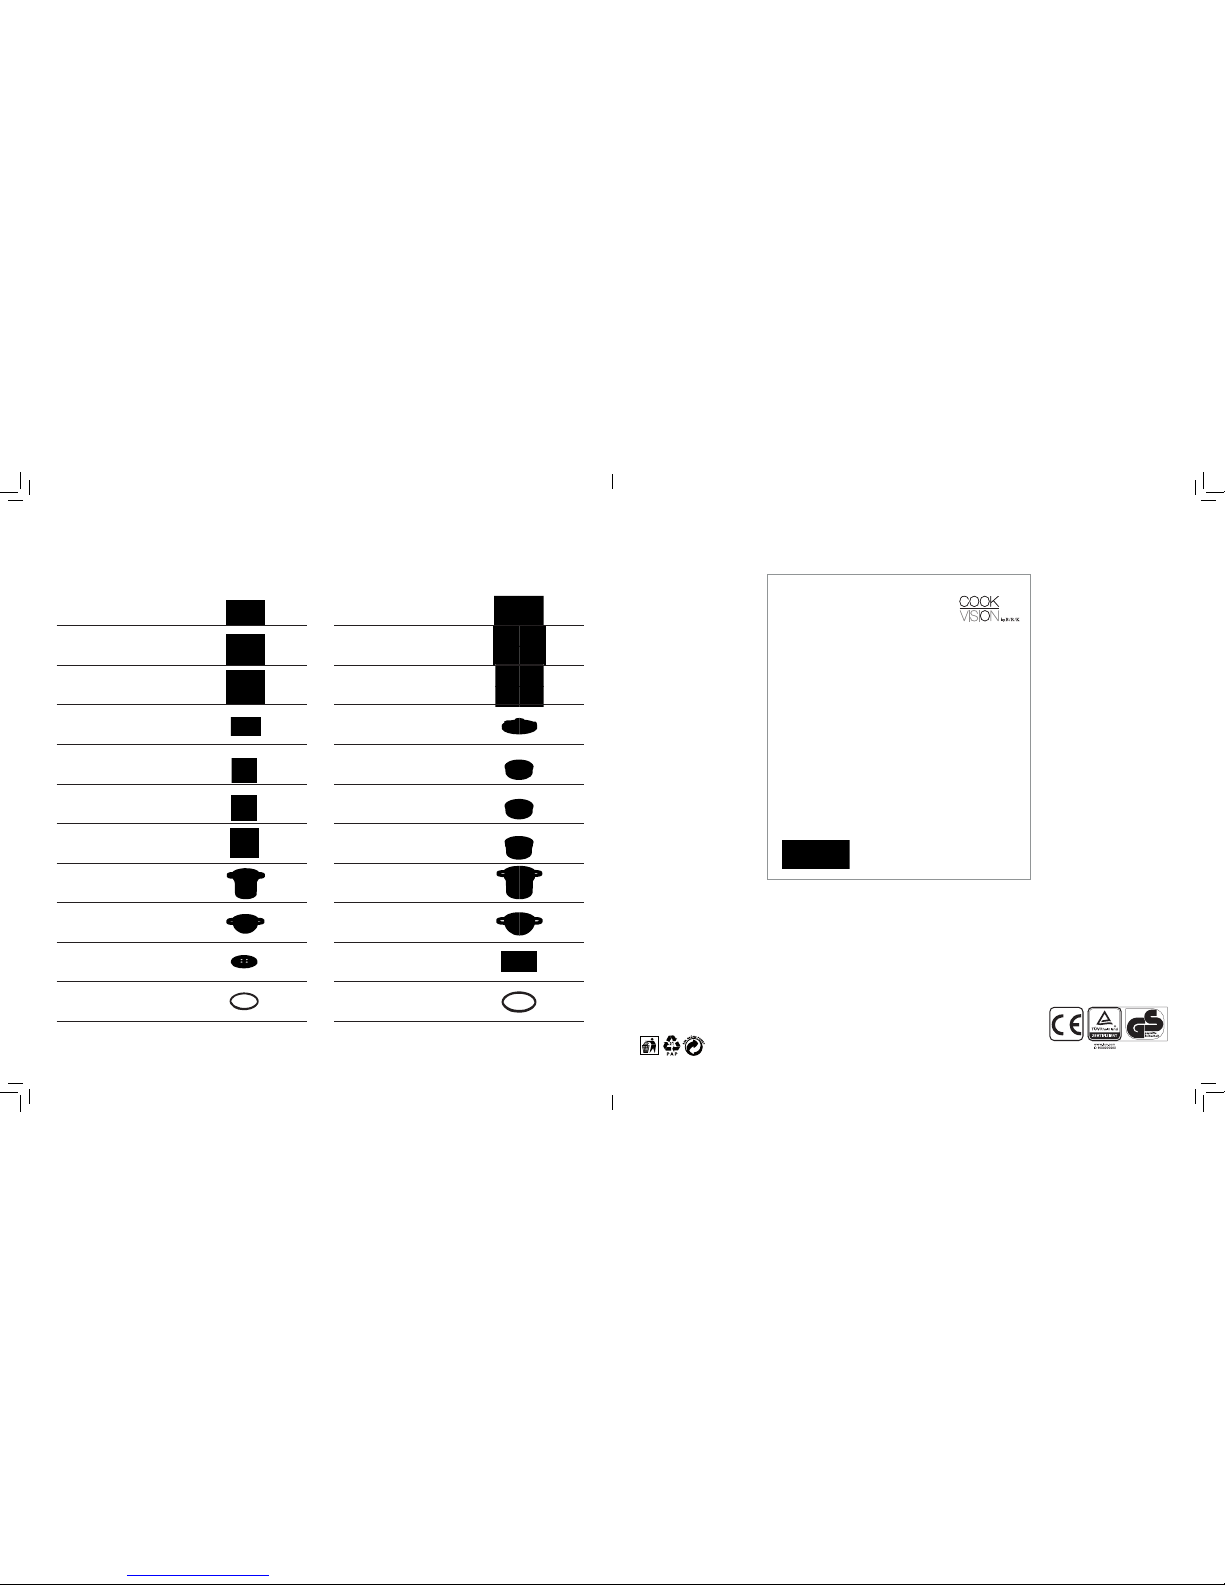
alpha range Recycling/Spare parts
Spare and replacement parts are available from your specialist retailer or under www.cookvision-shop.com.
ø 24 cm
Pot + glass lid 4.0 litres
Art.-no. 504042100
Pot + glass lid 6.0 litres
Art.-no. 504043100
Pot + glass lid 9.0 litres
Art.-no. 504044100
Pressure lid
Art.-no. 504025100
Steamer insert height: 5.5cm, not perforated
Art.-no. 504052100
Steamer insert height: 5.5cm, perforated
Art.-no. 504008000
Steamer insert height: 11cm, perforated
Art.-no. 504022000
Pasta insert
Art.-no. 504010100
Double boiler insert
Art.-no. 504078100
Roaster disk
Art.-no. 504016000
Silicone gasket
Art.-no. 504028100
ø 20 cm
Pot + glass lid 3.0 litres
Art.-no. 504040100
Pot + glass lid 4.0 litres
Art.-no. 504069100
Pot + glass lid 5.5 litres
Art.-no. 504041100
Pressure lid
Art.-no. 504026100
Steamer insert height: 5.5cm, not perforated
Art.-no. 504051100
Steamer insert height: 5.5cm, perforated
Art.-no. 504007000
Steamer insert height: 11cm, perforated
Art.-no. 504021000
Pasta insert
Art.-no. 504009100
Double boiler insert
Art.-no. 504024100
Roaster disk
Art.-no. 504015000
Silicone gasket
Art.-no. 504027100
Wuppertal, 29.10.2011
EC – CERTIFICATE OF CONFORMITY
for pressure cookers
EC type testing, module B
(Design control)
We hereby certify that the pressure cookers described below comply in respect of their concept and
manufacture as well as the versions marketed by us with the relevant safety and health requirements
of the EC Directives.
In the case of any modifi cation to these appliances not agreed with ourselves, this certifi cate becomes
invalid.
Appliance type: pressure cooker series „alpha“
Relevant EC Directives: PED 97/23/EC
Applicable standard: DIN EN 12778/09.05
B/R/K Vertriebs-GmbH
_______________________
Peter Rommerskirchen, CEO
Important: when parts are replaced, only ORIGINAL spare parts
designed for this pressure cooker are to be used.
In case of repair being required, please contact our customer
services. Repairs are only permitted to be carried out by authorised
persons.
Recycling instructions on packaging and product:
„The packaging consists of recyclable materials. Please dispose
of these with due consideration for the environment and separated
appropriately in the containers provided for the purpose. Should it not
be possible to re-use the product, please ask the responsible waste
management organisation for information concerning the necessary
measures for disposal“
16 17
Page 10
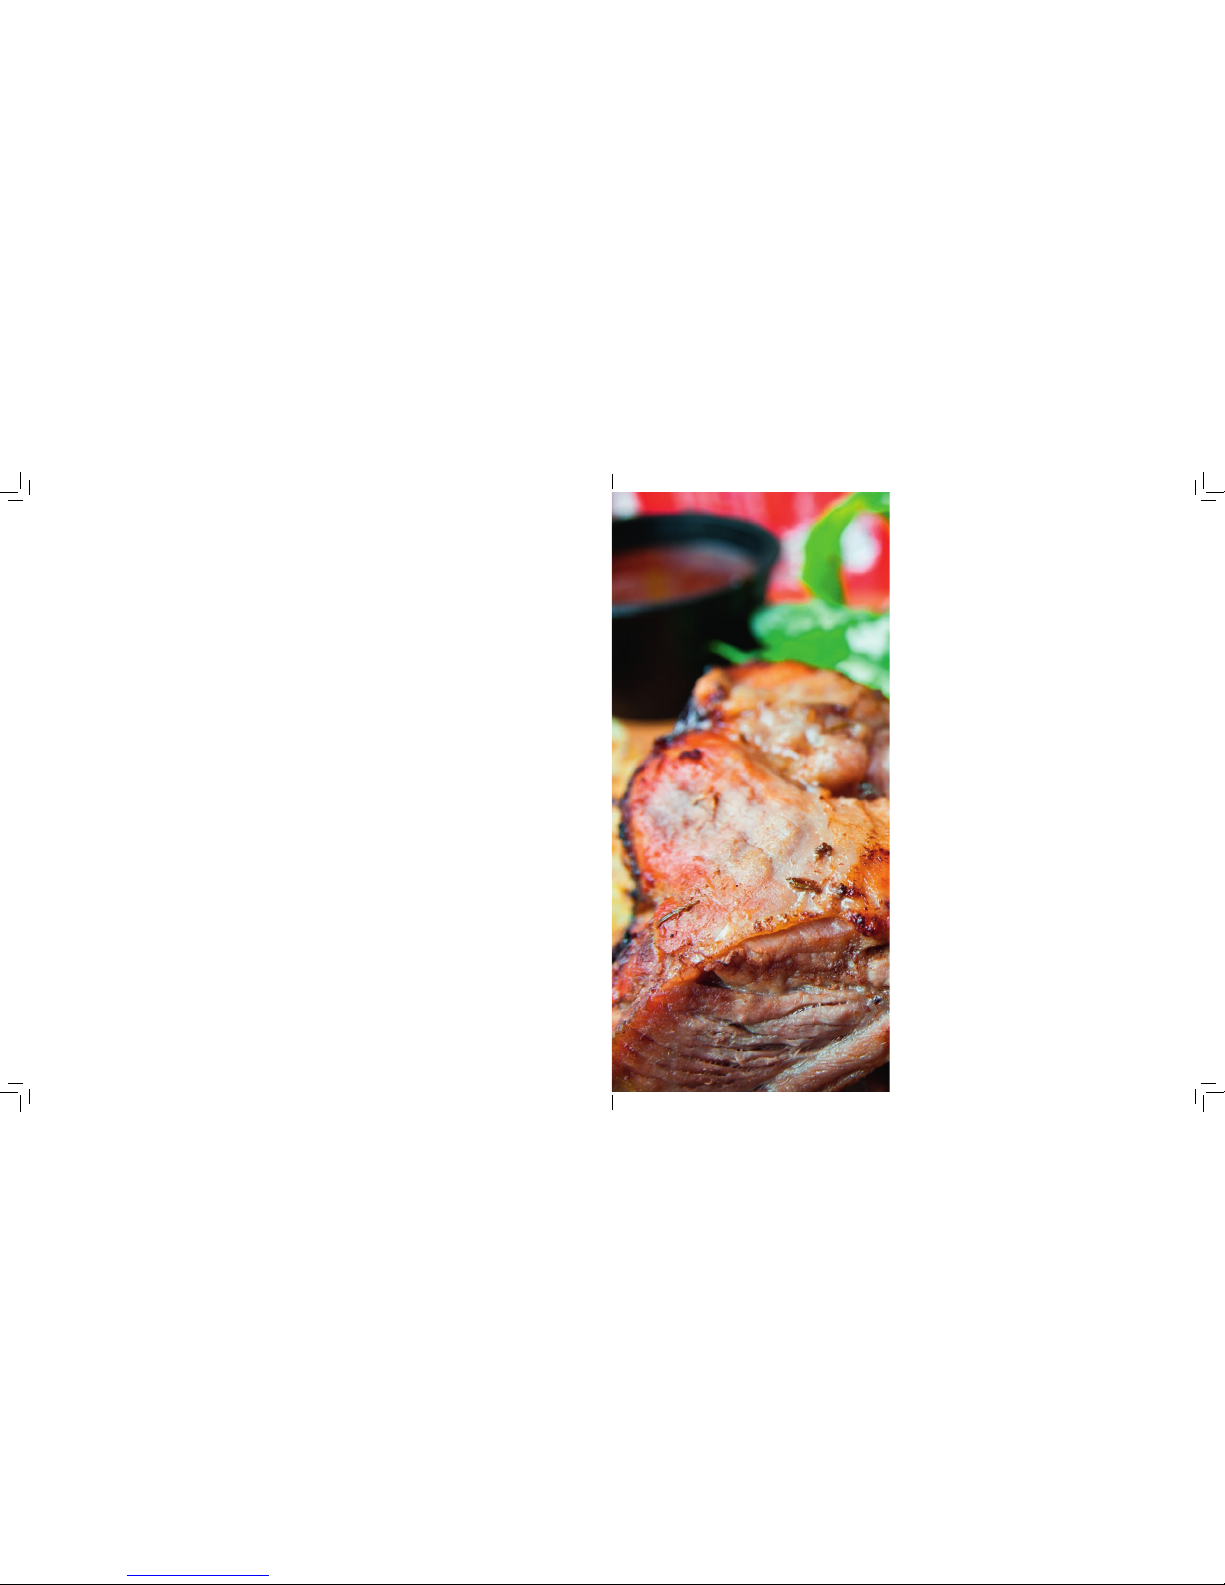
Cooking times Cooking times
Meat
Cooking time Fast cooking
Knuckle of pork 30-40 min. 2
Goulash 15-20 min. 2
Minced meat 5-10 min. 2
Chicken 20-25 min. 2
Veal 6 min. 2
Veal roas 15-20 min. 2
Veal fricassée 5 min. 2
Turkey leg 25-35 min. 2
Haunch of venison, braised 25-30 min. 2
Beef roast 40-50 min. 2
Rib of pork 10-12 min. 2
Roulade 15-20 min. 2
Sauerbraten (pot roast) 30-35 min. 2
Pork roast 25-30 min. 2
Seared in the pot without lid. The necessary liquid is added. Cut up
pieces too large, sear individually and lay on top of one another to
finish cooking.
Fish
Cooking time Gentle cooking
Steamed fish with potatoes 6-8 min. 1
Fish in white wine sauce with potatoes 6-8 min. 1
Haddock 4-6 min. 1
Fish (fresh)
Cook with liquid appropriate to the quantity. As fish stock is very
sticky, the lid should be removed immediately the pressure indicator
has completely disappeared.
Deep-frozen food
The usually extended defrosting and thawing times are reduced to
minutes, but are still dependent on type and size of the foods to
be defrosted. Defrosting in the pressure cooker preserves vitamins,
minerals and the flavouring of your food.
Differences in cooking times arise due to quality and amount and size
of the food being cooked, so the times given here must be understood
as very rough approximations.
After a while, you will have enough experience yourself to know how
long your meals will require to cook.
Deep-frozen foods do not have to be defrosted beforehand; it is
enough to extend the cooking times slightly.
Soups and stews with fried meat
When cooking times of the ingredients are not much different from
one another, e.g. meat and vegetables, the meat is seared, then the
vegetables added with the gravy.
When cooking times vary considerably, the cooking process for the
meat is normally interrupted and the vegetables added for the last
few minutes‘ cooking. In this way, meat and vegetables will both be
ready at the same time.
For soups and stews, it should be noted that foaming foods are started
off in an open pot and before the pot is closed, the foam should be
skimmed off.
Vegetables
The smaller you cut vegetables, the shorter their cooking times will be.
If you like you food ‚crunchy‘, cooking time is shorter. The more you
cook, the longer the cooking time.
Suggestion: better cook too short – cooking on is always possible.
Soups Cooking time Fast cooking
Bean soup 20 min. 2
Pea soup (not soaked) 20–25 min. 2
Vegetable soup 4–8 min. 2
Semolina soup 3–5 min. 2
Goulash soup 10–15 min. 2
Potato soup 5–6 min. 2
Bone soup 20–25 min. 2
Minestrone 8–10 min. 2
Rice soup 6–8 min. 2
Beef broth 35–40 min. 2
Chicken soup 25–35 min. 2
Tomato soup with rice 6–8 min. 2
Stews Cooking time Fast cooking
Cabbage stew 15 min. 2
Lentils (soaked) 13–15 min. 2
Pichelsteiner 20 min. 2
Serbian beef 8–10 min. 2
Vegetables Cooking time Gentle cooking
Cauliflower 3–7 min 1
Green peas 3–5 min. 1
Cabbage 5–15 min. 1
Carrots 3–7 min. 1
Peppers, stuffed 6–8 min. 1
Mushrooms 6–8 min. 1
Beetroot 15–25 min. 1
Spinach 3–4 min. 1
Fast cooking
Beans 6–10 min. 2
Potatoes 6–8 min. 2
Celeriac 12–15 min. 2
Boiled jacket potatoes 6–12 min. 2
18 19
Page 11

customer service adress:
B/R/K Handel+Service GmbH
Westring 340
42329 Wuppertal / Germany
phone: +49 (0)202 283 77-0
fax: +49 (0)202 283 77-91
e-mail: [email protected]
www.cookvision.com
www.cookvision-shop.com
 Loading...