

Page 1
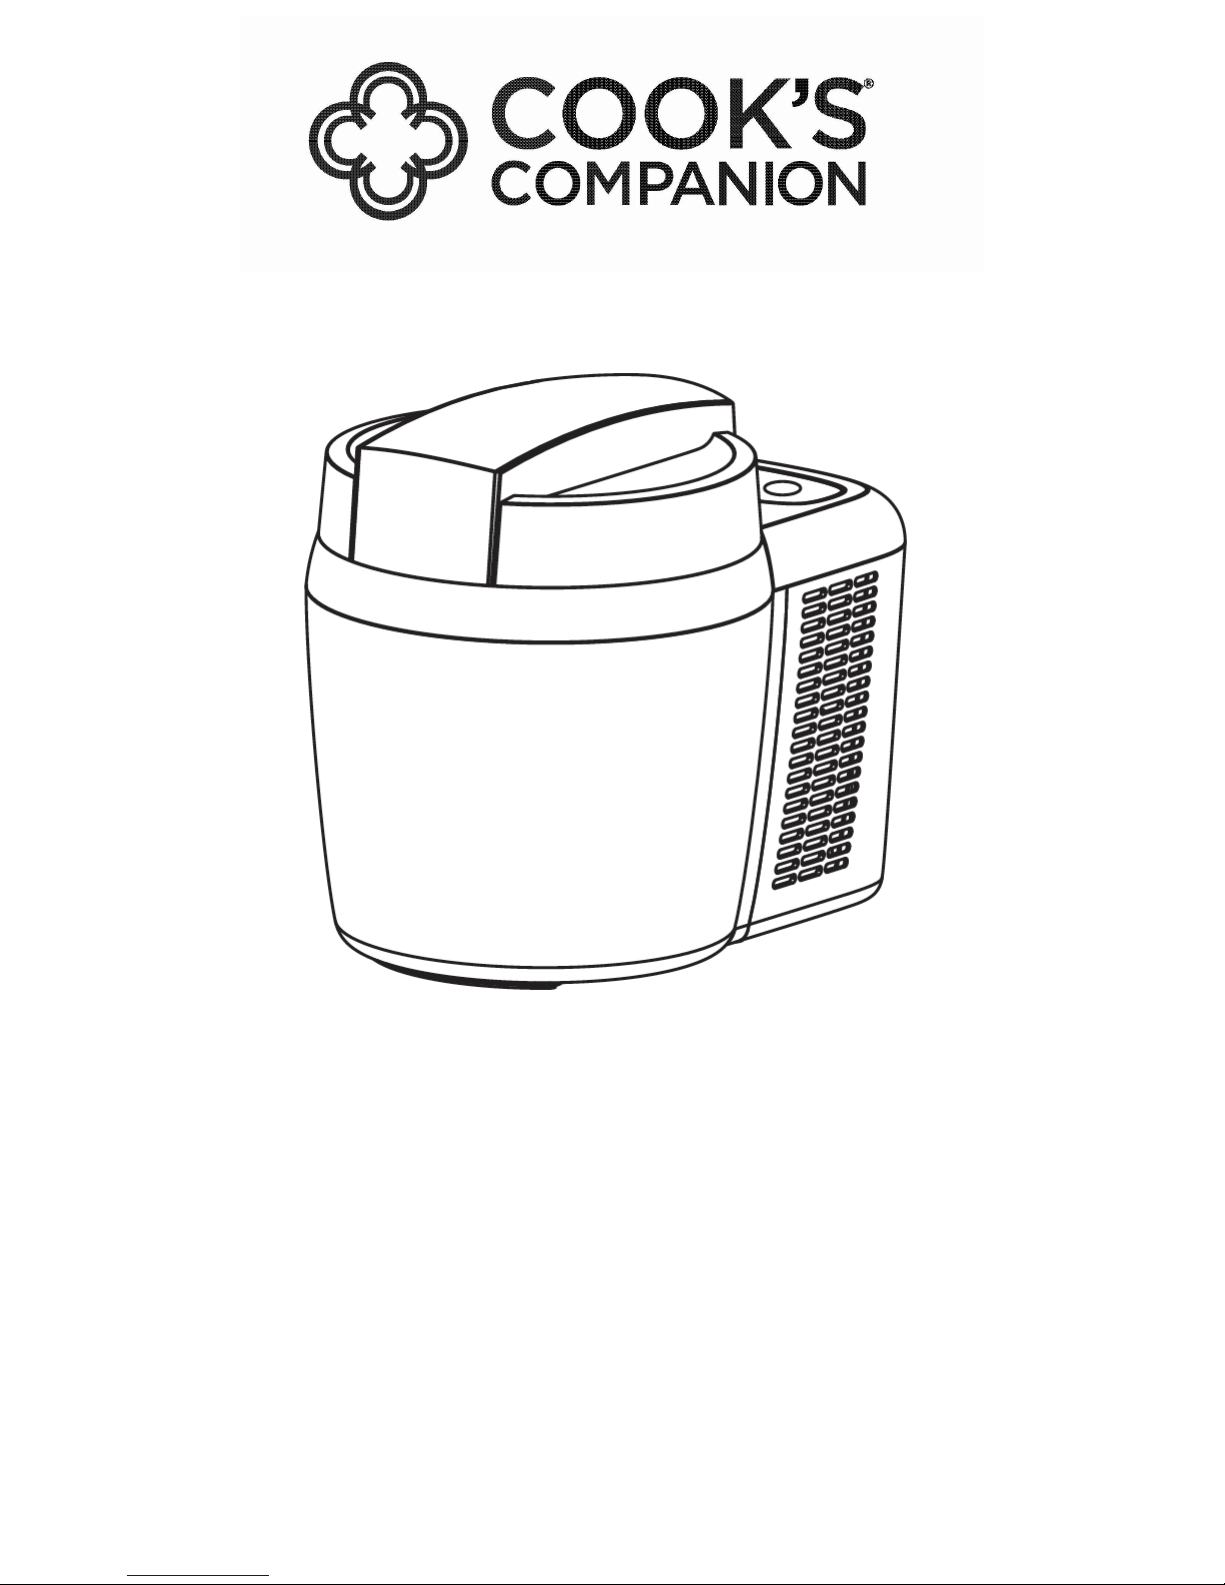
1.5 PINT ICE CREAM MAKER
Instruction Manual
MODEL ICM700C-CL
1
Page 2
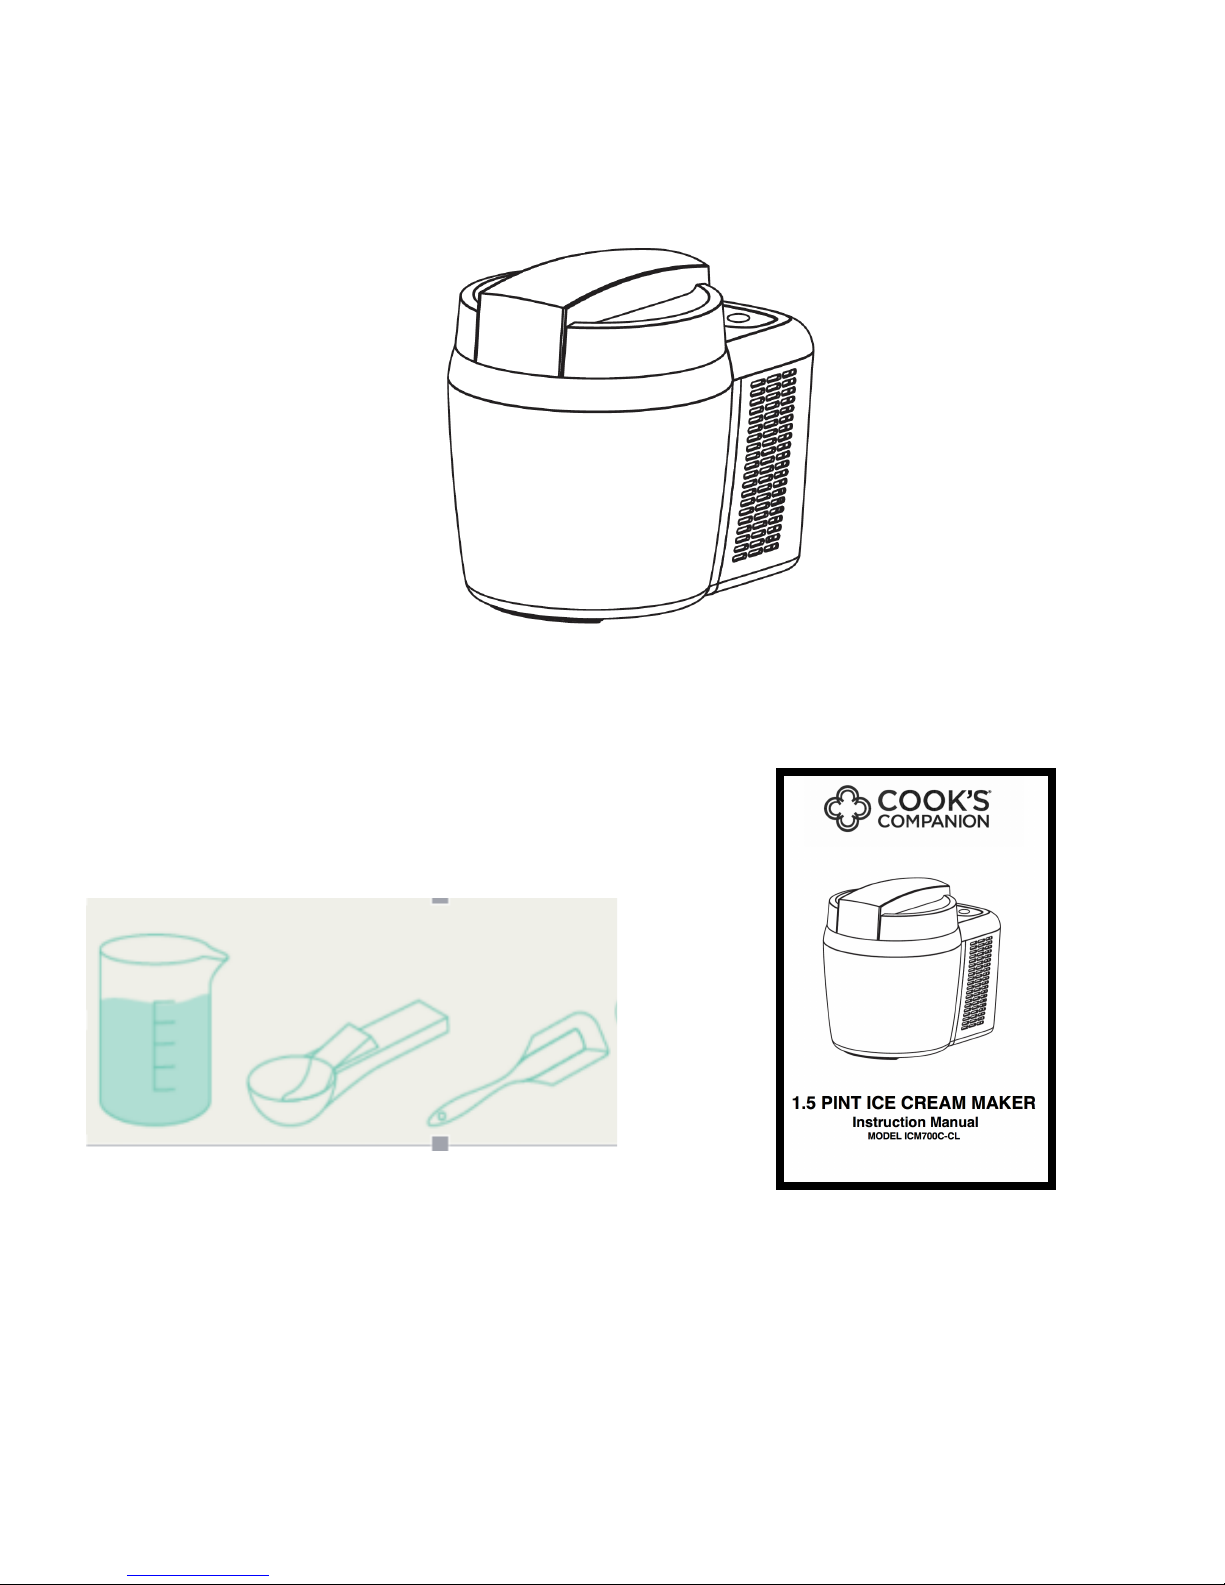
WHAT’S INCLUDED
2
Ice Cream Maker
Ice Cream Scoop,
Measuring Cup, Spatula
Instruction Manual
Page 3

IMPORTANT SAFEGUARDS
When using electrical appliances, basic safety
precautions should be followed as follows:
• Read all instructions.
• Do not use for anything other than intended use.
• Do not place the unit on or near gas or another hot
environment to avoid damages.
• Use extreme caution when moving the unit.
• Do not use near an open flame or cooktop.
• Place the unit on a level surface away from walls and
cupboards. Do not let the cord hang over the edge of a
table or counter or touch hot surfaces.
• Do not immerse the unit in liquid or allow liquid to be in
contact with electrical parts.
• Close supervision is required when any appliance is
used by or near children.
• Do not touch the control panel with any sharp
instruments.
• Do not use unit with an extension cord, always plug into
a wall outlet.
• To prevent electrical shock do not immerse cord, plugs,
or appliance in water or other liquid.
• Do not use the unit if the cord is damaged.
• Do not use outdoors.
• The use of accessory attachments not recommended by
the appliance manufacturer may cause injuries or
damage to the unit.
3
Page 4

• Always attach the cord to appliance, then plug the cord
into a wall outlet. To disconnect remove plug from wall
outlet.
• Do not place hot foods or liquids into the ice cream
maker.
• Close the lid immediately after adding ingredients so the
inside temperature stays stable.
• Do not place the appliance by a heat source or in direct
sunlight.
• SAVE THESE INSTRUCTIONS.
4
Page 5

PARTS IDENTIFICATION
5
1. Mixing Motor
2. Cover
3. Nut
4. Ice Cream Paddle
5. Aluminum Bowl
6. Housing
7. Back Cover
8. Control Panel
9. AC Adaptor
Page 6

BEFORE FIRST USE
1. Remove all packaging materials, stickers, and labels.
2. Before use, clean appliance in accordance of the
cleaning instructions in this manual on page 8.
3. Wipe the outside of the appliance with a cloth.
4. The ice cream maker must be set upright on a
horizontal surface for at least 5 hours after transit.
USING THE APPLIANCE
1. Make sure there is proper ventilation of 6” on all sides
before operating.
2. Assemble the mixing motor back onto the top cover
and insert the paddle into the shaft of the motor.
3. Connect the AC adaptor to the body of the Ice Cream
Maker first then plug into a wall outlet.
4. Prepare desired ice cream mixture. Note: Chilling
ingredients before putting them into the bowl will
reduce the time required to make the ice cream.
Chilling ingredients before putting them in the bowl will
also make the ice cream of a harder consistency.
CAUTION: Never exceed the MAX fill lie marking on the
Inner Bowl when using ingredients that expand.
5. Pour ice cream mixture into the inner bowl. Add hard
ingredients 30-40 minutes after the unit has been
working to avoid jamming the spatula or ingredients
settling on the bottom.
6
Page 7

6. Place the cover onto the Ice Cream Maker, turn the lid
clock wise to lock the cover and motor in place. Ensure
the metal pins underneath the mixing motor make
contact with the magnetic switches on the main body
of the Ice Cream Maker. Note: The motor will not
function if the magnetic switches are not engaged. The
motor will also switch off automatically if it is separated
from the magnetic switches.
7. Depending on desired consistency, press either HARD
(thicker consistency) or SOFT (thinner consistency)
button to begin operation. The motor will begin turning
and the until will begin freezing.
8. The unit will take 45-120 minutes to make the ice
cream, dependent upon quantity/type of ingredients
and the ambient temperature.
9. The ice cream maker will beep once the ice cream is
ready and the paddle is no longer able to turn. Press
the STOP button for the beeping to stop. The STOP
button can also be used to cancel operations at any
time.
10. Once finished, unplug the unit from the wall and main
body. Remove the motor and cover by turning it
counter clockwise, set aside. The paddle should be
inside the ice cream bowl. Remove the paddle using
the spatula and scrape off any ice cream stuck to the
paddle.
11. Use the scoop to spoon out ice cream from the inner
bowl into a freezer safe container or serve. Note: Do
not use metal utensils to scoop your ice cream in the
inner bowl as this may damage the surface of the
bowl.
7
Page 8

CLEANING
To remove the paddle, nut and cover for cleaning remove
the paddle by pulling it out of the shaft of the motor. Turn
the nut counter clockwise to remove, then take the cover
off. Use soapy water to clean the cover, nut, and paddle.
Use a soapy cloth to clean the inner bowl. DO NOT
IMMERSE THE MOTOR IN WATER, WIPE WITH A DAMP
CLOTH.
STORAGE
1. Unplug the cord
2. Make sure all parts are clean and dry.
TROUBLESHOOTING
8
PROBLEM
CAUSE
SOLUTION
The Ice Cream Maker does not
power on.
The motor is assembled
incorrectly.
The power cord is not inserted
correctly.
Make sure you have followed the
instructions on how to assemble
the motor and cover to the body
and engage the magnetic
switches.
Ensure the power cord is fully
connected to the main body.
The Ice Cream Maker isn’t
freezing the ice cream.
The appliance is placed too
close to a heat source.
Not sufficient ventilation.
The lid is opened too frequently.
Keep the appliance away from
direct sunlight or other heat
sources.
Place the ice cream maker in an
area with good ventilation and
leave 6” of clear space on all
sides of the vents.
Close the lid tightly and do not
open the lid too frequently while
in operation.
Page 9

RECIPE NOTES
____________________________
____________________________
____________________________
____________________________
____________________________
____________________________
____________________________
____________________________
____________________________
____________________________
____________________________
____________________________
____________________________
____________________________
____________________________
____________________________
____________________________
9
Page 10

RECIPE NOTES
____________________________
____________________________
____________________________
____________________________
____________________________
____________________________
____________________________
____________________________
____________________________
____________________________
____________________________
____________________________
____________________________
____________________________
____________________________
____________________________
____________________________
10
Page 11

RECIPE NOTES
____________________________
____________________________
____________________________
____________________________
____________________________
____________________________
____________________________
____________________________
____________________________
____________________________
____________________________
____________________________
____________________________
____________________________
____________________________
____________________________
____________________________
11
Page 12

LIMITED ONE YEAR WARRANTY
This warranty covers all defects in workmanship or materials in the mechanical and
electrical parts, arising under normal use and care in this product for a period of 12
months from the date of purchase provided you are able to present a valid proof-ofpurchase. A valid proof-of-purchase is a receipt specifying item, date purchased, and
cost of item. A gift receipt showing item and date of purchase is an acceptable proof-ofpurchase. Product is intended for household use only. Any commercial use voids the
warranty.
This warranty covers the original retail purchaser or gift recipient. During the
applicable warranty period within normal household use, we will repair or replace, at our
discretion, any mechanical or electrical part which proves defective, or replace unit with
a comparable model. Shipping and handling costs are not included for warranty
replacements and are the responsibility of the customer.
To obtain service under the terms of this warranty, send an email to
customercare@alliedrich.net or call 312-526-3760 between 10AM and 4PM CT. Please
provide the model number listed on the bottom of this page when contacting us.
THIS LIMITED WARRANTY COVERS UNITS PURCHASED AND USED WITHIN
THE UNITED STATES AND DOES NOT COVER:
• Damages from improper installation.
• Damages in transit.
• Defects other than manufacturing defects.
• Damages from misuse, abuse, accident, alteration, lack of proper care
and maintenance, or incorrect current or voltage.
• Damage from service by other than authorized dealer or service center.
• Shipping and handling costs.
• This warranty gives you special legal rights and you may also have other
rights to which you are entitled which may vary from state to state.
Manufacturer does not assume responsibility for loss or damage for return
shipment. We recommend that you keep your original packaging should you require
repair service. Before returning product please contact our customer care department
for return authorization. When returning product for repair please include your full name,
return address, and daytime phone number. Also include a brief description of the
problem you are experiencing and a copy of your sales receipt or other proof of
purchase in order to validate warranty status.
MODEL ICM700C-CL
12
 Loading...