

Page 1
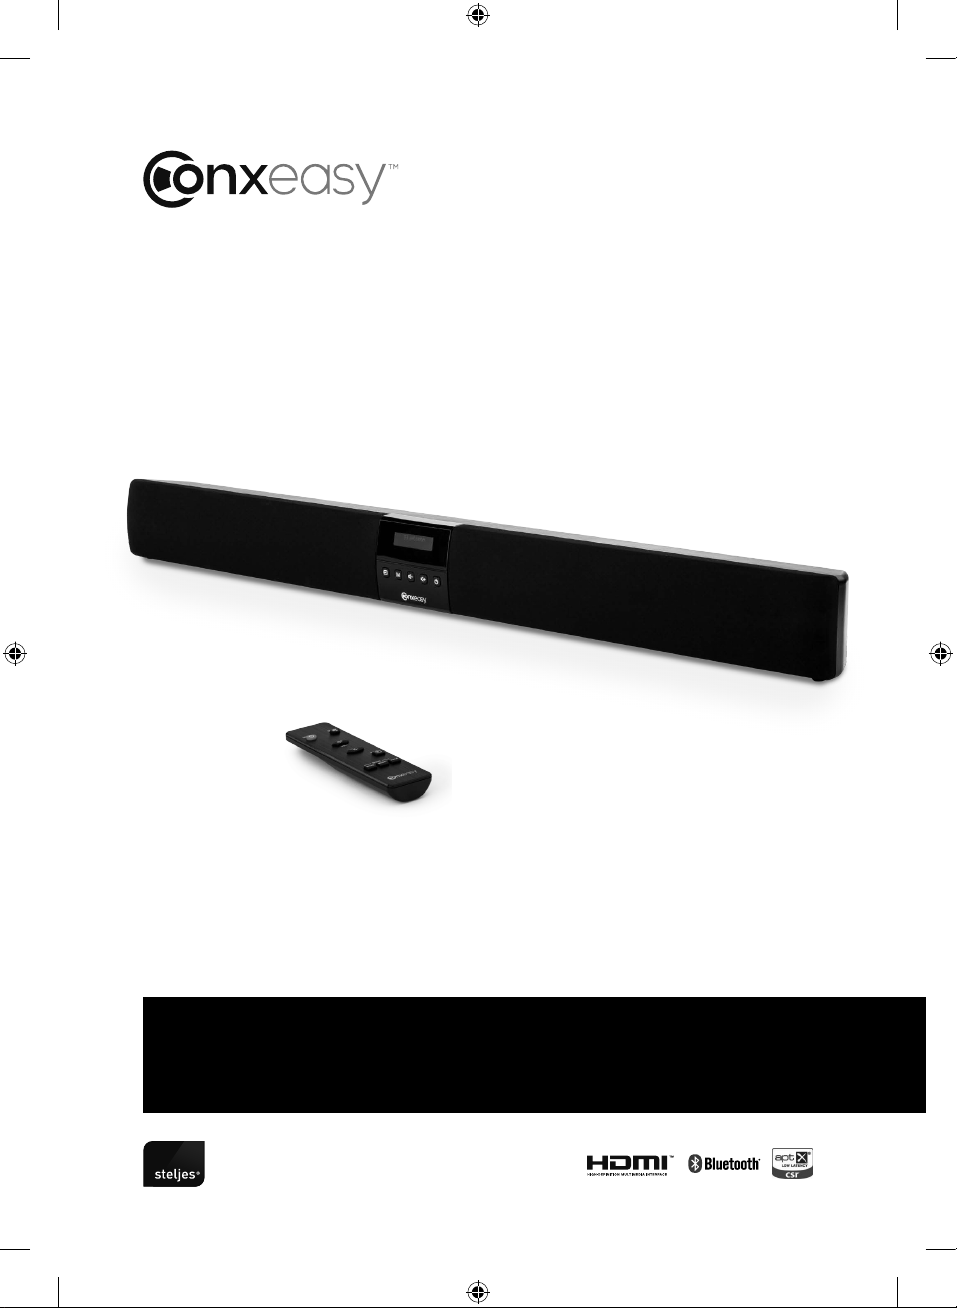
Flat Panel
SB603
Exclusive provider of
ConXeasy™ Audio Products
ConXeasy SB603 Manual LT.indd 1 22/01/2016 14:53
Display Soundbar
Page 2
SB603
Flat Panel Display Soundbar
CONTENTS
Important Information ...... . . . . . ..... . . . . . ..... . . . . . ..... 4
Wiring Information ....... . . . . . . .... . . . . . . .... . . . . . . .... . . . . 6
Wall Mounting ..... . . . . . ..... . . . . . ..... . . . . . ..... . . . . . ..... 8-9
Trouble Shooting ..... . . . . . ..... . . . . . ..... . . . . . ..... . . . . 10-11
Hook Up Diagram . . .... . . . . . . .... . . . . . . .... . . . . . . .... . . 12-15
Controls and Function .. . . . . .... . . . . . . .... . . . . . . .... . . . . . 16
Remote Control . . . . . . . .... . . . . . . .... . . . . . . .... . . . . . . .... . . . . 17
Limited Warranty .. . . . ..... . . . . . ..... . . . . . ..... . . . . . ..... . . 18
Specifications . . . . . ..... . . . . . ..... . . . . . ..... . . . . . ..... . . . . . ... 19
Exclusive provider of
ConXeasy™ Audio Products
2 Steljes Audio . ConXeasy SB603 User Guide
ConXeasy SB603 Manual LT.indd 2 22/01/2016 14:53
Page 3
ImpOrTaNT INfOrmaTION
READ BEFORE OPERATING EQUIPMENT
Read all the instructions carefully before
using the unit and keep them for future
reference.
ATTENTION
The owner’s manual contains important operating and
maintenance instructions, for your safety, it is necessary
to refer to the manual.
SAFETY INSTRUCTIONS
• Do not use this product near water or
moisture
• Do not install near any heat sources
• Clean only with a dry cloth. Unplug this
product from the wall outlet
• Do not attempt to service this product
yourself.
• Opening or removing covers may expose
you to dangerous voltages or other
hazards.
• Please contact the manufacturer to be
referred to an authorized service center
near you.
• Do not block any ventilation openings.
• To prevent risk of fire or electric shock,
avoid over loading wall outlets,
• Do not let objects or liquids enter the
product.
• Protect the power cord from being
walked on or pinched, particularly at
plugs and the point where they exit from
the product.
DANGEROUS VOLTAGE
Conductor dangerous voltage, that may be of sufficient
magnitude to constitute a risk of electric shock to persons is
present within this product’s enclosure.
Steljes Audio . ConXeasy SB603 User Guide 3
ConXeasy SB603 Manual LT.indd 3 22/01/2016 14:53
Page 4

POWER SOURCES
WARNING
• This audio system is designed to operate
on 230 volts 50Hz, AC current. The main
plug is used as the disconnect device
and should remain readily accessible. To
prevent electric shock, do not use the
soundbar’s mains cable with an extension
cord, receptacle, or other outlet unless
the blades and ground terminal can be
fully inserted to prevent blade exposure.
Never connect the audio system to 60 Hz
DC, or anything other than the specified
voltage.
DISPOSAL
• In the EU, electronic devices cannot
be disposed of with regular household
waste. Please use the return or collections
systems of the retailer from whom you
purchased the soundbar. Please dispose
of batteries in an environmentally friendly
manner. Do not dispose of batteries with
regular household waste. Please use
the return or collections systems of the
retailer from whom you purchased the
soundbar.
CAUTION
• Never remove the back covers of the
soundbar as this can expose you to very
high voltages and other hazards. If the
system does not operate properly, unplug
the audio system and call your authorised
dealer or service centre for advice. Adjust
only those controls that are covered in
the instructions.
• To reduce the risk of fire or electric shock,
do not expose this soundbar to rain or
moisture.
• The system should not be exposed to
dripping or splashing and objects filled
with liquids, such as vases, should not be
placed on the system.
• This soundbar should only be connected
to a mains socket outlet with a protective
earthing connection.
ELECTRICAL INFORMATION
• This system is fitted with a BS1363/A
13 amp plug. If it is not suitable for your
supply sockets it must be removed and
replaced with an appropriate plug. If the
plug becomes damaged and/or needs
to be replaced please follow the wiring
instructions below. The plug removed
must be disposed of immediately. It must
not be plugged into a supply socket as
this will be an electrical hazard. If the
fuse needs to be replaced it must be of
the same rating and ASTA approved to
BS1362. If the plug is changed, a fuse of
the appropriate rating must be fitted in
the plug, adapter or at the distribution
board. If the fuse in a moulded plug is
replaced, the fuse cover must be refitted
before the appliance can be used.
4 Steljes Audio . ConXeasy SB603 User Guide
ConXeasy SB603 Manual LT.indd 4 22/01/2016 14:53
Page 5
WIrINg INSTruCTIONS
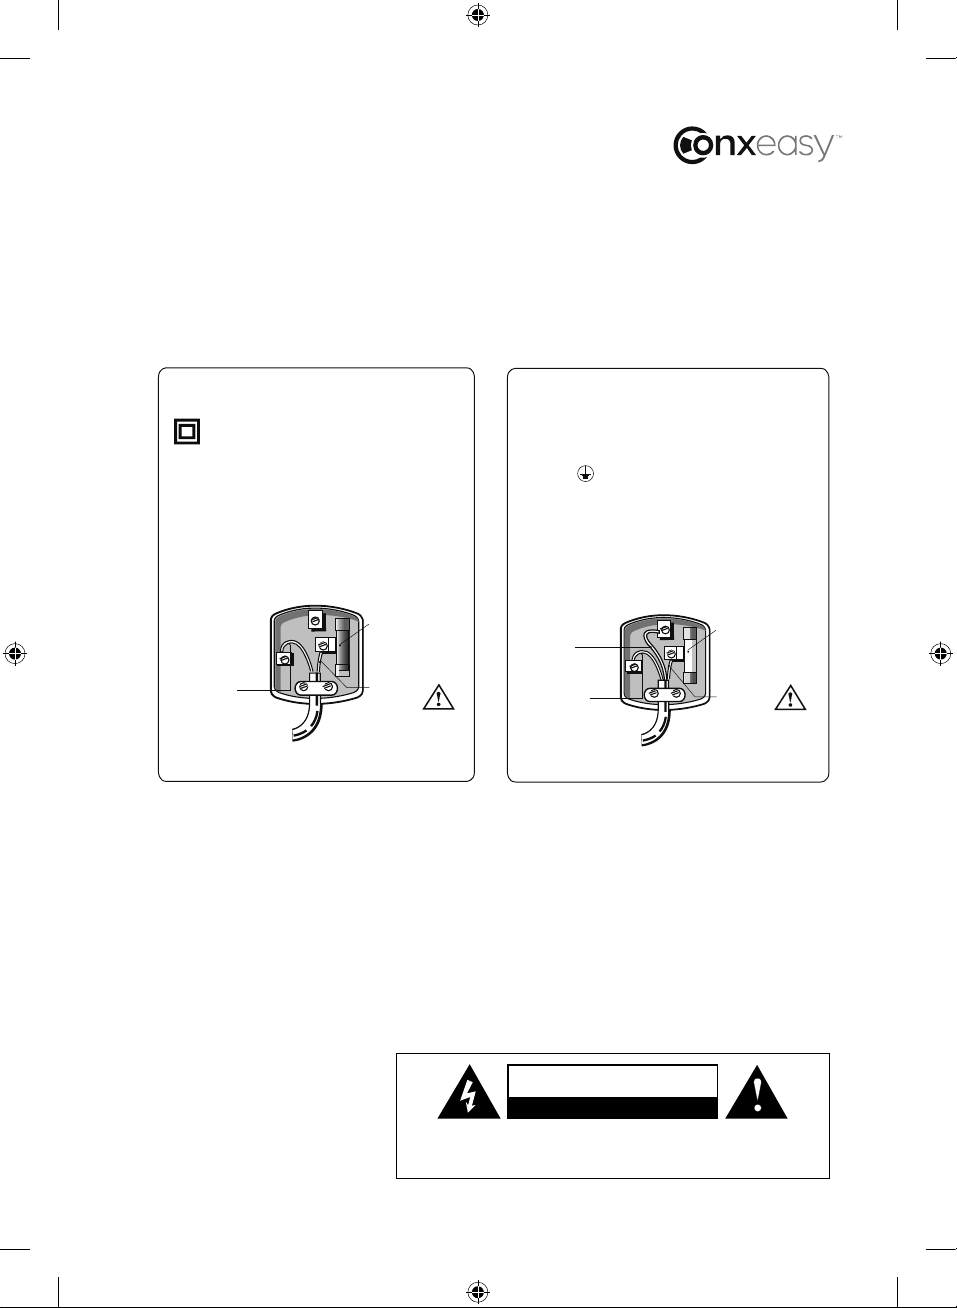
Follow the appropriate wiring instructions given below.
In both cases ensure that the outer sheath of the cable is
firmly held by the cable clamp.
2 - CORE PLUG
This symbol indicates that this
2-core appliance is Class II and
does not require an earth connection.
The wire coloured blue must be
connected to the terminal marked with
the letter N or coloured black.
The wire coloured brown must be
connected to the terminal marked with
the letter L or coloured red.
Fuse
Blue
(Neutral)
Brown
(Live)
3 - CORE PLUG
The wire coloured green and yellow
must be connected to the terminal
marked with the letter E, or by the earth
symbol
and yellow. The wire coloured blue must
be connected to the terminal marked
with the letter N or coloured black.
The wire coloured brown must be
connected to the terminal marked with
the letter L or coloured red.
Green &
Yellow
(Earth)
(Neutral)
or coloured green or green
Blue
Fuse
Brown
(Live)
WarNINg!
Do not connect either wire to the earth terminal.
WarNINg!
This appliance must be earthed.
The exclamation point within an equilateral triangle is intended to alert the
user to the presence of important operating and maintenance (servicing)
instructions in the literature accompanying the appliance.
The lightning flash with arrowhead symbol, within an equilateral triangle,
is intended to alert the user to the presence of uninsulated “dangerous
voltage” within the soundbar’s enclosure that may be of a sufficient
magnitude to constitute a risk of electric shock.
CauTION
rISk Of ElECTrIC ShOCk dO NOT OpEN!
CAUTION: TO PREVENT ELECTRIC SHOCK DO NOT PLUG A CABLE INTO A WALL
EXTENSION CORD, OR OTHER RECEPTACLE UNLESS THE METAL BLADES
OUTLET,
CAN
BE FULLY INSERTED TO PREVENT BLADE EXPOSURE.
Steljes Audio . ConXeasy SB603 User Guide 5
ConXeasy SB603 Manual LT.indd 5 22/01/2016 14:53
Page 6
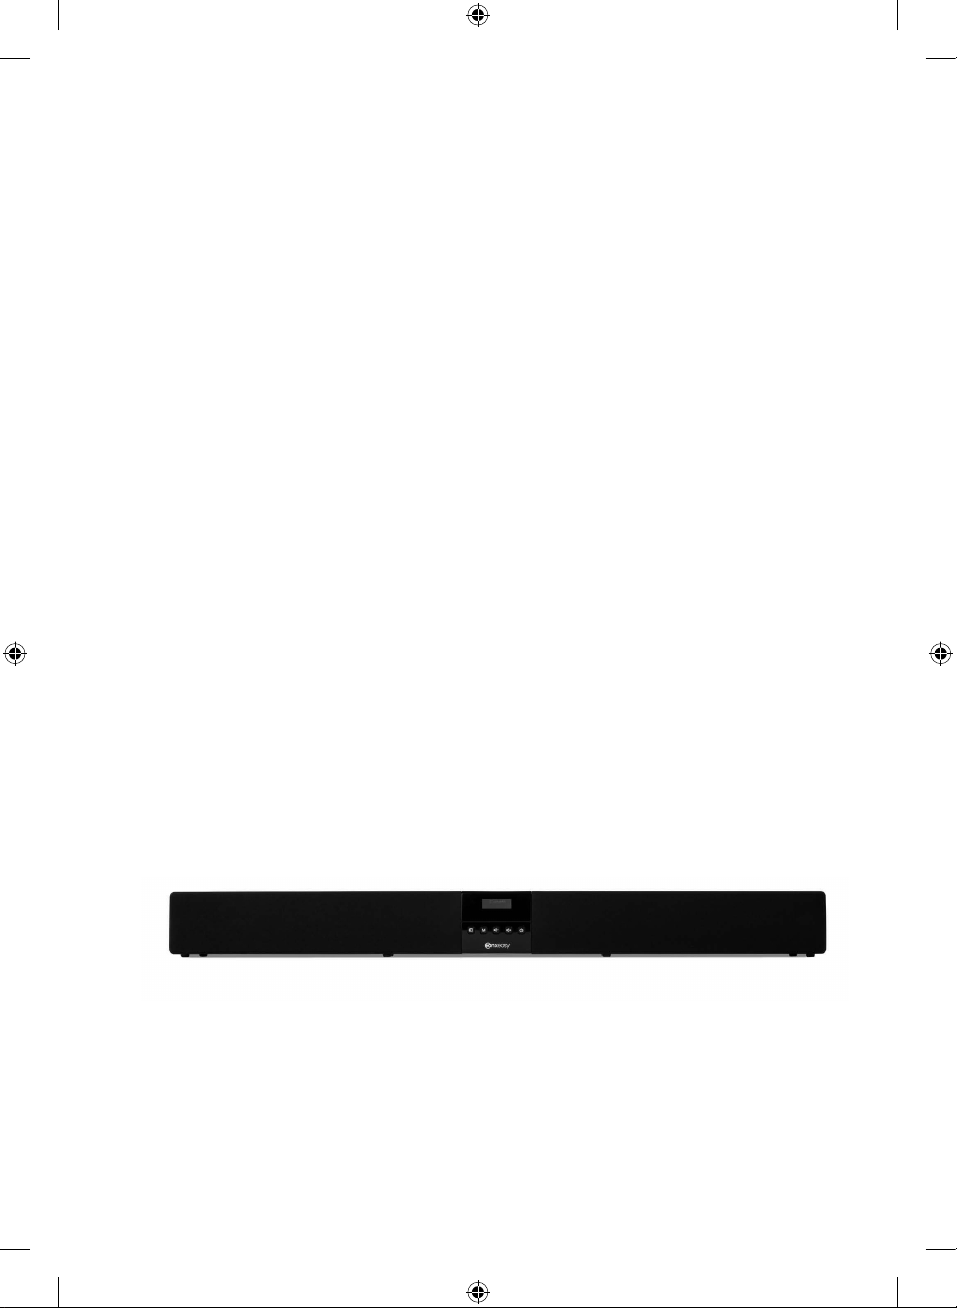
KEY FEATURES
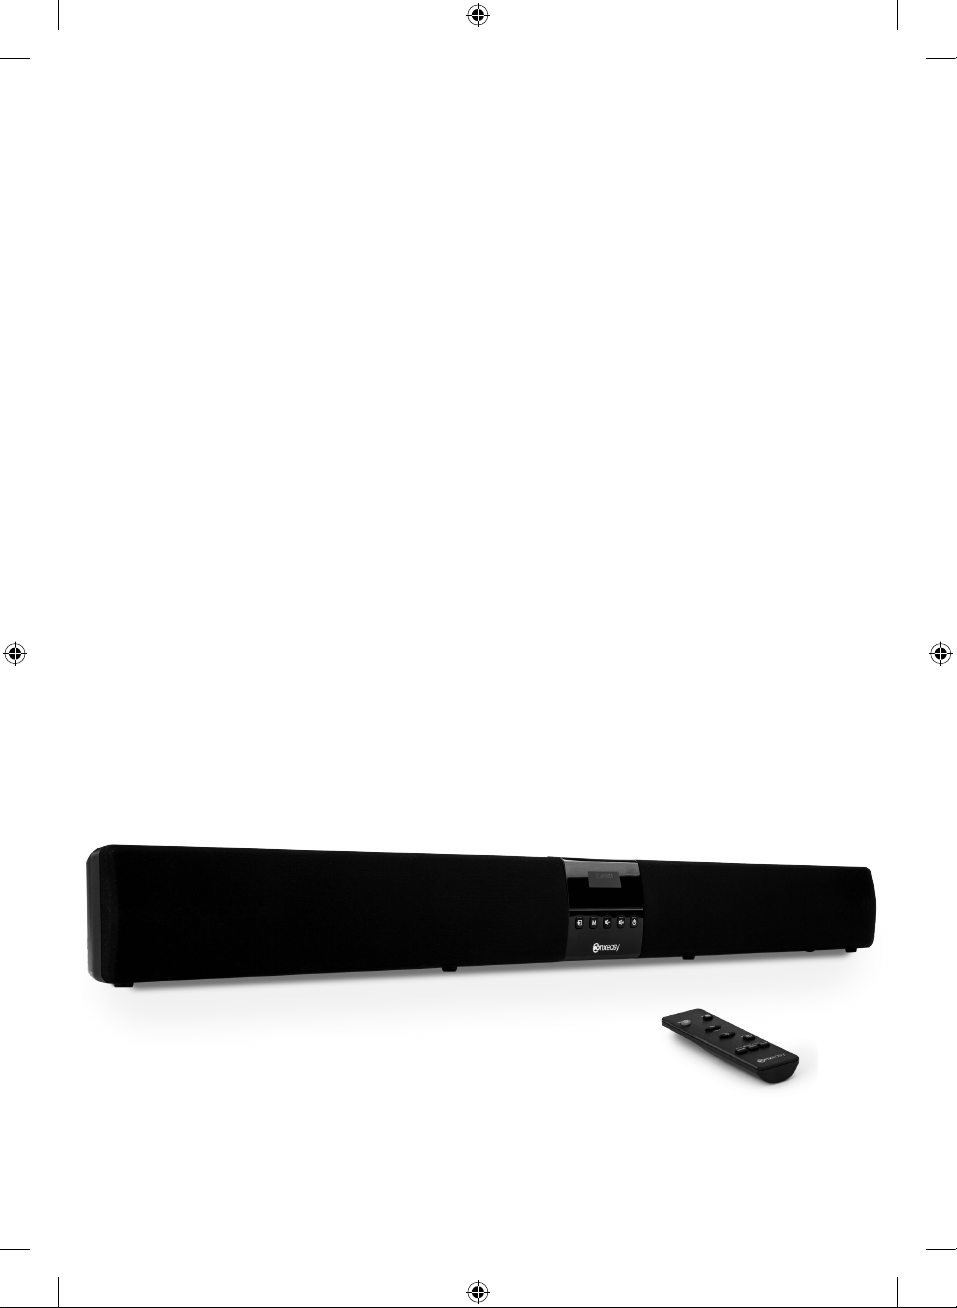
• The SB603 Flat Panel Display Soundbar is designed to provide a high quality alternative to
the loudspeakers in your Interactive Flat Panel/white board. To this end it has HDMI inputs,
optical digital, analogue, and Bluetooth aptX inputs. The Bluetooth input allows you to
stream music content direct from your mobile, laptop or tablet wirelessly, straight to the
SB603 . The SB603 Flat Panel Display Soundbar is designed to mount either on a desktop
or on a wall with the supplied wall mount fixings. It may also be mounted on bespoke
bracket assemblies supplies by your IFP provider.
ADVANCED TECHNOLOGIES IN THE SB603 FLAT PANEL DISPLAY SOUNDBAR
• Wider Sound Stage: The SB603 Flat Panel Display Soundbar features an acoustic design
utilising 2x 2.5 inch base drivers, 2x 2.5 inch broadband drivers and 2x passive membranes.
It provides for 3x DSP presets of Hall, Music and Speech, each tailored to provide what we
believe to be the best possible performance in each programme category.
• The inputs available on the SB603 Flat Panel Display Soundbar should accommodate all
interactive display panels or whiteboards, currently available, with 2x HDMI inputs and
1x HDMI output (with ARC), analogue (3.5mm stereo input), optical (Stereo) input and
Bluetooth aptX (for wireless connectivity).
6 Steljes Audio . ConXeasy SB603 User Guide
ConXeasy SB603 Manual LT.indd 6 22/01/2016 14:53
Page 7

TrOublE ShOOTINg
If you encounter problems when using the SB603 Flat Panel Display Soundbar, check the
following points before requesting a service.
In order to keep the warranty valid, please DO NOT attempt to repair the system yourself.
Note: due to EEC regulations this product will switch to standby mode as follows
The SB603 switches to standby mode in the following situation:
The device is idle for 30mins when powered by AC supply;
The L/R Audio in or 3.5mm jack is disconnected or when there is no input signal or the
input signal is too low.
If using the 3.5mm jack input to SB603, we recommend to default the output volume at
75% or above on the external devices to ensure that it does not automatically go into
standby mode.
1. No power
- Make sure power cords are securely connected to the AC output.
- Make sure that there is power at the AC output.
- Press the power button on the remote control or the front of the SB603 .
2. No audio
- Press the Volume + (Up) button on the remote control or the front of the SB603.
- Make sure that you selected correct input (Input 1, Input 2, or Input 3).
- Press MUTE on the remote to make sure the SB603 Flat Panel Display Soundbar is
not muted.
- Make sure audio cables are securely connected at the terminals of the SB603 and
the external devices.
Steljes Audio . ConXeasy SB603 User Guide 7
ConXeasy SB603 Manual LT.indd 7 22/01/2016 14:53
Page 8
3. Buzzing or humming noise
- Make sure audio cables are securely connected at the terminals of the SB603 and the
external devices.
- Test on an alternate device or replace the audio cable.
- Test the device and cable on an alternate input on the SB603 .
4. The remote control is not functioning
- Aim the remote control directly at the sensor on the front of the SB603 .
- Reduce the distance between the remote control and the SB603 .
- Make sure that the battery is inserted with its polarities (+/– signs) aligned as indicated.
- Replace the battery.
5. The sound bar and remote are not responsive
- Unplug the power cord from the AC output, and plug back in after a few seconds.
8 Steljes Audio . ConXeasy SB603 User Guide
ConXeasy SB603 Manual LT.indd 8 22/01/2016 14:53
Page 9
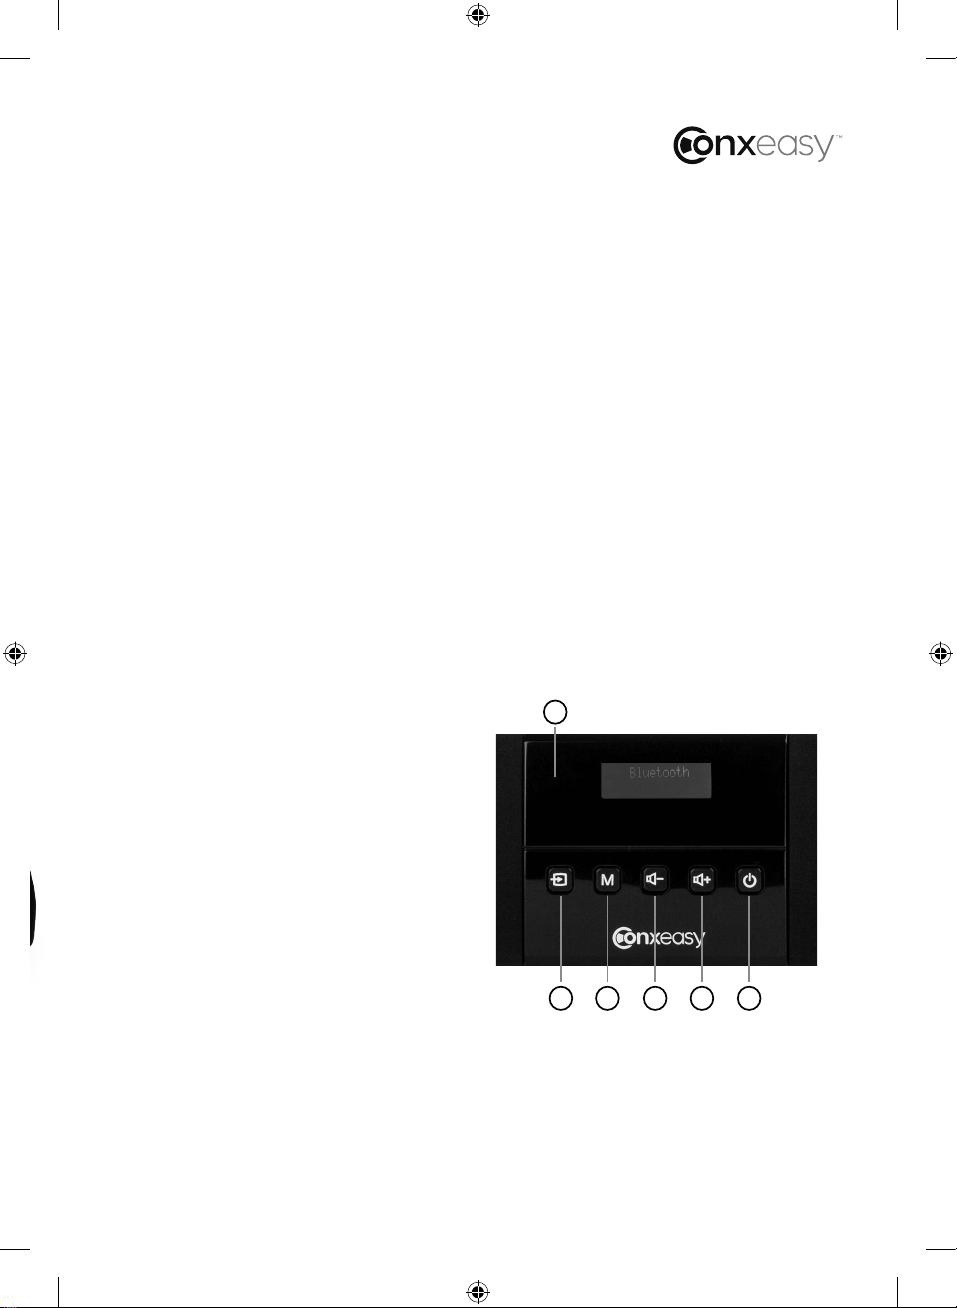
CONTrOlS aNd fuNCTIONS
Front Panel Controls / LED Indicators
1. REMOTE CONTROL Sensor Area
Point your remote control at this area
when you use the remote control.
2. POWER Button
The SB603 Flat Panel Display Soundbar
goes to the standby mode. Press this
button to turn the SB603 Flat Panel
Display Soundbar on; this Power
indicator will turn off to indicate the
SB603 Flat Panel Display Soundbar is
on. If the input becomes inactive the
SB603 Flat Panel Display Soundbar will
change to standby mode to conserve
power and this indicator will illuminate.
3. VOLUME + Button
Adjust the main volume up respectively.
4. VOLUME - Button
Adjust the main volume down
respectively
.
5. Mode Button
Press this button to select DSP
mode for Hall, Music or Speech.
6. SOURCE Button
Press this button to scroll through
the inputs.
1
23456
Steljes Audio . ConXeasy SB603 User Guide 9
ConXeasy SB603 Manual LT.indd 9 22/01/2016 14:53
Page 10
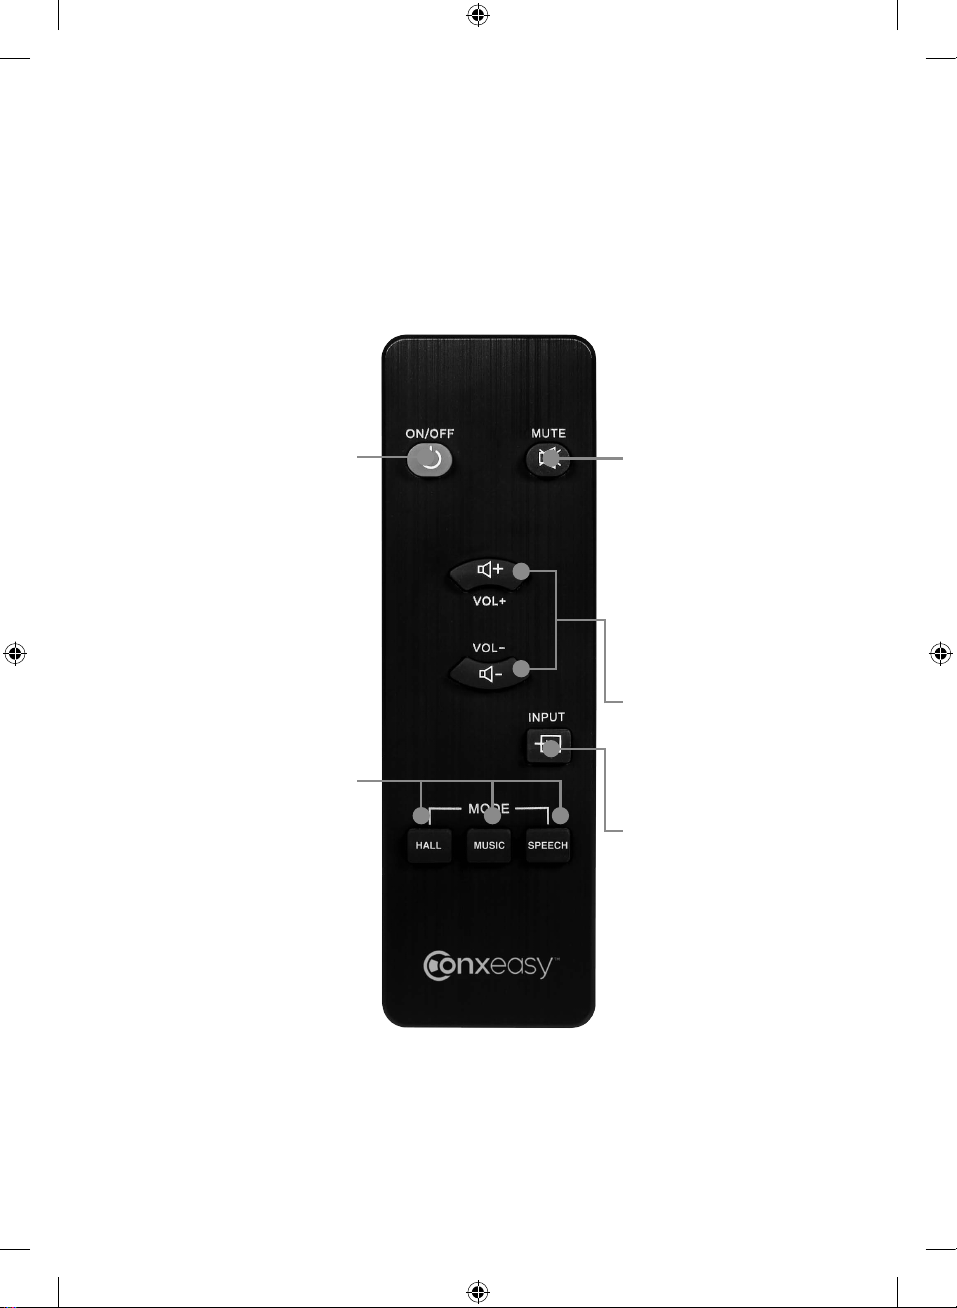
rEmOTE CONTrOl
POWER
Press this button
to turn the SB603
Flat Panel Display
Soundbar on or off.
MODE
This button is used
to select one of the
three presets DSP
programmes, HALL,
MUSIC or SPEECH.
MUTE
Press this button when
you want to activate the
audio mute. Press it again
to deactivate the mute
function.
MAIN VOLUME
Press the + or - button to
adjust the main volume
up or down respectively.
INPUT SELECTOR
Press this button to scroll
through the inputs
Remote Control
10 Steljes Audio . ConXeasy SB603 User Guide
ConXeasy SB603 Manual LT.indd 10 22/01/2016 14:53
Page 11

lImITEd WarraNTy
LIMITED WARRANTY
This product had been designed and
manufactured to the highest quality
standards; however, should you encounter
any problems with this product please
contact your local dealer or your country
distributor.
This limited warranty is valid for the original
owner for a period of one year from the date
of purchase, it is not transferable.
What is covered by the limited warranty:
The limited warranty covers all production
and material defects of the product, except
for the specifics stated below.
What is not covered by the limited
warranty:
Damage caused by packing and transport.
Defects caused by accidents, misuse, normal
wear and tear, mis-maintenance, voltage
variation and overloading.
Damage caused by incorrect installation or
operation. Damage caused by modification
or repair by a non-authorized service centre
and use of non-original spare parts.
How to claim parts or repair under warranty:
To have your product serviced under
warranty, you must contact the dealer from
whom the product was purchased.
You will need to produce this warranty
booklet completed and stamped by your
dealer on the date of purchase.
Alternatively, you will need the original sales
invoice or other proof of ownership and date
of purchase.
The supplier is liable only to repair or replace
defective parts of products and the supplier
is not responsible for indirect losses or
damage arising from the use of the product.
Transportation costs for servicing are not
covered by the warranty.
A service repair or replacement cannot
exceed the value of the product under
warranty; in no event shall the supplier be
responsible or liable for special, incidential,
consequential or indirect damage.
Other damage due to conditions beyond the
supplier’s control such as fire, rain, war and
other force majeure events.
Steljes Audio . ConXeasy SB603 User Guide 11
ConXeasy SB603 Manual LT.indd 11 22/01/2016 14:53
Page 12
SpECIfICaTIONS
Steljes SB603 Flat Panel Display Soundbar
2 x 2.75 Inch Mid-High Ferrite Magnet Drivers
2 x 2.75 Inch Bass Ferrite Driver
2 x Passive Bass Radiators
Analogue 3.5mm Stereo Jack In
HDMI In x 2, HDMI Out (ARC) x 1
Bluetooth aptX A2DP
Wall Mount Kit
60W Power Output
3 DSP Settings
Class D Amplifiers
Dimensions: 89 x 850 x 80mm (H x W x D)
Power Input AC 230-240V 50Hz
Exclusive provider of
ConXeasy™ Audio Products
Steljes Audio reserves the right to change specifications without notice. Images and
photos are for illustration only and actual product may vary. E&OE.
ConXeasy SB603 Manual LT.indd 12 22/01/2016 14:53
 Loading...