

Page 1
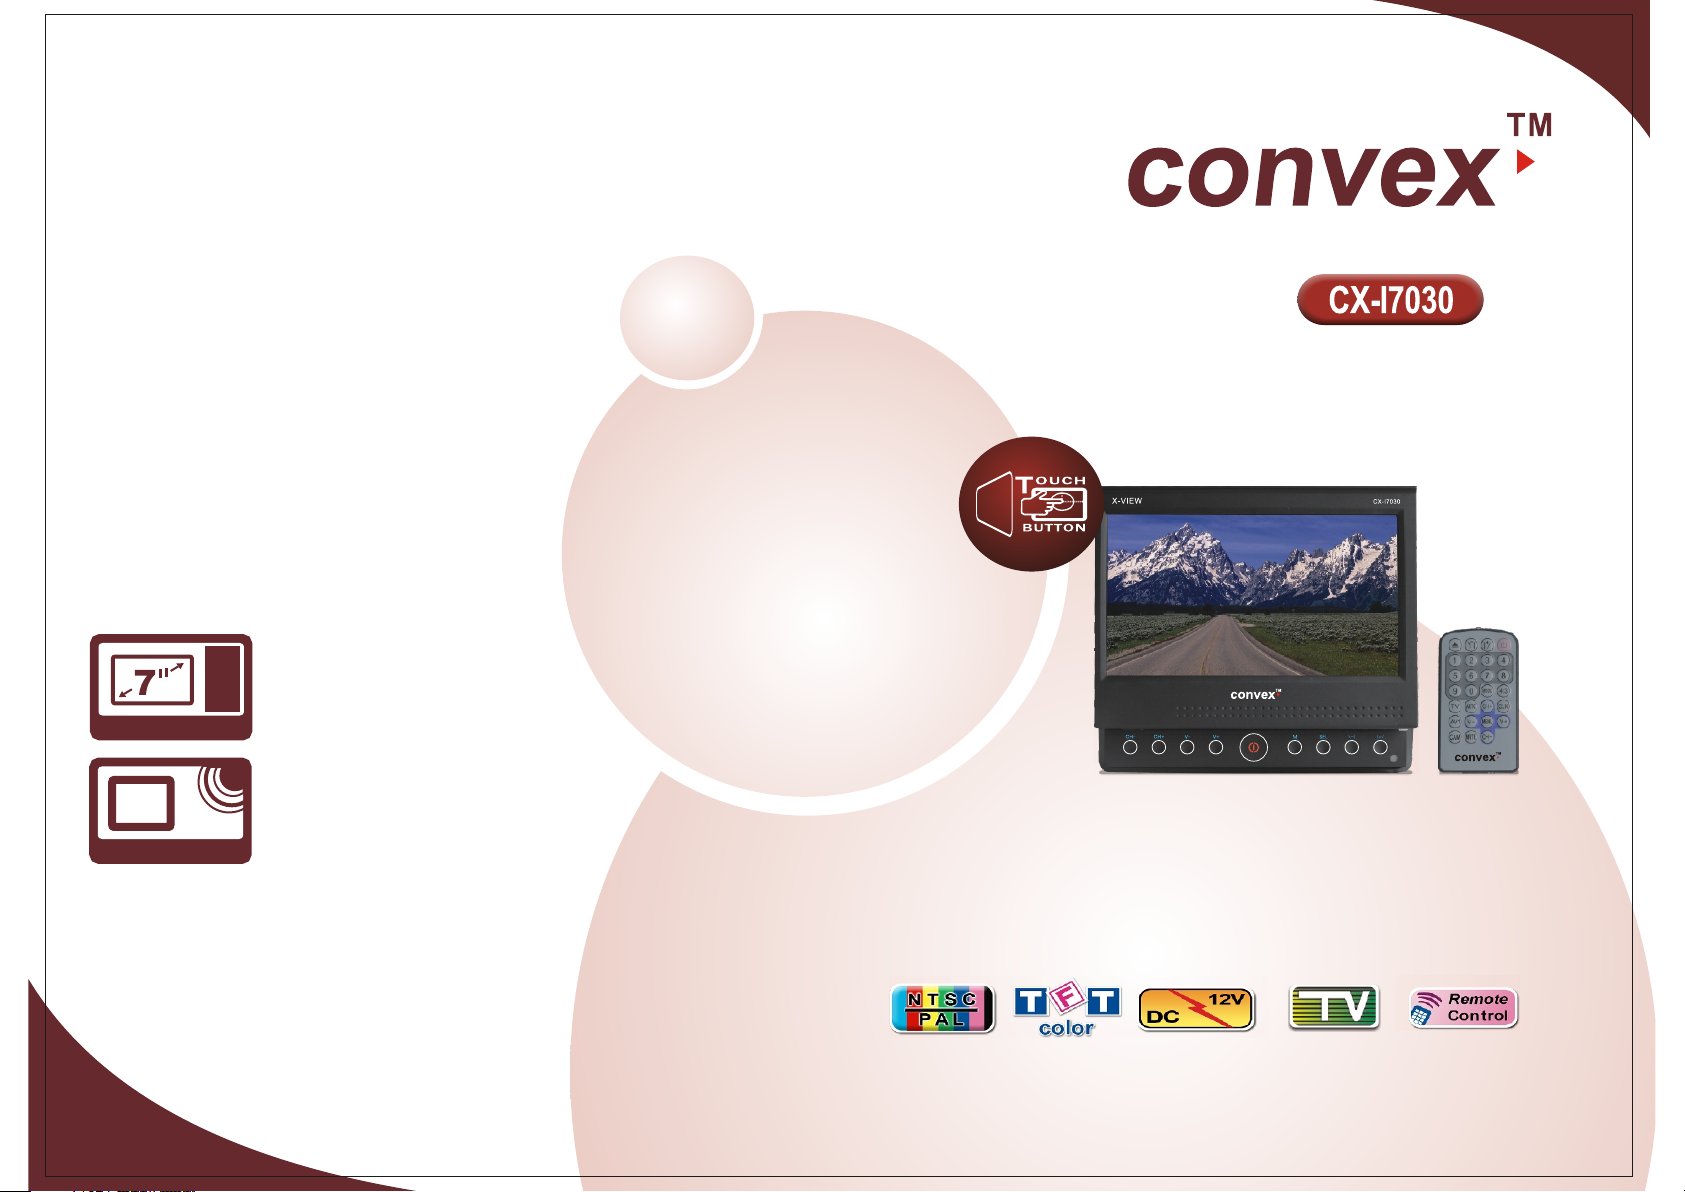
16:916:9
TFT wide-screen
Auto Display
TV
With TV tuner
16:916:9
USER MANUAL
Page 2

BRIEF INT ROD UCT ION
Para m e ter Specifications
Wo r k in g voltage D C 12 V
Wo r k in g cu rre n t 700m A M A X 1.1A
Wo r k in g te m p eratu re
-1 0 ~ 6 0 ℃
M e m ory te m pera tur e
-3 0 ~ 8 0 ℃
Video m o de Autom a ti c PA L o r NT S C
In p u t co n fig u ration Tw o -ro u te sign a l input (w ith in p u t b ackin g mir ror)
Exte rnals size 17.8 (W ) * 1 8 (L)* 5(H )cm
We ight 1.8 k g
Scre e n s ize 16:9
Resolu tio n 480*2 34 p ixel* R G B
Pix e l d istance 0.1 3 6 (H )*0.4 16 (V )
Item Quantity Notes
Mainframe 1
Remote 1
Mainframe power supply wire 1
Remote battery 1
Mainframe special taking-out instruments 1
Mainframe fittings (screw etc.) 1
Mainframe outer iron case 1
Mainframe case outer protection board 1
User’s manual 1
appreci ate y our p urchase of o ur qu ali ty automobile AV product . This
product a dop ts se veral adva nce d tec hnology inclu din g imported TFT modu le,
advance d mic rop rocessor t ech nol ogy, opt imized design , adv anced driving
circuit , bui lt- in anti-ja mmi ng an d quality video d eco ding circuit. Theref ore , thi s
product h as th e cha racteris tic s of hi gh resolution , no gl int, no radiati on, l ow
consump tio n and e nvironme nta l pro tection. You will b e sat isfied with the h igh
definit ion , viv id color and s tab le pi cture of the disp lay. This displ ay ca n hide
automat ica lly w hich meets t he mo dem 's requiremen ts fo r mini, precisi on an d
conceal men t. The pr ofe ssional desig n of th e car-mounted e lec tronic produc ts
makes thi s sys tem h ave satisf act ory f unctions . For e xam ple, the ope rat ion o f
switchi ng co lor a nd brightn ess e tc. c an be realized by p res sing correspo ndi ng
buttons o n the p ane l or by remote c ont rol c onveniently.
All opera tio ns ar e intellig ent ize d with OSD menu and a ll th e adjusted
paramet ers a nd lo cation can b e mem ori zed and resumed a uto matically. Th is
complet ely a cco rds with you r req uir ements for leis ure a nd convenienc e.
Special ly eq uip ped video input a uto matically dis pla ys backing stat us.
Enterta inm ent a nd monitor ing c an be r ealized synch ron ously wide syst em of
voltage d esi gn ca n better mee t the r equ irements of var iou s automobiles .
Additio nal ly, this p rod uct is a syste mat ic on e with different funct ion s and
fitting s cor res ponding to d iffer ent s pec ifications, p lea se carefully ch eck t he
corresp ond ing i tem list. To install and ope rat e this product pr ope rly, ple ase r ead
this manu al ca ref ully.
PRODUCT S PEC IFI CATION
Specifi cat ion s System Par ame ter
Produ ct functions
Hide Auto matically: th e LCD can fle x completely au tomatically.
Key Fun ctions: Touch respondent key- press
Memorize Automatical ly: all adj usted paramet ers and locatio n can be
memorized and resume d automatical ly.
Mode Id entificatio n: automatic PAL or NTSC syste m with wide range o f
application and stro ng compatibil ity.
Remote Function: rem ote operation o f all funct ions makes the op eration
easy and convenient.
Menu Fu nction: all ope ration is instr ucted by OS D menu with the rea l time
showing
Signa l Choice: three -route signal i nput (one r oute with camer a-special
socket).
Backing Inspection : specially equ ipped video input automa tically displ ays
the backing status.
Mode Ch oice: preset vi deo mode, conve nient and fast to adjust the s creen
quality.
Protection Mode: inp ut and output pro cess of the d isplay has the fu nction of
automatic check of mal function and pr otection function.
+
10 %
01
02
Page 3
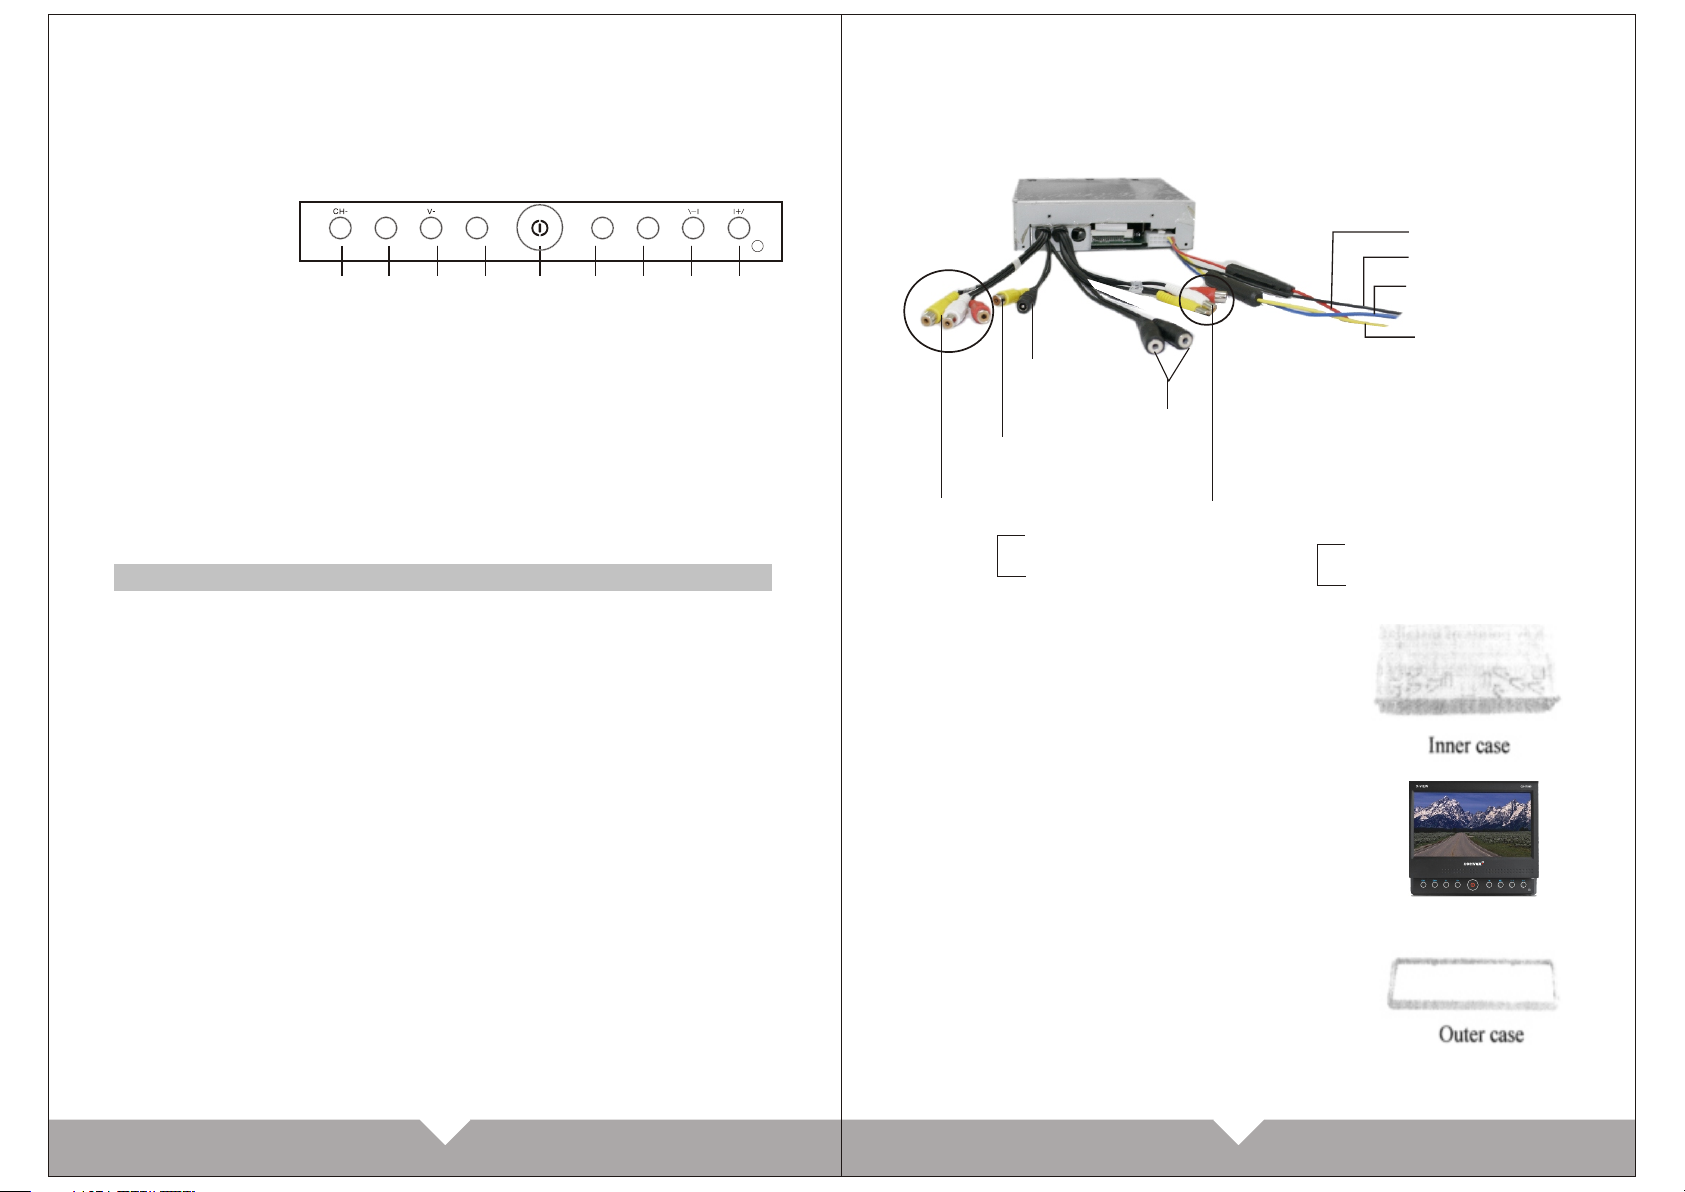
BUTTON DESCRIP TIO N
1.Screen B utt on de scriptio n
Please ch eck t he co nnection a nd cl ean u p the wires for con ven ience of
the later i nst all ation.
CH+
① ② ③ ④ ⑤ ⑥ ⑦ ⑧ ⑨
V+
SEL
M
①Channel -, pr ess i t for submen u.
②Channel +, pr ess i t for main men u.
③Volume & men u con tro l-.
④Volume & men u con tro l+.
⑤Power OFF /ON .
⑥MENU: men u, un der s ubmenu, pr ess M ENU t o return to ma in me nu st ate.
⑦Select sw itc hin g button TV/AV/ rear monit or mo de sh ift .
⑧Angle scr een a dju sted downw ard s.
⑨Angle scr een a dju sted upwar ds.
MAINFRA ME IN STALLATIO N
1.Key poi nts o f installatio n
This prod uct i s spe cially des ign ed fo r 12V automobil es. To inst all i t in
other aut omo bil es, please c onn ect p ower converte r or co nsult the
manufac tur er.
To avoid shor t out , you a re recomme nde d to di smantle the neg ati ve pole
of the stor age b att ery before i nst all ation.
Please do n ot co nne ct this prod uct w ith t he storage b att ery d irectly
without c onn ect ing fuse.
Please do f oll ow th e instruct ion s to co nnect the wire ACC a nd BATT,
otherwi se it w ill l ead to power o ff or malfun cti on and cause grea t con sumption
of batter y whe n you l eave befor e swi tch ing off t he display.
Please in sta ll th is product i n a slo t wit hout affecting the ope rat ion of airconditi one r and o ther elect ric a ppl iance.
2.Conne cti on\
Connect t he ACC t o the l ighter but ton .
Connect t he BATT to the stor age b att ery wire.
Connect b ack ing w ire to backi ng bu tto n or backup light w ire .
Connect e ach v ide o signal to th e vid eo/ sound input/o utp ut port (mirror
special s ock et an d correspo ndi ng vi deo socket cann ot be u sed
synchro nou sly ).
Camara pow er
cable (+12 v)
TV signal wire
Camara sig nal w ire
Vide o Inp ut(Yello w)
Audio Inpu t
Left(White)
Right(R ed)
3.Insta lla tio n
Please be c aut iou s not to ruin or m ess u p the
instrum ent p lat form.
Find an emp ty sl ot in t he instrum ent p lat form and cle an
up the insi de an d res erve
enough sp ace . Take o ut th e inn er shell and inst all i t in
the slot.
Install t he ma inf rame and con nec t the p ower socket
and video s ock et, t hen
install t he ma inf rame into th e inn er ca se.
Put the out er ca se on t he mainfra me, a s ill ustrated i n
the pictu re on t he ri ght
side.
Precaut iou s: The in val id battery shou ld be c hanged
immedia tel y and s hould not
be thrown i nto f ire .
Vide o Out put(Yell ow)
Audio Outp ut
(Red) ACC
(Black) GND
(Blue) BACK
(Yellow) B+
Left(White)
Right(R ed)
Mainframe
03
04
Page 4
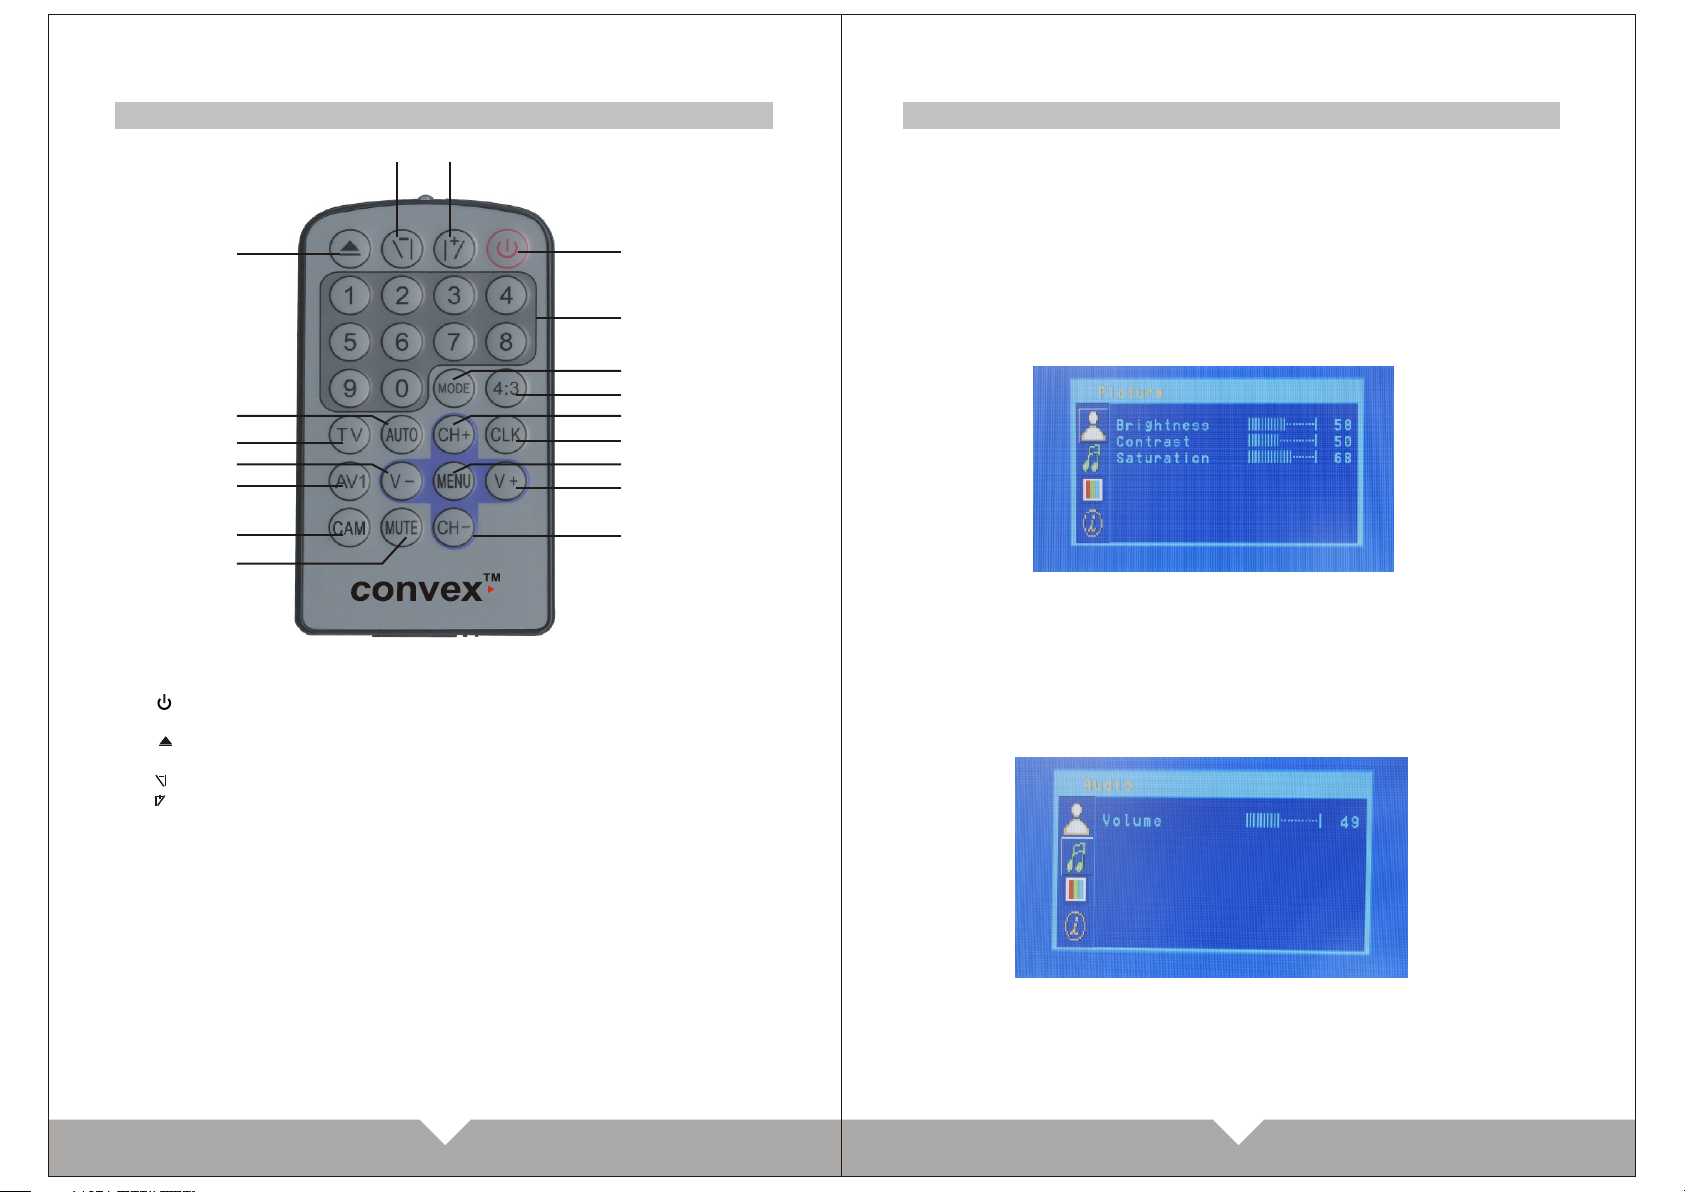
REMOTE CO NTR OL OPER ATI ON
OPERATION INSTR UCT ION
3
4
Please fo llo w the “ installa tio n and c onnection met hod ” to connect wire ,
and sure th e wir e is co rrected. Then power on t he un it. Thi s products have t hre e
kind of mod e: AV.TV.CAM.
Choose th e dis pla y mode you nee d.
2
13
14
15
16
17
18
1、 POWER
Press int er to s tay picture.
2、 Press thi s but ton p anel slip in a nd
out
3、 Press it to d own t he pa nel
4、 Press it to U P the pan el
5、(0-9): Number button
6、MODE: Pre ss th is bu tton to set th e
video mod e (Br igh tness, Sof t, Vivi d,
Standar d , Mem ory )
7、4: 3 : Scr een d isp lay mode switch
Press thi s but ton to switch the
screen di spl ay si ze: 16:9 / 4: 3
8、CH+:
Press for c han nel i ncrease
9、CLK butto n
Press it wi ll di spl ay time.
10、MENU
Press it en ter t o menu.
1
5
6
7
8
9
10
11
12
11、V+ :
Volume and m enu v alu e
adjustm ent ( inc rease)
12、CH-:
Press for t he ch ann el reduce
13、AUTO:
Press thi s but ton for 3 seconds t o
auto sear chi ng TV.
14、TV:
Press thi s but ton switch the TV
mode.
15、V- :
Volume and m enu v alu e
adjustm ent ( red uction)
16、AV1:
Press it to s wit ch the AV mod e.
17、CAM:
Press it to s wit ch the CAM mode.
18、MUTE:Sta tic k ey
Press"M " to en ter the menu func tio n; th en press“C H+” to ch oose the main men u.
main menu " Pic tur e" "Audio" " TV" " Uti lity". Afte r you c hoo se the main menu ,
which nee d adj ust ing, press " CH- " to ch oose submenu. P res s "M" again back to
the previ ous m enu .
1. Picture adjustment
1)Press the " M "bu tton to the main me nu,
2)press " M " to sub menu,
3)then use “CH+,CH- " to c hoose brightn ess ,contrast , color and
hue(N system),
4)then press V+ or V- to adju st the paramete r.
2. Volume adjustment
1) Press " M " butt on to enter menu,
2) then press “CH+,CH- “ to choose volum e item,
3) press “V+/V-“ to adjus t volume.
05 06
Page 5

3. Functi on ad justment
1) Press " M " button ent er me nu,
2) Use "CH+ /CH -" to c hoose FUNC TIO N ADJU STMENT item,
3) press "V + "en ter s ubmenu.
4) press "C H+ /C H-" c hoose timi ng po wer o ff , lan guage, overtu rn, m ode items.
5) Press V+ / V- t o adj ust the items whi ch yo u cho ose.
4. TV adjus tme nt
1) Press " M " enter
2) Press CH+/CH- butto n choose TV adju stment
3) Press V+ enter TV adjustment submen u.
4) Press CH+/ CH- to choos e auto search, fi ne tuning, system, blue
scree n, skip items.
AUTO TUNE: Af ter choose this item, pres s V+,V- enter
auto searching , press M ENU button can st op searching.
FINE TU NING: After choo se FINE TUNING , press V+/Vto fine t uning the previ ous or next progr am, to reach the best effect.
SYSTE M :Choose SYSTE M items, then pre ss V+,V- to ch oose
differen t TV system for yo ur Country TV sy stem. This uni t can support on :
PAL/DK, PAL /I , PAL/BG, PAL/ M , PAL/N, NTSC/M N etc system. Cho ose the
correct system , will re ceive nice pict ure and signal. Otherwis e will display
non-colorful, non- sound phenome non.
BLUE SC REEN: Can choos e blue screen fun ction ON or OFF.
SKIP : If you ch oose the program setting i s ON , press CH+/CH -
will skip this program , only can choose i t by number button.
5. Basic operation
1. Powe r on / off
Press b utton on panel or " " remote contro l , will powe r on ,
After pa nel slip out ; pres s same button aga in will power off.
2. Stay s tatus
Press " " f or save the scree n in black ,press again will o n. (Not for
panel slip out or in )
3. Adjust panel angle
Press " " " " b utton to adjust t he panel an gle.
4. MUTE
Press " MUTE " button on re mote control to rest the sou nd ,press again
will resume.
5. Func tion model swit ch
Press : S elect " button on p anel , can switch TV / AV1/ CAM mode.
6. Chan nel increase or r educe
Press C H+ / CH- to choose up o r down channel on TV mode
7. Menu o peration
Press M ENU button ente r to menu interfa ce.
8. Volume control
Press V + /V- to adjust the vo lume .
9. Full f unction remot e control by infr ared .
07 08
Page 6
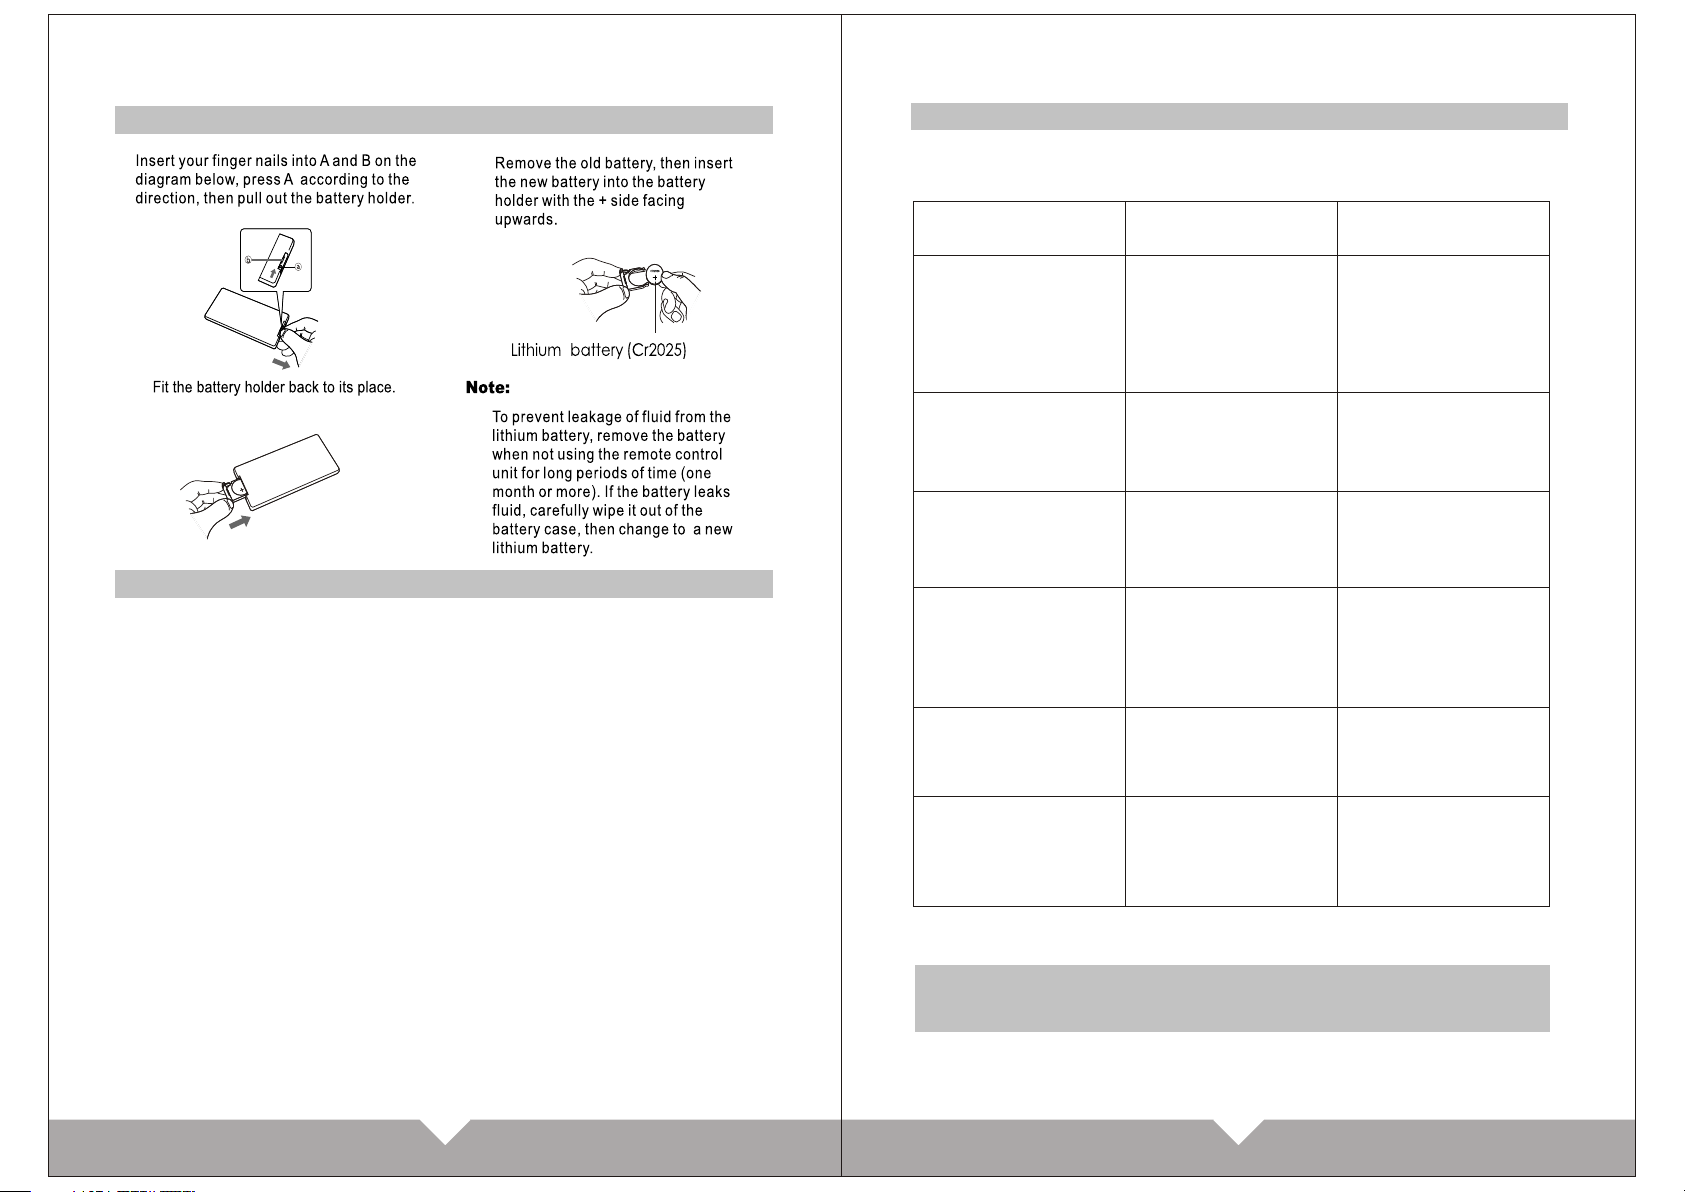
REPLACI NG TH E BATTER
SIMPLE TR OUB LE-SHOOTING G UID E
2.1.
3.
PRECAUT ION S
Please do not op era te th is product i n dri vin g.
This product i s an au tom atic instr ume nt。 Pl ease do not sw ing t he di splay
hard.
Please do not tr y to re pai r the displa y by yo urs elf. It is mad e up of m any
precisi on el ect ronic elem ent s, an d any dismantle men t or refit will mak e it
damaged o r bro ken . Please swi tch o ff the po wer i mmediately in c ase o f
malfunc tio n and i nform the co mpa ny or d istributor.
Please keep th e dis pla y away from th e pol lut ion of moisture , dus t, steam,
soot etc. P lea se sw itch off the power im med iat ely if any moistu re or o ther
objects p oll ute t he instrum ent a nd co ntact the co mpa ny or d istributor.
Do not use thinn er or o the r chemical d ete rge nt to clean the dis pla y's
surface . Swi tch o ff t he po wer before c lea nin g the dirt.
Please do not pu t the d isp lay under th e dir ect s unshine for a lon g tim e.
The working te mpe rat ure of the ins tru men t is -10~60℃.The desi gn fi ts th e
automob ile s wit h 12V negati ve po le co nnecting eart h sto rage battery
system.
Please ch eck t he fo llowing fa ult s bef ore sending you r uni ts for repairs.
Symp to m
Black Sc re en
NO pictu re
color pi ct ur e
With a lit tl e re gu la r light
spots an d co lo r sp ot s on
the scre en o r bl ac k
horizo nt al l in e in t he
pictur e
Unclea r pi ct ur e
The oute r co ve r of t he
monito r ha s be en d ef ormed
Prob ab le C au se
1.No12 v ol ta ge
2.Brig ht ne ss o r co ntrast
ratio is t oo s ma ll
3.no hig h- vo lt ag e
1.No sou rc es o ut pu t
2.The vi de o co nc en tric plug
become s lo os e
1 Vid eo sources ha ve
no outpu t
2.Colo r ra ti o sh ou ld be
re-adj us t
It is norm al s ym pt om i n the
active m at ri x di sp lay
techno lo gy.
1.Poor q ua li ty o f th e
video so ur ce s
2.Brig ht & Co nt ra st
1.Exte rn al t em pe rature is
too high .
2.The po we r ha s no t be en
switch ed o ff for a l on g ti me .
1 .check t he p ow er i s on o r
connec t ri gh tl y
2. check t he A/ V Ca bl e
is loose o r no t
3. Incre as e th e br ig htness
and cont ra st r at io
1.Chec k th e ou tp ut o f VCD
or DVD
2.Repl ac e wi th t he A/ Vcable
3.Tig ht en t he Vid eo i nput
cable
1.chec k th e vi de o so urces
2.Ente r in to t he M en u to
re-adj us t
it is norm al s ym pt om i n
view ran ge w it h a li tt le
regula r li gh t sp ot s on
displa y sc re en .
1.Repl ac e wi th t he h igh
qualit y vi de od is c
2.Rese t Br ig ht & co ntrast.
1.The su rr ou nd t em perature
should n ot e xc ee d to 0 -60
degree s.
2.Tur n of f th e po we r af ter
using th e un it .
Solu ti on
AL A R M
For yo ur safe ty, driver a re advi sed not t o watch t he disp lay whe n drivi ng.
It's p rohib ited in l aw of som e count ries wh en driv ing and o perat ing to
watc hed dis playe r.
09 10
 Loading...