

Converters.TV 535, 80G Operation Manual
Video to HDMI Matrix Selector-
Recorder 80G ID# 535
Operation Manual

Introduction
Features
V i d e o t o H D M I Matr i x S e l e c t o r - R e c o r d e r 80G is the most valuable
add-on to any home theater settings. This is great replacement to traditional VCR
or even DVDRW recorders, with their compact size and superior support to
variable mobile devices. This product can perfectly serve as the data center of all
incoming multimedia. You won't miss any favorite clip as you can record it
as H.264 MPEG 4 format into Secure Digital Card (SD Card) instant.
The other High Definition Video Recorder can build in 2.5" 80G HDD, it can
record it into SD/HDD with H.264 MPEG4 format, by simply clicking on the
remote controller.
• Video Recording: H.264 MP/HP (Main Profile/High Profile partial) and
stereo sound, optimized resolution for TV up to 1920x1080i@60fields/s.
• Video Playback: H.264 MP/HP with stereo sound. HD DVD quality up to
1920x1080i@60fields/s.
• Audio Recording: AAC+ compression.
• Photo viewer: JPEG (except progressives).
• Audio pass through.
• Video pass through.
• Recording live HD/SD TV program as VCR and very easy to use.
• Remote control for easy indoor usage.
Remote Control
1 . Power: Switch unit on or off
2 . Mute: Mute or un-mute the audio
3 . Source: Choose Component/
SV/AV/HDMI1/HDMI2 input
source
4 . N/P: Switch between NTSC/
PAL video output format
(CVBS/S-Video)
5 . Repeat: Select "off", "one file",
"all file" repeat in playback mode
6 . VOL+: Press to increase volume
7 . Output: Choose HDMI/
Component/AV/SV output
8 . Pause: Pause current process at the
first press
9 . Zoom: Zoom 2x ~ 10x
10. Vol -: Press to decrease volume
11. Record: Record the AV signal to SD/
HDD device
12. ■ : Stop playing the file or Stop record
the file
13. l◄◄ : Jump to the previous page/file
14. ►►l: Jump to next page/file
15. ◄l: Simultaneous press it to decrease
the slow-backward speed: x1/2,
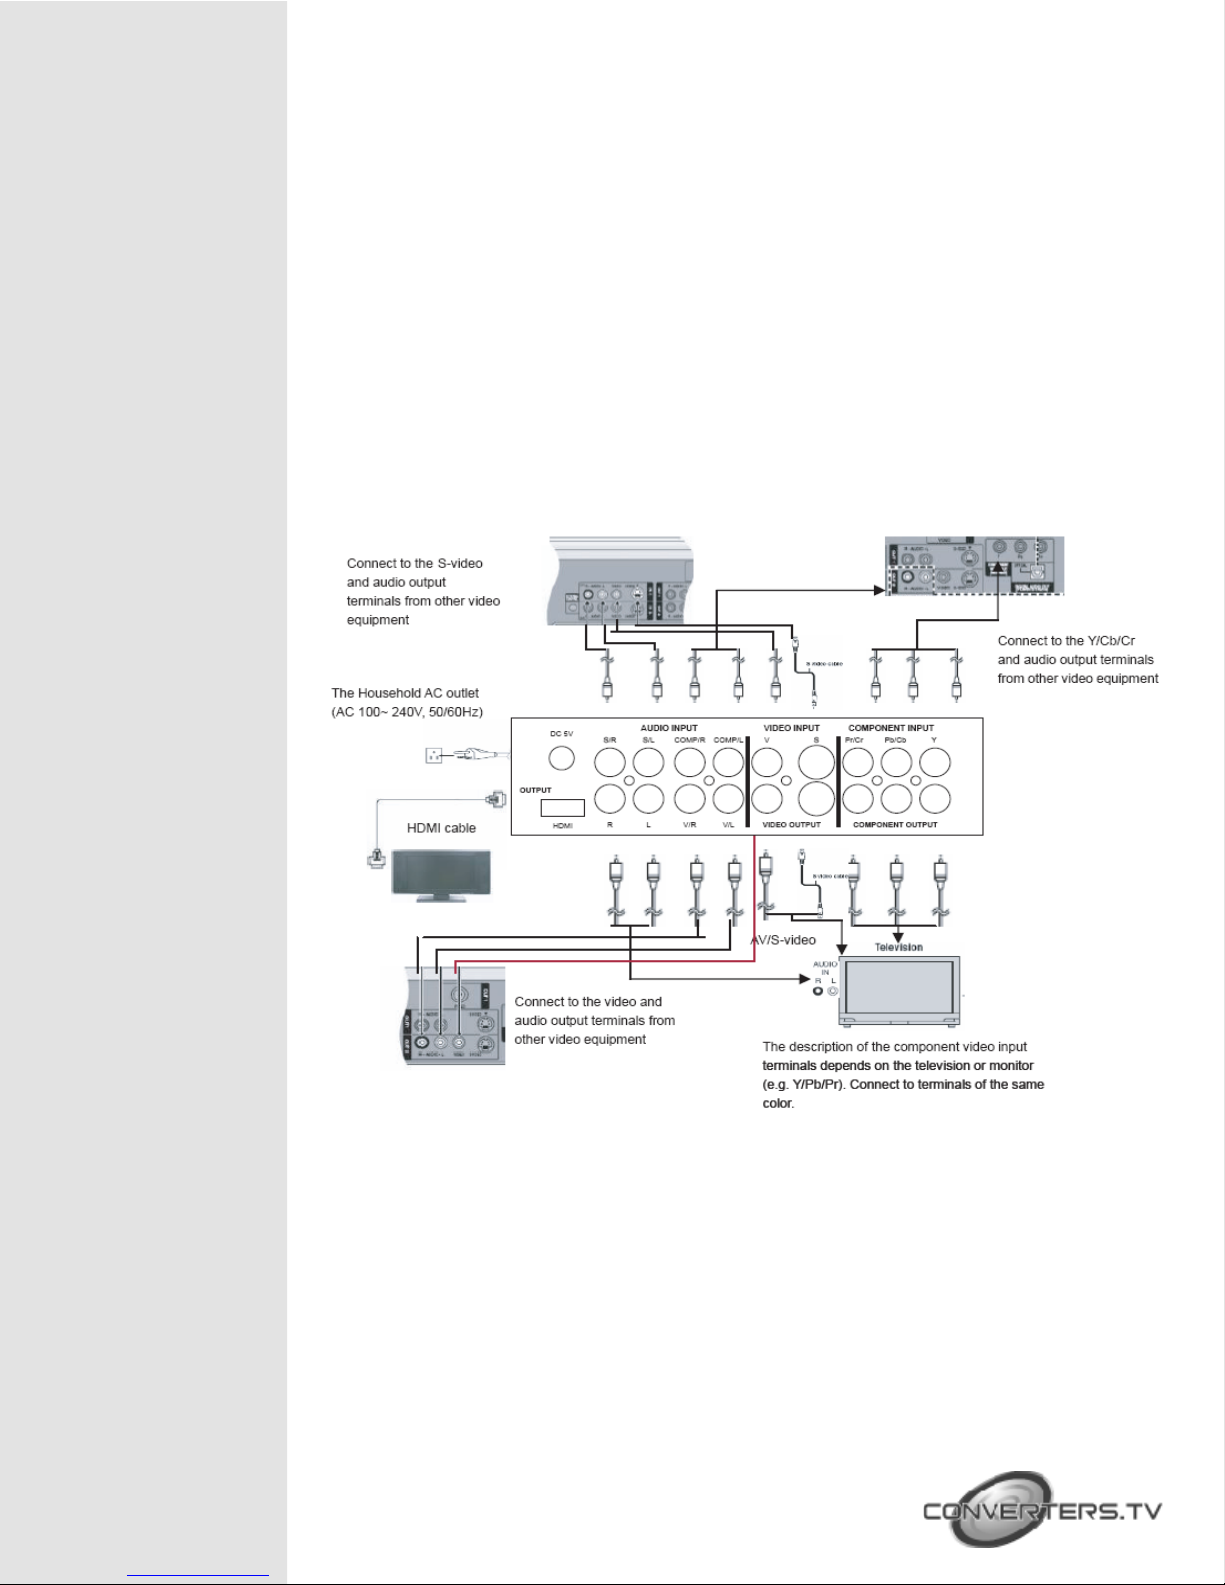
Connections
x1/4, x1/8, x1/16, x1/32, x1/64
16. l► : Simultaneous press it to decrease the slow-forward speed: x1/2, x1/4,
x1/8, x1/16, x1/32, x1/64
17. ◄: Simultaneous press it to increase the fast-backward speed: x2, x4, x8,
x16, x32, x64
18. ►: Simultaneous press it to increase the fast-forward speed: x2, x4, x8,
x16, x32, x64
19. Return: Return to the previous state
20. Menu: Display or switch off the OSD menu or switch between AV source
and SD/HDD device source
21. ▲/▼/◄/►: Move the cursor Up/Down/Left/Right or move the zoom area
Up/Down/Left/Right
22. Ok: Confirm the selection
23. Info: Press to display the information
24. Display: Display or switch off the OSD menu or switch between AV
source and SD/HDD device source
Input I/O: Component with Audio R/L x 1
S-Video with Audio R/L x 1
Video with Audio R/L x 1
HDMI x 2
Output I/O: Component x 1
S-Video x 1
Video x 1
HDMI x 1
R/L x 1
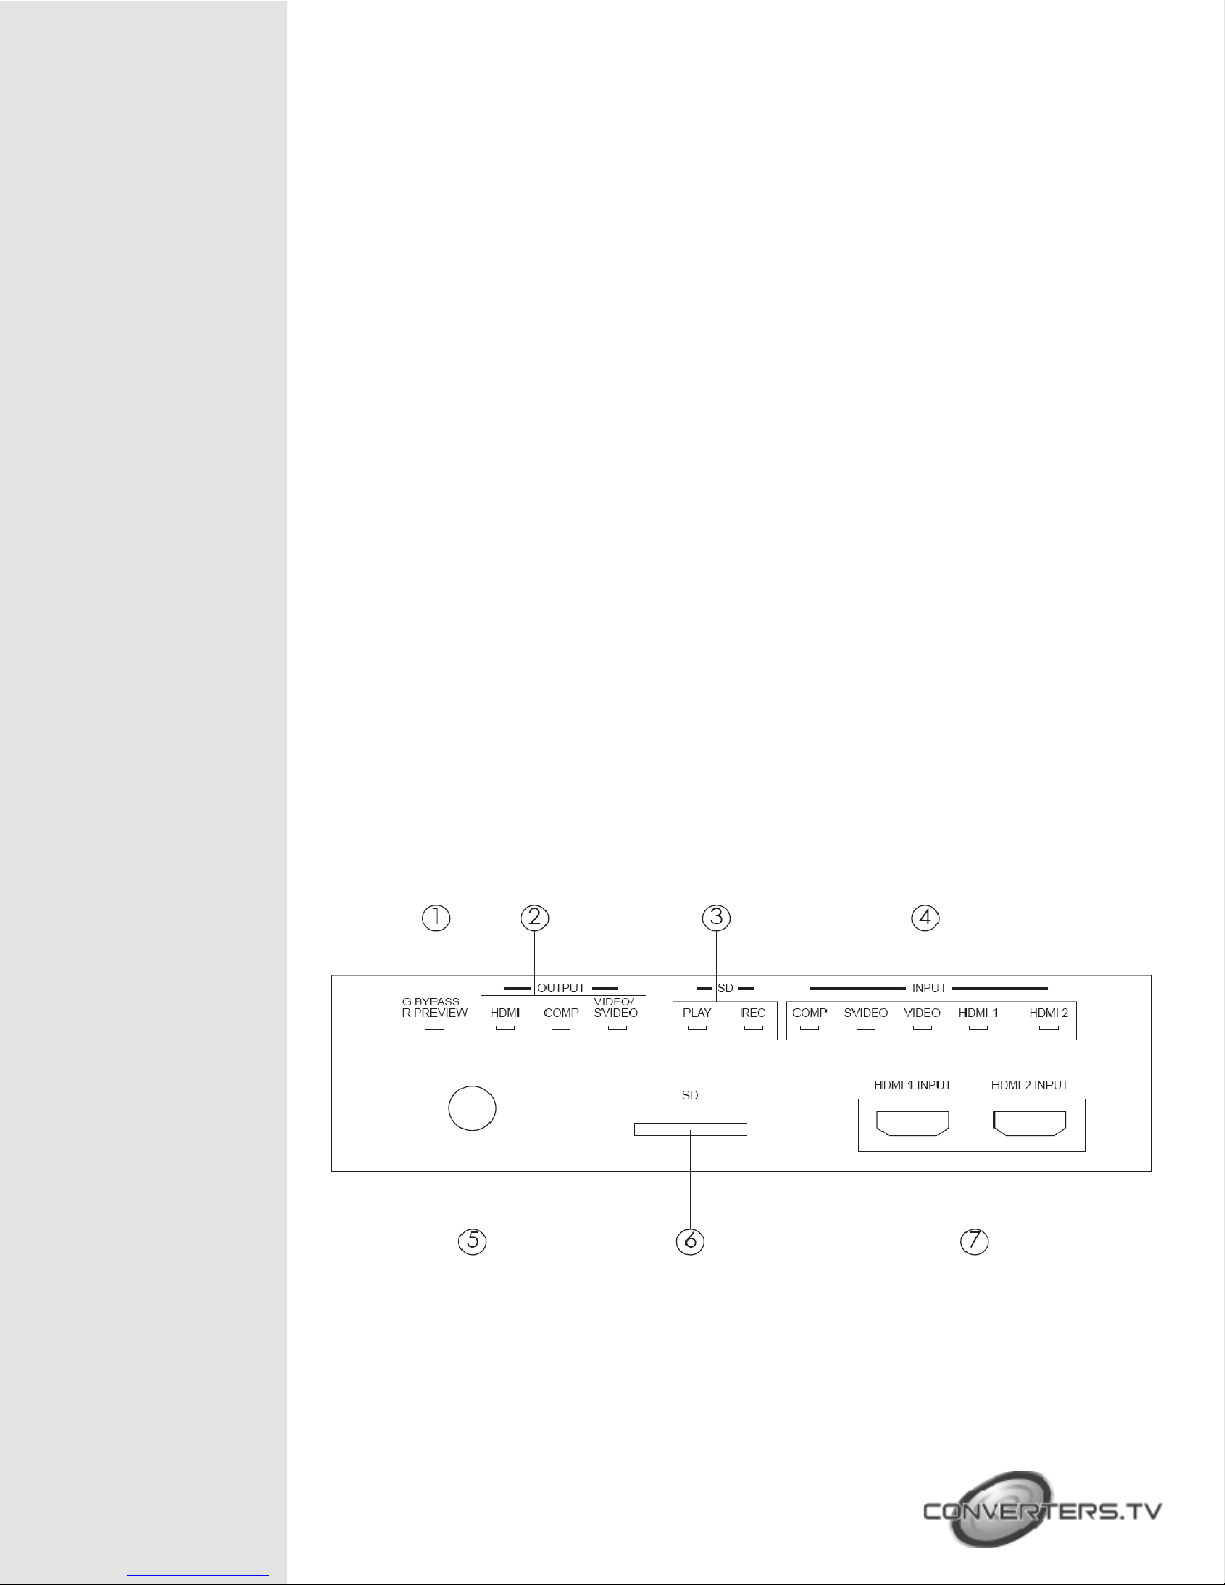
Front Panel
1. Bypass/Preview indicators: When selected Bypass mode the signal will
bypass without doing any process and the LED will illuminate in Green
light.
When selected Preview mode the signal will process before pass out and
the LED will illuminate in Red light.
2. Output port indicators: When the output port been selected the LED will
illuminate to indicate which outpot source is selected.
Rear Panel
Connections
3. Play/REC indicators: When play the files from SD card, the LED illuminate
in Red color, when play the files from HDD, the LED will illuminate in Blue
color. When record the files to SD/HDD card, the LED will illuminate in Red
color.
4. Input source indicators: When the input source been selected the LED
will illuminate to indicate which input source is selected. If video and Svideo connected at the same time the Video input is the first priority from
the system.
5. IR sensor
6. SD card slot
7. HDMI 1 & 2 input: Connect the HDMI input ports to the HDMI or DVI
output of your source equipment such as DVD player or set-top-box.
Using the High
Definition Video
Recorder
After connecting the unit to the TV and Power on, you are ready to start the
product. This chapter describes how to turn on the device and how to control
On-Screen Display (OSD) menu to configure the device settings.
Turning on power
Turning on the TV and select the appropriate video input and output to suit
the connections to this unit.
Using the OSD menu
 Loading...