

Converters.TV 524 Operation Manual
USB Video Capture
Stick Pro ID# 524
Operation Manual
Introduction
Features
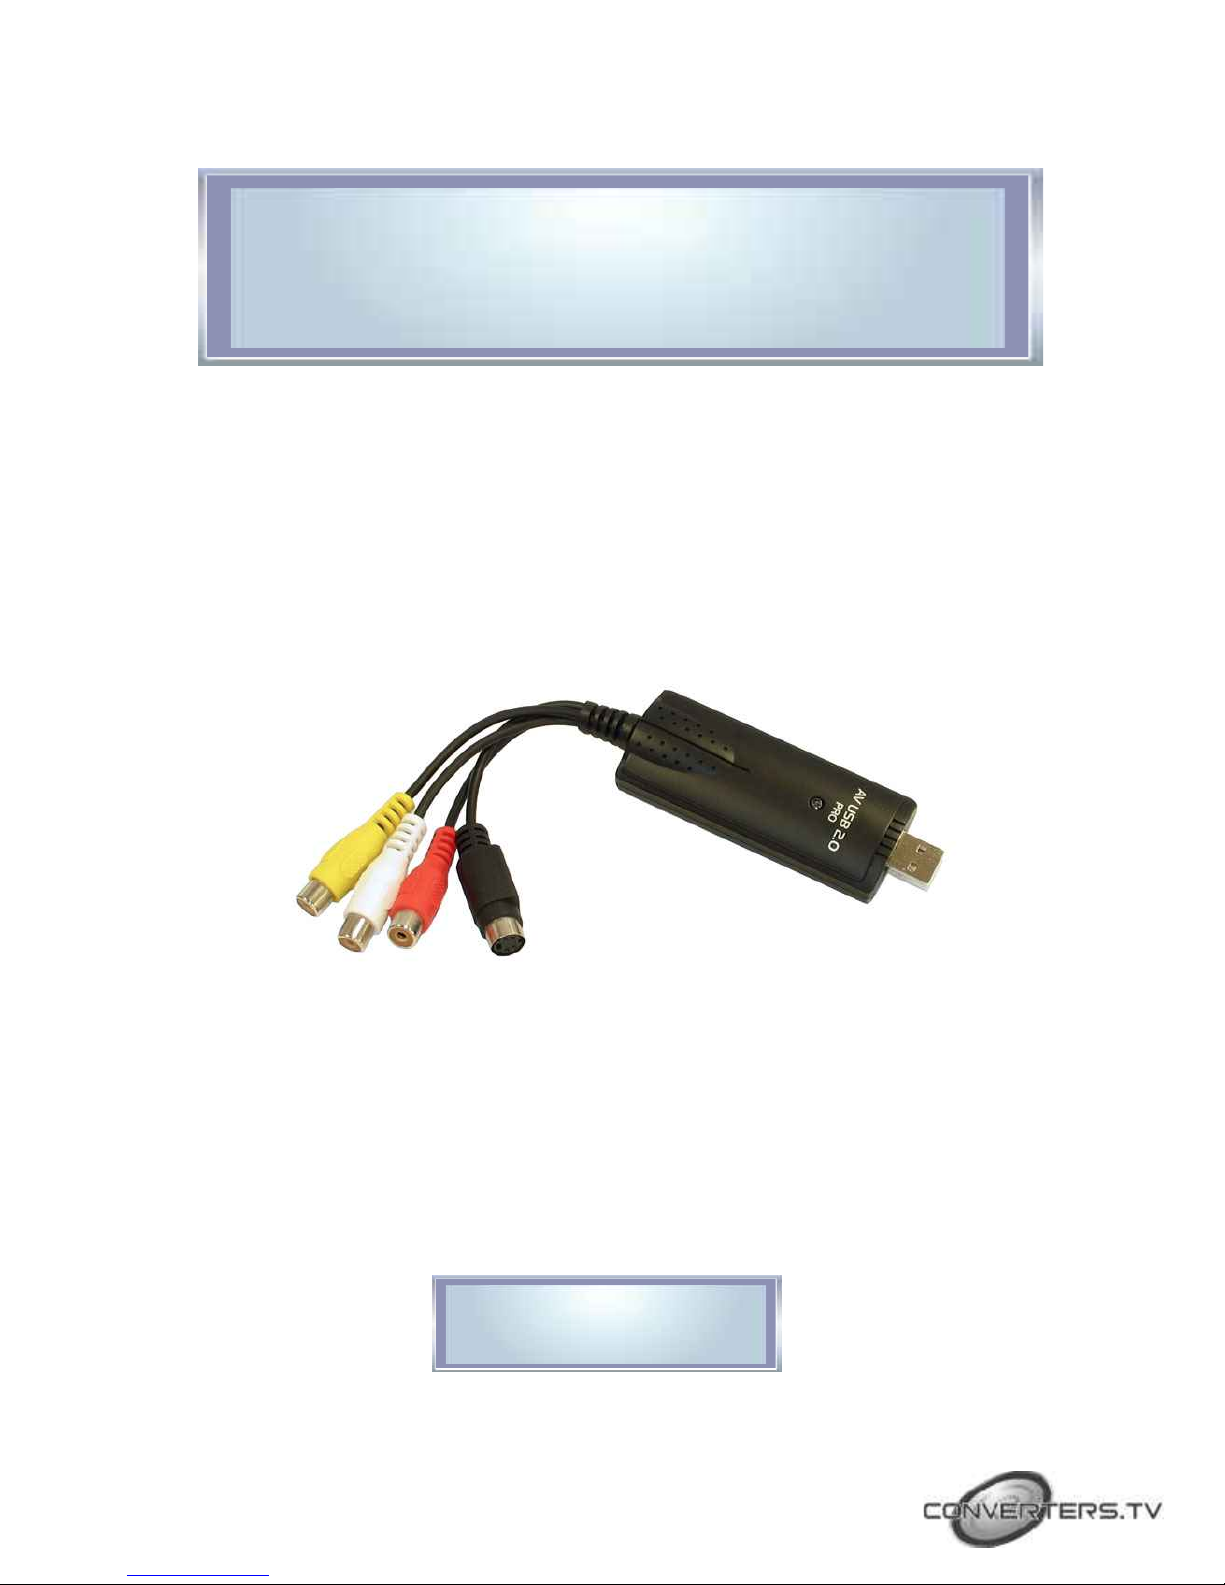
The USB Video Capture Stick Pro is a compact size USB 2.0 capture box
allows you to bring it to anywhere with your notebook. The USB Video
Capture Stick Pro is the best solution to digitalize your memories. Thru
the high speed USB 2.0 interface, you can easily capture picture and
directly real-time record video and audio to DivX file format from
videotape, DVD, VCD or V8 thru Video, S-Video input. The USB Video
Capture Stick Pro makes you to digitize your home video easily.
Hardware Features
• External USB 2.0 real-time video capture box.
• Video and audio recording by USB 2.0 interface.
• Supports Video, S-Video and Audio input.
• Suitable for NTSC/ PAL/ SECAM video input signals.
• Compatible with Windows XP (32bit / 64bit)/ Vista (32bit / 64bit).
• The USB Video Capture Stick Pro has passed Microsoft's WHQL and
Windows DTM (VISTA) certification.
Hardware Connection
and Reference
Software Features
Bundled CyberLink PowerDirector Software
• Preview and real-time record video and audio to DivX file format.
• Supports snapshot and video editing function.
• Supports Image Recording Format:
160*120/ 320*240/ 352*240/ 352*480/ 640*480/ 720*480.
• Multi-language OSD Display:Traditional Chinese, Simplified Chinese,
English, Japanese, German, Spanish, Italian, French and Korean.
Software Installation
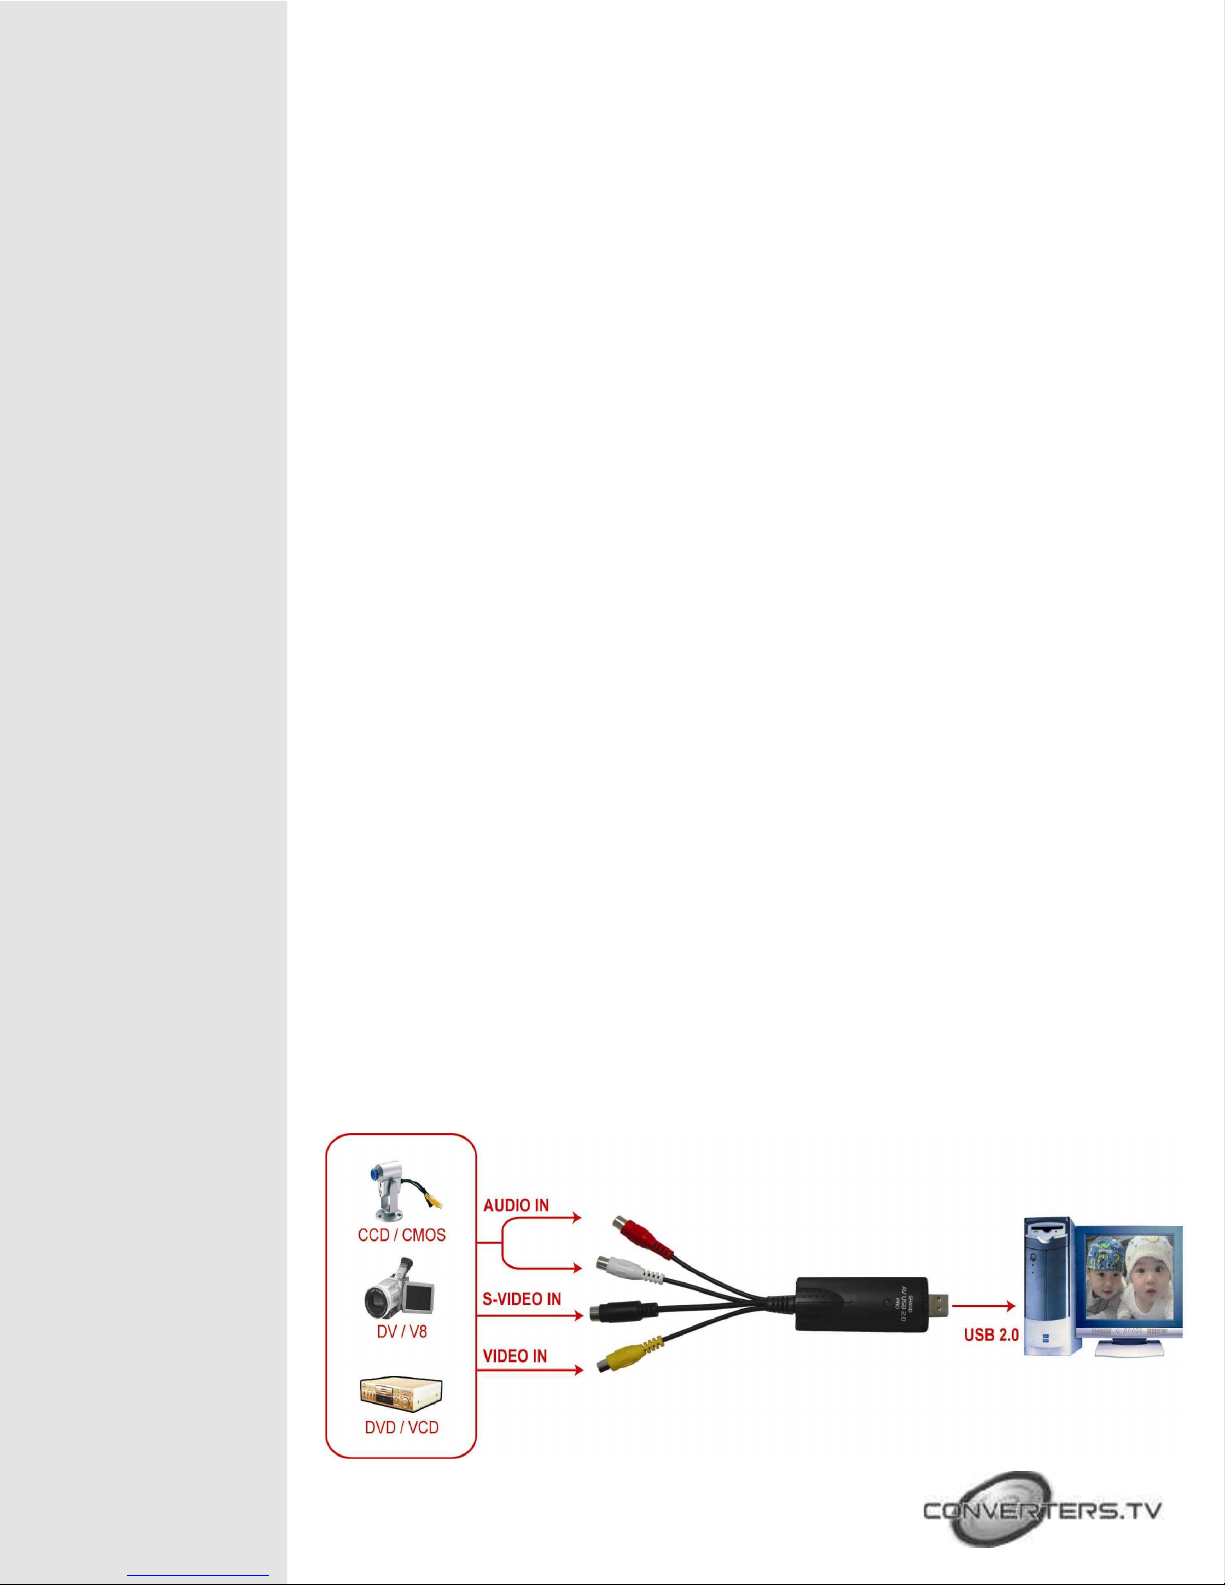
• AUDIO IN Connects to the device that supporting Audio output.
• S-VIDEO IN:Connects to the device that supporting S-Video output. (V8 / DVD)
• VIDEO IN:Connects to the device that supporting Video output. (CCD / V8 / DVD)
• USB 2.0 Port Connects to USB port of PC.
Install the Microsoft DirectX 9
• Microsoft DirectX 9 must be installed on your operating system, please install Microsoft
DirectX 9 from Driver CD first. (If you already have Microsoft DirectX 9 installed,
it’s not necessary.)
Install the Driver of USB Video Capture Stick Pro
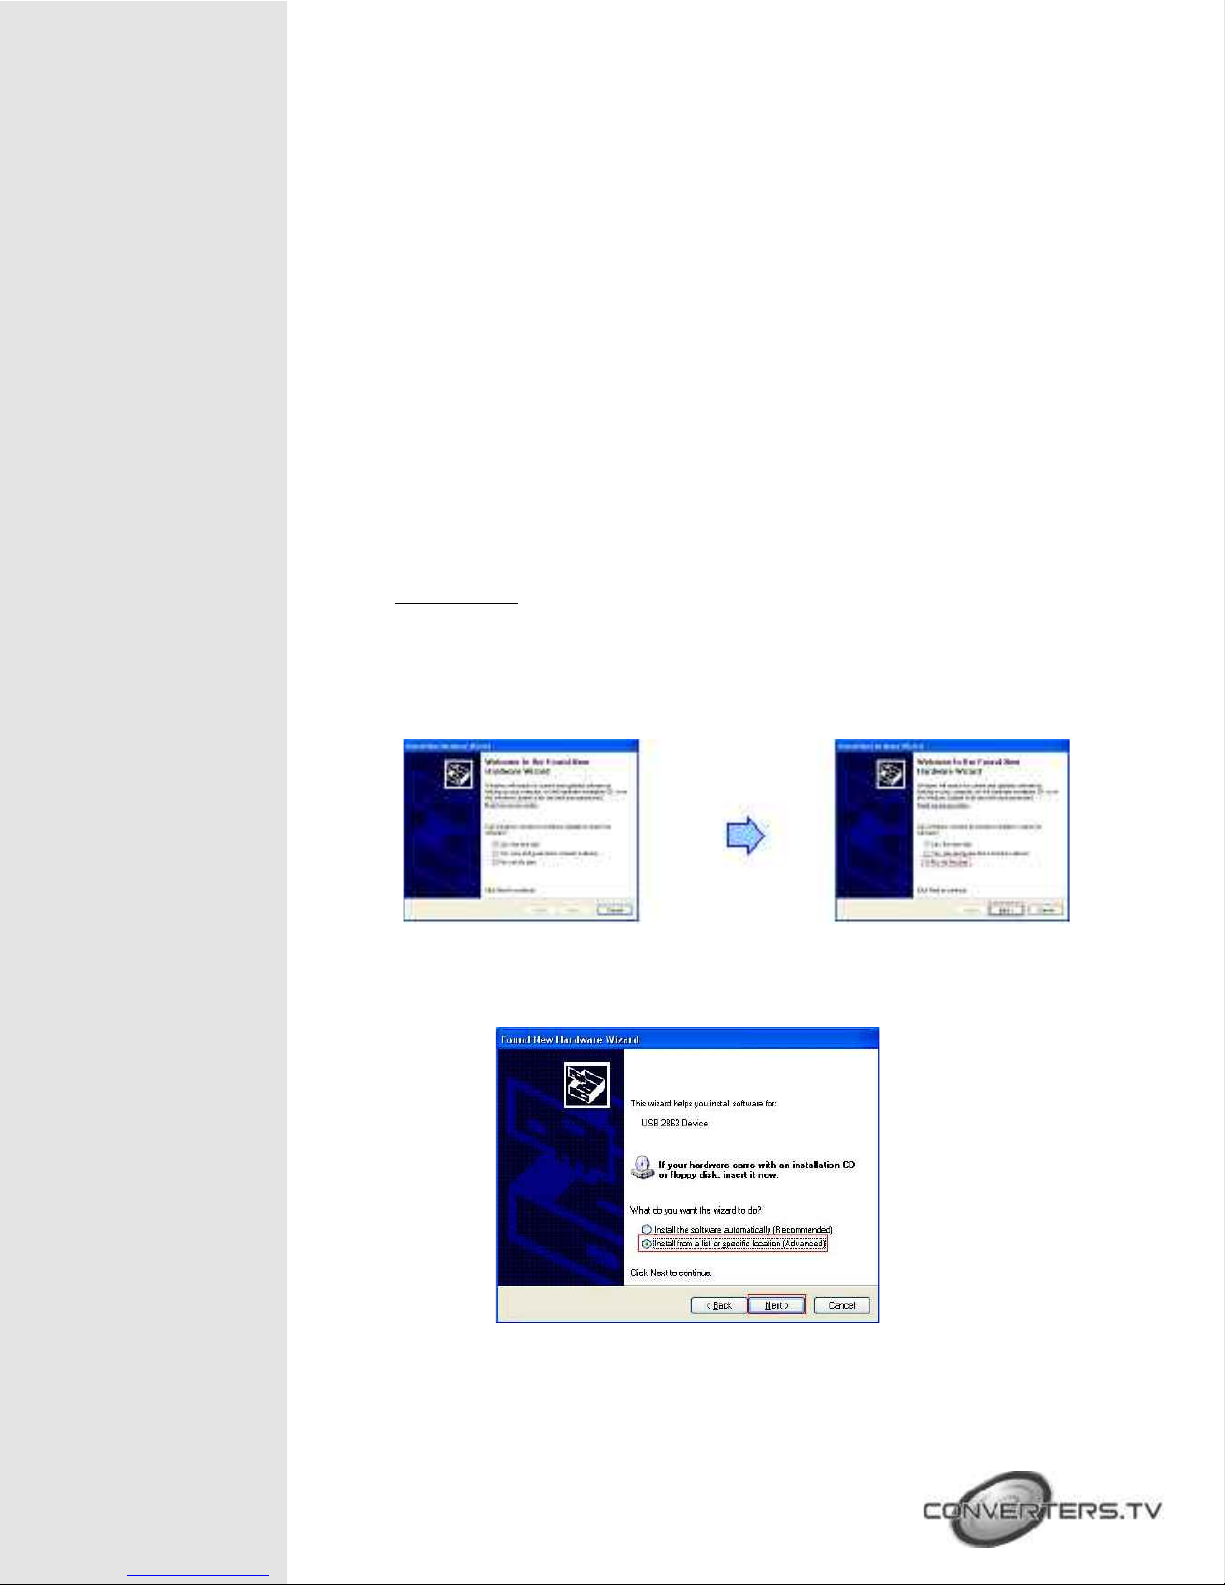
• Windows XP
Step 1:Please plug the USB Video Capture Stick Pro into the USB port of PC, then the
following dialog “Found New Hardware Wizard” will appear. Please select “No, not this time”,
and click the “Next” button.
Step 2:Please select “Install from a list or specific location [Advanced]”, then click
the “Next” button.
Step 3:Please select “Included this location in the search” and click “Browse”
button to choose your CD ROM and select the BDA32 or BDA64 folder. Click “Next”
to install..
 Loading...