Page 1

SPECIFICATIONS
Photo Tachometer—
Range: 5.0 to 99,999 RPM (revolutions per minute)
Resolution: 0.1 under 1000 RPM
1 over 1000 RPM
Detecting Distance: 2 to 12 inches (50 to 300 mm)
(depending on ambient light)
Contact Tachometer—
Range: 0.5 to 19,999 RPM (revolutions per minute)
Resolution: 0.1 under 1000 RPM
1 over 1000 RPM
Surface Speed Measurement—
Range: 0.05 to 1999.9 m/min
(meters per minute)
Resolution: 0.01 under 100 m/min
0.1 over 100 m/min
Range: 0.2 to 6560 ft/min (feet per minute)
Resolution: 0.1 under 1000 ft/min
1 over 1000 ft/min
Sampling Time: 1 second (over 60 RPM)
Memory Sampling Time: 10 seconds minimum
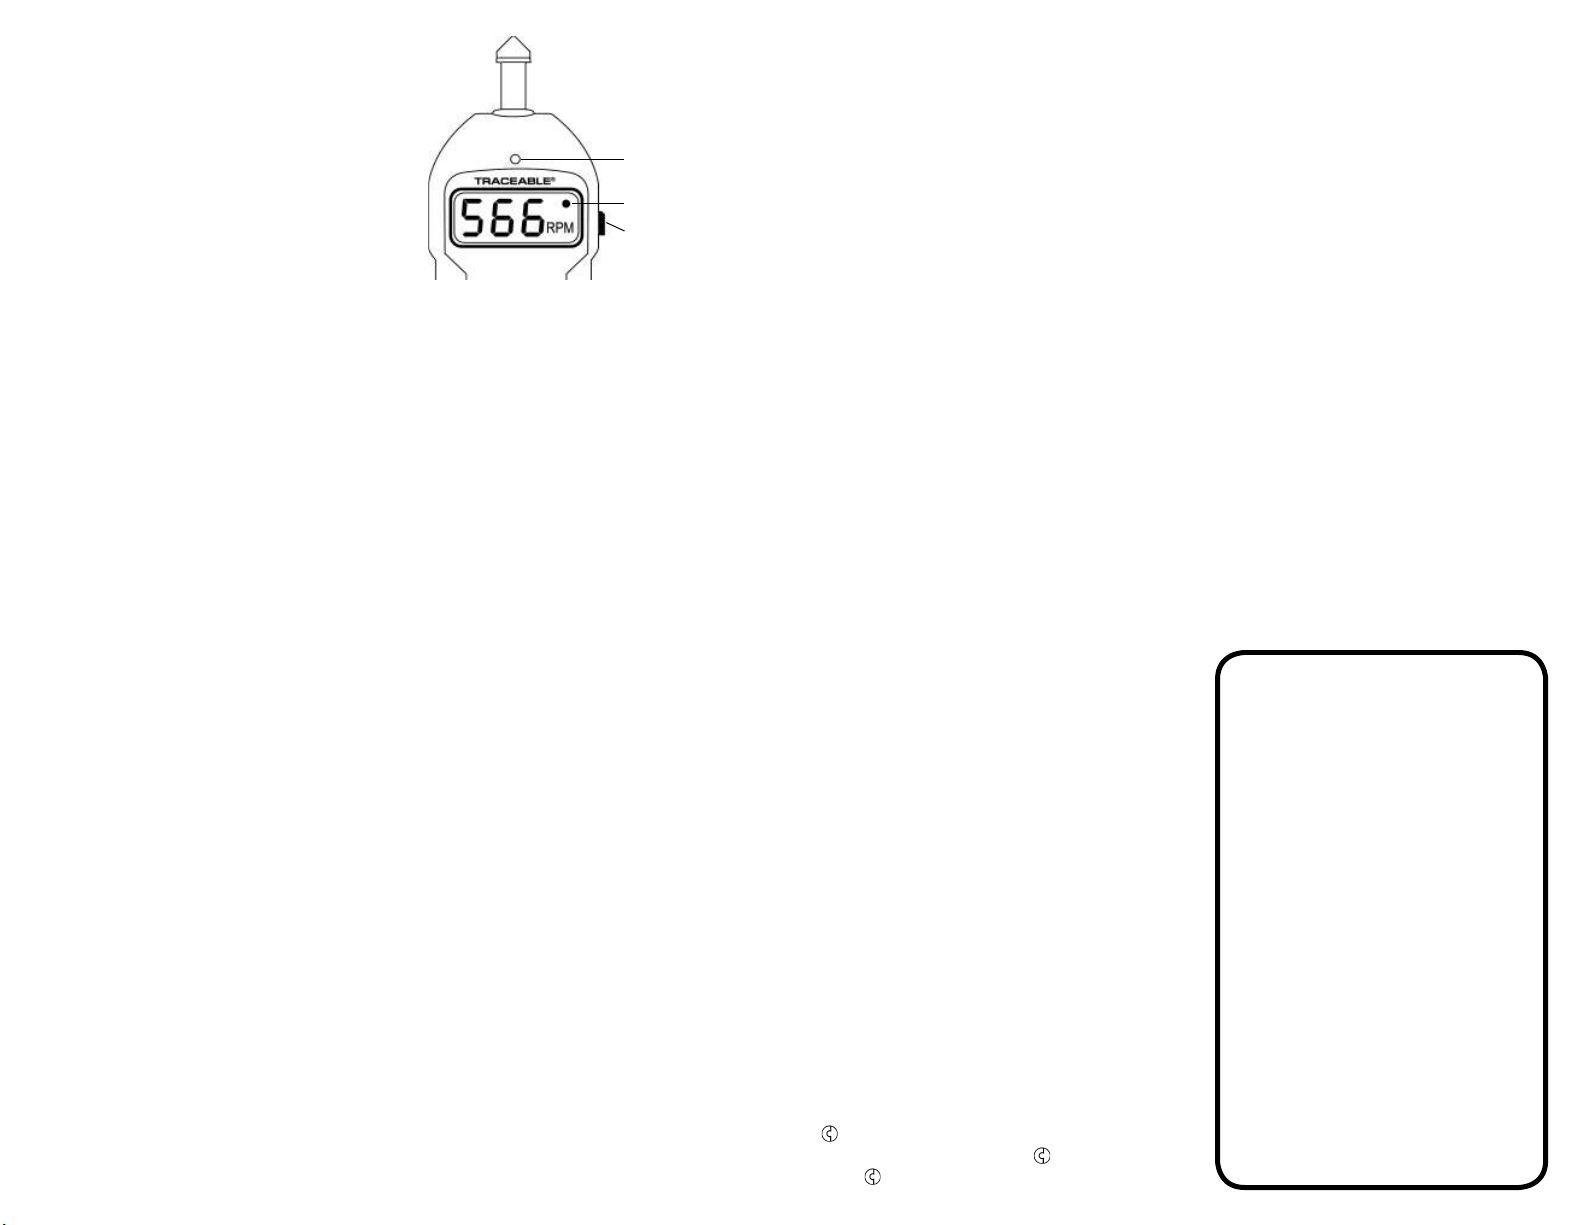
MONITOR INDICATOR (red LED)
MONITOR INDICATOR (LCD)
MEASUREMENT BUTTON
PHOTO TACHOMETER MEASUREMENT
1. Create a refl ective mark by cutting a strip of the
refl ective tape into a 0.5” square.
2. Set the function switch to the RPMé position.
3. Stop the rotating object to be measured and
apply the refl ective mark to the object. Make
certain that the surface of the object is smooth
and clean so that the refl ective mark will adhere.
The non-refl ective area must always be greater than the
refl ective area. If the object being measured is normally
refl ective, then it must be covered with black tape or paint
before applying the refl ective mark.
4. Allow the object to rotate.
5. Press and hold the measurement button and align
the visible light beam with the refl ective mark.
6. Verify that the light beam is properly aligned by
making certain that the monitor indicators blink
each time the refl ective mark passes through
the beam of light.
7. Record the result when the reading stabilizes.
(This will occur in approximately 2 to 10 seconds)
8. Release the measurement button once
measurement is complete.
If the measured rotation is less than 50 RPM,
increase the accuracy of the reading by applying
additional refl ective marks to the object. Place the
additional marks approximately 180 degrees from
each other. To determine the actual RPM, take the
displayed result and divide by the number of marks.
Use special care when measuring the rotation of the
fl at end of the shaft with a relatively small diameter.
Completely cover the fl at end with non-refl ective
black tape. Place the refl ective mark on top of the
black tape, as close to the edge as possible.
CONTACT TACHOMETER MEASUREMENT
1. Set the function switch to the RPMê position.
2. Place the RPM cone or RPM funnel on to the
end of the spindle. Some objects will be more
accurately measured by using the RPM funnel
rather than the RPM cone. To use the RPM
funnel, fi rst remove the RPM cone from the
spindle and replace it with the RPM funnel.
3. Press and hold the measurement button.
4. Place the spindle lightly against the rotating
object. The spindle should be positioned on the
center of the rotating axis of the object that is
being measured.
5. Record the result when the reading stabilizes.
(This will occur in approximately 2 to 10 seconds)
6. Release the measurement button once
measurement is complete.
SURFACE SPEED MEASUREMENT
1. Set the function switch to the M/MIN or
FT/MIN position.
2. Remove the RPM cone/funnel assembly from
the spindle and replace it with the surface speed
wheel assembly. Remove both the cone/funnel
and the sleeve that fi ts over the spindle.
3. Press and hold the measurement button.
4. Place the surface speed wheel in contact with
the moving surface.
5. Record the result when the reading stabilizes.
(This will occur in approximately 2 to 10 seconds)
6. Release the measurement button once
measurement is complete.
MEMORY RECALL
The memory feature will recall the last reading,
highest reading, and lowest reading achieved
during measurement. Readings are normally
retained in memory for several minutes.
After taking a measurement:
The fi rst press of the MEMORY button will display
the last reading (“LA” will appear on the display).
The second press of the MEMORY button will
display the highest reading achieved (“UP” will
appear on the display).
The third press of the MEMORY button will display
the lowest reading achieved (“DN” will appear on
the display).
CONTRAST ADJUSTMENT
The LCD display contrast can be adjusted
using the CONTRAST knob. Simply turn the
knob left or right until the desired LCD contrast
is obtained. If the display shows “88888 ”
when the measurement button is pressed, but no
measurement is being taken, the contrast needs to
be adjusted. Turn the contrast knob to the left until
a single “0 ” appears.
ALL OPERATION DIFFICULTIES
If this meter does not function properly for any
reason, replace the batteries with new, high quality
batteries (see the “Battery Replacement” section).
Low battery power can occasionally cause an
number of “apparent” operational diffi culties.
Replacing the batteries with new fresh batteries will
solve most diffi culties.
BATTERY REPLACEMENT
An erratic display, faint display, no display or “LO”
appearing on the display are all indicators that the
batteries need replacement. Remove the battery
cover located on the back of the unit. Remove the
exhausted batteries and replace them with four
new AA alkaline batteries. Place the batteries in
the proper direction as indicated by the illustration
in the battery compartment. Incorrectly installed
batteries may damage the electronics. Replace
the battery cover.
WARRANTY, SERVICE, OR RECALIBRATION
For warranty, service, or recalibration, contact:
CONTROL COMPANY
4455 Rex Road
Friendswood, Texas 77546 USA
Ph. 281 482-1714 • Fax 281 482-9448
E-mail sales@control3.com • www.control3.com
Control Company is ISO 9001 Quality-Certifi ed by DNV and
ISO 17025 accredited as a Calibration Laboratory by A2LA.
Control Company Cat. No. 4059
Traceable® is a registered trademark of Control Company.
2009 Control Company. 92-4059-20 Rev. 1 100809
©
TRACEABLE
TOUCHLESS/
CONTACT
TACHOMETER
INSTRUCTIONS
®
 Loading...