

Page 1

pakedge
device&software
inc.
W7x - Wireless Access Point Family
W7, W7R, W7C
ENTERPRISE-CLASS, ULTRA HIGH POWER, CONCURRENT DUAL
BAND WIRELESS-N ACCESS POINT- High Capacity, Stand-Alone
and Controller Based Ready
User Guide – Version S
Page 2

W7x User Manual
2
Federal Communication Commission Interference Statement
This equipment has been tested and found to comply with the limits for a Class B digital device, pursuant to Part 15 of the FCC Rules.
These limits are designed to provide reasonable protection against harmful interference in a residential installation. This equipment
generates, uses and can radiate radio frequency energy and, if not installed and used in accordance with the instructions, may cause
harmful interference to radio communications. However, there is no guarantee that interference will not occur in a particular installation.
If this equipment does cause harmful interference to radio or television reception, which can be determined by turning the equipment off
and on, the user is encouraged to try to correct the interference by one of the following measures:
- Reorient or relocate the receiving antenna.
- Increase the separation between the equipment and receiver.
- Connect the equipment into an outlet on a circuit different from that to which the receiver is connected.
- Consult the dealer or an experienced radio/TV technician for help.
FCC Caution: Any changes or modifications not expressly approved by the party responsible for compliance could void the user's
authority to operate this equipment.
This device complies with Part 15 of the FCC Rules. Operation is subject to the following two conditions: (1) This device may not cause
harmful interference, and (2) this device must accept any interference received, including interference that may cause undesired
operation.
This transmitter must not be co-located or operating in conjunction with any other antenna or transmitter.
Operations in the 5.15-5.25GHz band are restricted to indoor usage only.
IMPORTANT NOTE:
FCC Radiation Exposure Statement:
This equipment complies with FCC radiation exposure limits set forth for an uncontrolled environment. This equipment should be
installed and operated with minimum distance 20cm between the radiator & your body.
Page 3

W7x User Manual
3
Europe – EU Declaration of Conformity
This device complies with the essential requirements of the R&TTE Directive 1999/5/EC. The following test methods have been applied
in order to prove presumption of conformity with the essential requirements of the R&TTE Directive 1999/5/EC:
- EN60950-1
- Safety of Information Technology Equipment
- EN50385
- Generic standard to demonstrate the compliance of electronic and electrical apparatus with the basic restrictions related to human
exposure to electromagnetic fields (0 Hz - 300 GHz)
- EN 300 328
- Electromagnetic compatibility and Radio spectrum Matters (ERM); Wideband Transmission systems; Data transmission equipment
operating in the 2,4 GHz ISM band and using spread spectrum modulation techniques; Harmonized EN covering essential
requirements under article 3.2 of the R&TTE Directive
EN 301 893
Broadband Radio Access Networks (BRAN); 5 GHz high performance RLAN; Harmonized EN covering essential requirements of
article 3.2 of the R&TTE Directive
EN 301 489-1
Electromagnetic compatibility and Radio Spectrum Matters (ERM); ElectroMagnetic Compatibility (EMC) standard for radio
equipment and services; Part 1: Common technical requirements
- EN 301 489-17
- Electromagnetic compatibility and Radio spectrum Matters (ERM); ElectroMagnetic Compatibility (EMC) standard for radio
equipment and services; Part 17: Specific conditions for 2,4 GHz wideband transmission systems and 5 GHz high performance
RLAN equipment
This device is a 5GHz wideband transmission system (transceiver), intended for use in all EU member states and EFTA countries,
except in France and Italy where restrictive use applies.
Page 4

W7x User Manual
user should apply for a license at the national spectrum authorities in order to
setting up outdoor radio links and/or for supplying public access to telecommunications and/or network services.
This device may not be used for setting up outdoor radio links in France and in some areas the RF o
–
tímto prohlašuje, že tento
Undertegnede
[fabrikantens navn]
øvrige relevante krav i direktiv 1999/5/EF.
Hiermit erklärt
[Name des Herstellers]
den übrigen einschlägigen Be
Käesolevaga kinnitab
[tootja nimi =
põhinõuetele ja nimetatud direktiivist tulenevatele teistele asjakohastele sätetele.
Hereby,
[name of manufacturer]
provisions of Directive 1999/5/EC.
Por medio de la presente
[nombre del fabricante]
otras disposiciones aplicables o exigibles de la Directiv
ΜΕ ΤΗΝ ΠΑΡΟΥΣΑ
[name of manufacturer]
ΚΑΙ ΤΙΣ ΛΟΙΠΕΣ ΣΧΕΤΙΚΕΣ ∆ΙΑΤΑΞΕΙΣ
Par la présente
fabricant]
dispositions pertinentes de la directive 1999/5/CE.
[nome del costruttore]
pertinenti stabilite dalla direttiva 1999/5/CE.
[name of manufacturer
būtiskajām prasībām un citiem ar to saist
deklaruoja, kad šis
[naam van de fabrikant]
relevante bepalingen van richtlijn 1999/5/EG.
anifattur]
Dirrettiva 1999/5/EC.
nyilatkozom, hogy a
obtain authorization to use the device for
utput power may be limited to 10
user should contact the national spectrum
je ve shodě se základními požadavky a dalšími p
erklærer herved, at følgende udstyr
[udstyrets typebetegnelse]
, dass sich das Gerät
in Übereinstimmung mit den grundlegenden Anforderungen und
seadme
[seadme tüüp = type of equipment]
, declares that this
is in compliance with the essential requirements and other
declara que el
cumple con los requisitos esenciales y cualesquiera
∆ΗΛΩΝΕΙ ΟΤΙ
ΣΥΜΜΟΡΦΩΝΕΤΑΙ
déclare que l'appareil
est conforme aux exigences essentielles et aux autres
è conforme ai requisiti essenziali ed alle altre disposizioni
[type of equipment / iekārtas tips]
atitinka esminius reikalavimus ir kitas 1999/5/EB Direktyvos nuostatas.
in overeenstemming is met de essentiële eisen en de andere
ħtiġijiet essenzjali u ma provvedimenti o
megfelel a vonatkozó alapvetõ követelményeknek
4
overholder de væsentlige krav og
vastavust direktiivi 1999/5/EÜ
relevant
In Italy the end-
mW EIRP in the frequency range of 2454
authority in France.
0560
Česky [Czech]
Dansk [Danish]
Deutsch
[German]
Eesti [Estonian]
English
Español
[Spanish]
[Jméno výrobce]
směrnice 1999/5/ES.
2483.5 MHz. For detailed information the end-
[typ zařízení]
[Gerätetyp]
stimmungen der Richtlinie 1999/5/EG befindet.
name of manufacturer]
[type of equipment]
[clase de equipo]
a 1999/5/CE.
Ελληνική [Greek]
Français
[French]
Italiano [Italian]
Latviski [Latvian]
Lietuvių
[Lithuanian]
Nederlands
[Dutch]
Malti [Maltese]
Magyar
[nom du
Con la presente
Ar šo
Šiuo [manufacturer name]
Hierbij verklaart
Hawnhekk, [isem tal-m
relevanti li hemm fid-
Alulírott, [gyártó neve]
[type of equipment]
[type d'appareil]
dichiara che questo [tipo di apparecchio]
/ izgatavotāja nosaukums] deklarē, ka
[equipment type]
dat het toestel [type van toestel]
, jiddikjara li dan [il-mudel tal-prodott] jikkonforma mal-
[... típus]
atbilst Direktīvas 1999/5/EK
és az 1999/5/EC irányelv egyéb
Page 5

W7x User Manual
[nazwa producenta]
postanowieniami Dyrektywy 1999/5/EC.
declara que este
izjavlja, da je ta
týmto vyhlasuje, že
manufacturer]
oleellisten vaatimusten ja sitä koskevien direktiivin muiden ehtojen mukainen.
Härmed intygar
att denna
bestämmelser som framgår av direktiv 1999/5/EG.
jest zgodny z zasadniczymi wymogami oraz pozostałymi stosownymi
está conforme com os requisitos essenciais e outras disposições da
mi relevantnimi dolo
spĺňa základné požiadavky a všetky príslušné ustanovenia Smernice 1999/5/ES.
vakuuttaa täten että
tyyppinen laite on direktiivin 1999/5/EY
står I överensstämmelse med de väsentliga egenskapskrav och övriga relevanta
5
[Hungarian] elõírásainak.
Polski [Polish]
Português
[Portuguese]
Slovensko
[Slovenian]
Slovensky
[Slovak]
Suomi [Finnish]
Svenska
[Swedish]
Niniejszym
[Nome do fabricante]
Directiva 1999/5/CE.
[Ime proizvajalca]
[Meno výrobcu]
[Valmistaja =
[företag]
oświadcza, że [nazwa wyrobu]
[tipo de equipamento]
[tip opreme] v skladu z bistvenimi zahtevami in ostali
[typ zariadenia]
[type of equipment = laitteen tyyppimerkintä]
[utrustningstyp]
Page 6

W7x User Manual
6
T A B L E O F C O N T EN T S
INTRODUCTION
P
ACKAGE CONTENTS
S
YSTEM REQUIREMENTS
N
ETWORK CONFIGURATION
Ad-hoc (peer-to-peer mode)
Infrastructure
H
ARDWARE INSTALLATION
W7X C
MENU
OPTIONS ................................................................................................................................................... 15
S
YSTEM
Status ...................................................................................................................................................................15
Properties.............................................................................................................................................................18
Administration .....................................................................................................................................................18
Maintenance ........................................................................................................................................................19
Firmware..............................................................................................................................................................20
Time
N
ETWORK
LAN
Spanning Tree Settings
SNMP Settings
MODE-SPECIFIC
A
CCESS POINT MODE
2.4GHz and 5GHz Wireless
Network Settings ............................................................................................................................................................... 25
Wireless MAC Filter ........................................................................................................................................................... 31
Advanced
Client List ........................................................................................................................................................................... 33
C
LIENT BRIDGE MODE
2.4GHz and 5GHz Wireless
Network S
Advanced
Connection Status.............................................................................................................................................................. 39
R
EPEATER MODE
2.4GHz and 5GHz Wireless
..................................................................................................................................................... 7
.......................................................................................................................................................9
..................................................................................................................................................9
..............................................................................................................................................9
..................................................................................................................................9
Mode.............................................................................................................................................10
.............................................................................................................................................10
ONFIGURATION
..................................................................................................................................................13
......................................................................................................................................................................15
.....................................................................................................................................................................20
...................................................................................................................................................................21
Settings.........................................................................................................................................................21
........................................................................................................................................22
.....................................................................................................................................................22
SETUP ......................................................................................................................................... 24
....................................................................................................................................................24
..................................................................................................................................25
Wireless Security ........................................................................................................................................................... 28
WEP........................................................................................................................................................................... 28
WPA-PSK, WPA2-PSK ................................................................................................................................................ 29
WPA, WPA2 .............................................................................................................................................................. 30
........................................................................................................................................................................... 32
...................................................................................................................................................33
..................................................................................................................................35
etting
................................................................................................................................................................. 36
........................................................................................................................................................................... 38
..........................................................................................................................................................40
..................................................................................................................................41
Page 7

W7x User Manual
7
Network Settings ............................................................................................................................................................... 41
Wireless MAC Filter ........................................................................................................................................................... 43
Advanced
Client List ........................................................................................................................................................................... 44
LOG &
Connection Status.............................................................................................................................................................. 45
MANAGEMENT ......................................................................................................................................... 45
D
IAGNOSTICS
Ping Test
Traceroute Test Parameters
VLAN
M
W
IRELESS TRAFFIC SHAPING
B
AND STEERING
S
YSTEM LOG
L
OG
...........................................................................................................................................................................50
LED
O
PTIONS
APPENDIX A –
HARDWARE
RF INFORMATION
OPERATIONS ............................................................................................................................................................51
MANAGEMENT
ENVIRONMENT ........................................................................................................................................................52
MECHANICAL ...........................................................................................................................................................52
APPENDIX B – TECHNICAL SUPPORT
APPENDIX C – LIMITED
........................................................................................................................................................................... 44
...............................................................................................................................................................46
Parameters ...........................................................................................................................................46
................................................................................................................................46
ANAGEMENT
...................................................................................................................................................46
...........................................................................................................................................47
...........................................................................................................................................................49
................................................................................................................................................................49
..............................................................................................................................................................50
SPECS ............................................................................................................................................ 51
SPECIFICATIONS ...................................................................................................................................51
....................................................................................................................................................51
AND
SECURITY ................................................................................................................................52
.................................................................................................................... 53
WARRANTY ..................................................................................................................... 54
Page 8

W7x User Manual
th
e
w
a
ter
with
l
of
a
is
Mo
e
u
.
e
t
n
Touch
h
Acc
8
INTRODUCTION
Thank you for purchasing
Concurrent Dual Band Wireless Acc
As the central component of your
share files, audio, video, printers,
devices that have a wireless adap
PDAs, and other electronics; And
simultaneously, 5GHz capable wire
interference, improving the overall
Each band (either 2.4GHz or 5GHz)
• Access Point Mode:
broadcasts two Wi-Fi sign
below.
Laptop
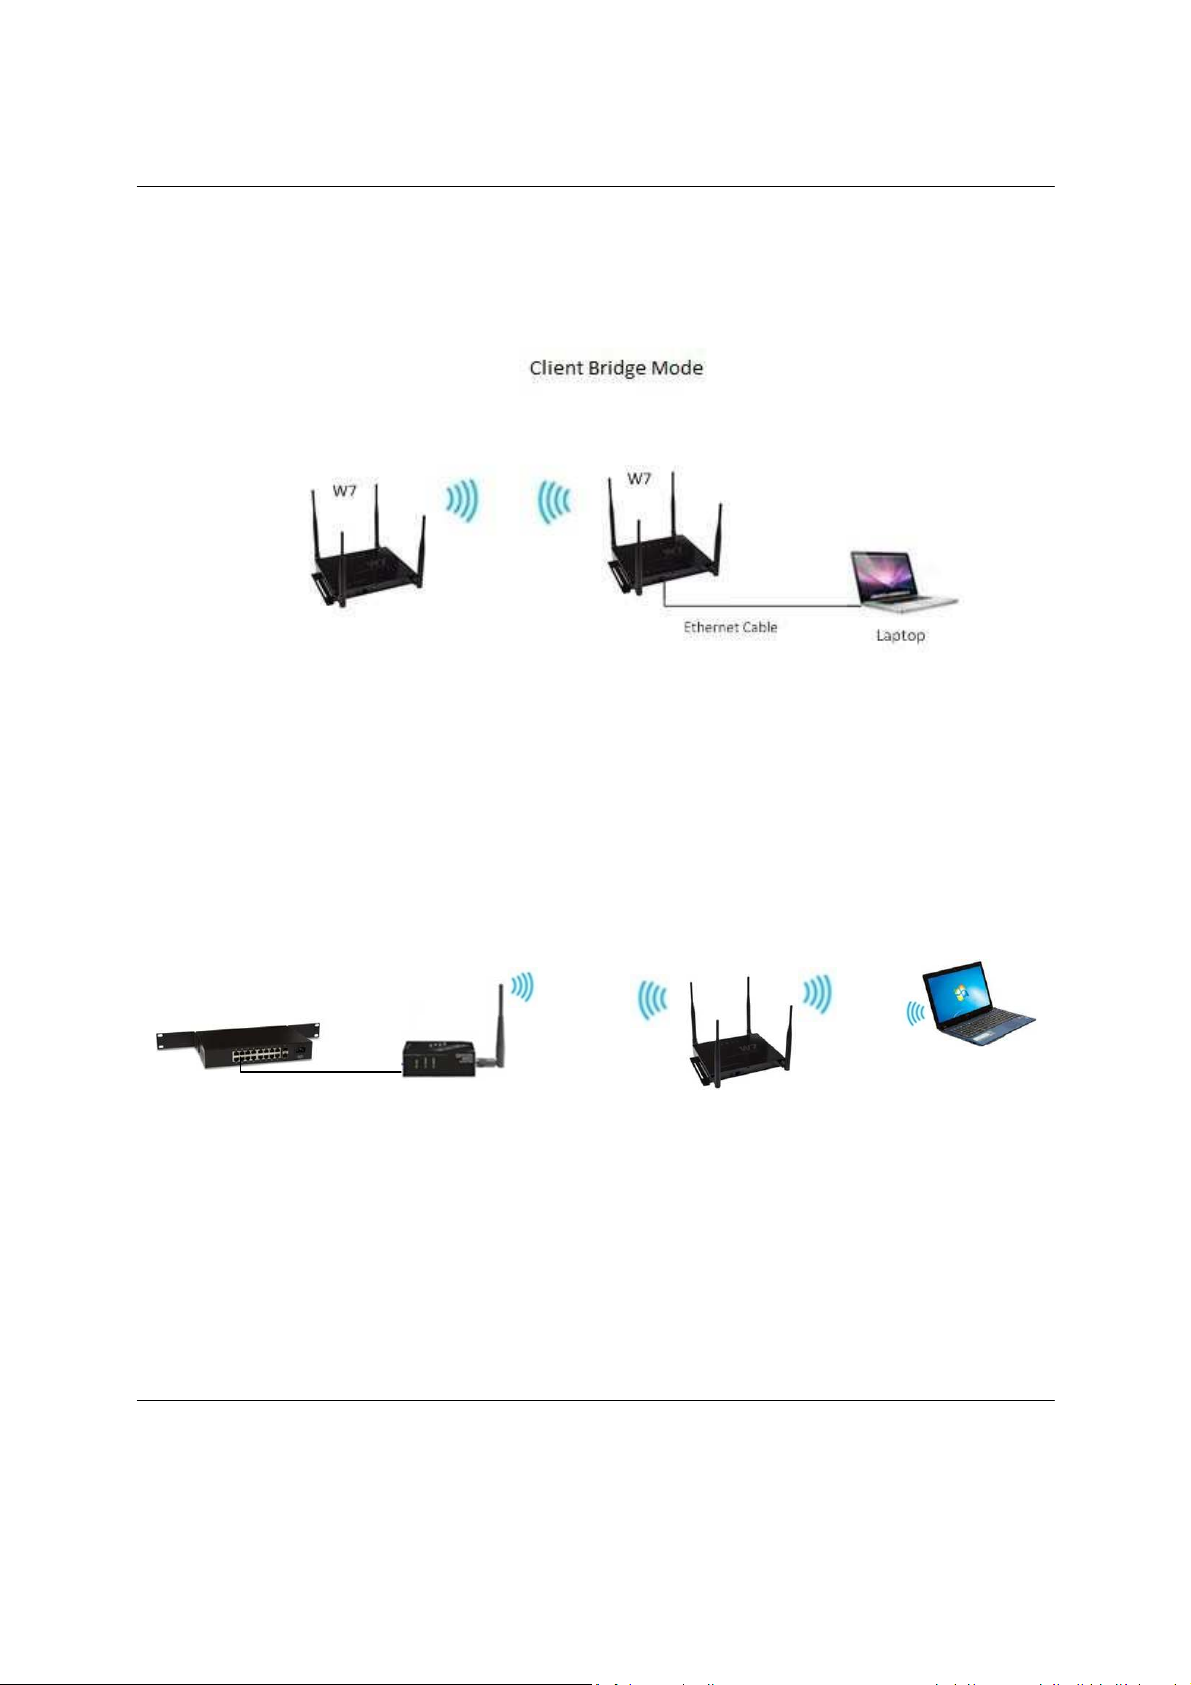
• Client Bridge Mode:
below. In Client Bridge
This is
Tablet
In th
e Pakedge W7x Concurrent Dual Band Wireless Acc
ss Point for your wireless network.
ireless network, the W7x can connect multiple comp
high-speed Internet connection, and other resources
to the W7x to create a secure, high-speed link betw
the W7x being able to broadcast both 2.4GHz and
ess devices are now free to choose the best signal wi
stability, reliability and performance of the wireless
the W7x can operate in any one of three modes:
the typical configuration for most Wi-Fi networks. In
ls (2.4 GHz and 5GHz) that clients can associate with,
Wireless Access Point
5GHz Si
gna
l
W7
2.4GHz Signal
mode, you can connect one W7x to a client by its Et
de, the W7x can receive a wireless signal from an
Mode
2.4GHz Signal
5GHz Signal
Phone
ss Point - the best
ters, allowing you to
You can easily connect
en your computers,
5GHz signals
h the least noise and
etwork.
this mode, the W7x
as shown in the figure
Panel
Laptop
ernet port, as shown
ess Point and send the
Page 9
W7x User Manual
9
signal through its Ethernet port to a client. This mode is used when you need to have network
connectivity to hard wired device(s) but are unable to run cable to them.
• Repeater Mode: In this mode, the W7x will receive a wireless signal from another AP and then repeat it.
This mode is useful in a situation where you need to extend the wireless coverage but are unable to run
cable to the W7x from the network.
NOTE: Setting the W7x in repeater mode will sacrifice half of the bandwidth available from the primary
access point for devices wirelessly connected to the repeater.
Repeater
Mode
W7
Any
WAP
Ethernet Cable
Laptop
Because the functionality of the W7x changes depending on its operating mode, this manual offers both general
and mode-specific content.
Page 10
W7x User Manual
10
P A C K A G E C O N T E N T S
• Package contents depend on your W7x model. Please refer to the installation manual of your
product.
S Y S T E M R E Q U I R E M E N T S
The minimum system requirements for the W7x are:
• PC-compatible computer with an Ethernet interface
• Operating system that supports an HTTP Web browser
N E T W O R K C O N F I G U R A T I O N
To help you understand how the W7x works with other LAN products to create a wireless network, we will
describe several possible wireless network configurations.
The wireless LAN products can be configured as:
• An ad-hoc (peer-to-peer) network for departmental or a small office/home office (SOHO) network
• Infrastructure for enterprise LANs
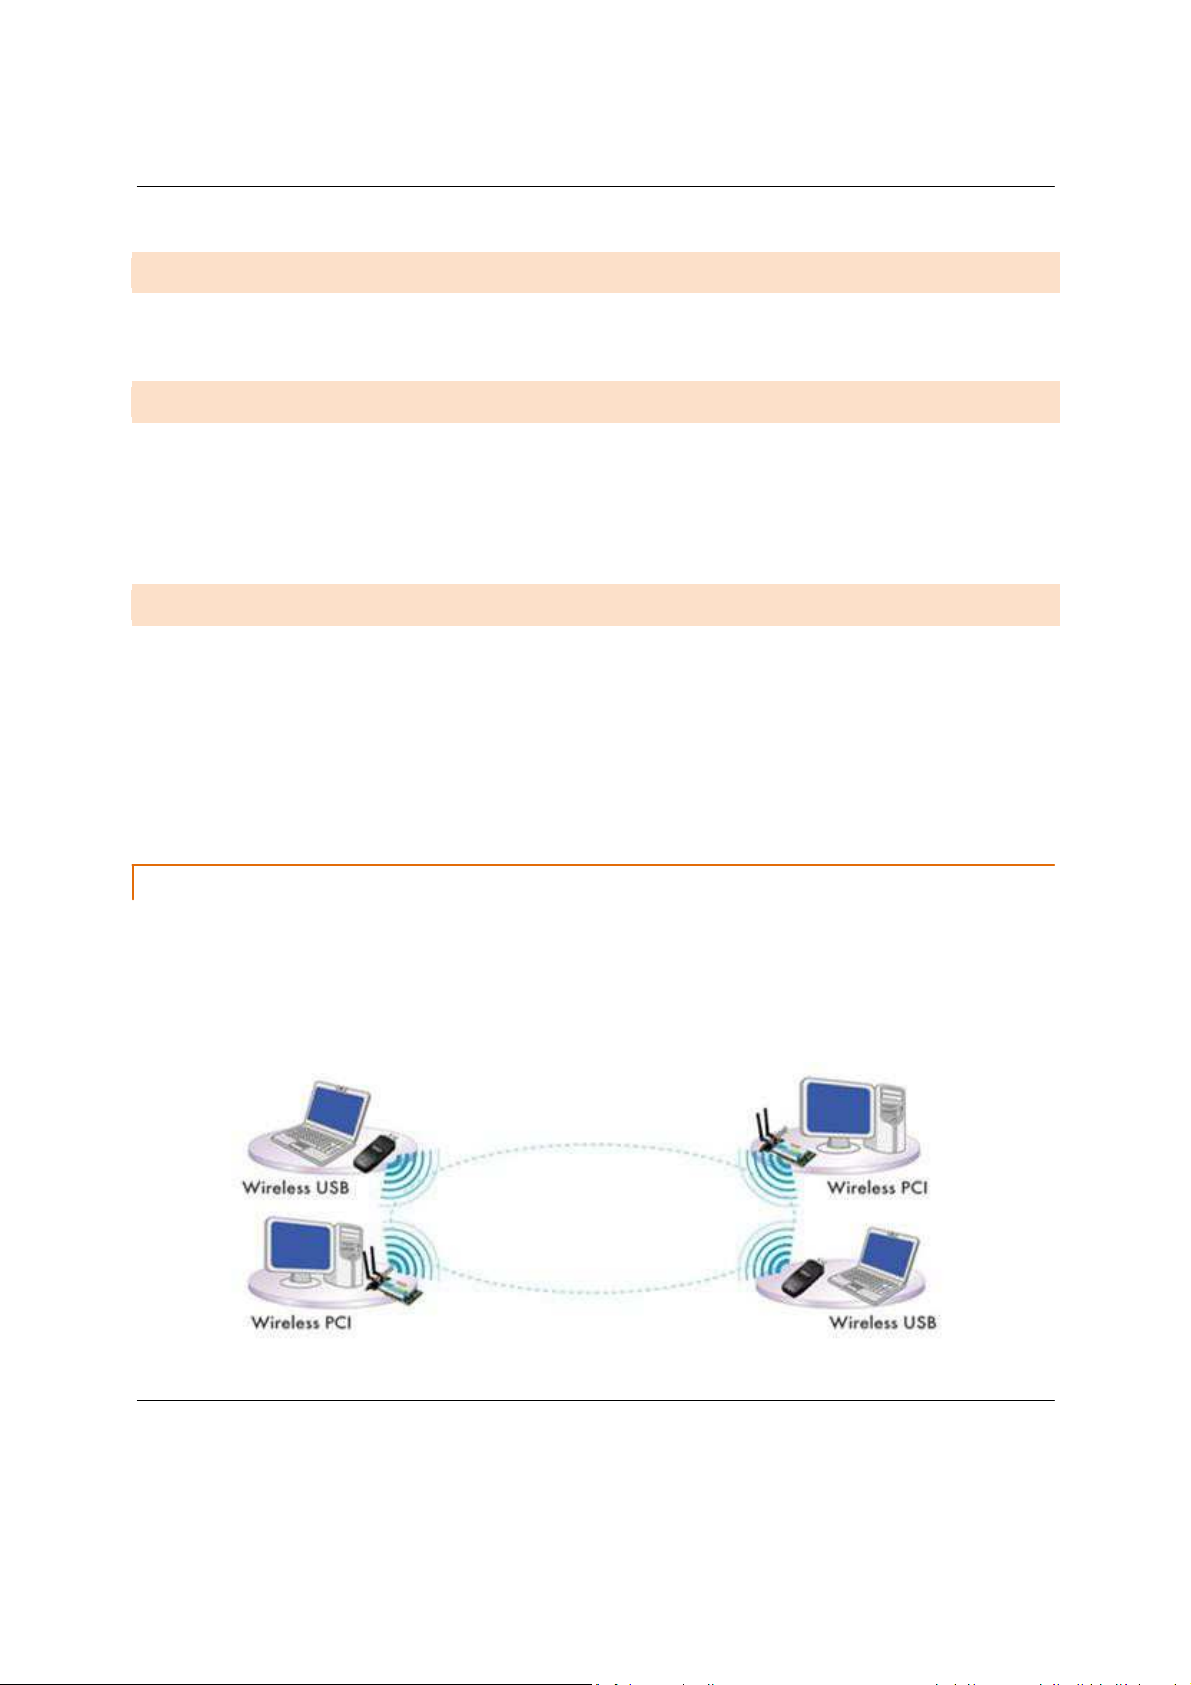
AD - H O C ( P E E R - TO - P E E R M O D E )
This is the simplest network configuration with several computers equipped with PC Cards that form a
wireless network whenever they are within range of one another. In ad-hoc mode, each client is peer-to-peer and
only has access to the resources of the other client and does not require an access point. This is the easiest and
least expensive way for the SOHO to set up a wireless network. The image below depicts a network in ad-hoc
mode.
Page 11
W7x User Manual
11
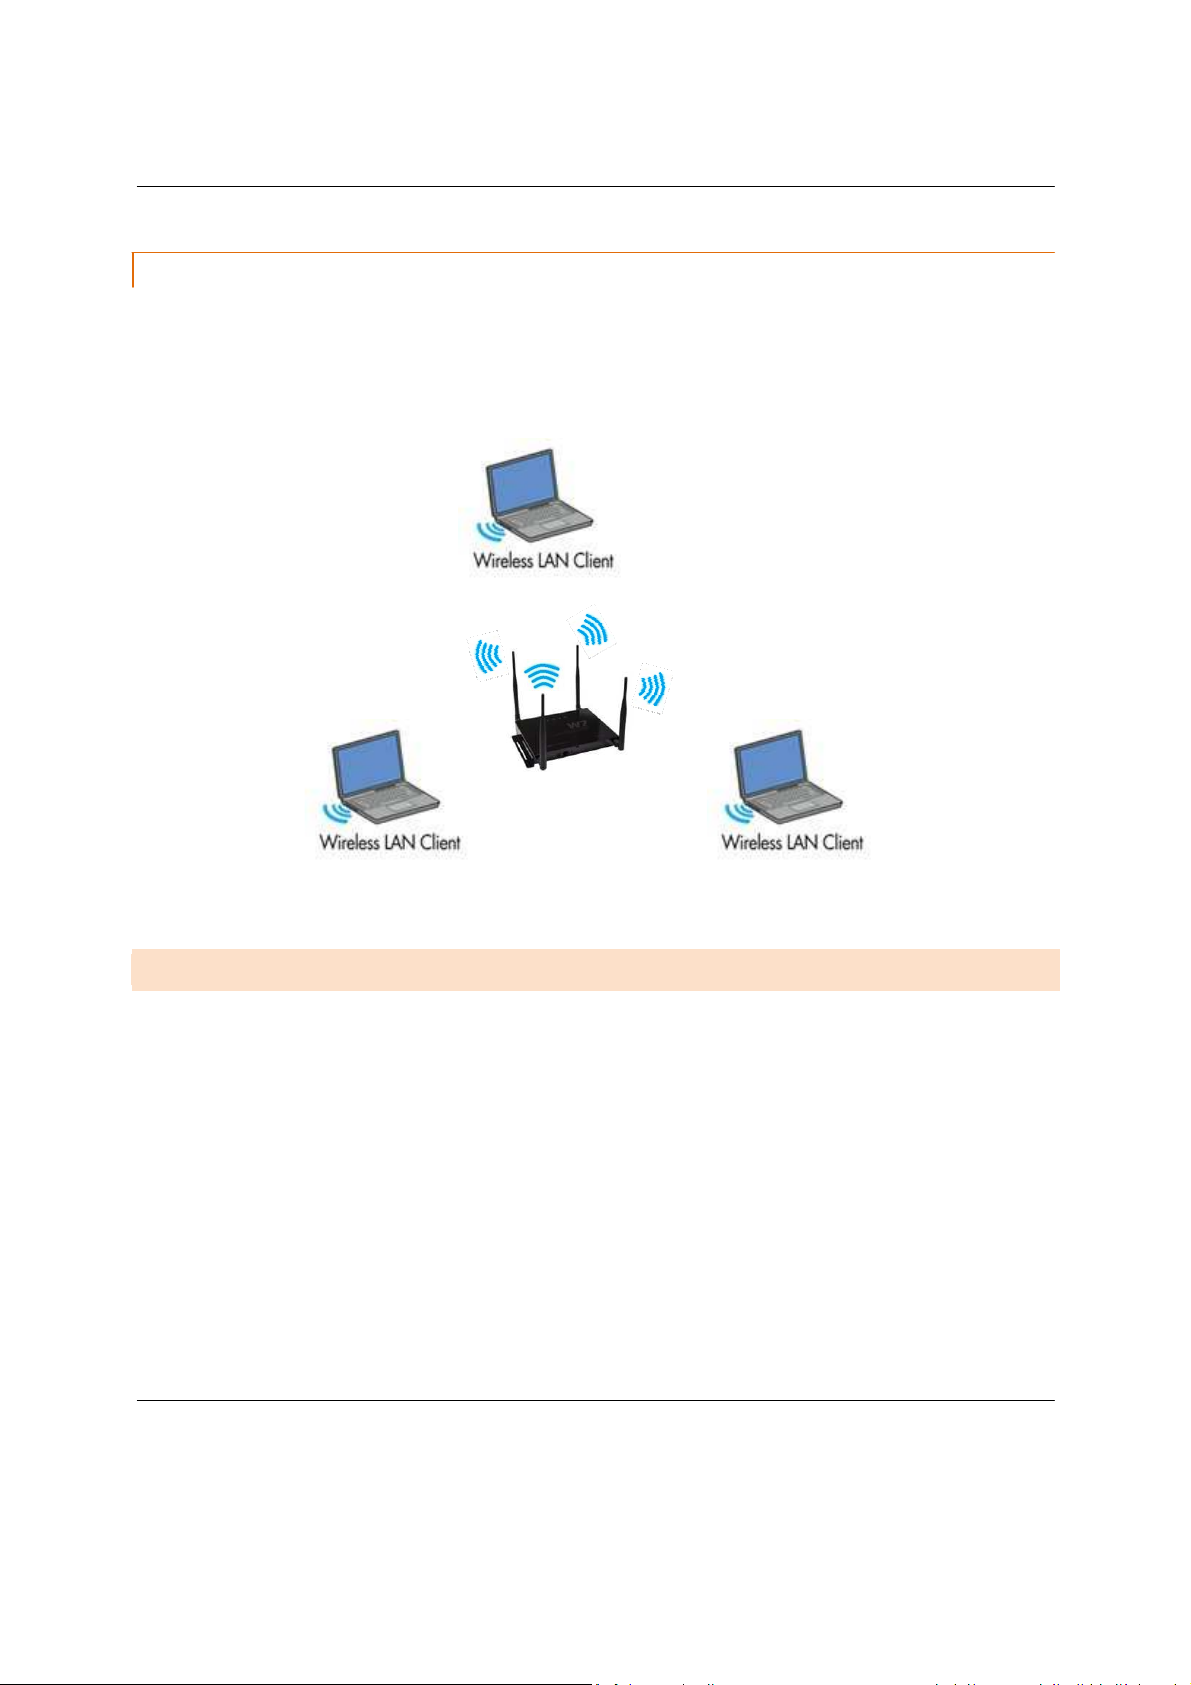
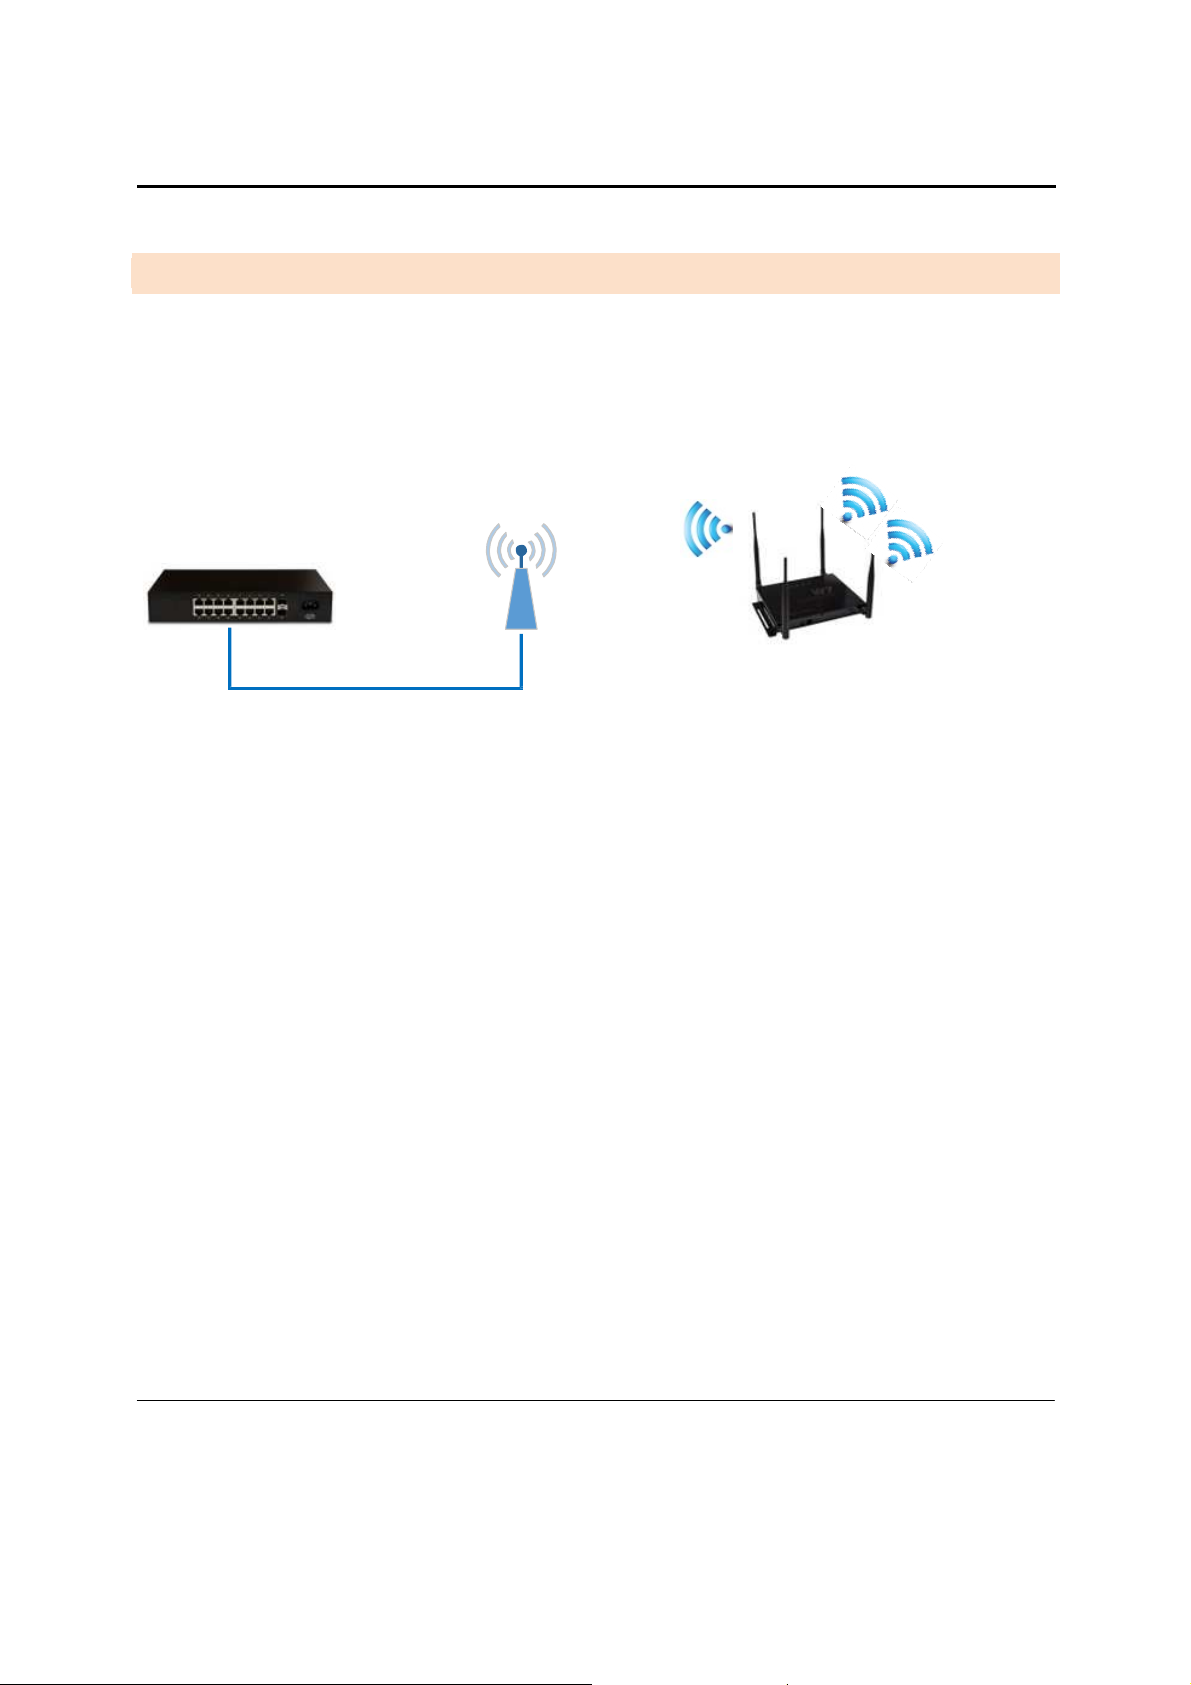
I N F R A S T R U C T U R E M O D E
In this mode, an Access Point such as the W7x handles all wireless communication between two
computers. It doesn’t matter if the W7x is stand-alone, or wired to an Ethernet network. In stand-alone mode,
the W7x can extend the range of your wireless LANs by acting as a repeater, increasing the connection distance
between wireless stations. The figure below shows a network configured in infrastructure mode.
W7x
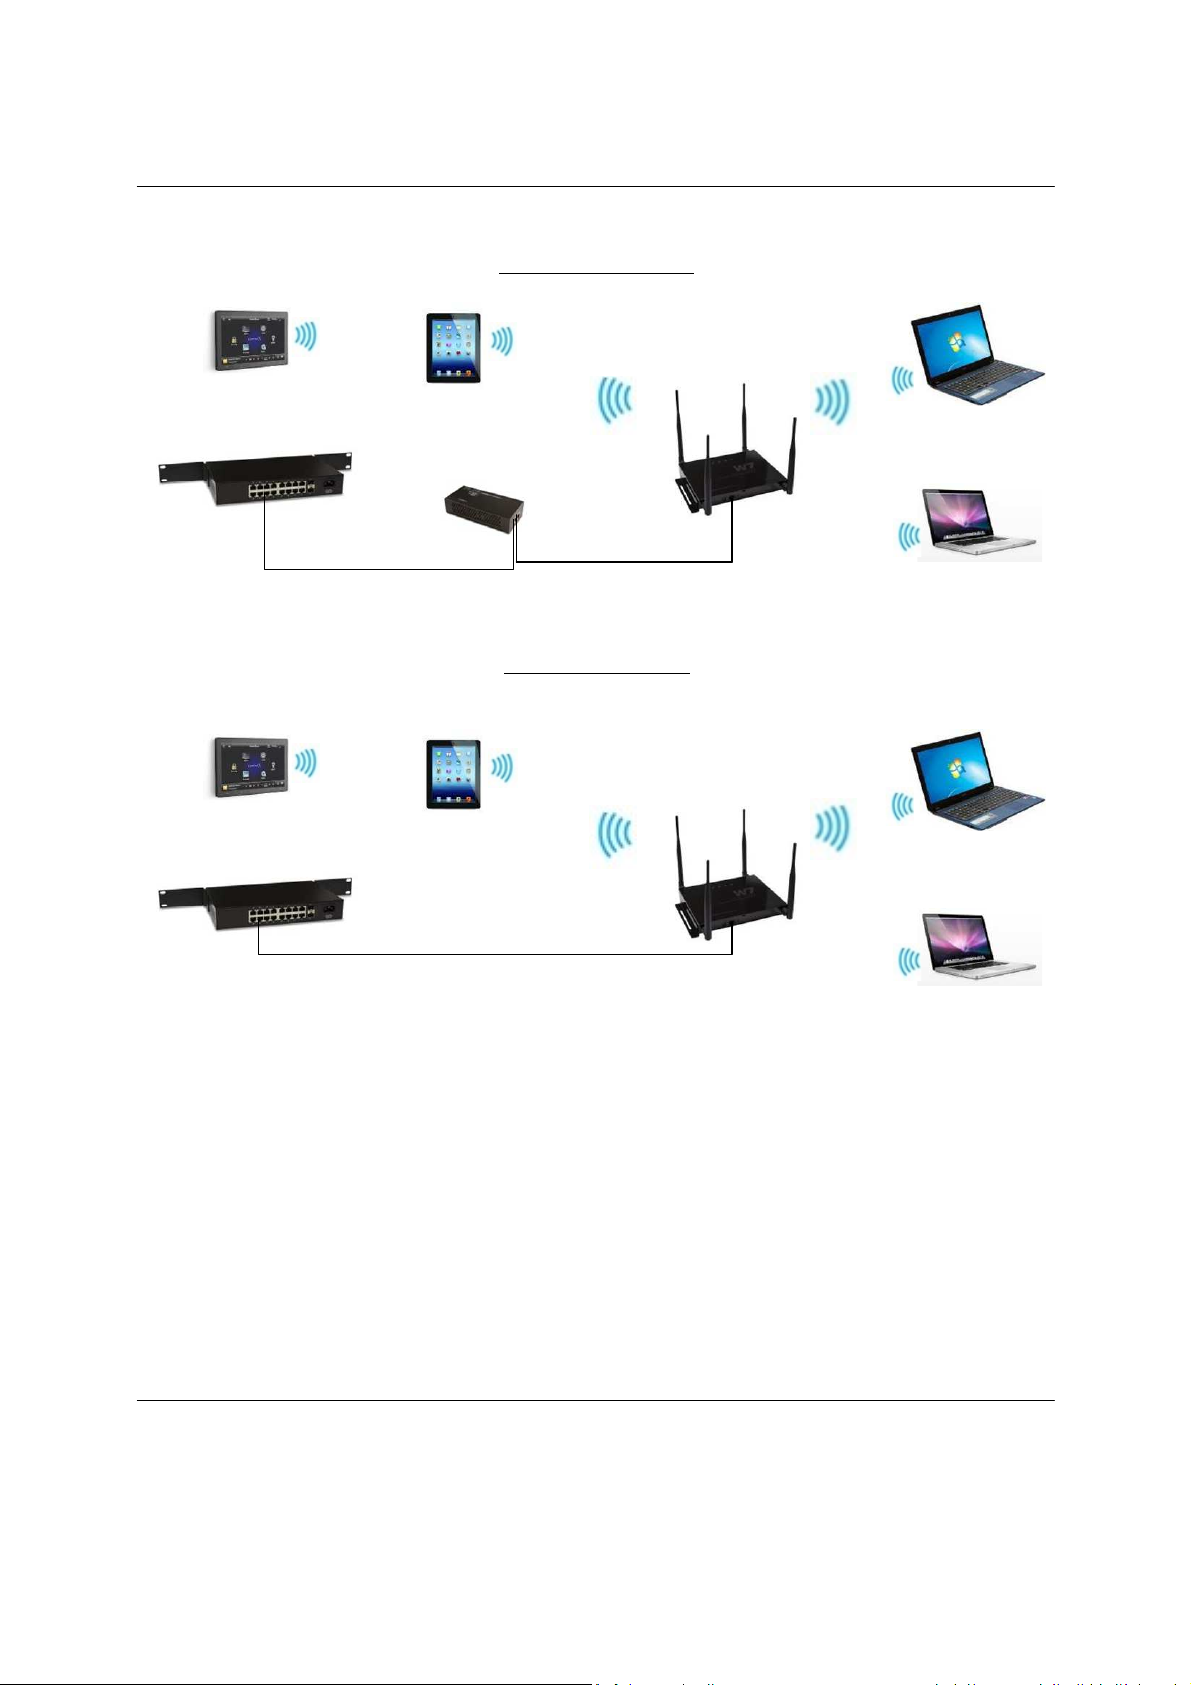
H A R D W A R E I N S T A L L A T I O N
The diagrams below depict the configuration using a PoE injector or a PoE Switch to power the W7x.
Page 12
W7x User Manual
12
Power using PoE
Switch
PoE Injector
Ethernet
Switch
The W7x can be configured in Client Bridge, Repeater, or Access Point mode. When shipped from the factory, the
W7x is set to Access Point mode. The default IP address of the W7x is 192.168.1.250 and username/password of
pakedge / pakedgea
In order to log in to the W7x, you must first configure the TCP/IP settings of your PC/Notebook. Follow these steps:
Power using PoE
Ethernet
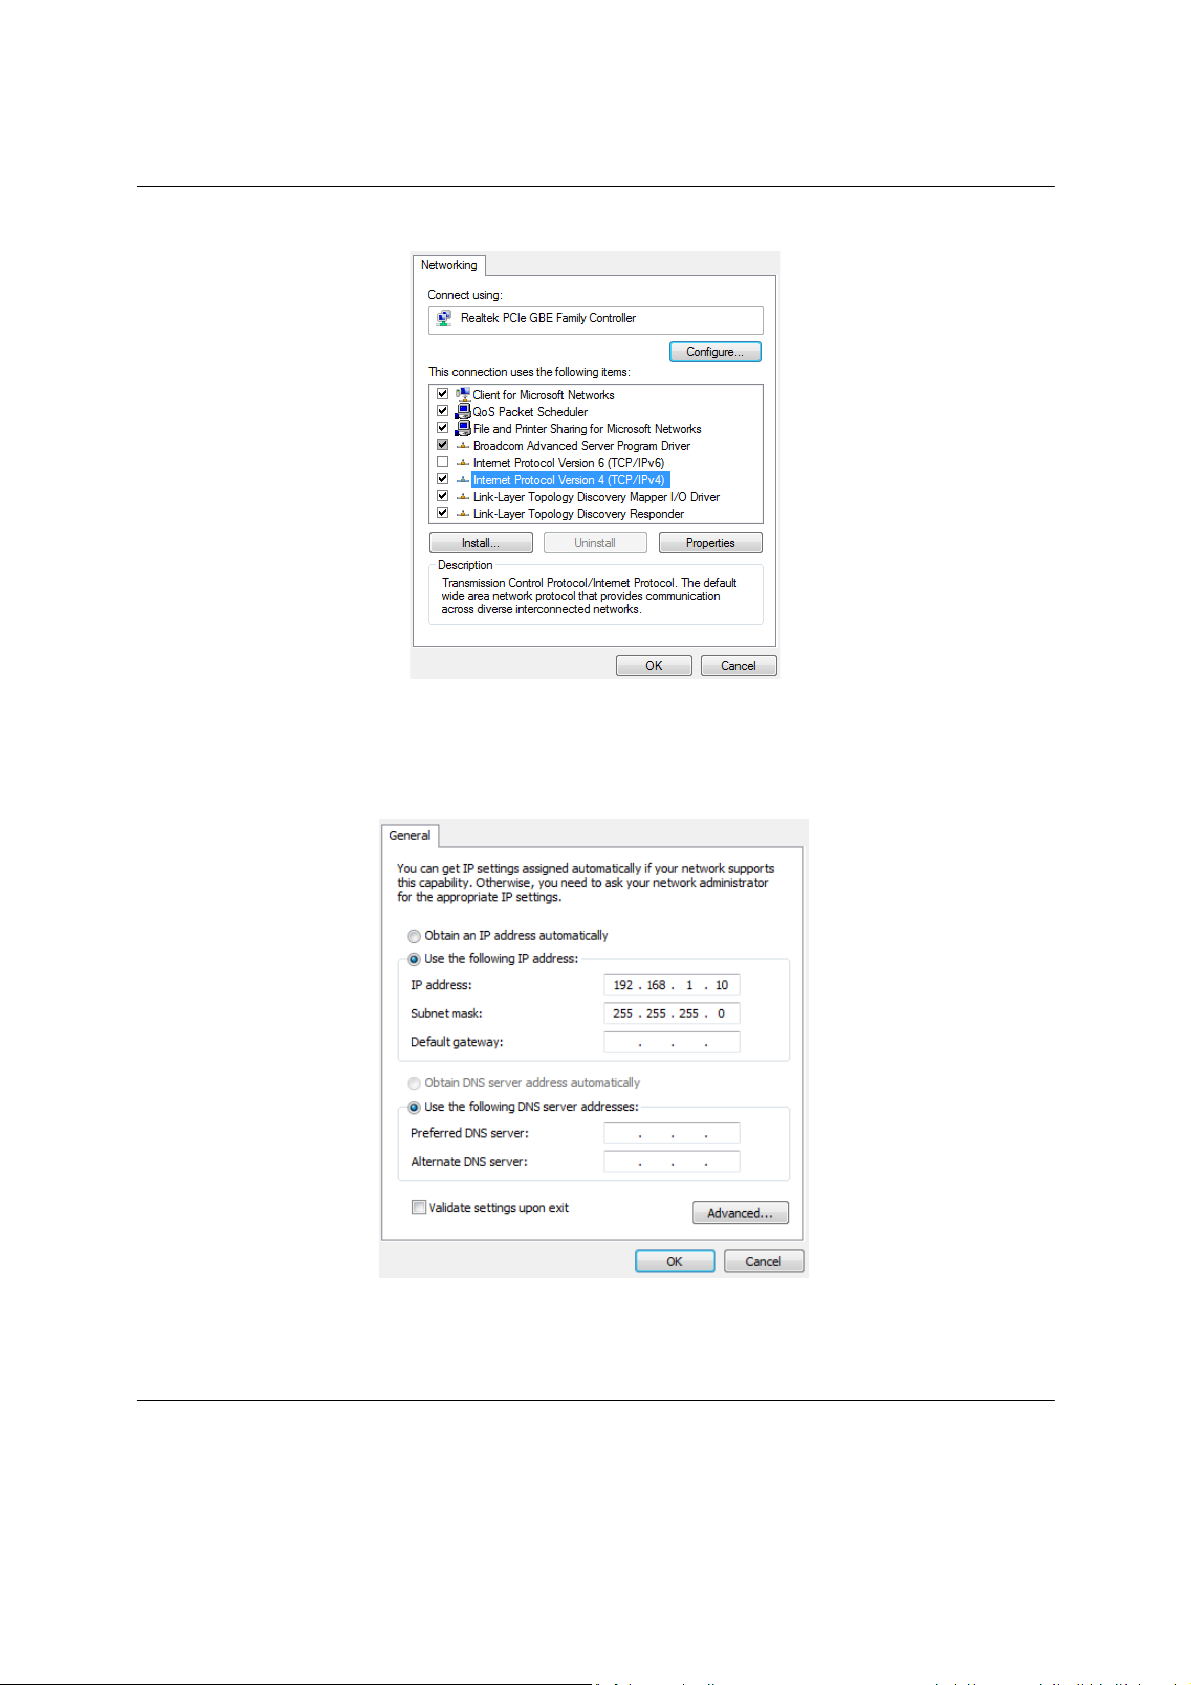
1. Under “Control Panel”, double-click “Network Connections” and double-click the connection of
your Network Interface Card (NIC). The Local Area Connection Properties dialog appears:
Injector
Power &
Ethernet
W7
Switch
W7
Page 13
W7x User Manual
13
2. Select “Internet Protocol (TCP/IP)” and click “Properties”. The Internet Protocol (TCP/IP) dialog appears
where you can configure the TCP/IP settings of your PC.
Page 14
W7x User Manual
14
PC IP address: 192.1
68.1.10
PC s
ubnet mask:
255.2
55.255.0
3. Select “Use the following IP Address” and type the IP address and subnet mask, as in the example below. (Be
sure the IP address and subnet mask are on the same subnet as the W7x.)
W7x IP address: 192.168.1.250
4. Click “OK” to close the dialog, and click “OK” to close the Local Area Connection Properties dialog.
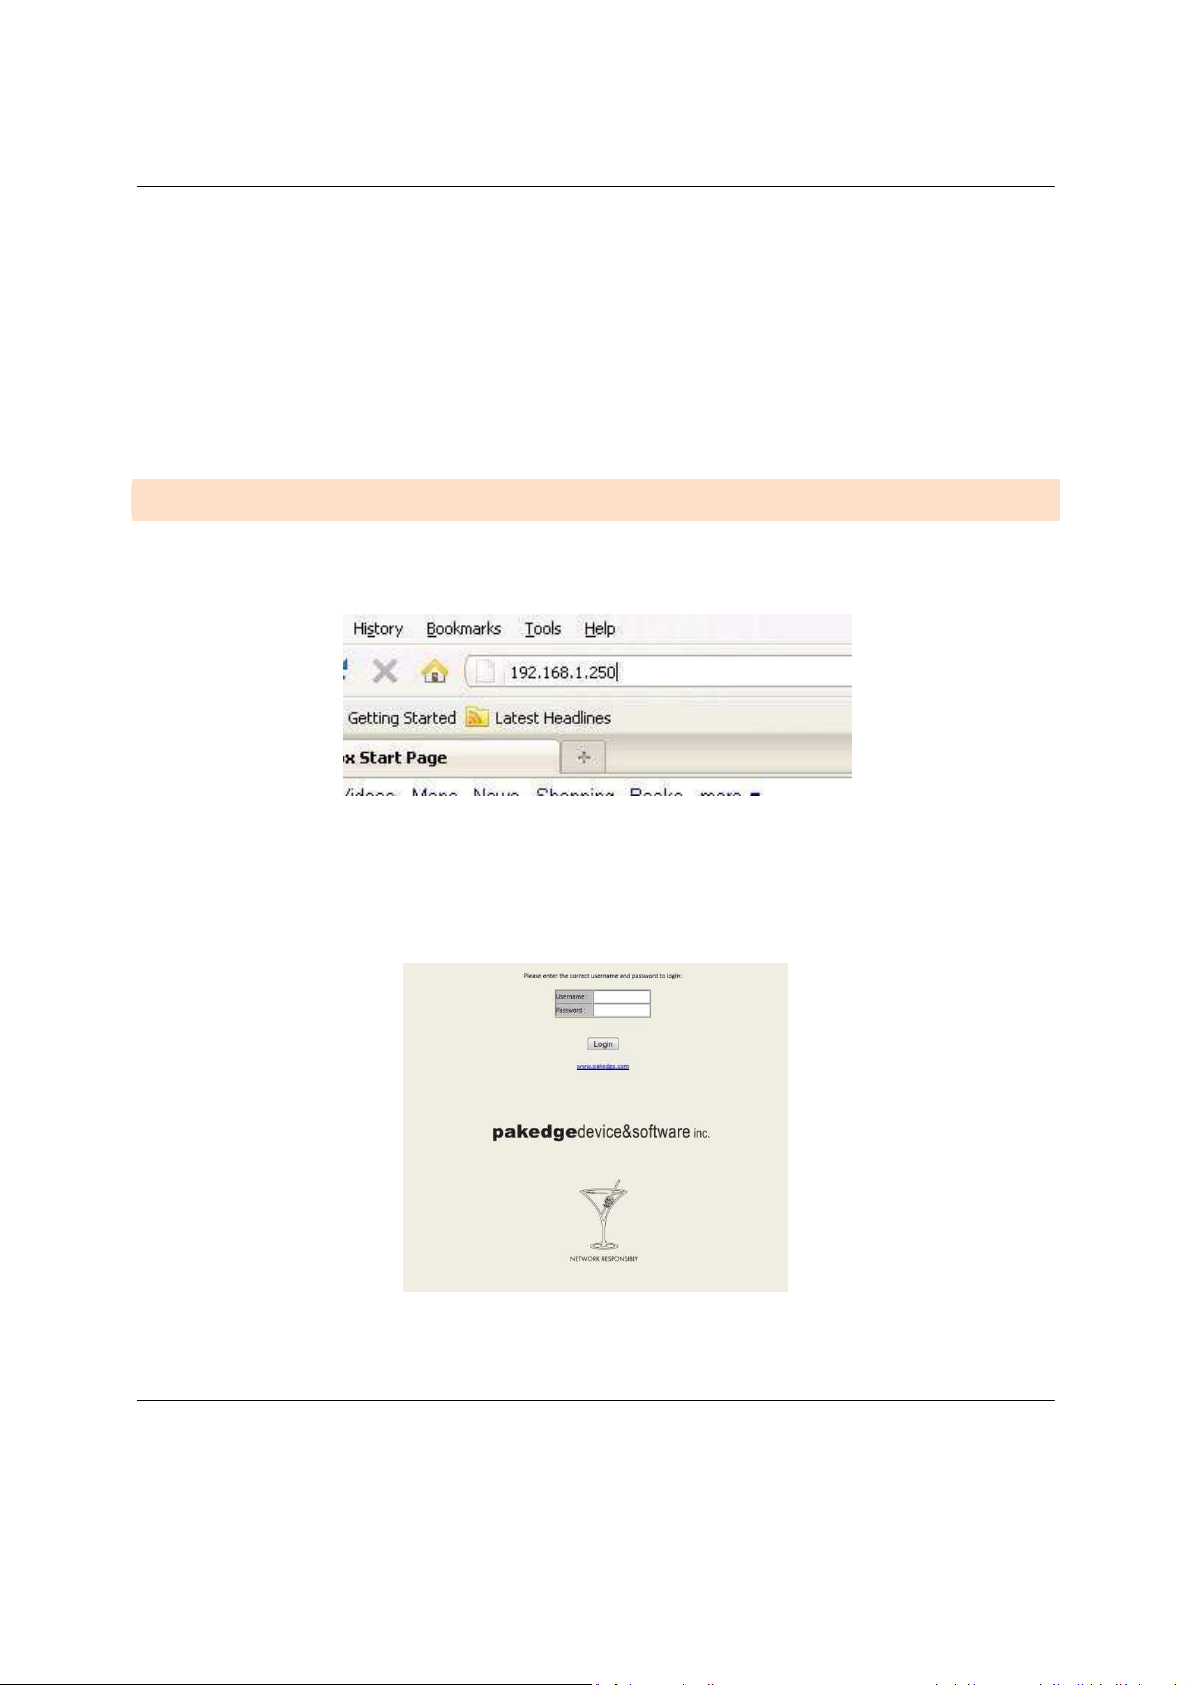
W7 X C O N F I G U R A T I O N
To configure the W7x through a Web Browser, in the address bar of the browser type the IP address of
the W7x (default 192.168.1.250) and press Enter.
NOTE: Make sure the Access Point and your computer are configured on the same subnet. To configure the IP
address of your computer, follow the steps in the previous section.
The W7x login dialog appears.
In the User Name box, type pakedge, and in the Password box type pakedgea, and click “Login”.
Page 15
W7x User Manual
15
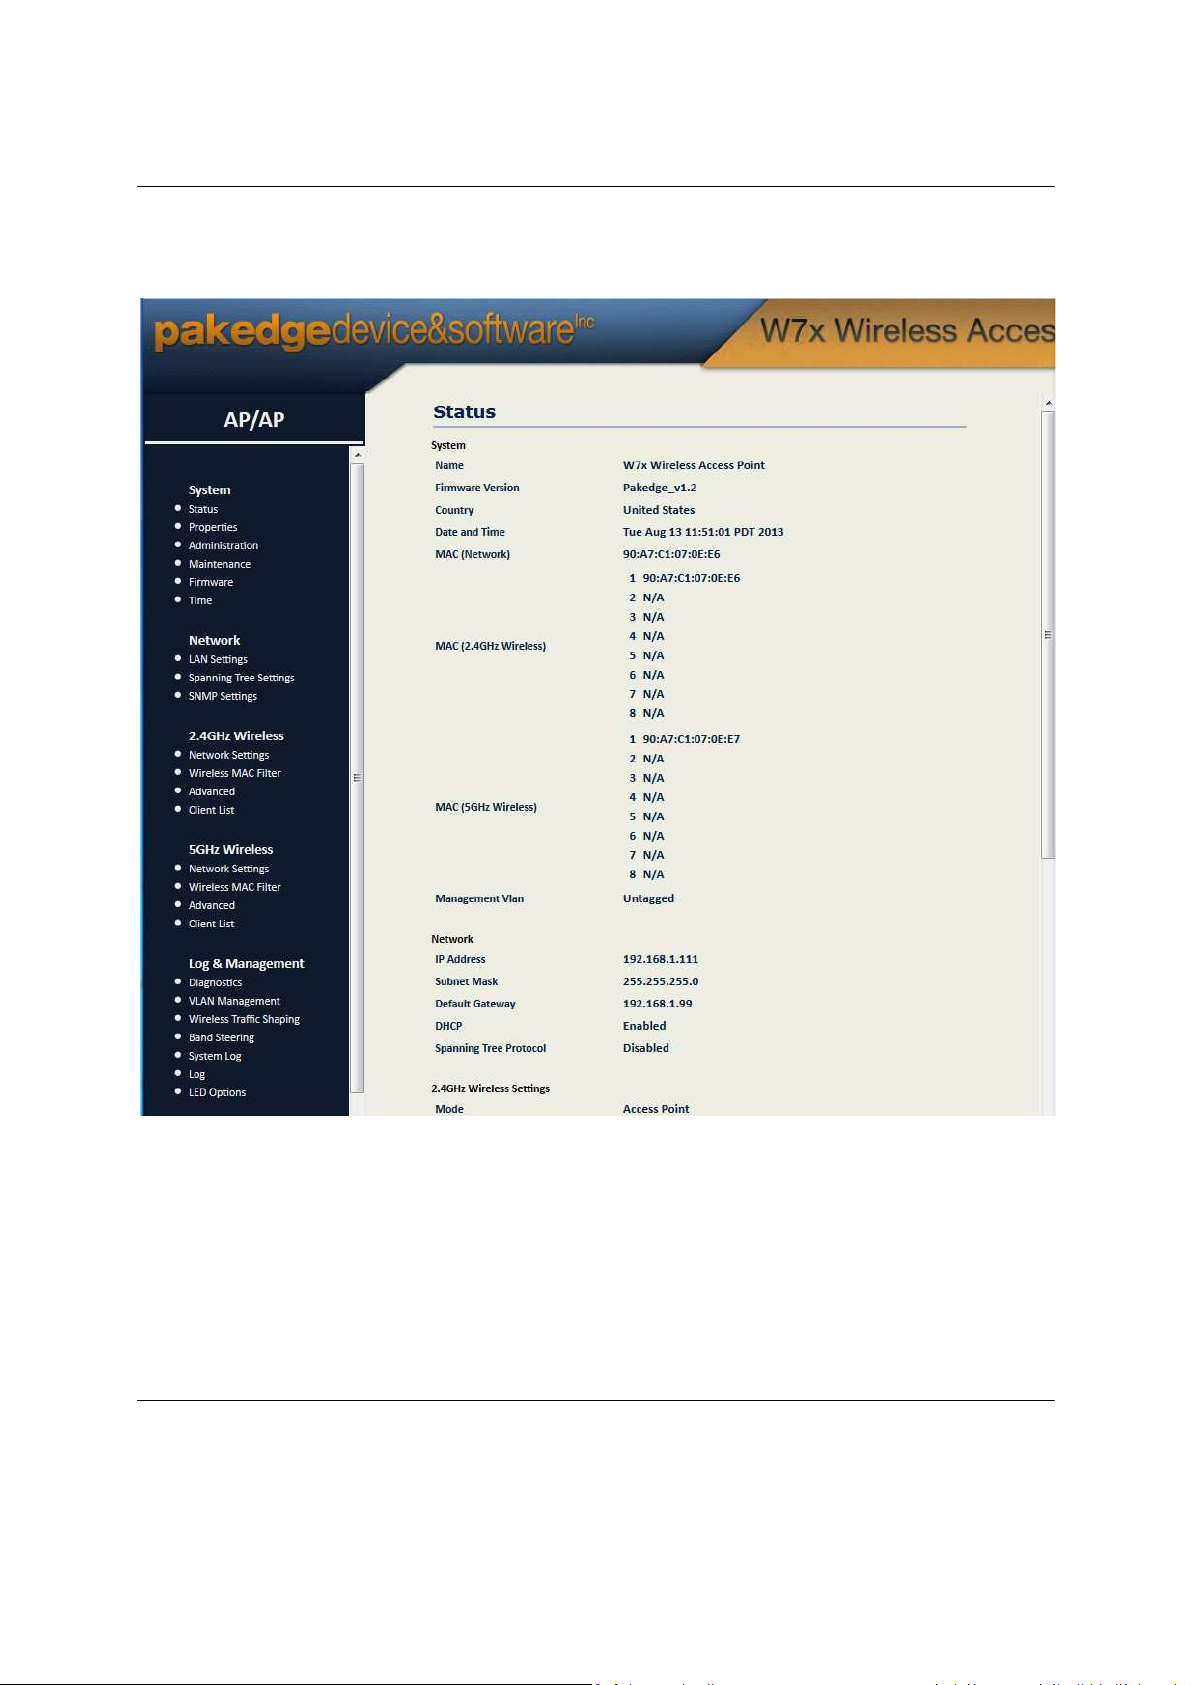
The W7x main menu appears (see figure below).
The area on the right displays current information about the system. To refresh the data to reflect the current
state of the W7x, click Refresh.
The navigation bar on the left has five groups:
• System: Display and/or modify the W7x’s status, system properties, administrative controls, maintenance,
firmware options, and internal time settings.
• Network: Display and/or modify settings for the system LAN (including IP & gateway), spanning tree, and
SNMP.
Page 16

W7x User Manual
16
• 2.4GHz Wireless: Display and/or modify settings for the wireless network, MAC filter, advanced system
options and the client list for the 2.4GHz band.
• 5GHz Wireless: Display and/or modify settings for the wireless network, MAC filter, advanced system
options and the client list for the 5GHz band.
• Log & Management: Display and/or modify settings for diagnostics, VLAN management, wireless traffic
shaping, system log, log settings and LED options.
NOTE: The main menu options change depending on the operating mode you set for your W7x. The main menu in
the figure above shows the options available with the default login, which is Access Point mode. If you set the W7x
to a different mode (e.g., Client Bridge mode), the options on the main menu will change. Sections of this manual
that discuss settings for the diferent operating modes include screen shots that show the main menu options
available in those modes.
MENU OPTIONS
S Y S T E M
On the W7x main menu, the System group has six options:
• Status
• Properties
• Administration
• Maintenance
• Firmware
• Time
S T AT
US
In the System group under the W7x, click “Status”. The Main dialog appears and displays the current
status of the W7x for the operating mode you’ve selected – see the figure below. The System section shows the
W7x’s Name, Firmware Version, Current Date/Time, MAC Network address, MAC Wireless address (for both
2.4GHz and 5GHz band) and the Management VLAN.
The Network section displays the access point’s IP Address, Subnet Mask, Default Gateway, DHCP and Spanning
Tree status.
The 2.4GHz/5GHz Wireless section displays the device operating mode, 802.11 mode, channel bandwidth, wireless
Channel and Profile Settings.
Page 17

W7x User Manual
17
Because the W7x supports multiple SSIDs, the Wireless section also displays the details of each SSID, and the
security settings of each SSID.
Page 18

W7x User Manual
Status
System
Name
Fìrmwa
Co
unt
Oate andTime
MAC (Network)
MAC (2.4GHz Wírel
MAC (5GHz Wireless)
Management Vlan
Ne
t\Vo
IPAd
Subnet
Default 6ateway
DHCP
Spanning Tree Proto
2.46Hz Wirel
Mode
802.11
Ol
annel Bandwi
間
吋
時
宙間
Mask
W7x
wireless
Version
Pakedge_v1.2
united
Tue Aug 13 11:51:01PDT 2013
90:A7:C1:07:0E:E6
1 90:A7:C1:07:0E:E6
2 N/A
3 N/A
ess)
4 N/A
5 N/A
6 N/A
7 N/A
8 N/A
1 90:A7:C1:07:0E:E7
2 N/A
3 N/A
4 N/A
5 N/A
6 N/A
7 N/A
8 N/A
Un
tagged
S
∞
e品Settings
dth
1
192.168.1.111
255.25
192.168.1.99
Ena bled
Disab
led
A
臼
ess Point
802.11B/G/N Mixed
20-40
MHz
States
5.255.0
A血ess Point
17
Page 19

W7x User Manual
PR O PE R T IE
S
Under the System section in the W7x main menu, click “Properties”. The Properties page is where you can
specify a name for the device, and switch the W7x’s operating mode.
• Name: Type a name for the device. (Note: This name is not used as the device SSID.)
• Mode: Select an operating mode. (For detailed information on configuring operating modes, see the
chapter on Mode-Specific Setup.)
•
To save your changes, click “Apply”.
NOTE: For any changes to take effect, you must click the “Save Changes” button on the lower left below the menu.
This will reboot the access point, applying the configuration changes.
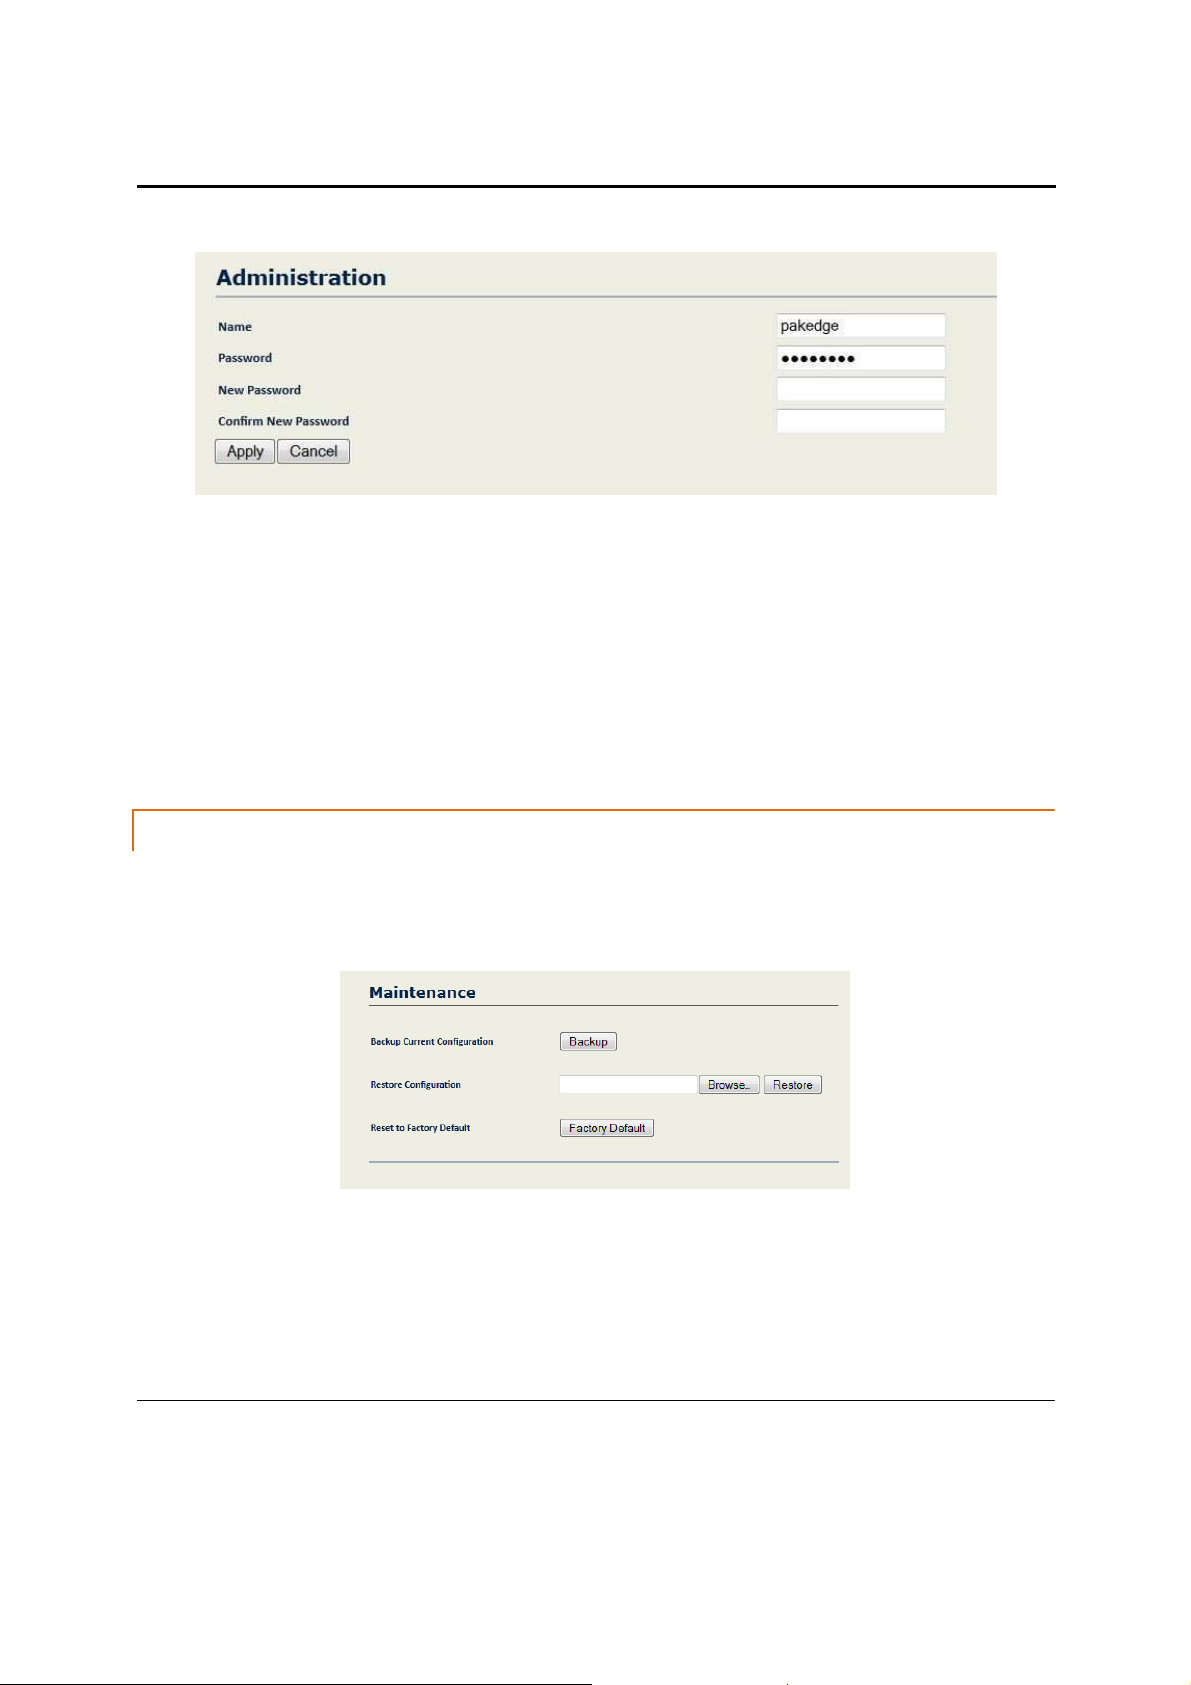
A D MI N IS T R AT IO
N
Click “Administration” under the System group in the W7x main menu. The Administration page allows
you to specify a user name and password for the W7x. By default, the W7x is configured with a default name of
pakedge and a default password of pakedgea. For security reasons, it is imperative to change the default user
name and password.
18
Page 20
W7x User Manual
• Name: Type a user name.
• Password: Type the current password.
• New Password: Type the new password, maximum 12 characters.
• Confirm New Password: Type the password again.
• Click Apply to save your changes.
NOTE: For any changes to take effect, you must click the “Save Changes” button on the lower left below the menu.
This will reboot the access point, applying the configuration changes.
M AI N T E N AN C
Under the System section in the W7x main menu, click “Maintenance”. When The Maintenance page
appears, you can save the current settings for the W7x. This is useful when, for example, you need to configure
several devices with the same settings.
E
• Backup Current Configuration: Click “Backup” to save the current configuration.
• Restore Configuration: If you have already backed up your W7x configuration, you can quickly restore it.
Click “Browse” and choose the backup file, then click “Restore”.
• Reset to Factory Default: Click “Factory Default” to reset the W7x to the factory default settings.
device restarts, you can access the W7x at the default IP address: 192.168.1.250 and login: pakedge /
pakedgea
After the
19
Page 21
W7x User Manual
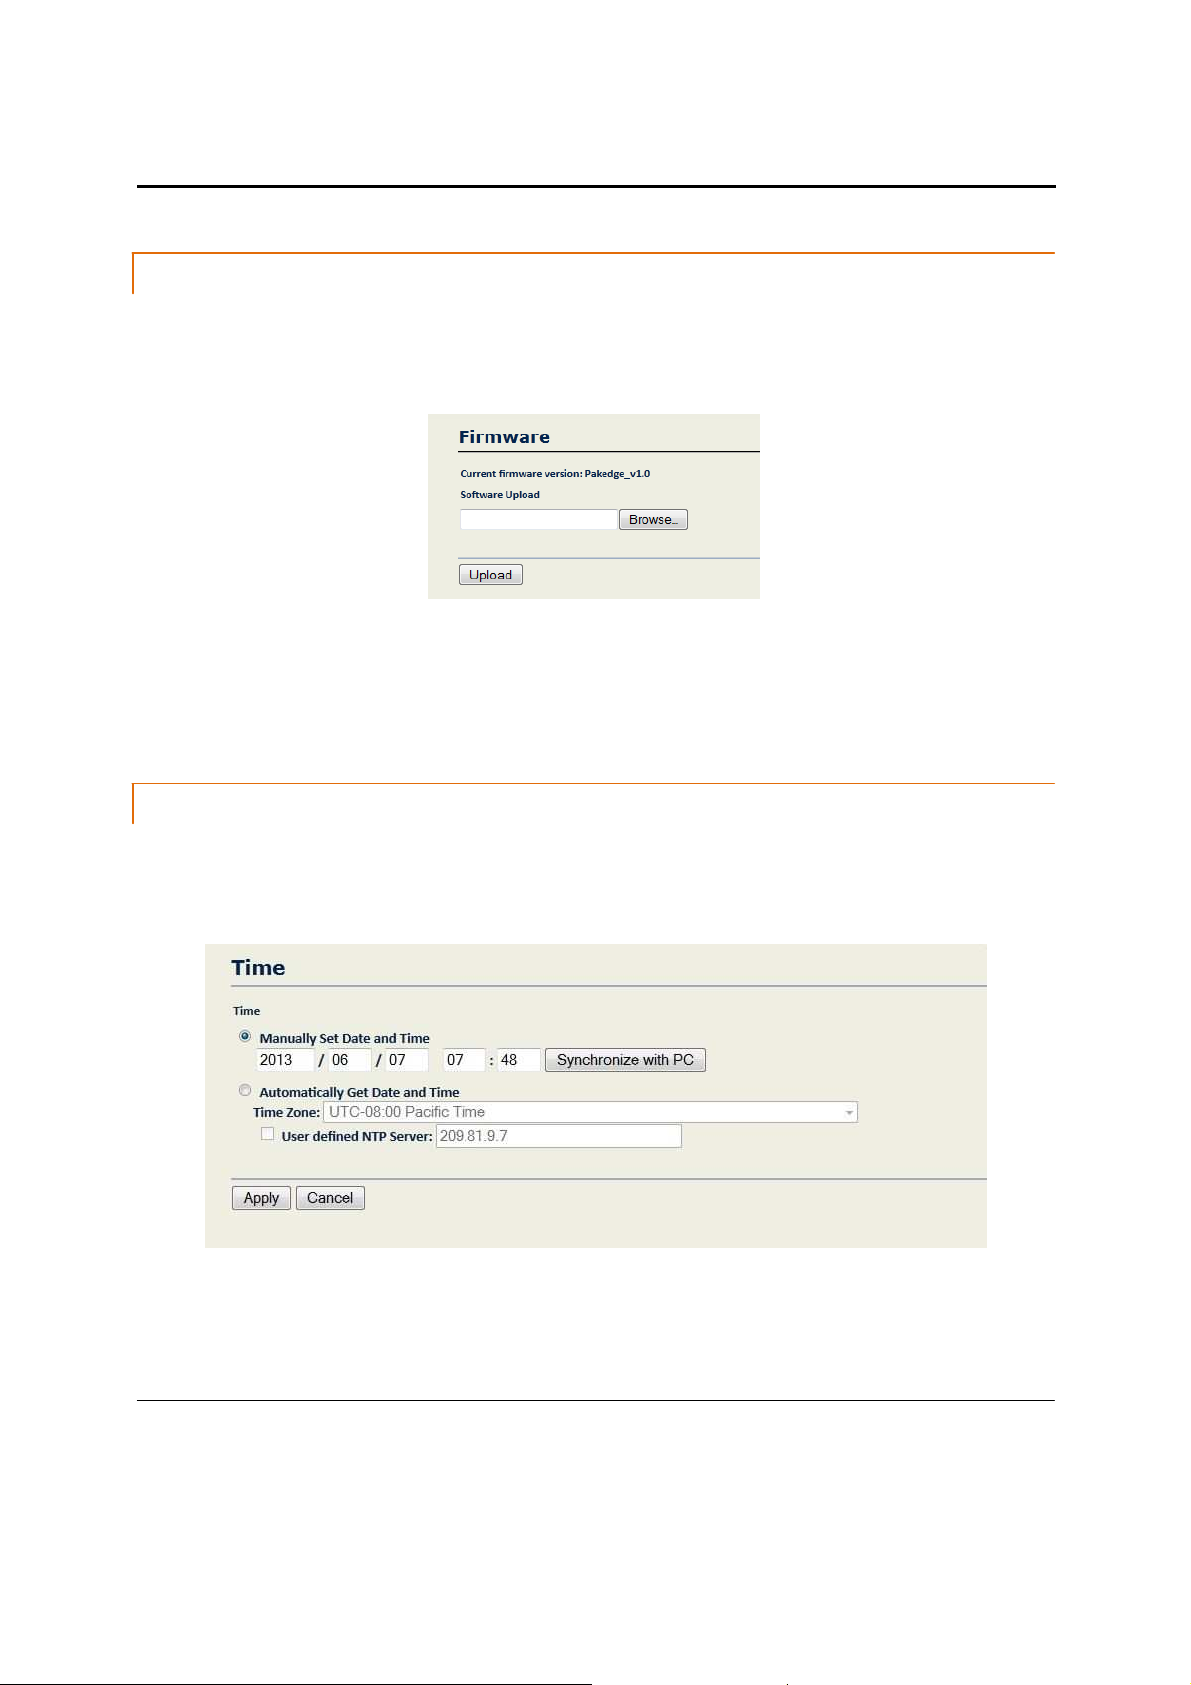
F IR MW AR
E
In the W7x main menu, in the System group, click “Firmware”. In the Firmware page you can upgrade
your W7x’s firmware. To perform a firmware upgrade, you must first download the correct firmware from the
Pakedge website under the Dealer Portal section.
• Click “Browse” and choose the firmware file that you downloaded from the Pakedge site.
• Click “Upgrade”.
Note: The upgrade usually takes at least 1 minute. During the firmware upgrade process, do not turn off the
device – doing so can damage the W7x. Once the upgrade completes, the device will restart automatically.
T IM
E
Click “Time”, under the System group in the W7x main menu. The Time page is used for configuring the
time on your W7x unit. You can configure the time manually, synchronizing with your PC or by using an NTP time
server.
• Manually Set Date and Time: Type the date and time or synch it with your PC’s clock.
• Automatically Get Date and Time: Choose the time zone of your location from the drop-down list.
• User Defined NTP Server: Type the IP address of the NTP server.
20
Page 22
W7x User Manual
• Click “Apply” to save your changes.
NOTE: For any changes to take effect, you must click the “Save Changes” button on the lower left below the menu.
This will reboot the access point, applying the configuration changes.
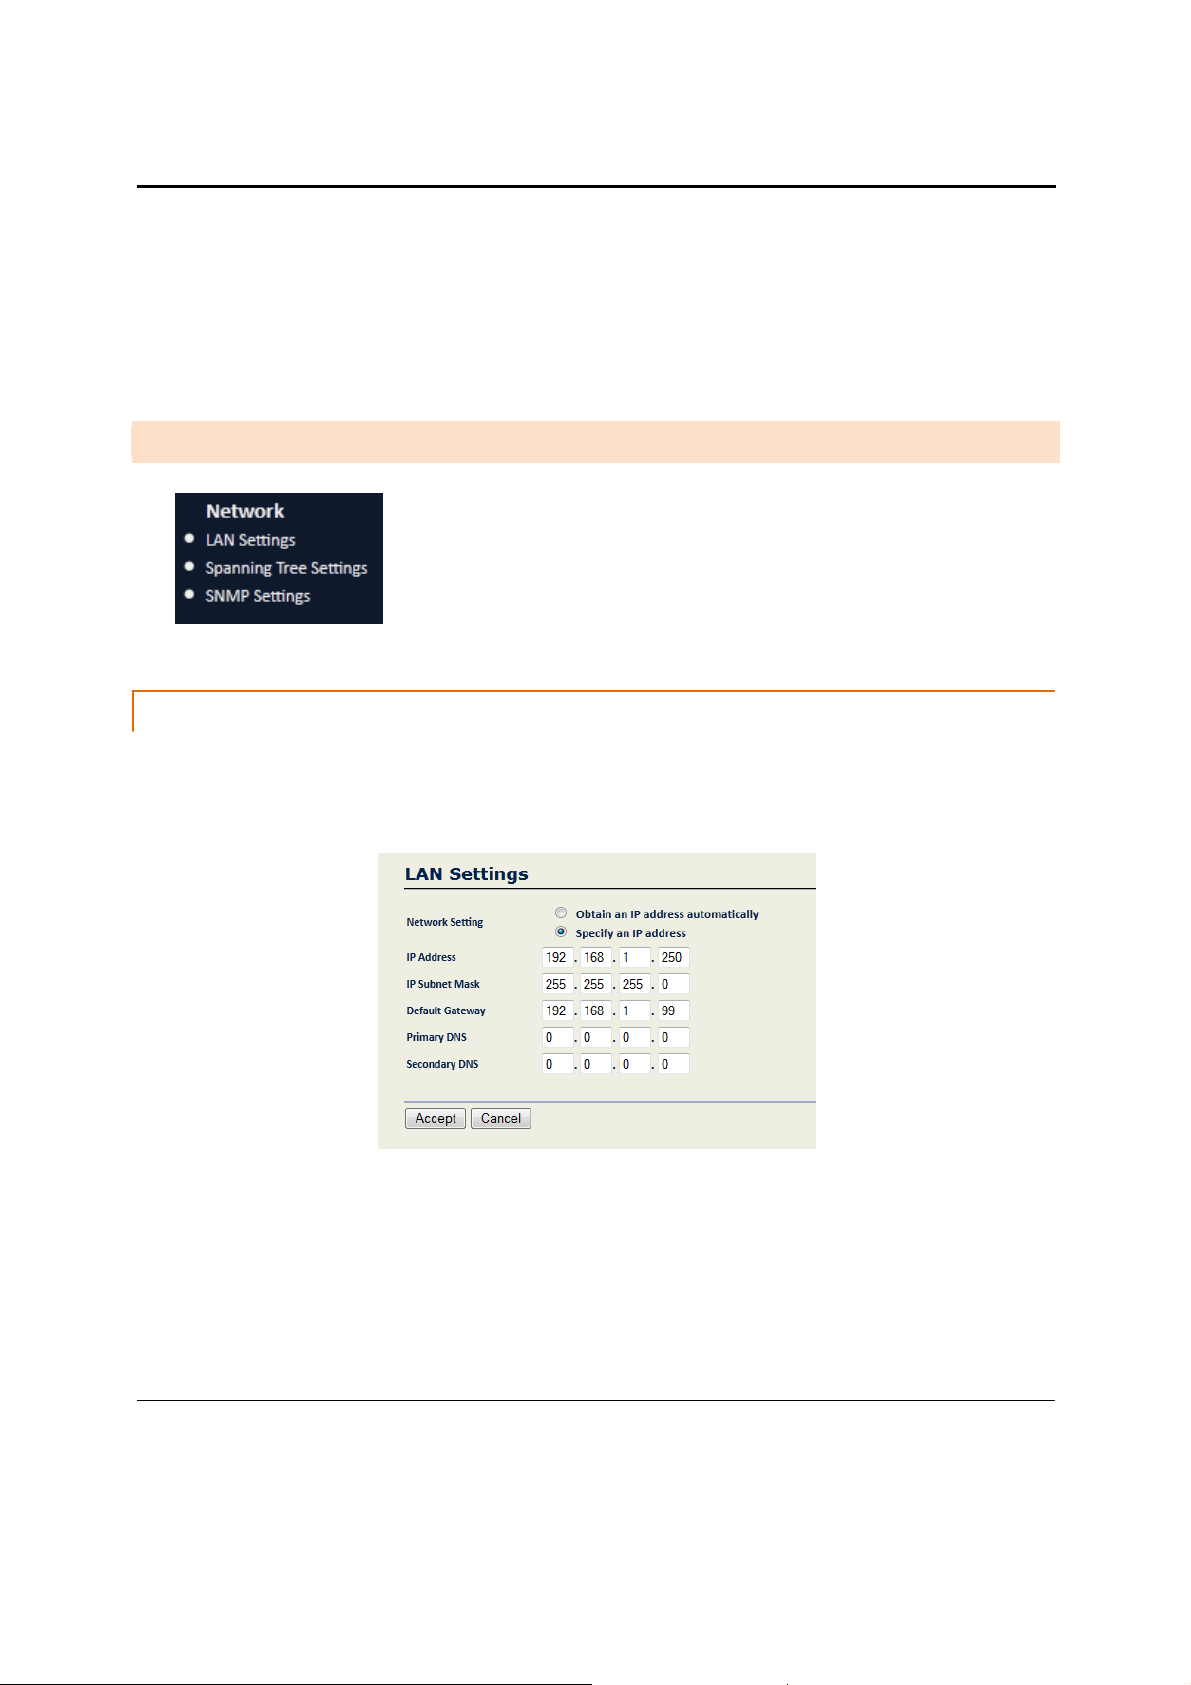
N E T W O R K
L
AN S E T T I N GS
To configure the IP address of your W7x, in the Network section of the W7x main menu, click “LAN
Settings”. In the LAN Settings page, you can configure the W7x with a static IP address, or obtain an IP address
automatically using a DHCP client.
On the W7x main menu, the Network group has three options:
• LAN Settings
• Spanning Tree Settings
• SNMP Settings
• Network Setting: If your W7x is connected to a DHCP server (such as a router), choose “Obtain an IP
address automatically”. Your W7x will be assigned an IP address from the DHCP pool (Not
recommended).
• Specify an IP address (default): Select this option if you want to use a static IP address. Type the
appropriate entries in the text boxes for IP Address, IP Subnet Mask, Default Gateway, Primary and
Secondary DNS.
• Click “Accept” to apply the changes.
21
Page 23

W7x User Manual
S PAN N IN
G T R E E S E T T IN GS
To configure Spanning Tree protocol for your W7x, in the main menu, in the Network section, click
“Spanning Tree Settings”.
• Spanning Tree Status: Disabled by default; to turn it on, select “On”.
• Bridge Hello Time: The hello time is the interval between sending one bridge protocol data unit (BPDU) and the
next unit on a port. Type an entry between 1-10 seconds (recommend using the default “2”).
• Bridge Max Age: Specify the maximum time the W7x can wait before saving its configuration BPDU information.
Type an entry between 6-40 seconds (recommend using the default “20”).
• Bridge Forward Delay: The forward delay is the amount of time the W7x will spend in listening and learning states.
Type an entry between 4-30 seconds (recommend using the default “4”).
• Priority: Assign a priority for the W7x in the Spanning Tree Protocol hierarchy. Type a number between 0-65535
(recommend using the default “32768” unless you have Spanning Tree enabled on any switches in the path
between the W7x and the router, then you would want the W7x’s Priority to be larger than any of the switches).
S N
MP S E T T IN GS
In the main menu of the W7x, in the Network section, click “SNMP Settings”. The SNMP Settings page
appears, where you can enter a community name and password to manage the W7x device remotely, using an
SNMP client.
22
Page 24
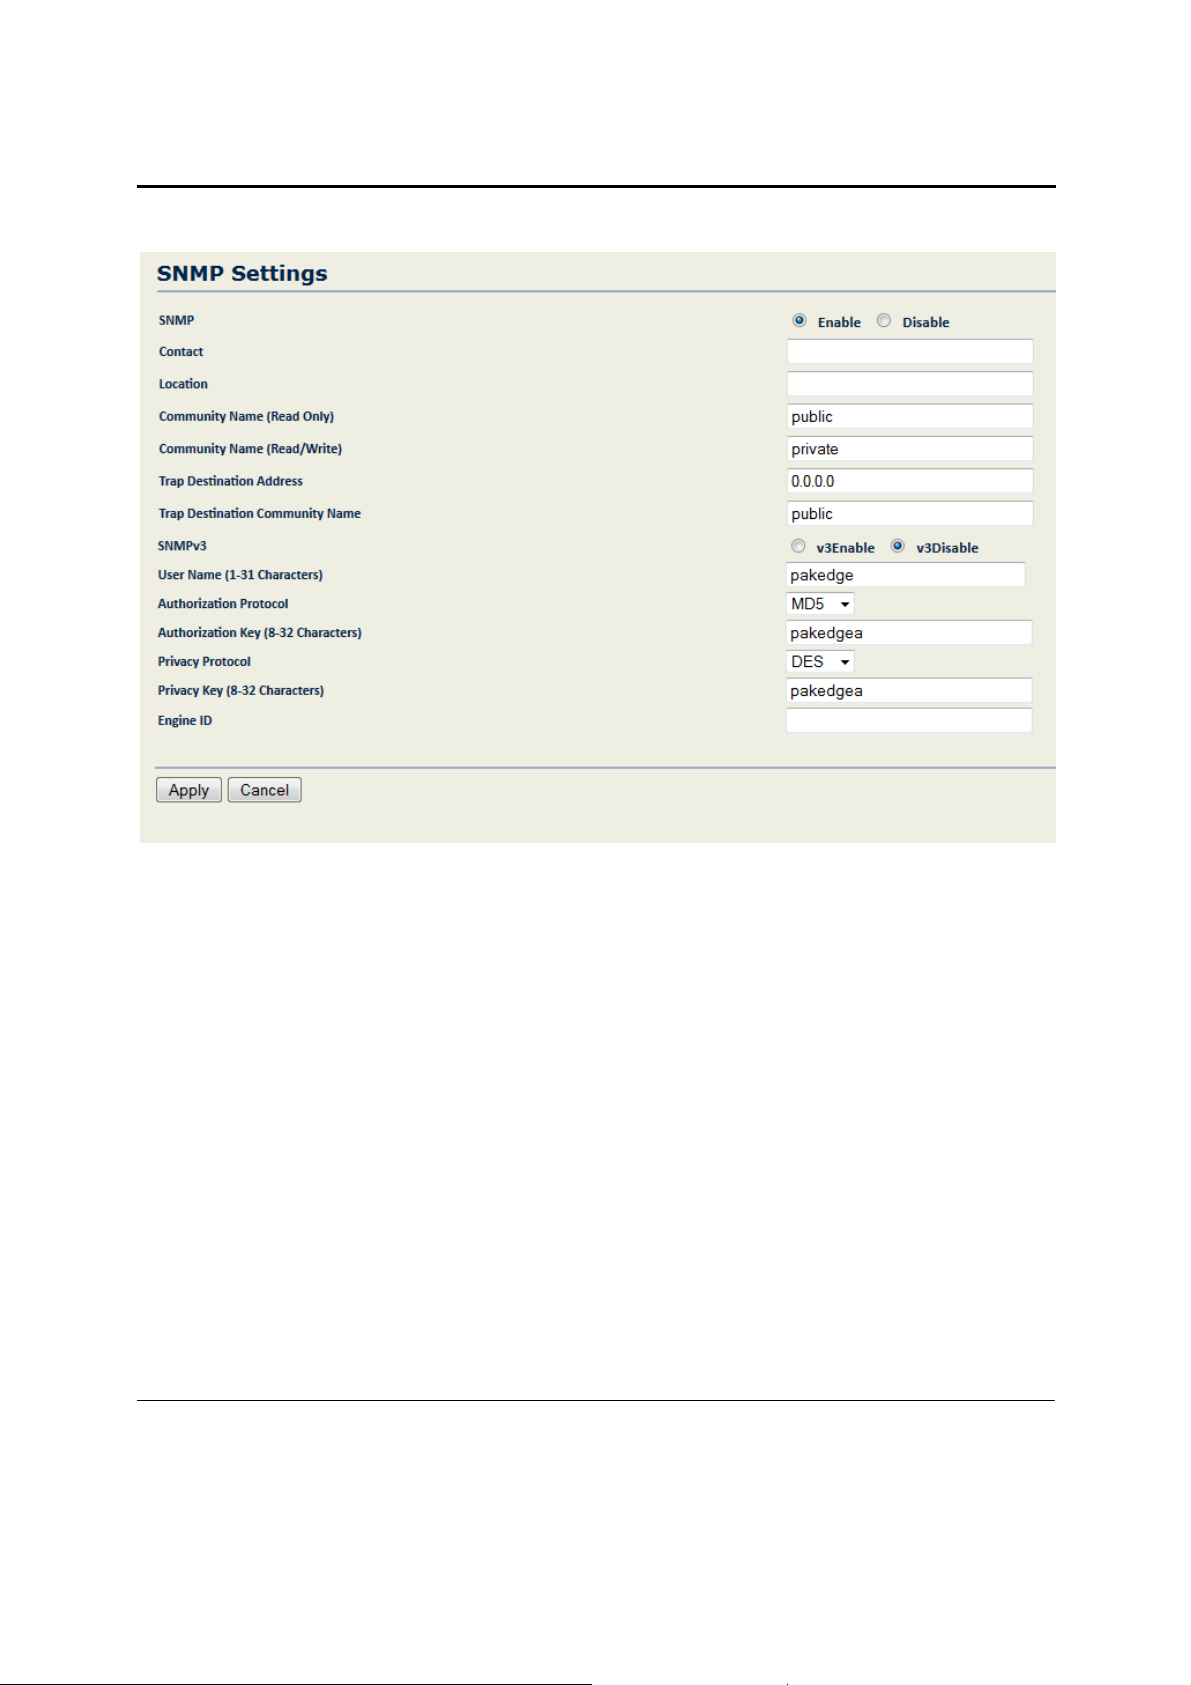
W7x User Manual
• Enable/Disable: To manage the W7x remotely using an SNMP manager, select “Enable”.
• Contact: Enter the contact information for the SNMP manager.
• Location: Enter the location of the W7x for reference by the SNMP manager.
• Community Name (Read only): Type the password for read-only access to the SNMP community.
• Community Name (Read/Write): Type the password for read/write access to the SNMP community.
• Trap Destination Address: Type the IP address to receive SNMP traps.
• Trap Destination Community Name: Type the password of the SNMP trap community.
• SNMPv3: Select v3Enable for added encryption, if your manager supports SNMPv3.
• User Name: Enter the user name for the SNMP manager with permission to access the W7x.
• Authorization Protocol: Select the encryption type that the SNMP manager is using for the login
information.
• Authorization Key: Enter the pass key that the SNMP manager will use to login to the W7x’s SNMP agent.
• Click “Apply” to save your settings.
23
Page 25
W7x User Manual
E
for
e
p
s
u
mo
5GHz
Touch
MODE-SPECIFIC S
This section describes the settings
• Access Point
• Client Bridge
• Repeater
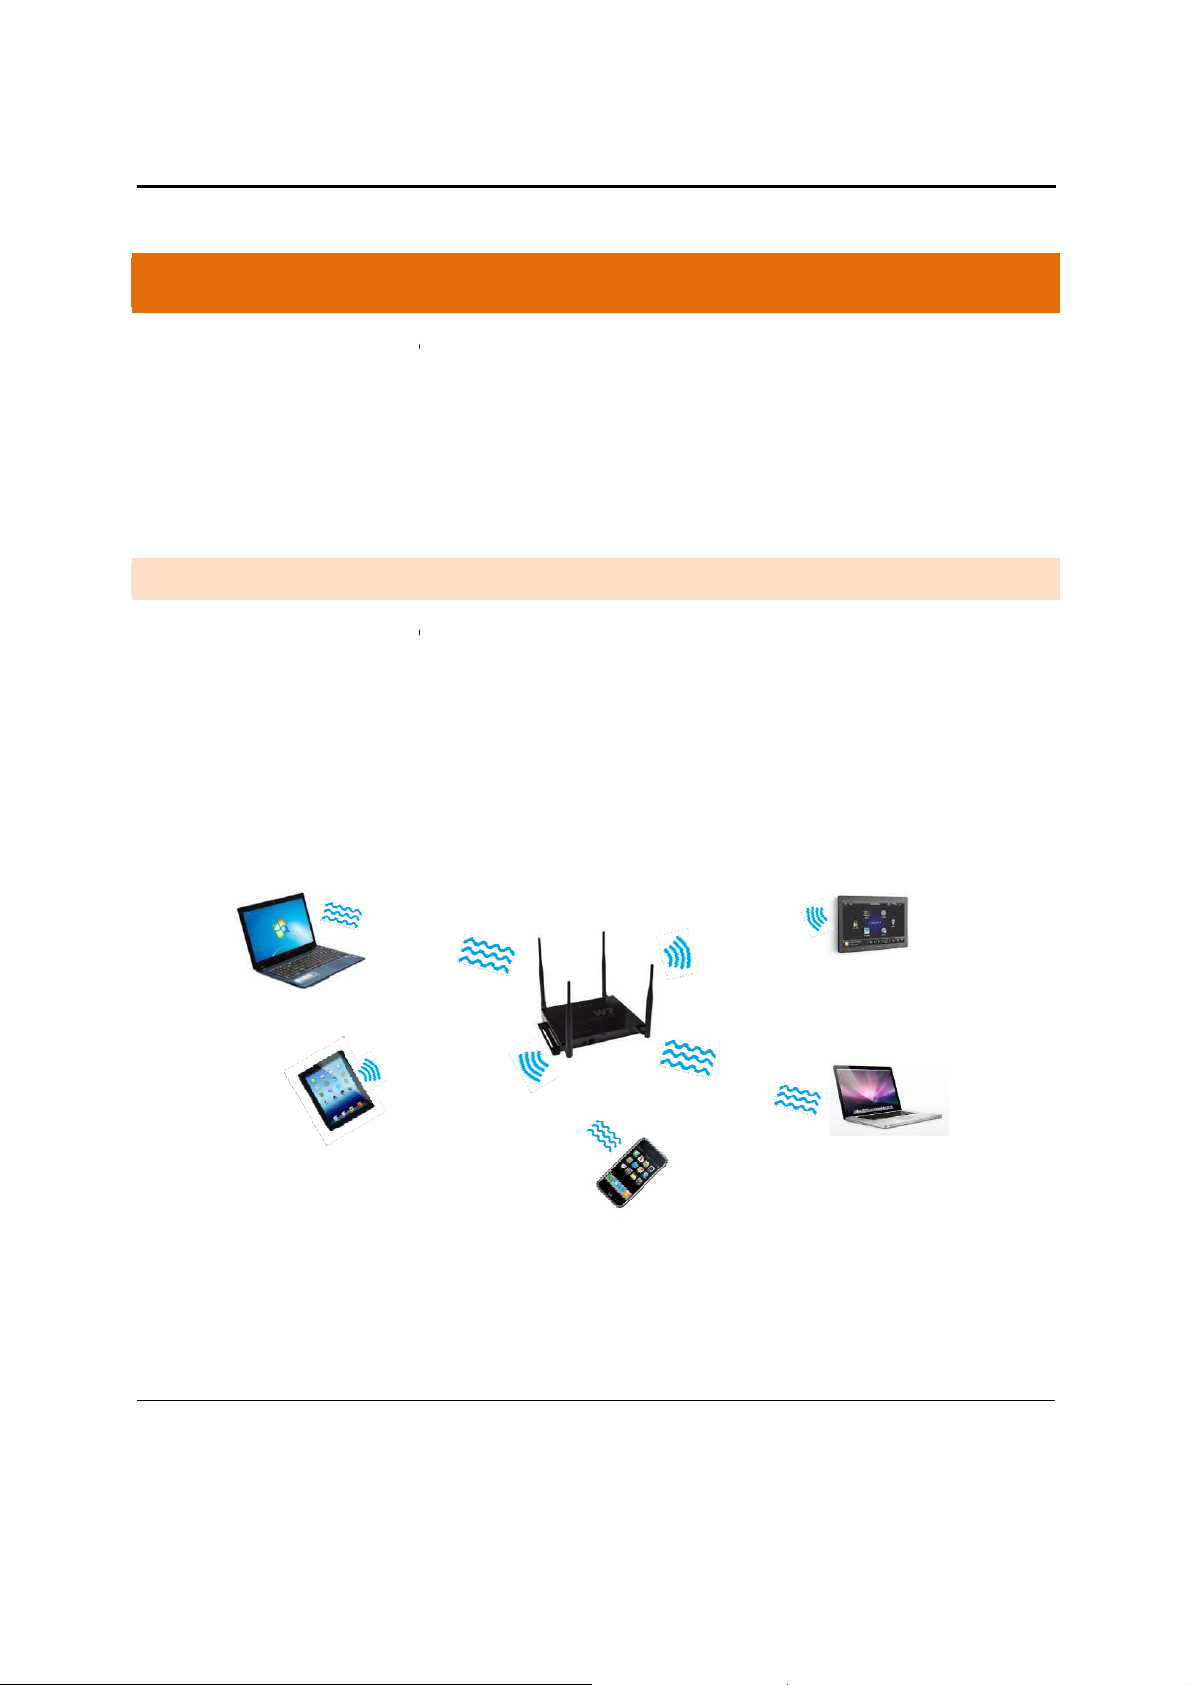
A C C E S S P O I N T M O D E
The options in the main menu of th
menu options discussed in this cha
In this mode, the W7x simultaneou
associate with. As shown in the fig
Laptop
Tablet
TUP
W7x change depending on the current operating
ter are those available in Access Point mode.
ly broadcasts a Wi-Fi signal on both a 2.4GHz and
re below.
your W7x in the three available modes:
Wireless Access Point
5GHz Si
gna
l
W7
2.4GHz Signal
Mode
2.4GHz Signal
5GHz Signal
Phone
de of the W7x. The main
that clients can
Panel
Laptop
24
Page 26

W7x User Manual
2 . 4 G H Z A N D 5 G H Z W I R E L E S S
On the W7x main menu, the Wireless section includes the following four
options, which will be described in detail in the sections that follow:
• Network Settings
• Wireless MAC filter
• Advanced
• Client List
NETWORK SETTING S
In the W7x main menu, click “Network Settings” to begin configuring your W7x network settings,
including the following options: wireless mode, channel, channel width, VLAN Tagging, SSID name and Security.
The Network Settings screen appears:
25
Page 27

W7x User Manual
•
802.11 Mode: Choose the setting that corresponds to the type of wireless clients connected to your
network: B, G, N, B/G or B/G/N (on the 2.4GHz) or A, N or A/N (on the 5GHz). If you aren’t sure which
type(s) of clients will access the wireless networks, it’s recommended to choose B/G/N Mixed (on the
2.4GHz) or A/N Mixed (on the 5GHz) for best performance.
NOTE: When set to a mixed mode ALL devices connected to the wireless will use the mode that is
compatible for ALL devices. Example – If you have the 2.4GHz Wireless set to B/G/N Mixed and a devices
connects using G, all devices will be connected at G speed.
•
Channel Mode: By default, the “Channel Mode” is set to 20/40MHZ (when using N). Selecting the 40MHz
channel mode will allow for a greater overall throughput of data but it will also increase the size of the
channel.
NOTE: When using 20MHz channel width on the 2.4GHz radio, channel 6 would bleed into channels 4, 5, 7
and 8 giving you three non-overlapping channels (1, 6 and 11). When using 40MHz channel width on the
2.4GHz radio, channel 6 would bleed into channels 2, 3, 4, 5, 7, 8, 9, and 10 giving you only one channel
without overlap.
•
Channel: In the default setting (Auto), the W7x automatically associates to the channel with best
performance for the wireless network. To select a channel manually, uncheck the “Auto” box and select a
channel from the drop-down list.
•
Detect Best Channel: Click “Scan” to perform an automatic site survey. A new window will open and
display the site survey utility. The W7x will scan the frequency for devices currently broadcasting their
SSID, and then will display them in the table.
•
Current Profiles: You can configure up to eight wireless profiles, per band, each with its own VLAN ID. To
modify and activate a profile check “Enable” and then click “Edit” to configure the settings.
•
SSID: The SSID is the name associated with the W7x WIFI network. By default, the SSID is broadcast on the
network for easy association by clients. An SSID cannot exceed 32 characters.
•
VLAN ID: Type the VLAN ID associated with this profile if the SSID will be broadcasting a VLAN other than
1.
•
802.1Q Tagging: Check if you are using any VLAN other than 1 on this SSID.
26
Page 28

W7x User Manual
•
Suppressed SSID: If you don’t want the SSID to be broadcast, check this box. With the SSID suppressed,
wireless clients will not be able to scan for this network in a site survey and will need to manually enter
the information to connect.
27
Page 29

W7x User Manual
•
Station Separation: If you enable this option, clients that connect to this access point will no longer be
able to communicate directly with each other. (This is also known as layer 2 isolation.)
•
Wireless Security – Type: Security is disabled by default. To enable wireless security, select an option
from the drop-down menu. For detailed information on configuring the security features of the W7x, such
as WPA, WPA-PSK, WPA Mixed, WPA-PSK Mixed, WPA2, and WPA2-PSK, see the next section. When you
select a wireless security option from the drop-down menu, the configuration options for that mode
appear on the page. (For details on setting the security options, see the next section.)
•
Click “Save” to update your changes. The SSID profile window will close and you need to click on “Accept”
under the Network Settings to update the configuration.
NOTE: For any changes to take effect, you must click the “Save Changes” button on the lower left below
the menu. This will reboot the access point, applying the configuration changes.
WIRELESS SECURITY
When you select a wireless security Type, as described at the end of the previous section, the
configuration options for that mode appear (See the figure below). The following sections describe the available
options, depending on the type of security you have chosen.
WEP
In the SSID Profile page, under Wireless Security, choose a wireless security protocol Type from the drop-
down list. For example, if your wireless network uses WEP encryption, choose WEP from the drop-down list. (WEP
is an acronym for Wired Equivalent Privacy, a protocol that offers the same level of security for wireless networks
as for wired networks.)
28
Page 30

W7x User Manual
•
Auth Type: In the drop-down list, choose an authentication method. The options are Open System or
Shared Key.
o
If you choose Open System, any client will be able to authenticate, as long as it conforms to any
MAC address filter policies you have set. In an open system, authentication packets are sent
without encryption.
o
If you choose Shared Key, the W7x sends a challenge text string (unencrypted) to devices that try
to communicate with the access point. The device that requests authentication encrypts the
challenge text and returns it to the access point. If the challenge text is correctly encrypted, the
access point authenticates the requesting device.
If you don’t know which authentication type will be used, it’s recommended to select Auto.
•
Input Type: Select Hex or ASCII.
•
Key Length: Choose a key length. 64-bit hex keys require 10 characters, and 128-bit keys require 26
characters. (A hexadecimal key is in the format of a number between 0 through 9, and a letter between A
and F.)
•
Default Key: You can specify 1-4 keys for up to four networks. Type the number of the key to be used by
default.
•
Keys 1-4: You can enter up to four unique WEP keys.
•
Click Save to apply the changes. The SSID profile window will close and you need to click on Accept, under
the Network Settings window, for the changes to take effect.
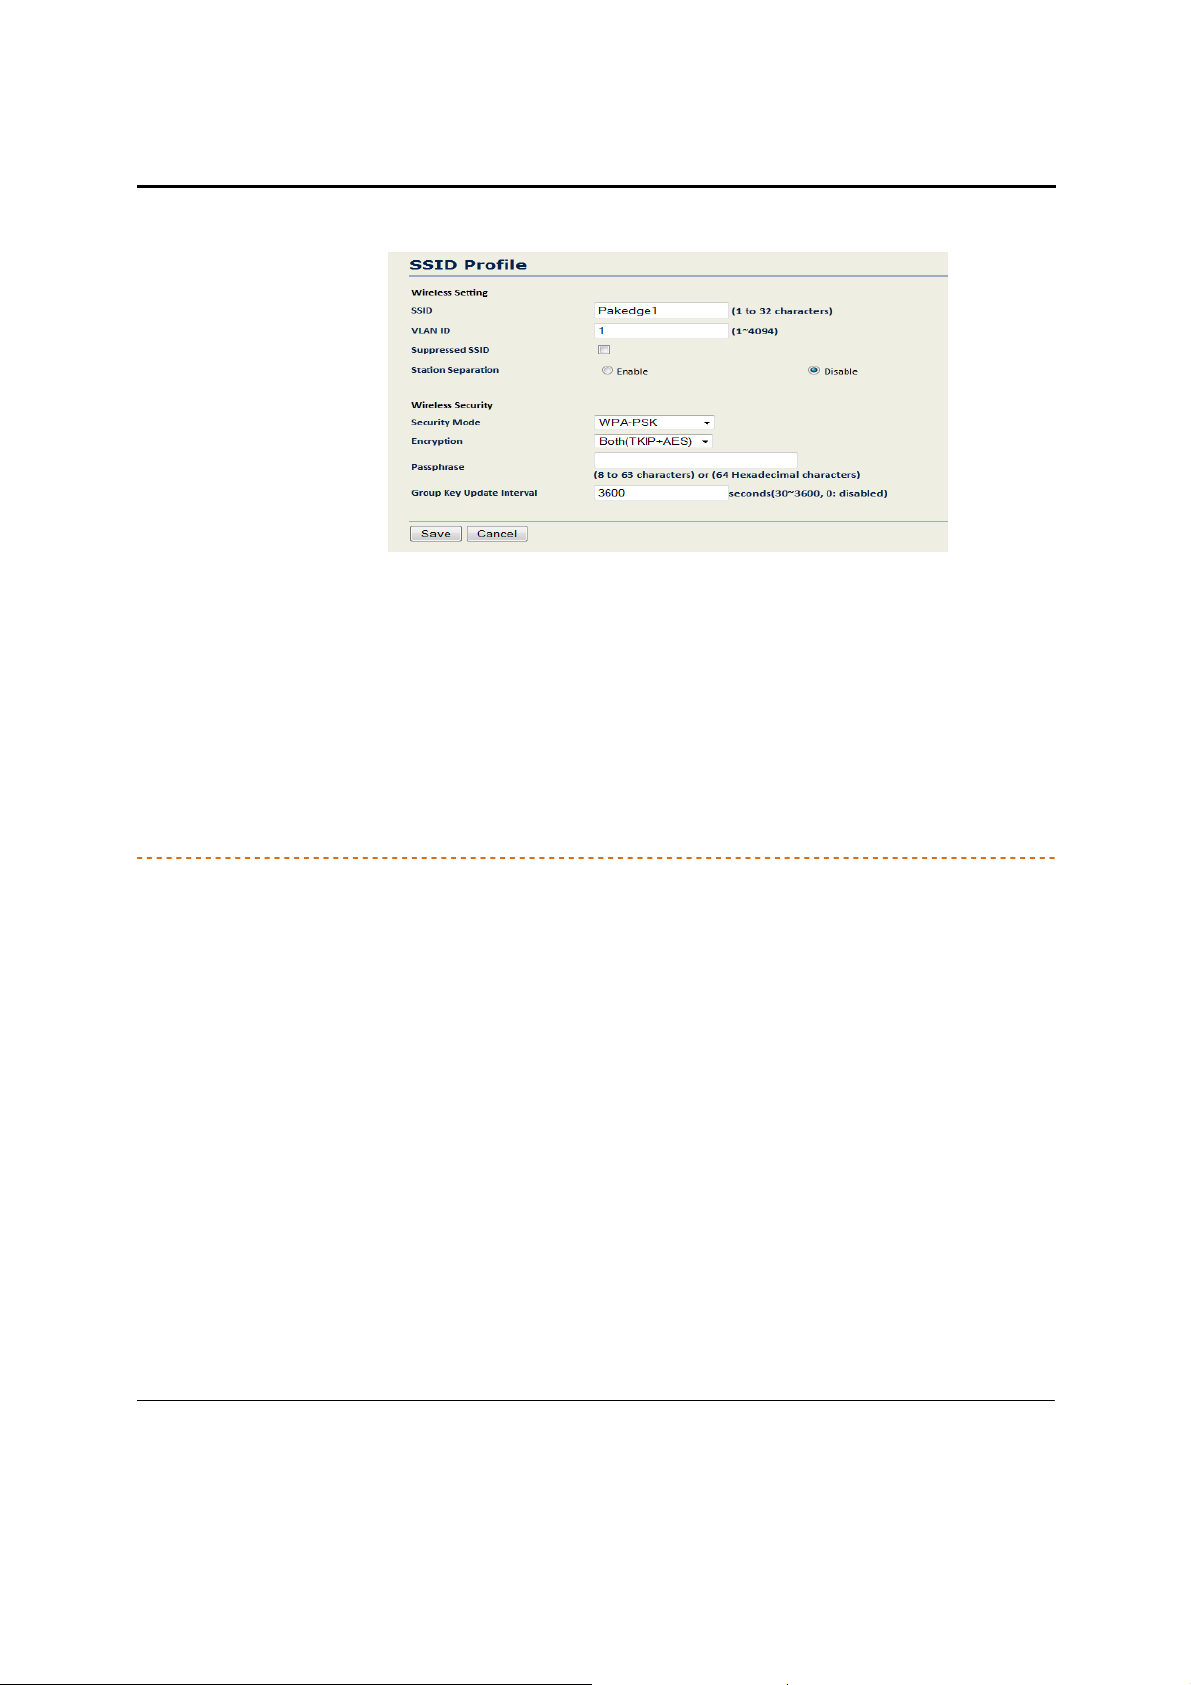
WPA-PSK, WPA2-PSK
When you select a wireless security Type, the configuration options for that mode appear.
WPA (Wi-Fi Protected Access) improves on the security features of WEP (Wired Equivalent Privacy). WPA
technology can work with existing Wi-Fi products that are enabled with WEP. WPA improves data encryption using
the Temporal Key Integrity Protocol (TKIP), which scrambles the encryption keys using a hashing algorithm, and
adds integrity checking to ensure that keys haven’t been tampered with.
If your wireless network uses WPA security with a pre-shared key (PSK), select WPA-PSK or WPA2-PSK from the
Type drop-down list. If your network doesn’t use a PSK, see the following section.
29
Page 31
W7x User Manual
•
Encryption: In the drop-down list, select the type of encryption your wireless network uses: TKIP, AES or
both. For Apple products, AES works best.
•
Passphrase: In the text box, type a passphrase of 8-63 characters to be shared by the Access Points and
clients in your network.
•
Group Key Update Interval: In the text box, type the number of seconds the Access Point will wait to
probe the client for a passphrase.
•
Click “Save” to apply the changes. The SSID profile window will close and you need to click on “Accept”,
under the Network Settings window, for the changes to take effect.
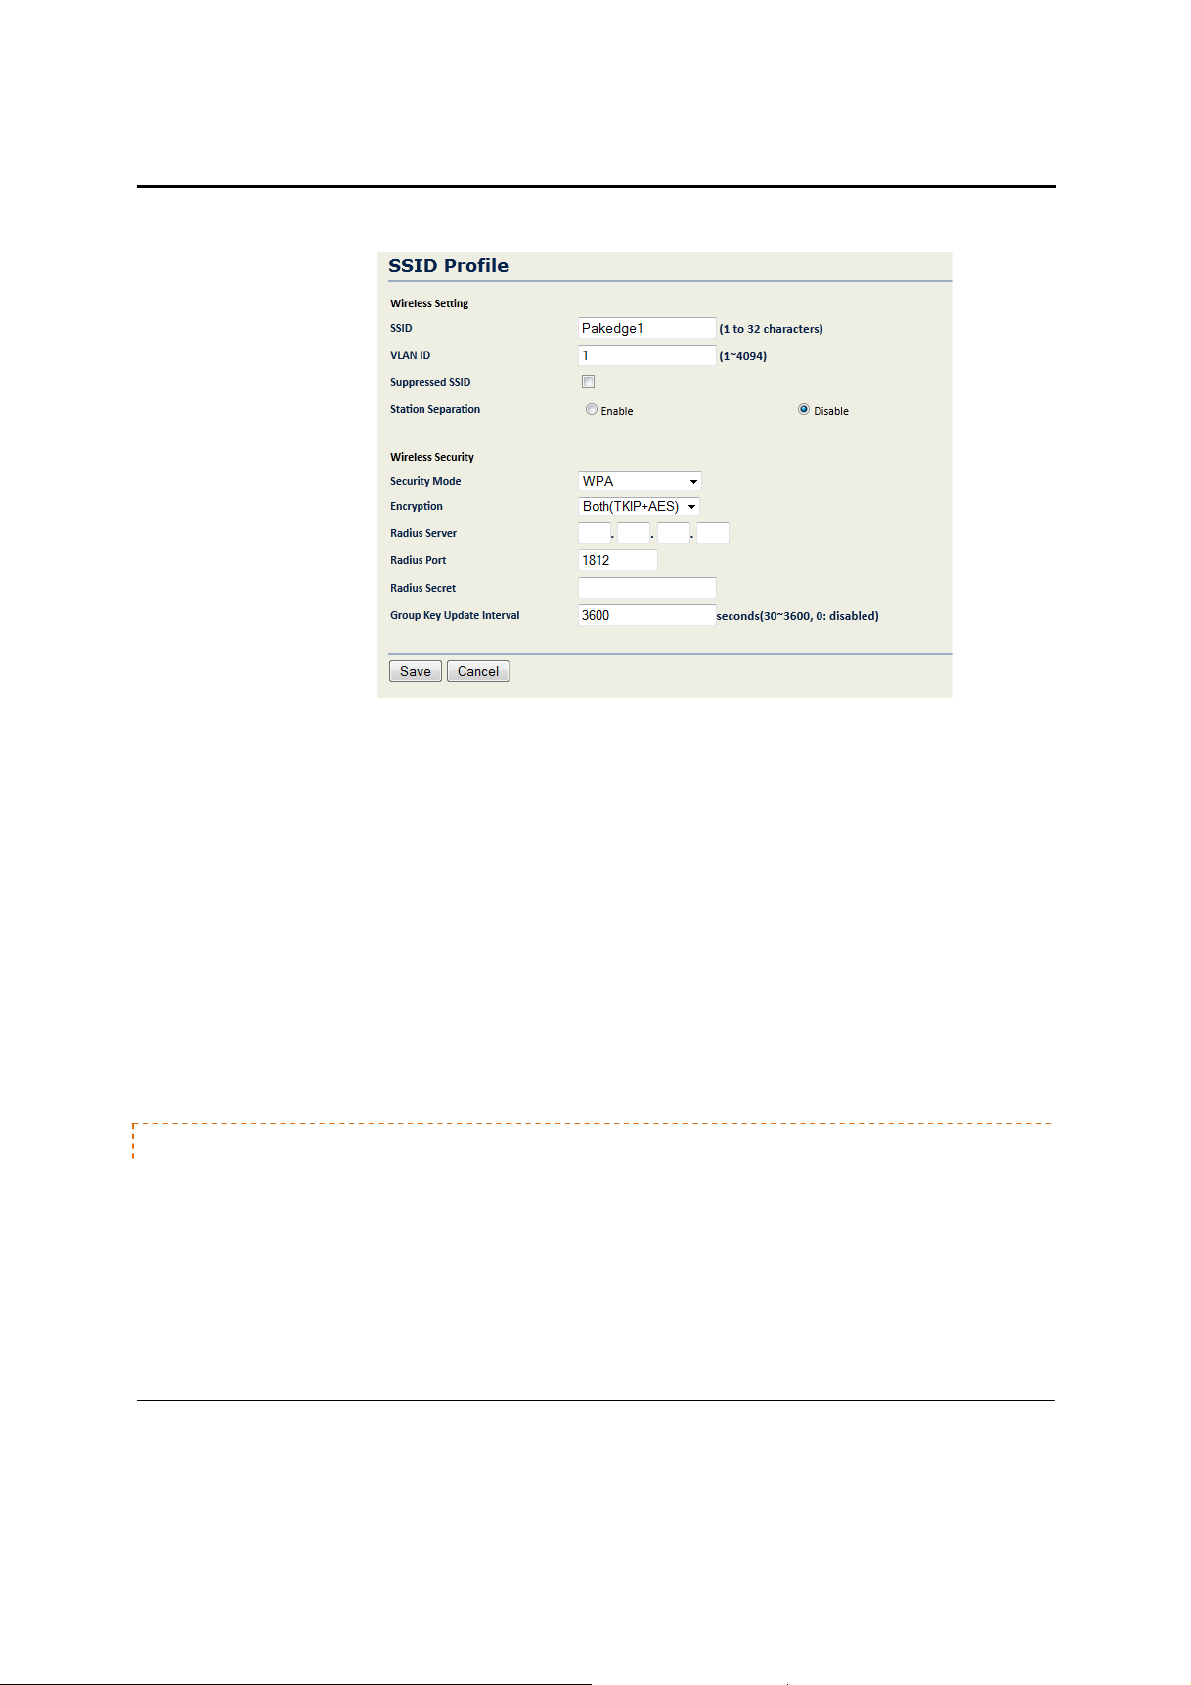
WPA, WPA2
When you select a wireless security Type in the SSID Profile page, the configuration options for the
security mode you chose appear at the bottom of the page.
If your wireless network uses WPA security without a pre-shared key (PSK) (also known as Enterprise), select WPA
or WPA2 from the Type drop-down list. The options for WPA and WPA2 appear at the bottom of SSID Profile page.
30
Page 32
W7x User Manual
•
Encryption: In the drop-down list, select the type of encryption your wireless network uses: TKIP, AES or
both. For Apple products, AES works best.
•
RADIUS Server: Type the IP address of the RADIUS server.
•
RADIUS Port: Type the port number of the RADIUS server. (The most common default is 1812.)
•
RADIUS Secret: Type the shared password of the RADIUS server.
•
Group Key Update Interval: Type the number of seconds (between 30-3600) that the Access Point should
wait before probing the client for the secret group key.
•
Click Save to apply the changes. The SSID profile window will close and you need to click on Accept under
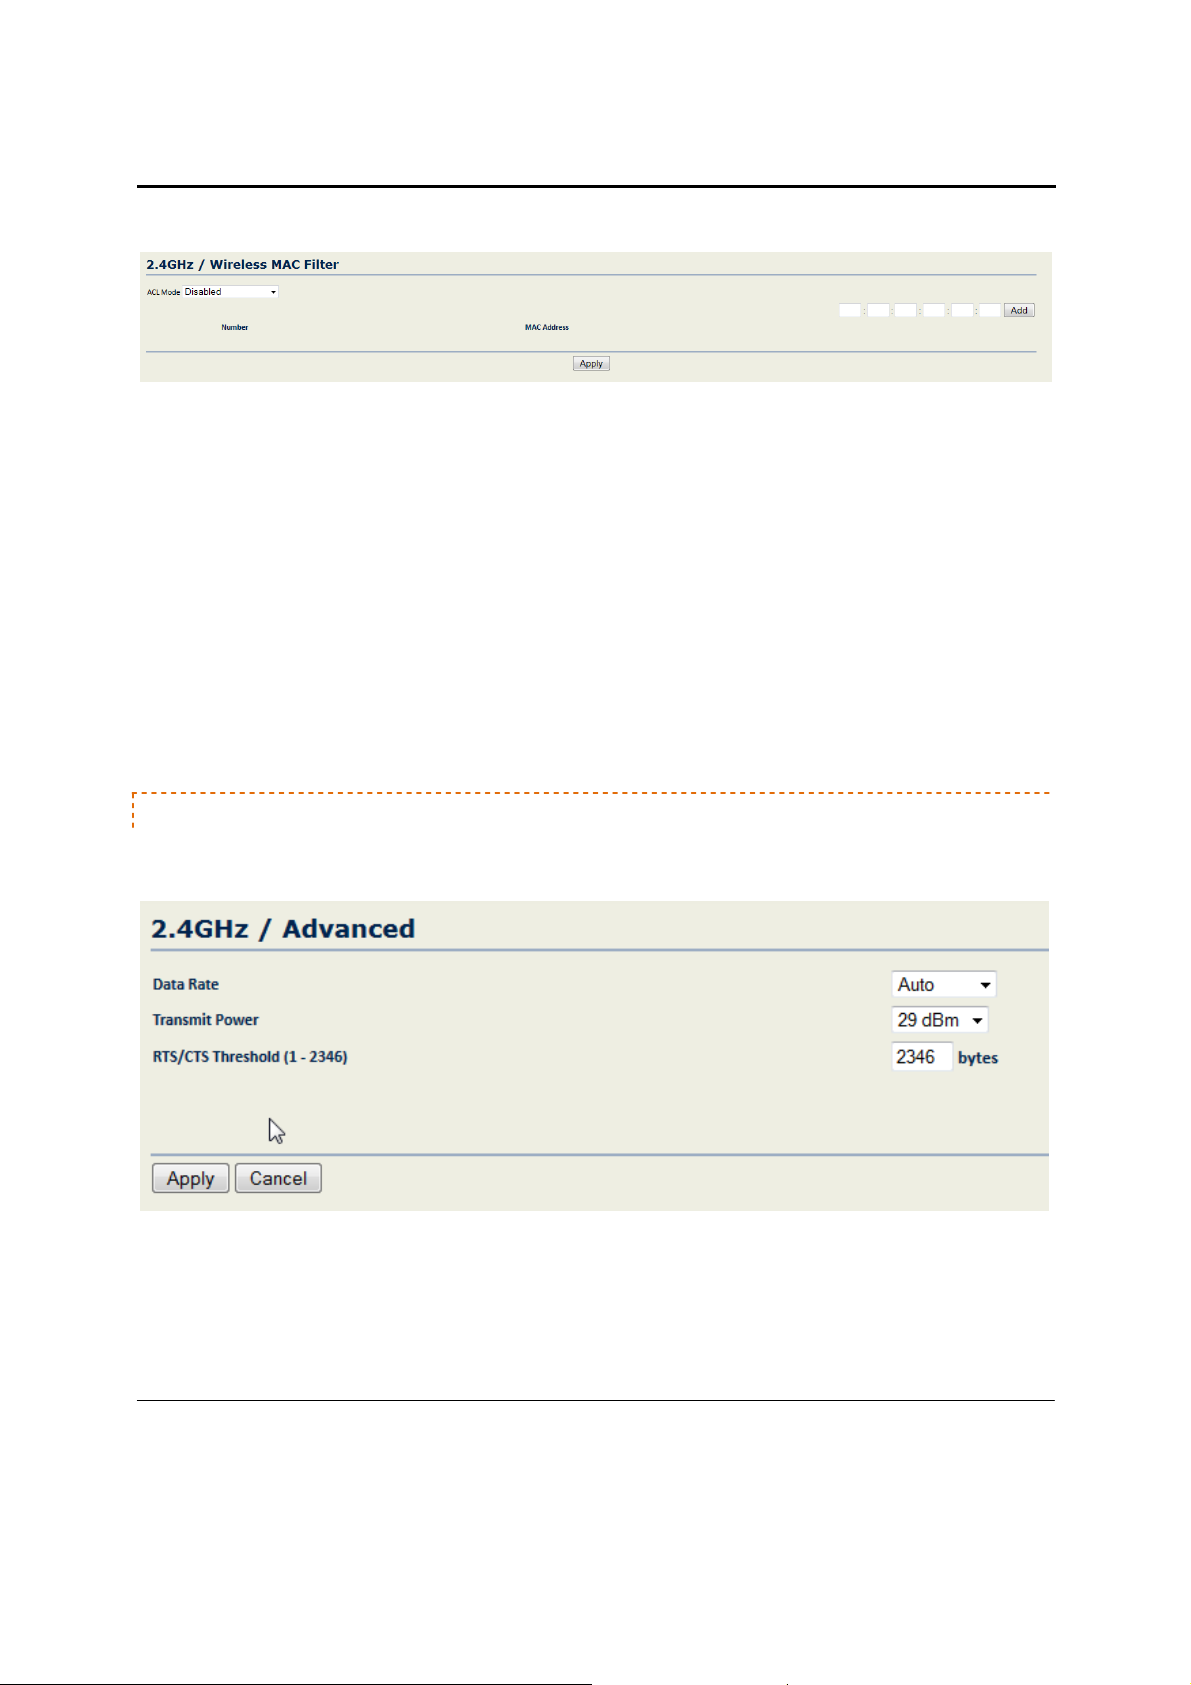
WIRELESS MAC FILTER
appears for you to allow or block access to the network by clients with specific MAC addresses.
the Network Settings window for the changes to take effect.
Under the W7x main menu, in the Wireless section, click MAC Filter. The Wireless MAC Filter page
31
Page 33
W7x User Manual
•
ACL Mode: To block a client from associating with the W7x, select Disabled from the drop-down list. Or to
deny or allow access by clients with a MAC that you type in a list, select Allow MAC in the List or Deny
MAC in the List in the drop-down list.
o If you select Allow MAC in the List, only clients whose MAC addresses are on the list in the table
will be able to access the network, and other clients will be blocked.
o If you select Deny MAC in the List, clients whose MAC addresses are on the list will be unable to
access the network, but all other clients will be granted access.
•
MAC Address: In the text box, type a client’s MAC address and click “Add” to add the client to the list.
•
The table at the bottom of the page lists MAC addresses you have blocked or allowed. To delete selected
MAC addresses, or delete all the addresses in the table, select the address (es) in the list and click Delete.
•
Click Accept to save your changes.
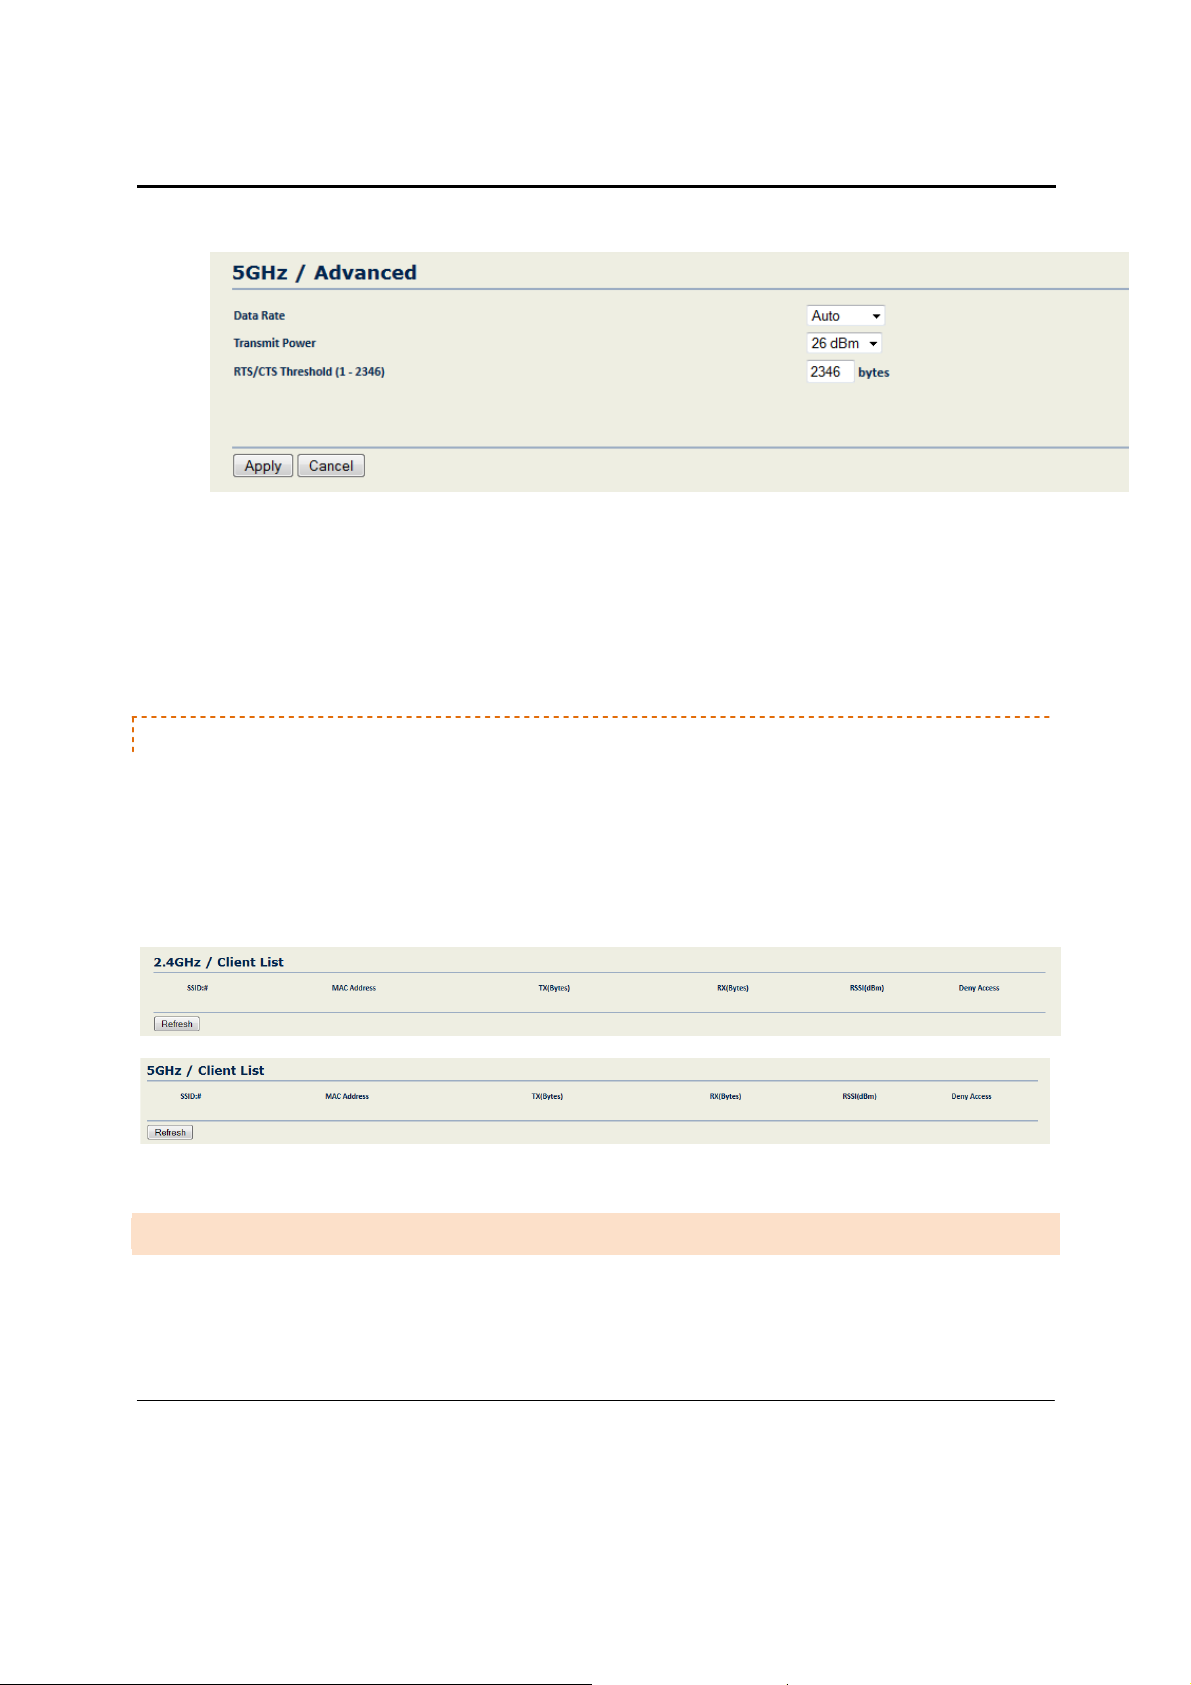
ADVANCED
You can configure the performance of your wireless network by changing the Data Rate, Transmit Power,
and RTS/CTS Threshold.
32
Page 34
W7x User Manual
•
Data Rate: From the drop-down list, choose the data transmission rate for the device (It is set to Auto by
default.)
•
Transmit Power: The power needed depends on the
distance of the devices in your wireless
network. From the drop-down list, select the desired power. You can use this feature to limit the
coverage area of the wireless network.
•
RTS/CTS Threshold: Type the packet size threshold for RTS/CTS (Request to Send/Clear to send) to occur.
CLIENT LIST
The Client List menu appears only when the W7x is operating under Access Point mode or repeater mode. This
menu will show all the devices connected to the W7x. From the Client List, you can click on “Block” and this will
prevent the device from connecting.
NOTE: If you want to block a device from connecting on both the 2.4GHz and 5GHz band, then you must click on
“Block” under both the 2.4GHz and 5GHz client list.
C L I E N T B R I D G E M O D E
NOTE: The options in the main menu of the W7x change depending on the current operating mode of the
W7x. The main menu options discussed in this section are those available in Client Bridge mode.
33
Page 35

W7x User Manual
In this mode, you can connect one W7x to a client by its Ethernet port, as shown below. In Client Bridge Mode, the
W7x can receive a wireless signal from an Access Point and send the signal through its Ethernet port to a client.
Client Bridge Mode
Ethernet
Summary of configuration for Client Bridge Mode
1. First setup the Wireless Access Point that that will be broadcasting to the Client Bridge. This Wireless
Access Point is the one broadcasting the Wireless Network you wish to connect the client device
to. Setup as usual- i.e. SSID, IP Address, Channel, Security, etc.
La ptop
2. Connect the W7x to the client and login via your Web Browser.
3. Configure the W7x by selecting Client Bridge Mode from the Properties page under the System
header.
NOTE: Either the 2.4GHz or the 5GHz band can be in Client Bridge mode. They cannot both be in
Client-Bridge mode. That’s why when you set one of the Bands to Client Bridge, the only available
option for the other is Access Point mode only.
4. Under Wireless (2.4GHz or 5GHz, depending on which band was selected to be in Client Bridge),
click on Network Settings. If you know the SSID you want the client-bridge to associate with, you can
type it under “Specify the static SSID”. For easier setup, click on “Site Survey” and a list of available
SSID’s will show up and you can select the appropriate one.
5. Configure the “Wireless Security” to match those on the SSID the client bridge is associated with.
6. Click Accept to apply the changes.
34
Page 36
W7x User Manual
7. Finish the configuration of the W7x in Client Bridge Mode by assigning it a unique IP address if it is
not connected to a DHCP server.
8. You should be able to verify performance from the client device by sending a ping request to the IP
address of the Wireless Access Point or by accessing the GUI through your Web Browser at the same
address.
For more detailed setup information on setting up the W7x in Client-Bridge mode see below.
2 . 4 G H Z A N D 5 G H Z W I R E L E S S
With the W7x operating in Client Bridge mode, the main menu shows two options under
the Wireless section:
•
Network Settings
•
Advanced
•
Connection Status
35
Page 37
W7x User Manual
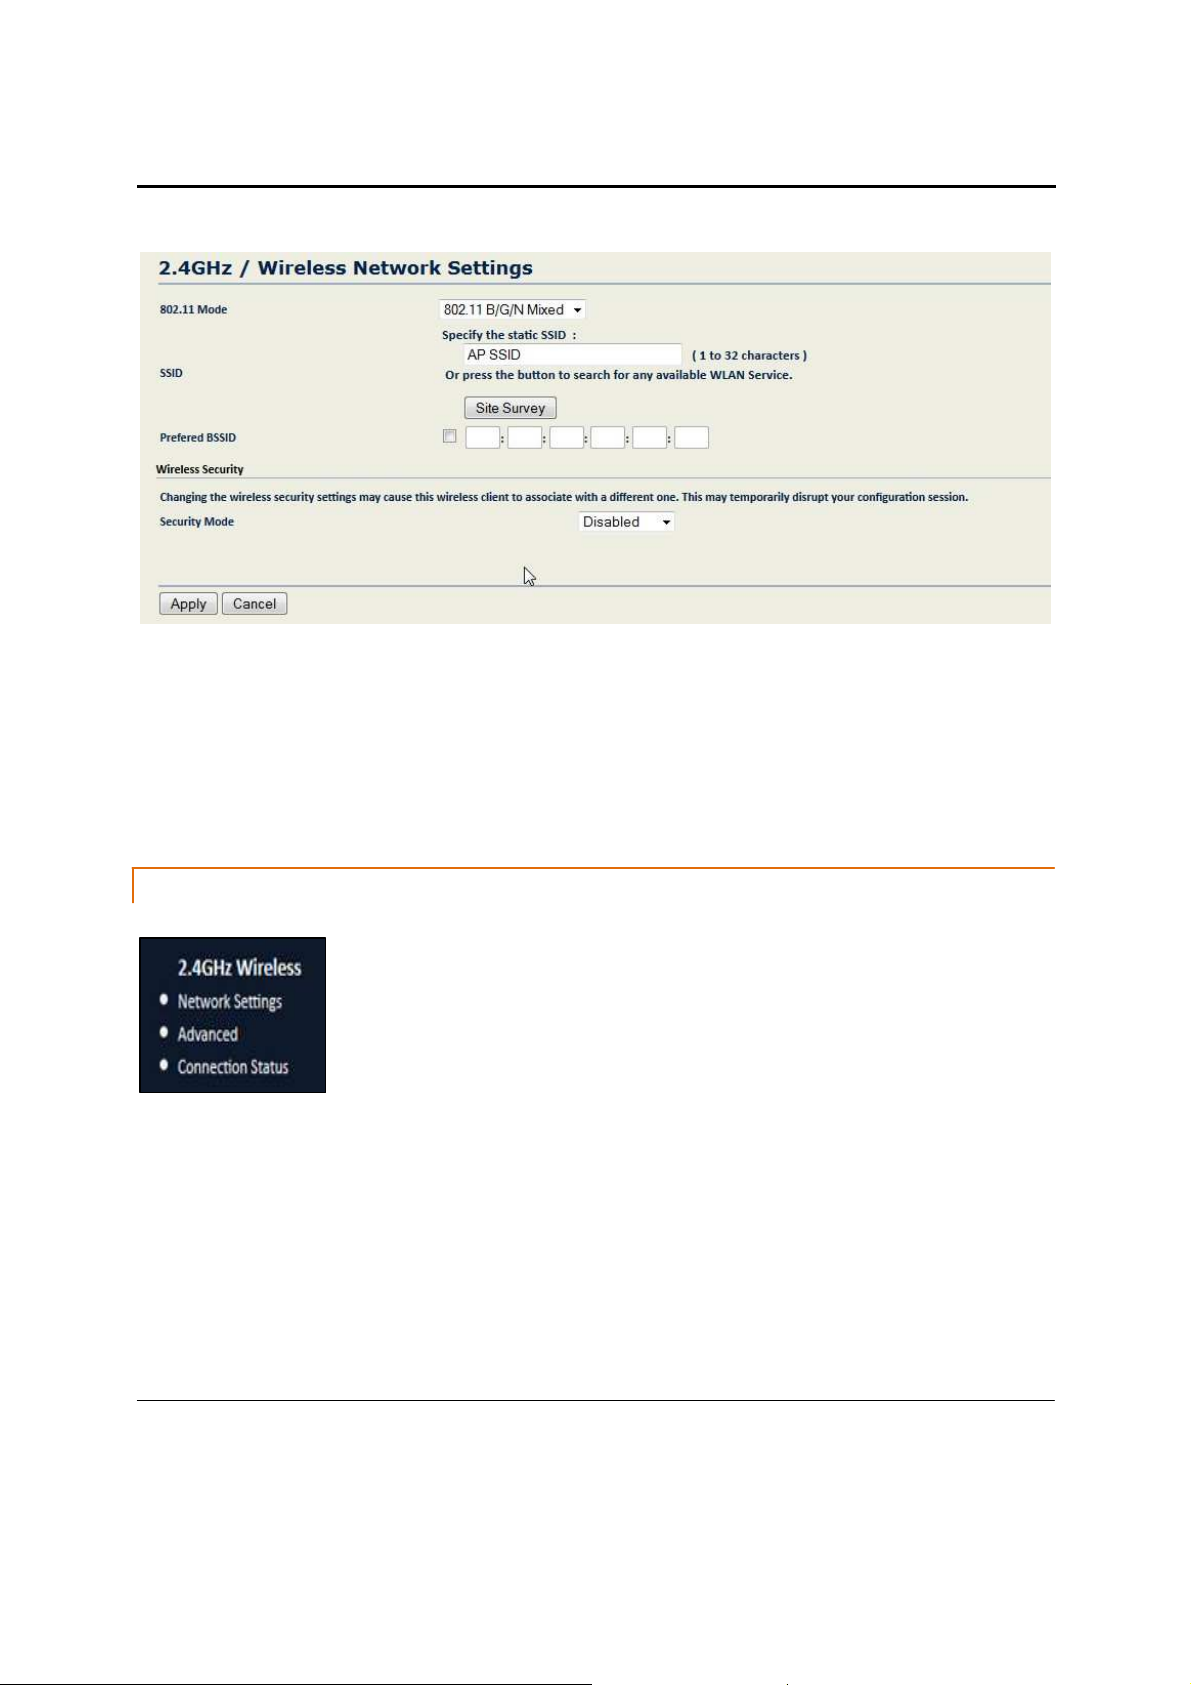
NETWORK SETTING
•
802.11 Mode: Choose the setting that corresponds to the type of wireless clients connected to your
network: B, G, N, B/G or B/G/N (on the 2.4GHz) or A, N or A/N (on the 5GHz). If you aren’t sure which
type(s) of clients will access the wireless networks, it’s recommended to choose B/G/N Mixed (on the
2.4GHz) or A/N Mixed (on the 5GHz) for best performance.
NOTE: When set to a mixed mode ALL devices connected to the wireless will use the mode that is
compatible for ALL devices. Example – If you have the 2.4GHz Wireless set to B/G/N Mixed and a devices
connects using G, all devices will be connected at G speed.
•
SSID: If you know the SSID you want the client bridge to associate with, you can type it under Specify the
static SSID. For easier setup, click on “Site Survey” and a list of available SSID’s will show up and you can
select the appropriate one.
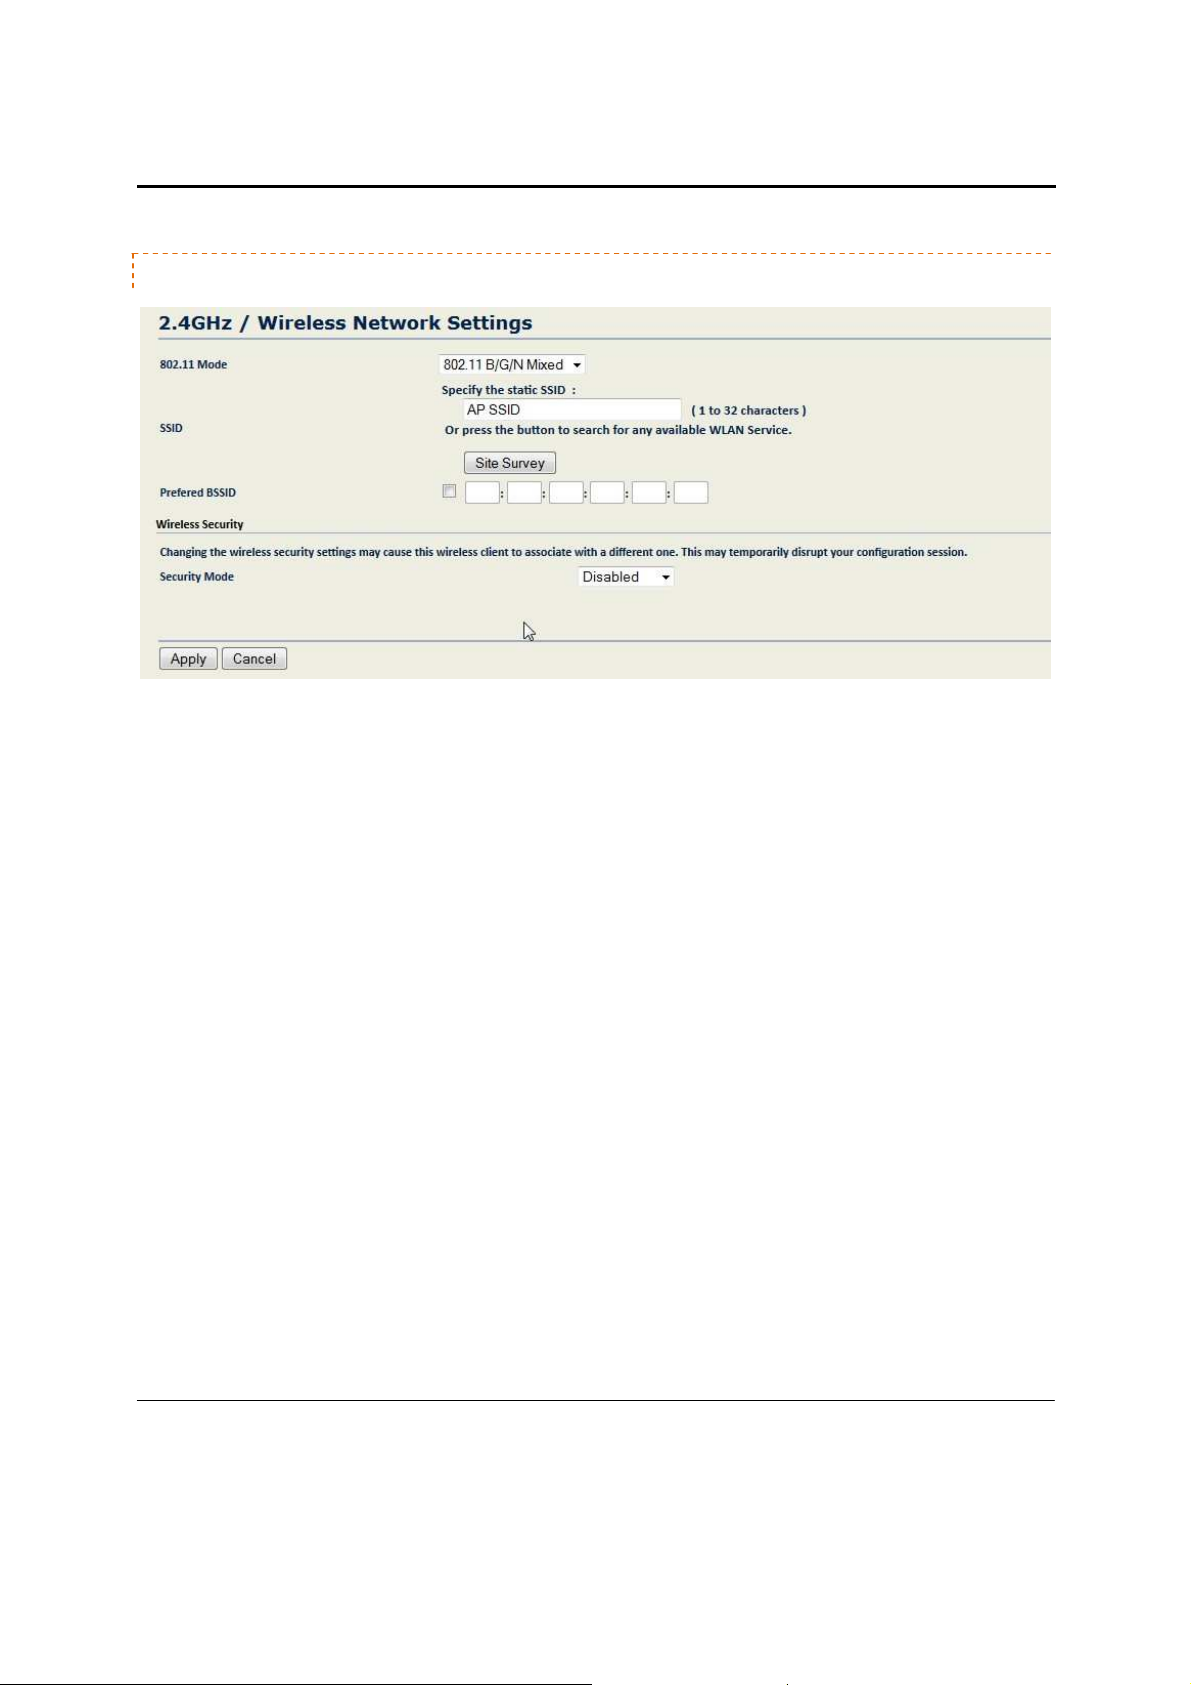
•
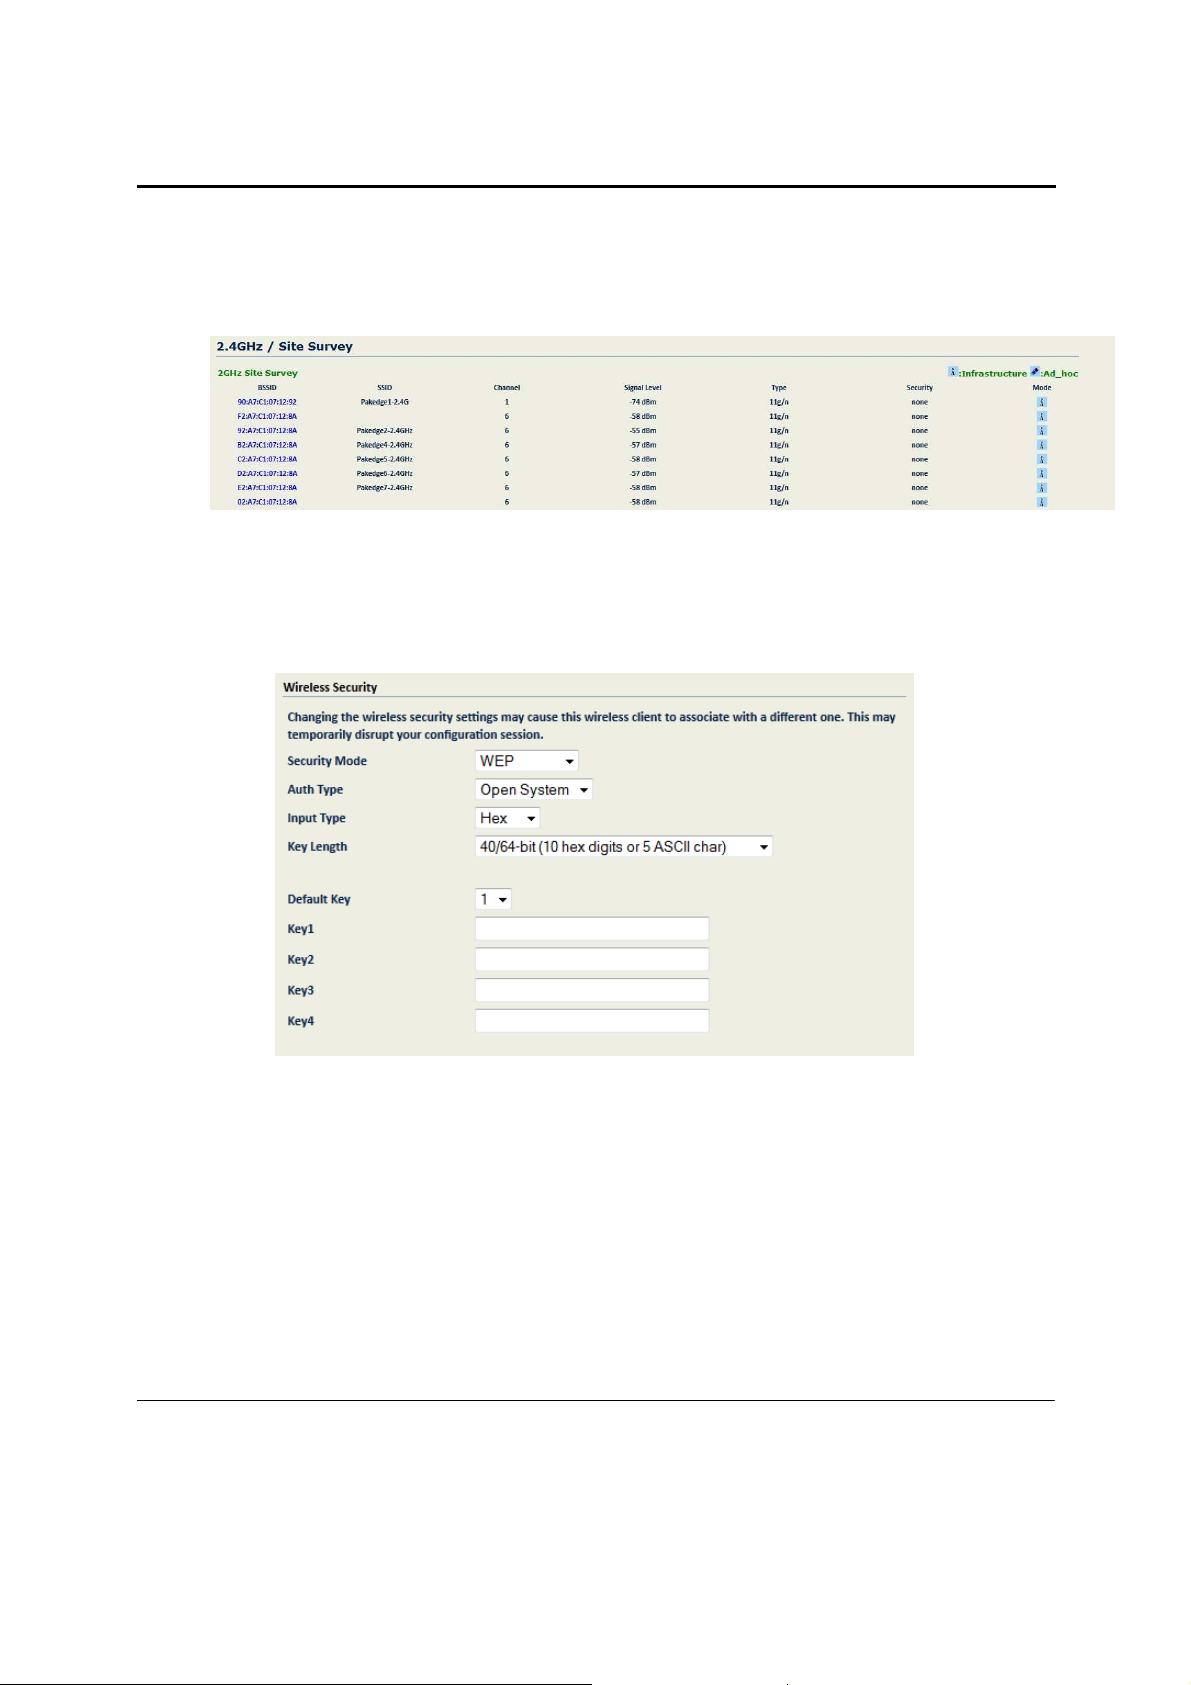
Site Survey: Click “Site Survey” to perform an automatic site survey. A new window will display the results
of the site survey. (See the figure below.) The W7x will scan the 2.4GHz frequency for devices currently
broadcasting their SSIDs, and display them in the 2.4GHz Site Survey table shown below. In the table, click
the BSSID of the Access Point you wish to connect to.
•
Click “Refresh” to re-scan the frequency.
36
Page 38

W7x User Manual
•
Preferred BSSID: If you want the W7x to associate based on MAC Address instead of SSID, select the
“Preferred BSSID” checkbox.
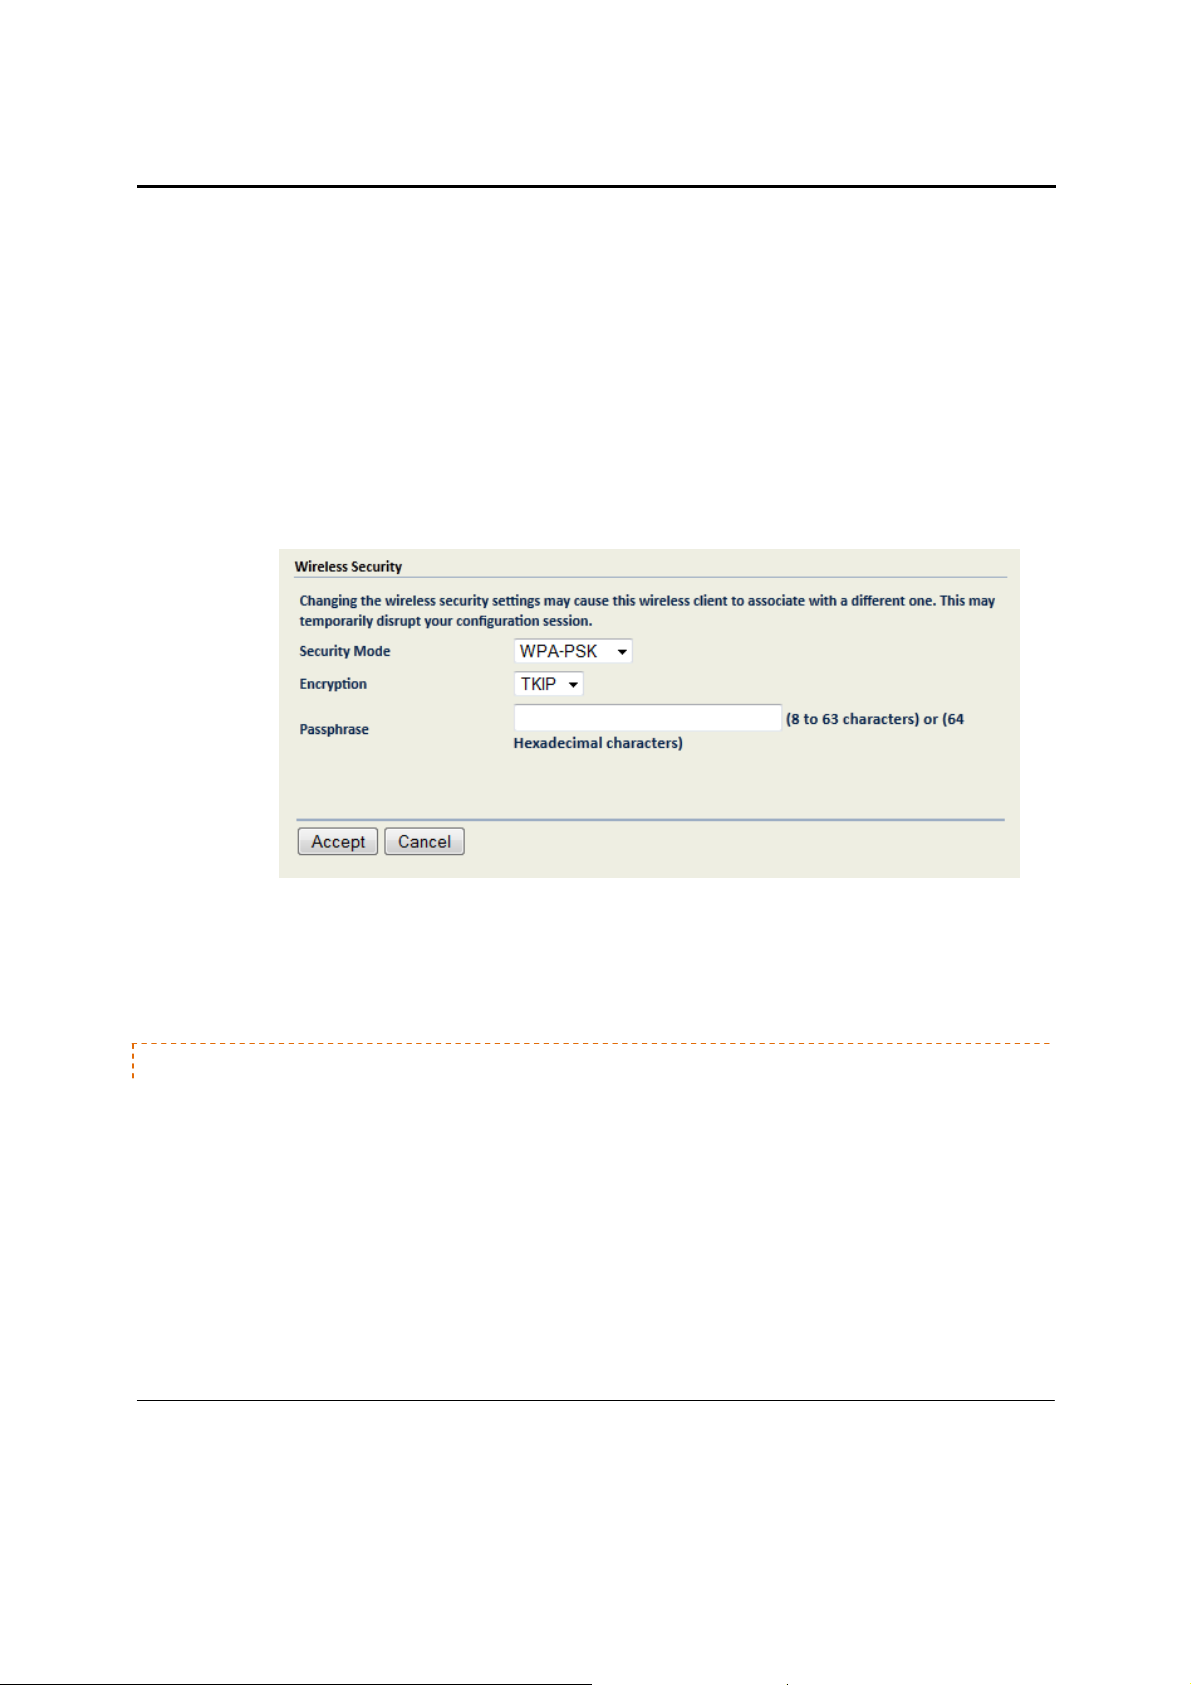
•
Wireless Security: Configure the security settings to match those on the SSID the client bridge is
associated with.
•
Security Mode: If your wireless network uses WEP encryption, select WEP from the drop-down list. The
Wireless Security page displays options for WEP encryption.
•
Auth Type: In the drop-down list, select an authentication method. The options are Open System, Shared
Key, and Auto.
o If you choose Open System, any client will be able to authenticate, as long as it conforms to any
MAC address filter policies you’ve set. Authentication packets are transmitted
o Choosing Shared Key enables the W7x to send an unencrypted challenge text string to a device
that attempts to communicate with the W7x. The device requesting authentication will encrypt
the challenge text and return it to the W7x. If the challenge text is correctly encrypted, the W7x
allows the requesting device to authenticate.
o If you are unsure which authentication type to use, it’s recommended to choose
•
Input Type: From the drop-down list, select Hex or ASCII.
unencrypted.
Auto.
37
Page 39
W7x User Manual
•
Key Length: From the drop-down list, select a key format. 64bit-hex keys require 10 characters; 128-bit
keys require 26 characters. A hex key is formatted in hexadecimal notation as a number between 0-9
followed by a letter between A-F.
•
Default Key: From the drop-down list, select the number of the key to be used; you can define four keys
(Key1…Key4) in the text boxes.
•
Key 1-4: Enter up to four unique WEP keys.
•
Click Accept to apply the changes. The SSID profile window will close and you need to click on Accept
under the Network Settings window for the changes to take effect.
•
Security Mode: If your wireless network uses a WPA pre-shared key, select WPA-PSK or WPA2-PSK from
the drop-down list.
•
Encryption: In the drop-down list, select the type of encryption your wireless network uses: TKIP or AES.
•
Passphrase: In the text box, type a passphrase of 8-63 characters that will be shared among the Access
Points and clients.
•
Click Apply to save your changes.
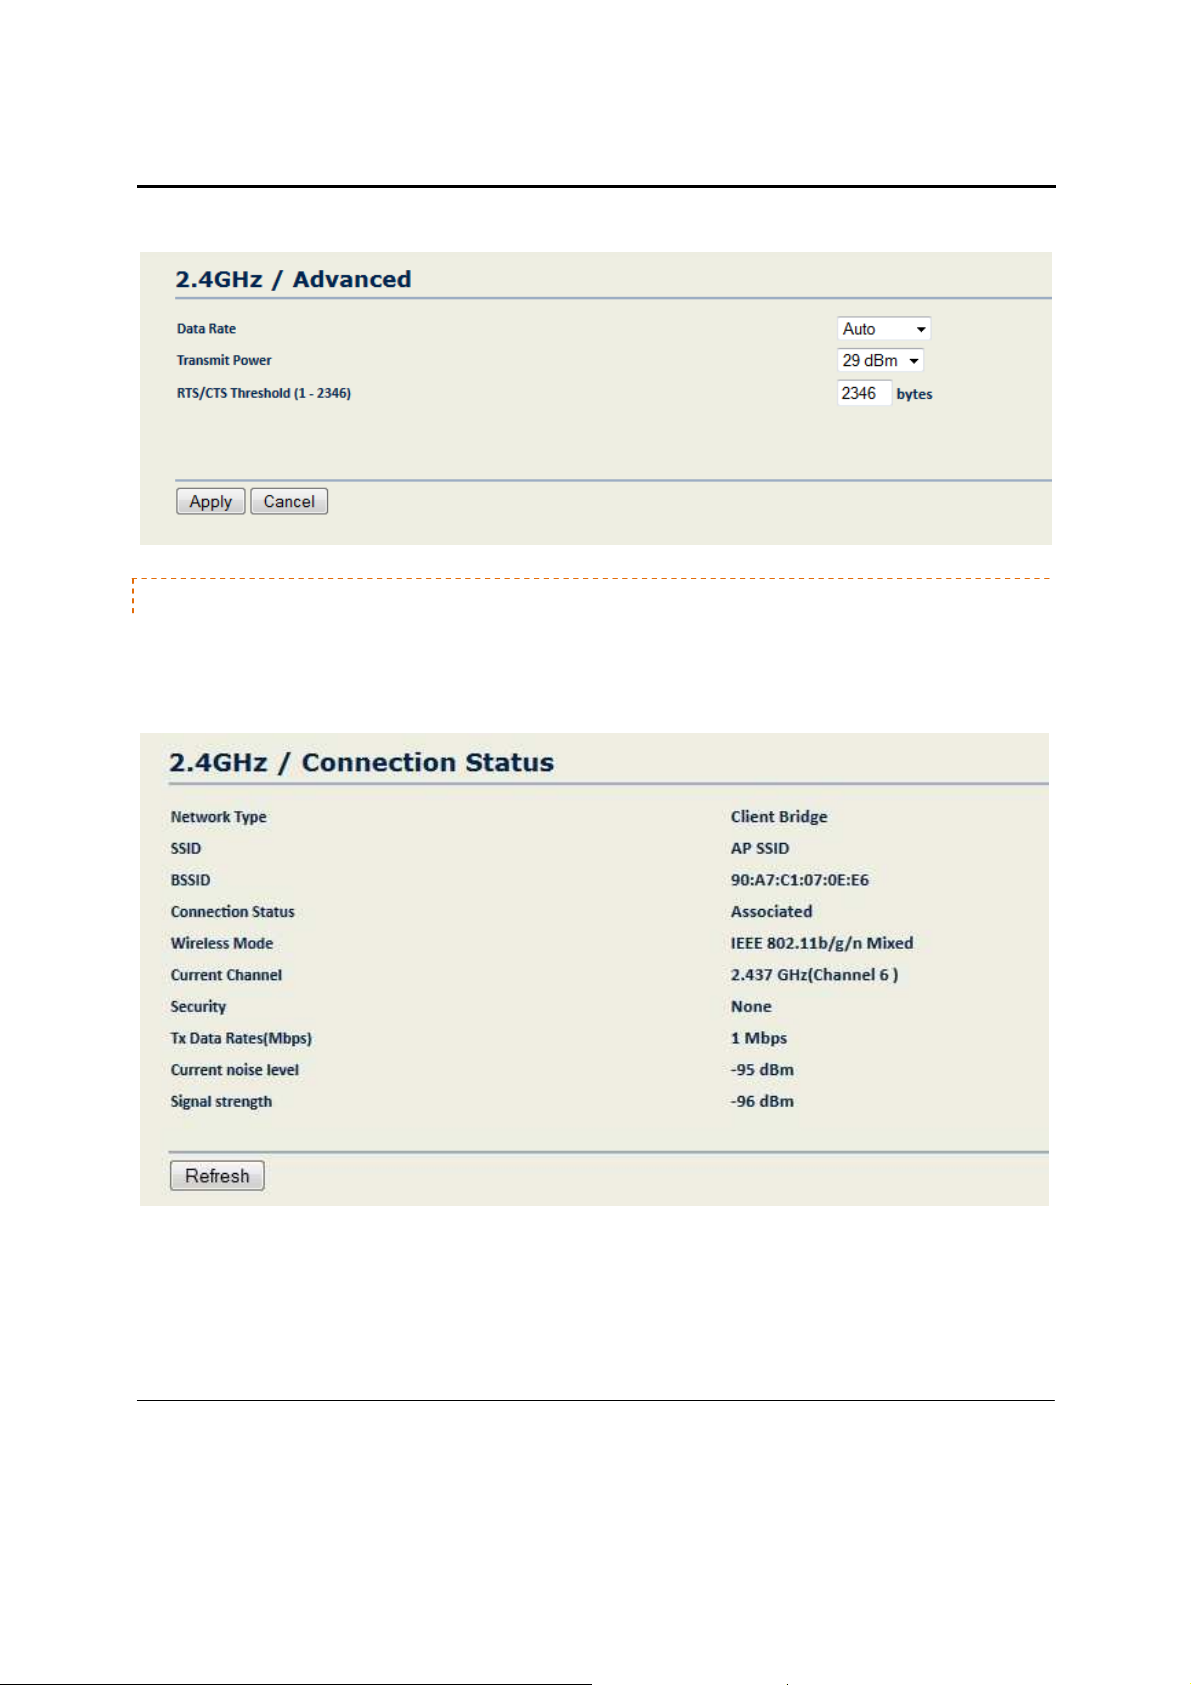
ADVANCED
You can configure the performance of your wireless network by changing the Data Rate, Transmit Power, and
RTS/CTS Threshold.
38
Page 40
W7x User Manual
CONNECTION STATUS
The Connection Status menu appears only when the W7x is operating under Repeater mode or Client-Bridge
mode.
39
Page 41
W7x User Manual
R E P E A T E R M O D E
NOTE: The options in the main menu of the W7x change depending on the current operating mode of the W7x.
The main menu options discussed in this chapter are those available in Repeater mode.
In Repeater mode, the W7x can associate with any Wireless Access Point, as shown in the figure below.
Any Access Point
Ethernet
Summary of configuration for Repeater Mode:
1. First setup the initial Access Point that will be broadcasting the Wireless Network you wish to associate
the W7x with. Setup as usual- i.e. SSID, IP Address, Channel, Security, etc. For simplicity, we will refer to
this AP as AP-1.
2. Connect the 2
3. Configure AP-2 by selecting Repeater Mode from the Properties page under the System header.
4. Now configure the SSID, Channel, and Security settings to match those of AP-1.
5. Finish the configuration of the W7x in Repeater Mode by assigning it a unique IP address, if it is not
connected to a DHCP server.
nd
AP, which we will call AP-2 to the LAN and login via your Web Browser.
Rebroadcast
6. You should be able to verify performance from the client device by sending a ping request to the IP
address of the W7x or accessing the GUI through your Web Browser at the same address.
For more detailed setup information for setting up the W7x in Repeater mode see below.
40
Page 42

W7x User Manual
2 . 4 G H Z A N D 5 G H Z W I R E L E S S
In Repeater mode, the W7x main menu has the following options, to be described in detail
in the sections that follow.
•
Network Settings
•
Wireless MAC Filter
•
Advanced
•
Client List
•
Connection Status
NETWORK SETTINGS
•
802.11 Mode: Choose the setting that corresponds to the type of wireless clients connected to your
network: B, G, N, B/G or B/G/N (on the 2.4GHz) or A, N or A/N (on the 5GHz). If you aren’t sure which
type(s) of clients will access the wireless networks, it’s recommended to choose B/G/N Mixed (on the
2.4GHz) or A/N Mixed (on the 5GHz) for best performance.
•
NOTE: When set to a mixed mode ALL devices connected to the wireless will use the mode that is
compatible for ALL devices. Example – If you have the 2.4GHz Wireless set to B/G/N Mixed and a devices
connects using G, all devices will be connected at G speed.
•
SSID: SSID is the name the W7x will broadcast over the wireless network to identify the Access Point. You
can set the SSID in either of two ways: type a name in the “Specify the static SSID:” text box (maximum
length 32 characters), or click “Site Survey” to perform an automatic Site Survey. A new window will
display the site survey utility. The W7x will scan the 2.4GHz frequency for devices currently broadcasting
41
Page 43
W7x User Manual
their SSID and display them in the 2.4GHz Site Survey table (see figure below). In the table, click the BSSID
of the Access Point you wish to connect to.
•
Click “Refresh” to re-scan the frequency.
•
Preferred BSSID: If you want the W7x to associate based on MAC Address instead of SSID, select the
checkbox and type a MAC address in the spaces provided.
•
Security Mode: If your wireless network uses WEP encryption, select WEP from the drop-down list. The
Wireless Security page will display options for WEP encryption.
•
Auth Type: In the drop-down list, select an authentication method. The options are Open System, Shared
Key, and Auto.
o If you choose Open System, any client will be able to authenticate, as long as it conforms to any
MAC address filter policies you’ve set. Authentication packets are transmitted
o Choosing Shared Key enables the W7x to send an unencrypted challenge text string to a device
that attempts to communicate with the W7x. The device requesting authentication will encrypt
the challenge text and return it to the W7x. If the challenge text is correctly encrypted, the W7x
allows the requesting device to authenticate.
o If you are unsure which authentication type to use, it’s recommended to choose
•
Input Type: From the drop-down list, select Hex or ASCII.
unencrypted.
Auto.
42
Page 44

W7x User Manual
•
Key Length: From the drop-down list, select a key format. 64bit-hex keys require 10 characters; 128-bit
keys require 26 characters. A hex key is formatted in hexadecimal notation as a number between 0-9
followed by a letter between A-F.
•
Default Key: From the drop-down list, select the number of the key to be used; you can define four keys
(Key1…Key4) in the text boxes.
•
Key 1-4: Enter up to four unique WEP keys.
•
Click Accept to apply the changes. The SSID profile window will close and you need to click on Accept
under the Network Settings window for the changes to take effect.
•
Security Mode: If your wireless network uses a WPA pre-shared key, select WPA-PSK or WPA2-PSK from
the drop-down list.
•
Encryption: In the drop-down list, select the type of encryption your wireless network uses: TKIP or AES.
•
Passphrase: In the text box, type a passphrase of 8-63 characters that will be shared among the Access
Points and clients.
•
Click Accept to apply the changes. The SSID profile window will close and you need to click on Accept
under the Network Settings window for the changes to take effect.
WIRELESS MAC FI LTER
On the W7x’s main menu, in the Wireless section, click Wireless MAC Filter. The Wireless MAC Filter page
appears where you can allow or block access to the network by clients with specific MAC addresses.
•
ACL Mode: To block a client from associating with the W7x, or to deny or allow access by a client with a
MAC on a list, select the appropriate option from the drop-down list.
43
Page 45

W7x User Manual
o If you select Allow MAC in the List, only clients whose MAC addresses are on the list in the table
will be able to access the network; other clients will be blocked.
o If you select Deny MAC in the List, clients whose MAC addresses are on the list will be unable to
access the network; but all other clients will be granted access.
•
MAC Address: In the text boxes, type a client’s MAC address, then click Apply to add the client to the list.
•
The table at the bottom of the dialogue lists the MAC address you have blocked or allowed. To delete
selected MAC addresses or delete all the addresses in the table, select the address (es) in the list and click
Delete.
•
Click Apply to save your changes.
ADVANCED
You can configure the performance of your wireless network by changing the Data Rate, Transmit Power, and
RTS/CTS Threshold.
CLIENT LI ST
The Client List menu appears only when the W7x is operating under Access Point mode or repeater mode. This
menu will show all the devices connected to the W7x. From the Client List, you can click on “Block” and this will
prevent the device from connecting.
NOTE: If you want to block a device from connecting on both the 2.4GHz and 5GHz band, then you must click on
“Block” under both the 2.4GHz and 5GHz client list.
44
Page 46

W7x User Manual
CONNECTION STATUS
The Connection Status menu appears only when the W7x is operating under Repeater mode or Client-
Bridge mode.
L O G & M A N A G E M E N T
The Log & Management menu has the following settings:
•
Diagnostics
•
VLAN Management
•
Wireless Traffic Shaping
•
Band Steering
•
System Log
•
Log
•
LED Options
45
Page 47

W7x User Manual
D I A G N O S T I C S
If you experience network errors or unresponsive devices, the W7x diagnostic functions can help you determine
the cause. To access the diagnostic functions, on the W7x main menu, in the Log & Management section, click
Diagnostics. The Diagnostics page appears.
P I N G T E S T P A R A M E T E R S
•
Target IP: Type the IP Address of the device to check.
•
Ping Packet Size: Type the size of the ping packets (In Bytes).
•
Number of Pings: Type the number of ping attempts.
•
Click Start Ping to start the test.
T R A C E R O U T E T E S T P A R A M E T E R S
A Traceroute test can help you identify obstacles you may have in the network. The Traceroute text maps the path
that packets take between the W7x and the target device. To run a Traceroute test, type the Traceroute target and
click “Start Traceroute” to being the test.
V L A N M A N A G E M E N T
If you enable VLAN tagging in the W7x Wireless section under any of the SSIDs, you can choose a VLAN
Management ID for the W7x to access the administrative functions of your W7x. Let’s say you pick VLAN3 to be
the VLAN used for management and the subnet range for VLAN 3 is 192.168.3.X. The IP address for the W7x must
be 192.168.3.X, where X is any value in range.
46
Page 48

W7x User Manual
•
VLAN Id for Management: To turn on VLAN Management, select the VLAN Id button.
•
In the VLAN Id text box, type the ID number of the VLAN you want to allow access to the administrative
functions of the W7x. For example, if VLAN3 is used for management, type in 3.
•
Click Accept to save your changes.
W I R E L E S S T R A F F I C S H A P I N G
The Traffic Shaping option allows you to limit incoming and outgoing traffic and divide traffic up per percentage
across different SSIDs.
NOTE: This feature will not only when the Access Point is in Access Point mode.
47
Page 49

W7x User Manual
ping
Wirel
ess Traffic
Sha
。
回
回
%
回
%
回
%
回
%
回
%
回
%
回
%
SGHz
%
回
%
回
%
回
%
回
%
回
%
回
%
回
TraffîcShaping
I ncom
i ng Traffic
2.4GH
z s
OutgoÎn
Total
Percentage
5510
#1:
5510 #2 :(0
弱的的
(0的
55
仿制約的
弱的的
(0的
弱的描
(0的
弱的盯
(0的
弱的甜
(0的
扭呵呵
OutgoÎn
Total
Percentage
5510
#1:
Li
mit
e而n
g
g Tra而cLÎmit
Pakedgel-2.4GHz
的
g Tra而cLÎmit
Pakedgel-SGHz
|1
∞
∞
削
E
n
|
%
%
|
%
@
Disable
| kbit/s
|
00
|
00
kbit/s
kbit/s
5510 #2 :(0
弱的的
55
仿制約的
弱的的
弱的描
弱的盯
弱的甜
| Appl
的
(0的
(0的
(0的
(0的
(0的
y 11
Cance
l
|
%
48
Page 50
W7x User Manual
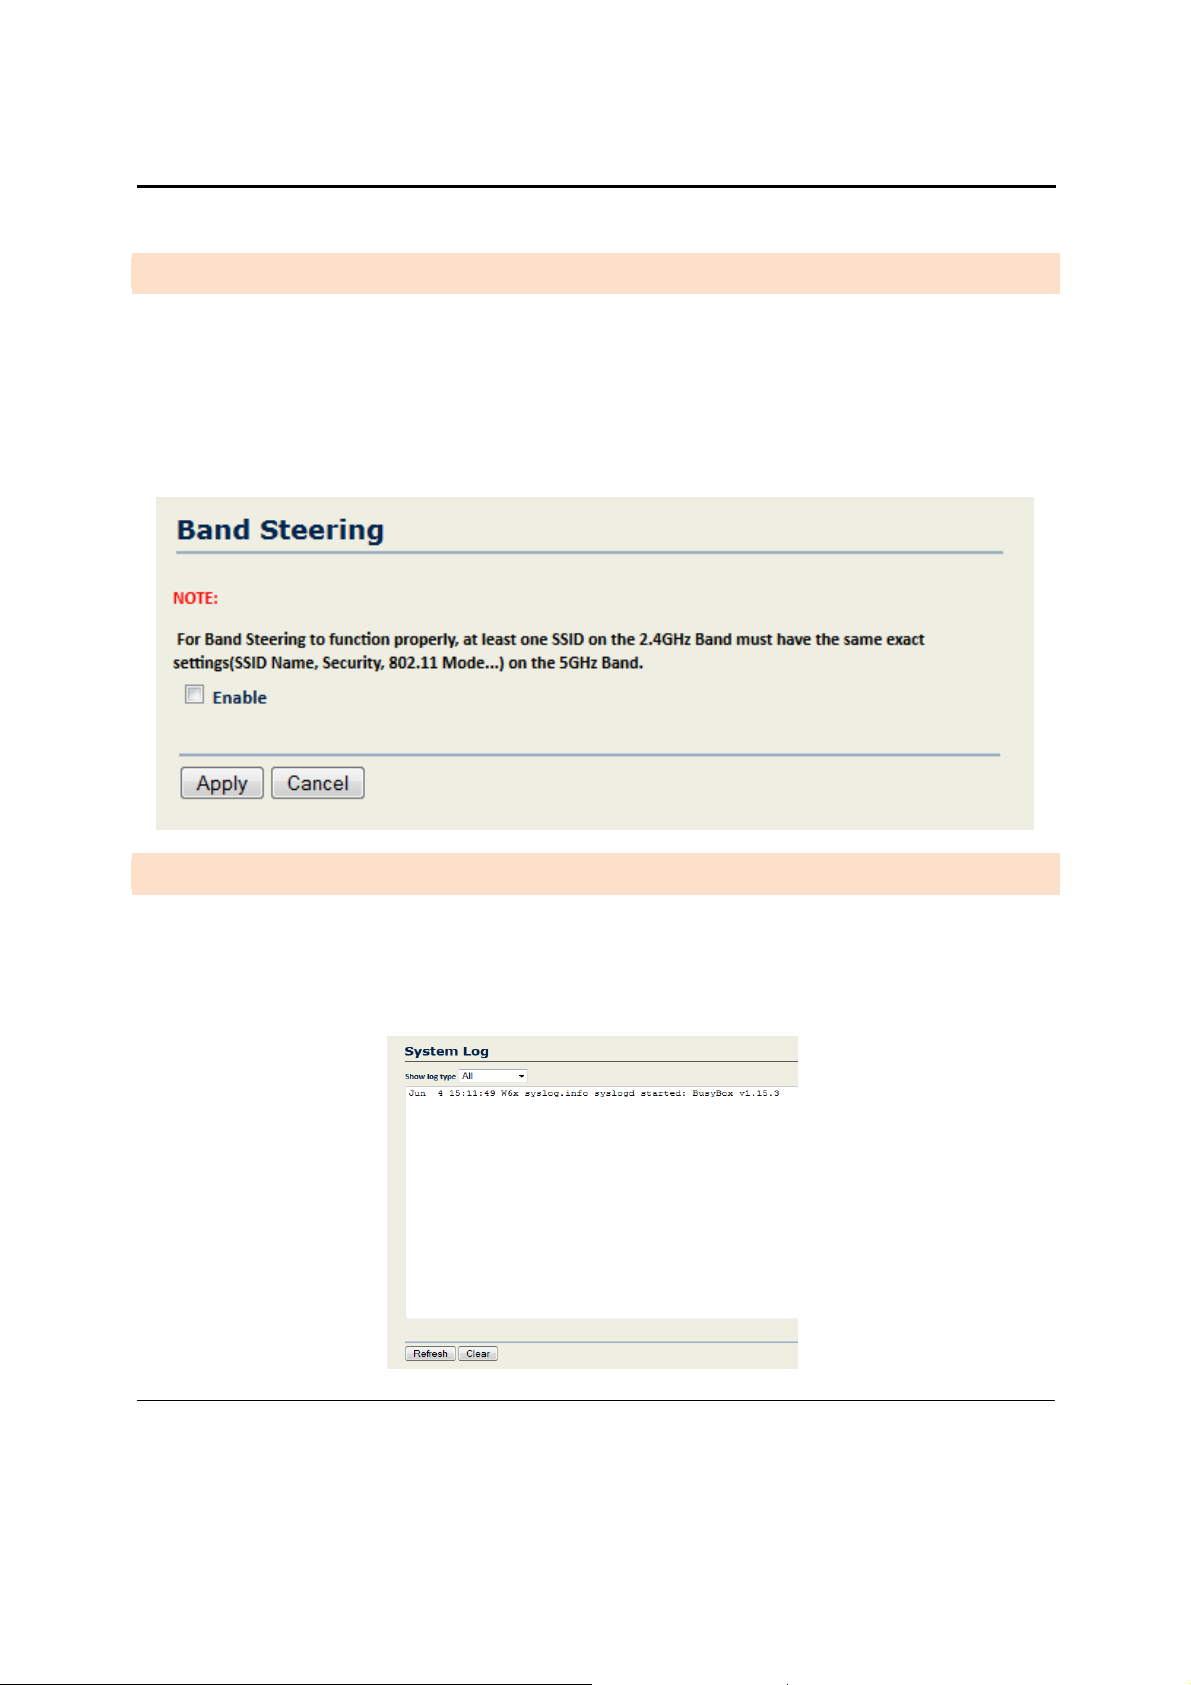
B A N D S T E E R I N G
Band steering allows connected clients to steer from 2.4GHz to 5GHz. It is important to note that the clients must
support 5GHz in order for Band Steering to work. Band steering is a very important feature and when enabled, it
increases the throughput by reducing the contention for the busy 2.4GHz band resources. Before you enable Band
Steering, make sure that you have at least one SSID on the 2.4GHz band that has the same exact settings on the
5GHz band. If you try to enable Band Steering and you do not have matching SSIDs on both bands, you will get an
error message and the functionality will not work.
S Y S T E M L O G
The System Log menu option will display logs recorded by the W7x.
Show log type: In the drop-down menu, select a log type. The log types available are: Debug, Information, Notice,
Warning, Error, Critical, Alert, and Emergency.
49
Page 51

W7x User Manual
L O G
While the system log contains a history of events recorded by the W7x device, the management log
contains events triggered on the Ethernet and wireless interface. This log is a useful debugging tool when an
unknown error occurs on the system, or when you need to send a report to Pakedge technical support.
The Log page displays a history of events triggered on the Ethernet and Wireless interface.
Syslog: Choose to Enable or Disable the system log.
Log Server IP Address: Type the IP address of the server that will receive the system log.
Local Log: Choose to Enable or Disable the local log.
Click Apply to save your changes.
L E D O P T I O N S
This menu will allow you to turn ON/OFF the LEDs for Power, Ethernet and Wireless.
50
Page 52

W7x User Manual
A P P E N D I X A – S P E C S
H A R D W A R E S P E C I F I C A T I O N S
•
1 x 10/100/1000 Gigabit Ethernet RJ-45 port with IEEE 802.3af Power over Ethernet (PoE) support
•
Configurable LED Indicators for Power, Ethernet, 2.4GHz Wireless and 5GHz Wireless
•
Power over Ethernet (PoE) IEEE802.3af compliant 48 VDC / 0.375A
•
Power Supply: 100 to 240 VDC ± 10%, 50/60 Hz (depends on different countries)
•
DC input: 12V/2A
R F I N F O R M A T I O N
•
Frequency Band:
o 802.11 B/G/N on 2.4 to 2.462GHz.
o 802.11 A/N on 5 to 5.805GHz.
•
Operating Channels:
o 2.4GHz - 11 for North America, 13 for Europe, 14 for Japan
o 5GHz – 24 Channels
•
Transmit Power (Typical):
o 802.11a (5.180 ~ 5.805GHz) up to 26dBm
o 802.11b (2.412 ~ 2.462GHz) up to 29dBm
o 802.11g (2.412 ~ 2.462GHz) up to 29dBm
o 802.11n (2.412 ~ 2.462GHz, 5.180 ~ 5.805GHz) up to 26dBm
•
Receiver Sensitivity (Typical):
o 802.11a (5.180 ~ 5.805GHz) up to -93dBm
o 802.11b (2.412 ~ 2.472 GHz) up to -98 dBm
o 802.11g (2.412 ~ 2.472 GHz) up to -93 dBm
o 802.11n (2.412 ~ 2.472 GHz, 5.180 ~ 5.805GHz) up to -93 dBm
O P E R A T I O N S
•
Operation Modes:
o 2.4/5GHz Have independent operation modes.
o Access Point/Client Bridge/WDS Bridge/WDS AP/Repeater
•
Up to 16 SSID
•
Supports 802.1q VLANs
•
Spanning Tree Supports 802.1d Spanning Tree Protocol
•
IP Auto-configuration – DHCP client
•
Transmission rate options:
51
Page 53

W7x User Manual
O 2.4GHZ – N ONLY, B/G/N MIX, B ONLY, G ONLY
O 5GHZ – N ONLY, A/N MIX, A ONLY
M A N A G E M E N T A N D S E C U R I T Y
•
User Power Control Adjustment by dBm
•
Web-based configuration (HTTP)/Telnet
•
Upgrade firmware via web browser
•
Reset Button: to reboot (press 1 second); to reset to Factory Default (press and hold for 10 second)
•
System Monitoring Statistic and Event log
•
Traffic Measurement Per interface
•
Auto-channel Selects least congested channel
•
Bandwidth management
•
Backup & Restore settings through Web interface
•
QoS WMM
•
WEP/WPA/WPA2/ WPA MIXED Encryption
•
WPA-PSK using TKIP or AES / WPA-EAP using TKIP
•
802.1x Authenticator
•
SSID broadcast enable/disable
•
MAC Address Filter
•
WLAN L2 Isolation (AP mode only)
•
Wireless Client connected list
E N V I R O N M E N T
•
Temperature Range: 0 to 50° C (32° to 122° F)
•
Storage: -20 to 60° C (-4° to 140° F)
•
Humidity (non-condensing):
o Operating: 90% or less
o Storage: 90% of less
M E C H A N I C A L
•
Dimensions – 9.142” x 6.242” x 1.438” (L x W x D)
•
Weight – 17.4 oz.
•
Housing – 14 gauge anodized aluminum electronic housing.
•
52
Page 54

W7x User Manual
A P P E N D I X B – T E C H N I C A L S U P P O R T
Please visit our website for up-to-date support information:
Website: www.pakedge.com
Email: support@pakedge.com
CONTACT INFORMATION:
Pakedge Device & Software Inc.
1163 Triton Drive
Foster City, CA 94404
U.S.A
53
Page 55

W7x User Manual
A P P E N D I X C – LI M I T E D W A R R A N T Y
MODEL W7X
Congratulations on your purchase of a Pakedge Device & Software wireless product! Pakedge designs and
manufactures the finest home networking products. With proper installation, setup, and care, you should enjoy
many years of unparalleled performance. Please read this consumer protection plan carefully and retain it with
your other important documents.
This is a LIMITED WARRANTY as defined by the U.S. Consumer Product Warranty and Federal Trade
Commission Improvement Act.
What Is Covered Under the Terms of This Warranty
SERVICE LABOR: Pakedge will pay for service labor by an approved Pakedge service center when needed as a
result of manufacturing defect for a period of one (1) year from the effective date of delivery to the end user.
PARTS: Pakedge will provide new or rebuilt replacement parts for parts that fail due to defects in materials or
workmanship for a period of one (1) year from the effective date of delivery to the end user. Such replacement
parts are then subsequently warranted for the remaining portion (if any) of the original warranty period.
What Is Not Covered Under the Terms of This Warranty
This warranty only covers failure due to defects in materials and workmanship that occur during normal use and
does not cover normal maintenance. This warranty does not cover any appearance item; any damage to living
structure; failure resulting from accident (for example: flood, electrical shorts, insulation); misuse, abuse, neglect,
mishandling, misapplication, faulty or improper installation or setup adjustments; improper maintenance,
alteration, improper use of any input signal and/or power, damage due to lightning or power line surges, spikes
and brownouts; damage that occurs during shipping or transit; or damage that is attributed to acts of God.
The foregoing limited warranty is Pakedge’s sole warranty and is applicable only to Products sold as new by
Authorized Dealers. The remedies provided herein are in lieu of a) any and all other remedies and warranties,
54
Page 56

W7x User Manual
whether expressed, implied or statutory, including but not limited to, any implied warranty of merchantability,
fitness for a particular purpose or non-infringement, and b) any and all obligations and liabilities of Pakedge for
damages including but not limited to incidental, consequential or special damages, or any financial loss, lost
profits or expense, or loss of network connection arising out of or in connection with the purchase, use or
performance of the Product, even if Pakedge has been advised of the possibility of such damages.
CAUTION: DAMAGE RESULTING DIRECTLY OR INDIRECTLY FROM IMPROPER INSTALLATION OR SETUP
IS SPECIFICALLY EXCLUDED FROM COVERAGE UNDER THIS WARRRANTY. IT IS IMPERATIVE THAT
INSTALLTION AND SETUP WORK BE PERFORMED ONLY BY AN AUTHORIZED PAKEDGE DEALER TO
PROTECT YOUR RIGHTS UNDER THIS WARRANTY. THIS WILL ALSO ENSURE THAT YOU ENJOY THE
FINE PERFORMANCE YOUR PAKEDGE PRODUCT IS CAPABLE OF PROVIDING.
Rights, Limits, and Exclusions
Pakedge limits its obligation under any implied warranties under state laws to a period not to exceed the warranty
period. There are no express warranties. Pakedge also excludes any obligation on its part for incidental or
consequential damages related to the failure of this product to function properly. Some states do not allow
limitations on how long an implied warranty lasts, and some states do not allow the exclusion or limitation of
incidental or consequential damages. In this case, the above limitations or exclusions may not apply to you. This
warranty gives you specific legal rights, and you may also have other rights that vary from state to state.
Effective Warranty Date
This warranty begins on the effective date of delivery to the end user. For your convenience, keep the original bill
of sale as evidence of the purchase date from your authorized dealer.
Important- Warranty Registration
Please register your product at www.pakedge.com. It is imperative that Pakedge knows how to reach you
promptly if we should discover a safety problem or product update for which you must be notified. In addition, you
may be eligible for discounts on future upgrades as new networking standards come about.
To Obtain Service, Contact Your Pakedge Dealer.
55
Page 57

W7x User Manual
Repairs made under the terms of the Limited Warranty covering your Pakedge product will be performed by an
Authorized Pakedge Service Center. These arrangements must be made through the selling Pakedge Dealer. If
this is not possible, contact Pakedge directly for further instructions. Prior to returning a defective Product directly
to Pakedge, you must obtain a Return Material Authorization number and shipping instructions. Return shipping
costs will be the responsibility of the owner.
For additional information about this warranty, visit our website:
Pakedge Device & Software Inc.
1163 Triton Drive
Foster City, CA 94404-1213
U.S.A
877-274-6100
Email- support@pakedge.com
www.pakedge.com
56
Page 58

W7x User Manual
pakedge
1163 Triton
device&software
Drive
inc.
Foster City CA
U.S.A
Visit Us
94404
At:
ww
w.pakedge.com
© Pakedge Device & Software Inc. 2013 – All Rights Reserved
57
 Loading...