

Page 1
System Remote Control
Recharging Station
Setup Guide
Installation
Important: The remote needs to be on Control4 OS
2.4.0 or later to properly indicate the battery level;
otherwise, a “Low Battery Warning” alert will appear.
Whether your recharging station came with or without a System
Remote Control, follow the steps below.
Welcome!
Congratulations on your purchase of the Control4® System
Remote Control Recharging Station. With this product, you no
longer have to worry about your System Remote Control battery
losing its charge and halting in the middle of changing channels
on your TV, while watching a video, or performing other tasks
with your Control4 system.
If the battery level drops, simply place the remote in the station
until the remote is fully charged and ready to use again.
Control4 recommends that you keep the remote on the
recharging station when not in use.
Box contents
If you’ve purchased the recharging station without a remote
(C4‑SRRS), make sure the following items are included:
• Recharging Station cradle
• Power supply
If you’ve purchased the recharging station with a remote, make
sure the following items are included:
• System Remote Control
• Recharging Station cradle
• Power supply
• Rechargeable battery
If any of these items are missing, contact your Control4 Dealer
immediately.
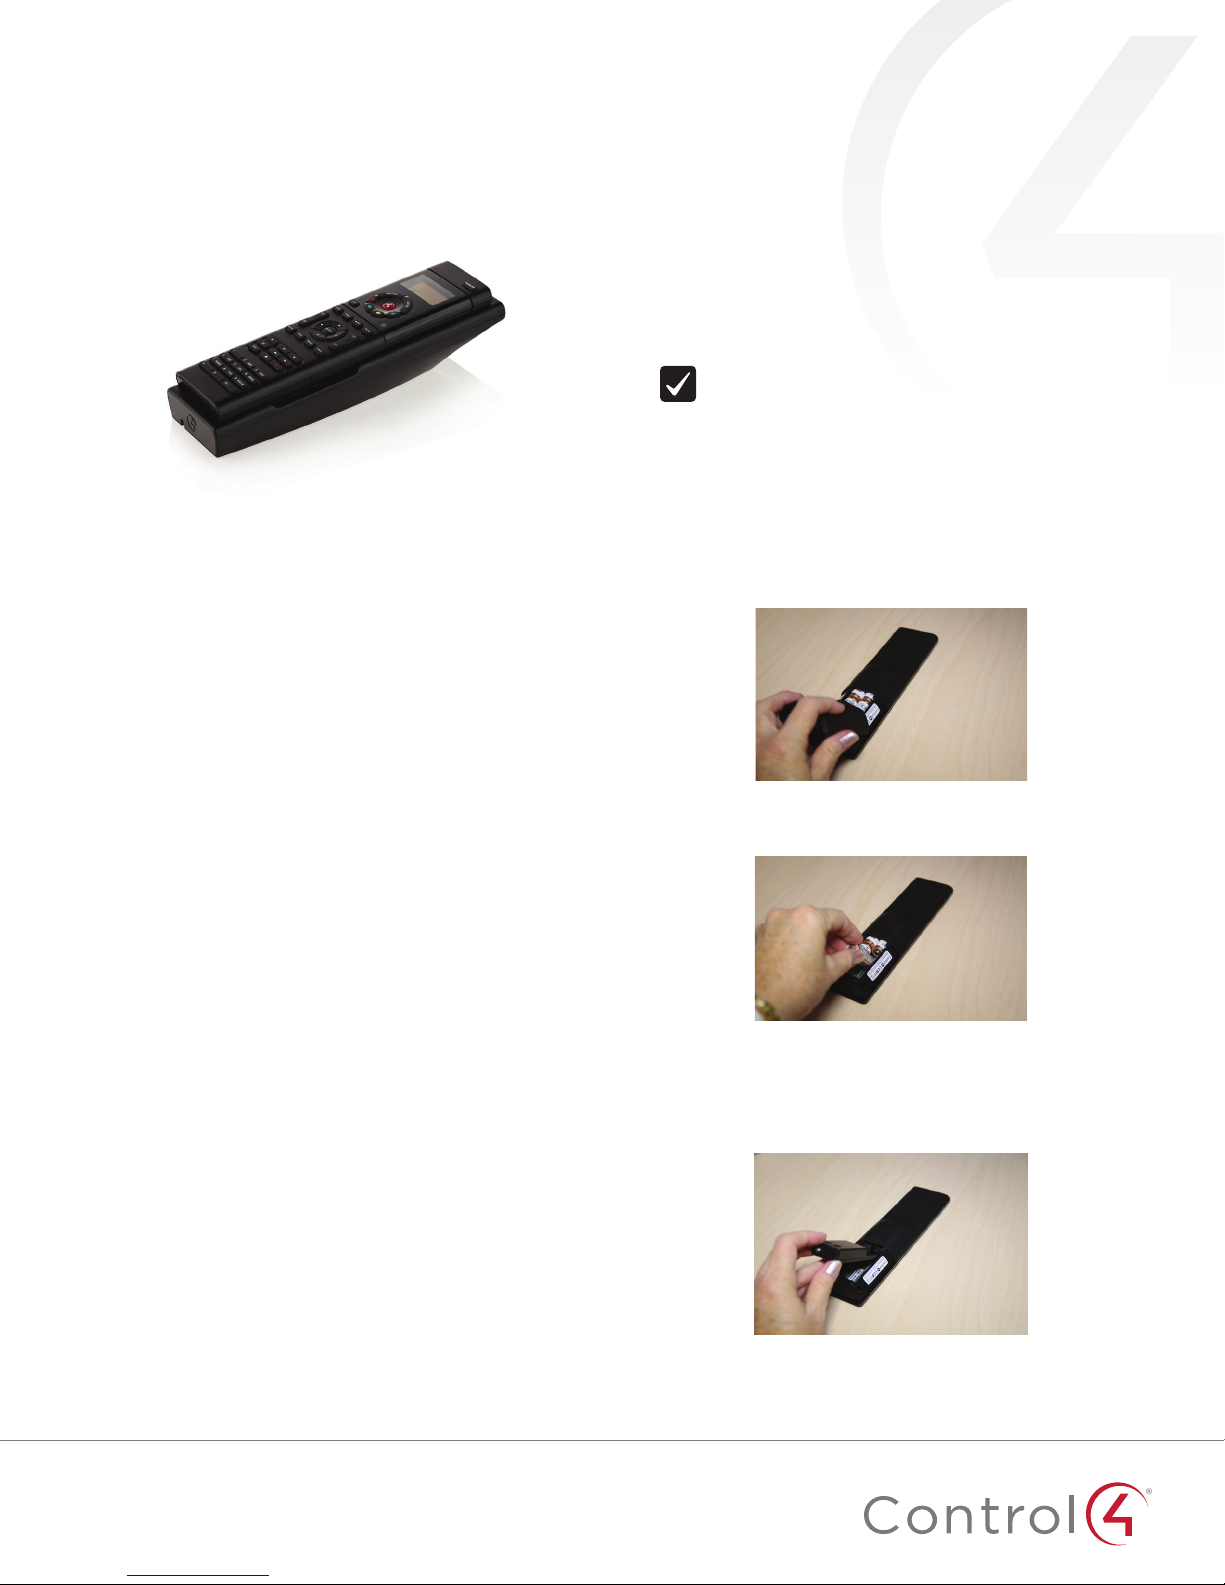
To set up your remote:
1 Turn the remote upside down. On the bottom of the remote,
slide the battery cover toward you with your thumb and lift it
o of the remote (Figure 1).
Figure 1: Remove battery cover
2 With your fingertip, remove the old batteries (Figure 2).
Figure 2: Remove old batteries
3 On the bottom of the remote (with the cover o and the
old batteries removed), insert the rechargeable battery by
sliding the small end into the slot first (Figure 3). Note the
orientation of + and ‑ symbols for proper battery insertion.
Figure 3: Rechargeable battery
11
Page 2
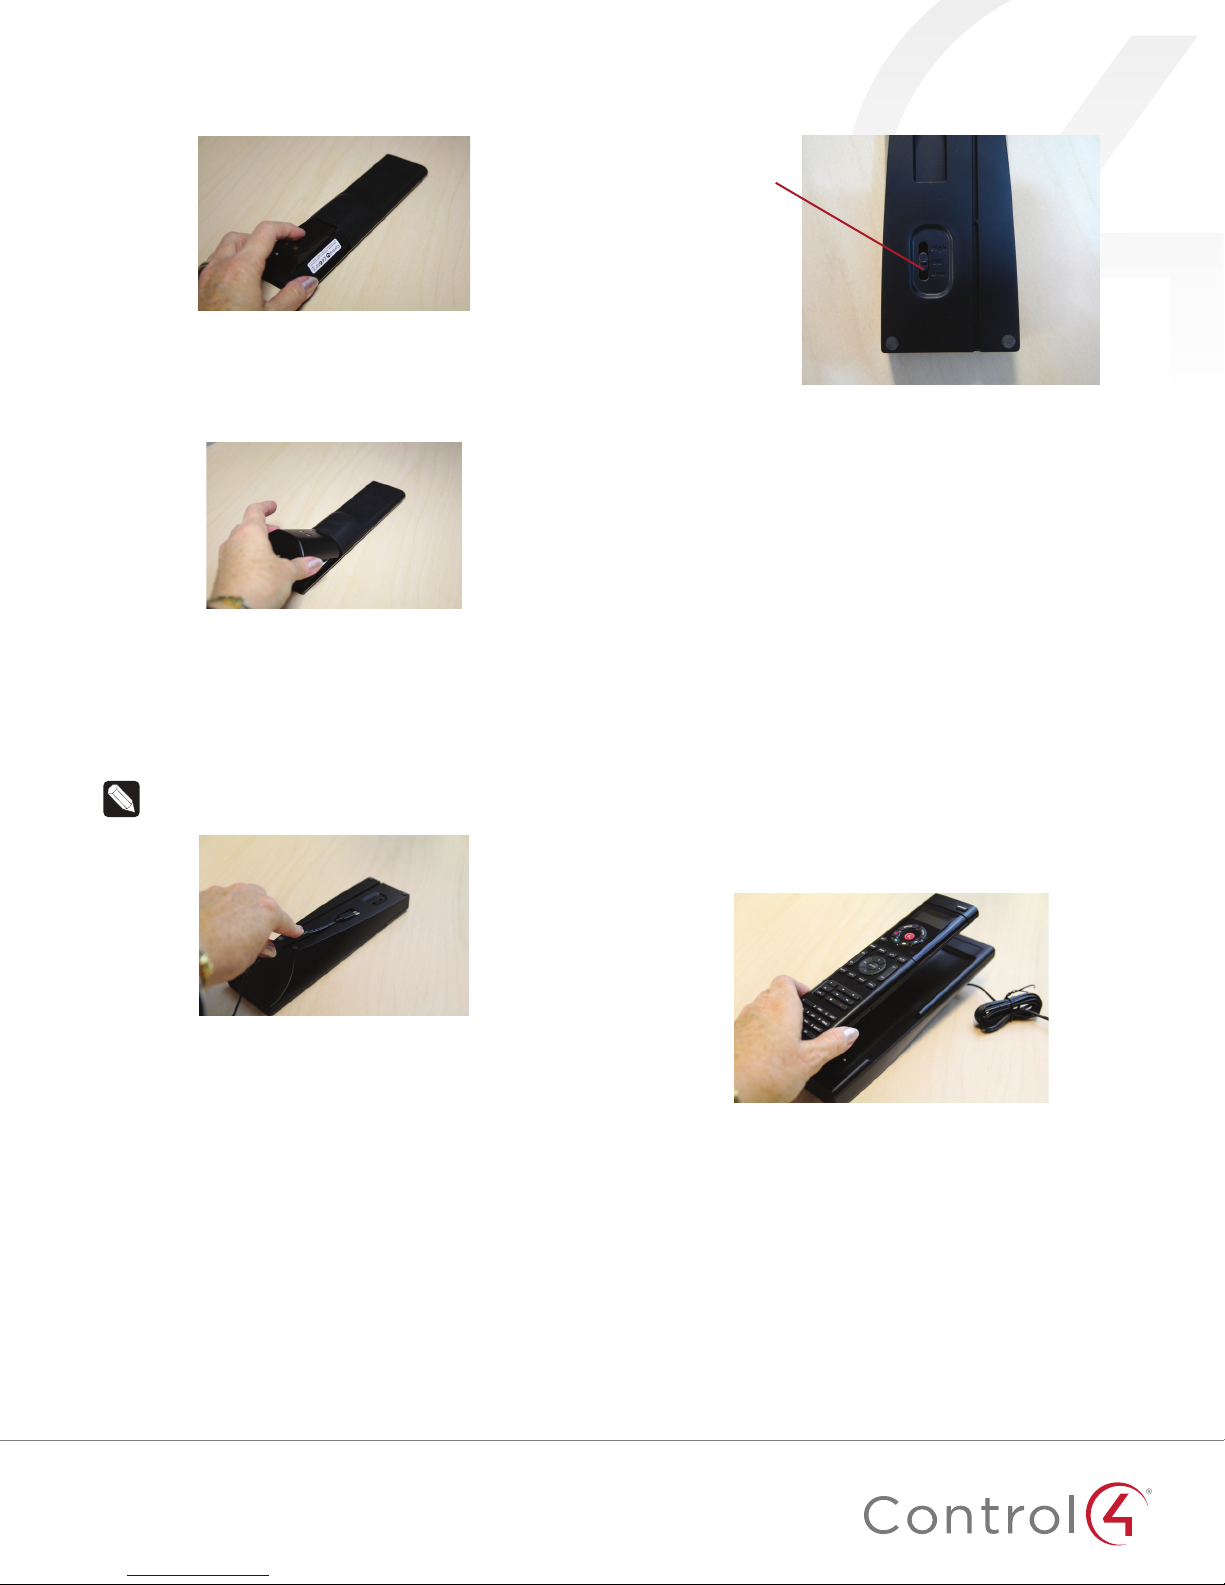
4 Seat the battery securely into the slot and press down
(Figure 4).
Figure 4: Battery installed
5 Insert the remote’s rechargeable battery cover into the
remote. Notice the two metal plates on the cover; that’s
how you can dierentiate the standard cover from the
rechargeable one (Figure 5).
Figure 5: Replace cover
6 Slide the battery cover into the slot and then press down
until the cover is horizontal. Slide the cover into the slot until
it snaps into place.
7 Insert the small end of the USB cable into the back of the
recharging station (inside the indentation) and thread the
power cord through the indentation in the station (Figure 6).
Note: You can thread the cord straight out or wind it
around to the opposite end of the recharging station.
Figure 6: Insert power cord
11 Turn the recharging station over. Notice the Charging
Indicator button labeled High, O, and Low (Figure 7).
Figure 7: Charging indicator button
Charging
Indicator
Button
12 Move the button to the desired light level.
• High: Sets to the highest light level.
• O: Sets the light to o.
• Low: Sets the light to low.
13 Turn the recharging station over to its upright position.
Place the remote on your recharging station
This section applies to recharging stations for existing or new
remotes.
1 If you purchased a recharging station without a remote,
ensure that you’ve replaced your old batteries with the new
rechargeable batteries and new cover.
2 While holding the remote in a horizontal position, place it
onto the charging station.
3 Ensure that it is properly seated. The two metal plates on
the back of the remote must touch the metal pins in the
recharging station (Figure 8). Depending on your light
setting an indicator light may come on at the bottom of the
recharging station.
Figure 8: Ensure proper installation
8 Attach the USB cable to the power supply.
a Remove the plastic shield from the power supply.
b Attach the correct power plug adapter to the power
supply by sliding it into the power supply’s slot until it
clicks into place.
c (Optional) To remove the power plug adapter, press the
Push button and slide the plug out.
9 Insert the power plug into a power outlet to begin
recharging.
10 For convenience, place the recharging station close to where
you use your remote.
2
Recharging station lights
Depending on the Charging Indicator brightness you select, the
indicator light will be High or Low brightness or Black/O. When
your recharging station is on, you may see the following lights.
• Red: The remote is recharging, and is not fully charged yet.
• Green: The remote is fully charged.
• Black: The light is o. Either the Charging Indicator is turned
o, or the remote is not seated properly in the recharging
station.
Page 3

Set up your remote for the recharging station
You’ll need to update your remote to recognize the new
rechargeable battery.
Control4 Dealers: You can select Enable Recharge Station in
Composer Pro (the Properties page) to acknowledge the battery.
This view also shows you the percent battery level.
If you have an SR‑260 or SR‑250 that is online, follow these
steps:
1 On the remote, press LIST, then INFO.
2 Press Config.
3 Select Recharge Station, then select Yes.
If you have an SR‑260 or SR‑250 that is oine, follow these
steps:
1 On the remote, press LIST, then select Config.
2 Select Recharge Station, then select Yes.
If you have an SR‑150:
1 On the remote, press Room O.
2 Press #, then *.
3 Press 4, then 5, 6, and 0.
Additional resources
For technical support, contact your Control4 Dealer. The
following resources are available to Control4 Dealers for more
support:
• Control4 Knowledgebase and forums
• Control4 Technical Support
• Control4 website:
• Composer documentation in online help or PDF formats,
available on the Dealer Portal under Resources
www.control4.com
Regulatory/Safety Information
To review regulatory information for your particular Control4
products, see the information located on the Control4 website at:
ctrl4.co/reg
.
Warranty
Visit
www.control4.com/warranty
for details.
More help
For the latest version of this document, open this URL or scan the
QR code on a device that can view PDFs.
control4.com | 888.400.4070
Copyright ©2017, Control4 Corporation. All rights reserved. Control4, the Control4 logo, the 4-ball logo, 4Store, 4Sight, Control4 My Home, and Mockupancy are
registered trademarks or trademarks of Control4 Corporation in the United States and/or other countries. All other names and brands may be claimed as the property of
their respective owners. All specifications subject to change without notice.
C
200-00325-C
2017-03-14 MS
 Loading...