

Page 1
48V Wireless Keypad
Power Supply
Installation Guide
Introduction
The 48V Wireless Keypad Power Supply enables Control4
wireless keypads—typically used with standard 110V or 240VAC
power—to be powered using Class2 low-voltage power. Multiple
keypads can be powered over common low-voltage wiring, such
as 16/2 or CAT5e Ethernet cable.
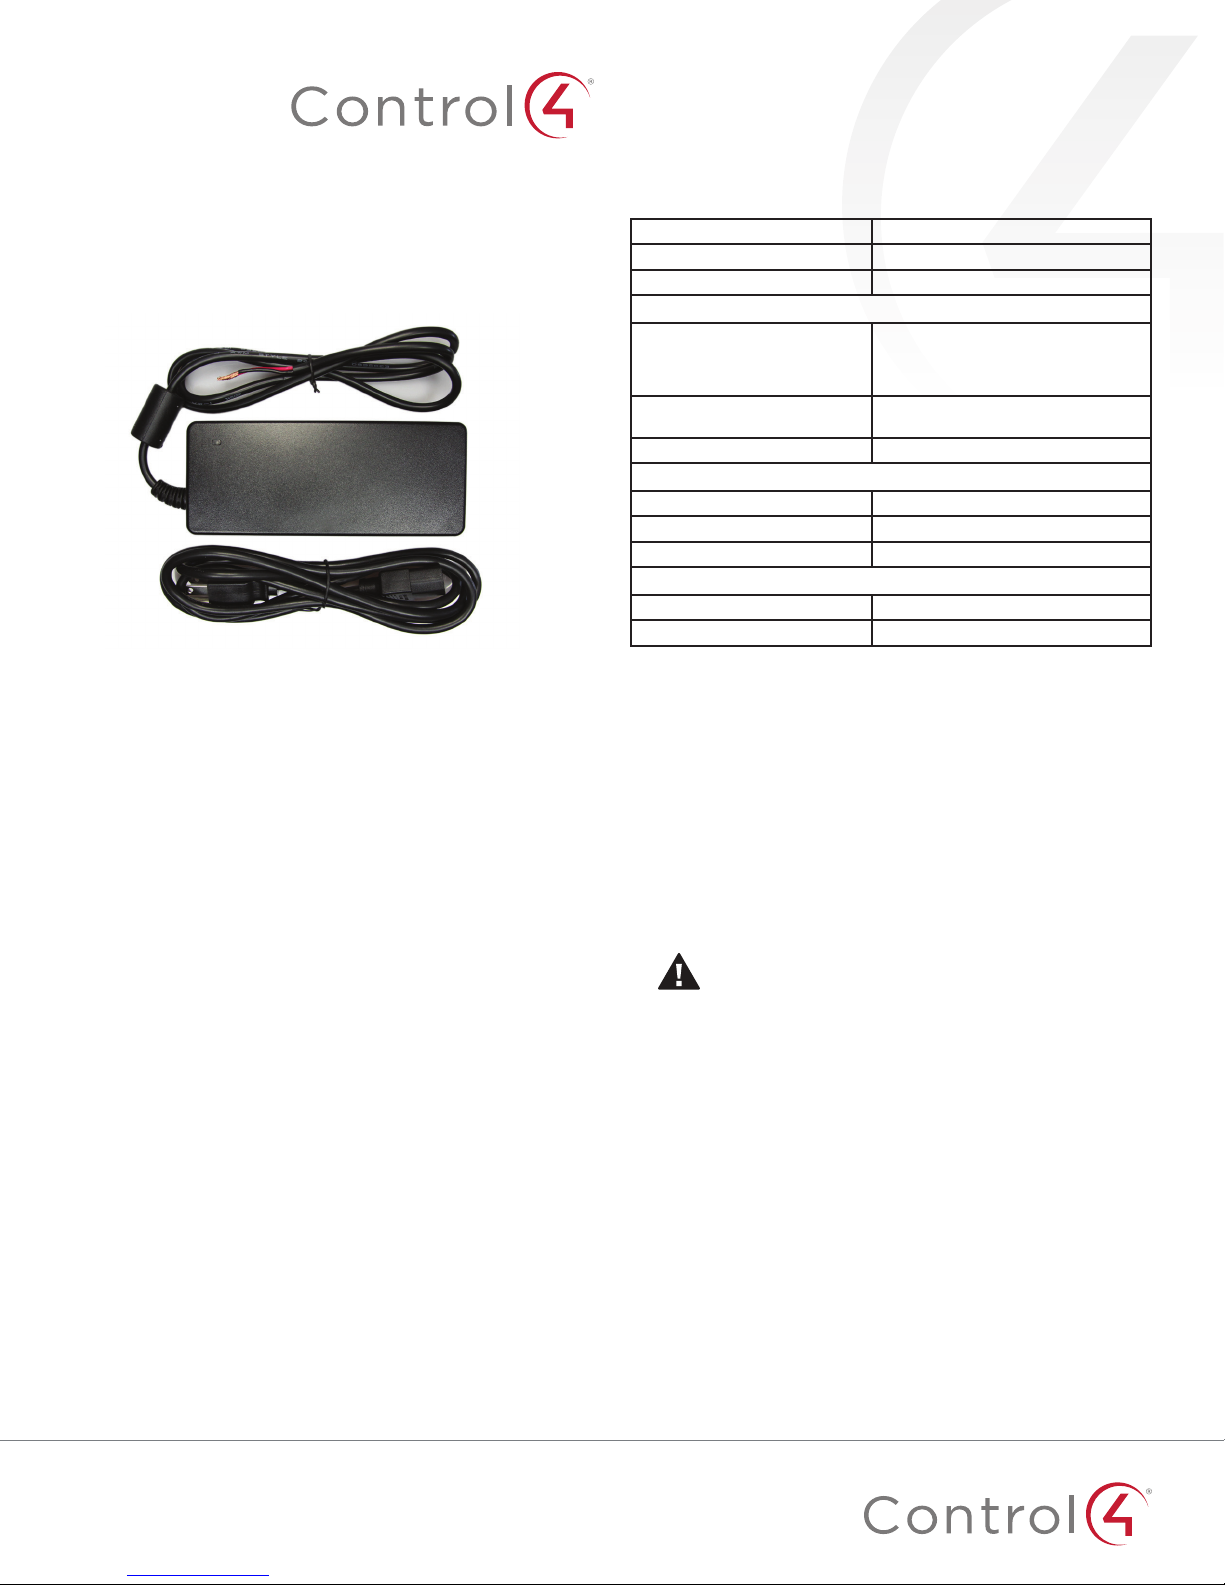
Box contents
• 48V Wireless Keypad Power Supply
Supported keypads
The Control4® 48V Wireless Keypad Power Supply can power the
following keypad models:
• C4-KC240 240V Wireless Configurable Keypad
• C4-KC120277 120-277V Wireless Configurable Keypad
• C4-SKC-N Square Wireless Configurable Keypad
• C4-KP2-Z Wireless 2-Button Keypad
• C4-KP3-Z Wireless 3-Button Keypad
• C4-KP6-Z Wireless 6-Button Keypad
• LSZ-3W1-240 240V 2-Button Keypad
• KPZ-3B1-240 240V 3-Button Keypad
• KPZ-6B1-240 240V 6-Button Keypad
Specifications
Model number C4-KPS48-BL
AC input 100-240VAC 50/60 Hz, 1.4A
DC output 48VDC, 2.5A (120W) max
Wiring requirements
Minimum conductor gauge 18 AWG (1.0 mm2)
Maximum cable run length 1,000 ft (300 m), summed for all keypads
Maximum number of keypads 20 per power supply
Operational temperature 32°F ~ 104°F (0°C ~ 40°C)
Humidity 5% - 95% non-condensing
Storage -4°F ~ 158°F (-20°C ~ 70°C)
Dimensions 6.5 × 2.5 × 1.4 in (165 × 64 × 36 mm)
AC input cable IEC C13
Note: When using Category cable, combine
all four solid color wires into one strand and
all four striped wires into a second strand.
per power supply
Environmental
Miscellaneous
Installing the power supply
1 Ensure that the location and intended use meet the following
criteria:
• Install in accordance with all national and local electrical
codes.
• NEC Code dictates that Class 1 (high voltage) and Class
2 (low voltage) powered devices cannot be installed
together in the same junction box. There are some
exceptions if this type of installation is required. Refer to
the current NEC documentation for additional information
or consult your building inspector.
Important! Ensure the power supply is not plugged into
a live AC power outlet until all wiring connections have
been made between the power supply and the wireless
keypads.
2 Connect the positive (+) and ground (-) leads from the
power supply to the appropriate leads on the multi-button
keypads (either directly or over an appropriate low voltage
cable).
3 Connect the red 48VDC (+) lead from the power supply
output to the Line In (black or brown) lead/terminal of the
keypad.
11
Page 2
4 Connect the black 48VDC (ground) lead/terminal from the
Wireless Keypad
Wireless Keypad
Wireless Keypad
Red (48VDC+)
Black (ground)
Green (ground)
Low-Voltage Keypad
Power Supply
To power
receptacle
White/Blue (Neutral)
White/Blue (Neutral)
White/Blue (Neutral)
Green/Yellow (ground)
Green/Yellow (ground)
Black/Brown (Line In)
Black/Brown (Line In)
Black/Brown (Line In)
Wireless Keypad
Wireless Keypad
Wireless Keypad
Red (48VDC+)
Black (ground)
Low-Voltage Keypad
Power Supply
To power
receptacle
White/Blue (Neutral)
White/Blue (Neutral)
White/Blue (Neutral)
Green/Yellow (ground)
Green/Yellow (ground)
Green/Yellow (ground)
Black/Brown (Line In)
Black/Brown (Line In)
Black/Brown (Line In)
power supply output to the Neutral (white or blue) and
Earth Ground (green/yellow) lead/terminal of the keypad.
Tip: Wiring connections should be secured using
conventional wire nuts or terminal blocks.
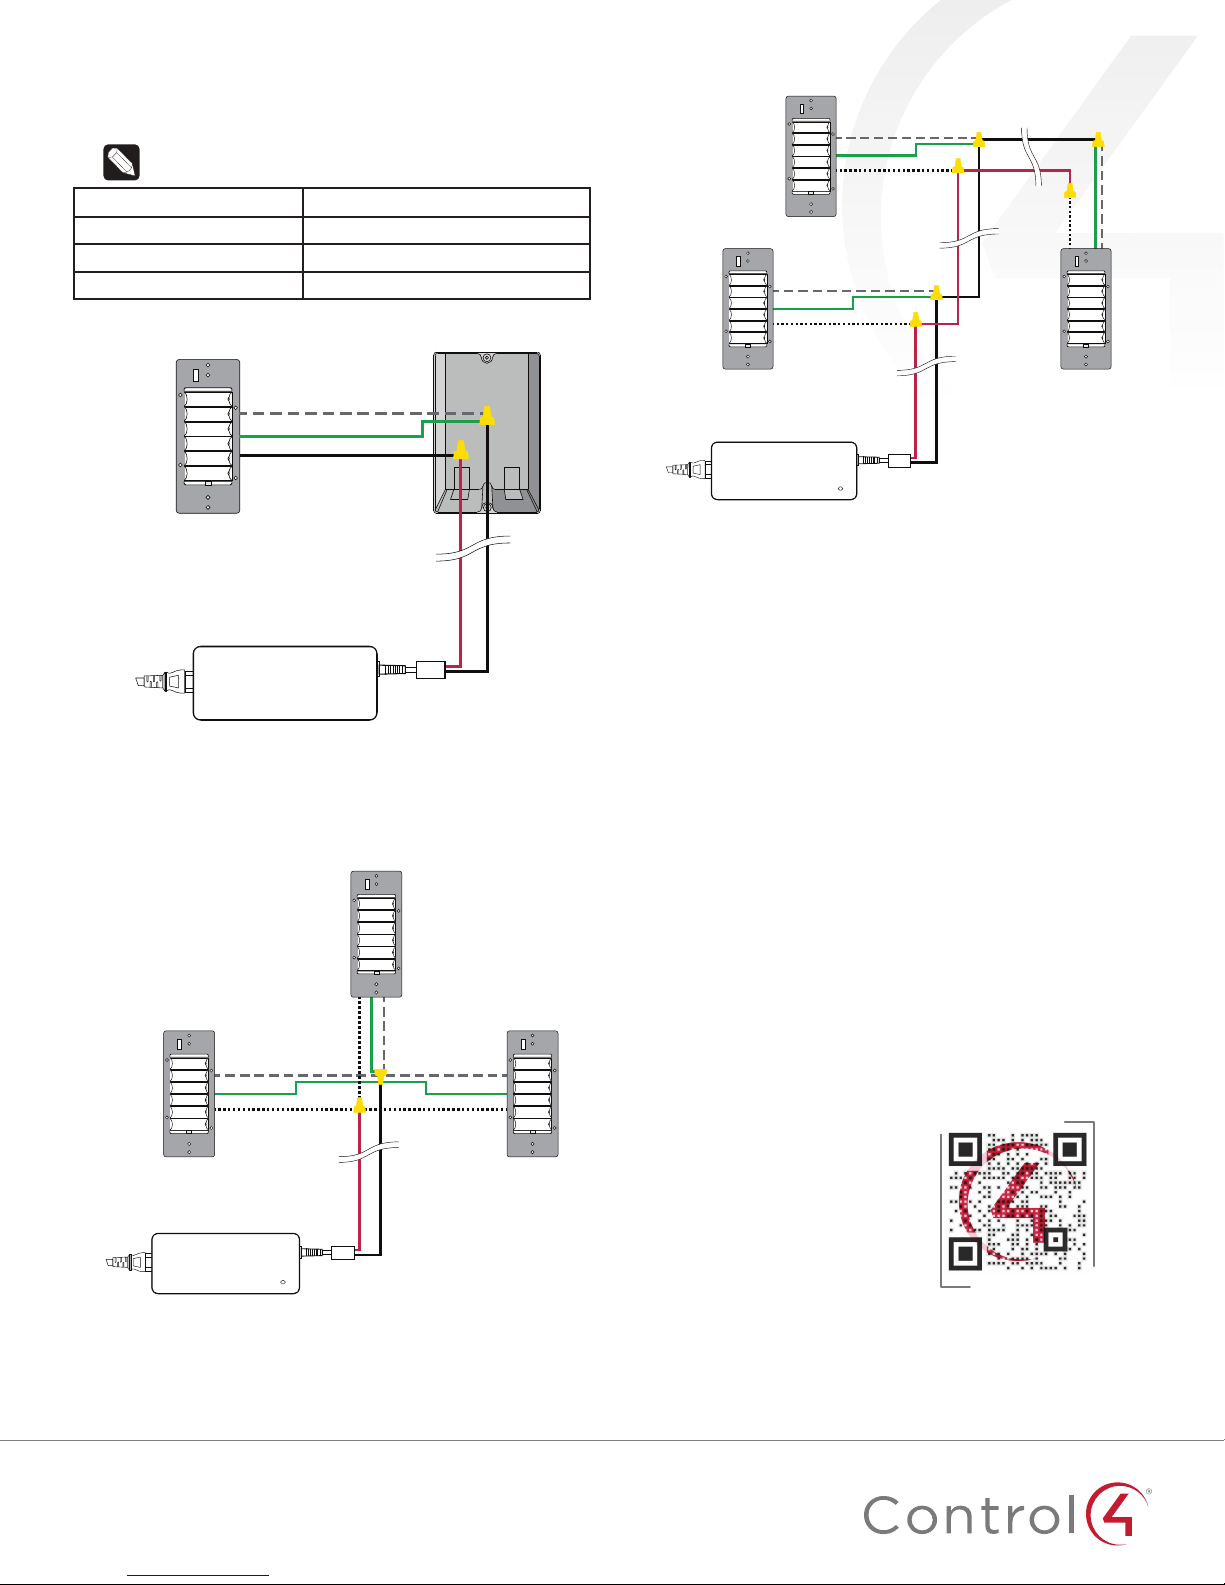
Keypad connection Power supply output wire leads
Line In (black or brown) Red (48V+ positive)
Neutral (white or blue) Black (ground)
Earth Ground (green/yellow) Black (ground)
Figure 1: Wiring—Single keypad option
White/Blue (Neutral)
Green/Yellow (ground)
Black/Brown (Line In)
Wireless Keypad
Black (ground)
Red (48VDC+)
Low-Voltage Keypad
To power
receptacle
Power Supply
Figure 3: Wiring—Multiple keypads option B
6 Plug in the power supply to power on the keypads.
7 Follow the standard procedure for configuring each type of
keypad in a project using Composer Pro.
Additional resources
5 Connecting multiple keypads to a single power supply can
be achieved by following either of the wiring diagrams
shown below:
Figure 2: Wiring—Multiple keypads, option A
The following resources are available for additional support:
• Control4 Knowledgebase and forums
• Control4 Technical Support
• Control4 website:
• Composer documentation available at
www.control4.com
ctrl4.co/docs
.
For the latest version of this document, open this URL or scan
the QR code on a device that can view PDFs.
Regulatory/Safety information
To review Regulatory information for your particular Control4
products, see the information located on the Control4 website at
ctrl4.co/reg
.
Patent information
Applicable patents are available at
Warranty
Visit
ctrl4.co/warranty
for details.
ctrl4.co/patents
.
MOST RECENT VERSION
ctrl4.co/48vps-ig
Copyright ©2016, Control4 Corporation. All rights reserved. Control4, the Control4 logo, the 4-ball logo, 4Store, 4Sight, Control4 My Home, and Mockupancy are
registered trademarks or trademarks of Control4 Corporation in the United States and/or other countries. All other names and brands may be claimed as the property of
their respective owners. All specifications subject to change without notice.
2
A
200-00448-A
2016-03-08 MS
 Loading...