

Page 1

Manuel d’instructions
CELED24DVDU6
Lisez toutes les instructions avant d’utiliser ce téléviseur et conservez le manuel
d’utilisation dans un lieu sûr pour pouvoir vous y référer ultérieurement.
Page 2

Table des matières
z Introduction
z Avertissement
z Attention
z Description de l'unité principale
z Télécommande
z Réglage de base de l'affichage à l'écran (OSD)
z Fonctions DTV
z Fonctions USB
z Fonctionnement du magnétoscope numérique
z Fonctionnement du lecteur DVD
z
Spécifications
Dépannage
z
1
Page 3

Introduction
Nous vous remercions d'avoir acheté ce téléviseur LED. Il peut être utilisé en tant que téléviseur
couleur normal et moniteur PC. Afin de tirer pleinement profit des fonctionnalités de votre
appareil dès maintenant, lisez attentivement ce manuel et gardez-le à portée de main pour le
consulter en cas de besoin.
INSTALLATION
① Placer le téléviseur à un emplacement à l'écart d'un éclairage direct. L’obscurité totale ou un
reflet sur l’écran peut provoquer une fatigue oculaire. Un éclairage doux et indirect est
recommandé pour assurer le confort de visionnage.
② Laisser suffisamment d'espace entre le récepteur et le mur afin de permettre l'aération du
téléviseur.
③ Éviter des emplacements excessivement chauds afin d'éviter d'endommager le boîtier ou de
causer une panne prématurée de l'appareil.
④ Ce téléviseur peut être raccordé à une alimentation C.A. de 100 à 240V et 50/60 HZ.
⑤ Ne pas installer le téléviseur près de sources de chaleur telles qu'un radiateur, des conduites
d'aération, les rayons solaires directs ou dans un emplacement tel qu'un compartiment et une zone
fermée. Ne pas recouvrir les ouvertures d’aération pendant le fonctionnement du téléviseur.
⑥ Le voyant lumineux reste allumé pendant 30 secondes après la mise hors tension ; tant que le
voyant reste allumé, vous ne pouvez pas remettre sous tension le téléviseur. Merci d'avoir pris le
temps de lire ces instructions.
2
Page 4

Avertissement
ATTENTION : POUR RÉDUIRE LE RISQUE DE CHOC ÉLECTRIQUE :
NE PAS DEMONTER LE COUVERCLE (OU L’ARRIERE)
NE PAS TENTER DE RÉPARER LES COMPOSANTS INTERNES.
L’ENTRETIEN DOIT ÊTRE EFFECTUE PAR DES TECHNICIENS
QUALIFIÉS.
RISQUE D’ELECTROCUTION
Ce symbole a pour but d'alerter l'utilisateur dans le but d'éviter
tout risque de choc électrique. Ne pas tenter de démonter
l'appareil.
Seul un personnel d'assistance spécialisé est qualifié pour cela.
Il convient de connecter les structures d'équipement de classe I à
la prise du réseau d'électricité et la prise doit être munie d'une
connexion à la terre de protection.
La prise connectée au socle d’alimentati on do it demeurer
aisément accessible en toutes circonstances.
ATTENTION
NE PAS OUVRIR
Les piles de la télécommande ne doivent pas être exposées à une chaleur
excessive telle que celle du soleil, d’un feu ou d’origine similaire
3
Page 5
Attention
Attention
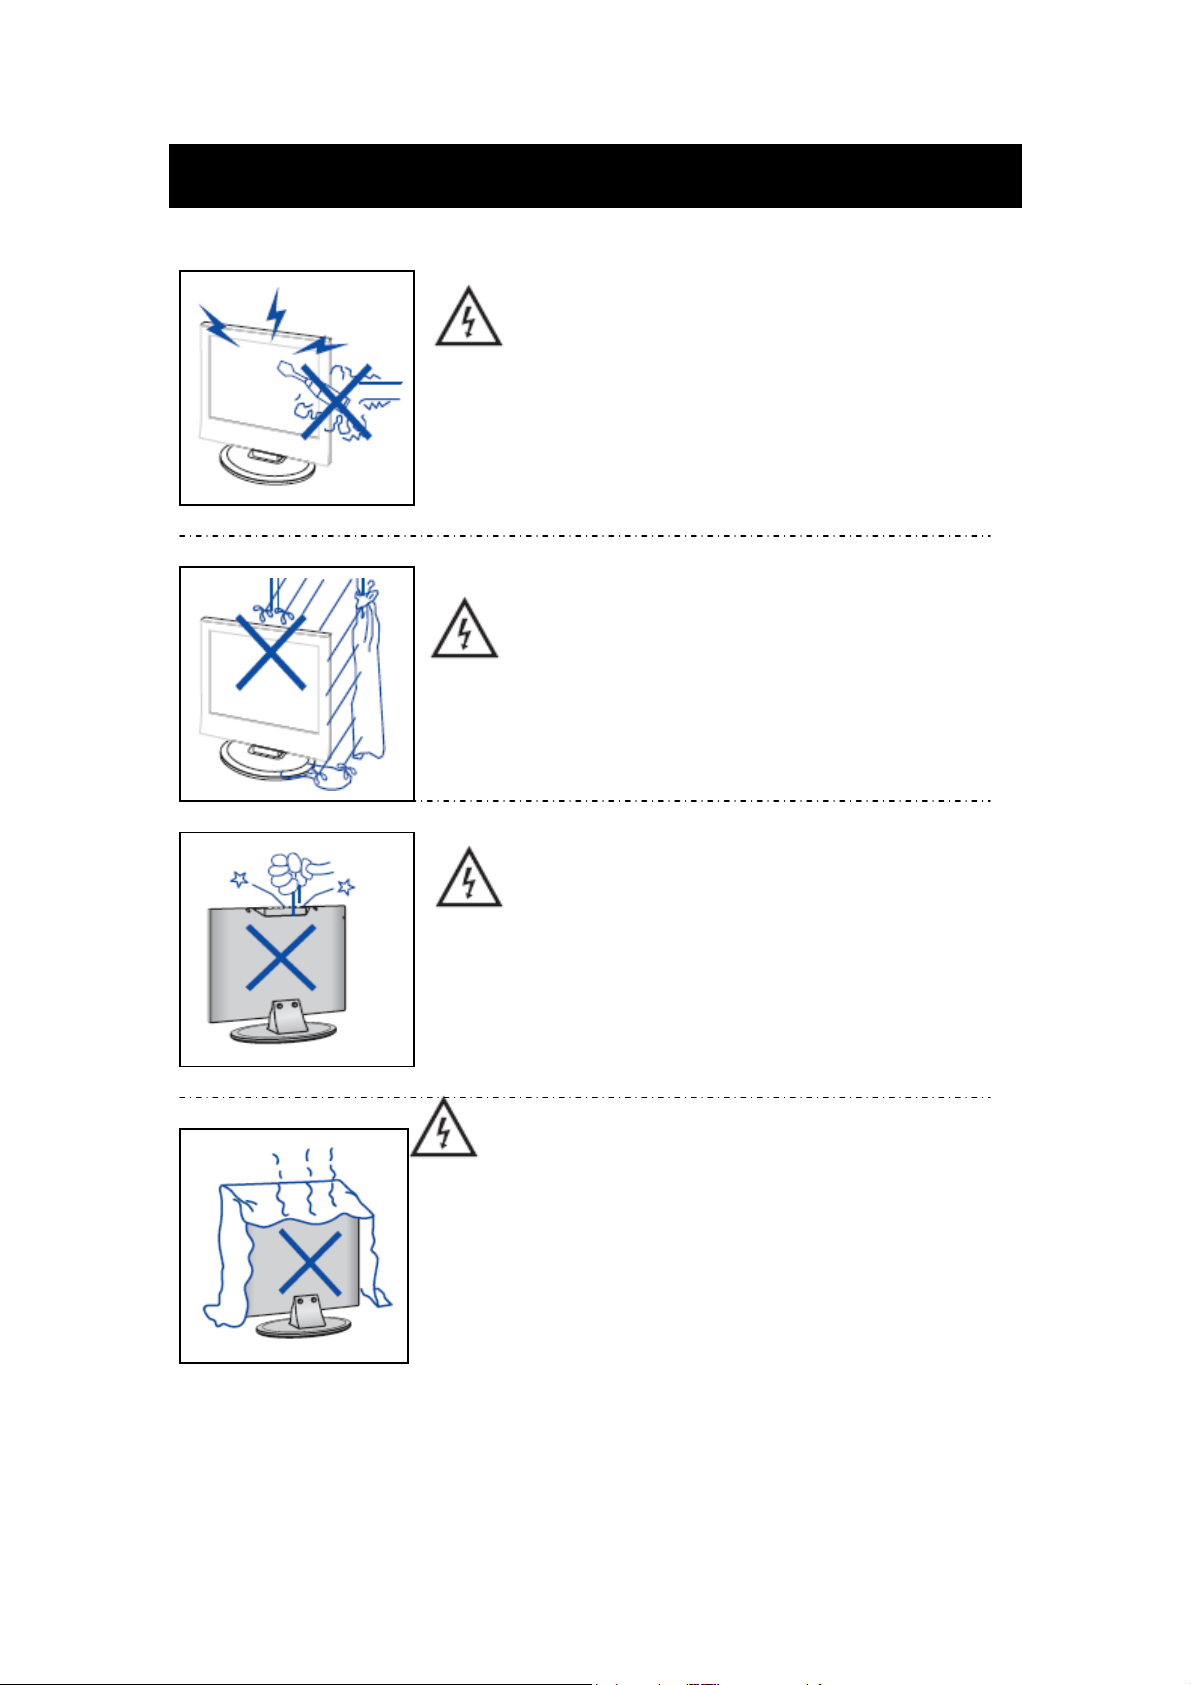
Des hautes tensions sont utilisées dans ce téléviseur.
- Les couvercles de sécurité ne doivent pas être retirés.
Veuillez contacter le personnel d'assistance qualifié pour toute
réparation.
Attention
Pour éviter tout risque d'incendie ou de choc électrique, ne pas
exposer l'appareil à la pluie ou à l'humidité Ne pas placer
d'objets contenant du liquide, tel un vase, sur le téléviseur.
Attention
Ne pas faire tomber ou introduire d’objets dans le boîtier du
téléviseur par les fentes ou les ouvertures. Ne jamais renverser de
liquide quelconque sur le téléviseur.
Attention
Éviter d'exposer l'unité principale aux rayons solaires directs et à
d'autres sources de chaleur. Ne pas installer le téléviseur
directement sur un autre appareil dégageant de la chaleur. Par
exemple un magnétoscope des amplificateurs audio. Ne jamais
obstruer les orifices d'aération prévus dans le cache arrière. Une
aération est essentielle pour éviter une panne des composants
électriques. Ne pas écraser le cordon d'alimentation électrique sous
l'unité principale ou d'autres objets lourds.
4
Page 6
Attention
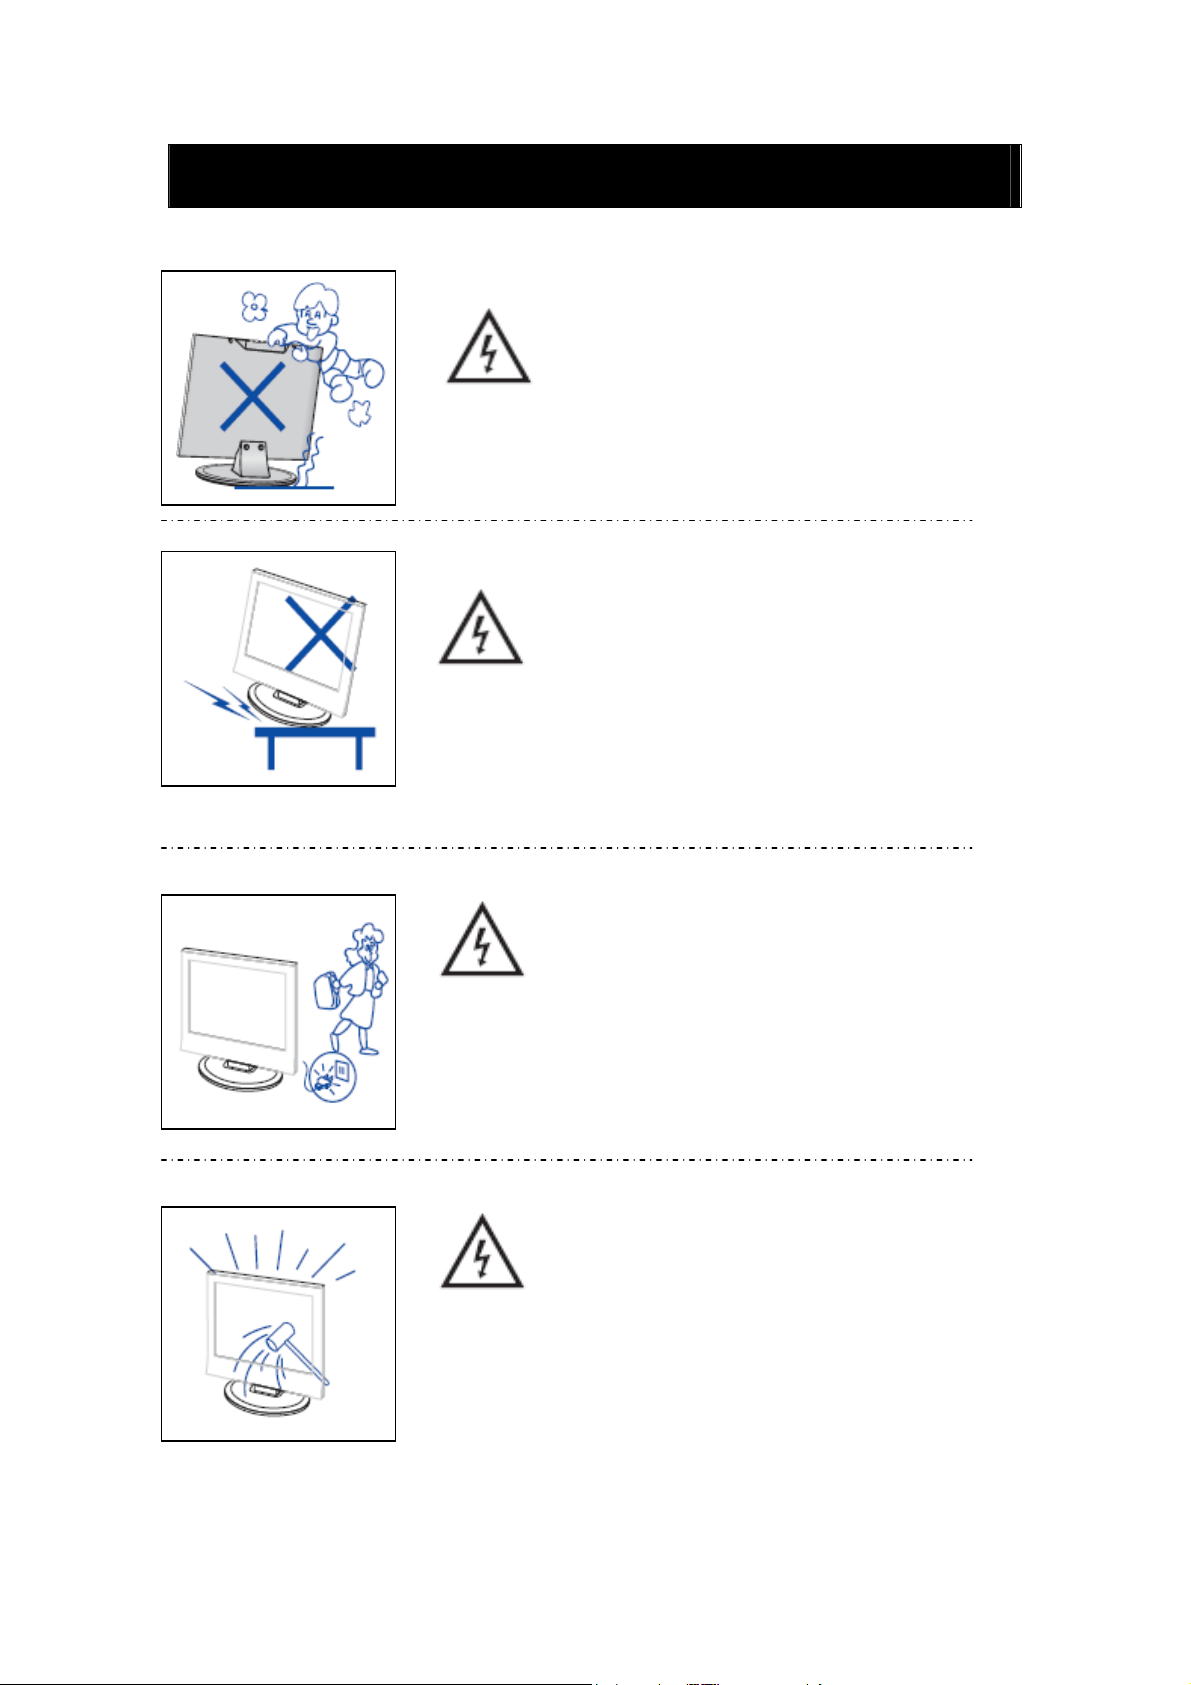
Attention
Ne pas monter ou s’appuyer sur le téléviseur ou pousser brusquement
celui-ci ou son support. Surveiller particulièrement les enfants.
Attention
Ne pas placer votre téléviseur sur un chariot, une étagère, une table
ou un support instable. Des blessures graves pourraient être causées
aux personnes et de sérieuses détériorations au téléviseur en cas de
chute de celui-ci.
Attention
Si l'appareil reste inutilisé pendant une longue période nous vous
recommandons de débrancher le cordon d'alimentation de la prise
murale.
Attention
Le panneau LED utilisé dans ce produit est fabriqué en verre.
Il peut donc se casser en cas de chute du produit ou d'impact sur le
produit. Prenez garde à ne pas vous blesser avec les morceaux de
verre cassé si le panneau LED se brise.
5
Page 7
Description de l'unité principale
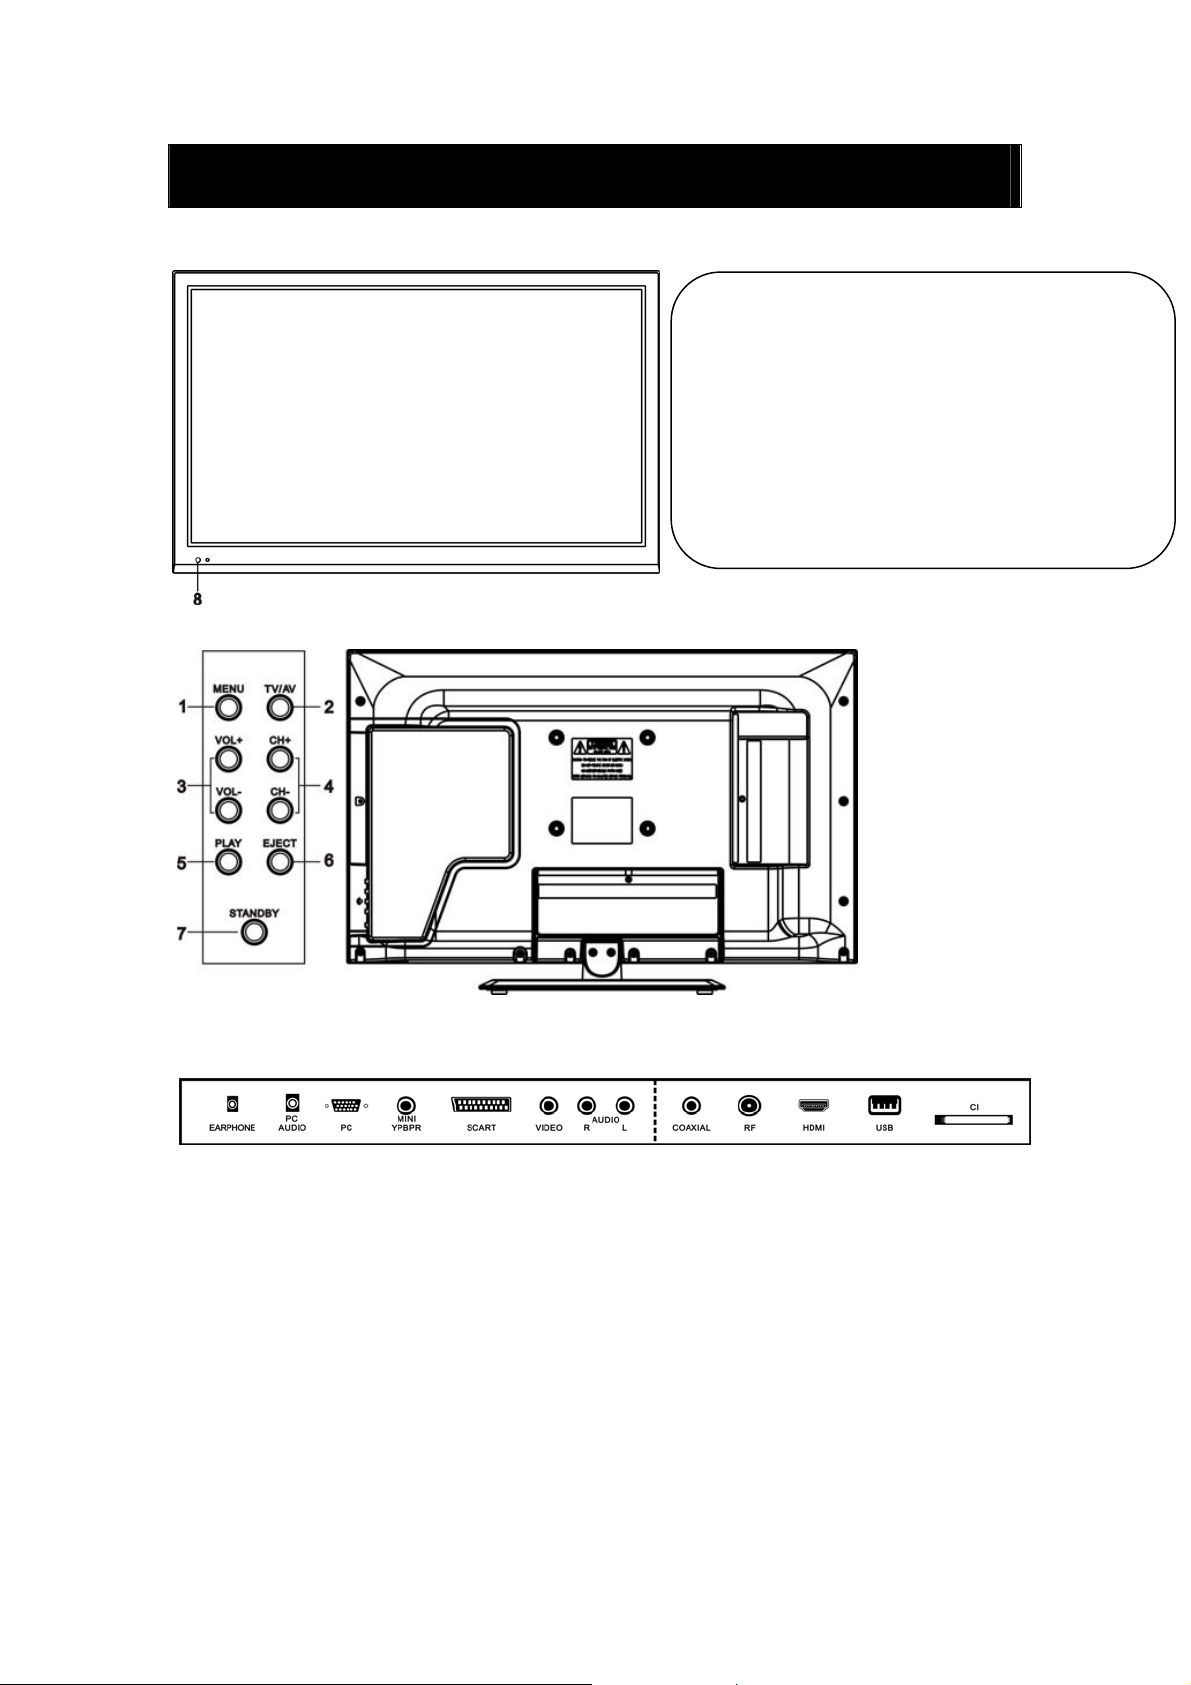
Fonction de la touche Panneau de commande
MENU :Appuyer sur MENU pour sélectionner le
menu principal.
TV/AV: Sélectionner le signal d'entrée.
VOL+ /-: Augmentation/Baisse du volume.
CH+/-: Chaîne de télévision suivante/précédente.
PLAY: Play/Pause
EJECT: Ejecter
STANDBY :Pour mettre en marche ou mettre en veille le
téléviseur.
capteur télécommande
Connexions des bornes du téléviseur
1. Prise sortie CASQUE.
2. Prise PC AUDIO
3. Entrée VGA
4. Entrée Mini-YPBPR
5. Prise Péritel.
6. Entrée vidéo.
7. Entrée AUDIO.
8. Sortie audio S/PDIF coaxial
9. Antenne TV
10. Entrée HDMI
11. Entrée USB.
12. Logement CI.
6
Page 8

Configuration facultative suivante :
Connecter le périphérique USB à la prise USB sur l'appareil.
Remarque :
● La connexion avec la prise USB n'est valable que pour une sortie de courant CC de 500 mA
MAXIMUM
● Pour vous assurer que votre disque dur mobile fonctionne bien, il convient d'utiliser une autre
alimentation électrique pour celui-ci. En outre, ne pas utiliser la prise USB en même temps.
● La prise en charge du disque dur mobile est assurée par la connexion avec la prise USB (il doit
être supérieur à 2 Go). Il ne peut y avoir plus de 4 partitions sur le disque dur mobile. La taille
maximale de partition est de 2 To. Les documents FAT/FAT32 sont pris en charge. La taille
maximale pour le document FAT est de 4 Go et la taille maximale pour le document FAT32 est de
2 To.
7
Page 9
Télécommande
Fonctions TV
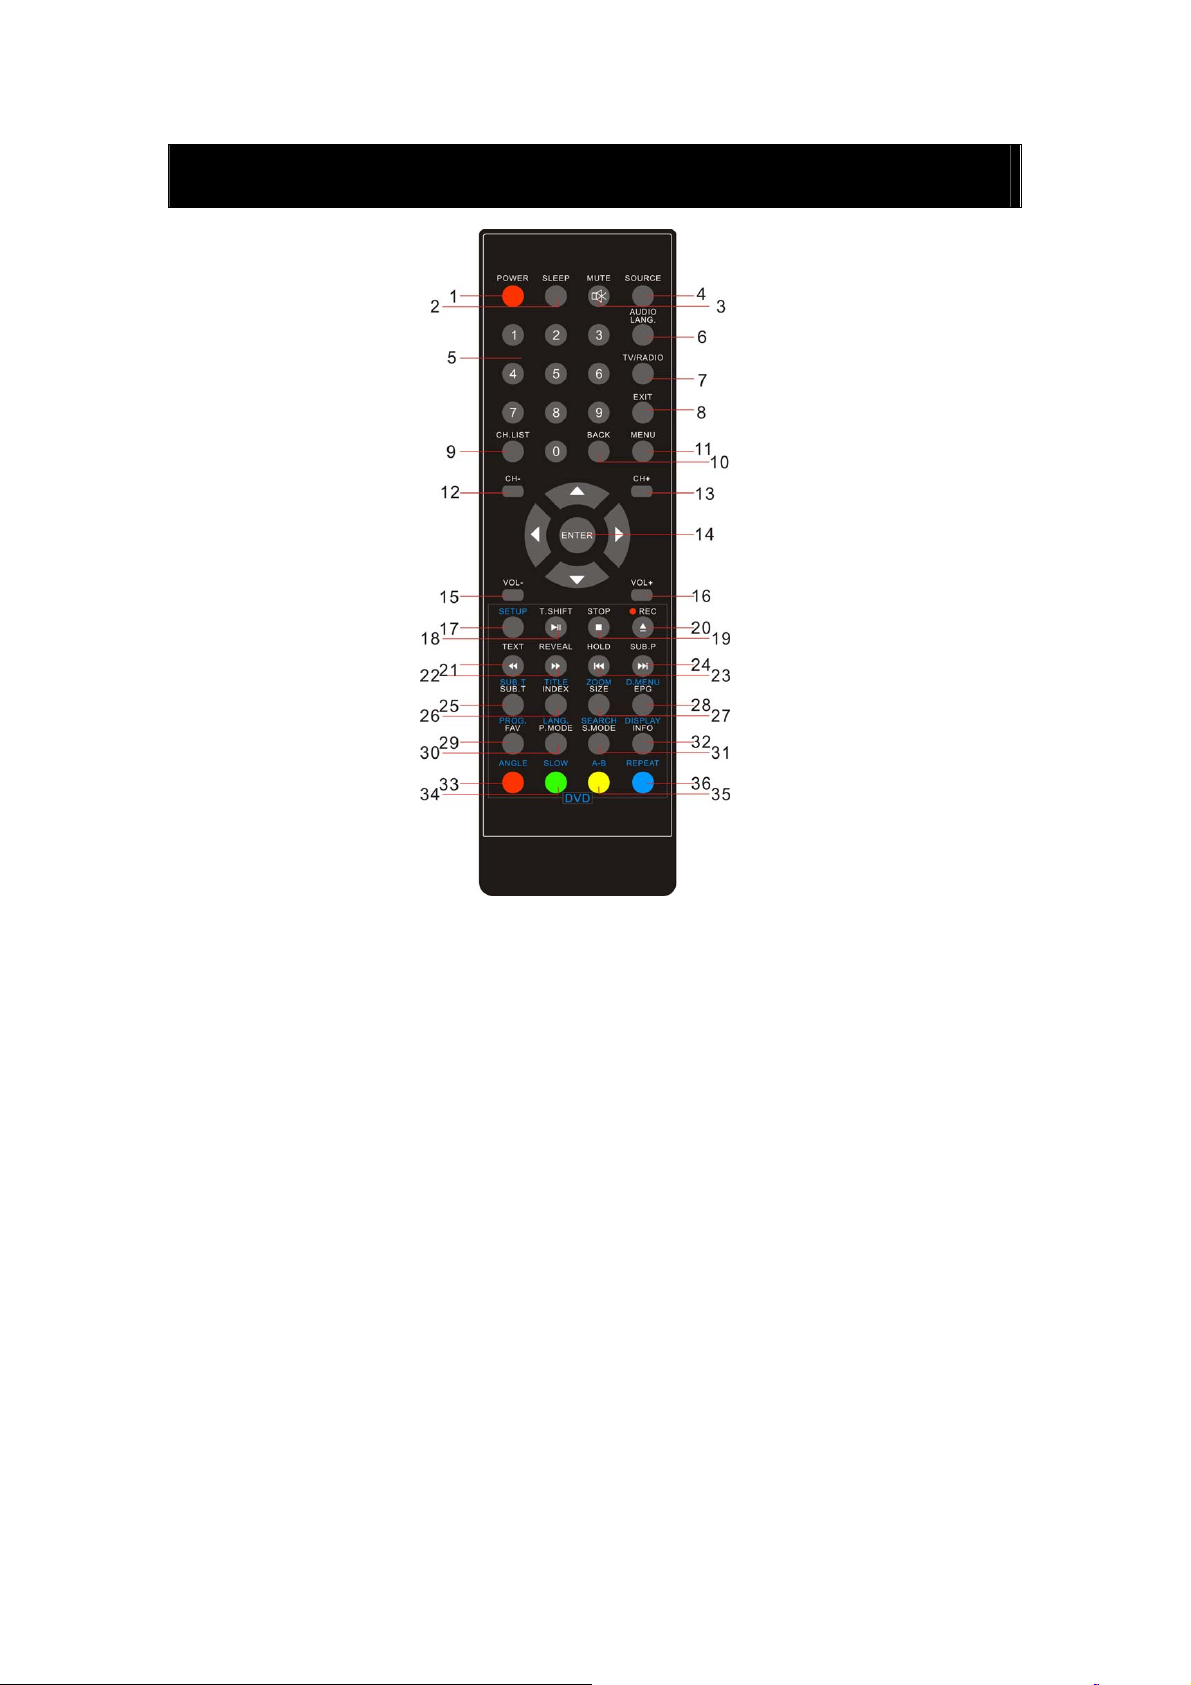
1. POWER :
2. SLEEP : Presser pour sélectionner l'un des pré-réglages pour l'extinction automatique
3. MUTE : Presser pour choisir le mode silencieux
4. SOURCE : Presser pour afficher le menu "Sources"
5. NUMBER : Touches numériques pour accès directs aux programmes TV
6. AUDIO/LANG. : Permet de choisir le mode audio entre stéréo, mono et dual/ Permet de choisir
la langue audio (si disponible)
7. TV/RADIO : Presser pour passer du mode TV au mode radio (si radios disponibles)
8. EXIT : Presser pour sortir du menu
9. CH.LIST : Liste des chaînes
10. BACK : Presser pour revenir à la dernière chaîne visionnée
11. MENU : Presser pour afficher l'interface utilisateur
12-13. CHANNELS "+" "-" : Presser pour passer à la chaîne suivante ou précédante
14. ◄►▲▼, ENTER: Use to select on-screen menu items and change menu values => <>^v,
ENTER : Utiliser pour naviguer dans le l'interface utilisateur
15-16. VOL "+" "-" : Presser pour augmenter ou diminuer le volume sonore
25.SUB.T : Presser pour afficher / supprimer les sous-titres (si disponibles)
28.EPG : Affichage du guide électronique des programmes (si disponible)
29.FAV : Presser pour afficher votre liste des chaînes préférées
30.P.MODE : Presser pour sélectionner le mode "Image"
8
Presser pour allumer/mettre en veille le TV
Page 10

31.S.MODE : Presser pour sélectionner le mode "Audio"
32.INFO : Presser pour afficher les informations du programme en cours
33/34/35/36 Touches couleur : Fonctions d'édition de la chaîne en cours
Fonctions du magnétoscope numérique (PVR)
18.T.SHIFT : Presser pour accéder aux fonctionnalités de contrôle du direct (Contrôles par les
touches ►,,,,,)
20.REC/●:Presser cette touche pour enregistrer directement la TNT sur périphérique de stockage
USB (Accédez au fichier dans le menu PVR ou en mode USB)
TEXT functions => Fonctions texte
21.TEXT : Fonctions télétexte
22.REVEAL : Presser pour afficher le télétexte
23.HOLD : Presser pour maintenir le télétexte
24.SUB.P : Sous-page télétexte
25.SUB.T: Sous-titrage télétexte
26.INDEX : Index télétexte
27.SIZE : Taille du télétexte
33/34/35/36 Touches couleur : Fonctions d'édition de télétexte
Fonctions USB
18. ► : Lecture / Pause
19. : STOP/Sortie du PVR ou du contrôle du direct
21. : Retour en arrière rapide
22. : Avance rapide
23. : Précédant
24. : Suivant
33/34/35/36 Touches couleur : Fonctions liées au média
Fonctions DVD
5. CHIFFRES : Touches numériques d'accès direct aux chaines
14. ◄►▲▼, ENTER :
les valeurs indiquées dans le menu
17. SETUP (PARAMÈTRES) :
20. : EJECTER
25.SUB.T (S-TITRES) : en mode DVD : affichage/ ARRÊT des sous-titres à l'écran.
26.TITLE (TITRE) : en mode DVD affiche le titre du DVD
27.ZOOM : en mode DVD Zoom sur l'image
28.D.MENU :
29.PROG. : En mode DVD, accès à la liste du menu, à la élection des chapitres, aux titres
30.LANG. :
31.SEARCH (Recherche) : en mode DVD Recherche des chapitres et de l'horloge
32.DISPLAY (AFFICHAGE) : Affiche les informations concernant le DVD
33.ANGLE : En mode DVD, sélection de l'angle de vision
34.SLOW (RALENTI) : RALENTI en mode DVD
35.A-B :
36.REPEAT (RÉPÉTITION) : Répéter Chapitre
9
Utilisez ces touches pour sélectionner les chapitres du menu et modifier
Accès au menu
Accès au menu du DVD
en mode DVD sélection de la langue audio
Répétition du point A au point B
Page 11
Réglage de base de l'affichage à l'écran
Guide d'installation
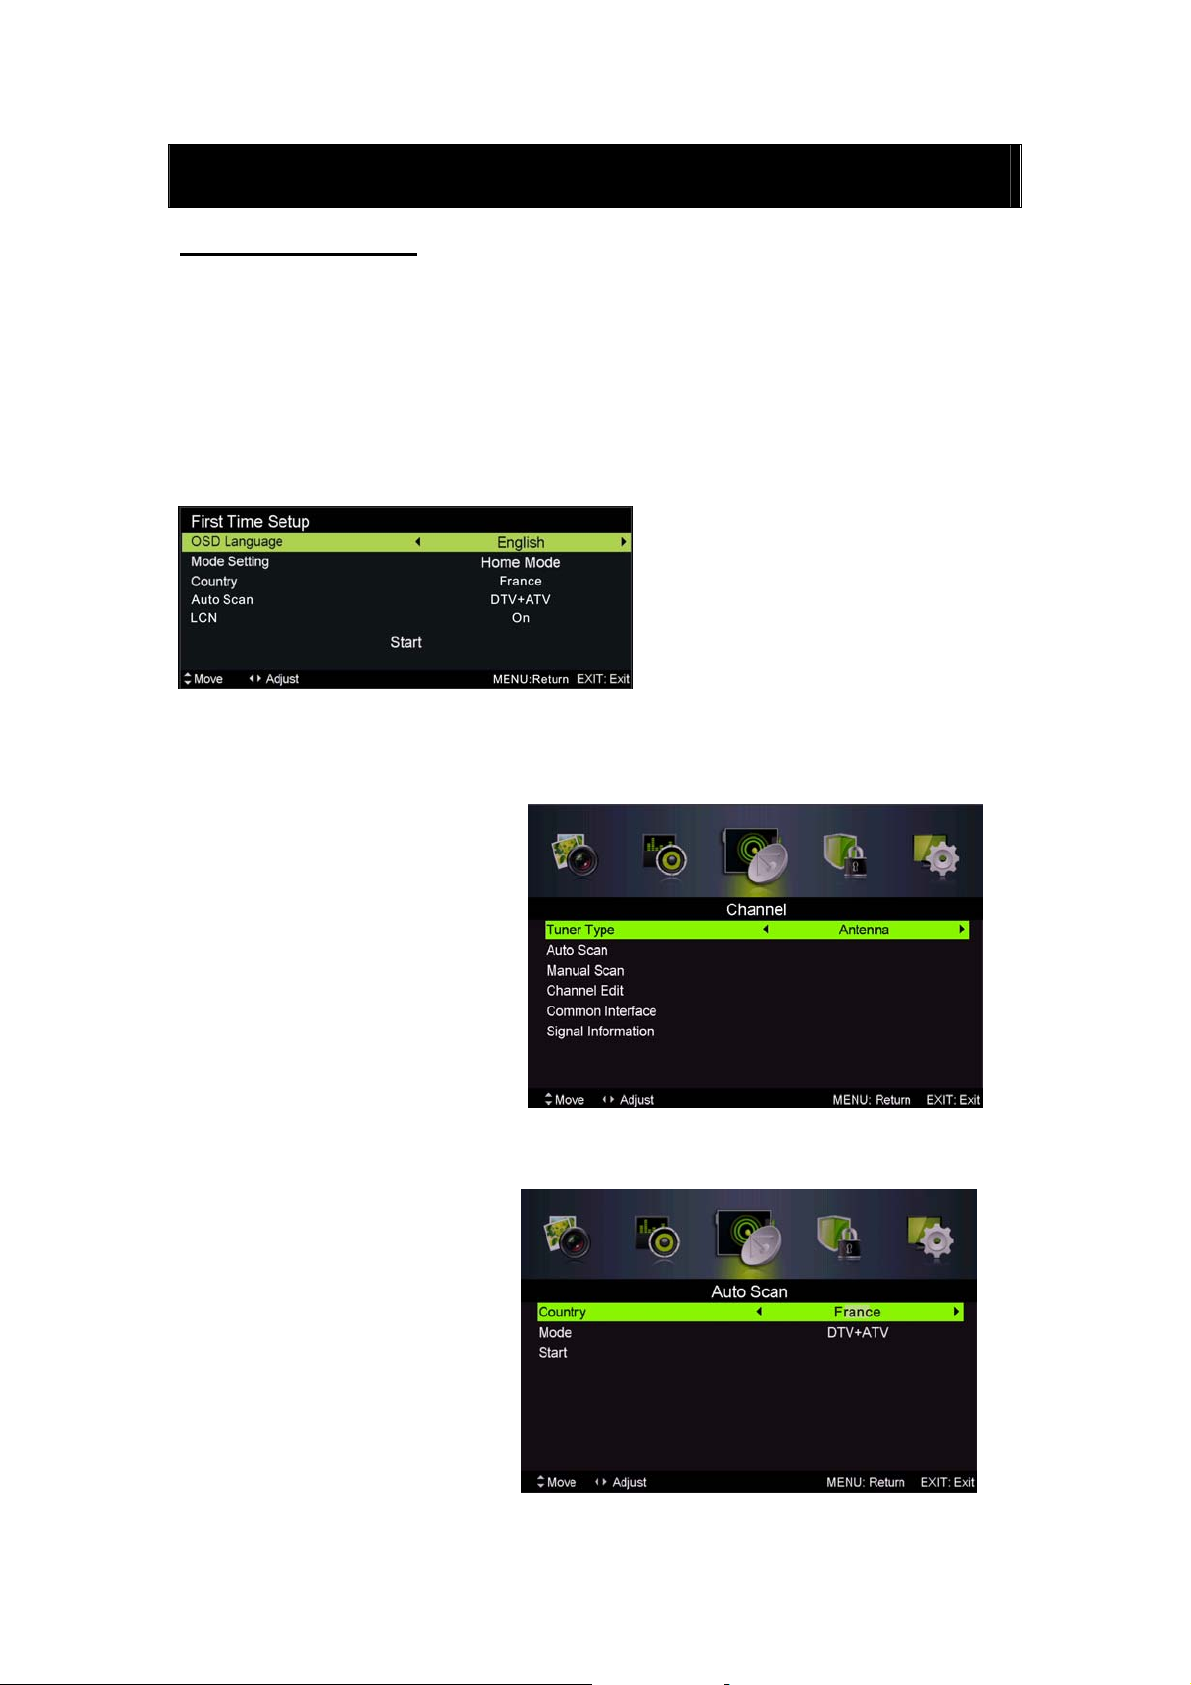
Si vous allumez le téléviseur pour la première fois et qu'il n'y a pas de programmes dans la
mémoire du téléviseur, le menu “Guide d'installation” apparaît à l'écran.
1. Appuyer sur la touche “c/d/e/f” pour sélectionner la langue locale.
2. Appuyer sur la touche “c/d/e/f” pour sélectionner le mode.
3. Appuyer sur la touche “c/d/e/f” pour sélectionner le pays
4. Appuyer sur la touche “c/d/e/f” pour sélectionner un mode : DTV+ATV, DTV, ATV.
5. Appuyer sur la touche “c/d/e/f” pour sélectionner “ON” (MARCHE) ou “OFF” (ARRET).
Remarque : La recherche d'une plate-forme peut être longue, faites preuve de patience !
Chaîne
Appuyer sur la touche MENU pour
afficher le menu principal. Appuyer
sur la touche ◄ / ► pour
sélectionner CHAINE dans le menu
principal.
1. Recherche Automatique :
Appuyer sur la touche “c/d”
pour sélectionner "Recherche
Automatique"
Appuyer sur la touche “c/d”
pour sélectionner le pays et sur la
touche “c/d” pour sélectionner le
mode.
Appuyer sur la touche “c/d/” puis sur “f” pour lancer la recherche. Appuyer sur MENU ou
10
Page 12
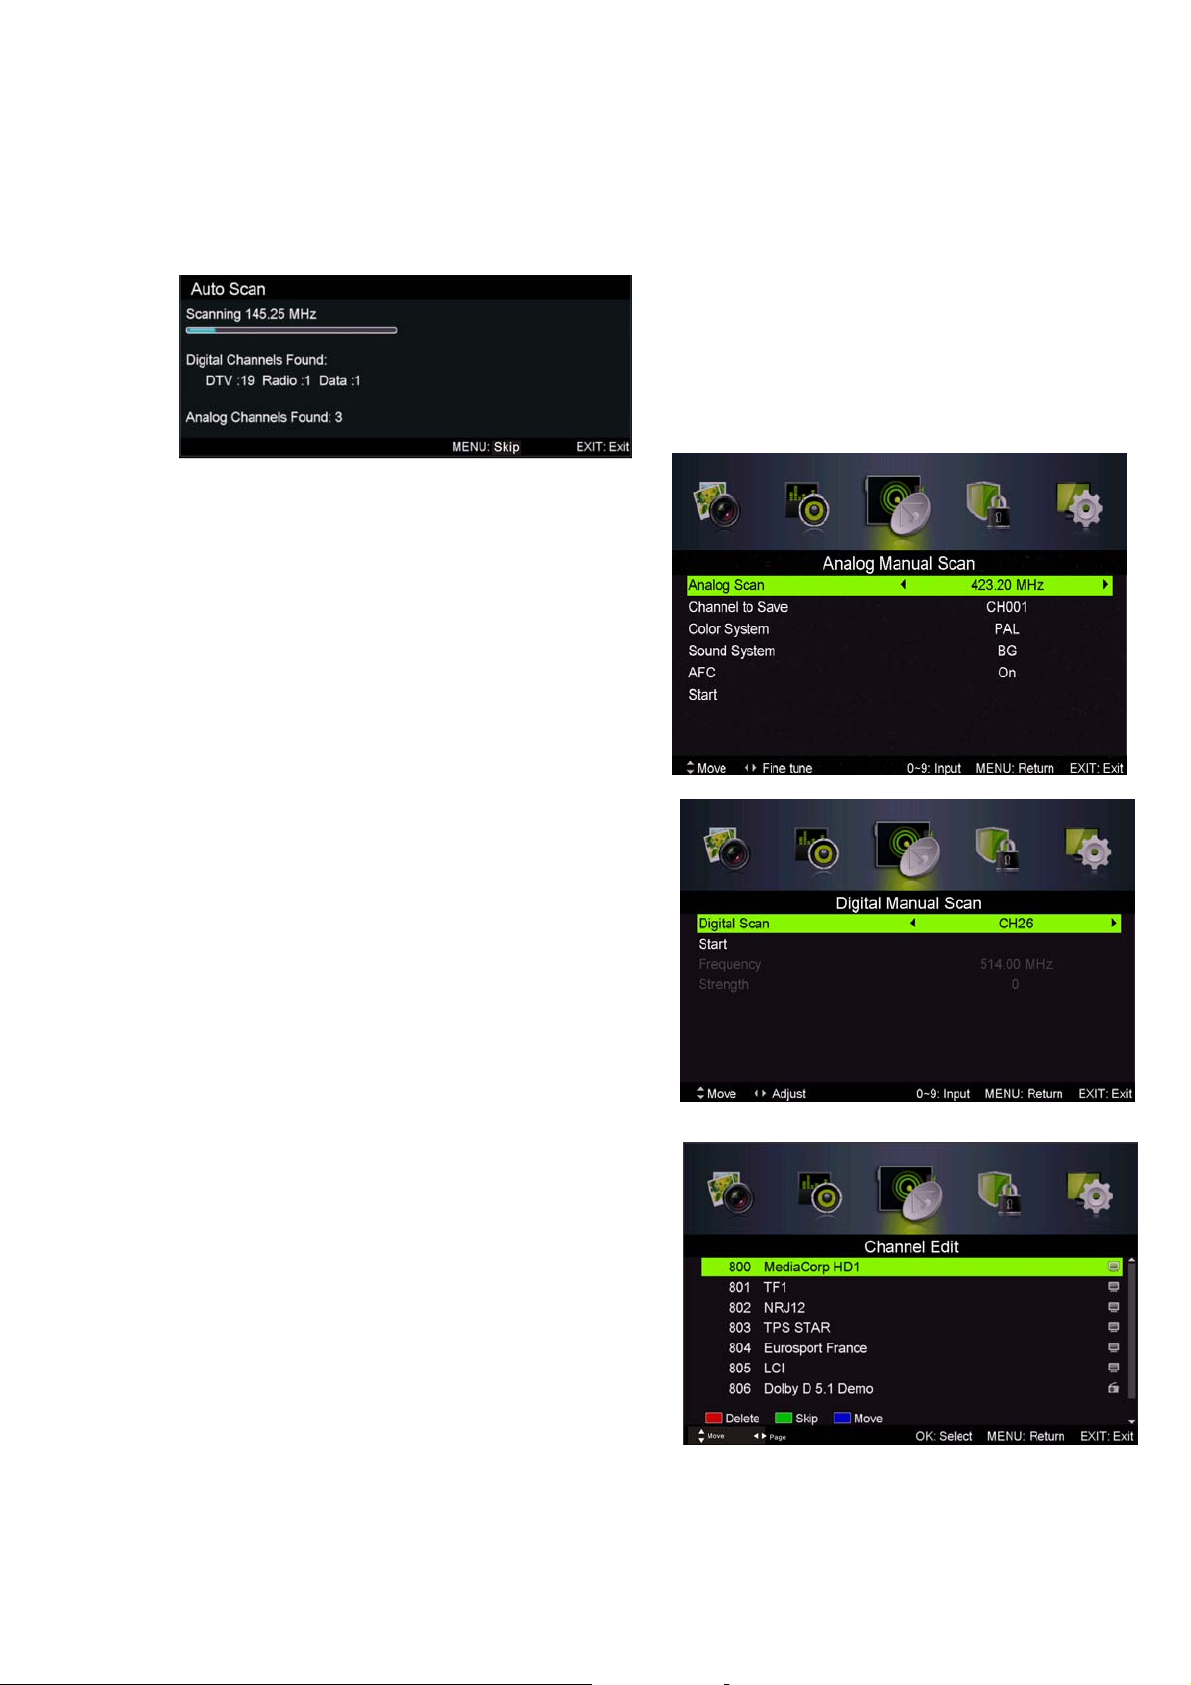
EXIT pour arrêter la recherche.
Remarque : La recherche d'une
plate-forme dure longtemps. Faites
preuve de patience !
2. Recherche Manuelle Analogique
Appuyer sur la touche “c/d” pour sélectionner
« Recherche Manuelle » et sur la touche “f” pour
accéder à la Recherche Manuelle Analogique.
Appuyer sur la touche MENU pour retourner au
menu précédent. Appuyer sur la touche "EXIT" pour
quitter le menu.
3.
Réglage manuel des chaînes numériques
Appuyer sur la touche “c/d” pour sélectionner
« Réglage manuel des chaînes numériques » et sur la
touche “d” pour commencer.
Appuyer sur la touche MENU pour retourner au
menu précédent.
Appuyer sur la touche "EXIT" pour quitter le menu.
Gestion des Chaines
4.
Appuyer sur la touche “c/d” pour sélectionner
“Gestion des chaînes” et appuyer sur la touche “ENTER”
pour accéder au menu.
a. SUPPRIMER
Appuyer sur la touche “c/d” pour sélectionner le
programme et appuyer une fois sur la touche “ROUGE”
pour supprimer le programme.
b. IGNORER
Appuyer sur la touche “c/d” pour sélectionner la
chaine que vous souhaitez ignorer et sur la touche
"BLEUE" pour l'ignorer Appuyer à nouveau sur la touche bleue pour annuler.
11
Page 13
c. DEPLACER
Appuyer sur la touche “c/d” pour sélectionner la chaine et sur la touche "JAUNE" pour déplacer.
Puis appuyer sur la touche “c/d” pour sélectionner la chaine que vous souhaitez déplacer.
Appuyez à nouveau sur la touche "JAUNE" pour
confirmer.
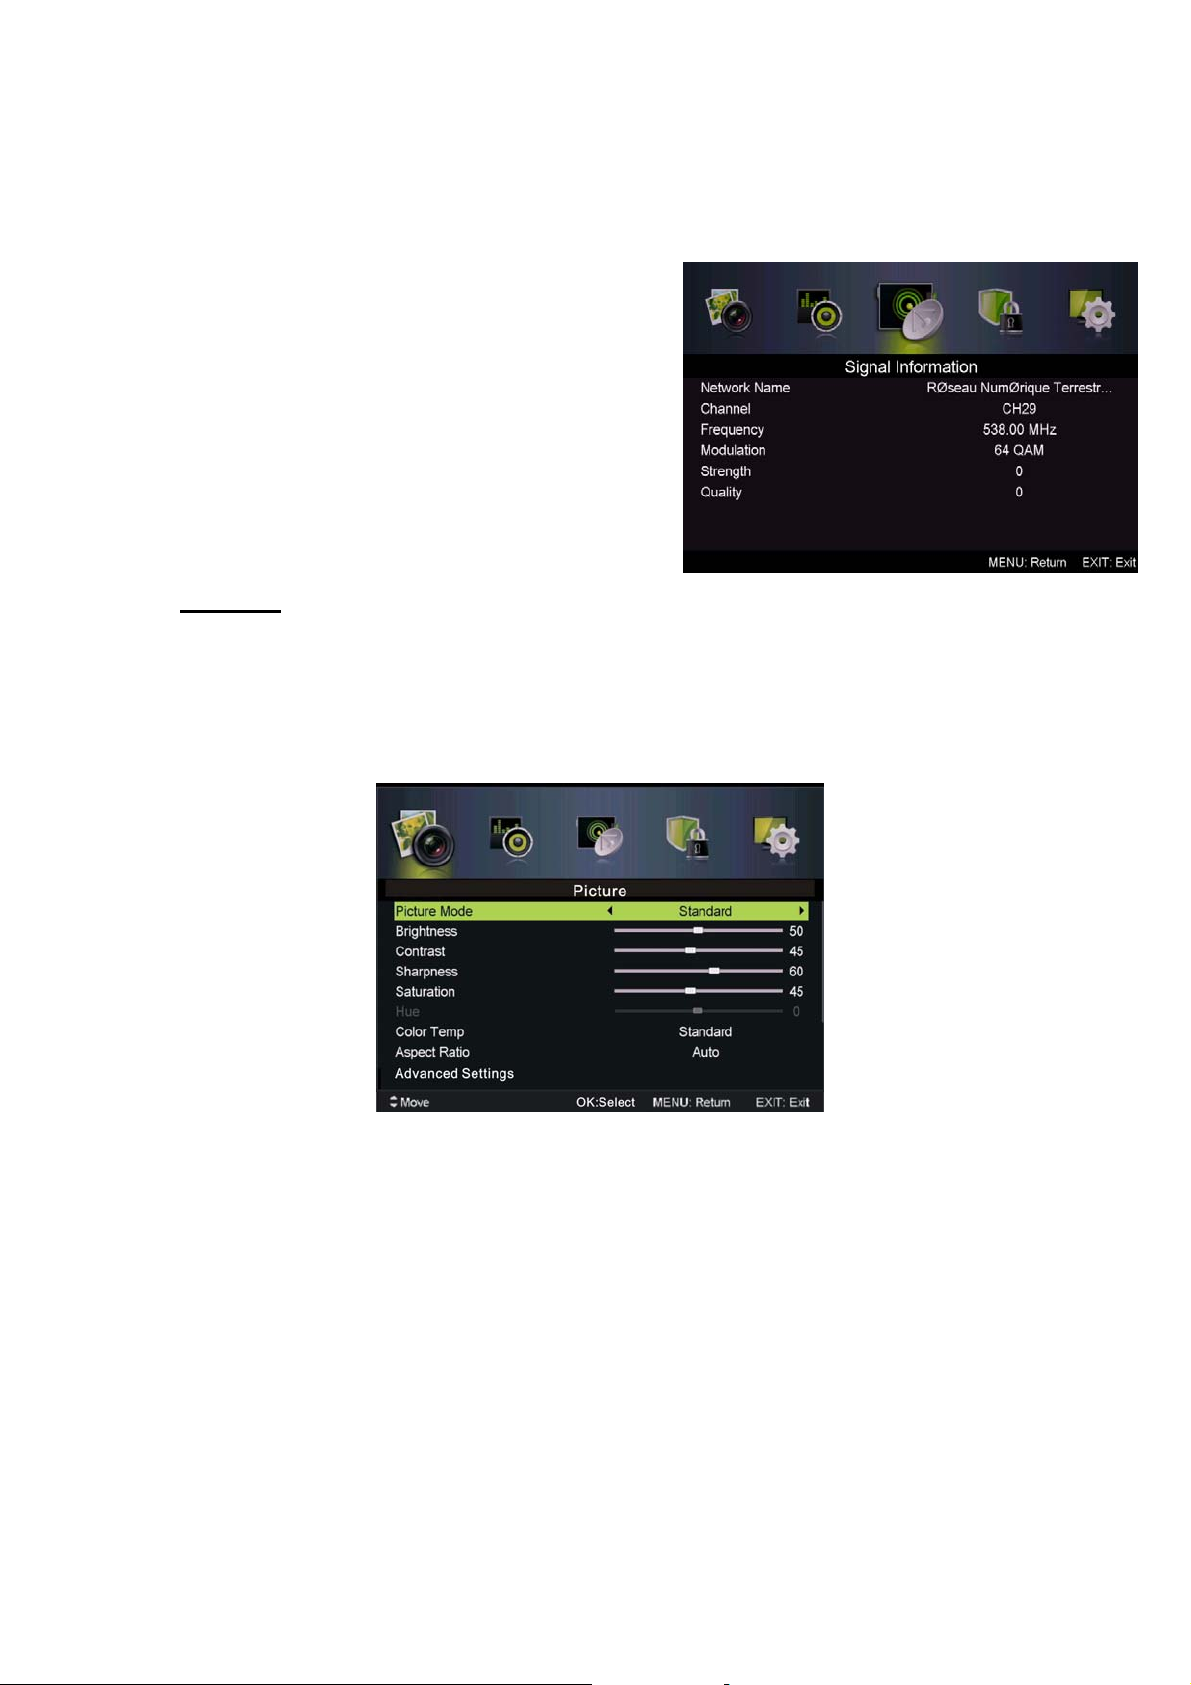
5. Informations concernant le signal
(uniquement en DTV)
Appuyer sur la touche “c/d” pour sélectionner
“Informations concernant le signal” et appuyer sur la
touche “ENTER” pour accéder au sous-menu. Appuyer
sur la touche MENU pour retourner au menu précédent.
Appuyer sur la touche "EXIT" pour quitter le menu.
IMAGE
Vous pouvez sélectionner le type d'image qui correspond le mieux à votre visionnage.
Appuyer sur la touche “MENU” pour ouvrir le menu OSD. Appuyer ensuite sur les touches
“e/f” et “c/d” pour sélectionner le menu “Image”. Appuyer sur la touche “c/d” pour
sélectionner “Mode Image” et appuyer sur la touche “e/f” pour faire la sélection.
1. Appuyer sur la touche “c/d” pour sélectionner “Luminosité” et appuyer sur la touche “e/f”
pour accéder au menu de réglage de luminosité afin de régler la luminosité.
2. Appuyer sur la touche “c/d” pour sélectionner “Contraste” et appuyer sur la touche “e/f”
pour accéder au menu de réglage du contraste afin de régler le contraste.
3. Appuyer sur la touche “c/d” pour sélectionner “Netteté” et appuyer sur la touche “e/f”
pour accéder au menu de réglage de la netteté afin de régler la netteté.
4. Appuyer sur la touche “c/d” pour sélectionner “Saturation” et appuyer sur la touche “e/f”
pour accéder au menu de réglage de la Saturation afin de régler la saturation.
5. Appuyer sur la touche “c/d” pour sélectionner “Teinte” et appuyer sur la touche “e/f” pour
accéder au menu de réglage de la teinte afin de régler la teinte.
6. Appuyer sur la touche “c/d” pour sélectionner “Netteté” et appuyer sur la touche “e/f”
pour accéder au menu de réglage de la netteté afin de régler la netteté.
7. Appuyer sur la touche “c/d” pour sélectionner “Temp. Couleur” et appuyer sur la touche
“e/f” pour sélectionner le mode : Standard, Froide, Chaude.
12
Page 14
8. Appuyer sur la touche “c/d” pour sélectionner “Format d'écran” et appuyer sur la touche
“e/f” pour faire la sélection.
9. Appuyer sur la touche “c/d” pour sélectionner “Paramètres Avancés” et appuyer sur la touche
“f/” pour accéder au menu de réglage des Paramètres Avancés pour faire le réglage.
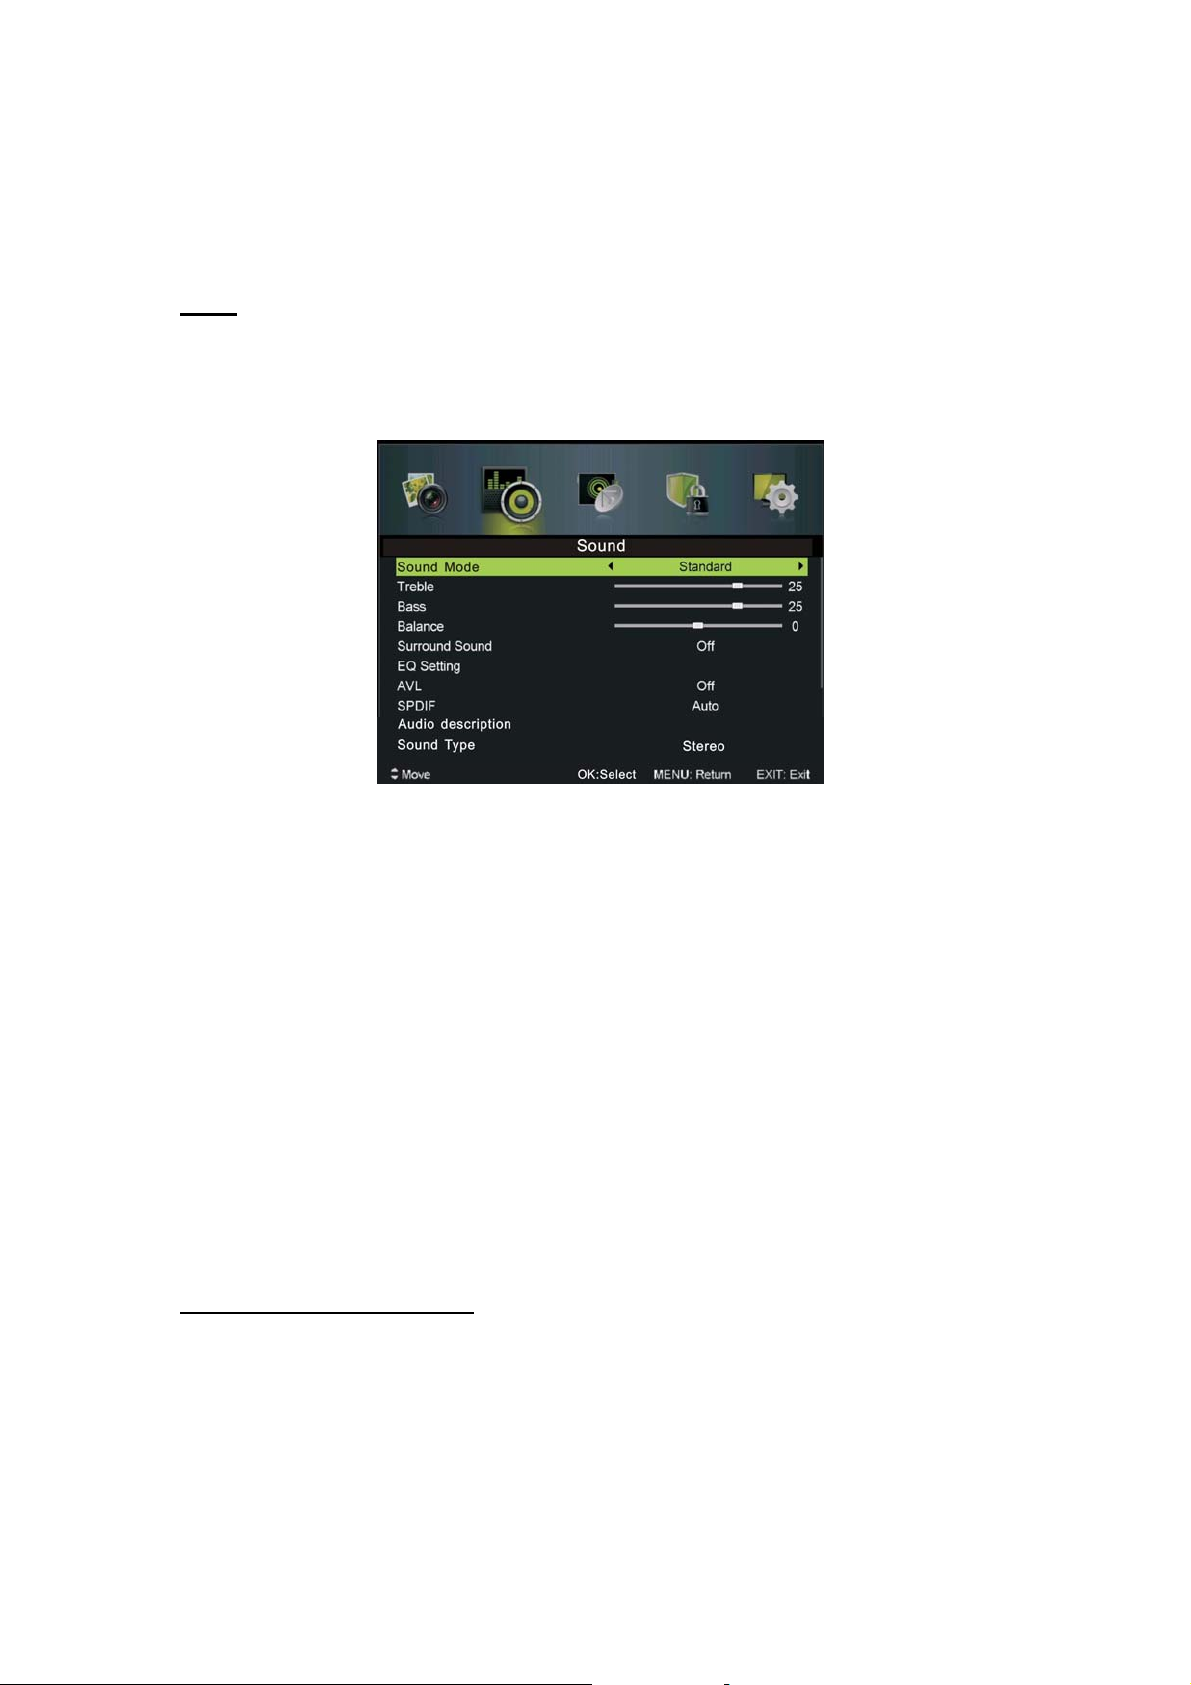
SON
Vous pouvez sélectionner le type de son qui correspond le mieux à votre écoute.
Appuyer sur la touche “MENU” pour ouvrir le menu OSD. Appuyer ensuite sur la touche “e/f”
pour sélectionner le menu “Son”.
1. Appuyer sur la touche “c/d” pour sélectionner “Mode Son” et sur la touche “e/f” pour
sélectionner le mode.
2. Appuyer sur la touche “c/d” pour sélectionner “Aigus” et appuyer sur la touche “e/f” pour
faire le réglage.
3. Appuyer sur la touche “c/d” pour sélectionner “Basses” et appuyer sur la touche “e/f”
pour faire le réglage.
4. Appuyer sur la touche “c/d” pour sélectionner “Balance” et appuyer sur la touche “e/f”
pour faire le réglage.
5. Appuyer sur la touche “c/d” pour sélectionner “Son surround” et sur “e/f” pour
sélectionner 0N” ou “OFF”.
6. Appuyer sur la touche “c/d” pour sélectionner “Réglage EQ” et appuyer sur la touche
“e/f” pour accéder au menu de réglage de l'équaliseur afin de régler l'équaliseur.
7. Appuyer sur la touche “c/d” pour sélectionner “AVL” (limiteur automatique de volume) et
appuyer sur la touche “e/f” pour choisir “On” ou “Off”.
Verrouillage du Système
Appuyer sur la touche “MENU” pour ouvrir le menu OSD. Appuyer sur la touche “e/f” pour
sélectionner le menu “Verrouillage du système”. Le mot de passe par défaut est “0000”.
Remarque : Le mot de passe administrateur est “23 6 3 ”.
13
Page 15

1.Appuyer sur la touche “c/d” pour sélectionner “Activer” puis sur la touche “e/f” pour
sélectionner “On” ou “Off”
2.Appuyer sur la touche “c/d” pour sélectionner “verrouillage des chaines” et sur la touche “f/”
pour sélectionner la ou les chaine(s) que vous souhaitez verrouiller.
3.Appuyez sur la touche “c/d” pour sélectionner “Contrôle Parental” et sur “e/f”pour paramétrer.
4.Appuyer sur la touche ▼ / ▲ pour sélectionner “Verrouillage Clavier”, puis sélectionner “On”
ou “Off”. Le clavier devient inactif si vous choisissez “On” dans Verrouillage Clavier.
5.Appuyer sur la touche ▼ / ▲ pour sélectionner “Nouveau Mot de Passe” et définir votre nouveau
mot de passe.
6.Appuyer sur la touche ▼ / ▲ pour sélectionner Annuler Verrouillage, puis sur la touche “f” pour
annuler.
PARAMETRES
Appuyer sur la touche “MENU” pour ouvrir le menu OSD. Appuyer ensuite sur les touches “e/f”
et pour sélectionner le menu “Paramètres”.
1. Appuyer sur la touche “//” pour sélectionner “Langue OSD” puis sur la touche “e/f” pour
choisir la langue OSD que vous souhaitez.
2. Appuyer sur la touche “c/d/” pour sélectionner “Langue Audio” puis sur la touche “f” pour
accéder au menu de réglage de la Langue Audio et choisir la langue que vous souhaitez.
3. Appuyer sur la touche “c/d” pour sélectionner “Sous-titres” et appuyer sur la touche “f/”
pour choisir “On” ou “Off”.
14
Page 16
Note: Cette fonction n’est disponible qu’en mode DTV.
4. Appuyer sur la touche “c/d” pour sélectionner le menu “Télétexte” et appuyer sur la touche
“f” pour accéder au sous-menu.
5. Appuyer sur la touche “c/d” pour sélectionner “Ecran Bleu” et appuyer sur la touche “e/f’’
pour sélectionner “On” ou “Off”.
6. Appuyer sur la touche “c/d /e/f” pour sélectionner Réglage Mode.
7. Appuyer sur la touche “c/d/e/f” pour sélectionner “Réglage Heure”.
8. Appuyer sur la touche “c/d/e/f” pour sélectionner “Paramètres PVR”.
9. Appuyer sur la touche “c/d” pour sélectionner “Première Installation”, puis appuyer sur “ENTER”
pour définir les options pertinentes y compris la langue OSD, le pays et la recherche des chaines.
10. Appuyer sur la touche “c/d/e/f” pour sélectionner “OAD”, puis sur “ENTER” pour accéder
au sous-menu.
11. Appuyer sur la touche “c/d” pour sélectionner “Réinitialisation”, puis sur “ENTER”. Appuyer sur la
touche “e” pour sélectionner “Oui” afin de restaurer tous les réglages par défaut.
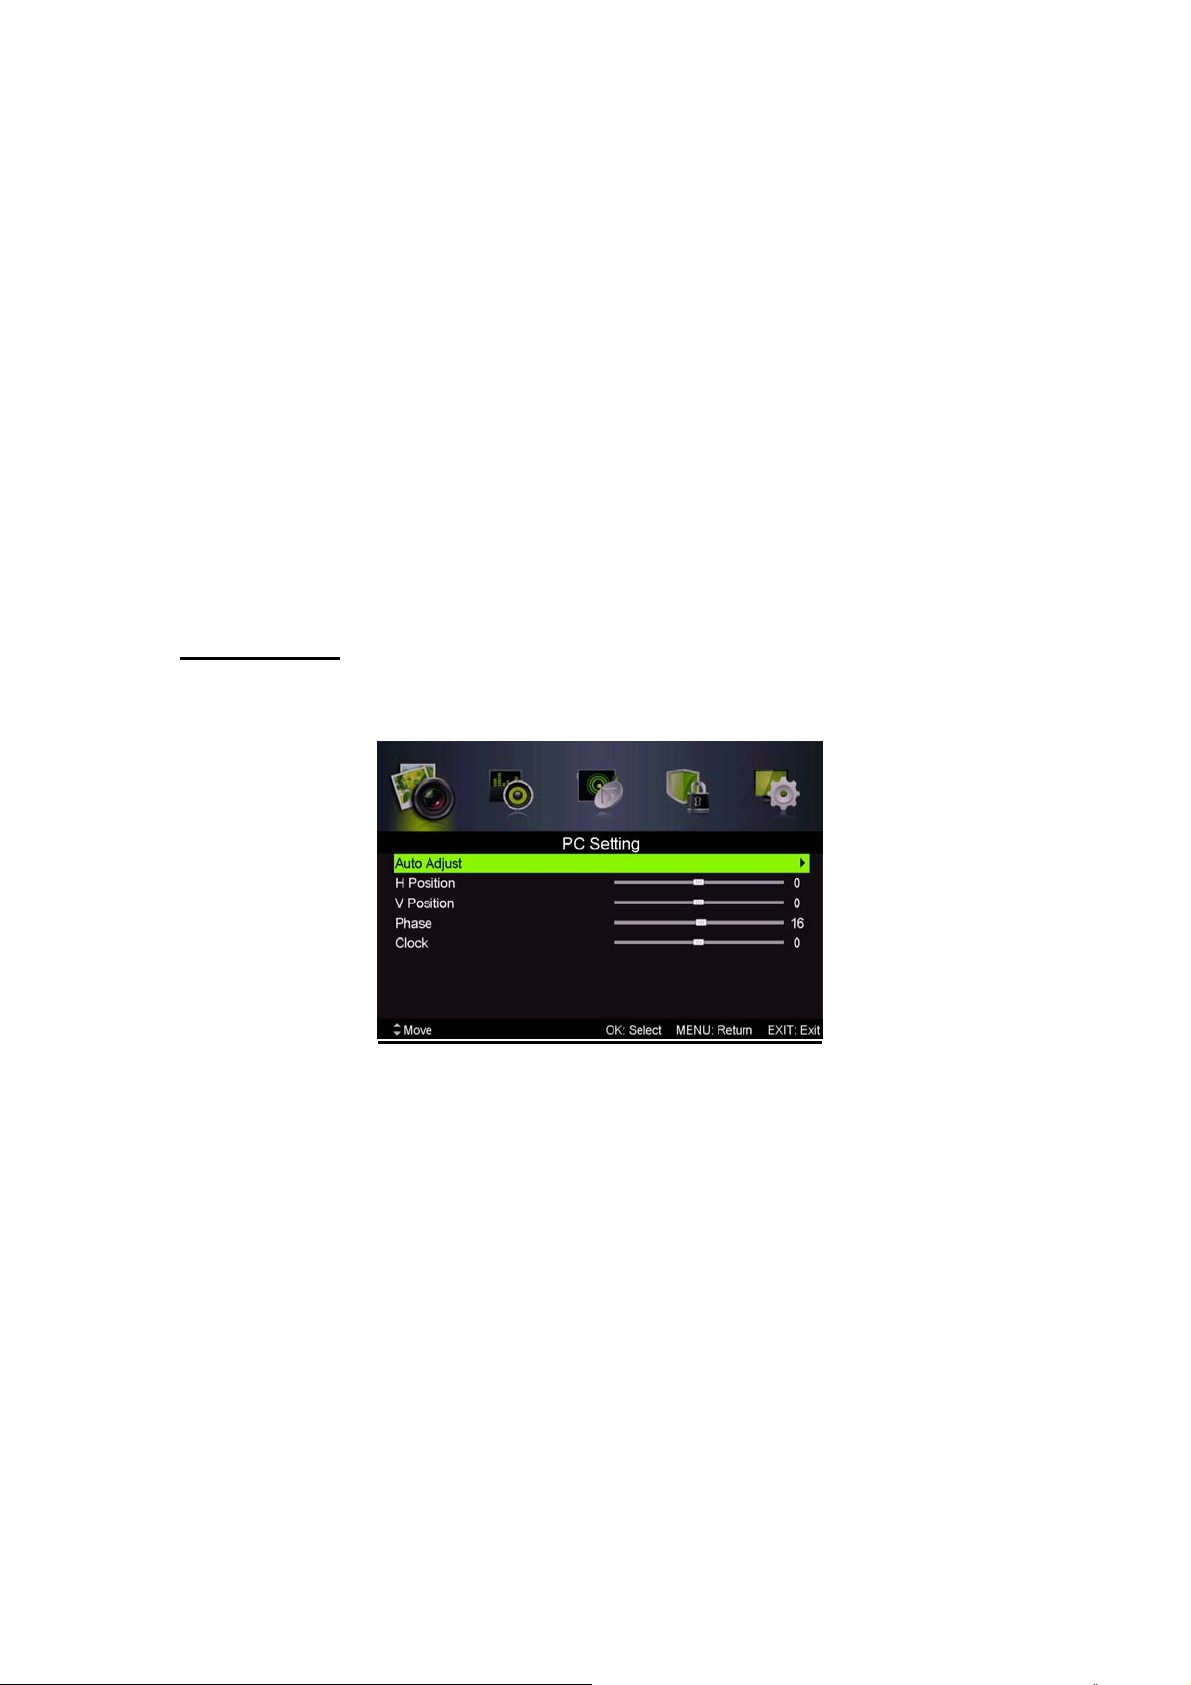
Ordinateur
Appuyer sur la touche “MENU” pour ouvrir le menu OSD. Puis appuyer sur la touche “e/f’’ pour
sélectionner le menu “Configuration PC”. (Uniquement disponible sur modèle PC.)
1. Appuyer sur la touche “c/d” pour sélectionner le menu “Réglage Auto” puis appuyer sur “f”
pour lancer le réglage automatique.
2. Appuyer sur la touche “c/d” pour sélectionner “Position H” et appuyer sur la touche “e/f”
pour faire le réglage.
3. Appuyer sur la touche “c/d” pour sélectionner “Position H” et appuyer sur la touche “e/f”
pour faire le réglage.
4. Appuyer sur la touche “c/d” pour sélectionner “Phase” and appuyer sur la touche “e/f” pour ajuster.
5. Appuyer sur la touche “c/d” pour sélectionner “Horloge” et appuyer sur la touche “e/f”
pour faire le réglage.
15
Page 17
Fonctions DTV
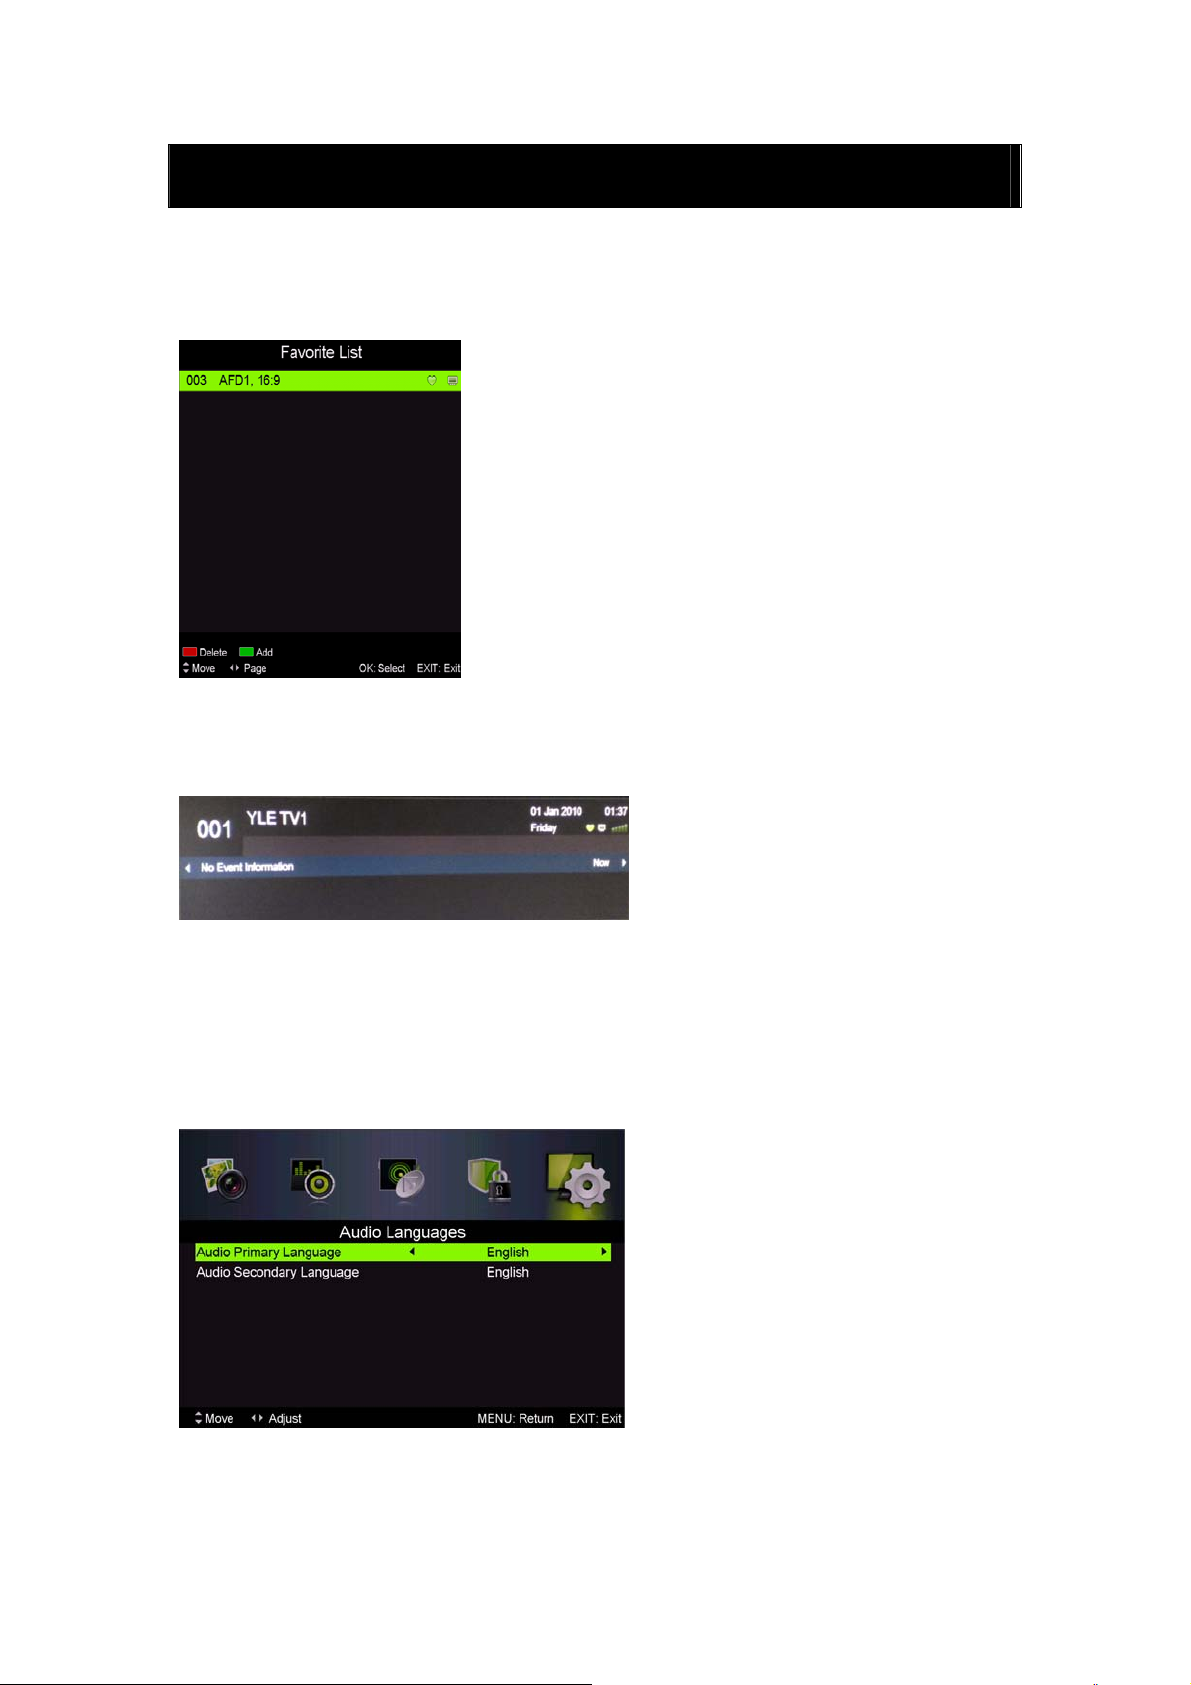
Liste Favoris
Lorsque la source DTV est sélectionnée, l'utilisateur peut entrer une liste de favoris en
appuyant sur la touche “FAV”. L’écran liste des favoris est illustré comme suit :
Information Programmes
Lorsque la source DTV est sélectionnée, vous pouvez appuyer sur la touche “DISPLAY” pour
afficher les informations sur les chaînes. L'écran Information Programmes est illustré comme suit:
Audio
Lorsque la source DTV est sélectionnée, vous pouvez entrer dans le menu Configuration pour
accéder au menu "Langue Audio". La fenêtre “langue audio” s'affiche ; appuyer sur la touche
” pour sélectionner le menu “langue audio”.
c/d
“
Guide électronique des programmes (EPG)
16
Page 18
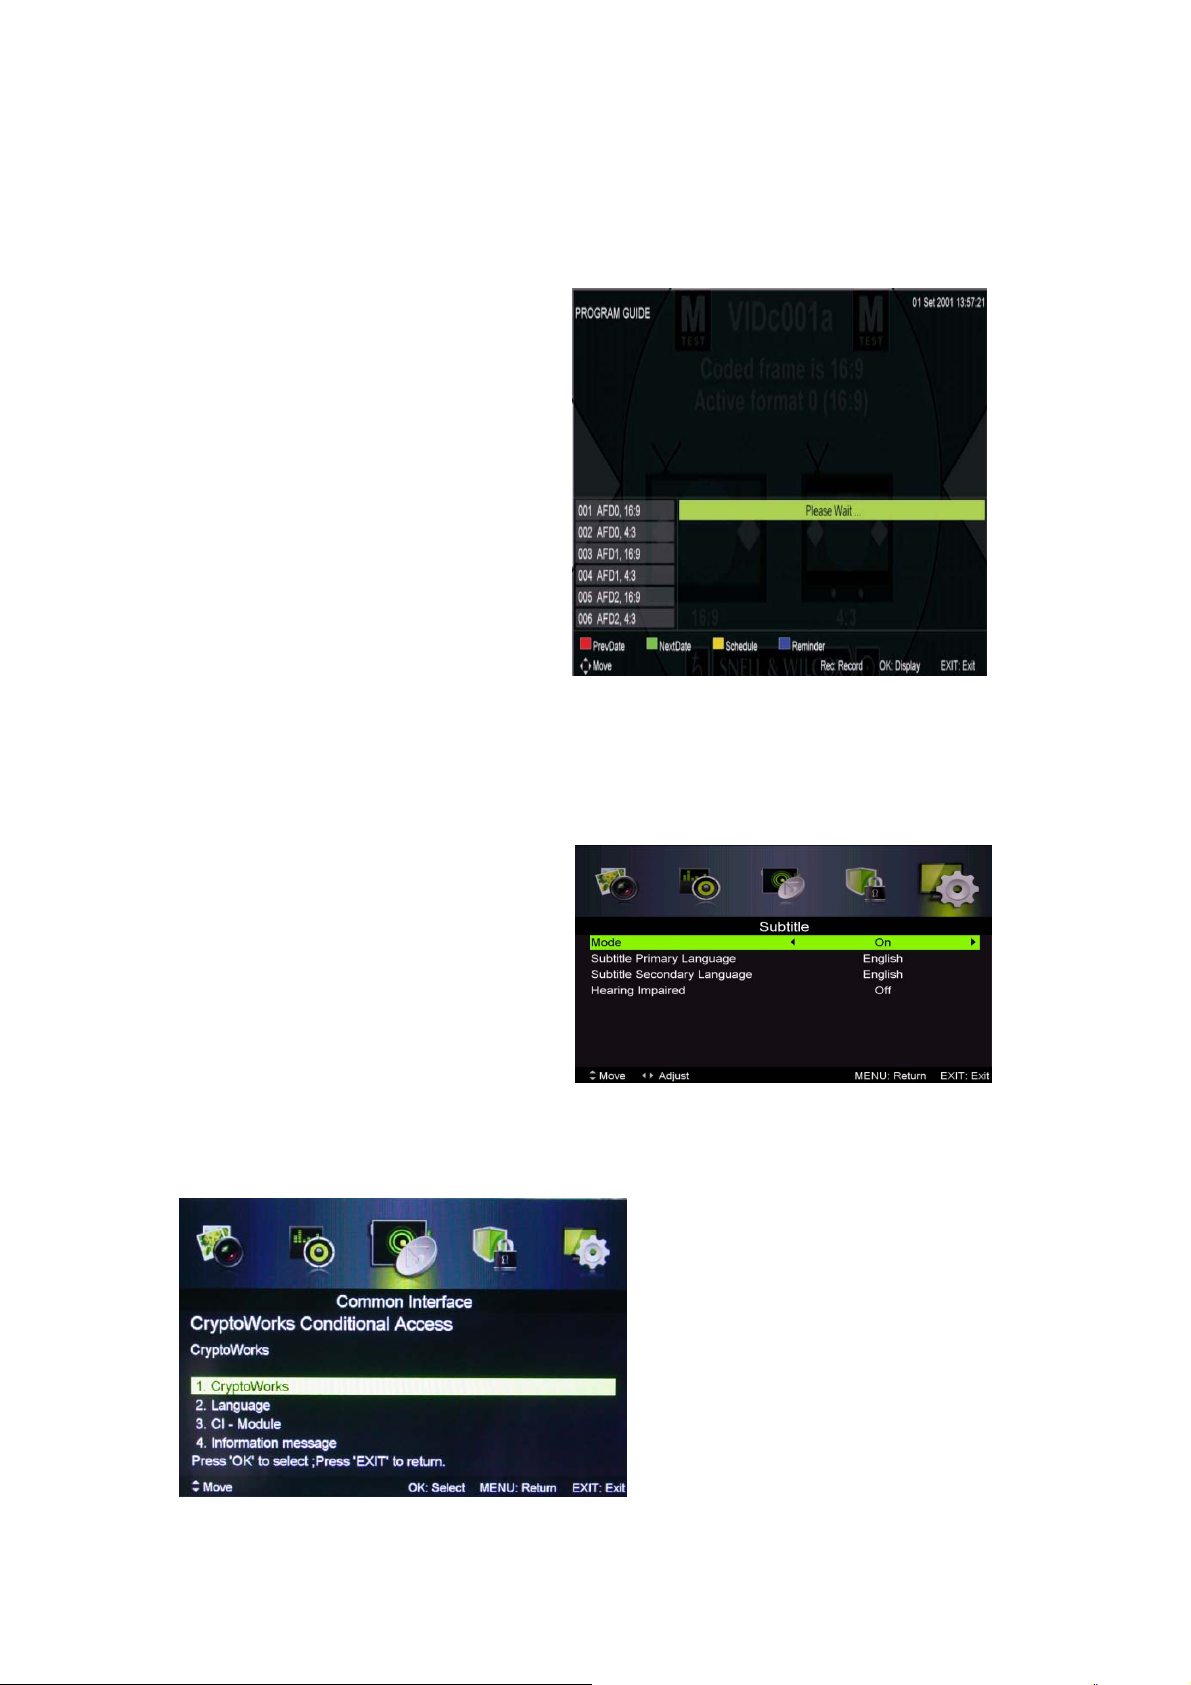
Le Guide électronique des programmes (EPG) fournit des informations concernant le programme
diffusé actuellement ou ultérieurement. Appuyer sur la touche "EPG" pour que le système affiche la fenêtre
EPG La DATE et l'HEURE s'affichent à droite de la fenêtre. Le côté gauche de la fenêtre indique toutes les
chaines. Le côté droit donne les programmes de la chaine. Le programme choisi s'affiche également en
haut de l'écran.
1. Appuyer sur la touche “c/d” pour
sélectionner le “programme”. Vous
pouvez appuyer sur la touche
"ROUGE" pour entrer en mode
enregistrement. Appuyer sur la touche
"VERTE" pour afficher les détails
relatifs au programme. Appuyer sur la
touche "JAUNE" pour vérifier les
détails concernant l'introduction de la
Liste des enregistrements programmés
du PVR. Appuyer sur la touche "Bleue"
pour entrer les paramètres de rappel.
2. Appuyer sur la touche “c/d” pour sélectionner “CH” puis sur “e/f” pour sélectionner le
numéro de la chaine afin de voir les prévisions de programme de la chaine en cours d'utilisation.
Remarque : Le disque externe sera formaté lors de l'enregistrement : veillez à ne pas y stocker
des fichiers importants
Sous-titres
Lorsque DTV est sélectionné comme source,
les utilisateurs ont accès au menu pour faire
les réglages.
Remarque : Les photos en regard des
fonctions ne sont fournies que pour
référence.
Interface commune
Appuyer sur la touche “
entrer dans le sous-menu.
Accessible uniquement avec une carte IC en DTV.
e/f” pour sélectionner Interface Commune, puis sur la touche ENTER pour
17
Page 19
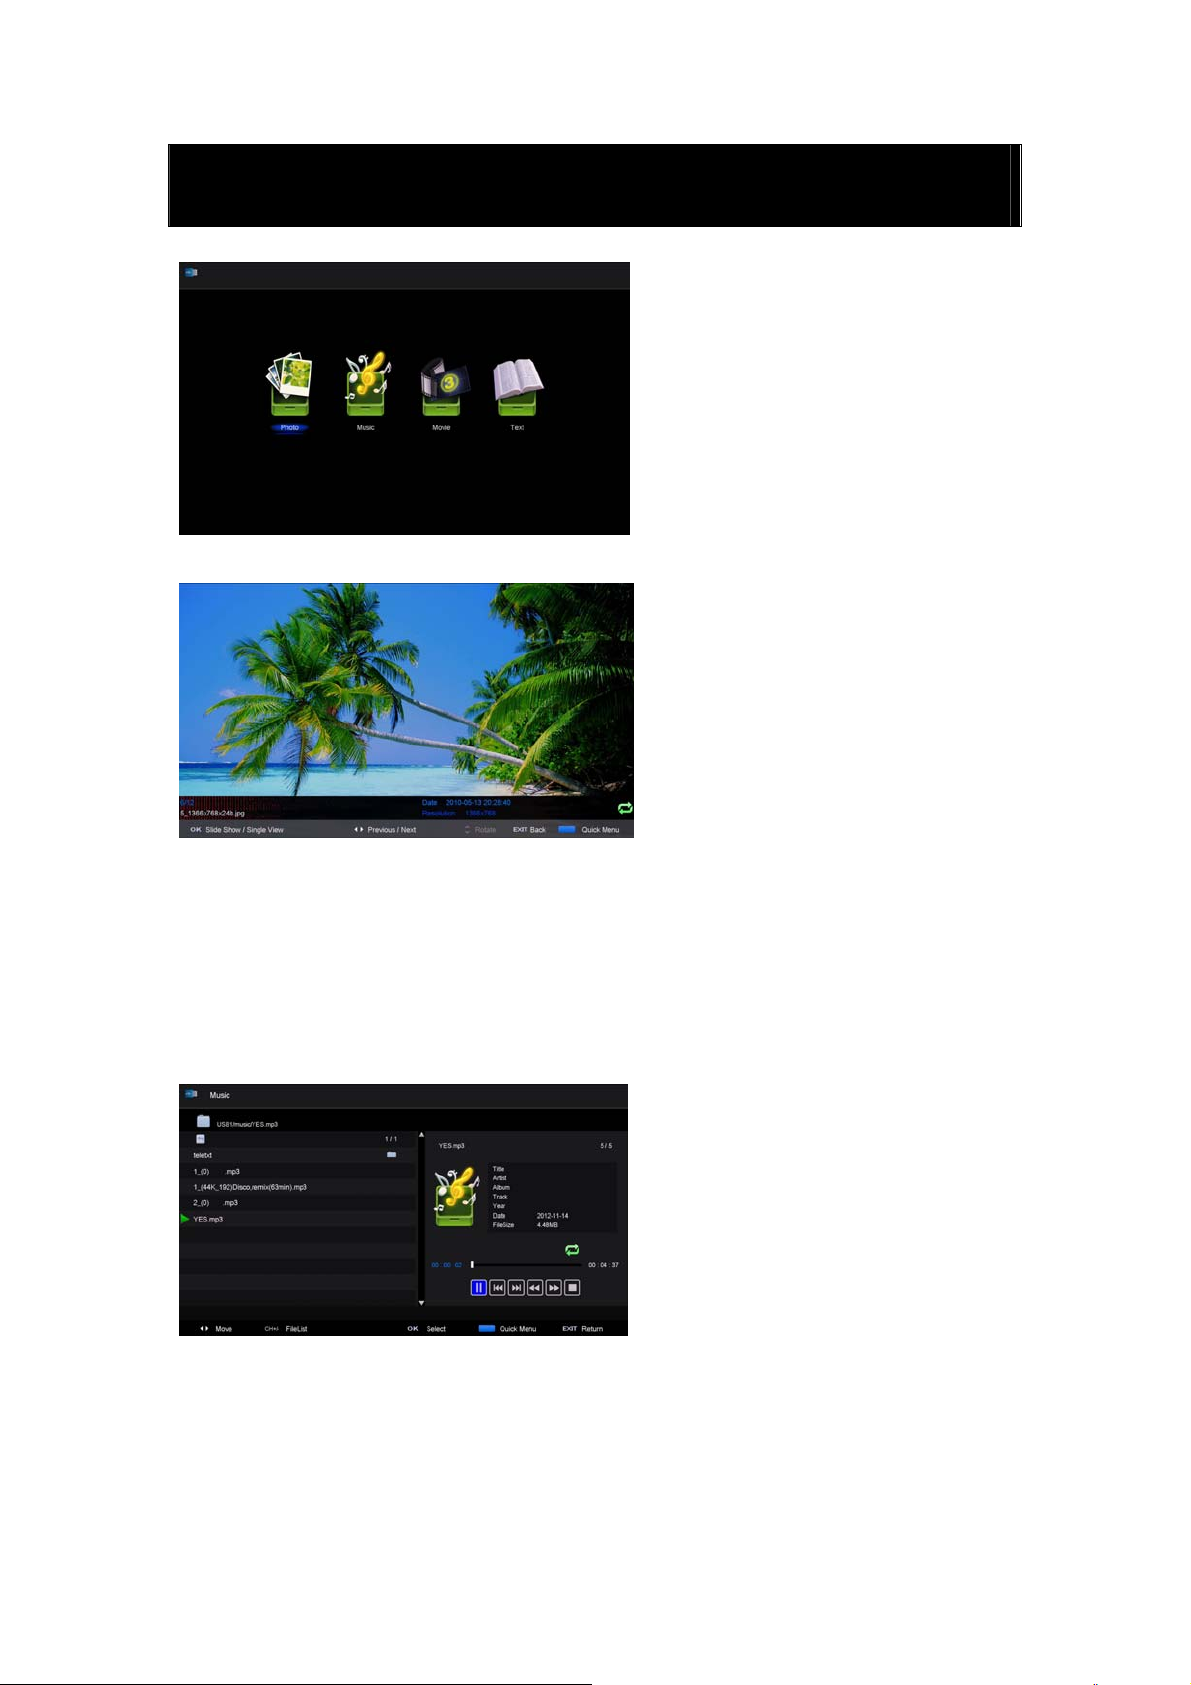
Fonctions USB
Appuyer sur la touche “SOURCE” pour sélectionner la source “MEDIA”.
Photo
1. Appuyer sur la touche “◄ / ►” pour accéder à l'option “PHOTO” et appuyer sur “ENTER” pour
valider.
2. Appuyer sur la touche ◄ / ► pour sélectionner le disque que vous souhaitez visualiser, puis sur
la touche OK pour entrer.
3. Appuyer sur la touche "BLEUE" pour ouvrir le sous-menu.
4. Appuyer sur la touche EXIT pour retourner au menu précédent.
Musique
1.
1. Appuyer sur la touche ◄/► pour sélectionner MUSIQUE dans le menu principal, puis sur la
touche OK pour entrer.
2. Appuyer sur la touche ◄ / ► pour sélectionner le disque que vous souhaitez visualiser, puis sur
la touche OK pour entrer.
3. Appuyer sur la touche "BLEUE" pour ouvrir le sous-menu ;
4. Appuyer sur la touche EXIT pour retourner au menu précédent.
18
Page 20
Cinéma
1.
Appuyer sur la touche ◄/► pour sélectionner FILM dans le menu principal, puis sur la touche
OK pour entrer.
Appuyer sur la touche c/d
2.
la touche OK pour entrer.
3. Appuyer sur la touche "BLEUE" pour ouvrir le sous-menu ;
4. Appuyer sur la touche EXIT pour retourner au menu précédent.
pour sélectionner le disque que vous souhaitez regarder, puis sur
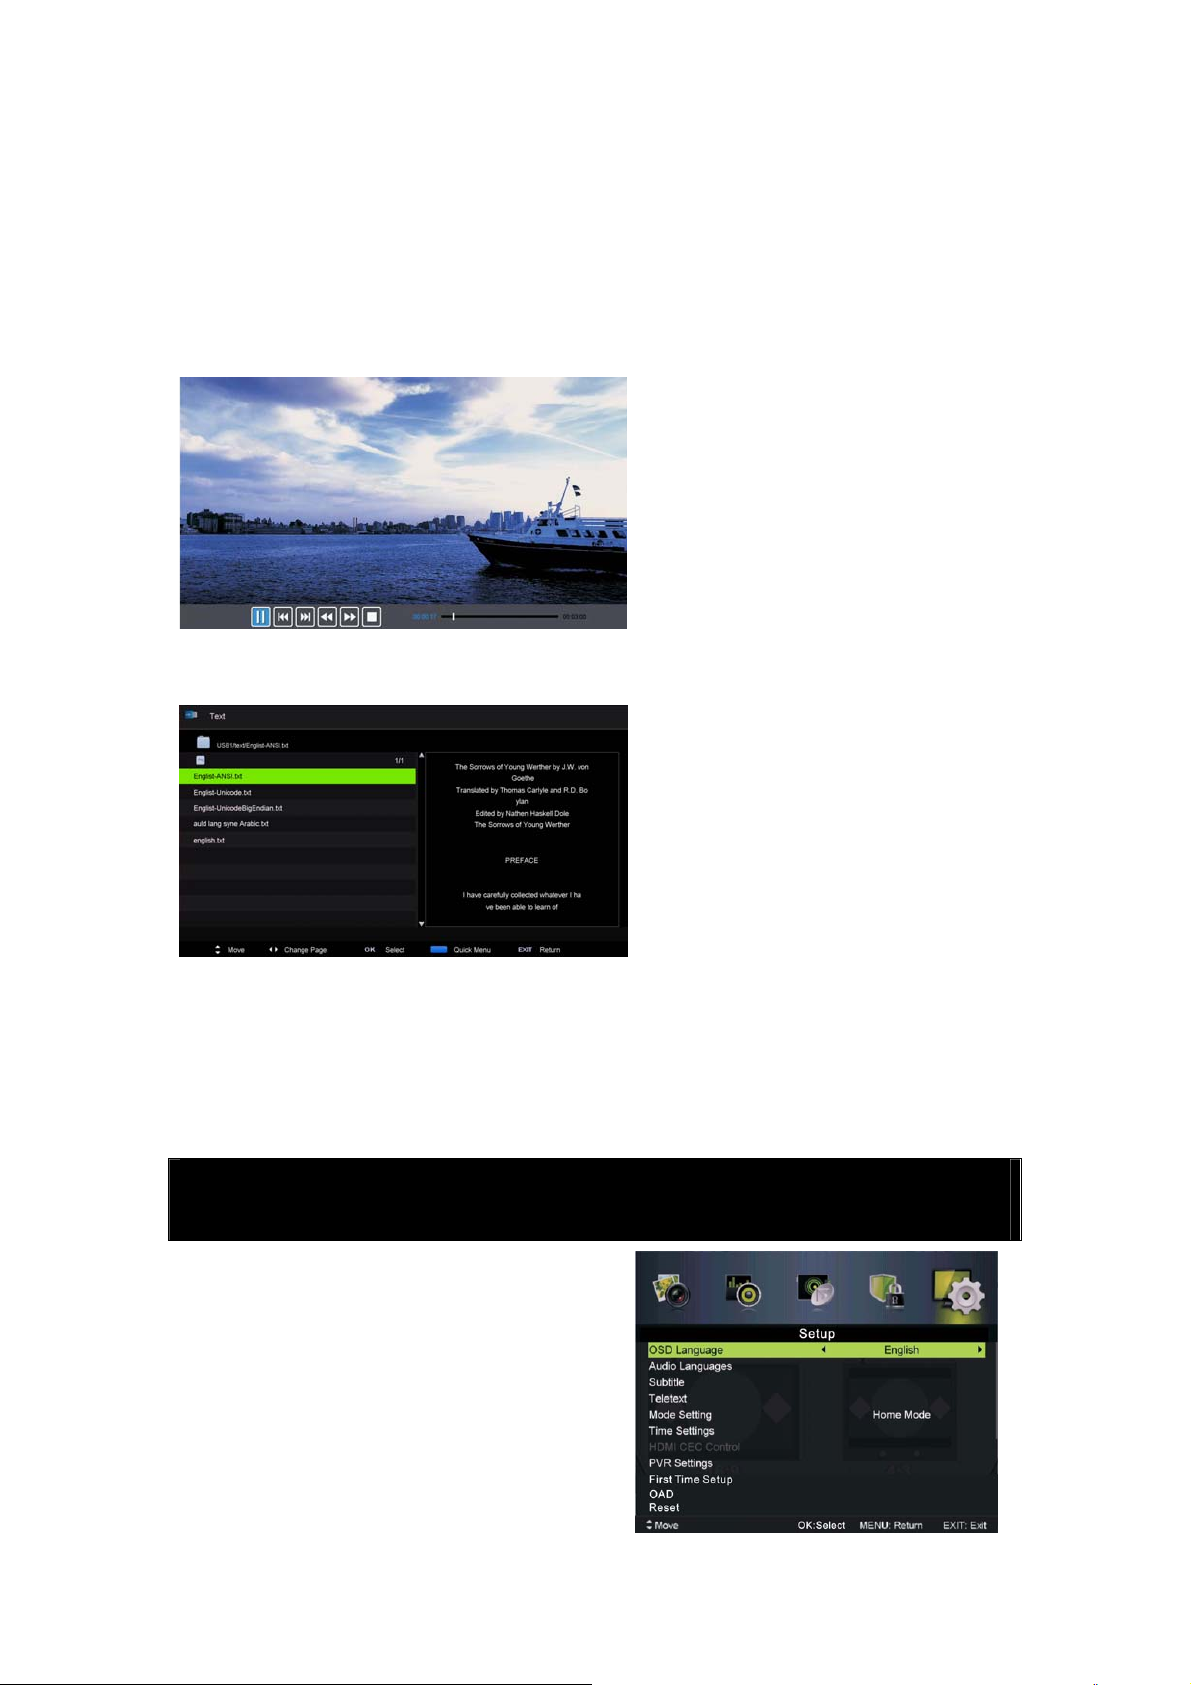
Texte
1. Appuyer sur la touche ◄/► pour sélectionner TEXTE dans le menu principal, puis sur la touche
OK pour entrer.
2. Appuyer sur la touche
la touche OK pour entrer.
3. Appuyer sur la touche "BLEUE" pour ouvrir le sous-menu.
4. Appuyer sur la touche EXIT pour retourner au menu précédent.
c/d pour sélectionner le disque que vous souhaitez regarder, puis sur
Fonctionnement du magnétoscope numérique
En source DTV, appuyer sur la touche
“MENU” pour ouvrir le menu OSD.
Appuyer ensuite sur les touches“◄ /
►” pour sélectionner le menu
“Configuration”.
.
19
Page 21

1. Appuyer sur la touche “c/d”
pour sélectionner “PVR Settings”
(paramètres PVR) puis appuyer sur
“ENTER” ou “►” pour entrer dans
le menu.
a) Appuyer sur la touche “◄ / ►” pour
sélectionner Gestionnaire de Fichiers”
et appuyer sur la touche “ENTER” pour
vérifier le système de fichiers PVR.
b) Appuyer sur la touche “◄ / ►”
pour sélectionner “Liste
Périphériques” et appuyer sur la
touche “ENTER” pour accéder au
sous-menu.
c) Appuyer sur la touche
“c/d”pour sélectionner
“Enregistrements Programmés” et
appuyer sur la touche “ENTER”
pour faire votre sélection.
Remarque :
1. Le disque externe sera formaté lors de l'enregistrement : veillez à ne pas y stocker des
fichiers importants
2. Appuyer sur la touche “
” une première fois pour lancer l'enregistrement. Après un
second appui, l'icône de l'enregistreur va être réduite, mais l'enregistrement continue.
20
Page 22

Fonctionnement du lecteur DVD(G10SM02)
TABLE DES MATIÈRES
Basic Operation (Fonctionnement de base)
·······································································
22
DVD Setup Mode (Mode Configuration DVD) ··························································22
General Setup (Configuration générale)
··················································································22
Audio Setup (Configuration audio)············································································· 24
Preference Setup (Configuration favorite)·································································· 25
21
Page 23

Opérations de base
1. Appuyez sur la touche Source sur la télécommande pour choisir la source entrée DVD.
2. Appuyez sur cette touche pour charger le disque dans le lecteur.
Tenez le disque par les bords, sans en toucher les surfaces. Puis insérez le DVD, le côté
étiquette
tourné vers l'arrière de l'appareil, dans la fente DVD de votre téléviseur.
Poussez légèreme nt le DVD jusqu'à ce qu'il soit introduit automatiquement dans le logement.
DVD Setup Mode (Mode de configuration DVD)
· Le Mode Configuration donne le menu de configuration de la Page de Configuration
Générale, la Page de Configuration Haut-parleur, la Page de Configuration Audio et la Page des
Préférences.
· Dans le Menu Configuration, la sélection se fait à l'aide des Flèches de Navigation, de la
touche SETUP et de la touche OK.
· Appuyez d'abord sur la touche SETUP, entrez dans le menu SETUP, puis appuyez sur la
touche Droite, pour accéder au Sous-menu suivant. Appuyez sur la touche Gauche, pour revenir au
menu précédent.
Appuyez de nouveau sur la touche SETUP pour quitter le menu de configuration.
Configuration Générale
TV Display (affichage TV)
Permet de choisir entre 4:3/Pan Scan, 4:3/Letter Box, Wide. (4:3/Recadrage, 4:3/Letter Box,
Large.)
Langue OSD
Permet de sélectionner la langue de l’OSD
. Anglais
. Français
. Allemand
. Italien
. Espagnol
· Portugais
22
Page 24

Economiseur d'écran
Si l'économiseur d'écran est activé, son image apparaitra à l'arrêt du lecteur ou en cas d'arrêt sur
image
pendant quelques minutes. L'économiseur d'écran permet d'éviter la détérioration de l'écran
· On (Active l'économiseur d'écran).
· Off (Désactive l'économiseur d'écran).
Last Memory (Dernière Mise en mémoire)
Permet de définir les éléments dans la dernière mise en mémoire. Options “on” et “off” .
Sélectionnez "ON", arrêtez l'appareil avant les réglages de mémoire, et réintialisez le paramétrage
de l'appareil.
Définir pratiquement la même durée.
Si vous sélectionnez "OFF", la machine reviendra automatiquement aux paramètres par défaut.
· On (Active la dernière mise en mémoire).
· Off (Désactive la dernière mise en mémoire).
23
Page 25

Audio Setup (Configuration audio)
Downmix
· LT/RT
Bande son multivoie, le signal de sortie est intégré dans les canaux
gauche et droit.
· Stéréo
Bande son multivoie, le signal de sortie est intégré dans la stéréo
Dual Mono
Permet de sélectionner Stéréo, L-MONO (Mono Gauche), R-MONO (Mono Droite) et
MIX-MONO.
Dynamic (Dynamique)
Cette option sert à régler le taux de compression permettant d'ajuster le contraste sonore (Volume).
24
Page 26

Preference Setup (Configuration favorite)
Vérifiez qu'aucun disque ne se trouve dans le lecteur DVD, puis sélectionnez Preference Page
(Page des Préférences)
TV Type (Type de téléviseur)
· PAL
Sélectionné quand l'appareil est raccordé à un Téléviseur fonctionnant sur le système PAL.
· MULTI
Le lecteur règle le téléviseur en fonction du DVD lu.
· NTSC
Sélectionné quand l'appareil est raccordé à un Téléviseur fonctionnant sur le système NTSC.
Audio
Si l'une des langues ci-dessous est proposée sur le disque, vous pouvez lire le DVD dans cette
langue.
Dans le cas contraire, c'est la langue enregistrée qui sera utilisée.
. Anglais
. Français
. Allemand
. Espagnol
. Italien
. Portugais
Sous-titres
Si l'une des langues ci-dessous est proposée sur le disque, vous pouvez afficher les sous-titres dans
cette langue.
25
Page 27

Dans le cas contraire, c'est la langue enregistrée qui sera utilisée.
. Anglais
. Français
. Allemand
. Espagnol
. Italien
. Portugais
Menu du Disque
Si l'une des langues ci-dessous est proposée sur le disque, vous pouvez afficher le Menu dans cette
langue. Dans le cas contraire, c'est la langue enregistrée qui sera utilisée.
. Anglais
. Français
. Allemand
. Espagnol
. Italien
. Portugais
Parental
Si vous souhaitez lire un DVD doté d'un contrôle parental, vous pouvez sélectionner un degré de
contrôle en fonction
de la classification du DVD ou de vos propres choix. Par exemple, si le lecteur DVD est réglé sur
PG (Déconseillé aux moins de 10 ans), aucun disque de classification supérieure ne pourra être lu.
· KID SAFE (TOUS PUBLICS)
· G (AVERTISSEMENT)
26
Page 28

· PG (DECONSEILLE AUX MOINS DE 10 ANS)
· PG 13 (INTERDIT AUX MOINS DE 13 ANS)
· P GR (INTERDIT AUX MOINS DE 16 ANS)
· R· (INTERDIT AUX MOINS DE 18 ANS non classé X)
· NC 17 (INTERDIT AUX MOINS DE 18 ANS)
· ADULT (Réservé aux Adultes)
Mot de passe
Vous pouvez changer le mot de passe qui vous sera demandé pour modifier la classification du
film
dans la fonction Contrôle Parental.
Remarque : (Le mot de passe par défaut est "123456")
Par Défaut
Vous pouvez revenir aux paramètres d'usine en appuyant sur RESET puis sur OK.
27
Page 29

SPÉCIFICATIONS
ENTREE RGB
Horizontal
Mode Résolution
DOS 720x400 31,5 70
VGA 640x480 31,5 60
SVGA 800x600 37,9 60
XGA 1024x768 48,4 60
WXGA 1360x768 47,7 60
Mode Résolution
VGA 640 x 480 31,47 59,94
480i 720 x480i 15,73 59,94/60
Fréquence
(KHz)
Entrée HDMI
Horizontal
Fréquence
(KHz)
Vertical
Fréquence
(HZ)
Vertical
Fréquence
(HZ)
576i 720 x 576i 15,63 50
480p 720 x480p 31,47 59,94/60
576p 720 x 576p 31,26 50
720p 1280 x 720p 37,50
44,96
1080i 1920 x 1080i 28,13
33,75
1080p 1920 x 1080p 56,25
67,5
ENTREE COMPOSANT (YPbPr)
Fréquence de balayage
Mode Résolution
480i 720 x480i 15,73 59,94/60
576i 720 x 576i 15,63 50
480p 720 x480p 31,47 59,94/60
576p 720 x 576p 31,26 50
horizontal
(KHz)
Fréquence du balayage
50
59,94/60
50
59,94/60
50
59,94/60
vertical
(HZ)
720p 1280 x 720p 37,50
1080i 1920 x 1080i 28,13
1080p 1920 x 1080p 56,25
28
44,96
33,75
67,5
50
59,94/60
50
59,94/60
50
59,94/60
Page 30

Dépannage
Avant de consulter le personnel de réparation, vérifier la grille suivante pour rechercher les
solutions possibles.
PROBLEME SOLUTION
Le téléviseur ne s'allume pas
Pas d'image ou de son
Mauvaise qualité d'image, son
correct
Bruit audio ●Éloigner les équipements infrarouge du téléviseur.
●Vérifier que le cordon d'alimentation est branché.
●Les piles de la télécommande sont peut-être usées ;
remplacer les piles.
●Vérifier le câble entre le téléviseur et l'antenne /
dispositif AV externe
●Appuyer sur la touche Marche de la télécommande.
●Appuyer sur la touche SOURCE de la télécommande,
puis appuyer plusieurs fois sur la touche “▲/▼” pour
sélectionner la source du téléviseur.
●Vérifier le câble entre le téléviseur et l'antenne /
dispositif AV externe
●Essayer une autre chaîne, la chaîne peut avoir des
difficultés à émettre.
●Régler la luminosité/le contraste dans le menu Vidéo.
Vérifier que l'unité est réglée sur PAL
.
.
Le panneau TFT LED est constitué de sous-pixels produits à l'aide d'une technologie sophistiquée.
Toutefois, l'écran peut comporter un petit nombre de pixels lumineux ou sombres. Ces derniers
n'auront pas d'impact sur les performances du produit.
- Consommation électrique en mode veille : 0.41W
- Consommation d’é nergie de “47” kWh par an, sur la base de la consommation électrique d’
un
téléviseur fonctionnant quatre heures par jour pendant trois cent soixante-cinq jours.
La consommation réelle dépend des conditions d’utilisation du téléviseur.
29
Page 31

Service après-vente
Si vous rencontrez un problème résultant vraisemblablement d'un défaut pendant l'utilisation de
votre téléviseur LED, contactez le magasin dans lequel vous avez acheté l'appareil ou l'agence
SAV.
30
Page 32

Instructions de fixation du pied
Nota : les images ci dessous peuvent être différentes de la réalité
1. Insérer l’unité principale (A) dans le 1
pied (B) --- voir image C
2. Mettre en place les vis dans le pied 2
comme indiqué sur les images D et E.
3. Les vis sont fournies avec le pied.
A
B
C
E
3
Page 33

z Introduction
z Warning
z Caution
z Main Unit Description
z Remote Control
Contents
z OSD basic adjustment
z DTV Features
z USB
z
z
z Specifications
z
Features
PVR
DVD
Trouble Shooting
Operation
Operation
1
Page 34

Introduction
Thank you very much for your purchase of our product of LED TV. It serves as a normal color
TV and PC monitor. To enjoy your
carefully and keep it handy for ready reference.
① Locate the
reflection on the picture screen can cause eyestrain. Soft and indirect lighting is recommended for
comfortable viewing.
② Allow enough space between the receiver and the wall to permit ventilation.
③ Avoid excessively warm locations to prevent possible damage to the cabinet or premature
component failure.
④ This TV can be connected to AC100-240V 50/60HZ.
⑤ Do not install the TV in a location near heat sources such as radiator, air ducts, direct sunlight,
TV in a
room where direct light does not strike the screen. Total darkness or a
TV
to the full from the very beginning, read this manual
INSTALLATION
or in a place somewhere like close compartment and close area. Do not cover the ventilation
openings when using the TV.
⑥ The indicator light will last about 30 seconds to go out after cutting off the electricity, during
this period, you cannot repower it on until the indicator light goes out, thanks a lot for your
attention!
2
Page 35

Warning
CAUTION: TO AVOID THE RISK OF ELECTRIC SHOCK.
DO NOT REMOVE COVER (OR BACK).
NO USER- SERVICEABLE PARTS INSIDE.
REFER SERVICING TO QUALIFIED SERVICE PERSONNEL.
RISK OF ELECTRIC SHOCK
DO NOT OPEN
This symbol is intended to alert the user to avoid the risk
of electric shock, do not disassemble this equipment by anyone
except a qualified service personnel.
Class I structures of equipment should be connected to the grid
power output with a protective earth connection on the socket.
Power plug as a broken appliance,broken installations should
be easy to operate.
CAUTION
3
Page 36

Caution
Caution
High voltages are used in the operation of this product.
- Do not
to qualified service personnel .
open the product's casing.
Refer servicing
Caution
To prevent fire or electrical shock hazard, do not expose
the main unit to rain or moisture,do not place objects
filled with liquids, such as vases, on the apparatus.
Caution
Do not drop or push objects into the television cabinet
slots or openings. Never spill any kind of liquid on the
television receiver.
Caution
Avoid exposing the main unit to direct sunlight and other
directly on other products which give off heat. E. g. video
cassette players, Audio amplifiers. Do not block the
ventilation holes in the back cover. Ventilation is essential
to prevent failure of electrical component. Do not squash
power supply cord under the main
sources of
heat. Do not stand the television receiver
unit or other heavy objects.
4
Page 37

Caution
Caution
Never stand on, lean on, push suddenly the product
or its stand. You should Pay special attention to
children.
Caution
Do not place the main unit on an unstable cart stand,
shelf or table. Serious injury to an individual, and
damage to the television, may result if it should fall.
Caution
When the product is not used for an extended period
of time, it is advisable to disconnect the AC power
cord from the AC outlet.
Caution
The LED panel used in this product is made of glass.
Therefore, it can break when the product is dropped
or applied with impact. Be careful not to be injured
by broken glass pieces in case the LED panel breaks.
5
Page 38

Main unit description
r
Control Panel Button Function
1. Menu key
2. TV/AV select
3. Volume up/down
4. Channel up/down
5. PLAY/PAUSE
6. EJECT
7. STANDBY
TV Terminal Connections
1. HEADPHONE output terminal.
2. PC AUDIO terminal.
3. VGA input terminal.
4. Mini-YPBPR input terminal.
5. SCART input terminal.
6. Video input terminal.
7. AUDIO input terminal.
8. COAXIAL terminal
9. TV antenna.
10. HDMI input terminal.
11. USB input terminal.
12. CI slot
8. Remote control senso
6
Page 39

Optional Configuration as below:
Connect the USB to the USB jack on the set.
NOTE
● It is only 500 mA MAX of DC current output when you connect with USB jack
● To ensure the Mobile HD works well, you should use other power supply for the Mobile HD.
And do not use the USB jack in the same time.
● It supports Mobile HD by connecting with USB jack (must more than 2 GB). The partitions of
the Mobile HD can’t be more than 4 partitions. The max partition is 2TB. It supports FAT/FAT32
document. The max FAT document is 4GB and the max FAT32 document is 2TB.
7
Page 40

Remote control
TV Functions
1.POWER: Press the TV on and standby.
2.SLEEP: Press to select a preset time interval for automatic shut off.
3.MUTE: Press to mutes the sound.
4.SOURCE: Press to display the input source menu.
5.NUMBER: Numeric buttons for direct channel access.
6.AUDIO/LANG.:
7.TV/RADIO: Press to change between TV and Radio
8.EXIT: Exit the menu
9.CH.LIST: channel list
10.BACK:go back to the last viewed channel
11.MENU: Press to display the OSD menu.
12-13.CHANNEL “+” “-”: Press to change the TV channels.
14. ◄►▲▼, ENTER:
15-16. VOL “+” “-”: Press to increase or decrease the volume.
25.SUB.T: Display/OFF the subtitle on screen
28.EPG: Electronic Program Guide(EPG) display.
29.FAV: Press to display the favorite channel list which you stored before.
30.P.MODE: Press to select the picture mode.
8
Stereo, Mono, Dual audio/Change audio language.
Use to select on-screen menu items and change menu values
Page 41

31.S.MODE: Press to select the sound mode
32.INFO: Show Current Information
33/34/35/36. Colour buttons: Channel Edit function
PVR Function
18.T.SHIFT:
20.REC/●:
Timeshitf function(Opearted by
Press this button to directly record the DTV into USB disk(In USB Mode or
PVR Setting to see the PVR file)
TEXT functions
21.TEXT: Teletext function
22.REVEAL: Teletext reveal
23.HOLD: Teletext hold.
24.SUB.P: Teletext subpage
25.SUB.T: Teletext subtitle
26.INDEX: Teletext index
27.SIZE: Teletext size
33/34/35/36. Colour buttons: Teletext function
►,,,,,
keys)
USB Functions
18.►:PLAY/PAUSE
19. :STOP/Exit PVR or
21.: Fast return key
22.:Fast forward key
23.: Previous key
24.: Next key
33/34/35/36. Colour buttons:Media function
DVD functions
5.NUMBER: Numeric buttons for direct channel access.
14. ◄►▲▼, ENTER:
17. SETUP:
20. :EJECT
25.SUB.T: in DVD mode : display / OFF the subtitle on the screen.
26.TITLE: in DVD mode display the DVD title content
27.ZOOM: in DVD mode Zoom the picture
28.D.MENU:
29.PROG.: In DVD mode, access to menu list, select chapters, titles
30.LANG.:
31.SEARCH: in DVD mode Search disc chapter and time
32.DISPLAY: Show Current Information
33.ANGLE: In DVD mode, select movie vision angle
34.SLOW: SLOW in DVD mode
35.A-B:
36.REPEAT: Repeat chapter
Access to the system menu
Access to menu in DVD Disc
in DVD mode select audio language
repeat point A to point B when selected
Timeshift
Use to select on-screen menu items and change menu values
9
Page 42

OSD basic adjustment
Installation Guide
If this is the first time you are turning on the TV and there are no programs in the TV memory, the
installation Guide menu will appear on the screen.
1. Press the “c/d/e/f” button to select the local language.
2. Press the “c/d/e/f” button to select mode.
3. Press the “c/d/e/f” button to select the local country you want to
4. Press the “c/d/e/f” button to select mode :DTV+ATV,DTV,ATV.
5. Press the “c/d/e/f” button to select “ON”or “OFF”.
Note: Searching for platform will
take a long time, please be patient!
Channel
Press MENU button to display the
main menu. Press ◄ / ► button to
select CHANNEL in the main menu
1.Auto Scan
Press “c/d” button to select
“Auto Scan”
Press “c/d” button to select
country and press the“c/d” button to
select mode.
Press “c/d/button “ and then press
“ f”button to start scanning. Press
“MENU” or “EXIT”button to stop
Searching for platform will take
Note:
a long time. Please be patient!
10
Page 43

2.Analog Manual Scan
Press “c/d” button to select “Manual scan” and
press the“f” button to Analog manual scan.
Press “MENU” button to return the previous menu.
Press “EXIT” button to exit the menu.
3
.Digital Manual Tuning
Press “c/d” button to select “Diigital Manual
Scan” and press the “d” button to start.
Press “MENU” button to return the previous
menu.
Press “EXIT” button to exit the menu.
4.Channel Edit
Press “c/d” button to select “
press the “ENTER” button to enter.
Channel
Edit” and
a. DELETE
Press “c/d” button to select the program and
press “RED” button once to delete the program.
NOTE:RENAME only use in ATV.
b. SKIP
Press “c/d” button to select the channel which you
want to skip and press the “BLUE” button to skip . Press “BLUE” button again to cancel the
setting.
c. MOVE
Press “c/d” button to select the channel and press the “YELLOW” button to move . Then
press the “c/d” button to select the channel with which you want to move. Press “YELLOW”
button again to confirm.
11
Page 44

5. Signal information (only use in DTV)
Press “c/d” button to select “Signal information”
and press the “ENTER” button . Press “MENU”
button to return the previous menu. Press “EXIT”
button to exit the menu.
PICTURE
You can select the type of picture, which best corresponds to your viewing.
Press the “MENU” button to enter the OSD menu. Then press “e/f” button to select the
“PICTURE” menu. Press “c/d” button to select “Picture Mode” and press the “e/f” button to
select.
1. Press “c/d” button to select “Brightness” and press the “e/f” button to enter brightness
adjustment menu to adjust brightness.
2. Press “c/d” button to select “Contrast” and press the “e/f” button to enter contrast
adjustment menu to adjust contrast.
3. Press “c/d” button to select “Sharpness” and press the “e/f” button to enter sharpness
adjustment menu to adjust sharpness.
4. Press “c/d” button to select “Saturation” and press the “e/f” button to enter Saturation
adjustment menu to adjust saturation.
5. Press “c/d” button to select “Hue’’ and press the “e/f” button to enter hue adjustment menu
to adjust hue.
6. Press “c/d” button to select “Sharpness” and press the “e/f” button to enter sharpness
adjustment menu to adjust sharpness.
7. Press “c/d” button to select “Color Temp” and press the “e/f” button to select mode:
Standard,Cool,Warm..
8. Press “c/d” button to select “Aspect Ratio” and press the “e/f” button to select.
9.
Press “c/d” button to select “Advanceed Settings” and press the “f” button to enter
Advanceed Settings adjustment menu to adjust.
12
Page 45

SOUND
You can select the type of sound, which best corresponds to your listening.
Press the “MENU” button to enter the OSD menu. Then press “e/f” button to select the
“SOUND” menu.
1. Press “c/d” button to select “Sound Mode” and press the “e/f” button to select mode.
2. Press “c/d” button to select “Treble” and press the “e/f” button to adjust.
3. Press “c/d” button to select “Bass” and press the “e/f” button to adjust.
4. Press “c/d” button to select “Balance” and press the “e/f” button to adjust.
5. Press “c/d” button to select “Surround sound’’and“e/f” button to select“0N”or “OFF”.
6. Press “c/d” button to select “EQ Setting’’and“e/f” button to enter EQ Setting adjustment
menu to adjust EQ..
7. Press “c/d” button to select “AVL” and press the “e/f” button to select “On” or “Off”.
8. Press “c/d” button to select “SPDIF” and press the “e/f” button to adjust.
9. Press “c/d” button to select “Audio description” and press the “e/f” button to adjust.
10. Press “c/d” button to select “SOUND TYPE” and press the “e/f” button to adjust.
LOCK SYSTEM
Press the “MENU” button to enter the OSD menu. Then press “e/f” button to select the
“Lock System” menu. The default password is “0000”.
1. Press “c/d” button to select “Enable’’and then press “e/f” button to select “On” or “Off”
2. Press “c/d” button to select “channel locks” and press the “f” button to select channel(s)to
13
Page 46

lock .
3. Press “c/d” button to select “Parental Rating” and press the “e/f” button to set.
4. Press ▼ / ▲ button to select “Lock Keypad”, then press button to select “On” or “Off”, The
key board will be invalid if you set Lock Keypad “On”.
5. Press ▼ / ▲ button to select “New Password” and set your new password.
6.. Press ▼ / ▲ button to select“Clear Lock”and then press the “f” button to clear.
SETUP
Press the “MENU” button to enter the OSD menu. Then press“e/f” button to select the “SETUP”
menu.
1. Press “c/d” button to select “OSD Language” and press the “e/f” button to select the OSD
language which you desire.
2. Press “c/d/” button to select “Audio Language” and press the “f” button to enter the Audio
language adjustment menu to select the Audio language which you desire.
3. Press “c/d” button to select “Subtitle” and press the “f” button to select “On” or “Off”.
Note: This function is only used for DTV source.
4. Press “c/d” button to select “Teletxt” menu and press the “f” button to enter sub-menu.
5. Press “c/d /e/f ”button to select Mode Setting.
6. Press “c/d/e/f” button to select “Time Setting”.
7. Press “c/d/e/f” button to select “HDMI CEC Control”.
8. Press “c/d/e/f” button to select “PVR Settings”.
9. Press “c/d” button to select “First Time Setup”, then press “ENTER” button to set relevant
options including OSD language, country and tuning.
10. Press “c/d/e
11 .Press “c/d” button to select “Reset”, then press “ENTER” a dialogue. Press “e” button
selecting “Yes” to restore all setting to default setting.
/f” button to select “OAD”, then press “ENTER” button to enter sub menu.
14
Page 47

PC
Press the “MENU” button to enter the OSD menu. Then press “e/f’’ button to select the “PC
Setting” menu. (Only available in PC model).
1. Press “c/d” button to select “Auto Adjust” menu and press the “f”button to auto adjustment.
2. Press “c/d” button to select “H Position” and press the “e/f” button to adjust.
3. Press “c/d” button to select “V-Position” and press the “e/f” button to adjust.
4. Press “c/d” button to select “Phase” and press the “e/f” button to adjust.
5. Press “c/d” button to select “Clock” and press the “e/f” button to adjust.
15
Page 48

DTV Features
Favorite List
When the source is selected as DTV, users can enter Favorite List by pressing “FAV” button. The
“Favorite List” window is illustrated as follows:
Program Information
When the source is selected as DTV, you can press “display” button to display the channel’s
information. The program information window is illustrated as follows:
Audio
When the source is selected as DTV, users can enter the Setup menu to enter the “Audio
Language” menu . The “audio language” window is illustrated, and press “
“audio language” menu .
c/d
” button to select the
16
Page 49

Electronic Program Guide(EPG)
Electronic Program Guide (EPG) provides program information which will be broadcasted
now or in the future. The system will display EPG window by pressing “EPG” button. DATE and
TIME information is displayed on the right of the window. The left side shows all channels. The
right side shows the programs in the channel. The selected program is also displayed on the top of
the screen.
1. Press the “c/d” button to select the
“program”. You can press “RED”
button to enter record mode. Press
“GREEN” button to display the
program’s detail. Press “YELLOW”
button to Check details at PVR’s
Schedule List introduction. Press
“Blue” button to enter remind setting.
2. Press the “c/d” button to select “CH”
and press the “e/f” button to select
the channel number to see the current
channel’s program forecast.
Note: The U disk will be formatted when in burning, please do not store important files in the
U disk.
Subtitle
When the source is selected as DTV,
users can go to the menu to set.
Note: The pictures in regard to function
are provided for reference purposes
only.
Common interface
the “e/f” button to select Common interface,then press ENTER button to enter sub menu.
Press
Only available when there is CI card under DTV.
17
Page 50

USB Features
Press the “SOURCE” button to change to the “MEDIA” source.
Photo
1. Press the “◄ / ►” button enter the “PHOTO” option, and press enter button to enter
2.Press ◄ / ► button to select drive disk you want to watch, then press enter button to enter.
3.Press “BLUE” button to enter the sub menu to set.
4. Press the “exit” button to back to the previous menu.
Music
Press ◄ / ► button to select MUSIC in the main menu, then press enter button to enter
1. 1.
2. Press ◄ / ► button to select drive disk you want to watch, then press enter button to enter
3. Press “BLUE” button to enter the sub menu to set.
4.. Press the “exit” button to back to the previous menu
18
Page 51

Movie
1.
Press ◄ / ► button to select MOVIE in the main menu, then press enter button to enter
button to select drive disk you want to watch, then press enter button to enter
2. Press
3. Press “BLUE” button to enter the sub menu to set.
4. Press the “exit” button to back to the previous menu.
c/d
Text
1. 1.Press ◄ / ► button to select TEXT in the main menu, then press enter button to enter.
s
2. Pres
3. Press “BLUE” button to enter the sub menu to set.
4. Press the “exit” button to back to the previous menu.
In DTV source, press the “MENU”
button to enter the OSD menu. Then
press“◄ / ►” button to select the
“Setup” menu.
.
c/d
button to select drive disk you want to watch, then press enter button to enter
PVR
Operation
19
Page 52

1. Press “c/d” button to select “PVR
Settings” and press the “ENTER”or
“►” button to enter.
a) Press “◄ /
►” button to select “File Manager” and
press the “ENTER” button to check
PVR file system.
b) Press “◄ / ►” button to select
“Device List” and press the “ENTER”
button to the sub menu.
c)Press “c/d” button to select “Scheduled Record” and press the “ENTER” button to set.
Note:
1. The U disk will be formatted when in format, please do not store important files in the U
disk.
2. Press “
” button for the first time to start recording, for the second time, the sign of
recorder will be slimmed down, but it's still under recording.
20
Page 53

DVD Operation(G10 SM0 2)
CONTENTS
Basic Opeartion·········································································································· 22
DVD Setup Mode ······································································································· 22
General Setup·············································································································22
Audio Setup ················································································································ 24
Preference Setup·········································································································25
21
Page 54

Basic Operation
1. Press Source button on the remote controller to select DVD input sour ce.
2. Press button to load disc into disc tray.
Hold the disc without touching either or its surfaces, insert the DVD with the label toward the
device’s back panel into the DVD slot on the right side of you TV set.
Only push the DVD slightly until the unit feeds it automatically.
DVD Setup Mode
· Setup Mode provides the menu for the configuration of General Setup Page, Speaker Setup
Page, Audio Setup Page and Preference Page .
· Item selection in the Setup Menu is done by using the Navigation Arrows, SETUP button and
the OK button.
· Press the SETUP button first , enter into SETUP menu, then press the DIRECTION RIGHT
button,you can enter into the next Sub-me nu.Press the DIRECTION LEFT button,you can back to
the preview menu.
· Press the SETUP button again to exit the Setup Menu.
General Setup
TV Display
This is used to select the aspect 4:3/Pan Scan, 4:3/Letter Box, Wide.
OSD Language
This is used to select the OSD language.
· English
· French
· German
· Italian
· Spanish
· Po rtuguese
22
Page 55

Screen Saver
Start the screen saver, the screen saver image will appear when the player stops or the picture is
frozen for a few minutes. This saver can keep the screen from being damaged.
· On (Start the screen saver).
· Off (Remove the screen saver).
Last Memory
Can set the items on the last memory, “on”and “off” option.
Select “on”, shutdown the machine before the settings for memory, re-boot the machine setting.
Set near the same time.
Select “off”, every time the machine automatically switched back to the default settings.
· On (Start the last memory).
· Off (Remove the last memory).
23
Page 56

Audio Setup
Downmix
· LT/RT
A disc recorded multi channel soundtrack, the output signal will be incorporated to left and right
channel.
· Stereo
A disc recorded multi channel soundtrack, The output signal will be incorporated to stereo.
Dual Mono
This is used to select the Stereo, L-MONO, R-MONO and MIX-MONO.
Dynamic
This option is used to set the compression ratio in order to control the sound (Volume) contrast.
24
Page 57

Preference Setup
You must sure no disc in the DVD then you can select Preference Page.
TV Type
· PAL
This is selected when the player is connected to an PAL System TV.
· MULTI
The player will set the TV system according to the disc in the tray.
· NTSC
This is selected when the player is connected to a NTSC System TV.
Audio
If a language listed below is recorded on the disc, you can play the sound in such language.
If not, the language recorded will be used.
·English
·French
·German
·Spanish
·Italian
·Portuguese
Subtitle
If a language listed below is recorded on the disc, you set the subtitle to be displayed in such
language.
If not, the language recorded will be used.
·English
25
Page 58

·French
·German
·Spanish
·Italian
·Portuguese
Disc Menu
If a language listed below is record on the disc, you can set the Menu to be displayed in such
language. If not, the language recorded will be used.
·English
·French
·German
·Spanish
·Italian
·Portuguese
Parental
When playing disc with parental lock function, you may select an Age Control Grade according to
grade of disc and your own preference. For example, if PG is selected, DVD Video disc rated
higher than the PG grade cannot be played.
· KID SAFE
· G
· PG
· PG 13
· P GR
26
Page 59

· R
· NC 17
· ADULT
Password
User can change the password that is required when the user wants to change the Age Control
Grade in the Parental Lock function.
NOTE: (Default password is 123456 )
Default
User can load the original factory setting by choose RESET and press OK button.
27
Page 60

SPECIFICATIONS
RGB INPUT
Horizontal
Mode Resolution
DOS 720x400 31.5 70
VGA 640x480 31.5 60
SVGA 800x600 37.9 60
XGA 1024x768 48.4 60
WXGA 1360x768 47.7 60
HDMI INPUT
Mode Resolution
VGA 640 x 480 31.47 59.94
480i 720 x480i 15.73 59.94/60
Frequency
(KHz)
Horizontal
Frequency
(KHz)
Vertical
Frequency
(HZ)
Vertical
Frequency
(HZ)
576i 720 x 576i 15.63 50
480p 720 x480p 31.47 59.94/60
576p 720 x 576p 31.26 50
720p 1280 x 720p 37.50
44.96
1080i 1920 x 1080i 28.13
33.75
1080p 1920 x 1080p 56.25
67.5
COMPONENT (YPbPr) INPUT
Mode Resolution
480i 720 x480i 15.73 59.94/60
576i 720 x 576i 15.63 50
480p 720 x480p 31.47 59.94/60
576p 720 x 576p 31.26 50
720p 1280 x 720p 37.50
Horizontal Frequency
(KHz)
44.96
Vertical Frequency
50
59.94/60
50
59.94/60
50
59.94/60
(HZ)
50
59.94/60
1080i 1920 x 1080i 28.13
1080p 1920 x 1080p 56.25
28
33.75
67.5
50
59.94/60
50
59.94/60
Page 61

Trouble Shooting
Before consulting service personnel, check the following chart for
PROBLEM SOLUTION
TV will not turn on
No picture, no sound
Poor picture, sound OK
Audio noise ●Move any infrared equipment away from the TV.
●Make sure the power cord is plugged in.
●The batteries in the remote control may be
Exhausted; replace
●Check the cable between TV and antenna/
device.
●Press the power button on the remote.
●Press the SOURCE button the remote, then press the
“▲/▼”button repeatedly to select the TV source.
●Check the cable between TV and antenna/
device.
●Try another channel, the station may have broadcast
difficulties.
●Adjust the brightness/contrast in the Video menu.
that the unit is set to PAL
the batteries.
possible solutions.
external AV
external AV
Check
The TFT LED panel uses a panel consisting of sub pixels which requires sophisticated technology to
produce. However, there may be
will have no impact on the performance of the product.
a small number of
bright or dark pixels on the screen. These pixels
29
Page 62

After-sale Service
In case any problem mostly like a fault occurs while your using LED TV ,please contact the
store where you purchased this unit or the service agency.
30
Page 63

Instructions for fixing stand
Note: the pictures below are only for reference
1. Insert unit (part A) into unit (part B)----C.
2. Screw the stand in the position as
E shows.
3. Screws are provided with stand.
1
2
3
A
B
C
D
E
Page 64

www.continentaledison.com
 Loading...