

Continental Conair FF9XXX Owners Manual
Color profile: Disabled
Composite Default screen
Contents
Introduction...................................................1
Welcome............................................................1
•
Features ............................................................1
•
Included in Your Package ..............................................2
•
Installing and Adjusting Your Phone...............................3
Desk/Tabletop Installation..............................................3
•
Wall Installation......................................................4
•
Installing the Handset Battery Pack .....................................10
•
Charging the Battery Pack.............................................11
•
Cleaning the Battery Contacts ..........................................11
•
Setting the Pulse/Tone Switch..........................................12
•
Adjusting the Ringer Controls ..........................................12
•
Automatic Digital Code Security ........................................13
•
Using Your New Phone .........................................14
Making and Receiving Calls............................................14
•
Flash and Call Waiting................................................14
•
Storing a Phone Number in Memory ....................................15
•
Editing a Phone Number in memory ....................................16
•
•Erasing a Number from Memory........................................17
Using Memory Dialing................................................18
•
•Chain Dialing .......................................................18
•Using Caller ID......................................................19
•Using Redial........................................................23
•Using the Tone feature ...............................................23
•Traveling Out-of-Range ...............................................23
Troubleshooting ..............................................24
•
Quick Reference Chart................................................24
Specifications ................................................26
OF YOUR OWNER’S MANUAL
CONTENTS
C:\LaDonna\EXI 7960\EXI7960.vp
Wed Jan 13 14:50:05 1999
Fold out the back cover of this
owner’s manual to use the handy
“Controls and Functions” page
for reference.

Color profile: Disabled
Composite Default screen
Introduction
WELCOME
Congratulations on your purchase of the Uniden EXI7960 cordless
telephone. This phone is designed for reliability, long life, and
outstanding performance.
FEATURES
• 900 MHz Technology
• Call Waiting Caller ID
TO YOUR NEW PHONE
• 3-line LCD Display
• 30 Number Caller ID Memory
• New Call Indication
• Face Up/Face Down Charging
• 10 Memory Dial Locations
• 32 Digit Redial
• Pulse/Tone Dialing
• Page/Find
• 7 Hour Talk Time
• Handset Earpiece and Ringer Volume Control
• Hearing Aid Compatible
INTRODUCTION
INTRODUCTION
C:\LaDonna\EXI 7960\EXI7960.vp
Wed Jan 13 14:50:08 1999
The EXI7960 features include AutoTalk and AutoStandby. AutoTalk allows
you to answer a call by just removing the handset from the base so you
don’t have to waste time pushing buttons or flipping switches. AutoStandby
allows you to hang up by simply returning the handset to
the base.
The UltraClear Plus true compander circuitry virtually eliminates
background noise. This innovative technology, together with 40 different
channels, provides you with the best possible reception during all
your conversations.
To protect you against misbilled calls which might result from your phone being
activated by other equipment, the EXI7960 has Random Code™ digital security
which automatically selects one of over 65,000 digital security codes for the
handset and base. Also, the AutoSecure™ feature electronically locks your phone
when the handset is in the base.
To get the most from your phone, please read this owner’s manual thoroughly. Also,
be sure to complete the product registration form and mail it in.
Be sure to visit our web site at: www.uniden.com.
1
Color profile: Disabled
Composite Default screen
TIP
To get the most from your
phone, please read this
owner’s manual thoroughly.
Also be sure to complete
and mail the product
registration form.
INCLUDED IN YOUR PACKAGE
01 1 0:25A1 1/08
uniden america
817-858-3300
integratedcallerid
talk flash
mem
abc def
123
mno
jkl
ghi
584
pqrs
7
callid
select chan redial/p
6
wxyz
tuv
9
tone
oper
8
#
delete
dn upvol
900MHz
status
page/find
NOTE
If any of these items are
missing or damaged,
contact the Uniden Parts
Department at (800)554-3988.
Hours are from 8:00 a.m. to
5:00 p.m. Central Time,
Monday through Friday. We
can also be reached on the
web at www.uniden.com
.
Handset
Rechargeable Battery
Base
Long Telephone Cord
• This Owner’s Manual
• Precautions and Important Safety Instructions
• Registration Card
AC Adapter
2
C:\LaDonna\EXI 7960\EXI7960.vp
Wed Jan 13 14:50:22 1999
Color profile: Disabled
Composite Default screen
Installingand Adjusting YourPhone
TIP
Before choosing a location
for your phone, read the
“Installation Considerations”
included in the “Precautions
and Important Safety
Instructions” brochure.
DESK/TABLETOP INSTALLATION
1) Plug the AC adapter cord into the
9 VDC input jack on the back of
the base, then place the AC
adapter cord inside the molded
strain relief.
2) Plug one end of the long
telephone cord into the
jack on the base, then place the
telephone cord into the right
molded channel cord holder.
Place the power cord so that it does not create a trip hazard
or where it could become chafed and create a fire or
electrical hazard.
TEL LINE
INSTALLING AND ADJUSTING
AND ADJUSTING YOUR PHONE
INSTALLING
C:\LaDonna\EXI 7960\EXI7960.vp
Wed Jan 13 14:50:39 1999
3) Plug the other end of the long
telephone cord into the telephone
wall jack. (Remember, the phone
must be fully charged before you
can use it.)
3
Color profile: Disabled
Composite Default screen
HINT
Before using your phone,
fully charge the NickelCadmium battery pack for
15-20 hours.
4) Plug the AC adapter into a
standard 120 VAC wall outlet.
Use only the Uniden AC adapter supplied with this phone and
DO NOT use an outlet controlled by a wall switch.
5) Raise the antenna to a
vertical position.
4
C:\LaDonna\EXI 7960\EXI7960.vp
Wed Jan 13 14:50:49 1999
WALL INSTALLATION
▼
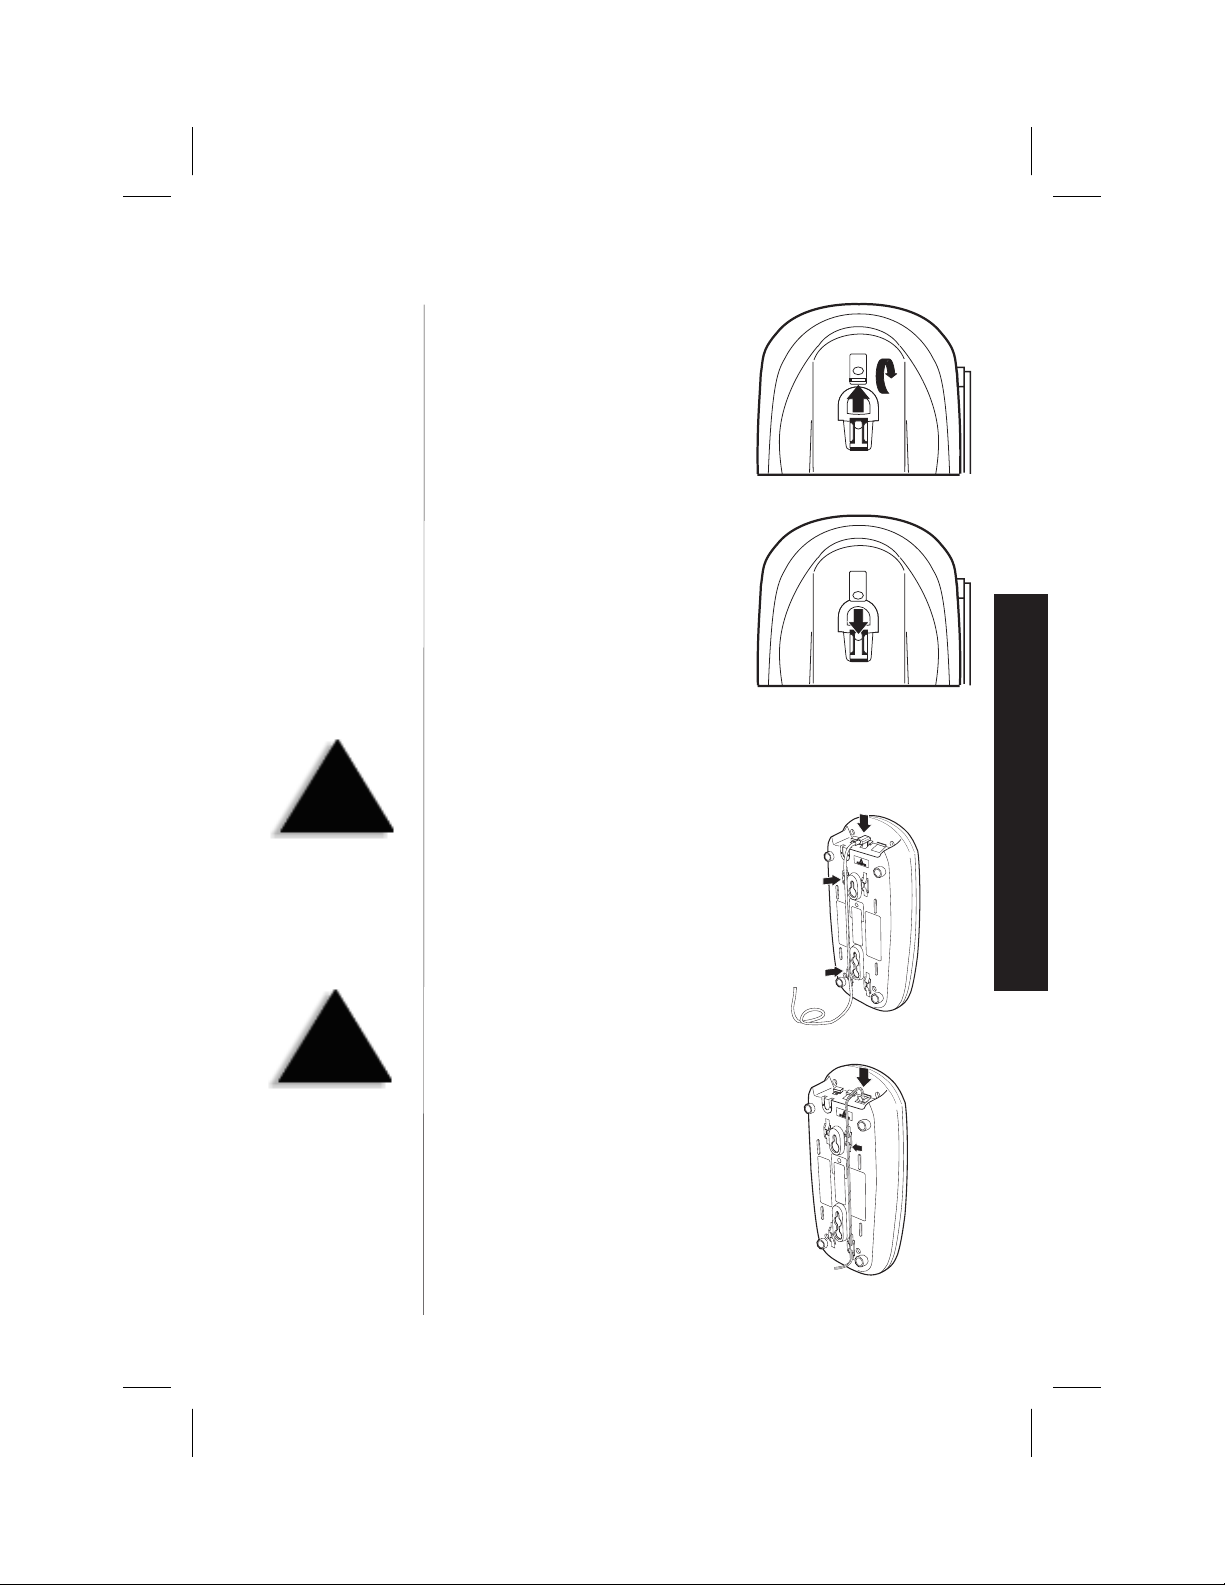
Setting the Handset Retainer for Wall Mounting
1) Remove the handset retainer on
the base by sliding it upward.
Color profile: Disabled
Composite Default screen
2) Flip the handset retainer over so
the tab is facing up.
3) Slide the handset retainer back
onto the base.
INSTALLING AND ADJUSTING
!
DO NOT use an outlet
controlled by a wall switch.
!
Before you plug the other
end of the telephone cord
into the modular jack on
the wall, charge the battery
(refer to “Charging the
Battery Pack,” page 11).
Standard Wall Plate Mounting
▼
This phone can be mounted on any standard AT&T or GTE wall plate.
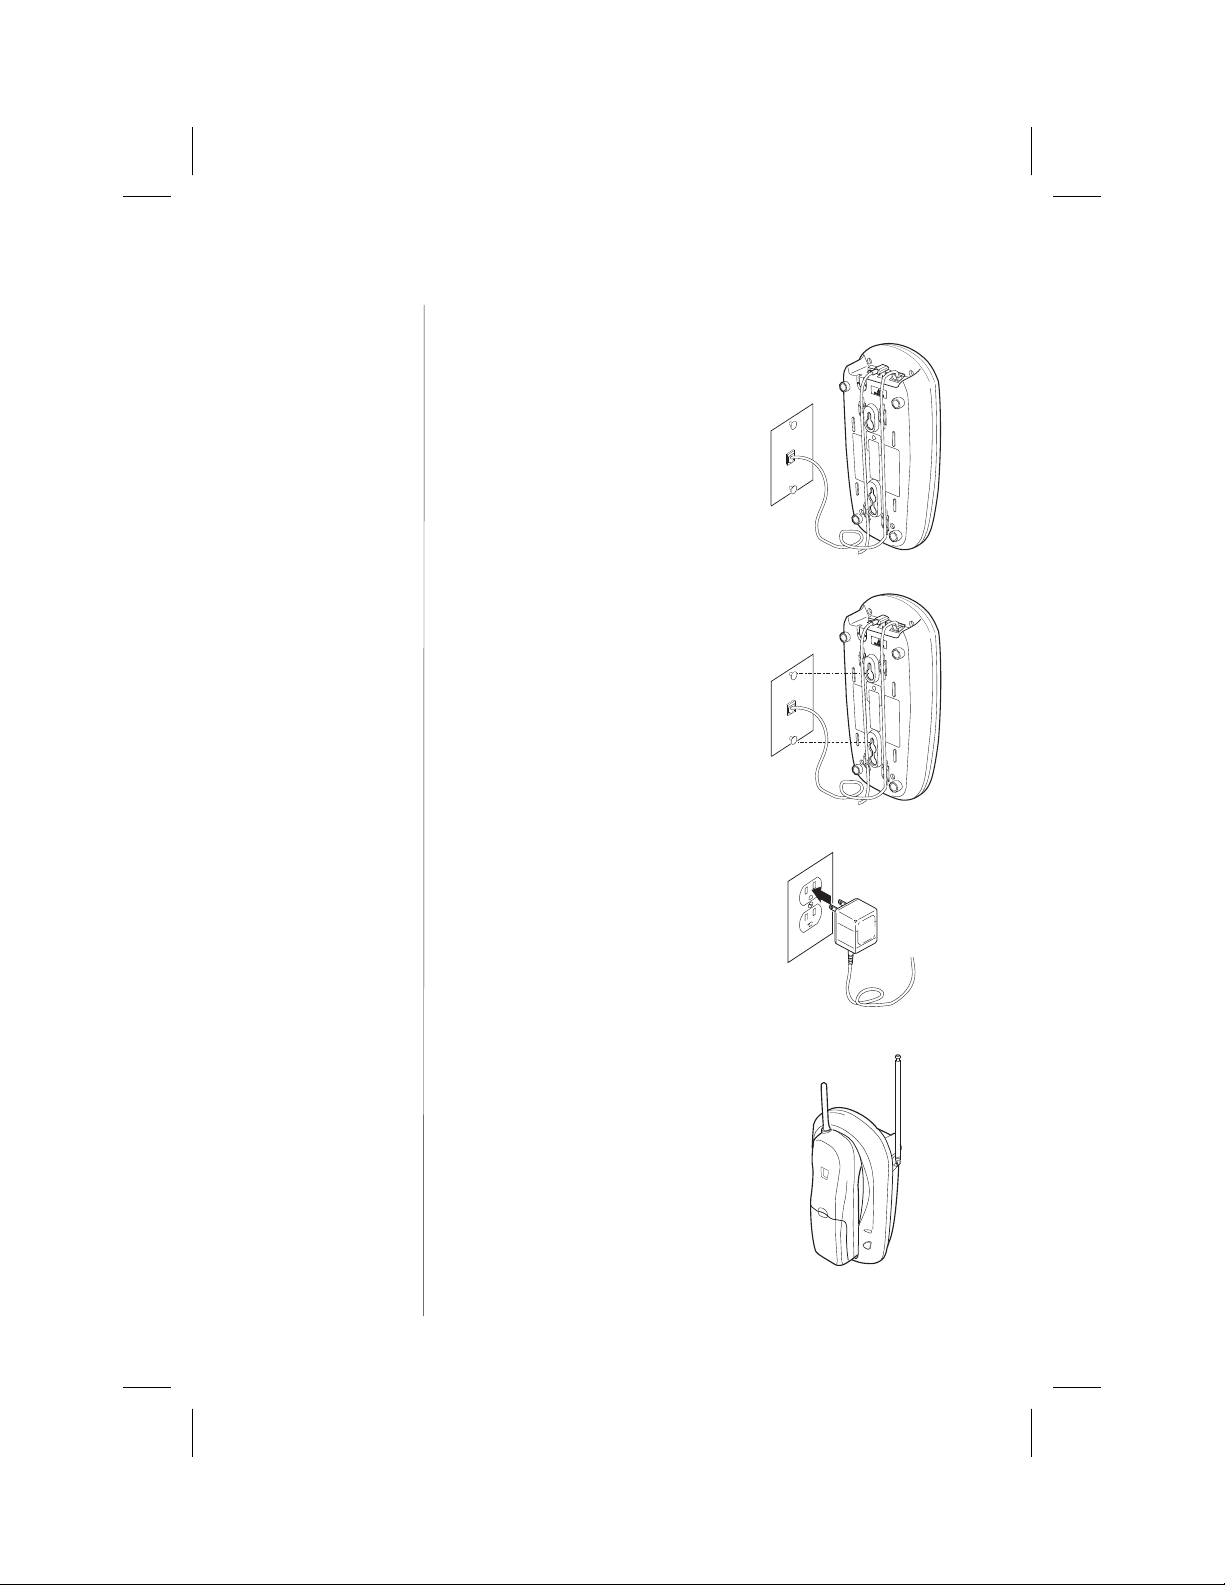
1) Plug the AC adapter into the base,
then place the AC adapter cord
inside the left molded channel
cord holder.
2) Plug a short telephone cord into the
TEL LINE
the telephone cord inside the right
molded channel cord holder.
jack on the base, then place
C:\LaDonna\EXI 7960\EXI7960.vp
Wed Jan 13 14:51:01 1999
5
Color profile: Disabled
Composite Default screen
3) Plug the other end of the cord
into the wall jack. (Remember, the
phone must be fully charged before
you can use it.)
4) Place the base on the two posts of
the wall plate and slide it downward
to secure.
5) Plug the AC adapter into a standard
120 VAC wall outlet that is not
controlled by a wall switch.
6) Raise the antenna on the base.
6
C:\LaDonna\EXI 7960\EXI7960.vp
Wed Jan 13 14:51:14 1999
Color profile: Disabled
Composite Default screen
Direct wall mounting
▼
If you don’t have a standard wall plate, you can mount your phone
directly to the wall. Before mounting your cordless telephone, consider
the following:
• Select a location away from electrical cables, pipes, or other items
behind the mounting location. Inserting screws into areas such as this
can be hazardous.
• Try to mount your phone within 10 - 15 feet of a working phone jack in
order to avoid excessive cord length. Remember, you are not mounting
your phone to a wall plate with a built-in phone jack.
• If the selected mounting area has no wooden support beams directly
behind it, you will need the appropriate anchoring devices in order for
the wall to properly support your phone.
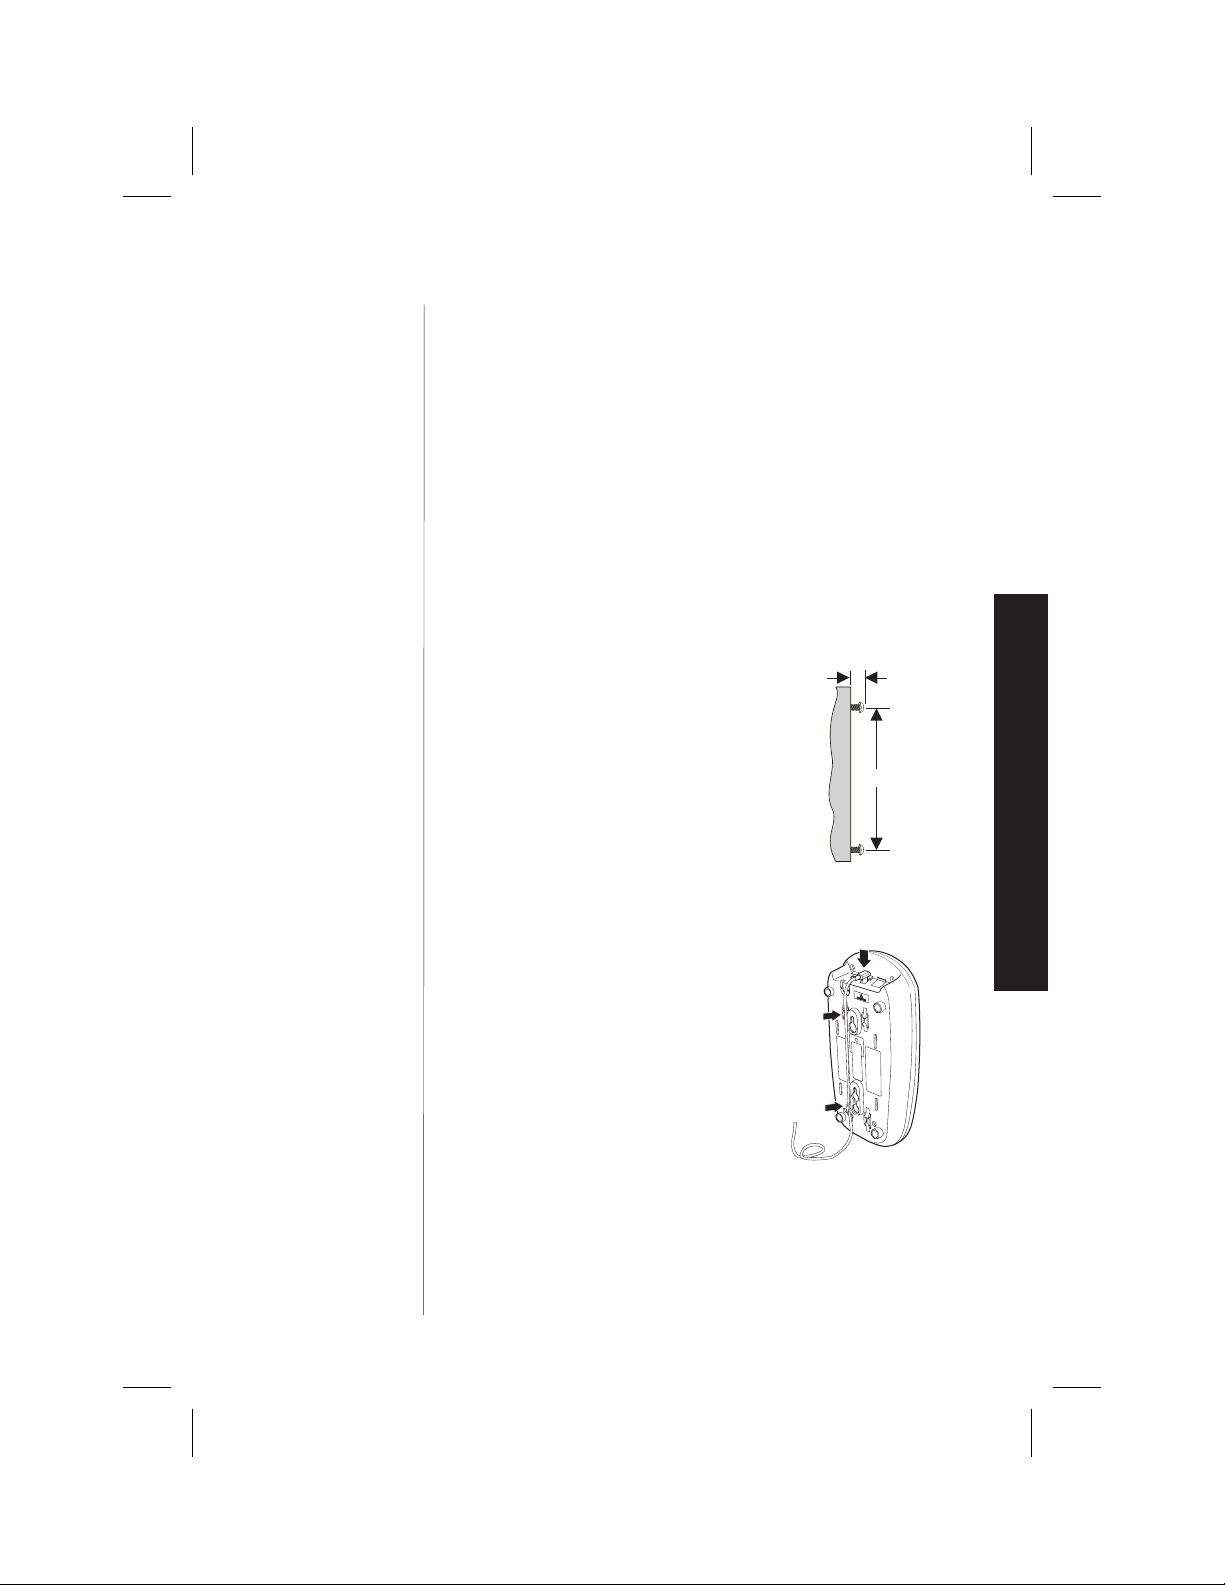
1) Insert two mounting screws into
3/16 in.
the wall, with their appropriate
anchoring device if necessary,
3-15/16 inches apart. Allow about
3/16 of an inch between the wall
3 15/16 in.
and screw heads for mounting
the phone.
INSTALLING AND ADJUSTING
C:\LaDonna\EXI 7960\EXI7960.vp
Wed Jan 13 14:51:18 1999
2) Set the handset retainer. (Refer to “Setting the Handset Retainer for
Wall Mounting” on page 4.)
3) Plug the AC adapter into the base
and place the cord inside the left
molded channel cord holder.
7
Color profile: Disabled
Composite Default screen
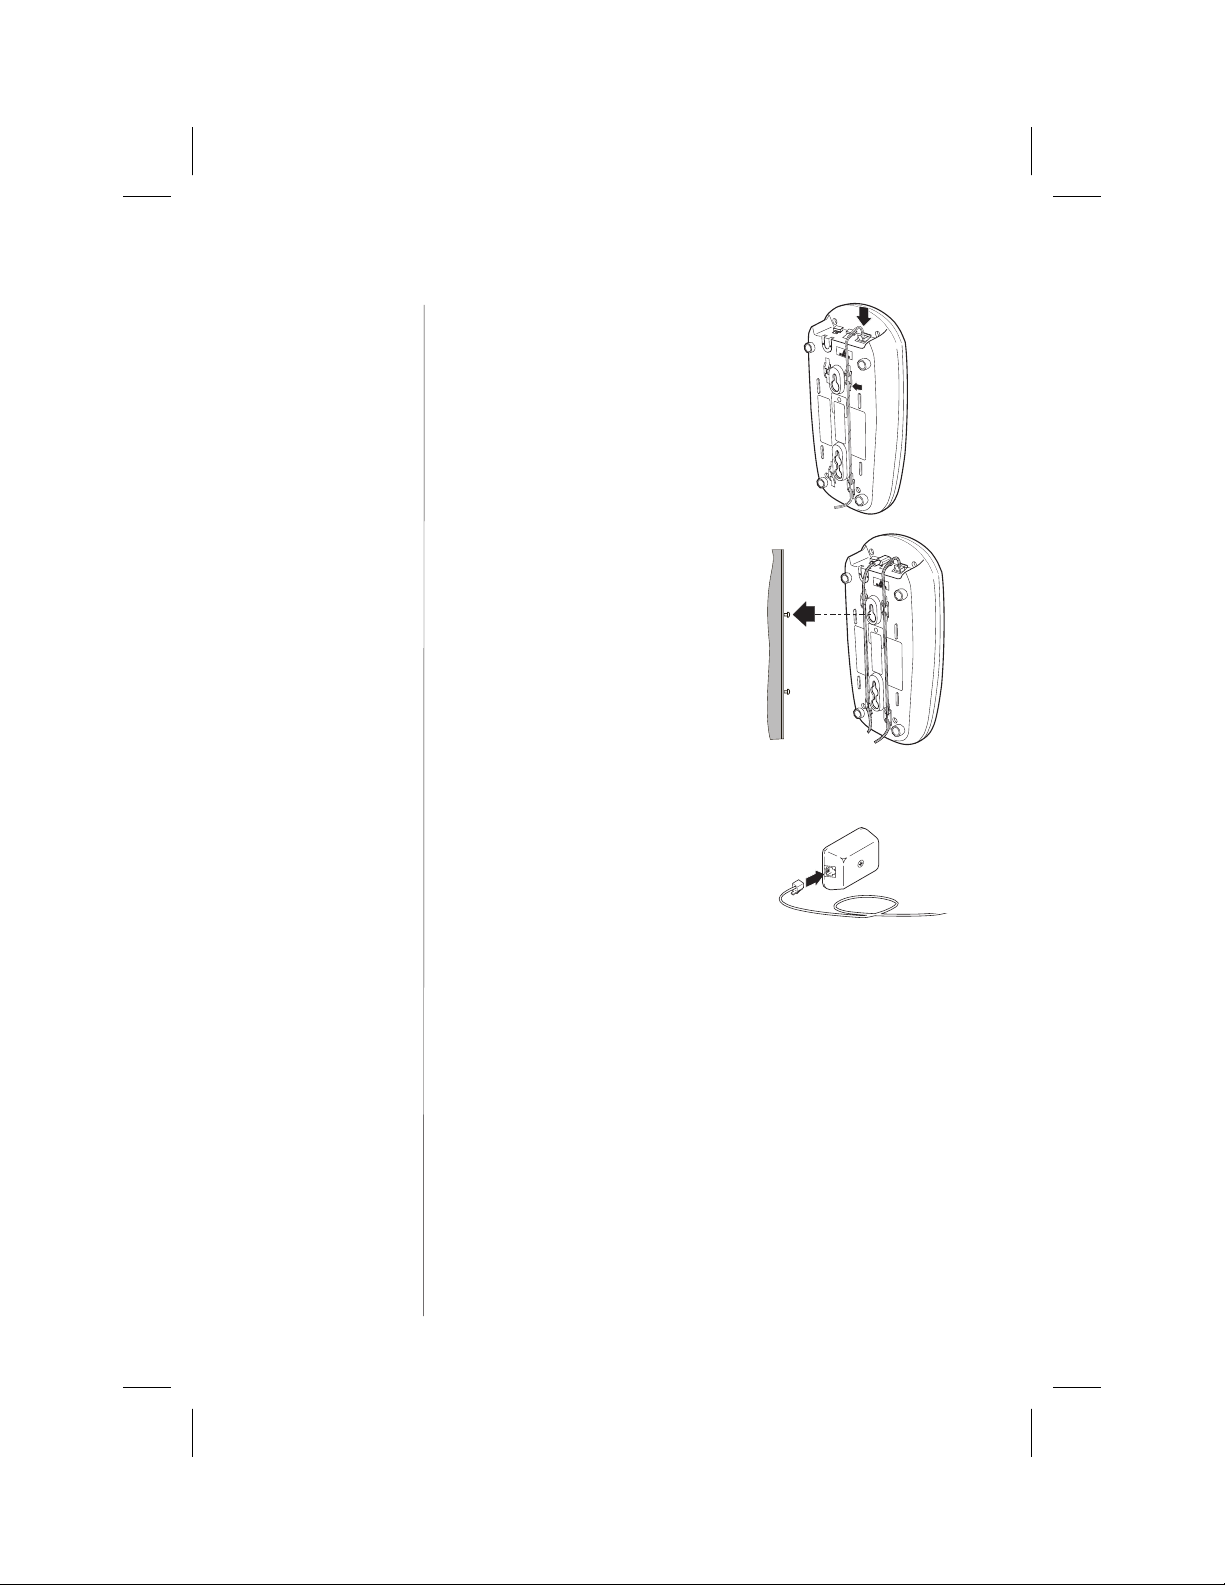
4) Plug one end of the long telephone
cord into the TEL LINE jack on the
back of the base and place the
telephone cord into the right molded
channel cord holder.
5) Place the base on the screws and push
it downward to secure.
6) Plug the other end of the telephone
cord into the wall jack.
8
C:\LaDonna\EXI 7960\EXI7960.vp
Wed Jan 13 14:51:27 1999
 Loading...