

Contigo 6100 Installation Manual
Installation Guide - Addendum
Garmin to Contigo 6100
6100 and Garmin: Dispatch and Navigation
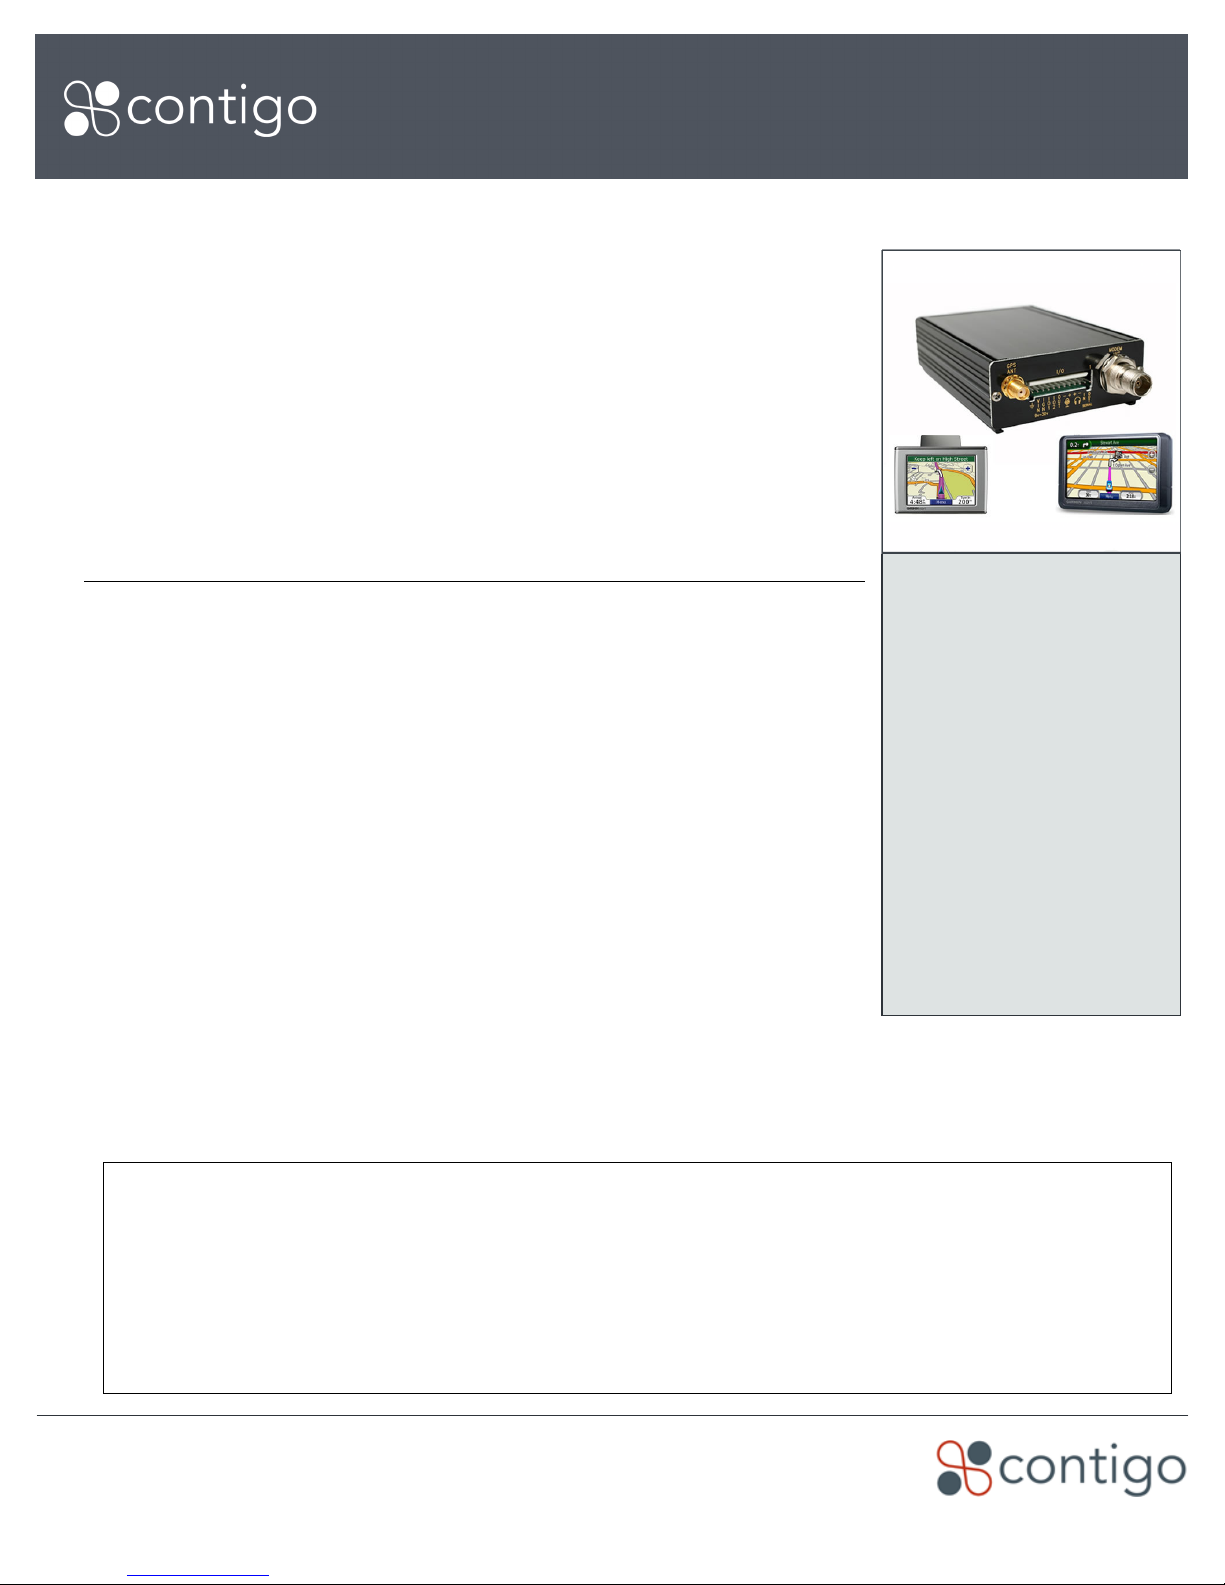
The Contigo 6100 provides a fleet management interface to Garmin™ Personal
Navigation Devices (PNDs) including the nüvi® 255/255W and nüvi 350/360. The 6100
may be connected to Garmin PNDs via a custom wiring harness that supports
Dispatch and Navigation in addition to all existing Contigo functions. From the
Contigo web application, Dispatchers may send jobs and messages to vehicles,
and monitor the status of jobs as drivers accept their jobs on the PND. Drivers may
navigate to the destination and complete these jobs.
This document is an addendum to the 6100 Installation Guide, and describes the
additional steps to install the Garmin unit and connect its related wiring to the 6100
and vehicle.
1. Before You Begin
Prerequisites
› Ensure you have all the equipment, tools and supplies indicated in this
document.
› Ensure that the 6100 beacon has been upgraded to the correct firmware
revision (52) to support the Garmin Fleet Management Interface. Contact
Contigo for more information.
› Have the standard 6100 Installation Guide on hand as a reference for
installing the beacon and making standard connections to the vehicle
(including un-switched power, ground, ignition sense, auxiliary inputs and
outputs).
› Have the appropriate 6100/Garmin wiring harness for the PND you are
installing (nüvi 255/255W or nüvi 350/360).
6100 to nüvi 350/360: Part Number: 6100-PWR-SPC340
Requirements
› 6100 / Garmin Wiring harness for
the appropriate PND model
› v52 firmware upgrade for 6100
beacon
› Garmin PND and mounting
bracket (nüvi 255/255W,
350/360)
› (nüvi 350/360 only) Cigarette
Lighter Power Adapter
Tools and Supplies
› All those required for 6100
installation (see 6100 Installation
Guide)
› Electrical tape
› Plastic cable ties
› Screw drivers, mounting screws
› Wrenches, sockets
› Optional: Vehicle Accessory
extension cable
6100 to nüvi 255/255W: Part Number: 6100-PWR-NUVI255
› Understand and be familiar with the Contigo web-based software portal, including beacon provisioning,
beacon management, and Dispatch functions including sending a message. Alternatively, ensure someone is
available to support you during the installation who has access to this information and to the portal.
IMPORTANT NOTE
› If the Contigo 6100 is already installed in the vehicle:
The beacon’s firmware must be v52. This may be verified through the Contigo portal’s Beacon Manager.
Firmware may not be upgraded in the field. You must swap the beacon for one with firmware v52.
The existing harness must be replaced. Contact your Contigo representative for more information.
› Some Garmin models are not interchangeable from vehicle to vehicle as their wiring harnesses may be
different.
Copyright © 2009 Contigo Systems Inc. All rights reserved.
www.contigo.com
Garmin to Contigo 6100
Installation Guide
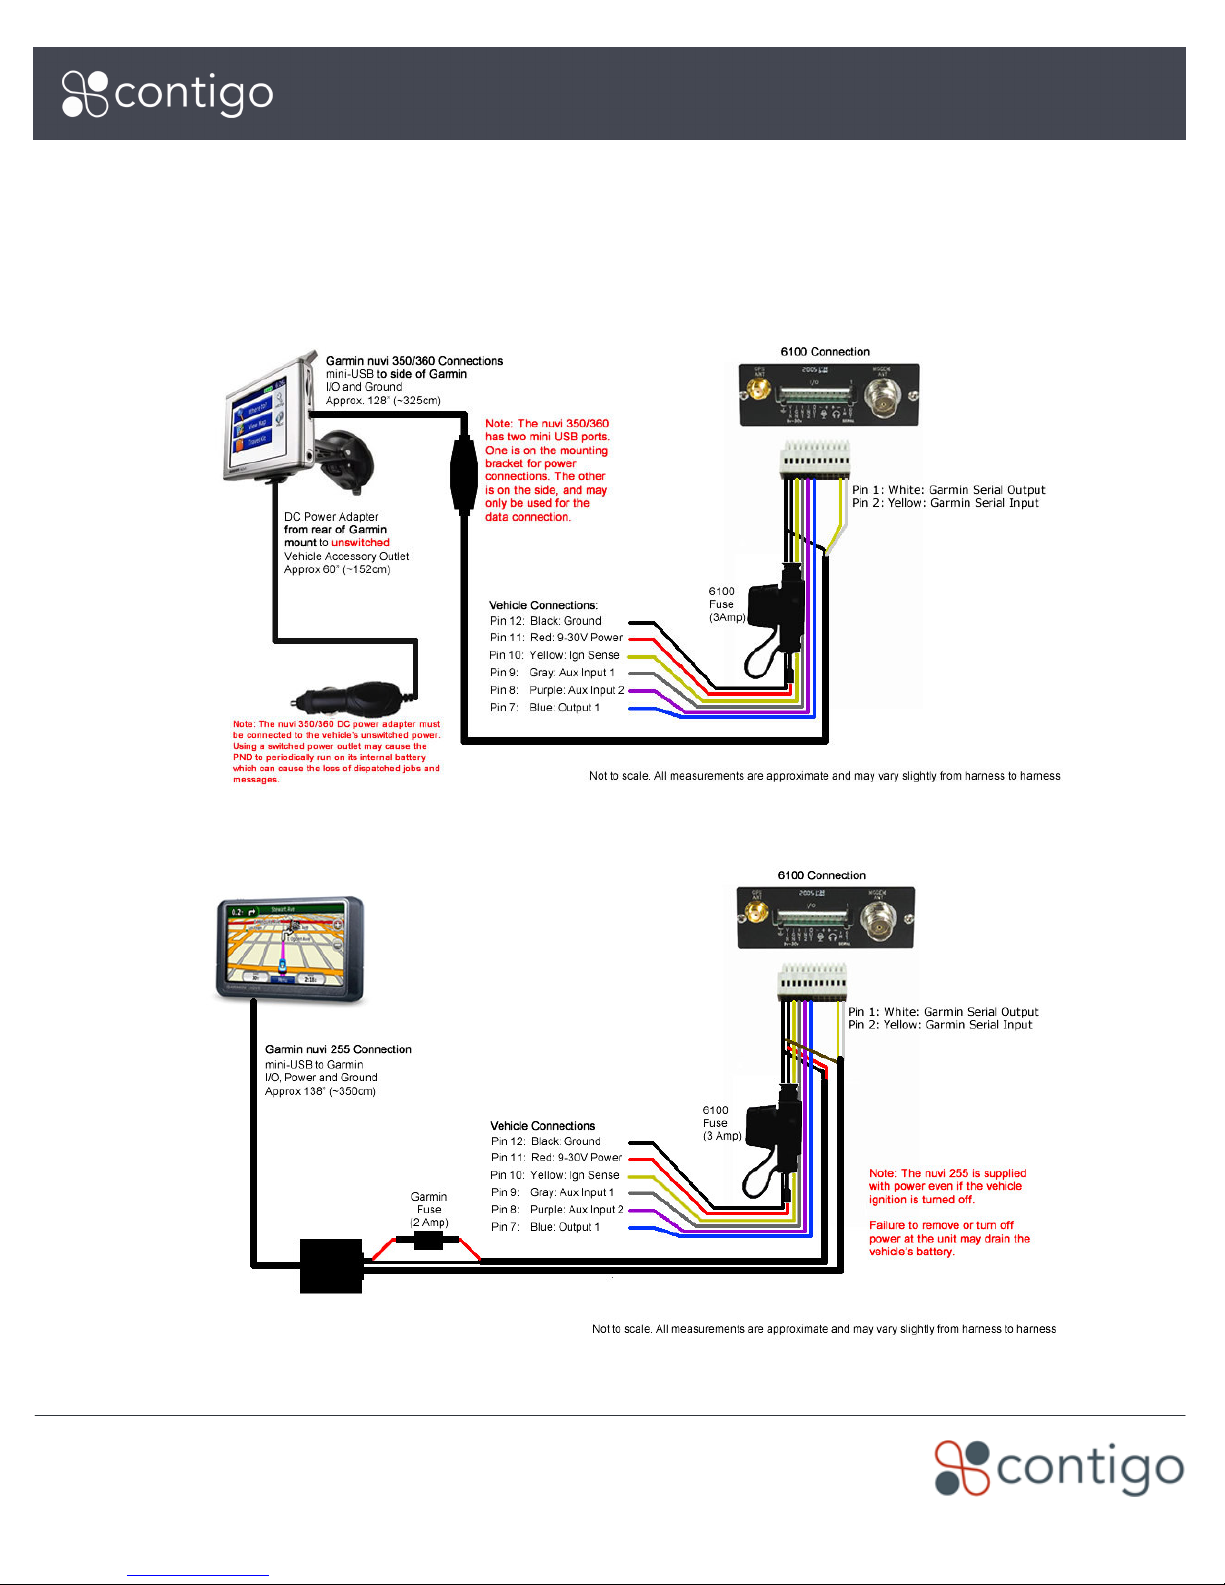
Wiring Harness Diagrams
The following diagrams illustrate the connections between the 6100 beacon and the Garmin units currently
supported. Familiarize yourself with the appropriate wiring harness for your installation.
Garmin nüvi 350/360 to 6100
Garmin nüvi 255W to 6100
Copyright © 2009 Contigo Systems Inc. All rights reserved.
www.contigo.com
2 of 7
Garmin to Contigo 6100
Installation Guide
Select a Suitable PND Installation Position
Garmin PNDs are shipped with portable/removable mounting brackets. These are typically designed to adhere to
the inside of the windshield glass (which usually provides the clearest line-of-sight to the sky). Alternatively, you may
choose to permanently mount the bracket using your own fasteners or adhesive.
› Locate all the mounting hardware provided in the Garmin PND packaging to ensure the kit is complete.
› Determine the best location for the PND, and ensure there is a smooth, clean area of glass to affix the
mounting bracket, or other suitable mounting location.
› Ensure the PND is in clear line of sight to the sky and that it is able to acquire GPS satellite signal.
› Ensure the placement of the Garmin PND and its mounting hardware will not obscure the driver’s vision or
prevent normal operation of the vehicle and its controls. The PND should be placed within reach of the driver
for easy access to the Garmin navigation and dispatch controls.
› Ensure that the mini-USB cable can reach from the planned 6100 beacon location to the PND.
The mini-USB data cable carries data from the 6100 beacon to the PND. It also provides the grounding
point for the PND.
For certain models, (e.g. nüvi 255, nüvi 255W) the mini-USB cable also provides the power source for the
PND.
The mini-USB data cable must be routed up to the PND from the rest of the harness. Take note of the
size and shape of the mini-USB connector to ensure your routing accommodates it.
IMPORTANT NOTE
(nüvi 350/360 only): Ensure that an
distance of the PND location. While they are equipped with internal batteries,
switched external power. Power should remain to the PND even when the ignition is switched off. Operating
the PND on its internal battery will prevent Jobs and Messages being properly delivered to the PND.
You may choose to source a vehicle accessory extension cable (not provided by Contigo) that allows you to
source vehicle power at the same point as the 6100 beacon.
un-switched vehicle accessory power outlet
is located within suitable
PNDs must be operated on un-
2. Install the 6100 Beacon
Install the 6100 beacon, Antenna and Wiring Harness
› Following the instructions in the 6100 Installation Guide, install the 6100 beacon and antenna: Using the
6100/Garmin wiring harness, make the standard wiring connections (power, ground, ignition sense) and
optional connections if desired (auxiliary inputs and outputs).
Test the 6100 Beacon
› Perform an end-to-end system test by locating the beacon via the Contigo portal.
Configure the 6100 Beacon for PND Use
› In the Contigo portal, configure the 6100 as having a PND attached. See the Dispatch Administration and
Configuration Guide for more information.
Copyright © 2009 Contigo Systems Inc. All rights reserved.
www.contigo.com
3 of 7
 Loading...