


User Notice
1.Thanks for purchasing Urine Analyzer! Please read the User Manual
carefully before using this product. The User Manual which describes
the operating procedures should be followed strictly.
2.This manual detailed introduce the steps must be noted when using
the product, operation which may result in abnormal. Any anomalies
or personal injury and device damage arising from use, maintain, store
do not follow requirements of the User Manual, Our company is not
responsible for the safety, reliability and performance guarantees! The
manufacturer’s warranty service does not cover such faults!
3.The device with data storage function, for user losses which caused
by data loss due to device damage or user's operation, our company
does not assume any responsibility.
4.Test strip can only choose regular products, it's recommended to use
the test strip which supplied with the device, so better ensure the
accuracy of the test.
5.Our Company reserves the right to change the content of the manual,
the contents of this manual are subject to change without notice.
I
Statement
This user manual contains proprietary information, which is protected
by copyright. All rights reserved. Reproduction, adaption or
translation, for any part of the manual without prior written
permission, is prohibited.
Our company assumes no responsibility for incidental or
consequential damage in use caused by any error appear in this
document. In case of product upgrades, the information contained in
this manual is subject to change without notice.
Our company reserves the final elucidative right.
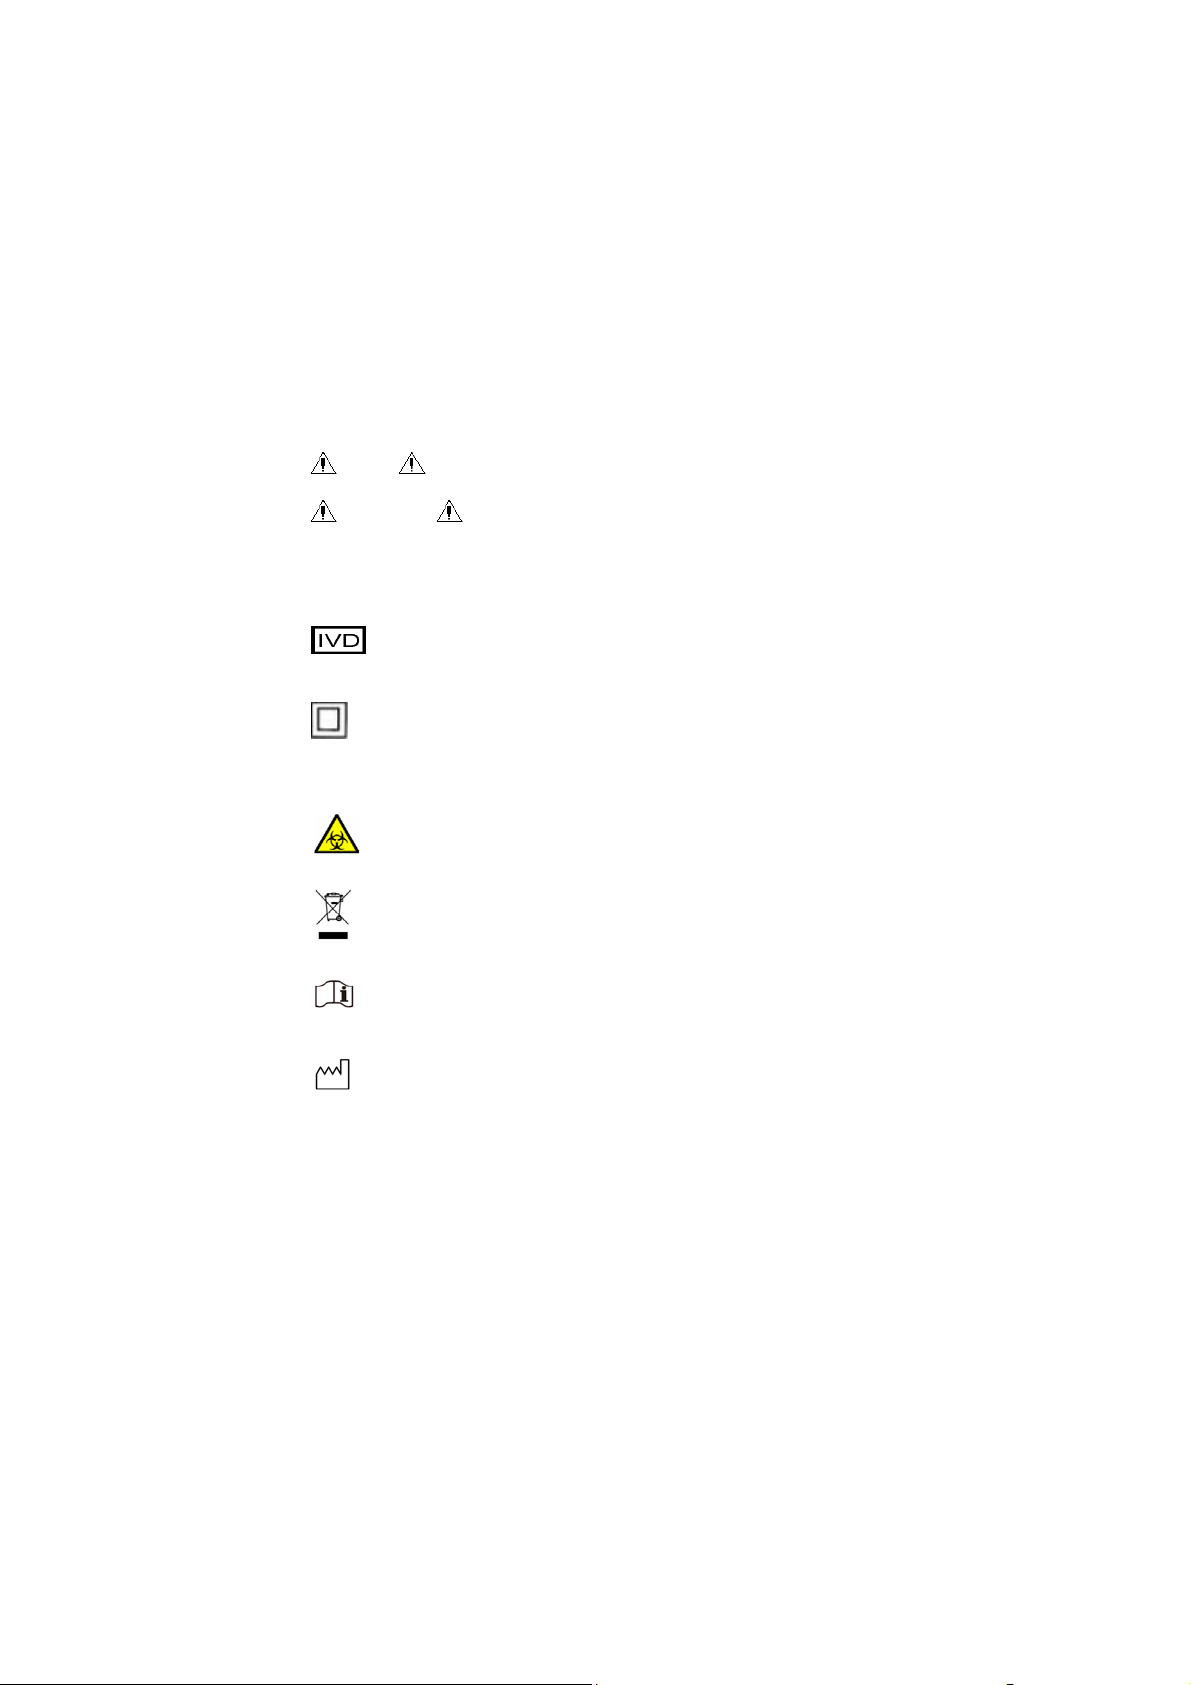
Meaning of symbol
Note : Tips, advice and suggestions.
Warning : Warnings must be complied strictly to ensure
that the Urine Analyzer can operation normally and the test result
are correct and true.
In vitro diagnostic medical equipment.
Equipment which all protected by double insulation or
reinforced insulation.
ISO7000-0659, Biohazard.
WEEE (2002/96/EC).
Refer to instruction manual/booklet.
Date of manufacture.
II

Serial number.
Manufacturer.
This item is compliant with In Vitro Diagnostic Medical
Device Directive 98/79/EC of Dec.27,1998, a directive of the
European Economic Community.
FCC WARNING
This device complies with part 15 of the FCC rules. Operation is subje
ct to the following two conditions:
(1) this device may not cause harmful interference, and
(2) this device must accept any interference received, including
interference that may cause undesired operation.
Changes or modifications not expressly approved by the party
responsible for compliance could void the user’s authority to operate
the equipment.
NOTE: This equipment has been tested and found to comply with the
limits for a Class B digital device, pursuant to part 15 of the FCC
Rules. These limits are designed to provide reasonable protection
against harmful interference in a residential installation. This
equipment generates uses and can radiate radio frequency energy and,
if not installed and used in accordance with the instructions, may
cause harmful interference to radio communications. However, there
is no guarantee that interference will not occur in a particular
installation. If this equipment does cause harmful interference to radio
or television reception, which can be determined by turning the
equipment off and on, the user is encouraged to try to correct the
interference by one or more of the following measures:
- Reorient or relocate the receiving antenna.
III

- Increase the separation between the equipment and receiver.
-Connect the equipment into an outlet on a circuit different from that
to which the receiver is connected.
-Consult the dealer or an experienced radio/TV technician for help
RF Exposure
When using the device, ensure that the antenna of the device is as least
20 cm away from all persons.
IV

Content
User Notice ................................................................................... I
Statement ..................................................................................... II
Content ........................................................................................ V
Chapter 1 Overview ...................................................................... 1
1.1 Summarization ................................................................ 1
1.2 Precautions for Use ......................................................... 2
1.3 Technical Specification................................................... 3
Chapter 2 Installation .................................................................... 5
2.1 Operation Environment .................................................. 5
2.2 Dismantlement and Installation ...................................... 5
2.3 Appearance and Structure ............................................... 6
2.3.1 Front View ........................................................... 6
2.3.2 Back View ........................................................... 7
2.4 Power Supply .................................................................. 7
Chapter 3 Operation ...................................................................... 9
3.1 Buttons ............................................................................ 9
3.2 Power On ...................................................................... 10
3.3 Start Test ....................................................................... 11
3.4 Power Off ..................................................................... 13
3.5 Setup Menu ................................................................... 14
3.5.1 Records .............................................................. 14
3.5.2 Unit .................................................................... 16
3.5.3 Clock .................................................................. 16
3.5.4 Language ............................................................ 17
3.5.5 Factory Settings ................................................. 17
3.6 Instructions of Bluetooth .............................................. 20
3.6.1 Scope of Application ......................................... 20
3.6.2 Operating Steps of Bluetooth Communication .. 21
3.6.3 Other Descriptions ............................................. 21
Chapter 4 Maintenance ............................................................... 22
4.1 Maintenance .................................................................. 22
4.2 Dismantle and Install the Paper Tray ............................ 22
V

4.3 Clean the Paper Tray .................................................... 23
4.4 Disinfection .................................................................. 24
4.5 Waste Disposal ............................................................. 24
4.6 Troubleshooting ............................................................ 24
Appendix .................................................................................... 26
VI

Chapter 1 Overview
1.1 Summarization
Urine test is the most common method for checking disease in clinical
test, and checking with urine test strip is the most effective method.
urine test strip and urine sample produce a chemical reaction, the color
of each test color-area will change after reaction, the corresponding
test results can be obtained according to the color change. The
analyzer is researched and developed basing on modern photoelectric
and microprocessor technology for clinical inspection of urine, and it
integrates the advantages of easy and quick operation, exact result.
Features:
High-luminance and white LED, improves Signal Noise Ratio;
High-performance photoelectric receiving components, RGB
tricolor test theory, which makes the analyzer possess the
function of good anti-interference and adaptability;
User-friendly interface, features in vivid arrangement and
convenient use;
With flash memory technology, automatic synchronization
storage during testing process, and the data doesn't lose when the
device power off or unexpected shut down;
Store up to 500 test results, manage according to date and sample
NO, which is convenient for consulting;
Compatible with 8 items, 10 items and 11 items of test paper;
With a rechargeable battery that can be tested anytime, anywhere.
Purpose:
Use with the dedicated urine test strips for clinical urine testing.
Life:
Under the conditions of daily maintenance, normal use time is
not less than five years.
1

1.2 Precautions for Use
Note
Before using, please read the Manual carefully and strictly
operate according to it.
Please don't use the accessories not provided by manufacture.
Please don't use the analyzer in condition that the test strip is
expired or the device is damaged.
Please transport, install and operate the analyzer following the
User Manual.
To ensure the accuracy, the operation temperature should be in
range of 10℃-30 , if exceeds this range, place ℃ the analyzer in
required environment for 20-30 minutes before using.
Away from the strong electric field (magnetic field) when using,
avoid direct sunlight.
Use the supporting test strip which specified by the manufacturer.
2
1.3 Technical Specification
Glucose(GLU), Bilirubin(BIL), Specific
gravity (SG), PH, Ketone body(KET), Occult
Test item
Test mode Single-step test
Language Chinese and English
Display LCD, resolution:320*240
Principle RGB tricolor test theory
blood(BLD), Protein(PRO),
Urobilinogen(URO), Nitrite(NIT),
Leukocytes(LEU), Ascorbic acid (VC)
Communicatio
n interface
Mini USB interface, Bluetooth wireless
communication(apply to BC401BT)
Repeatability CV≤1%
Stability CV≤1%
Record mode LCD display, FlashROM data storage
Relative
≤80%
humidity
Built-in rechargeable lithium battery 3.7V,
1900mAh
Power supply
Host computer: DC 5V, 1A
Adapter: AC 100V-240V, 50/60Hz
Test r ange Refer to Grads Table in appendix
Input power
≤5W
consumption
Temperature: 10 ~30℃℃
Relative humidity: ≤80%
Operating
environment
Atmospheric pressure: 76kPa~106kPa
Away from the strong electric field (magnetic
field), avoid direct sunlight
3

Dimension 126mm(L)*73.5mm(W)*30mm(H)
4

Chapter 2 Installation
2.1 Operation Environment
As with all precise electronic instruments, the urine analyzer should
avoid placing in high temperature and humidity environment for a
long time. To get optimal result, please keep relative stable
temperature(10 ~30 ) and humidity(≤80%), and the tabletop to be ℃℃
placed the analyzer should be level.
Operating environment:
Temperature: 10℃~30℃
Relative humidity: ≤80%
Atmospheric pressure: 76kPa~106kPa
Transportation and storage environment:
Temperature: -40℃~55℃
Relative humidity: ≤95%
Atmospheric pressure: 76kPa~106kPa
Warning
Please don't use the analyzer in the following places:
Direct sunlight areas or the front of open window;
There is flammable and explosive gases;
Near the heating or cooling equipment;
Near strong light-source.
2.2 Dismantlement and Installation
Open the package and remove the material used for
transportation. Keep the package for possible future transportation or
storage.
(1) Take out the urine analyzer from the package.
(2) Remove the wrapper, take out the analyzer from the plastic
packaging.
(3) Check the components according to the packing list.
If there is any problem, contact our company or agent
immediately.
5

2.3 Appearance and Structure
2.3.1 Front View
Figure 2-1 Front view
① LCD display: man-machine conversation window
② Mini USB socket: AC adapter power supply socket,
interface of data transmission.
③ Keyboard: 5-key touch control keyboard, operate the
analyzer with the buttons.
④ Test paper tray: place the strip to be tested on it.
6

2.3.2 Back View
Figure 2-2 Back view
① Battery cover: it's need to open the battery cover when
install and remove the lithium battery;
② Reset key: if necessary, press this button to reset the urine
analyzer.
2.4 Power Supply
The device can use the built-in rechargeable battery as power supply.
Connect the urine analyzer to the AC adapter when the built-in battery
power is low or it needs to use the external power.
Steps for connecting AC adapter:
1) Make sure that the AC power complies with the technical
specification.
2) Apply the Mini USB data cable accompanying with the analyzer.
Plug data cable to power interface of adapter, plug AC adapter to
AC power socket.
7

Warning
AC power outlet must be well connected to ground (zero
grounding voltage<5V).
The AC power must be stable, avoid using the same power
together with high-power appliance, and a manostat is
recommended to configure.
Please turn off the power supply immediately and contact
with the maintenance center, when fog, peculiar smell or
strange sound was found in device.
Hold the adapter itself when you unplug it, rather than the
data cable.
8

3.1 Buttons
Chapter 3 Operation
Figure 3-1 Buttons
①
on/off the device.
②
button to switch current test user;
In the main interface, long press this
button for 2 seconds to enter the setup interface;
In other interface, execute the return
operation.
③
main interface, press this button to start test.
④
press this button to move the tray up; in the menu interface, press this
button to move the cursor up; in history interface, long press this
button to quickly move the cursor.
ON/OFF button: Long press this button to turn
Menu button: In the main interface, short press this
OK button: Confirm the current operation; In the
Up direction button: In the main interface, long
9

⑤ Down direction button: In the main interface, long
press this button to move the tray down; in the menu interface, press
this button to move the cursor down; in history interface, long press
this button to quickly move the cursor.
3.2 Power On
Under normal power supply situation, long press ON/OFF button
for 3 seconds, the urine analyzer will power on and test various parts
of the system, enter the main interface after self-test, as shown in
Figure 3-2:
Figure 3-2 Main interface
Note
When self-test information prompt abnormities, first
according to the user manual to resolve abnormities. If
abnormalities are still not resolved, please contact the dealer
or manufacturer.
10

When the device prompts to calibrate the clock after the
self-test is completed, users need to set time themselves.
3.3 Start Test
Preparation before test:
Urine test strips that matched the device;
Urine sample that stored no more than 4 hours;
Absorbent paper for sucking residual urine;
Protective gloves for preventing contamination.
After the test strip is immersed in the sample, absorb the excess
sample liquid in both sides of test paper with absorbent paper, then put
the test strip flat on the device test paper tray. Keep the top of test strip
is aligned with the top of test paper tray.
The main interface displays test countdown, test sample number, user
name and the name of the test item.
According to the need, operate as follows:
: Short press this button once, the sample number add 1; long
press this button for 3 seconds, the paper tray out of the storehouse.
: Short press this button once, the sample number reduce 1;
long press this button for 3 seconds, the paper tray back to the
storehouse.
: Short press this button once to switch testing user; long press
this button for 2 seconds to enter the device setup interface; during the
test, short press it to exit.
: Short press this button once to begin 60-seconds countdown,
enter the test after the countdown return to zero; short press it once
again before zeroing, the countdown will directly return to zero and
immediately enter the rapid test status.
: Long press this button for 4 seconds, the device will power
off.
Test steps:
1) Place the test strip;
2) Under the main interface, press OK button
current sample;
11
to begin testing the

3) Begin 60-seconds countdown. After finishing the countdown or
press OK button
there are error messages during the test, follow the prompt, then
press OK button
4) Measurement is completed, display and store the test result. As
figure 3-3.
once again, the device begin to test data. If
to continue the measurement;
Note
The sample number starting from 1 after the first power-on
every day, after testing 1 sample, the sample number
automatically add 1. After p owe r on aga in the same day, the
sample number starting from the latest sample number.
Select the history sample number, you can re-test the sample
and save the latest test result.
If an error message appears after pressing the OK button,
please follow the prompt.
Do not place objects on the front removable part of test paper
tray, in order to avoid a collision when the tray is removed,
cause the bias of test results.
12

Figure 3-3 Test is completed
3.4 Power Off
Recommended to power off as follows:
1) Under the main interface, long press the direction button
seconds to make the paper tray back to the device storehouse,
then long press the direction button
make the paper tray out of the device.
2) Remove the tray and rinse the bracket with clear water, then blot
up the liquid above and below the tray with absorbent paper.
3) Install the tray into the location where it out of the storehouse,
long press the direction button
automatically back to the storehouse.
4) Long press ON/OFF button
automatically power off.
Note
Don't directly unplug/ plug the paper tray with hand to avoid
damages of mechanical structure.
for 4 seconds, the device will
for 3 seconds again to
for 3 seconds to make the tray
for 3
13

3.5 Setup Menu
Figure 3-4 Menu
Figure 3-4 shows the device menu interface, it includes historical
records, unit, clock, language, factory settings. Select menu option
through direction button , press OK button to enter next
submenu, press the menu button
in any interface to return to the
previous interface.
3.5.1 Records
Historical records menu interface, as shown in Figure 3-5.
14

Figure 3-5 Historical records
All records
Enter the all records query interface, each page shows 10 historical
data at most, user can page to see more historical records through
direction button
, after selecting a record, press OK button to
see the corresponding record. As shown in Figure 3-6.
15

Figure 3-6 Historical records
User list
Query the historical test data of the selected user.
Date list
Query the historical test data of the selected date.
Send
The urine analyzer upload all test results to PC through Mini USB
interface or bluetooth(apply to BC401BT).
Note
If transmit data through Mini USB interface, users need to
use the data cable which is specified by the manufacturer.
Use the PC software which is specified by the
manufacturer(optional).
Delete
Delete all historical data.
Note
Data can not be recovered after deletion, please operate carefully.
3.5.2 Unit
The default unit when the urine analyzer leave factory is set to plus
system, if you need change the unit, please change it through the unit
menu.
3.5.3 Clock
Clock setup menu is used to modify the date and time. User can press
the direction button
OK button
the next modification, after completing modifications in turn, press
OK button
saves the new date and time, and exit to the device setup interface. In
clock setup interface, users can press menu button
cancel modification and directly return to device setup interface.
Note
to modify the value in this interface, press
to save the modification of the current item and enter
to complete all modifications, the system automatically
at any time to
16

The system clock always has some cumulative error, the user
should calibrate once every two months.
Urine analyzer manages test reports according to the sample
number, date and time of test report, please input the date
and time according to the facts, otherwise it will lead to
disorder of test report management.
3.5.4 Language
Set the language of device interface, the device supports both Chinese
and English.
3.5.5 Factory Settings
Figure 3-7 The interface of inputing password
User password: 0000.
Modify the value of current item with the direction button
the OK button
to save the modification of current item and enter
next item, after inputing the password, press the OK button
the factory settings interface, as shown as figure 3-8.
17
, press
to enter

Figure 3-8 Factory settings
Adjust sensitivity
Adjust the sensitivity for the currently selected test strip. During using,
the sensitivity can be adjusted when the user wants to increase or
decrease the sensitivity of the analyzer.
When you set the sensitivity, must be careful, a valid setting is
recommended, you can use urine quality control materials or
homemade known content quality control substitutes. For example:
gradually dilute known content glucose, homemade PRO standard, use
standard of BLD, LEU with microscope, etc.
There are several problems should be pay attention to when use other
types of analyzers for comparison:
1.The test paper used by the analyzer made by which standard.
2.The mutual comparability of test strips which made by different
standards is very poor, the same control material test different test
papers get different results.
3.How is the repeatability of the analyzer, whether has evaluation
or self-evaluation.
4.How is the quality of the test paper which used by the analyzer,
in the case of the repeatability of the analyzer is excellent, whether the
repeatability of test paper is excellent.
18

After understanding the above, you can securely adjust the sensitivity.
The setup interface of adjusting sensitivity is shown in figure 3-9.
Figure 3-9 Adjust sensitivity
Select the item which need modified, enter the sensitivity adjusting
menu of each grads in this item, as shown in figure 3-10.
19

Figure 3-10 Adjust sensitivity
Press direction button
press OK button
then modify the corresponding value through direction button
press OK button
to cancel the modification. After finishing modification, press menu
button
After modifing all item, press menu button
settings menu.
When you set the sensitivity, must be careful, adjust the
After adjusting, the sensitivity value of the test item remains
Sleep time
The device is set to enter the sleep state when there is no operation.
Under sleep state, the display is turned off, press any button can
restore to the working state at this time.
Under sleep state, the device will automatically power off without
operation for 30 minutes.
System reset
to exit the modification of current item.
Note
sensitivity may cause detection errors.
the same size and sequence as before.
Note
to enter the modification of current grads value,
to confirm the modification, press menu button
to select grads value which need modified,
,
to return to the factory
Restore the system to factory settings.
Note
After restoring to factory settings, all user settings(including
sensitivity adjustment) will be restored to the factory state.
About
Display the relevant information of the device.
3.6 Instructions of Bluetooth
3.6.1 Scope of Application
Apply to BC401BT Urine Analyzer.
20

3.6.2 Operating Steps of Bluetooth Communication
1. Power On
Turn on bluetooth function of computer, mobile phone or other
intelligent device(hereinafter referred to as PC), and the Urine
Analyzer is ON.
2. Matching
PC searchs and matching the bluetooth urine analyzer. Under normal
circumstance, it doesn't need to input password during matching(the
default bluetooth password is 0000).
3. Connecting
After a successful matching, PC can communicate with urine analyzer.
3.6.3 Other Descriptions
After the device has power on and enter the main interface, the
bluetooth will turns on automatically, and the interface displays the
bluetooth icon at the same time, users can search and connect
bluetooth equipment in this interface for communication; the screen
and bluetooth will automatically turn off 4at the same time if the
device has no operation for sleep time, if you want to continue
communication, press any button to exit sleep state, then the bluetooth
automatically turns on; users can view the bluetooth name of the
corresponding device in the interface of Factory Settings-About,
specific reference to part of the factory settings 3.5.5.
Note
Use the PC software which is specified by the
manufacturer(optional).
21

Chapter 4 Maintenance
4.1 Maintenance
1. After daily use, the test tray should be took out for cleaning, and
the remained urine should be cleaned with absorbent paper or
cotton swab in time, to avoid inaccurate result for
cross-pollution.
2. Often clean the analyzer with soft cloth to keep it clean. If the
surface of the analyzer is very dirty, then wipe it with clean water
or neutral cleaning fluid. Do not clean with gasoline, paint
dilutions, benzene compounds, alcohol and other organic
solvents. As these reagents will make the urine analyzer
transmogrify, drop lacquer, finally affect performance or
appearance.
3. Do not clean the LCD with water, it is recommended to gently
clean it with soft and dry cloth or soft paper.
4. Do not repair or dismantle the device without authorization, if
there are quality problems, it can only be repaired by a factory
authorized agency or factory engineers.
Note
When cleaning paper tray, do not pollute, scratch, or use chemical
solvents to clean the white part on the top of the tray.
4.2 Dismantle and Install the Paper Tray
Dismantle and install the paper tray according to the following steps:
Under the main interface, long press the direction button
seconds to make the paper tray back to the device storehouse, then
long press the direction button
paper tray out of the device.
for 3 seconds again to make the
22
for 3

When installing, insert the clean tray into the device from underside,
hold the paper tray gently with hand, at this time, press the
direction
button for three seconds, then the paper tray will move
back to the device storehouse.
4.3 Clean the Paper Tray
Drive rack
Paper bracket
Calibration comparator block
Positioning magnet
Figure 4-1 Test paper tray
For daily cleaning, use the soft cloth dipped with distilled water or
absorbent paper to wipe the paper bracket and the calibration
comparator block, and make sure there is no dust, substance, nick, if
any found, please replace it with dealer.
If there is urine alkali in the paper bracket, use cotton swab dipping
with NaOH (concentration: 0.1mol/L) to wipe the paper bracket, and
use absorbent paper to wipe.
Note
Please do not clean with any substance that may scrape the paper
bracket and the calibration comparator block.
23

Please do not clean the calibration comparator block with any
solvent.
Please do not contact the calibration comparator block with
NaOH.
4.4 Disinfection
1) According to one of the following three methods to configure
disinfectant:
2% glutaraldehyde solution;
0.05% sodium hypochlorite solution -----1:100 dilution: add 1mL
sodium hypochlorite solution(concentration:5%) to 99ml water;
Isopropanol (70% -80%), without dilution.
2) Inject the disinfectant into a tall and narrow container for about
10 cm high.
3) Immerse the paper tray to the disinfectant, and keep the
calibration comparator block on the surface.
4) Soak for 10 minutes, then take it out and wipe it with absorbent
paper.
4.5 Waste Disposal
According to local regulations about biohazard waste disposal to
discard the waste generated during use.
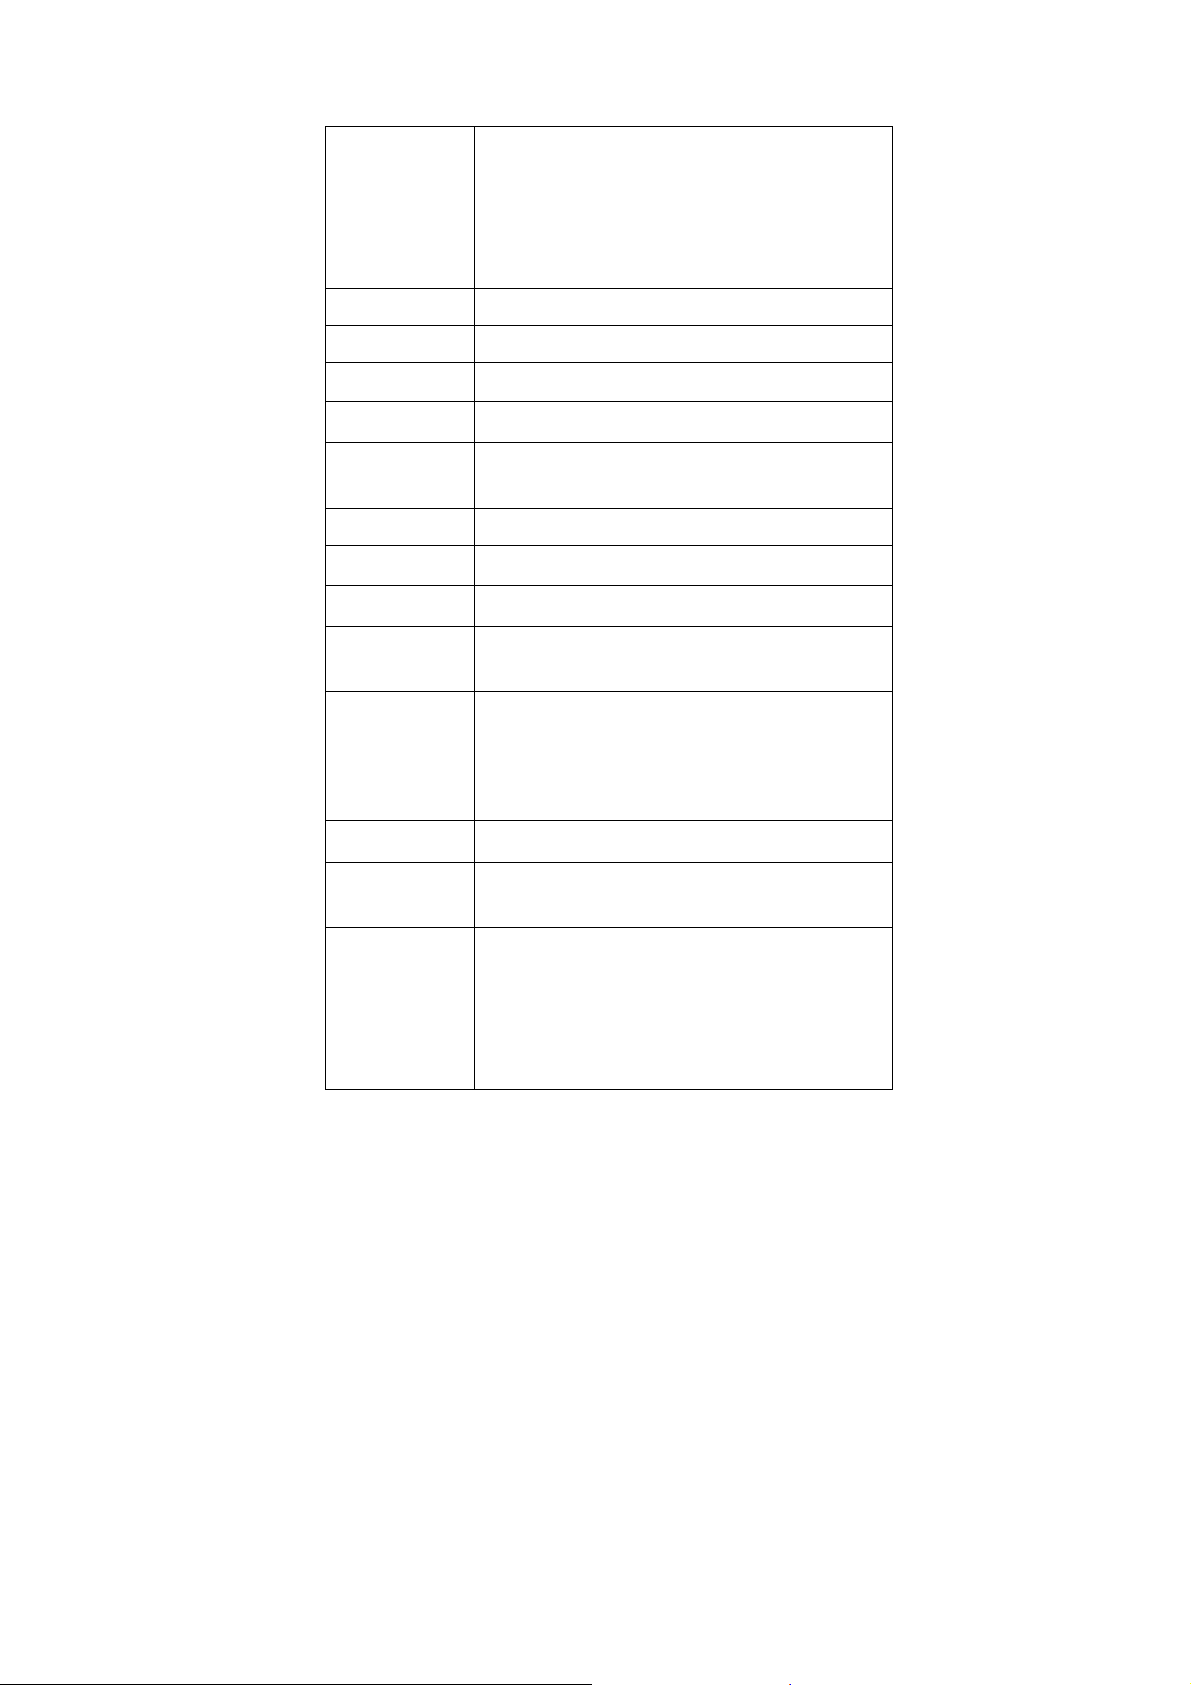
4.6 Troubleshooting
When there is a fault with the urine analyzer or some functions can
not be achieved caused by users' improper operation, the urine
analyzer will displays error message, all error messages are as
follows:
Error message Solution
Abnormal
system
information
The memory has problems, the analyzer can
not properly read the system parameters, if it
still displays abnormal message after restarting
please contact the dealer.
24

Abnormal
Motor
Abnormal light
source
Abnormal
backlight
Test paper is
placed wrong
Can't power on
Hardware fault
1. Motor rotation is abnormal, check whether
there is debris on the paper tray, causing
the motor stuck.
2. Low battery, restart after connecting the
AC adapter.
1. The light source is strong, weak or
damaged.
2. The calibration comparator block is
contaminated, please clean it.
Please confirm whether the device work under
strong light source, re-arrange the work
environment of the device according to
requirements of the manual.
Please check whether the head of the test strip
has been placed to the inner end of the tray
flute, even the strip has not been placed, if it is,
please correct it within 10 seconds and press
OK button
.
Low battery, restart after connecting the AC
adapter, if still can't power on, please contact
the dealer.
The device can't work resulted from abnormal
test paper information, abnormal motor,
abnormal light source. Please contact the
dealer.
25

Grads Table
Item
URO 1
BLD 2
BIL 3
KET 4
LEU 5
GLU 6
PRO 7
PH 8
cod
e
Gra
ds
code
0
1
2
3
0
1
2
3
4
0
1
2
3
0
1
2
3
0
1
2
3
4
0
1
2
3
4
5
0
1
2
3
4
0
1
Appendix
Special
unit
Norm
+1
+2
>=+3
-
++1
+2
+3
+1
+2
+3
+1
+2
+3
-
++1
+2
+3
-
++1
+2
+3
+4
-
++1
+2
>=+3
5
6
Internatio
nal unit
3.3umol/l
33umol/l
66umol/l
131umol/l
0umol/l
17umol/l
50umol/l
100umol/l
0mmol/l
1.5mmol/l
4.0mmol/l
8.0mmol/l
15cells/ul
70cells/ul
125cells/ul
500cells/ul
0mmol/l
2.8mmol/l
5.5mmol/l
14mmol/l
28mmol/l
55mmol/l
10/ul
25/ul
50/ul
250/ul
-
0g/l
0.15g/l
0.3g/l
1g/l
3g/l
5
6
Conventio
nal unit
0.2mg/dl
2mg/dl
4mg/dl
8mg/dl
-
0.03mg/dl
0.08mg/dl
0.15mg/dl
0.75mg/dl
0mg/dl
1mg/dl
3mg/dl
6mg/dl
0mg/dl
15mg/dl
40mg/dl
80mg/dl
15cells/ul
70cells/ul
125cells/ul
500cells/ul
0mg/dl
50mg/dl
100mg/dl
250mg/dl
500mg/dl
1000mg/dl
0mg/dl
15mg/dl
30mg/dl
100mg/dl
300mg/dl
5
6
26

NIT 9
SG 10
VC 11
2
3
4
0
1
0
1
2
3
4
5
0
1
2
3
4
7
8
9
-
+1
<=1.005
1.010
1.015
1.020
1.025
>=1.030
-
++1
+2
+3
7
8
9
7
8
9
-
18umol/l - 0.12mg/dl
<=1.005
1.010
1.015
1.020
1.025
>=1.030
0mmol/l
0.6mmol/l
1.4mmol/l
2.8mmol/l
5.6mmol/l
<=1.005
1.010
1.015
1.020
1.025
>=1.030
0mg/dl
10mg/dl
25mg/dl
50mg/dl
100mg/dl
Note: 1. The parameter between in the table and the test strip may be different,
please refer to Strip Instruction for details.
2. The data in BLD item represent the number of each microlitre erythrocyte, the
data in LEU item represent the number of each microlitre leucocyte.
27
 Loading...