

Page 1
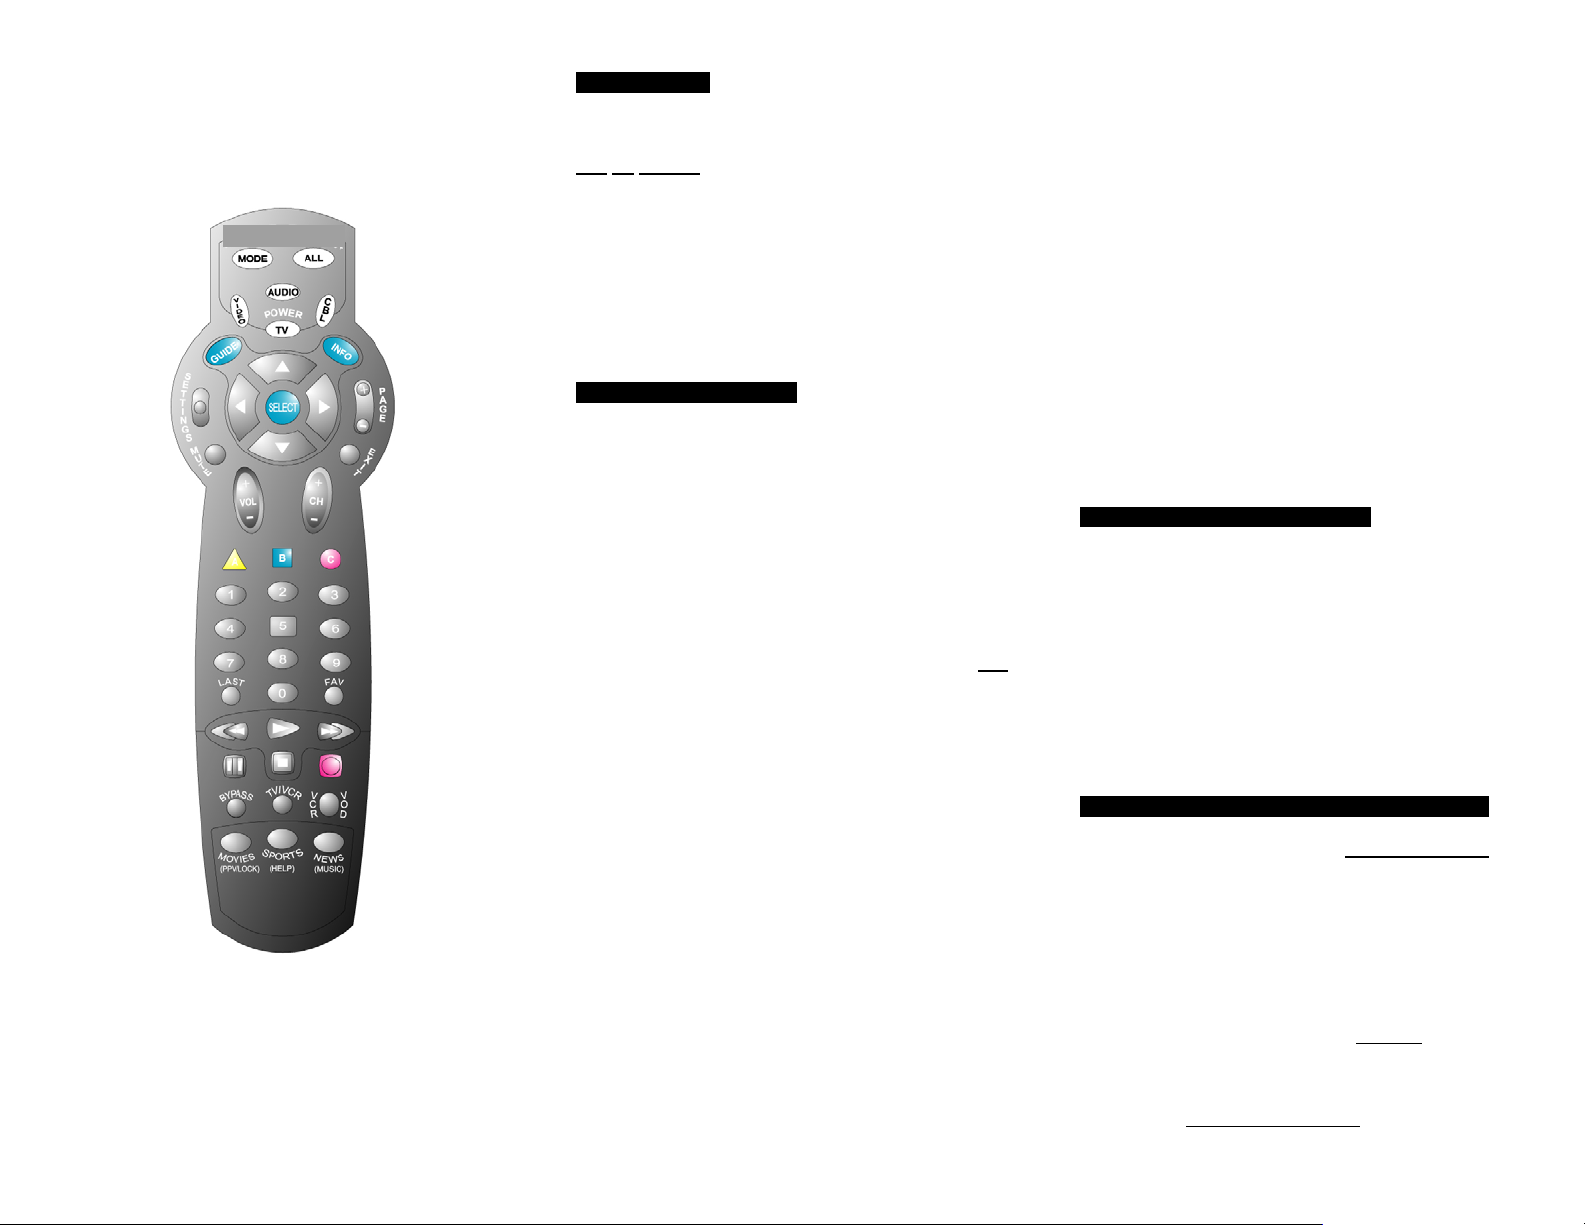
CheckMate® IV
Model RT-U49C+
Universal Remote Control
+
-
Programming And Operating
Instructions
To have a clearer idea of the features and capabilities of
your remote control, take a moment to read these
instructions. Save for future reference.
© 2003, CONTEC CORPORATION, Rev. 07/03
1. Introduction
Your CheckMate® IV universal remote control is
simple to program, easy to use, and can operate up to
four (4) devices, which include:
CABLE Cable set-top terminals
TV Televisions
VIDEO VCR, DVD
AUDIO Audio receivers, amplifiers, CD players
Before you can use your remote control, it must be
programmed (set-up) to operate the above devices.
2. Before Getting Started
Some of the special features and buttons on your
remote control are as follows:
Point and Press
Lets you program your TV, VIDEO, AUDIO devices
without codes. . For more information, see Sections
5 and 18.
[ALL]
Turns all of your electronic devices on / off with one
button press. [ALL] can even be programmed to
automatically tune your TV to its correct output
channel. For more information, see Section 8.
[MOVIES], [SPORTS], [NEWS]
Program your favorite channels on the [MOVIES],
[SPORTS] and [NEWS] buttons. For more
information see Section 9.
[VCR / VOD] Toggle
“Toggles” the VCR buttons between CABLE (VideoOn-Demand) and VIDEO (VCR / DVD) functions.
For more information, see Section 10.
SmartKeys™
Program multiple button presses on the [CBL] and
[TV] buttons. For more information, see Section 15.
®
Programming
[MODE]
Indicates which mode (CBL, TV, VIDEO, AUDIO)
the remote is currently operating in by illuminating
the power button. To change to a different mode,
press [MODE], then the power button for the
electronic device you wish to operate. For more
information, see Sections 10, 11, 12, 13, 16, 18.
Memory Guard™
Eliminates reprogramming after battery changes.
Time Out
Shuts remote off if any button is pressed and held
for 30 seconds. This extends battery life in the
event the remote becomes lodged under or between
heavy objects.
3. Installing / Replacing Batteries
Install two (2) new “AA” alkaline batteries as indicated
by the diagram in the battery compartment.
When the batteries become low and need to be
replaced, the [CBL], [TV], [VIDEO], [AUDIO] buttons
will not illuminate normally or at all during use.
When this happens, replace the existing batteries with
two (2) new “AA” alkaline batteries to restore normal
operation to the remote control.
4. Programming Your Cable Set-Top Terminalu
Your CheckMate
operate the Scientific-Atlanta Explorer
Voyager
To operate a different cable set-top terminal, look up
the brand and model in the Cable Setup Code list. If
you are not sure of your brand and model, contact
your cable company.
1. Press [SELECT], then [MUTE] together
2. From the Cable Setup Code list
®
and Pace digital set-top terminals.
power / mode buttons illuminate in slow-rotation
(i.e. CBL Æ TV Æ VIDEO Æ AUDIO Æ CBL…).
®
IV remote is pre-programmed to
, locate the 3-
®
, Pioneer
until the
Page 2

digit code for your brand / model and enter it on
the keypad of the remote control. The set-top
terminal will turn off.
3. Then, press [SELECT] to lock in the code. The
power / mode buttons will blink 3-times and go out.
Cable Setup Codes
Motorola
DCT, CFT2200
CFT2100, CFT2000
Jerrold
DL4, DP(V), DQN(V), DPBB
Scientific Atlanta
Explorer
Explorer
Explorer
Explorer
®
(default)
®
(#, *)
®
(Blue Ridge)
®
8000 DVR
8600X
8600
Pace
510 Digital
HD Digital
001
002
003
004
010
011
412
005
006
004
010
Pioneer
Voyager®
BA-V1000, BA-V2000
Tocom
5503VIP, 5507, 5508
Zenith
MM 2500
Digital
004
007
008
009
013
5. Programming Your TV, VIDEO, AUDIO Devices
Code-Entry Programming
1. Turn on all the electronic devices (TV, VCR, DVD,
AUDIO) you want to program the remote to
operate.
2. Press [SELECT], then [MUTE] together
until the
power / mode buttons illuminate in slow-rotation
(i.e. CBL Æ TV Æ VIDEO Æ AUDIO Æ CBL…).
3. a. To program your TV, locate the 3-digit code for
your brand in the TV Setup Code
it on the keypad of the remote control. Entry
of the correct code will cause your TV to turn
off. If multiple codes are listed for your brand,
you may have to enter several different codes
until your TV turns off.
b. As soon as you have entered a 3-digit code
that turns your TV off, press [MUTE].
1. If the TV turns back on, press [SELECT] to
lock in the code. The power / mode
buttons will blink 3-times and go out.
Or
2. If the TV does not turn back on, enter a
different 3-digit setup code until your TV
turns back on. Then press [SELECT] to
lock in the code. The power / mode
buttons will blink 3-times and go out.
4. To program your VCR or DVD, refer to the VCR /
DVD Setup Code lists
above.
5. To program your AUDIO
AUDIO Setup Code list
above.
Point and Press® Programming
This method allows you to program
without
using codes. Instead, the remote control
automatically finds the correct command that you
select in a variety of codes until you find the code that
operates your device. You then lock in the correct
code as described below.
The following instructions describe how to program
your remote control using the [CH +] or [CH -] buttons
("Power" function during programming). You can also
program your remote control using other buttons /
functions as described in Section 18. When using this
method, there are several important points to
remember:
• The order in which you program your electronic
devices is not
important.
list and enter
and repeat steps 2 and 3
devices, refer to the
and repeat steps 2 and 3
the remote control
• There may be several codes that turn your
electronic devices on / off (or perform other
functions). Once you lock-in a code, be sure to
check the available functions for that device (i.e.
TV - Vol +/-, Mute, TV Input (TV / VCR button),
VIDEO - Play, Stop, Rew..., AUDIO - Volume /
Mute) to see if they are operating.
• While the remote is searching for the correct
setup code(s) for your electronic devices, it is
possible that other (previously programmed)
devices may turn on / off (or perform other
functions). If this occurs, continue pressing the
[CH +] or [CH -] buttons (or the buttons described
in Section 18) until you find the correct code for
the device you are programming.
• It may take several minutes for the remote to find
the correct code that turns your device on / off (or
performs another selected function). During this
time, the power / mode buttons will illuminate in
fast-rotation (i.e. CBL Æ TV Æ VIDEO Æ AUDIO
Æ CBL..).
Programming your electronic devices using the
[Ch +] or [Ch -] buttons (“Power” function during
programming)...
1. Turn on all the electronic devices (TV, VCR, DVD,
AUDIO) you want to program the remote to
operate.
2. Press [SELECT], then [MUTE] together
until the
power / mode buttons illuminate in slow-rotation
(i.e. CBL Æ TV Æ VIDEO Æ AUDIO Æ CBL...).
3. Press and hold the [CH +] button until one device
turns off. While you are pressing the [CH +]
button, the power / mode buttons will illuminate in
fast-rotation. As soon as one device turns off,
release the [CH +] button.
4. Press [MUTE]. If the device that turned off...
a. Turns back on, press [SELECT] to lock in this
code. The power / mode buttons will blink 3times and go out.
Or
b. Does not turn back on, press [CH -] one step
Page 3

at a time until that device turns back on. Each
time you press the [CH -] button, the power /
mode buttons will illuminate once in reverse
fast-rotation (AUDIO Æ VIDEO Æ TV Æ CBL).
Once you have found a code that turns the
device on / off, press [SELECT] to lock in this
code. The power / mode buttons will blink 3times and go out.
5. Repeat steps 2 to 4 above for each of the
remaining electronic devices you wish to program
the remote to operate.
6. Programming Your TV / VCR Combination
1. First, turn on your TV / VCR combination device
and install a VHS tape.
2. Next
3. Last, program your remote to operate the VCR
TV Setup Codes
, program your remote to operate the TV
functions.
Using the Code Entry Programming method
described in Section 5, find a TV Setup Code that
operates the TV functions (Power, Vol, + / -,
Mute) of your TV / VCR unit.
functions.
Using the Code Entry Programming method
described in Section 5, enter, lock and test each
3-digit VCR Setup Code
code is found that operates the transport functions
(PLAY, STOP, REW, FWD, PAUSE, REC) of your
TV / VCR unit.
Admiral
Adventura
Aiwa
Akai
Amark
Amstrad
Anam
AOC
Audiovox
Belcor
Bell & Howell
for your brand until a
026 054 211
047
214
053
023 215
157
217 218 219 220 221
222 223
053
220
073
211
Broksonic
Brokwood
Candle
Centurion
Citizen 068 091 211 233
Concerto 073 095
Contec 147
Coronado 023
Craig 223
Crown 023
Curtis Mathes 016 054 107 108 211
213
Daewoo 051 068 073 095 158
159 189 191 194 196
197 198 200 202 204
205 206 207 209
Daytron 073 095 107 108
Dumont 073
Electro Home 073 095
Elektra 353
Emerson 016 023 053 064 103
139 158 159 164 165
166 167 168 169 392
400 401 402 408
Envision 073 095
Fisher 355 356
Funai 047
GE 015 018 042 044 049
054 055 068 073 090
095 101 102 103 389
390 396 403 406 407
Gibralta 023 048 053 068 073
090 095 107 108 233
360
Goldstar (LG) 023 053 068 073 090
107 108 233 360 361
Grundig 233
Hall Mark 073 095
Hitachi 023 068 095 096 097
098 099 100
Inkel 364
JC Penney 039 053 068 073 092
095 102 355
JVC 104 105 106 396 397
410
Kawasho 073 095
KMC 023
KTV 023 053 233 366
Kurazai 211 213
LG (Goldstar) 023 053 068 073 090
107 108 233 360 361
165 167
073
068 091
095 107 108
415
Lodgenet 211 213
Logik 211 213
Luxman 068 073 095
LXI 024 026 157
Magnavox (Philips) 023 068 071 073 089
090 091 093 134 385
387 397 404
Majestic 211 213
Marantz 053 107 108 109
Megatron 215
Memorex 090 211 213 355 388
405
MGA/Mitsubishi 053 068 073 090 095
107 109 110 216 384
394 395 398 399
Montgomery Ward 022 023 026 053 071
072 108 211 213
NEC 028 068 090 108 200
Orion 019 159 160 161 162
163 382
Panasonic 042 043 044 045 046
Philco 023 053 068 071 072
091
Philips(Magnavox) 023 068 071 073 089
090 091 093 134 385
387 397 404
Pilot 073 094 233
Pioneer 111 144 383
Portland 023 068
ProScan 055 070
Proton 090 371 372
Pulsar 073
Quasar 044
Radio Shack 073
Realistic 022 166 168
RCA 042 052 053 054 055
069 070
Sampo 090 108
Samsung 015 016 017 023 031
090 107 108 134 147
151 153 386 411
Sanyo 353 355 356 376 377
Scott 090 108 168
Sears 023 031 038 039 068
353 355 356
Sharp 016 022 023 024 025
026 027 028 029 393
395 409
Signature 2000 023 026 108 211 213
Sony 014 020 021
Soundesign 091
Squareview 157
416
Page 4

Supre-Macy 380
Sylvania 068 071 072 090 091
093 107 108 157 158
Symphonic 047 157
Tatung 044
Techwood 068
Teknika 023 068 072 091 168
213
Telerent 023 213
Tera 381
Tevion 065
TMK 068 090
Toshiba 030 031 038 039
Totevision 233
Universal 068 102
Vidtech 068
Wards 068 090
White Westinghouse 211 408
XR-1000 213
Yamaha 068
York 090 108
Zenith 047 048 049 050 051
391 405 406
VCR Setup Codes
Admiral 066 075
Adventura
Aiwa 132
Akai 269 275 336 351 352
354
Audio Dynamics 243 291
Bell & Howell 357
Broksonic 333 337 358 359
Canon 086 362
Citizen 033 172 247 331
Colortyme 291
Craig 172 363
Curtis Mathes 086 112 247 291
Daewoo 033 343 344 345 346
347
Daytron 345 365
DBX 243 291
Dynatech 132
Emerson 033 086 132 326 327
331 332 333 334 335
336 337 338 339 340
341 342
Fisher 035 081 357 363
Funai 132
GE 086 172 174
Go Video 348 349 350
414
Goldstar (LG) 247 331
Harman Kardon 291
Hitachi 078 132
Instant Replay 086
JC Penney 078 086 172 238 291
JCL 086
JVC 120 128 243 247 250
253
Kenwood 120 132 238 243 247
LG (Goldstar) 247 331
Lloyd 132
Logik 367
LXI 132 331
Magnavox (Philips) 086 132 183
Marantz 086 172 183 238 247
291
Marta 331
Matsui 368
Memorex 132 238 331 363 369
370
Mitsubishi 255 258
MTC 132 172
Montgomery Ward 066 170 173 373
Multi Tech 132 172 367
NEC 120 238 243 291 374
375
Orion 322 326 327 328 329
330
Panasonic 112 117
Pentax 078
Philco 086 132 183
Philips (Magnavox) 086 132 183
Pioneer 078 120 263
Portland 345
ProScan 170 174
Quartz 238 378
Quasar 112
RCA 078 132 141 170 172
173 174
Realistic 066 132 238 363
Samsung 269 271 275 276 278
Sansui 120 367 379
Sanyo 238 346 357 363
Scott 033 332 367
Sears 035 078 238 331 363
Sharp 066 075
Shintom 367
Signature 2000 066 170 173 373
Sony 056 058 060
Soundesign 132
Sylvania 086 132 141 183 184
322 324
416
Symphonic 132
Tandy 132 238
Tashiko 331
Tatung 243
Teac 132 243
Technics 086
Teknika 132 331 359
Thomas 132
TMK 338
Toshiba 033 035 078 081
Totevision 172 331
Unitech 172
Vector Research 291
Video Concepts 132 291
Wards 066 132 172 247 331
XR-1000 367
Yamaha 132 243 291
Zenith 058 120 122 128 132
DVD Setup Codes
Apex Digital 193 227
B144 146
Denon 201 203
DVD-Video 199
ECA 156
GE 150 152 156 175
Goldstar (LG) 129 133 135 179 260
Gradiente 212 234
Harmon Kardon 256 259
Hitachi 149
JVC 177 179
Kenwood 228
KLH 248 252
LG (Goldstar) 129 133 135 179 260
Magnavox 138 143 146
Marantz 270
Mitsubishi 181 185
NAD 246
Onkyo 085 244
Panasonic 115 118 121 124
Pioneer 125 187 188
Proceed 236
Samsung 192 224 225
Sharp 034 076 077 079
Sony 040 059 061
Thomson 156 237
Toshiba 082 085 087 113
Yamaha 121 124 210
Zenith 129 133 135
Page 5

AUDIO Setup Codes
Compact Disc
ADC 318
Akai 249 261
Aiwa 176
Carver 176
Crown 154
Denon 273
Fisher 230 274
Goldstar (LG) 308
Harman Kardon 315
JVC 297
Kenwood 131 176 274 289 299
Krol 176
LG (Goldstar) 308
Magnavox (Philips) 037 084 119 296
Mission 176
Mitsubishi 245 249
NAD 182 231 290
Nakamichi 264 319
NEC 235
NSM 176
Onkyo 300
Panasonic 184 266
Philips (Magnavox) 037 084 119 296
Pioneer 116 127
Quasar 184
Radio Shack 186 190 266 279 289
RCA 295
Sanyo 230 309
SAE 176
Scott 186
Sharp 288 289
Sony 067 292 293
Soundesign 148 242 311 320
STS 318
Sylvania 084
Teac 186
Technics 184 208 317
Toshiba 290
Yamaha 280
Receiver / Amplifier
Adcom 325
Aiwa 301
Akai 142
Bose 302
Carver 155 180
Denon 262 307
Everquest 136
Fisher 063 180
Fosgate Audionics 305
Goldstar (LG) 036
Harman Kardon 130 257 305 306
Hitachi 240
Jensen 140
JVC 114 241
Kenwood 063 277
LG (Goldstar) 036
Luxman 281
Magnavox 080
Marantz 282 283 284 285
NAD 286
Onkyo 126 171 304
Optimus 142 229 321
Panasonic 032 074
Parasound 323
Philips (Magnavox) 080
Pioneer 123 137 251 298
Quasar 032
Radio Shack 229 267
Realistic 226 268
Rotel 310
Sansui 283
Sanyo 195
Scott 272
Sharp 294
Sherwood 229 267
Sony 041 057 232 287
Soundesign 083 088 239 265
SSI 313
Taekwang 142
Teac 314 316
Technics 032
Wards 063
Victor 114 241
Yamaha 145 254 303
Zenith 036 083 088 239 265
7. Code Number Read-Back
To identify the 3-digit setup codes stored under the
Point and Press
®
programming method, follow these
steps:
To identify the TV setup code…
1. Press [TV], then [SELECT] together
until the [TV]
button illuminates.
2. Press [INFO]. The [TV] button will “blink back” the
code numbers, with a 1-second interval between
each digit of the code.
Example: For code “035”, the remote will blink
10 times, then 3 times, then 5 times.
To identify the 3-digit VIDEO code, press [VIDEO],
then [SELECT] in step 1, then press [INFO].
To identify the 3-digit AUDIO code, press [AUDIO],
then [SELECT] in step 1, then press [INFO].
8. [ALL] Button
Once you have programmed each of your devices,
press [ALL] to turn all of them on / off with a single
button press. You can also program the [ALL] button
to tune your TV to its correct output channel.
Programming the [ALL] Button
If you would like the [ALL] button to also tune your TV
to its correct output channel (typically 3) follow these
steps:
1. Press [MODE], then [CBL] to select the remote’s
cable mode.
2. Press [SETTINGS], then [ALL] together until the
[TV] button illuminates.
3. Press [0], then [3] X,Y.
4. Press [CH S] to store the TV channel. The [TV]
button will blink 3-times and go out.
X Your TV output channel may also be 2 or 4. If you
are not sure, contact your cable operator.
Y Depending on your TV brand, the channel may
have to be entered as “3”, “03” or “003”.
Using the [ALL] Button
When pressing the [ALL] button, be sure to keep the
remote control aimed at your electronic devices until
your electronic devices turn on or / off.
Resetting the [ALL] Button
Page 6

1. Press [MODE], then [CBL] to select the remote’s
cable mode.
2. Press [SETTINGS], then [ALL] together
until the
[TV] button illuminates.
3. Press [CH S]. The [TV] button will blink 3-times
and go out.
9. [MOVIES], [SPORTS], [NEWS] Buttons
Your remote has 3 Channel Memory Buttons –
[MOVIES], [SPORTS], [NEWS] (may be labeled
differently on some models). Each of these buttons
can store up to 5 cable channels. Each cable channel
can be up to 5-digits.
Some or all of your remote’s Channel Memory
Buttons may come pre-tuned to channels or functions
selected by your cable operator. If they have not
been pre-tuned by your cable operator, they can be
programmed as follows:
Programming [MOVIES], [SPORTS], [NEWS]
To program the [MOVIES] button to cable channels 1,
12, 123, 231 and 17, follow these steps:
1. Press [MOVIES], then [CBL] together
until the
[CBL] button illuminates.
2. Enter each channel as follows:
a. Enter 1
st
channel # - 001.
b. Press [CH +] to advance to next channel #
setting.
nd
c. Enter 2
channel # - 012.
d. Press [CH +] to advance to next channel #
setting.
e. Enter 3
rd
channel # - 123.
f. Press [CH +] to advance to next channel #
setting.
th
g. Enter 4
channel # - 231.
h. Press [CH +] to advance to next channel #
setting.
i. Enter 5
th
channel # - 017.
3. Press [MOVIES] to store the above channels. The
[CBL] button will blink 3-times and go out. To
store fewer than 5 channels, you can press the
[MOVIES] button any time after entering a
complete channel number.
4. Repeat the above steps to program the [SPORTS]
and [NEWS] buttons. Follow the example in step
1, but press [SPORTS] or [NEWS], then [CBL]
together
until the [CBL] button illuminates.
Using [MOVIES], [SPORTS], [NEWS]
Using the above programmed channels as an
example…
1. Press [MOVIES] – Cable set-top terminal tunes to
channel 001.
2. Press [MOVIES] again – Cable set-top terminal
tunes to channel 012.
3. Press [MOVIES] again – Cable set-top terminal
tunes to channel 123.
4. Press [MOVIES] again – Cable set-top terminal
tunes to channel 231.
5. Press [MOVIES] again – Cable set-top terminal
tunes to channel 017.
6. Press [MOVIES] again – Cable set-top terminal
tunes to channel 1…. repeat.
Whenever a Channel Memory button is pressed, the
function of the transport buttons will automatically
switch back to Cable.
When pressing the [MOVIES] button, be sure to keep
the remote control aimed at your Cable set-top
terminal to ensure the full channel numbers are
received in their entirety.
Resetting [MOVIES], [SPORTS], [NEWS]
To reset [MOVIES], [SPORTS], [NEWS], follow these
steps:
1. Press [MOVIES], then [CBL] together
[CBL] button illuminates.
2. Press [MOVIES]. The [CBL] button will blink 3times and go out.
10. Operating Your Cable Set-Top Terminal
Your remote control is designed to operate all
features and functions of your digital set-top terminal.
until the
the
To operate your CABLE set-top terminal, press
[MODE], then [CBL]. In your remote’s CABLE
mode
, you can then press…
[ALL] ALL devices on / off.
[CBL] Cable set-top terminal on / off.
[TV] TV on / off.
[VIDEO] VCR / DVD on / off.
[AUDIO] Audio on / off.
[CH S] / [CH T] Increases / decreases cable
channel.
[VOL S] / [VOL T] Increases / decreases volume.
[MUTE] Mute volume.
[EXIT] Exits on-screen menus, view
guide, interactive screens.
[SETTINGS] Displays program settings.
[GUIDE] Displays interactive program
guide.
[INFO] Displays channel, time
information.
[FAV] View favorite channels.
[LAST] Last channel viewed.
[A], [B], [C] On-screen decision buttons.
[0] - [9] Numeric entry buttons.
[PAGE S/T] Page up / down through menus,
program guide.
[], [], [], [] Navigate on-sc reen menus,
program guide, PPV events and
interactive services.
[SELECT] Select menu, interactive screen
item.
[BYPASS] Switch between set-top terminal
and TV.
[TV / VCR] Changes VCR Video inputs.
[VCR / VOD] “Toggles” the VCR buttons
between cable VOD (Video-OnDemand) and VCR / DVD
functions.
Press [VCR / VOD]. If...
a. [CBL] illuminates, the VCR
buttons are operating your
cable VOD functions.
OR
[VIDEO] illuminates, the
VCR buttons are operating
your VCR or DVD functions.
b. While [CBL] or [VIDEO] is
Page 7

illuminated, press [VCR /
VOD] to switch from VOD to
VCR or VCR to VOD.
[
] VCR / DVD or VOD rewind.
] VCR / DVD or VOD play.
[
[
] VCR / DVD or VOD fast-forward.
] VCR / DVD or VOD pause.
[
[
] VCR / DVD or VOD stop.
] VCR / DVD or VOD record.
[
[MOVIES] Programmable favorite channel.
[SPORTS] Programmable favorite channel.
[NEWS] Programmable favorite channel.
11. Operating Your TV
Your remote control can operate many functions of
your TV.
To operate your TV, press [MODE], then [TV]. In
your remote’s TV
[ALL] ALL devices on / off.
[CBL] Cable set-top terminal on / off.
[TV] TV on / off.
[VIDEO] VCR / DVD on / off.
[AUDIO] Audio on / off.
[CH S] / [CH T] Increases / decreases channel.
[0] – [9] Numeric entry buttons.
[VOL S] / [VOL T] Increases / decreases TV
volume.
[MUTE] Mute TV volume.
[TV / VCR] Change TV’s video inputs.
[
] VCR / DVD rewind.
] VCR / DVD play.
[
[
] VCR / DVD fast-forward.
] VCR / DVD pause.
[
[
] VCR / DVD stop.
] VCR / DVD record.
[
12. Operating Your VIDEO (VCR or DVD) Device
Your remote control can operate many functions of
your VCR or DVD.
To operate your VCR or DVD, press [MODE] then
[VIDEO]. In your remote’s VIDEO
then press…
[ALL] ALL devices on / off.
mode, you can then press…
mode, you can
[CBL] Cable set-top terminal on / off.
[TV] TV on / off.
[VIDEO] VCR / DVD on / off.
[AUDIO] Audio on / off.
[CH S] / [CH T] Increases / decreases channel.
[0] – [9] Numeric entry buttons.
[VOL S] / [VOL T] Increases / decreases TV
volume.
[MUTE] Mute TV volume.
[TV / VCR] Change VCR video inputs.
[ ] VCR / DVD rewind.
] VCR / DVD play.
[
[
] VCR / DVD fast-forward.
] VCR / DVD pause.
[
[
] VCR / DVD stop.
] VCR / DVD record.
[
13. Operating Your AUDIO Device
To operate your AUDIO device, press [MODE],
then [AUDIO]. In your remote’s AUDIO
can press…
[ALL] ALL devices on / off.
[CBL] Cable set-top terminal on / off.
[TV] TV on / off.
[VIDEO] VCR / DVD on / off.
[AUDIO] Audio on / off.
[CH S] / [CH T] Increases / decreases channel.
[0] – [9] Enter channels.
[VOL S] / [VOL T] Increases / decreases volume.
[MUTE] Mute volume.
] Rewind.
[
[
] Play.
] Fast-forward.
[
[
] Pause.
] Stop.
[
[
] Record.
14. Programming Volume Control
When you first program your remote, volume / mute
are controlled through your TV (except AUDIO which
defaults to the AUDIO device).
The volume control options in each mode of the
remote are:
CBL TV (default), Cable or Audio.
TV TV (default), Cable or Audio.
VIDEO TV (default), Cable or Audio.
AUDIO AUDIO device (default), Cable or T V.
mode, you
To control volume / mute through your Cable settop terminal in the remote’s cable
1. Press [CBL], then [SELECT] together
[CBL] button illuminates.
2. Press [VOL S], then [CBL] for Cable volume. The
[CBL] button will blink 3-times and go out.
To return volume control to your TV, repeat step 1,
then press [VOL S], then [TV] in step 2.
15. Your Remote's SmartKeys™
Your remote has two (2) SmartKeys™ - [CABLE] and
[TV] that operate in its cable mode. Each
SmartKey™ can be programmed to transmit multiple
functions.
Programming and using the [CBL]
The [CBL] button normally turns on / off your cable
set-top terminal. To program the [CBL] button to
transmit multiple pre-programmed functions, follow
the steps below:
1. Press [MODE], then [CBL] to select the cable
mode of your remote.
2. Press [CBL], then [SETTINGS] together
[CBL] button illuminates.
3. Press the option number below for the desired
functions:
Option
[1]
[2]
[3]
[4]
[5]
[6]
[7]
[8]
Pre-Programmed to turn on…
Cable & TV - tune TV to Ch 3
Cable & TV - tune TV to Ch 2
Cable & TV - tune TV to Ch 4
Cable, TV & VIDEO - tune TV to Ch 3
Cable, TV & VIDEO - tune TV to Ch 2
Cable, TV & VIDEO - tune TV to Ch 4
Cable, TV, VIDEO & AUDIO - tune TV to
Cable, TV, VIDEO & AUDIO - tune TV to
mode…
until the
SmartKey™
until the
Ch 3
Ch 2
Page 8

[9]
Cable, TV, VIDEO & AUDIO - tune TV to
Ch 4
[0]
Cable only (default)
4. The [CBL] button will blink 3-times and go out,
storing the selected option.
Programming and using the [TV]
SmartKey™
The [TV] button normally turns on / off your TV. To
program the [TV] button to transmit multiple preprogrammed functions, follow the steps below:
1. Press [MODE], then [CBL] to select the cable
mode of your remote.
2. Press [TV], then [SETTINGS] together until the
[TV] button illuminates.
3. Press the option number below for the desired
functions:
Option Pre-programmed to turn on…
[1]
[2]
[3]
TV - tune TV to Ch 3
TV - tune TV to Ch 2
TV - tune TV to Ch 4
[0]
TV only (default)
4. The [TV] button will blink 3-times and go out,
storing the selected option.
Note: When using any SmartKey™ to transmit a
series of functions, be sure to keep your remote
aimed at the devices to ensure all functions are
received in their entirety.
16. Mode Lock™
Your model CheckMate
®
IV remote comes set in its
“unlocked” operating mode. While in this mode, it can
operate all of your cable set-top functions, as well as
many functions on your TV, VIDEO and AUDIO
devices.
To lock your remote in its cable operating mode...
1. Press [CBL], then [MUTE] together
until the [CBL]
button illuminates.
2. Press [0, 0, 0]. The [CBL] button will blink 3-times
and go out.
To unlock your remote for multi-device
operation…
1. Press [CBL], then [MUTE] together
until the [CBL]
button illuminates.
2. Press [9, 9, 9]. The [CBL] button will blink 3-times
and go out.
17. TV / VCR Input
This button changes the input source of your
electronic devices. In the remote's Cable and TV
modes, this button operates the TV Input function on
your TV. In the remote's VIDEO mode, this button
changes the TV / VCR function on your VCR.
You can program this button so that in the remote's
cable mode, [TV / VCR] will operate the TV / VCR
function on your VCR, eliminating the need to change
modes on the remote.
To program the [TV / VCR] button to operate your
VCR Input function…
1. Press [TV / VCR], then [SELECT] together
until the
[CBL] button illuminates.
2. Press [VIDEO]. The [CBL] button will blink 3-times
and go out.
To return this button to operate the TV Input function
on your TV, repeat step 1, then press [TV] in step 2.
18. Additional Programming Information,
Troubleshooting, Tips
Additional Programming Information
1. The power / mode buttons will illuminate in
slow-rotation (i.e. CBL Æ TV Æ VIDEO Æ AUDIO
Æ CBL...) while the remote is in a programming
mode. In the absence of a keypress entry, the
power / mode buttons will stop illuminating after 30
seconds and the remote will exit the programming
mode.
2. When programming the remote control using the
[CH +] or [CH -] buttons (Power function) under
the Point and Press® Programming method, you
may find a code that turns a device off but not
back on. If this happens…
a. The correct code has not been found as
you may have a code that operates some
but not all of the functions of your device.
Continue pressing [CH +] until your device
turn on.
OR
b. You may have gone past the correct matching
code. Try pressing [CH -] one press at a time
until you find a code that turns your device
back on.
3. When using the Point and Press
®
Programming
method, you can also program your remote using
buttons other than the [CH +] or [CH -] (as
described in Section 5) as follows:
a. [VOL +] – to “go forward” through the codes
using the “VOL +” function on your devices.
b. [VOL -] – to “go back” through the codes using
the “VOL -“ function on your devices.
Note: When you find the correct code, the
volume of the device being programmed will
increase or decrease.
c. [S] - to “go forward” through the codes using
the “CH +” function on your devices.
d. [T] - to “go back” through the codes using the
“CH -“ function on your devices.
Note: When you find the correct code, the
channel of the device being programmed will
increase or decrease.
e. [XX] - to “go forward” through the codes using
the “Fast Forward” function on your devices.
f. [WW] - to “go back” through the codes using
the “Rewind” function on your devices.
Page 9

Note: When you find the correct code, the
fast-forward or rewind function of the device
being programmed will be performed. To
simplify programming using these buttons,
insert a VHS tape or DVD in the device being
programmed.
You can also program your remote using the other
available functions as follows:
a. Press [SELECT], then [MUTE] together
the power / mode buttons illuminate in slowrotation (i.e. CBL Æ TV Æ VIDEO Æ AUDIO
Æ CBL...).
b. In this order, carefully press [0], [0], [0], [CH+]
and [VOL+]. The power / mode buttons
illuminate in slow-rotation (i.e. CBL Æ TV Æ
VIDEO Æ AUDIO Æ CBL...).
c. You can now program your remote using the
[CH+], [CH -], [VOL+], [VOL -], [S], [T],
[FFWD], [REW], [PLAY], [STOP], [REC],
[PAUSE], [LAST], [FAV], [0] - [9] buttons.
When you find the correct code, the function
associated with the selected button will be
performed.
4. Your remote is equipped with a Point and Press
Programming label on the back of its case. This
will help you quickly program the remote without
using codes.
Troubleshooting / Tips
1. If the same button is pressed and held for 30
seconds, your remote control will turn itself off
automatically. This extends the battery life should
the remote become lodged under or between
heavy objects, for example sofa cushions.
2. If you have a TV that’s operated by remote
control, it is recommended that you plug it directly
into a wall outlet instead of the cable set-top
terminal.
3. If you have any questions concerning the brand,
model or operation of your cable set-top terminal,
contact your cable operator.
until
®
4. If the [MODE] button is not operating, the remote
is in its locked mode. To set the remote to its
unlocked mode, see Section 16.
Frequently Used Terms
AUDIO Devices
players that you can program your remote to operate.
Default Setting
receive it from your cable operator.
Electronic Components / Devices
electronic devices the remote is designed to operate.
These include cable set-top terminals, TVs, VCRs,
DVDs, Audio receivers, amplifiers and CD players.
Fast-Rotation
illuminate in a fast sequence (i.e. CBL Æ TV Æ
VIDEO Æ AUDIO Æ CBL...) repeated every 1/3
second. Fast-rotation occurs when the remote is
receiving keypresses to program it to your electronic
devices.
Mode
- The device the remote is set to operate (ex.
CABLE, TV, VIDEO, AUDIO). See Section 16 for
locking and unlocking the mode of the remote control.
Program (Setup) – the process of teaching your
remote control to operate your electronic devices.
Slow-Rotation
in a slow sequence (i.e. CBL Æ TV Æ VIDEO Æ
AUDIO Æ CBL...) repeated every 1 second. Slowrotation illumination occurs when the remote is in the
programming mode, waiting for the next entry on the
keypad of the remote.
TV Output Channel
be set on for proper Cable reception (most often TV
channel 3, but may be TV channel 2 or 4). If you
have any questions concerning your TV output
channel, contact your cable operator. Or, with your
cable set-top terminal turned on, try setting your TV to
channel 2, 3 or 4 to obtain a clear picture.
Transport Functions
[FWD], [REW], [PAUSE] and [REC] buttons. In the
remote's Cable mode, these buttons operate your
Cable set-top features. In the remote's VIDEO mode,
these buttons operate your VCR or DVD functions.
- Audio receivers, amplifiers, CD
– How your remote is set when you
- The various
- The power / mode buttons will
- The power / mode buttons illuminate
- The channel your TV needs to
- These are the [STOP], [PLAY],
VIDEO Devices
Rev. 07/03
© 2003, CONTEC CORPORATION
CheckMate
trademarks of Contec Corporation
Explorer
Atlanta, Inc.
Voyager
Media Technologies, Inc.
U.S. Patent 6,507,306
- VCR or DVD players.
®
and Point and Press® are registered
®
is a registered trademark of Scientific-
®
is a registered trademark of Pioneer New
Page 10
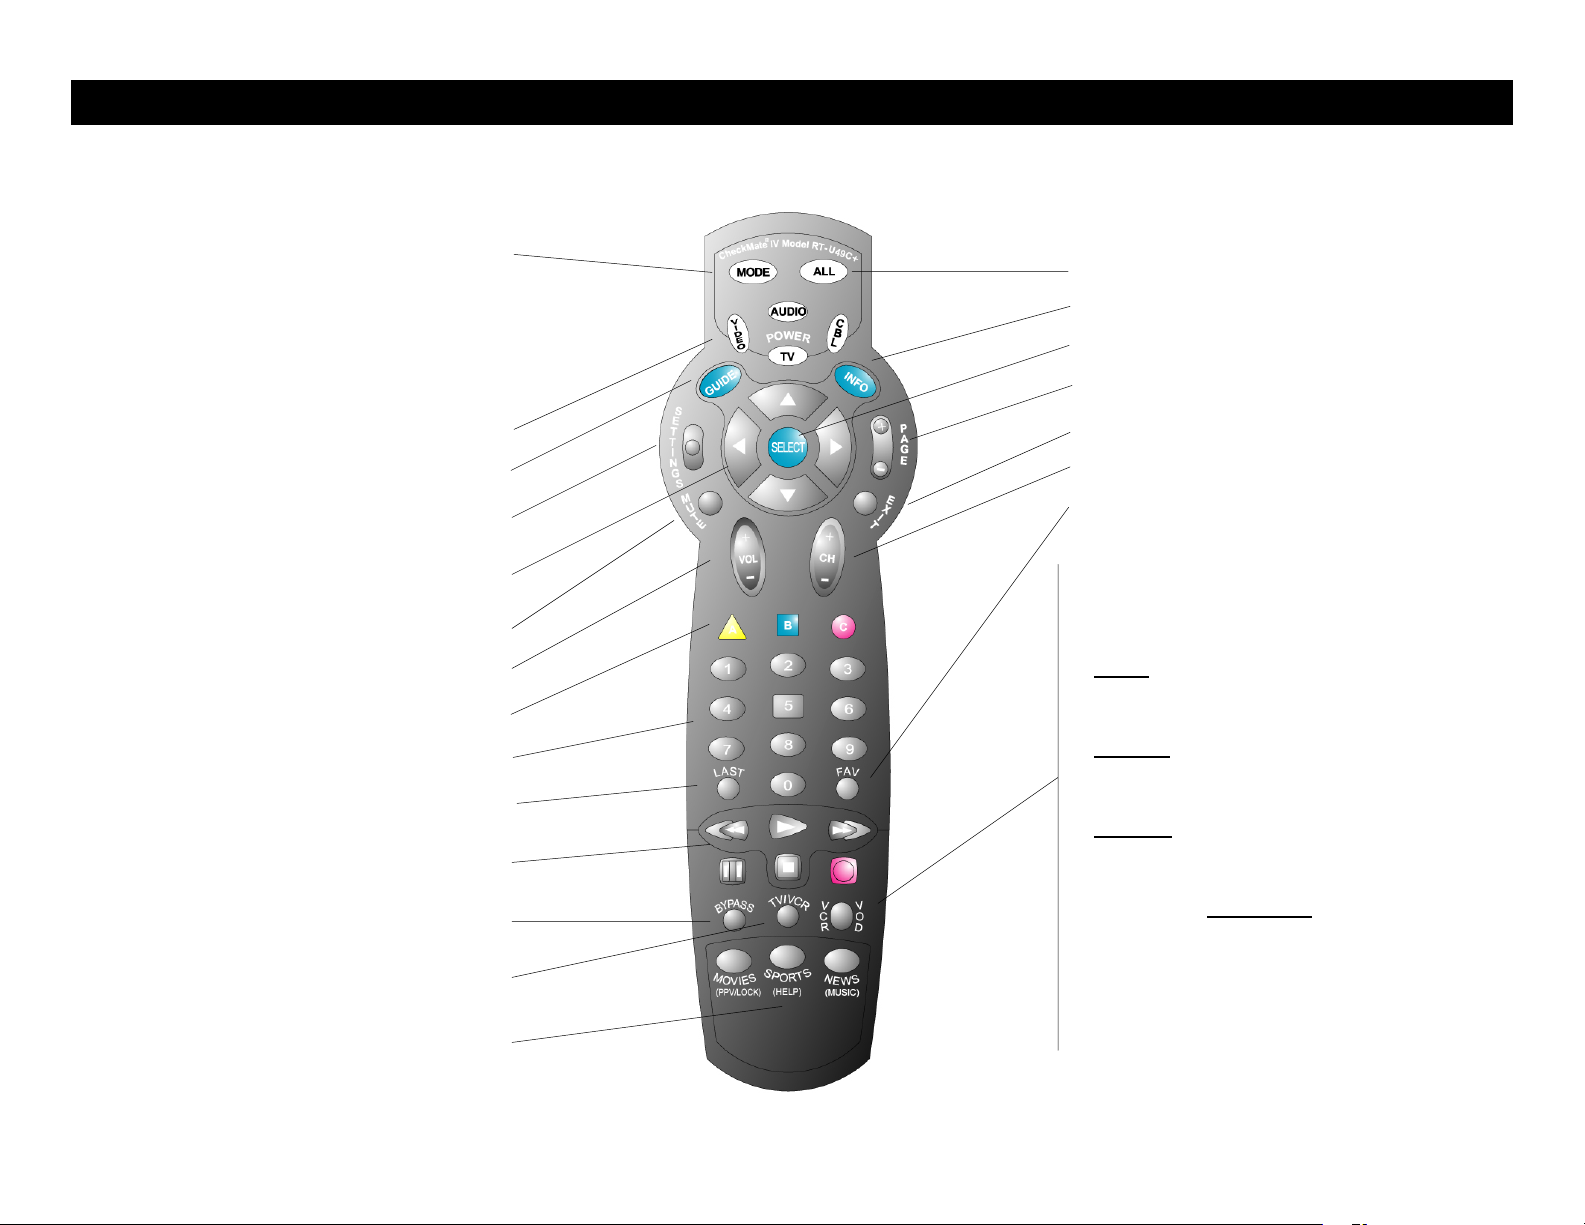
T
-
l
Illuminate / select device being
operated. Press [Mode], then…
[CBL] - for Cable mode
[TV] - for TV mode
[VIDEO] - for VCR / DVD mode
[AUDIO] - for Audio mode
Power on / off for each device
Display Program Guide
Display program settings
Navigates (S,T,W, X) through
interactive screen choices
Mutes volume
Increase or decrease volume
On-screen decision buttons
Enter channel, PIN numbers
Recall last channel
Cable, Video, Audio
transport functions
Bypass Cable set-top terminal
and tune directly to TV
TV or VCR input
Channel Memory Buttons
(may be labeled differently or
pre-set on some models)
19. Using Your R
U49C+ Remote Contro
+
-
ALL devices on / off
Display channel information
Select interactive screen choice
Page +/- through screens
Hides interactive screens
Increase or decrease channel
Recall favorite channels
Toggles between Cable, Video or
Audio functions as follows:
Press [VCR / VOD] once. If the…
[CBL]
button illuminates, VCR
buttons are operating Cable VideoOn-Demand (VOD) functions
[VIDEO]
button illuminates,
VCR buttons are operating
VCR or DVD functions
[AUDIO]
button illuminates,
VCR buttons are operating
Audio (CD) functions
While button illuminated
,
press [VCR / VOD] again to
switch from Cable to Video,
Video to Audio, Audio
to Cable
Note: Some models may have
VCR / VOD slide switch`
 Loading...