

Page 1
en
Instructions for use
es
Instrucciones de uso
sv
Bruksanvisning
Built-in oven
Horno eléctrico
integrable
Inbyggnadsugn
en
es
sv
Page 2

2
en
page 03–046
es
página 47 – 090
sv
sidan 91 – 134
Page 3

3
Table of contents
Important information . . . . . . . . . . 4
Packaging and old appliances . . . . . 4
Before installation . . . . . . . . . . . . . . 5
Safety information . . . . . . . . . . . . . . 5
Reasons for damage . . . . . . . . . . . . 6
Your new cooker . . . . . . . . . . . . . . 7
The control panel . . . . . . . . . . . . . . . 7
Oven temperature selector . . . . . . . 7
Press-down switches . . . . . . . . . . . 8
Slide-in levels . . . . . . . . . . . . . . . . . . 8
Accessories . . . . . . . . . . . . . . . . . . 9
Before using the appliance
for the first time . . . . . . . . . . . . . . . 10
Preliminary cleaning . . . . . . . . . . . . . 10
Initial burn-in . . . . . . . . . . . . . . . . . . 10
Cleaning out . . . . . . . . . . . . . . . . . . 10
Current time . . . . . . . . . . . . . . . . . . 10
Electronic clock . . . . . . . . . . . . . . . 11
The control panel . . . . . . . . . . . . . . . 11
Special functions . . . . . . . . . . . . . . . 11
Minute timer . . . . . . . . . . . . . . . . . . 12
Automatic timer . . . . . . . . . . . . . . . . 12
Description of Oven Features . . . . 14
Switching the Oven ON and OFF . 17
Safety features . . . . . . . . . . . . . . . . 19
Locking the oven . . . . . . . . . . . . . . . 19
Permanent lock . . . . . . . . . . . . . . . . 20
Automatic safety off function . . . . . . 20
Inhaltsverzeichnis
Baking . . . . . . . . . . . . . . . . . . . . . . 21
Baking table . . . . . . . . . . . . . . . . . . 22
Pizza baking . . . . . . . . . . . . . . . . . . 24
Cooking tips and helpful hints . . . 25
Roasting . . . . . . . . . . . . . . . . . . . . . 26
Roasting table . . . . . . . . . . . . . . . . . 28
Grilling . . . . . . . . . . . . . . . . . . . . . . 29
Thermo-grilling . . . . . . . . . . . . . . . . . 30
Surface grilling . . . . . . . . . . . . . . . . . 31
Defrosting and slow cooking . . . . 32
Steam cooking setting . . . . . . . . . . . 35
Cleaning and care . . . . . . . . . . . . . 36
Important cleaning basics . . . . . . . . 36
Catalytic oven coating . . . . . . . . . . . 38
HydroClean®cleaning system . . . . . 39
Removing/installing the oven door . 41
Lowering the heating element . . . . . 41
Inset rack . . . . . . . . . . . . . . . . . . . . 42
Service and repair information . . . 43
Trouble-shooting guide . . . . . . . . 44
Page 4
4
Important information
Please read these instructions for use carefully. They
contain important information concerning your
personal safety as well as for the use and care of
your appliance.
The instructions for use apply to several versions.
Accordingly, you may find descriptions of individual
features which do not apply to your specific
appliance.
Please keep the operating and installation
instructions in a safe place; this important
documentation may also be of use to a subsequent
owner.
Packaging and Your new appliance was protected by suitable
old appliances
packaging while it was on its way to you. All
materials used for this purpose are environmentally
friendly and can be recycled. Please make a
contribution to protecting the environment by
disposing of the packaging appropriately.
Old appliances are not worthless rubbish.
Environmentally-conscious recycling can reclaim
valuable raw materials. Before disposing of your old
appliance, please make sure that it is unusable or
label it with a sticker stating ‘Caution – Scrap’.
This appliance is labelled according to the European
Directive 2002/96/EC concerning waste electrical
and electronic equipment – WEEE. The Directive
creates the framework for withdrawal and
reclamation of old appliances applicable throughout
the EU.
Up-to-date information on how to dispose of your
old appliance and the packaging from the new one
can be obtained from your retailer or local authority.
Page 5
5
Before installation
Transport damage Check the appliance after unpacking it.
Do not connect the appliance if it has been
damaged in transport.
Electrical connection The appliance may only be connected by an
approved specialist. Losses resulting from damage
caused by incorrect connection will invalidate
warranty claims.
Safety information This appliance is intended for domestic use only.
Only use the cooker for food preparation.
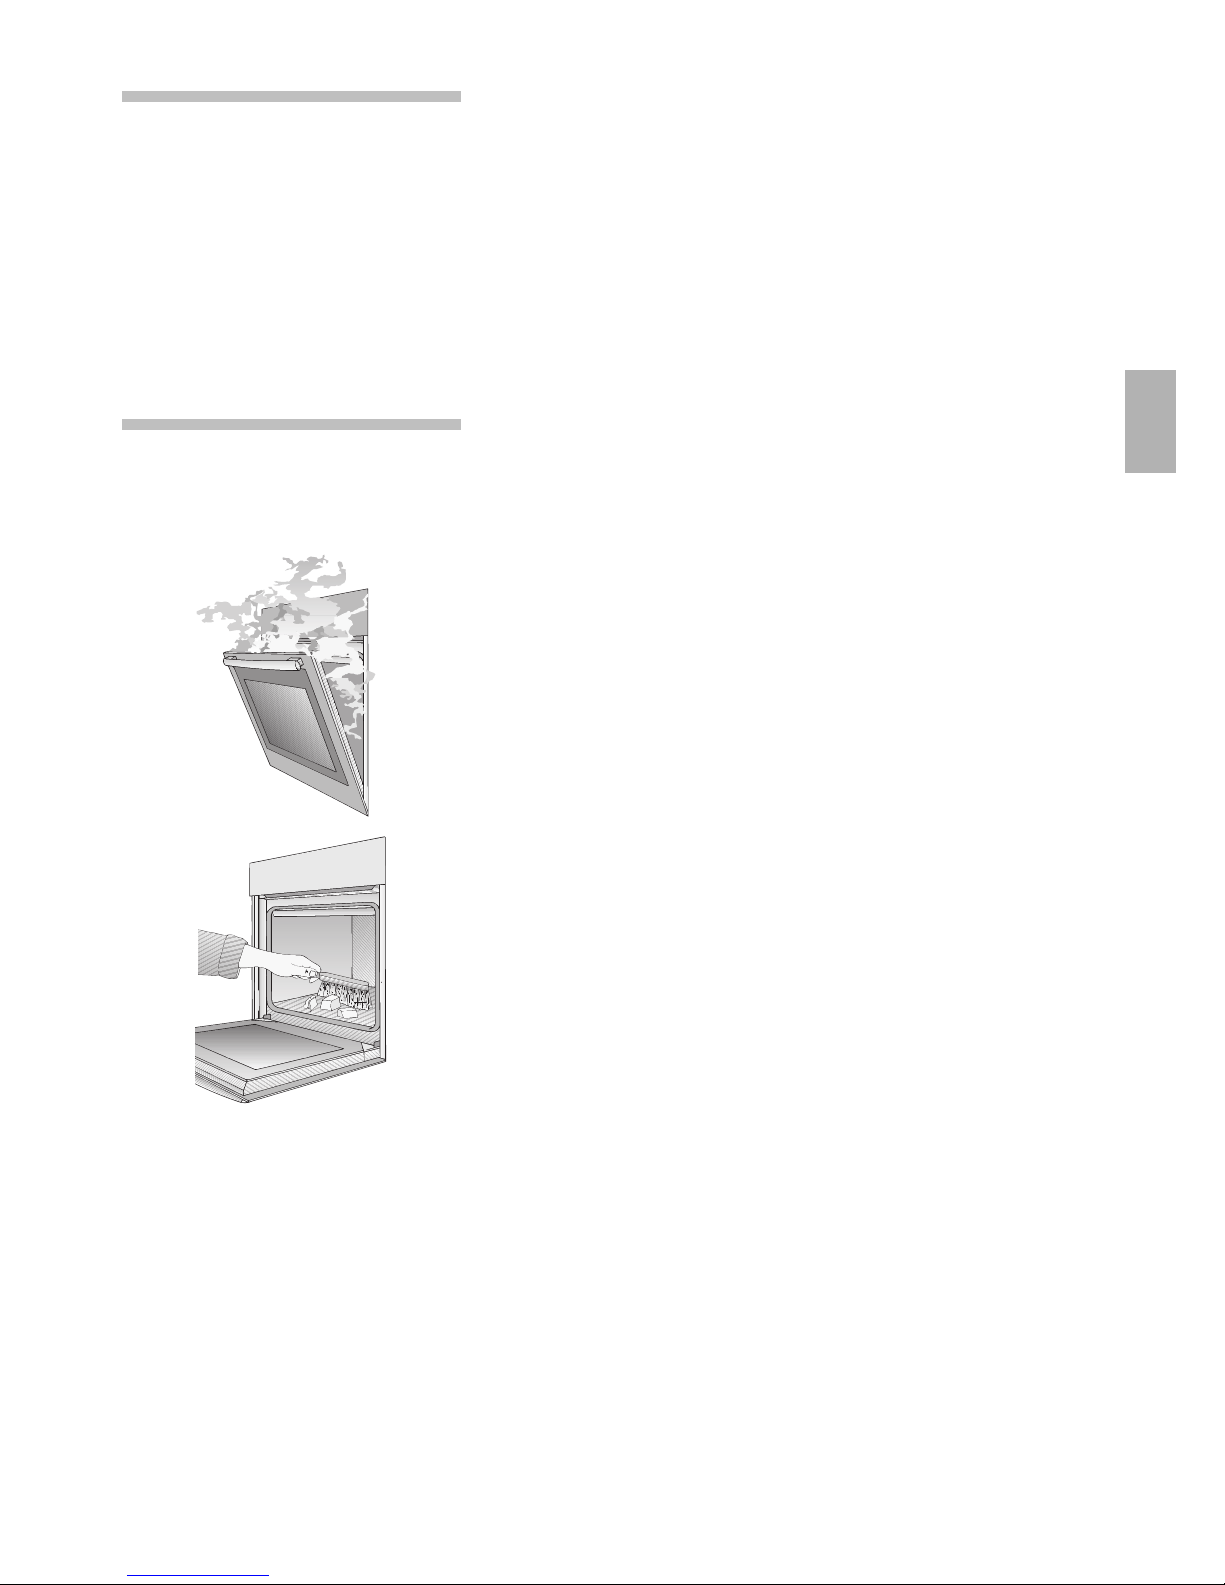
Hot oven Open the oven door carefully. Hot steam may
escape. Never touch the internal surfaces of the hot
oven or the heating elements. Risk of being burnt!
Children must be kept at a safe distance from the
appliance.
Never store combustible items in the oven. Never
place flammable objects onto the hobs. Fire hazard!
Never place cables of electronic devices onto the
hobs.
Never trap leads of electronic devices in the hot oven
door. The isolation on the leads could melt. There is
a risk of short-circuiting.
Remove all packaging remnants, e.g. polystyrene
parts, from the oven.
Repairs Incorrectly done repairs are dangerous.
There is a risk of electrocution!
Only an after-sales service technician trained by us
may carry out repairs.
If there is a fault, switch off the fuse in the fuse box.
Call the after-sales service.
Page 6

6
Reasons for damage
Baking sheets, aluminium foil Do not place a baking sheet on the oven floor. Do
or crockery on the floor of not line the oven floor with aluminium foil. Do not
the oven place crockery on the base of the oven. This causes
heat to accumulate. Baking and roasting times will
no longer be correct and the enamel will be
damaged.
Slide-in parts In order to avoid damage, insert slide-in parts
carefully.
Baking paper If using hot air *, do not place greaseproof paper
loosely in the oven (e.g. when heating the oven). The
hot-air fan could draw in the paper which may
damage the heater and fan.
Water in the oven Never pour water directly into a hot oven. This could
damage the enamel.
Fruit juice When baking very moist cakes, do not put too much
on the baking sheet. Fruit juice dripping from the
baking sheet leaves stains that cannot be removed.
It is recommended that you use the deeper universal
pan.
Cooling with the door open Only leave the oven to cool with the door closed.
Do not allow anything to become trapped in the
oven door. Even if you only leave the oven door open
slightly, the fronts of adjacent units could be
damaged over time.
Very dirty oven seal If the oven door seal of is very dirty, the oven door
will no longer close correctly when the oven is in use.
The fronts of adjacent units could be damaged.
Keep the oven door seal clean.
Using the oven door
as a seat Do not stand or sit on the oven door.
Care and cleaning Do not use a high-pressure cleaners or steam jets.
Page 7
Electronic clockOven functions
7
Your new cooker
Here, you will learn more about your new oven. The
control panel and its switches and displays are
explained here. The heating modes and the
accessories included with new oven will be explained
here.
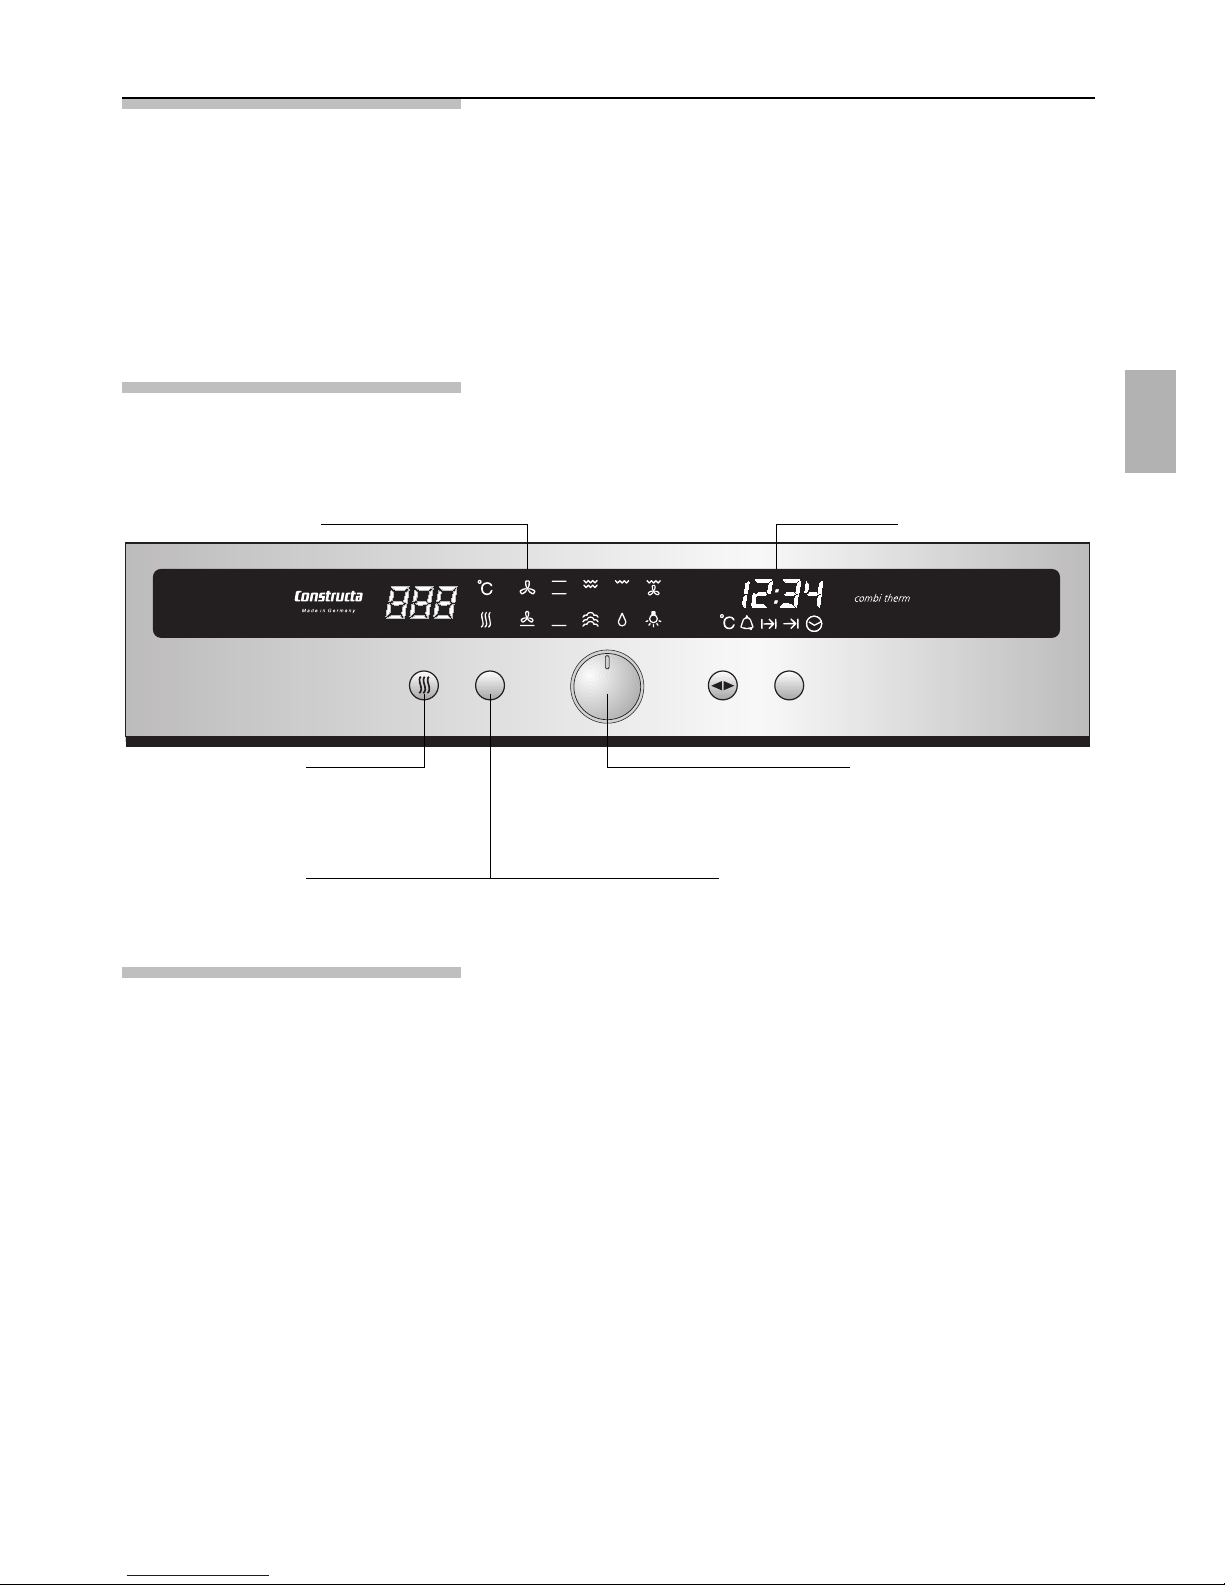
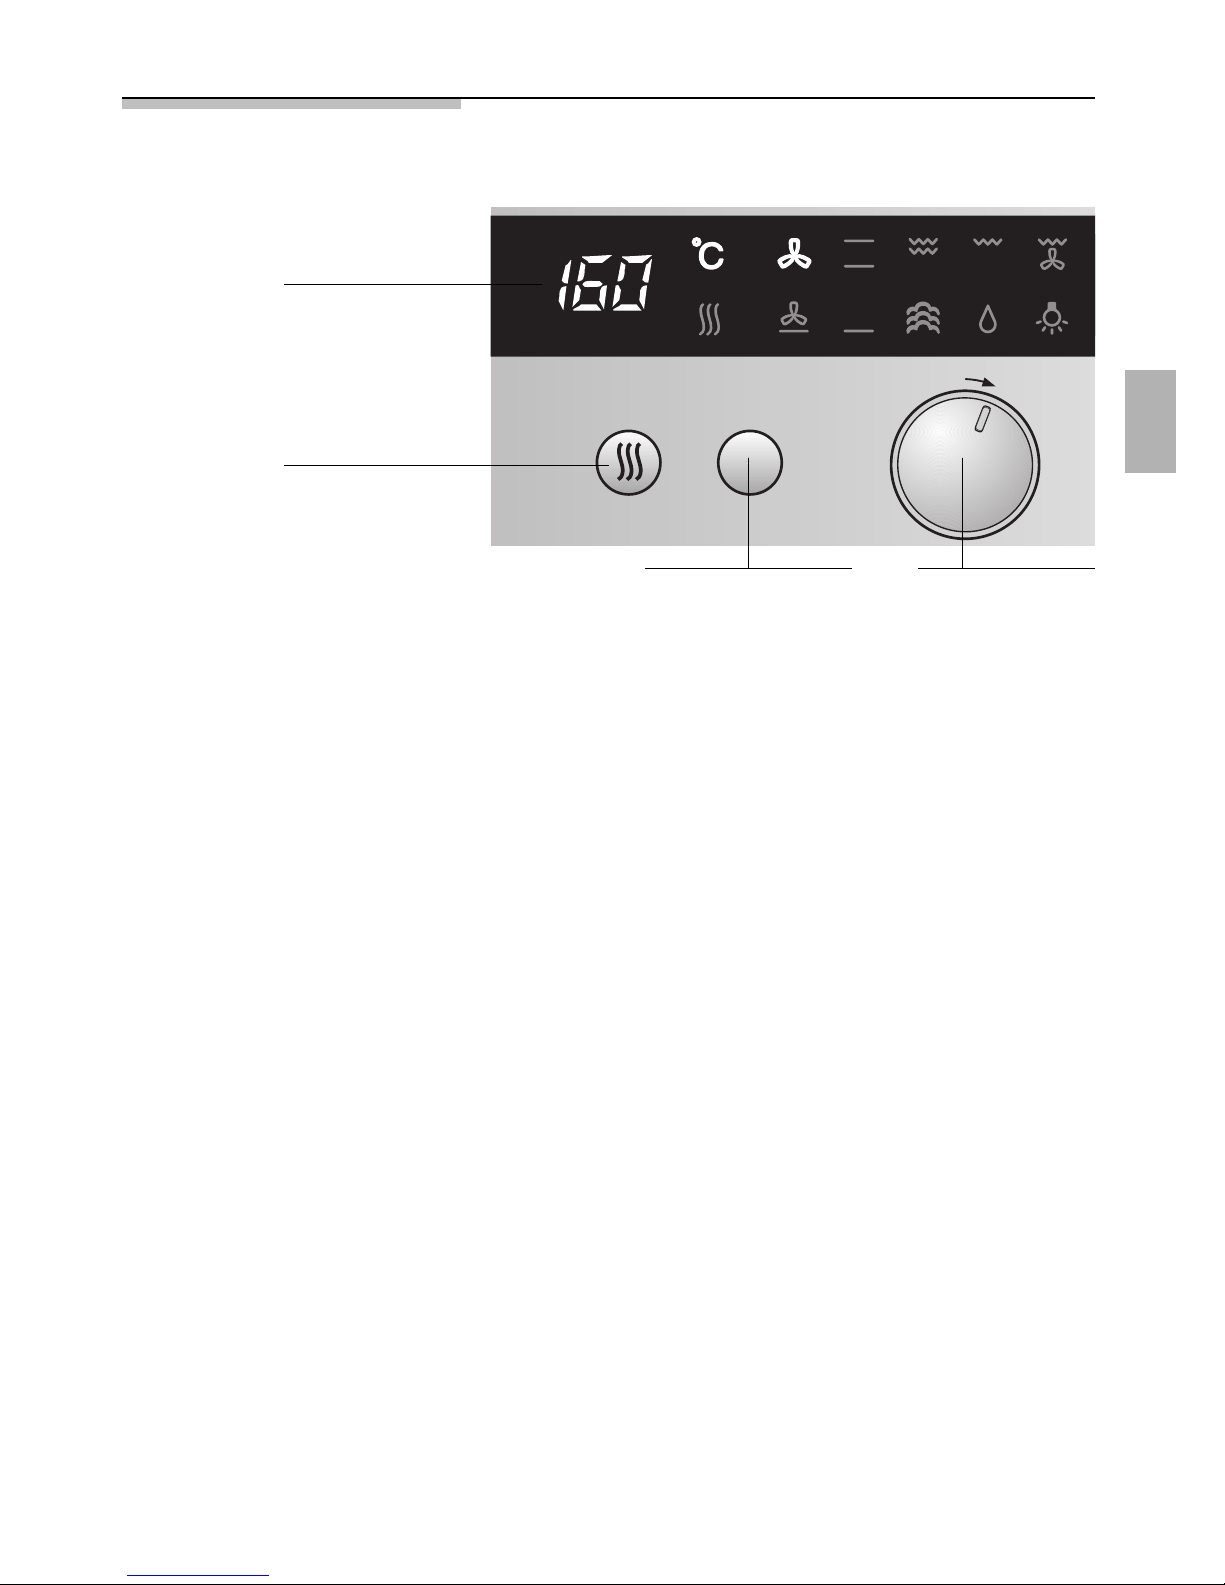
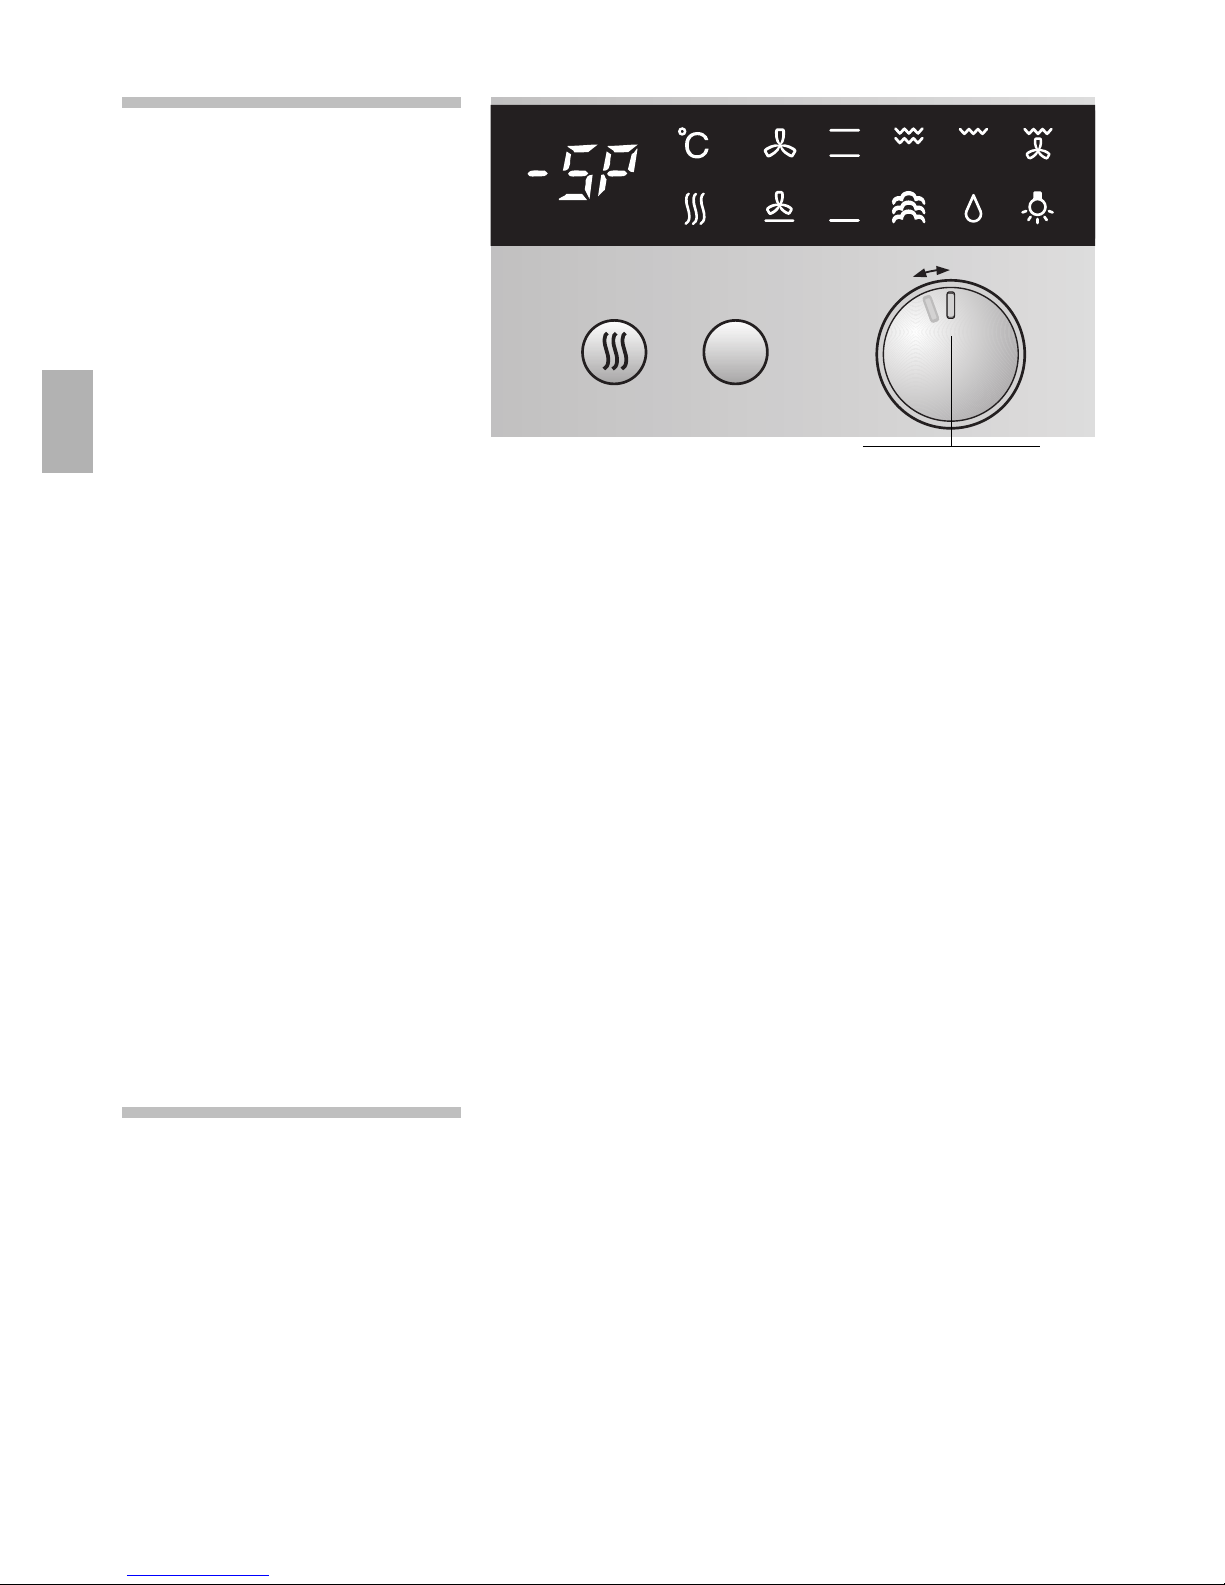
The control panel
Rapid heating for
*
hot air mode
Temperature selector with oven temperature display
Oven functions
*
Hot air
/
Top/bottom heat
(
Large grill area
)
Small area grill
,
Thermo-grilling
&
Pizza baking
.
Bottom heat
%
Steam cooking
d l
HydroClean
®
$
Oven light
;
Oven temperature
$
Rapid heating
Notes:
The oven light switches on for every oven function.
Exception: HydroClean.
The ; on the display is backlit when the oven is
heating up and lights up red during residual heat.
Rapid heating
s can only be selected in hot air
mode.
Steam cooking % for system steam cooker (option
available from specialist dealers).
Function selector with setting
for preferred temperature
Page 8
8
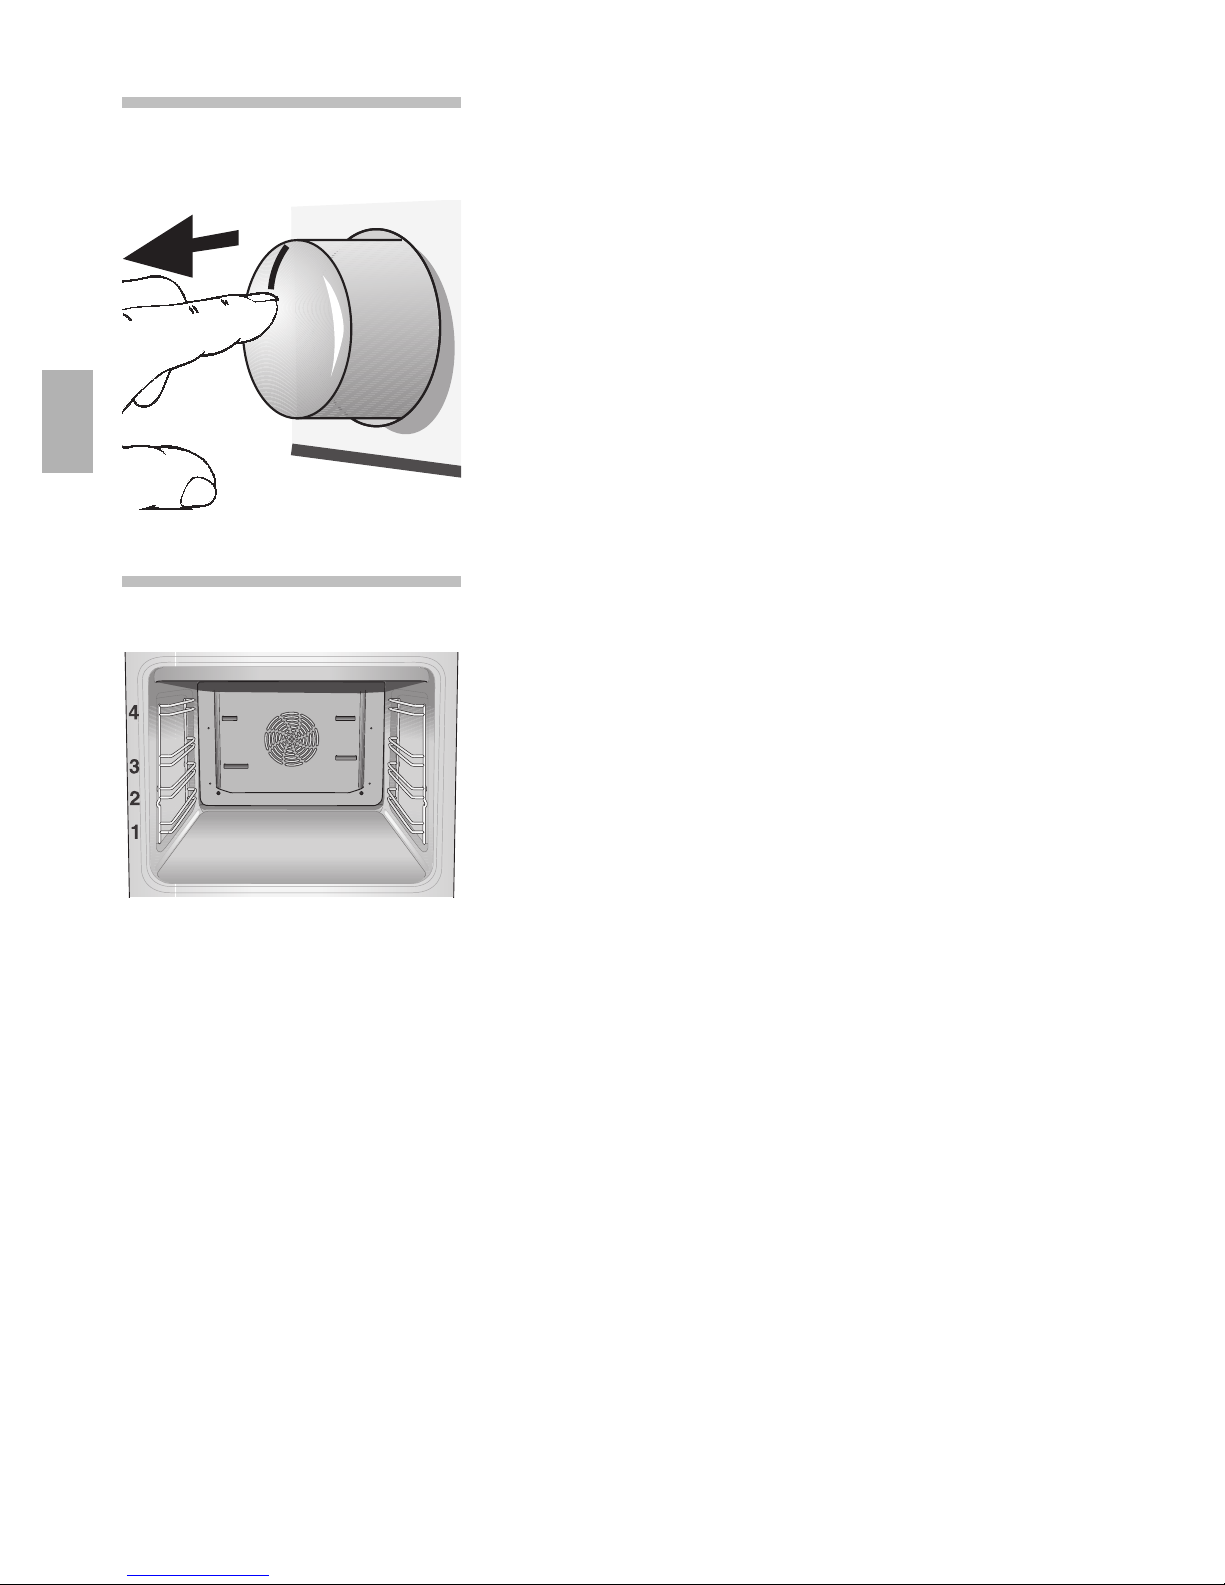
Press-down
switches
To engage and disengage, depress the switch.
Slide-in levels Your oven features 4 slide-in levels.
The slide-in levels are numbered from bottom to
top.
The numbers are marked on the oven.
In order to not block the air circulation, do not use
slide-in level ››2‹‹ when using the hot air mode *.
Page 9
9
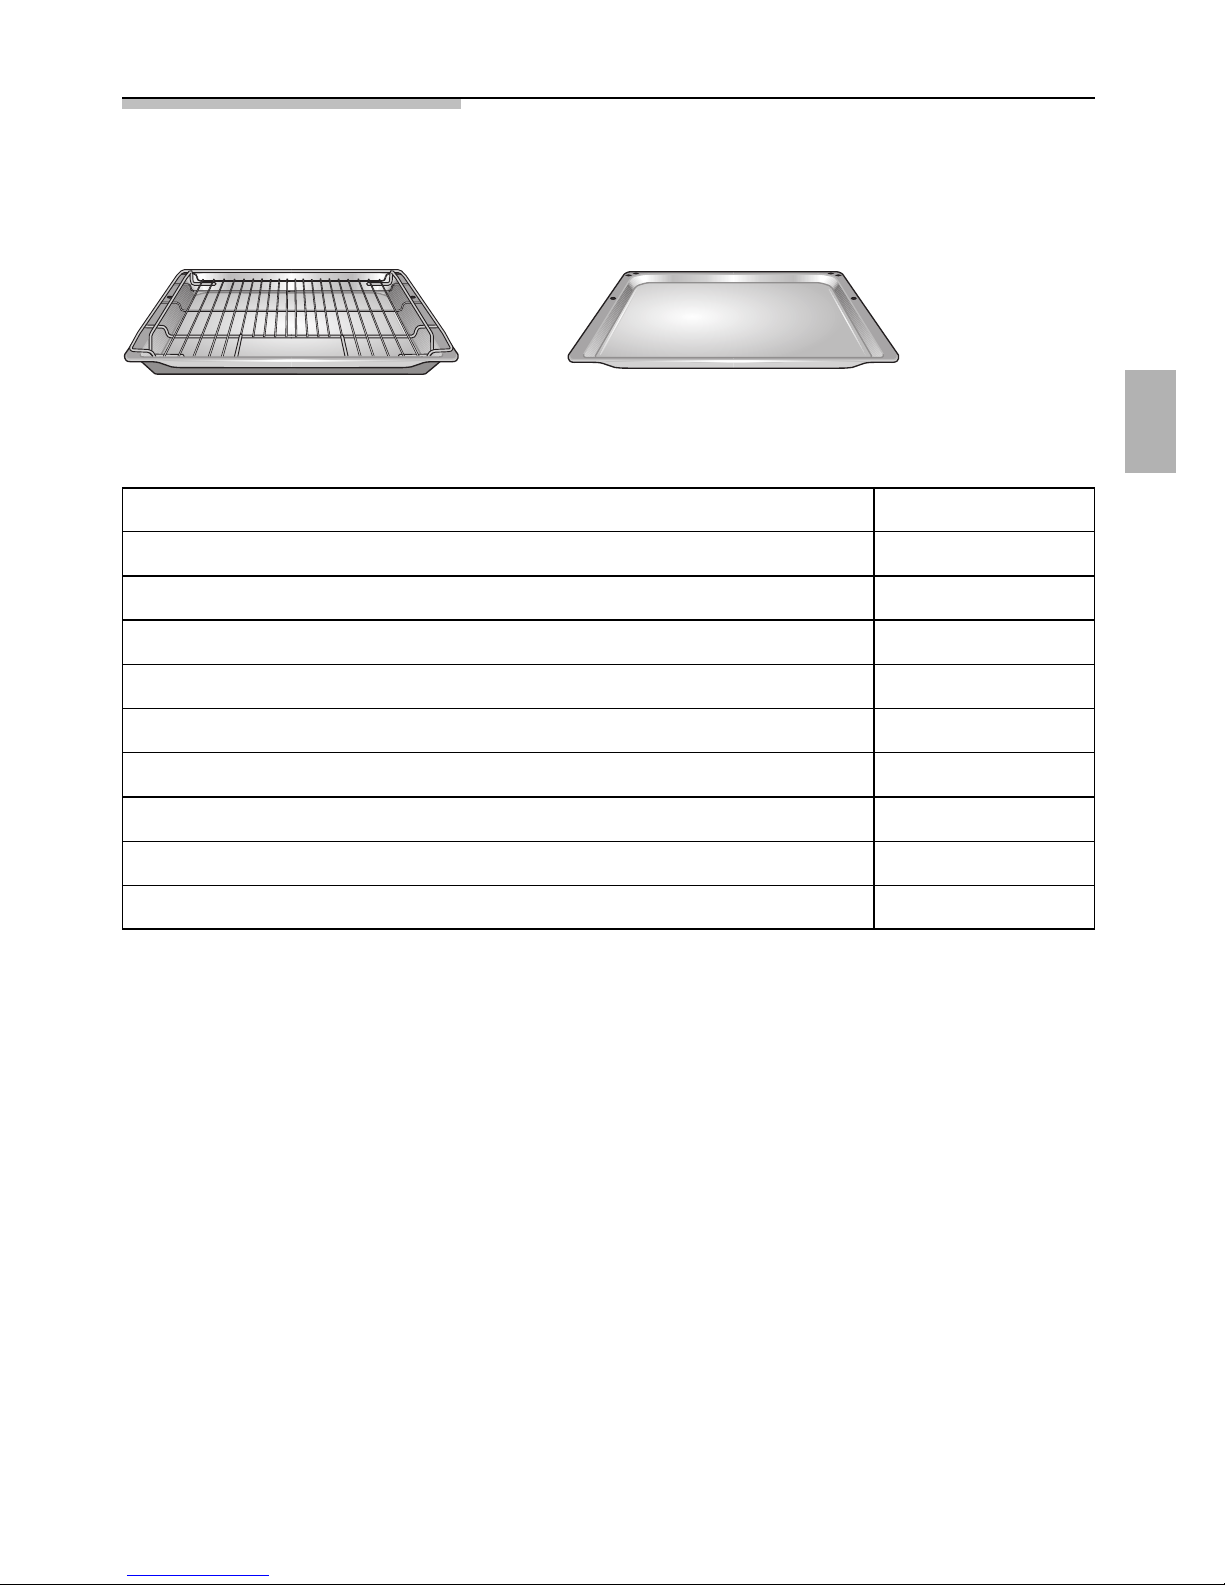
Accessories Your oven is supplied with the following
accessories:
Universal pan with grille Aluminium baking sheet
The following accessories can be obtained from
a specialist dealer: Order Number
Notes:
The protective device prevents contact with the hot oven door.
This is especially important in the presence of young children.
The baking sheet or universal pan may distort when the oven is operating. This is
caused by major temperature differences on the utensil. These differences may occur
if only one part of the utensil was covered or if deep-frozen food e.g. pizza, was placed on the utensil.
The distortion subsides again during baking, roasting or grilling.
Steam cooker
Aluminium baking sheet
Enamel baking sheet
Baking / Roasting grille, bent at right angles
Baking / Roasting grille, fine meshed
Universal pan with an inlay grille CZ 1242 X0
CZ 1282 X0
CZ 1332 X0
CZ 1342 X0
CZ 1432 X0
CZ 1442 X0
Retrofit kit – telescopic pullout for two tiers CZ 1702 X0
Retrofit kit – telescopic pullout for three tiers CZ 1742 X0
Retrofit kit – full telescopic pullout for four tiers CZ 1752 X0
Protective device for the oven door 440651
Page 10
10
Before using the appliance
for the first time
Preliminary cleaning Take the accessories out of the oven.
Remove all packaging remnants, e.g. polystyrene
pieces, from the oven.
1. Clean the appliance exterior with a soft
moistened cloth.
2. Remove the hanging grid from the oven.
3. Clean the oven and the accessories with a hot
detergent solution.
Observe the operating instructions enclosed with the
hob.
Initial burn-in Before using the appliance for the first time, you
must set the current time on the electronic clock.
Heat the empty oven for approx. 30 minutes.
Select top and bottom heat at a setting of 240 °C.
Cleaning out Clean the oven with a hot detergent solution.
Fit the hanging grid.
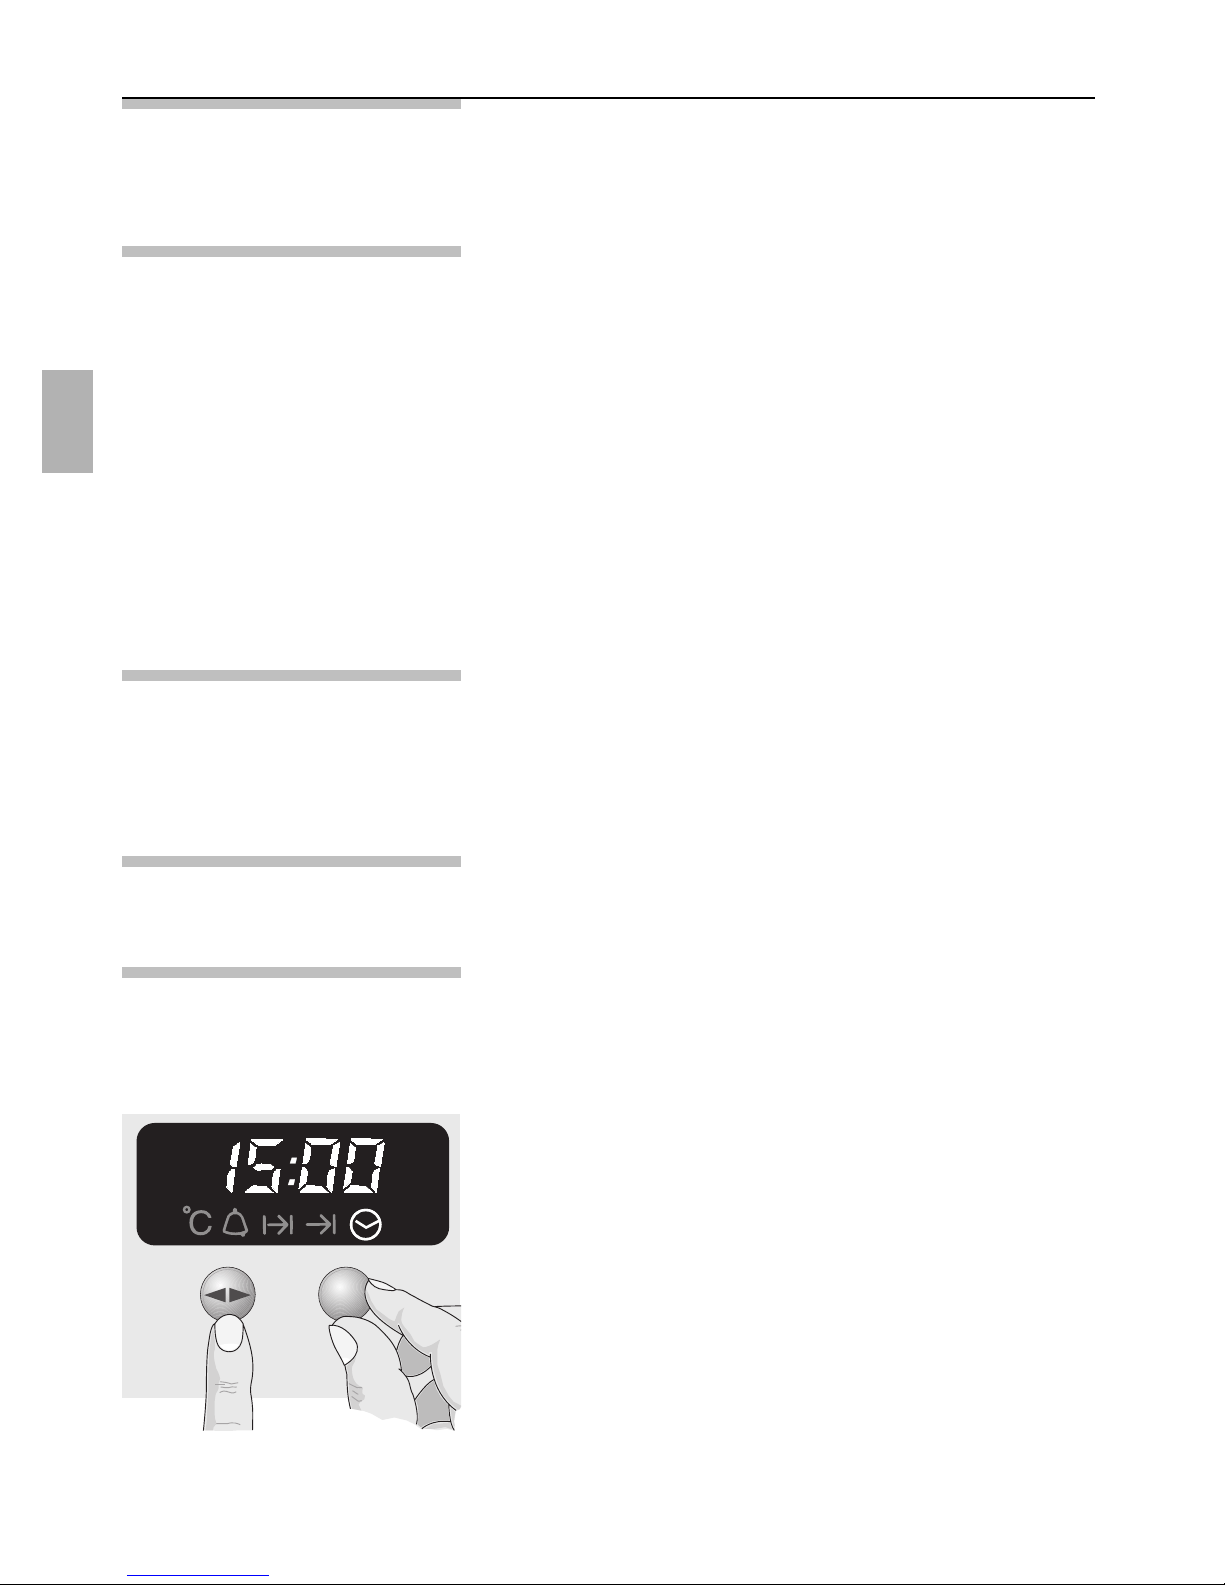
Current time After connecting to the mains or after a power
failure, the display 0:00 will flash.
Setting Press the
>
button and set the current time with
the rotary knob (e.g. 15:00).
To correct the time, press the
> button until
the
#
symbol flashes.
Then set the time.
Note: The time cannot be completed if an automatic
function or the timer has been set (to cancel see
”electronic clock”).
Page 11

11
Electronic
clock
The electronic clock can be operated with one hand;
after pressing the button, set the time with the rotary
knob. Settings can be made for as long as the
function display flashes (~ 4 seconds).
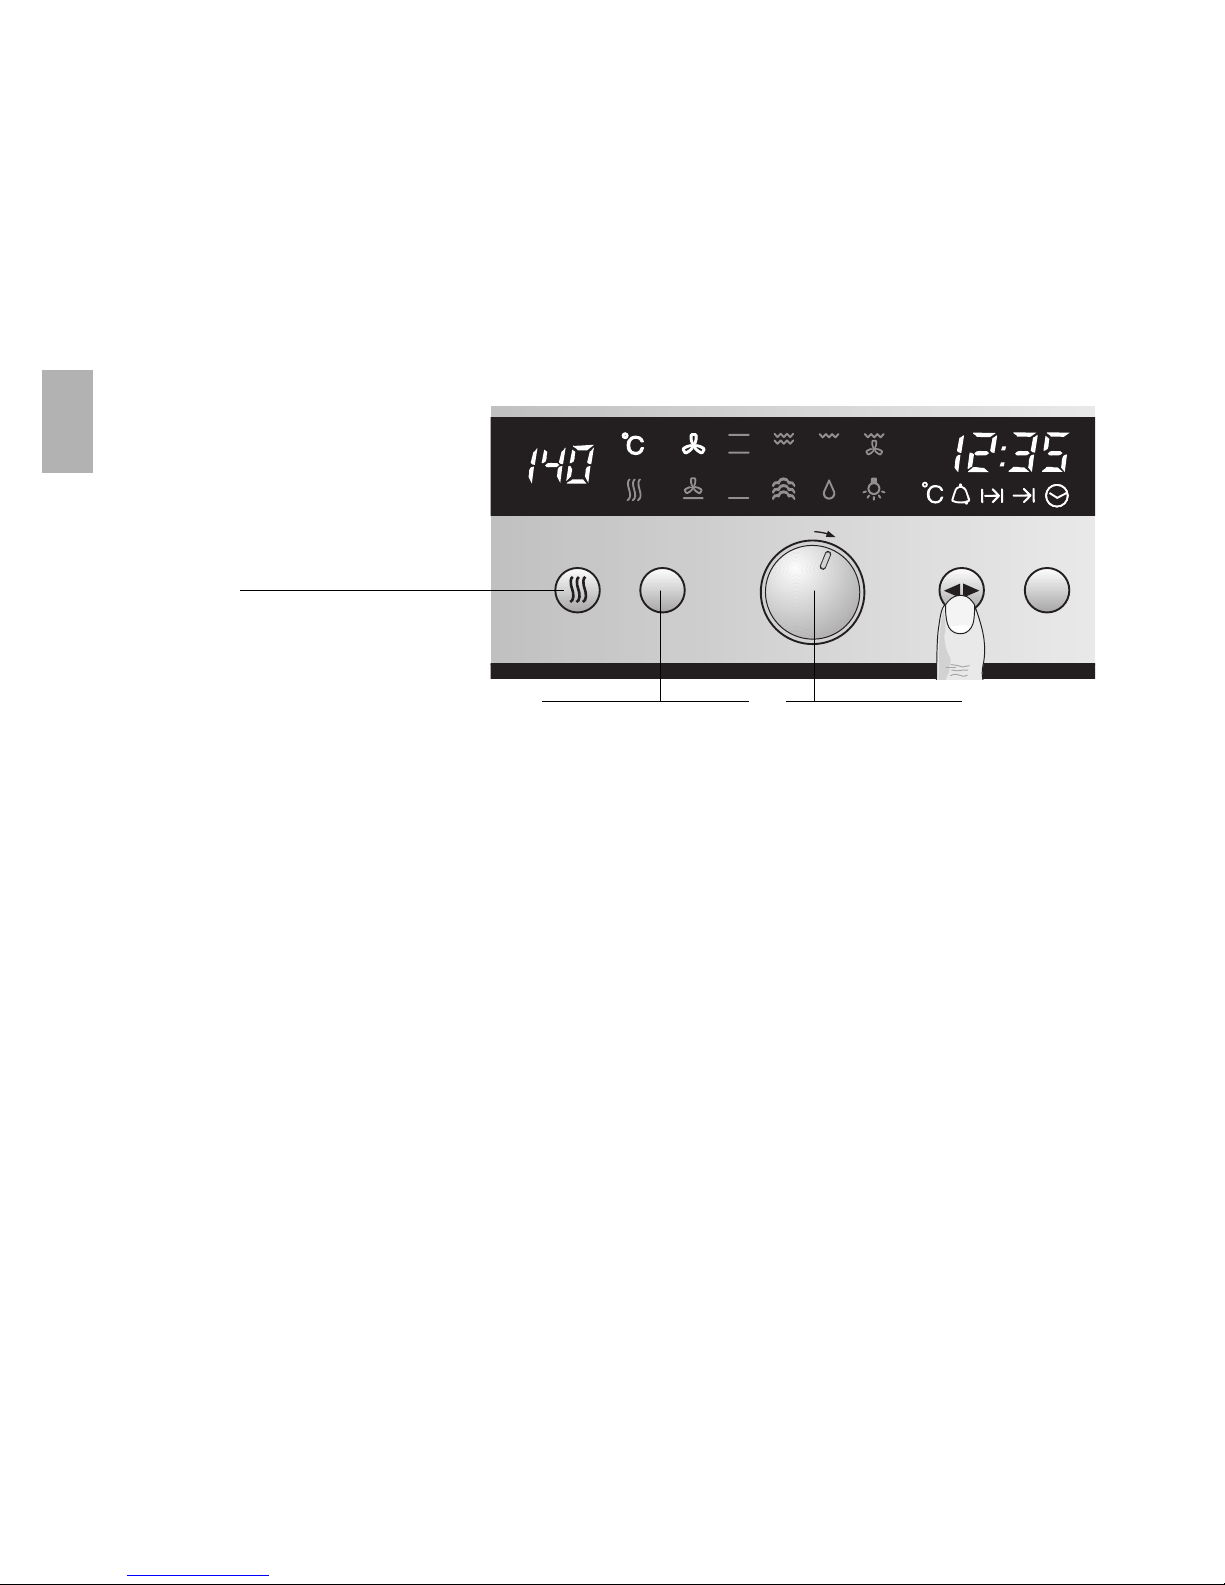
The control panel
Minute timer
Current oven
temperature
ON time OFF time
Rotary knob
– to engage and
disengage,
depress gently.
Time of day
Function selector
Special functions
Masking out the display
1.
Press the > button for 7 seconds.
After this, the display dims, the time and the
display continue running in the background.
2. To switch on the display, briefly press the >
button.
Rapid Heating Rapid heating can be set using the s button (see
section ”Switching the Oven ON and OFF”.
Setting the time See the section ”Before using your appliance for the
first time”.
Dimming the display Between 22.00 and 6.00, the display is automatically
dimmed.
Page 12
12
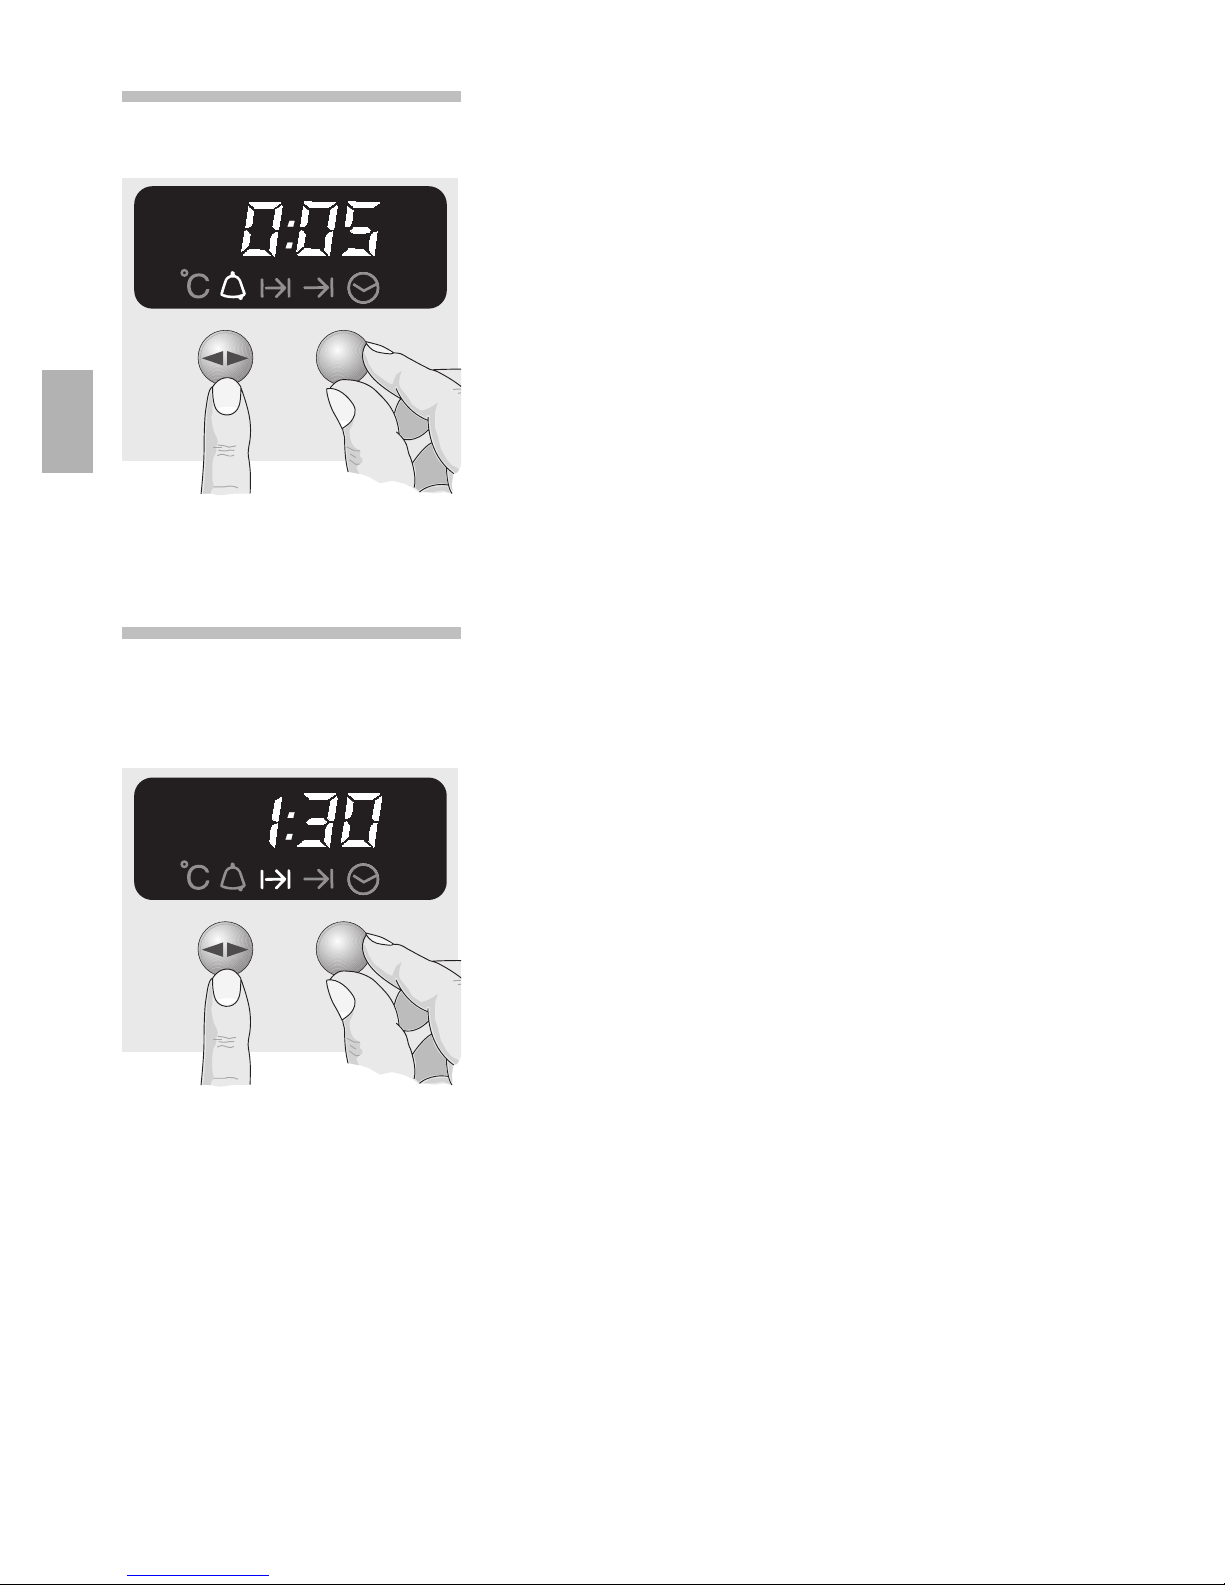
Automatic timer You can switch the oven on and off via the electronic
clock.
Automatic switch off Baking or roasting starts straight away.
1. Select the heating system and the oven
temperature.
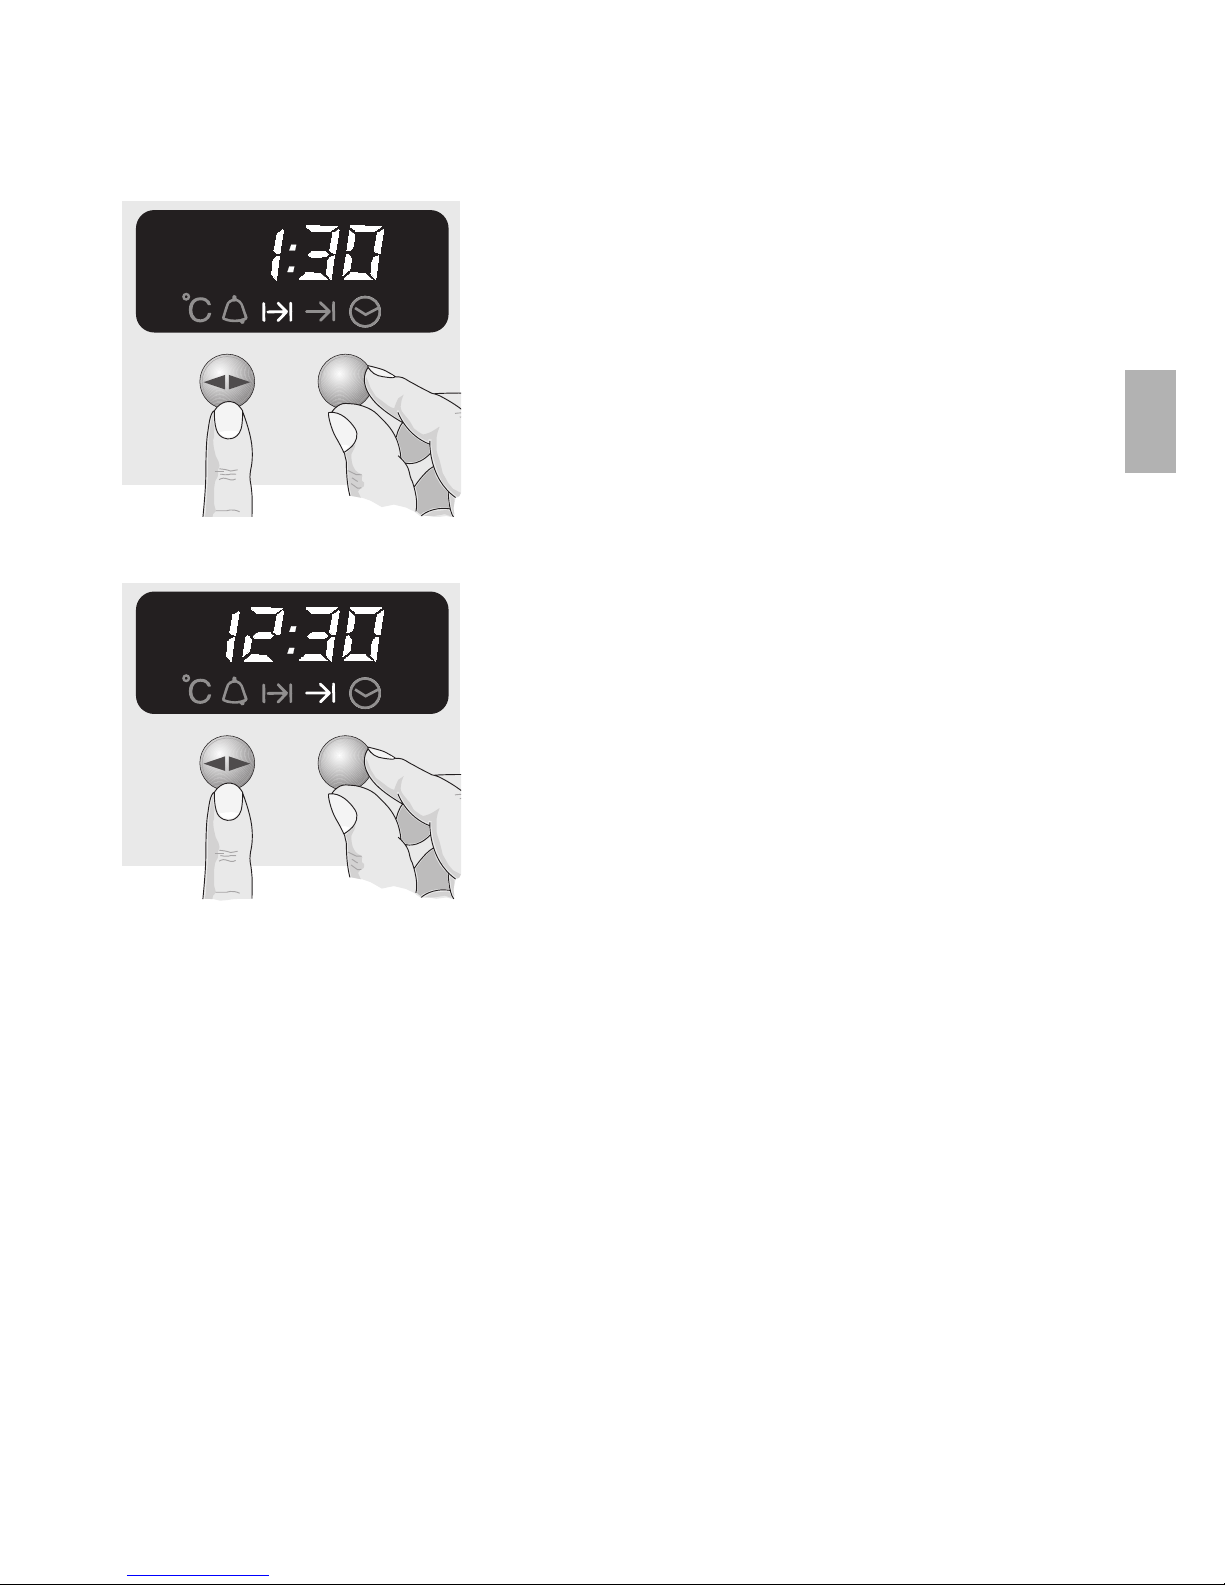
2. Press the > button until the ? symbol flashes
and set the ON time with the rotary knob
(example. 1 hour and 30 minutes).
When the setting has been made, the current
time is displayed after approx. 4 seconds.
The ? symbol signals automatic mode.
3. When the time has elapsed, (example. 1 hour and
30 minutes), a signal is emitted and the !
symbol flashes.
The oven switches off automatically.
To stop the signal early, press the > button.
4. Switch the oven off.
5. To end automatic mode, press the > button
again.
Minute timer
1.
Press the > button and set the time
(e.g. 5 minutes).
When the timer switches on, the remaining time is
displayed.
2. When the time has elapsed, a signal is emitted
and the
,
symbol flashes. To stop this signal
press the > button.
Page 13
13
Automatic switch on and For use when the food is to be baked or roasted for
switch off a set period at a point in time later on which is
selected by you.
1. Select the heating system and the oven
temperature.
2. Press the > button until the ? symbol flashes
and set the ON time with the rotary knob
(example. 1 hour and 30 minutes).
3. Press the > button until the ! symbol flashes
and set the OFF time with the rotary knob
(example. 12:30).
When the setting has been made, the current
time is displayed after approx. 4 seconds.
The ! symbol signals automatic mode.
4. The oven is automatically switched on and off at
the preset times (e.g. 11:00 and 12:30).
5. When the time has elapsed, a signal is emitted
and the ! symbol flashes. To stop the signal
early, press the > button.
6. Switch the oven off.
7. To end automatic mode, press the > button
again.
Checking, correcting and
1. To check your settings, press the > button until
cancelling settings the symbol flashes.
2. If required, correct the settings with the rotary
knob.
3. If you want to cancel your settings, turn the set
time back to 0:00 and switch the oven off.
Note The automatic timer is best used with dishes which
require little attention.
The minute timer and OFF time can be pre-
programmed up to a max. 24 hours.
The settings can be displayed at any time by
pressing the
> button.
Page 14

14
Description of Oven Features
Hot air A fan system located in the rear oven wall circulates
the hot air in the oven, achieving an especially
effective heat transfer to the food being baked or
roasted.
Advantages:
– simultaneous baking and roasting possible on up
to 3 levels
– less dirt on the oven interior
– shorter preheating times
– low oven temperatures
– gentle defrosting
Top/bottom heat Through heating elements located at the top and
(Conventional heating system) bottom of the oven, heat is generated and
transferred to the food being baked or roasted.
Baking and roasting is possible on one slide-in level
only.
Advantages:
– baking of cakes with moist topping, pizza, quiche
Grill surface Through heating elements located at the top of the
oven, heat is generated and transferred to the food
being grilled.
Advantages:
– particularly effective with flat, small cuts of meat,
i.e., steaks, sausages, fish, vegetables and toast.
Large grill area Advantages:
– the entire grilling surface heats up
–especially useful for large amounts of food
Small area grill Advantages:
– only the centre area of the grilling surface heats
up
– especially useful for small amounts of food
– energy saving operation
*
/
(
)
Page 15

15
Thermogrilling With thermogrilling, the fan and the surface grill and
are switched on and off in alternation.
The heat generated by the surface grill is evenly
distributed by the fan in the oven cavity.
Advantages:
– especially useful for poultry and large cuts of
meat.
Bottom heat With this setting, only the heating element at the
bottom of the oven is activated.
Advantages:
– particularly useful with dishes and baked
products which require a distinctive bottom crust
or browning.
Use just before the end of the baking or roasting
time.
Pizza setting The pizza setting adds bottom heat to hot air.
Advantages:
–fresh preparation, good for products with a high
”juice ratio” e.g. pizza and juicy cakes with a crisp
base.
– especially suitable for frozen products,
e.g. pizzas, chips etc.
Steam cooking setting For system steam cooker
(option available from specialist dealers).
,
.
&
%
Page 16

16
HydroClean®cleaning system
The oven cleaning function featured in your oven is
intended to keep your oven neat and tidy. Through
automatically controlled vaporisation of cleaning
solution, the combined effects of heat and steam
soften the dirt deposits on the oven wall enamel and
facilitate their removal. For more information
concerning this function, see the section ”Cleaning
and Care” later in this booklet.
Advantages:
– takes the toil out of oven cleaning
–protects the enamel on the interior surfaces
– constitutes an environmentally friendly method
Rapid Heating Note
Rapid heating can only be used with the hot air
mode
d
s
Page 17
Temperature display
17
Switching the Oven ON and OFF
Example: Hot air
Before you switch on your oven, decide which
heating system you would like to use.
Switching on the oven Turn the function selector until the heating system
you want appears on the display.
The suggested temperature is displayed and the
oven light is switches on.
You can increase or decrease the suggested
temperature in increments of 5° C (for temperatures,
see the baking or roasting table).
Steam cooking setting
% This is a set temperature and cannot be changed.
For system steam cooker
2
appears in the display.
(option available from
specialist dealers)
HydroClean
®
d
This is a set temperature and cannot be changed.
l
appears in the display.
Defrost See the ”Defrosting and Slow cooking” section for
adjusting the ”defrost” setting.
Display light
; The display light of the oven temperature lights up
when the oven is heating up and lights up red during
residual heat. It goes out once the set temperature
has been reached.
Rapid heating
for hot air
Temperature selector Function selector
Page 18
18
When the oven is heating up, the temperature in the
oven can be displayed for about 5 seconds. Press
the : button.
You can find out the current temperature when using
all functions (except for
%, d, $
, defrost
setting).
Switching off the oven Turn the function selector to the {setting.
All functions are deleted.
Note The appliance features a cooling fan which runs after
switching off the oven, until the oven has cooled
down.
Hot display for the oven
ä up to Z 120° C.
â 120° to Z 80° C.
Current oven temperature
Rapid heat up
Switching on the oven When the oven is switched ON in hot air
* mode,
you can activate rapid heating using the sbutton.
The s symbol is lit up whilst the oven is being
heated up. It goes out once the set temperature has
been reached.
Tur ning the rapid heating Press the s button to switch OFF rapid heating.
OFF early ”Rapid heat up” disappears from the display.
Temperature selector Funktionswähler
Rapid heating
for hot air
Page 19
19
Safety features
Locking the oven Quickly turn the function selector anticlockwise from
0 to
$
and back again three times.
–
Å – appears on the display.
The oven cannot be switched on inadvertently by
unauthorised persons, e.g. playing children.
To unlock the oven, quickly turn the function selector
anticlockwise from 0 to
$
and back again three
times.
– Å– disappears from the display.
Function selector
System Preferred Temperature
temperature range
in ° C in ° C
* 160 40 – 200
”Defrost”
–– –– ––
without
temperature
*
setting
/ 170 50– 275
( 220 50 – 275
) 180 50 – 275
, 170 50– 250
System Preferred Temperature
temperature range
in ° C in ° C
& 220 50 – 275
. 200 50 – 225
%
2
fixed
setting
d
l
fixed
setting
Temperature ranges of the various heating systems
Page 20
20
Permanent lock
Quickly turn the function selector anticlockwise from
0 to
$
and back again six times.
1
appears on the display.
The oven cannot be switched on inadvertently by
unauthorised persons, e.g. playing children.
To operate/unlock the oven, quickly turn the function
selector anticlockwise from 0 to
$
and back again
three times.
After being used, the oven is again automatically
permanently locked when the function selector is at
0 for thirty seconds.
To disengage, quickly turn the function selector
anticlockwise from 0 to
$
and back again six
times.
1
disappears from the display.
Automatic safety
off function
Depending on the setting, the oven is switched OFF
automatically after thirty minutes to thirty hours.
000
flashes in the display.
Safety off will not function if the setting on the
appliance has been changed.
Function selector
Page 21
21
Baking
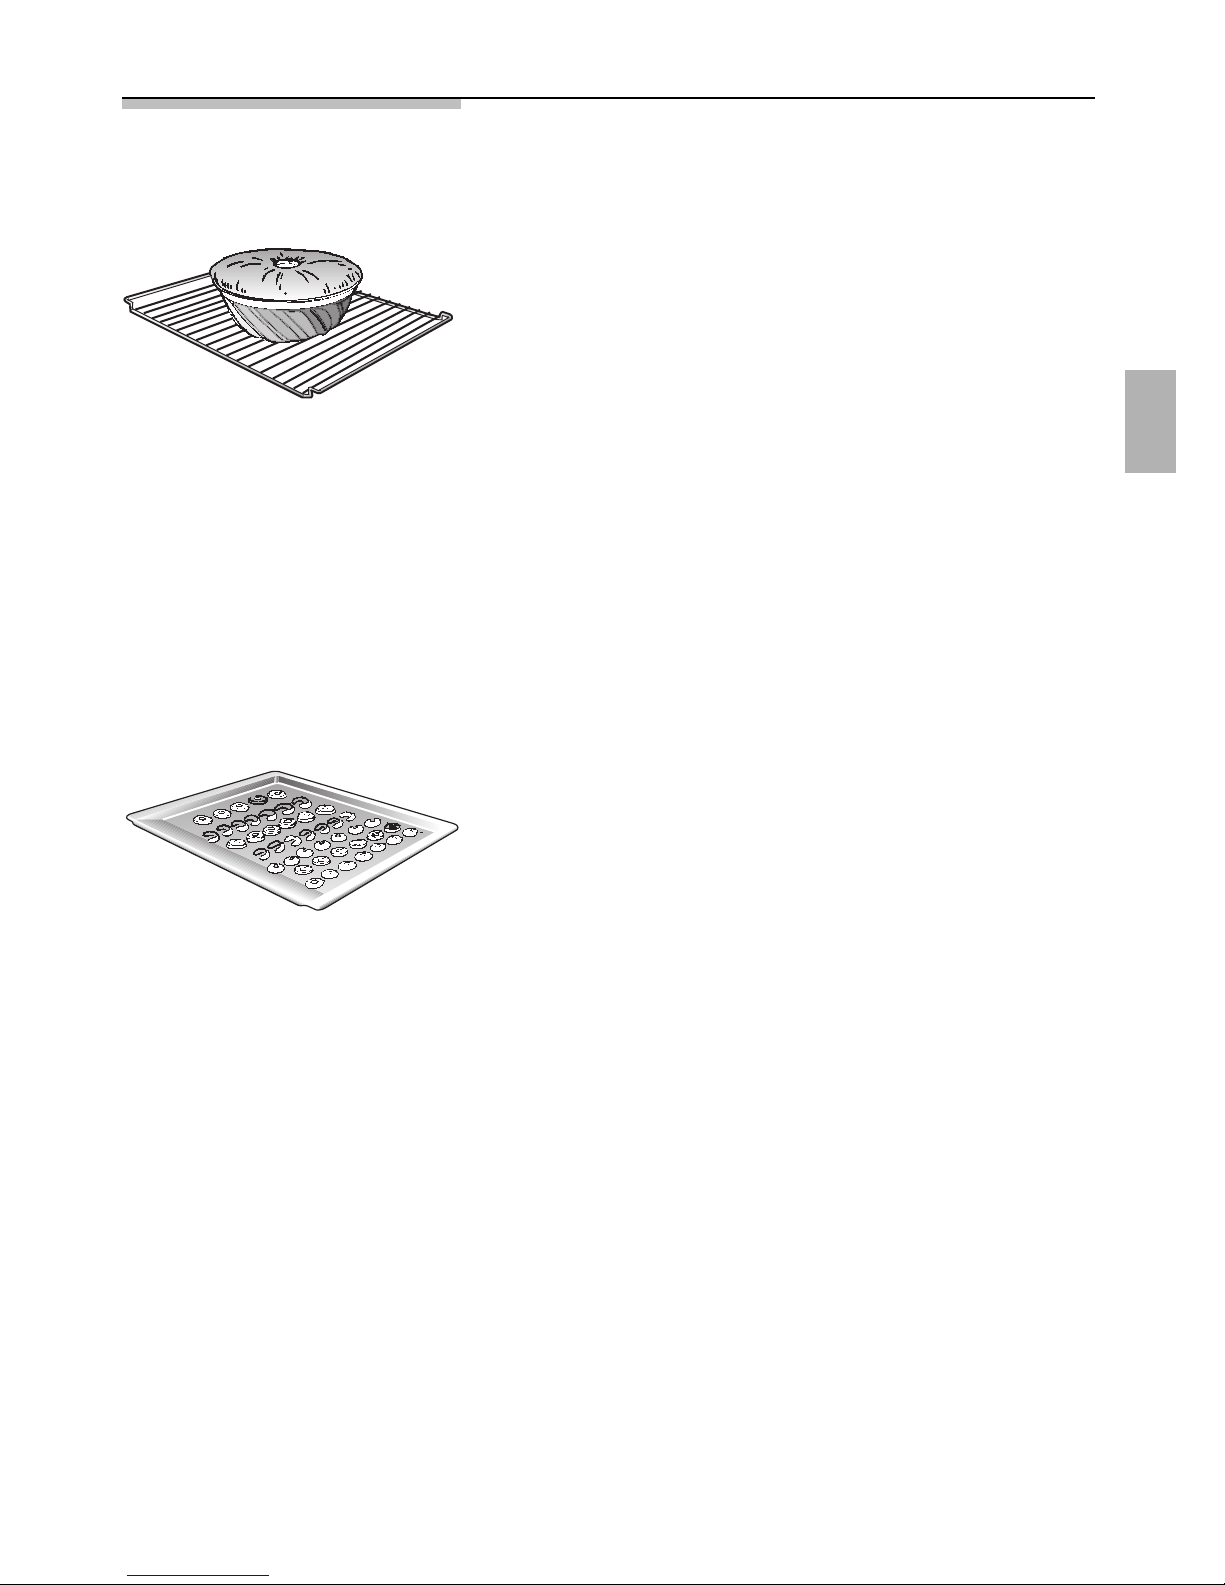
Using baking tins Always place baking tins in the centre of the
baking grille.
We recommend dark metallic baking tins.
Notes When using light-coloured baking tins made of thin
walls or glass the baking time is increased and the
cake will not brown so evenly.
The browning result can be influenced by adjusting
the temperature setting.
If a cake collapses after taking it out of the oven,
possibly select a longer baking time or set the
temperature lower.
Using baking sheets The slanted end of the baking sheet must always
face the oven door.
In order to avoid damage, insert slide-in parts
carefully.
Always fully insert the baking sheet.
Use only original sheets.
Baking in tin-plate tins
* Hot air Slide-in level 1
/ Top/bottom heat Slide-in level 1
If the cake bottom becomes dark in colour:
Check the slide-in level. Shorten the baking time and
possibly use a lower temperature.
If the cake bottom remains light in colour:
Check the slide-in level. Increase the baking time,
select a lower temperature or use a dark metal
baking tin.
Do not place baking tins or tall cakes too close to
the rear wall.
Page 22

22
Hot air
*
Top and bottom heat
/
Cake/Baked product type Slide-in Temperature Baking Slide-in Temperature
level in ° C duration level in ° C
- in minutes
Cake mixtures
Sheet cake with topping
1 sheet 1 160– 170 30 – 050 1 170 – 180
2 sheets 1 + 3 160 – 170 35 – 055 – –
Cake in a round tin/
square tin 1 160– 170 60 – 080 2 170 – 180
Fruit cake base 1 160 – 170 20 – 035 2 170 – 180
Short pastries
Sheet cake with a dry topping
e.g. crumble
1 sheet 1 160– 170 60 – 070 1 200 – 210
2 sheets 1 + 3 160 – 170 70 – 080 – –
Sheet cake with a moist topping
e.g. cream icing
1 sheet 1 160– 170 70 – 090 – –
Cake in a tin
e.g. quark cake 1 160– 170 60 – 100 2 170 – 180
Fruit cake base
(pre-heating) 1 160– 170 20 – 035 1 190 – 200
Sponge mixtures
Swiss roll (pre-heating) 1 180 – 190 10 – 015 1 200 – 220
Fruit cake base 1 160– 170 20 – 030 2 170 – 180
Sponge cake (6 eggs) 1 160– 170 30 – 045 2 160 – 170
Sponge cake (3 eggs) 1 170– 180 20 – 035 2 170 – 180
Baking table
Details stated in the table are guide values and apply for aluminium baking sheets and
dark baking tins.
The values can vary according to the type and amount of dough, pastry or mixture
and baking tin. For pre-heating, observe the notes stated in the table.
We recommend using the lower of the stated temperatures first. In general, the lower
temperature ensures a more even browning.
If baking to your own recipes, follow the temperature in the table for similar
cakes/baked products.
Page 23

23
Hot air
*
Top and bottom heat
/
Cake/Baked product type Slide-in Temperature Baking Slide-in Temperature
level in ° C duration level in ° C
- in minutes
Yeast dough
Sheet cake with a dry topping
e.g. crumble
1 sheet 1 170– 180 040– 070 1 190 – 200
2 sheets 1 + 3 170 – 180 050 – 070 – –
Sheet cake with a moist topping
e.g. cream icing
1 sheet 1 160– 170 065– 085 1 190 – 200
Yeast dough ring and plait
(500g flour) 1 160– 170 035– 045 1 180 – 200
Low tin cake 1 160– 170 030– 045 2 170 – 180
High tin cake 1 160– 170 035– 045 1 170 – 180
Small cakes/pastries
Meringues 1 80 100 – 180 1 80
Puff pastry (pre-heating)
1 sheet 1 190– 200 020– 035 1 200 – 220
2 sheets 1 + 3 190 – 200 025 – 035 – –
Choux pastry (pre-heating)
1 sheet 1 190– 200 020– 035 1 200 – 220
2 sheets 1 + 3 190 – 200 030 – 040 – –
Cake mixture (e.g. muffins)
1 sheet 1 160– 170 020– 030 2 170 – 180
2 sheets 1 + 3 160 – 170 025 – 035 – –
Short pastry
(pre-heating)
(e.g. butter biscuits)
1 sheet 1 150– 160 010– 025 1 160 – 180
2 sheets 1 + 3 150 – 160 015 – 025 – –
3 sheets 1 + 3 + 4 150– 160 015– 025 – –
Savouries
Pizza (pre-heating)
1 sheet – – 030 – 040 1 180 – 190
2 sheets 1 + 3 170 – 180 035 – 045 – –
Bread (pre-heating) 1 200– 220 10 – 15 2 220 – 240
Short-term bake 1 220 010 – 015 1 240
Complete bake 1 180 – 200 040 – 050 1 180 – 200
Page 24

24
Pizza baking
&
Details stated in the table are guide values and apply for enamelled baking sheets.
The values can vary according to the type and amount of dough and baking tin.
For pre-heating, observe the notes stated in the table.
We recommend using the lower of the stated temperatures first. In general, the lower
temperature ensures a more even browning.
If baking to your own recipes, follow the temperature in the table for similar baked
products.
Die Angaben beziehen sich auf das Einschieben in den kalten Backofen.
Dish Utensil Slide-in Temperature Baking time
level in ° C - in minutes
Pizza Baking sheet 1 180 – 200 30 – 40
Alsatian flammkuchen Baking sheet 1 190 – 210 20 – 30
Gateaux Cake tin or spring-style
tin made from tin-plate 1 180– 200 30 – 45
Quiche Cake tin or spring-style
tin made from tin-plate 1 190 – 200 40 – 50
Quark cake Spring-style tin 1 160 – 170 60 – 80
Swiss fruit cake (Waehe) Universal pan 1 210 – 230 30 – 50
Strudel Baking sheet 1 190 – 210 40 – 50
Deep-frozen ready meals (observe manufacturer’s instructions)
Dish Utensil Slide-in Temperature Baking time
level in ° C - in minutes
Pizza (pre-heat) Grille covered with
with a thin base greaseproof paper 1 190 – 210 10 – 20
Pizza (pre-heat) Grille covered with
with a thick base greaseproof paper 1 180 – 200 15 – 25
Potato products (pre-heat)
(e.g. chips) Universal pan 1 200– 220 15 – 25
Bakery goods (pre-heat) Grille covered with
(e.g. bread rolls) greaseproof paper 1 200– 220 05–15
Strudel (pre-heat) Baking sheet 1 190 – 200 25 – 45
Further information and recipes can be found in the enclosed recipe book.
Page 25

25
Cooking tips and helpful hints
The bottom of a cake baked Remove from the oven all baking sheets or the
on a baking sheet remains universal pan which is not needed.
too light in colour
The bottom of a cake baked Use a grille and not a baking sheet to support the
in a tin remains too light in cake tin during baking.
colour
The bottom of the cake or Set cake or cookies at a higher set of slide-in levels.
cookies becomes too dark
in colour
The cake becomes too dry Set a slightly higher oven temperature and shorter
baking time.
The cake is too moist on Choose a slightly lower oven temperature.
the inside Note.: Higher temperatures do not shorten baking
times (done on the outside, raw on the inside).
Choose a slightly longer baking time. Allow the dough
to rise slightly longer. Add less liquid to the dough.
When baked with hot air Avoid blocking the air vents at the rear wall of the
circulation, cake baked in oven with the baking tins.
round or square tins becomes
too dark in colour.
Very moist cake dough You can let the steam escape from the oven and
(e.g. fruit cake) causes a lot thereby reduce the forming of water droplets by
of steam to generate in the briefly and carefully opening the oven door (1-2 times,
oven that condenses on the in case of longer baking times, more often).
oven door
Very uneven browning when Check the slide-in level.
using hot air circulation.
Cake collapses when taken Use less liquid.
out of the oven
To save energy Pre-heat only if expressly required by the recipe.
Dark baking tins have a higher degree of heat
absorption.
Residual heat: In case of longer baking times, you
can switch off the oven approx. 5-10 minutes before
the full baking time has elapsed.
Page 26
26
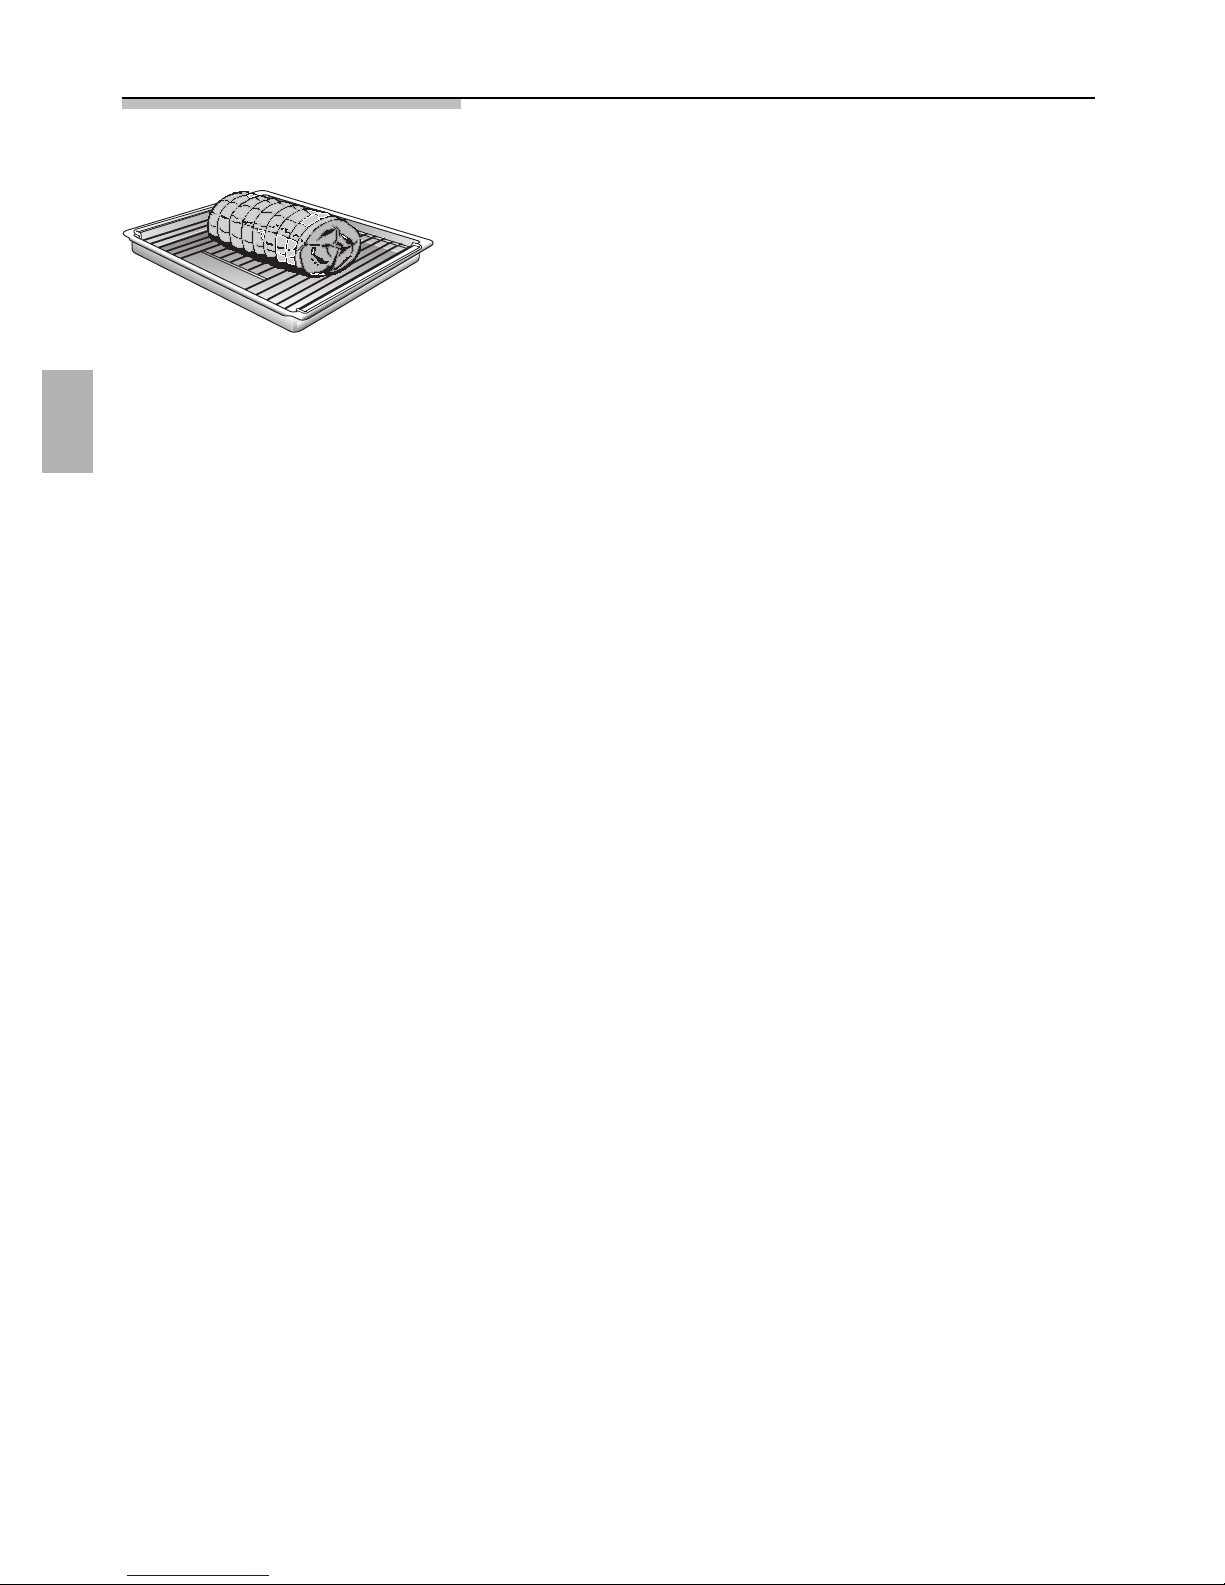
Roasting Put grille into the universal pan and insert them
together at the same slide-in level.
Meat can be roasted weighing in the oven in a
particularly economical fashion if the weight of the
cut exceeds 750g.
Roasting in an uncovered pot Rinse the universal pan and/or the roaster with water
and place the meat into it.
With fatty meat and poultry, pour
1
/8to 1/4litre of
water into the universal pan (to suit to size and type
of roast). If required, add hot water. At your
discretion baste lean meat with fat, or cover it with
bacon.
The roast drippings collecting in the universal pan
make tasty gravy. Dissolve the drippings with hot
water, bring to the boil, thicken with corn starch,
season to taste and, if required, pass it through a
strainer.
No pre-heating is required. Save energy by putting
the roast into the oven while it is still cold.
Roasting in a covered pot Place the meat into the roasting pot, cover it with a
matching lid, and insert it on the grille in the oven.
We recommend that beef roast is prepared in a
covered roasting pot.
Page 27

27
Notes Large, high roasts, goose, turkey, duck
= long roasting times, low temperatures
Medium-sized, lower roasts
= medium roasting times, medium temperatures
Small, flat roasts
= short roasting times, high temperatures
Roasting time per cm of meat height, without bones
approx. 13-15 minutes
Roasting time per cm of meat height, with bones
approx. 15-18 minutes
We recommend, using the lower of the stated
temperatures first. In general, the lower temperature
ensures a more even browning.
When roasting with
/, we recommend turning the
roast after approx. 1/2- 2/3of the roasting time has
elapsed.
When roasting only use cookware with oven-proof
handles.
Prepare large roasts directly in the universal pan
without using the grille.
Smaller cuts of roasting can be roasted on
aluminium foil. To do so, bend the edges of the foil
upward, as if to forms a dish and place it onto the
grille.
After the end of the selected roasting time and with
the oven switched OFF, leave the roast in the closed
oven for approx. 10 minutes.
The roast is not done on Use a lower oven temperature.
the inside Note.: Higher temperatures do not shorten roasting
times (done on the outside, raw on the inside).
Choose slightly longer roasting times.
Very moist roasts (e.g. roasts You can let the steam escape from the oven and
prepared with water) cause a thereby reduce the forming of water droplets by
lot of steam to generate in briefly and carefully opening the oven door
the oven that condenses on (1-2 times, in case of longer roasting times, more
the oven door often).
Page 28
28
Hot air
*
Top and bottom heat
/
Roast meat Slide-in Temperature Roasting Slide-in Temperature
level in ° C duration level in ° C
- in minutes
Pork
Roast joint with crackling
e.g. shoulder or knuckle 1 160 – 170 100 – 130 2 200 – 220
Roast joint / collared pork 1 160 – 170 100 – 140 2 190 – 210
Smoked pork (1Kg) 1 160 – 170 70 – 80 2 190 – 210
Filet of pork 1 180 – 190 30 – 45 3 210 – 230
Meat loaf 1 170– 190 65 – 75 2 190 – 210
Beef
Filet 1 180– 190 45 – 65 2 200 – 220
Roast beef (pink) – – 40 – 60 2 230 – 240
Veal
Roast/ Brisket 1 160– 170 90 – 120 2 180 – 200
Knuckle 1 160– 170 100 – 130 2 190 – 210
Lamb
Leg 1 180– 190 70 – 110 2 200 – 220
Back 1 160 – 170 90 – 120 2 200 – 220
Poultry
Chicken 1kg 1 170 – 180 60 – 70 2 200 – 220
Duck 1 160– 170 90 – 120 2 190 – 210
Goose 4kg 1 150– 160 130 – 180 2 180 – 200
(1 for high
slow-cook food)
Game
Venison (back) 1 160 – 170 90 – 120 2 200 – 220
Venison (roast joint) 1 160 – 170 90 – 120 2 190 – 210
Roast boar/deer 1 160 – 170 100 – 120 2 190 – 210
Fish 1 160 – 170 30 – 40 2 180 – 200
Further information and recipes can be found in the enclosed recipe book.
Roasting table Details stated in the table are guide values.
The values can vary according to the roast size and
type and the roasting pot used.
Page 29

29
Grilling Exercise caution when grilling.
Always keep children at a safe distance.
Note Always close the oven door when grilling.
The grilling temperatures are adjustable.
Always use the grille and the universal pan.
Always place food to be grilled in the centre of the
wire grille.
The heating element automatically switches OFF
when the thermostat is activated.
The heating element is reactivated after a short
period of time.
Put grille into the universal pan and insert them
together at the slide-in level stated.
Page 30
30
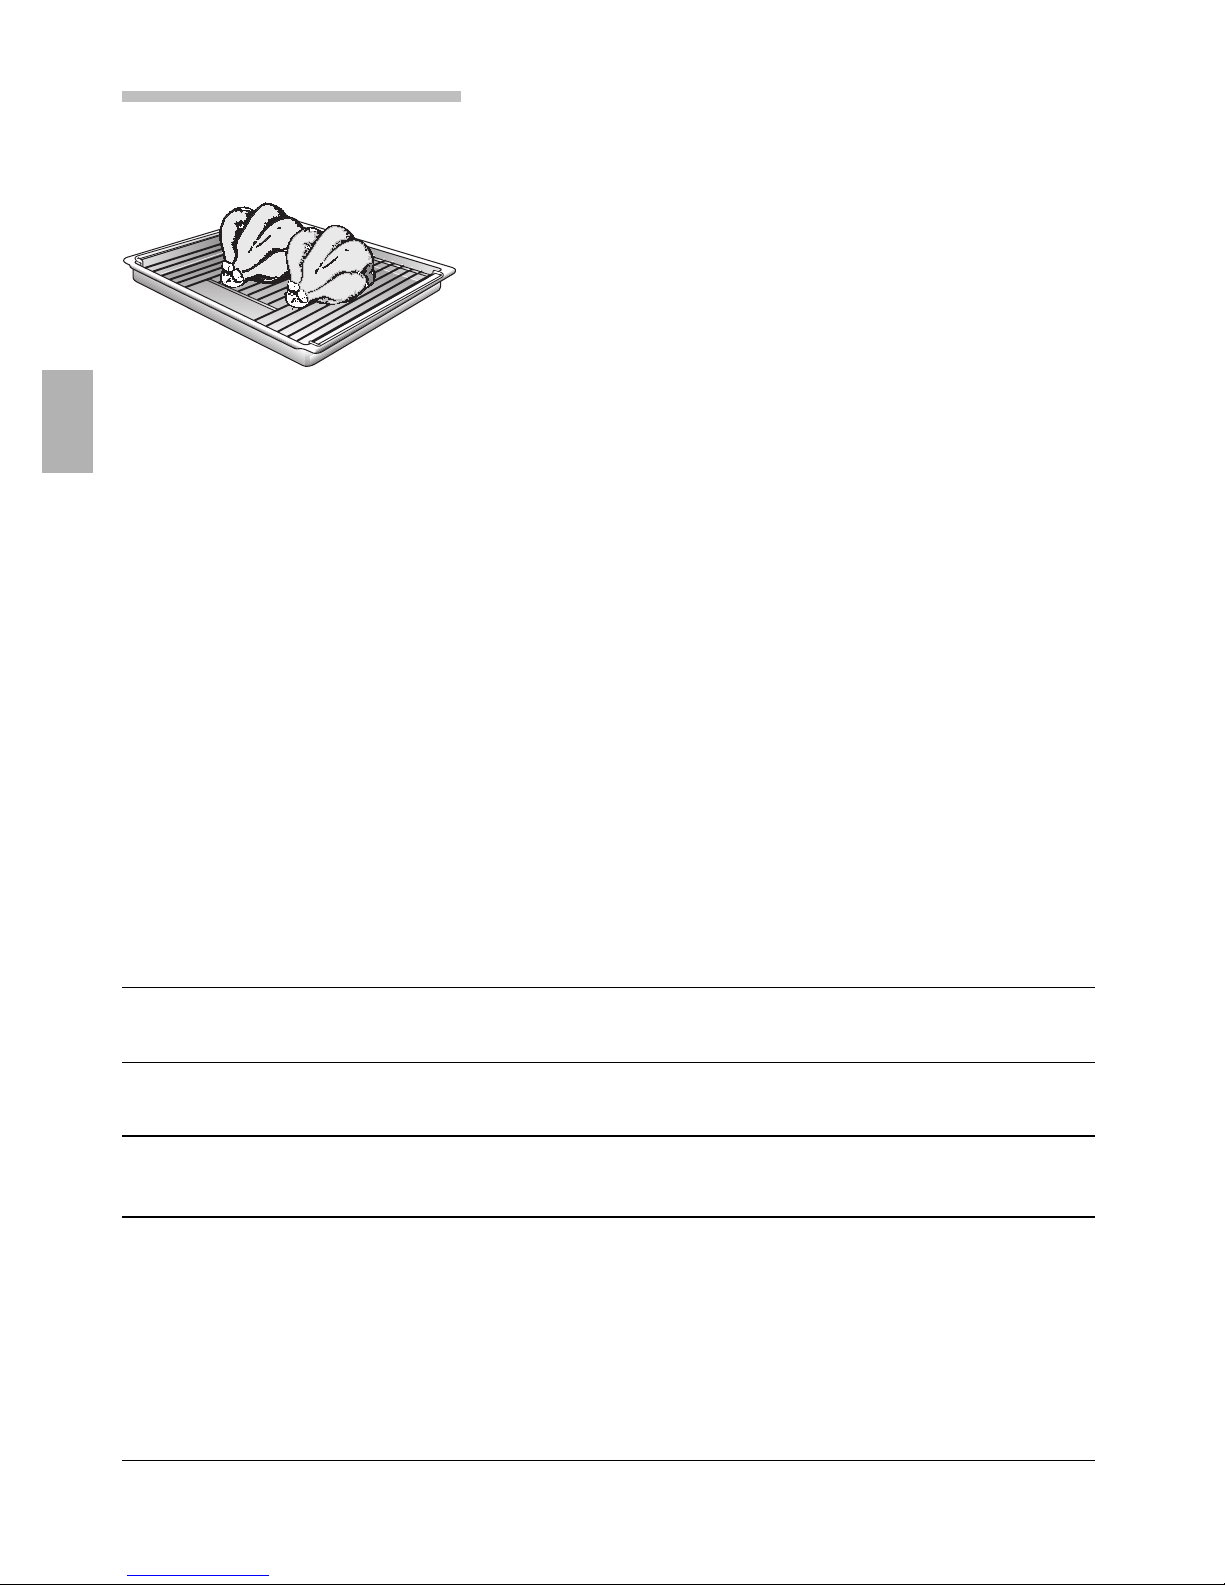
Thermo-grilling , Use this method for particularly crispy poultry or
roast (e.g., roast pork with rind).
Use the grille and universal pan together. Turn large
roasts after about half of the total grilling time has
elapsed.
To prevent breakage after removing them from the
oven, place glass utensils on a dry kitchen towel
instead of cold or wet surfaces.
Depending on the type of food being prepared, the
combination of hot air and surface grilling can cause
an increased amount of oven dirt. Therefore, to
prevent burning in, thorough cleaning of the oven is
recommended after each use.
Whole poultry should be turned after approx. two
thirds of the cooking time has elapsed. With duck
and goose, pierce the skin under the wings to allow
excess fat to drain off.
After the end of the selected roasting time and with
the oven switched OFF, leave the roast in the closed
oven for approx 10 minutes.
Details stated in the table are guide values. The
values can vary according to the type and amount of
grilled food and apply to food when inserted into the
cold oven.
Grilled food Weight Utensil Temperature Slide-in Grilling time
level
Roast pork Grille/
with rind 2 kg universal pan 170 – 190° C 2 130– 140 min.
Beef Grille/
Roast beef (pink) 1,5 kg universal pan 210 – 220° C 2 040 – 060 min.
Poultry
Half a chicken Approx. Grille/ 200– 220° C 2 140 – 150 min.
1–3 pieces 400g per piece universal pan
Whole chicken Approx. 1 kg Grille/ 200 – 210° C 2 150 – 160 min.
1–3 pieces per piece universal pan
Goose Approx. 4 kg Grille/ 150 – 170° C 2 140 – 160 min.
universal pan
Page 31

31
Surface grilling For flat, smaller dishes.
Always use the grille and universal pan.
Turn the food after approx. two-thirds of the grilling
time has elapsed.
At your discretion, lightly baste the grille and the food
with oil.
Details stated in the table are guide values.
The values can vary according to the type and
amount of grilled food and apply to food when
inserted into the cold oven.
Grilled food Temperature Slide-in Grilling time – Remarks
level 1st side 2nd side
Pork
Filet steaks max. 4 08–11 min. 5 – 08 min.
(2-2.5 cm)
Neck steaks 250° C 4 11 – 14 min. 7 – 10 min.
Sausages 250° C 4 07–10 min. 5 – 07 min. Lightly cut
Beef Grill times can be
Filet steaks max. 4 10 – 13 min. 5 – 08 min. lengthened or shortened
Tournedos max. 4 09–12 min. 5 – 08 min. according to the desired
degree of slow cooking
Toast Slide-in level depends on
With topping 190° C 3 06–09 min. – the height of the topping
Fish
Small fish 230 – 250° C 3 11– 15 min. 5 – 09 min. Turn
(
)
Page 32

32
Defrosting and slow cooking
Defrosting and slow cooking
using the hot air
*
Important heating system For defrosting and slow cooking frozen or deep-
frozen foods, use only the hot air heating system.
With all deep-frozen foods, observe the
manufacturer’s instructions.
As a rule, defrosted frozen or deep-frozen foods
(especially meats) require less slow cooking time
than fresh products, since freezing has a pre-cooking
effect.
If frozen meat is placed in the oven, the defrosting
time must be added to the required slow cooking
time.
Always defrost deep-frozen poultry before slow
cooking because the giblets must be removed.
For slow cooking deep-frozen fish, use the same
temperatures as for fresh fish.
Deep-frozen ready-to-eat meals in aluminium
dishes may be placed into the oven several at a
time.
Slide-in levels With 1 baking sheet: Slide-in level 1
With 2 baking sheets: Slide-in level 1 + 3.
Times stated are guide values. The values can vary
according to the type and amount of deep-frozen
food.
Page 33

33
Defrosting Defrost deep-frozen foods or foods from a freezer
at 50° C. Higher defrosting temperatures may cause
the food to dry out.
Defrost deep-frozen meals packed in aluminium
foil or closed aluminium containers at a setting of
130-140° C.
Defrost and warm up deep-frozen bakery products
at 100-140° C. Brush bread, rolls or yeast pastry
lightly with water to make the crust more appealing.
Defrost dry deep-frozen sheet cakes at
160-170° C for 20-30 minutes.
Defrost moist deep-frozen sheet cakes (with fruit
topping) at 160-170° C for 30-50 minutes.
Afterwards, wrap the cakes in aluminium foil to
prevent the cake from drying out.
Defrost and toast deep-frozen toast (with topping)
at 160-170° C for approx. 20 minutes.
Frozen pizza:
Please observe manufacturer’s instructions.
Page 34

34
Defrost
Recommended for delicate cakes only
(i.e. whipped-cream gateaux).
1. Turn the function selector to position *.
2. Turn down the oven temperature at the
temperature selector until – – – appears on the
display.
The fan on the oven wall runs without heat being
generated.
Depending on the size and type of cake, defrost for
25-45 minutes.
After this time, remove it from the oven.
Let it stand at room temperature for 30-45 minutes.
With smaller amounts (pastries), the defrosting time
is reduced to 15-20 minutes and the subsequent
standing time to 10-15 minutes.
Temperature selector Function selector
Page 35

35
Using the steam
cooking setting
Caution Can be operated with the system steam cooker
only (option available from specialist dealers).
Do not use the steam cooking setting until the oven
has completely cooled down completely
(room temperature).
As a heating system, only select
%.
Other settings are not permitted.
1. Tur n the function selector to the % setting.
The indicator light % lights up and
2
appears
in the display.
2. The steam cooking process is now regulated
automatically.
Note If
2
flashes in the display, the oven has not
cooled down completely.
For further information, see the operating
instructions for the system steam cooker.
Function selector
Page 36

36
Cleaning and care
Important cleaning
basics
For cleaning, do not use abrasives, no corrosive
cleaners and no sharp objects.
Do not scratch off burnt-in food residues, but soak
them off with a moist cloth and dishwashing
detergent.
Stainless steel front When using commercially available stainless cleaning
agents, the lettering may become damaged.
Do not use scouring sponges.
Use commercial available detergents applied to a
soft, moistened cloth or chamois.
Enamel and glass Use hot soapy water for cleaning.
The oven seal should be taken off for cleaning the
oven front (behind the oven door).
Oven door pane The temperature of the pane inside the oven door is
reduced by a heat-reflecting coating.
The reduced temperature ensures that visibility
through the oven door window is not impaired.
When the oven door is opened, this coating may
have a bright appearance. This is quite normal does
not represent a quality defect.
Hob surface The hob is covered by a special set of operating
instructions.
Please observe all cleaning directions in the
instructions.
Page 37

37
Oven Clean the oven after each use, especially after
roasting or grilling.
Food remnants burn-in when the oven is reheated.
The baked in remnants are very difficult to remove
once burnt in.
The amount of dirt that builds up is less when using
hot air as compared with other heating systems.
Do not clean the warm oven with any of the
cleaning products specifically designed for this
purpose.
When baking very moist cakes, use the universal
pan.
For roasting, use the appropriate utensils
(Dutch oven).
Clean the oven whilst warm with hot soapy water
before it becomes too dirty.
Leave the oven open until the interior has dried out.
Page 38

38
Catalytic oven
coating
Self-cleaning surfaces The rear wall of the oven is coated with self-cleaning
in the oven enamel. The surface cleans itself while the oven is in
operation.
Large splashes sometimes only disappear after the
oven has been used several times.
Never use oven cleaner on the self-cleaning back
wall of the oven.
Slight staining of the enamel does not affect its
self-cleaning properties.
Cleaning the oven floor, the Use hot soapy water or a vinegar solution.
oven ceiling and the side
It is best to use oven cleaner for more stubborn dirt.
walls
Only use oven cleaner in a cold oven.
Enamel is baked on at very hot temperatures.
This can cause some slight colour variation.
This is normal and does not affect the function.
Do not use coarse scouring pads or strong cleaning
agents to remove such discolorations..
The edges of thin sheets cannot be completely
enamelled. As a result these edges can be rough.
Anti-corrosion protection is guaranteed.
Page 39

39
HydroClean
®
The oven cleaning function featured in your oven is
cleaning system
d
intended to keep your oven neat and tidy. Through
automatically controlled vaporisation of cleaning
solution, the combined effects of heat and steam
soften the dirt deposits on the oven wall enamel and
facilitate their removal.
Caution:
The cleaning system can only be used after the oven
has completely cooled (room temperature).
Use normal water only, and no distilled water.
Switching oven cleaning system ON:
1. Remove the baking sheet and the universal pan
from the oven. The baking grille may remain in the
oven.
2. Pour approx. 400ml of water mixed with a little
dishwashing detergent into the floor tub of the
oven.
In case of a lot of dirt, you may wish to allow the
cleaning solution to soak in for a while before
switching the oven on.
3. Close the oven door.
Caution:
The cleaning system can only be used after the
oven has completely cooled.
4. Tur n the function selector to d.
The
d indicator light and the ; indicator light for
the oven temperature light up.
l
appears in the display. When
l
flashes, the
oven has not cooled down completely.
After the warm up has ended (4 minutes), the
indicator light for the oven temperature light no
longer lights up. After a further 17 minutes, the
cleaning system ends and an acoustic signal is
emitted.
Switching oven cleaning system OFF:
Turn the function selector to the
0 position.
Function selector
Page 40

40
After turning the oven Cleaning tips:
cleaning system OFF Never leave residual water in the oven for any length
of time, e.g. overnight.
1. Open the oven door and pick up the residual
water with a large absorbent sponge cloth.
2. Using the detergent soaked sponge cloth, a soft
brush or a plastic pot scrubber wipe the oven
interior.
Stubborn dirt can be removed with a cleaning
scraper (for glass and ceramics).
Caution: Use the scraper carefully and do not
apply the tool too flat, but at an angle because
the enamel could be scratched.
3. Scale deposits can be removed with a cloth
soaked in vinegar.
4. Wipe clean with clear water and dry with a soft
cloth (do not forget to wipe under the oven door
seal).
Cleaning tips:
If the oven is very dirty, the procedure may be
repeated.
If the oven is very dirty with grease, e.g. after
roasting or grilling, we recommend rubbing stubborn
dirt with detergent before switching the oven
cleaning system on.
After cleaning, leave the oven door open for an hour
in its slanted resting setting, i.e. at an angle of
approx. 30°, to allow the interior enamel surfaces to
dry thoroughly.
Rapid drying
1. Place the oven door in its slanted resting setting,
at an angle of approx. 30°.
2. Turn the function selector to *.
3. Reduce the oven temperature with the
temperature selector until 50°C is displayed.
4. Duration: approx. 5 minutes.
5. Then, switch the oven off.
Page 41

41
Removing the oven door You can easily remove the oven door.
Take care that you not reach into the hinge area.
Risk of injury!
1. Fully open the oven door.
2. Throw the catch levers on the right and left-hand
side.
3. Placing the oven door at an angle towards you,
grasp the door with both hands, close a little
more and lift it out of the hinges towards you.
After cleaning, install the oven door again following
the directions in reverse order.
Lowering the In order to clean the oven ceiling more easily, fold
heating element down the heating element.
Caution: The heating element must have cooled
down.
1. Press the retaining clip upwards until you hear the
click.
2. Hold the heating element and fold it down.
After cleaning
Fold the heating element back up.
Pull the retaining clip forward and press it up until it
clicks into place.
Page 42

42
Inset rack
Removing
You can take the inset rack out for cleaning.
1.
At the front, press the frame upwards and
remove.
2. At the rear, pull the frame towards the front and
remove.
Clean the inset racks with washing up liquid and a
sponge or with a brush.
Hanging
The frame fits on the left and right.
The protrusion (a) must always on the bottom.
1. At the rear, push the frame in as far as it will go.
2. Push the frame backwards.
3. At the front, push the frame in as far as it will go.
4. Push the frame downwards.
Page 43

43
Service and repair information
In the event of problems or repairs that you cannot
solve or perform yourself, our customer service will
be happy to help.
Check the customer services directory for a service
facility in your area.
Caution: Calling the customer service because of an
operator error can be very costly!
E Number and FD Number You can find this information on the appliance’s
nameplate. The nameplate is located on the
appliance, behind the oven door on the left bottom
edge of the oven.
In the event of a customer service request, please
have the following information handy:
E-Number FD
Replacing the oven light Caution: Unplug the appliance or remove the
fuse by actuating the miniature circuit-breaker or
by unscrewing the fuses in the fuse box in your
house.
1. To prevent damage, place a dish towel into the
cold oven.
2. Unscrew the lamp cover counter-clockwise.
3. Replace the lamp.
–Type: incandescent bulb E 14, 220-240 Volt,
40 Watt, heat-resistant to 300 °C.
–You may obtain this bulb from your customer
services or from your appliance dealer.
Replacing the oven door
seal Remove the defective oven door seal by simply
unhooking it.
You can obtain the new oven door seal from
customer services.
Page 44

44
Trouble-shooting guide
Calling the customer service is not always really necessary. In some cases, you can remedy the
situation yourself. The following table may contain some helpful tips.
Important general safety guidelines:
Service or repair work on the electronic components may only be performed by a qualified
expert. Without exception, prior to starting such repairs, the appliance must be disconnected
from the mains. This may be accompanied by tripping the automatic fuse or by removing the
fuse or by removing the fuse from the fuse box that controls your flat or apartment.
Problem Possible cause Remedy
…if there is a general failure of Defective fuse. Check the fuse in the fuse box and
all electrical functions, i.e., the replace if required.
control lamps have suddenly
ceased to function.
…if a liquids or a mixture with The appliance has not Level the appliance using the levelling
a thin consistency are distributed been placed or installed feet or check the installation.
at a visibly uneven thickness? plumb and level.
…if the oven suddenly The electronic clock is Set electronic clock to operation
stops function? set to an automatic without automatic timer:
cycle. 1. Press the : button.
2. Reset ON time
? to 0:00.
…if the oven suddenly stops The power supply was Reset the time of day.
function and the electronic briefly interrupted.
clock flashes 0:00?
…if is displayed? The power supply was Re-activate the electronic clock and
briefly interrupted the oven control
Page 45

45
Problem Possible cause Remedy
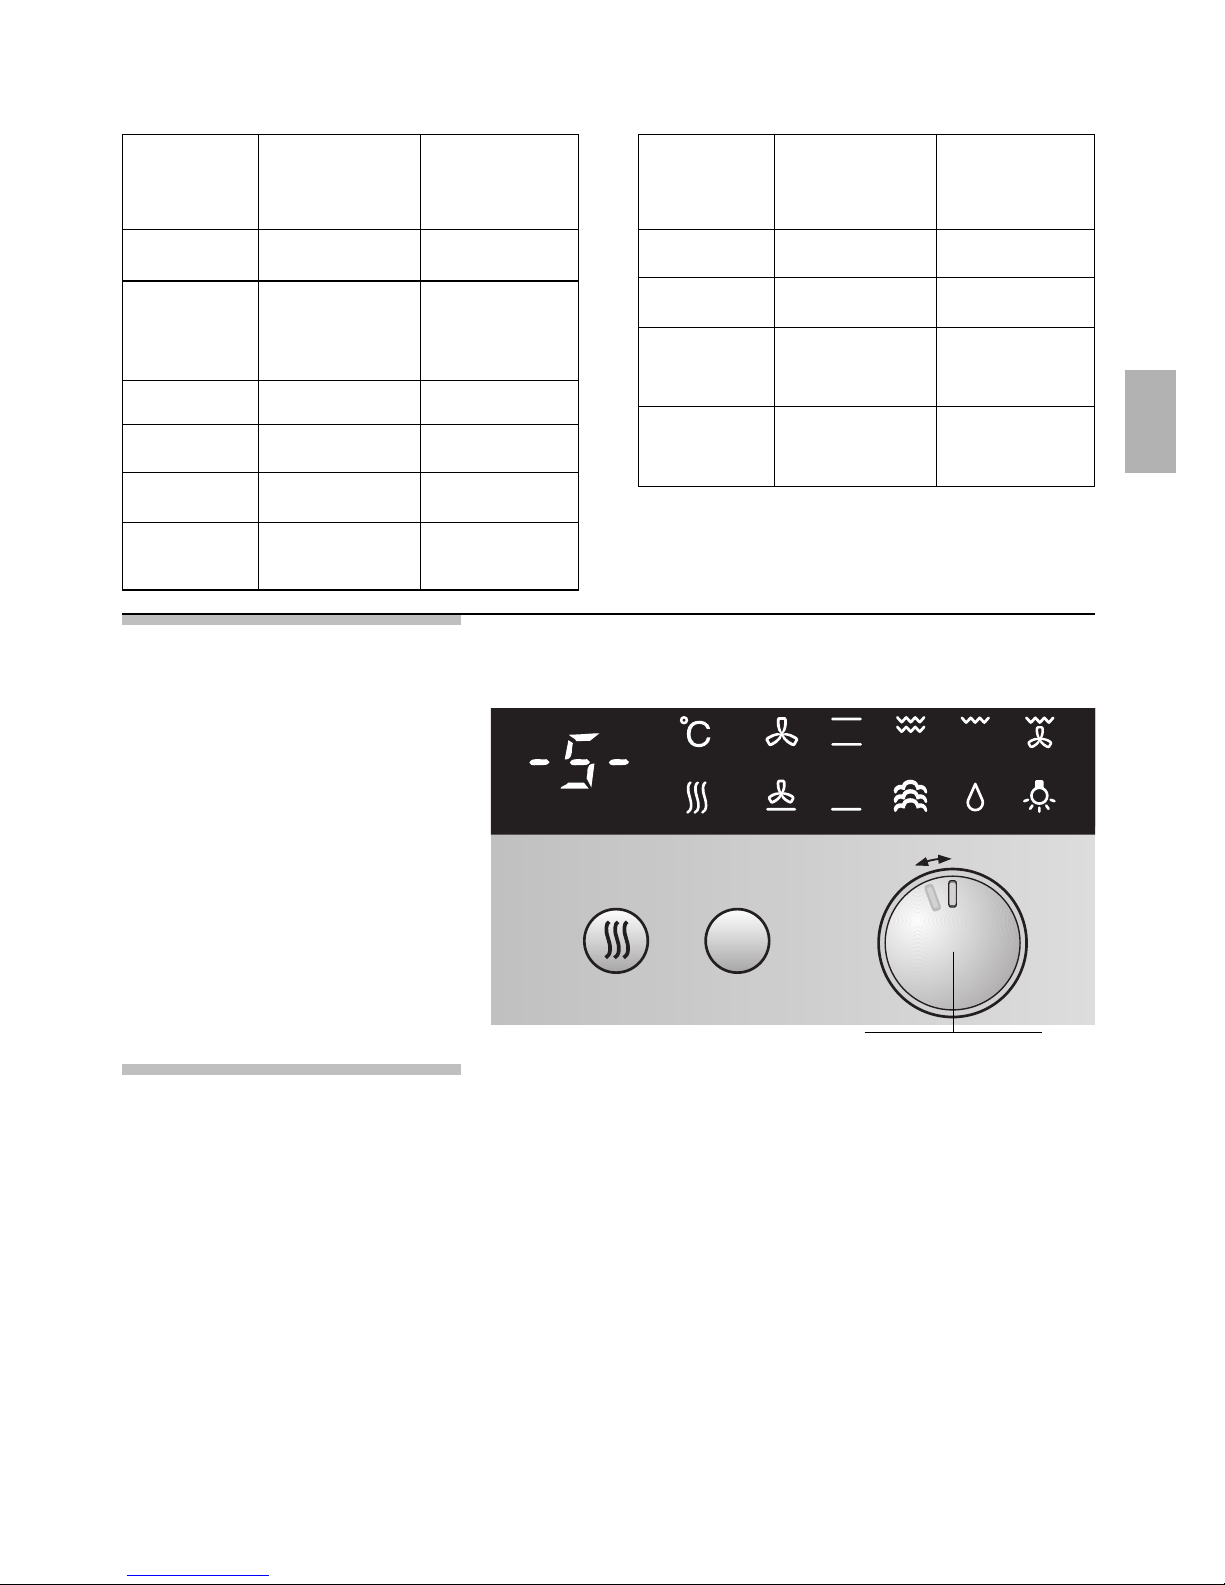
…if – 5 – is displayed? The oven is locked Turn the function selector anticlockwise
(child safety). from 0 to $oven lighting and back
again three times.
– 5 – disappears.
…if
1
is displayed? The oven is locked Turn the function selector anticlockwise
(child safety). from 0 to $oven lighting and back
again six times.
1
disappears.
… if symbols on the control The power supply was Turn the function selector from (to
panel light up, but the oven briefly interrupted.
)
and back again five times.
does not heat up? ❑ 333 should appear in the display.
…if electronic control functions Energy pulses Reset the relevant functions.
fail? (e.g. lightning flash).
… if the indicator light for the The temperature inside Prior to using the oven cleaning
oven functions does not light up the oven is still too high. function, the oven must be allowed to
red when the cleaning system cool completely.
is switched ON?
Defective control lamp. Replacement only by an authorised
expert.
Page 46

46
Problem Possible cause Remedy
…if smoke is generated during Roasting temperature
roasting or grilling? is too high.
Grille or universal pan is Put grille into universal pan and insert
slid-in incorrectly. together at one slide-in level.
…if enamelled slide-in parts Normal occurrence due Not available
have matt, bright stains? to dripping meat juices.
…if the glass pane or window Normal occurrence due Switch on the oven for approx.
of the oven door become to existing temperature 5 minutes at 100 °C.
clouded? difference.
…if the oven shows increasing Normal occurrence, Briefly open the oven door occasionally
condensation water? e.g. in the case of cakes during baking or roasting, wipe up the
with very moist topping condensation water after operation.
(fruit) or roasts.
…the interior the panes of the Normal soiling For better cleaning, you can remove
oven door are dirty on the inside the pane of glass on the oven door.
after prolonged use?
1. Remove the oven door and with the
handle pointing downwards, lay on a
cloth.
2. Unscrew the cover on the oven
door. In addition, loosen the screws
on the left and right. (Fig. A).
3. Remove pane. (Fig B).
Clean the pane (both sides) with glass
cleaner and a soft cloth.
4. Insert the pane again. Make sure
that the smooth surface faces
outwards.
5. Put on the cover and screw it on.
6. Re-install oven door.
You can only then use the oven
again when the pane (both sides) is
correctly installed.
Page 47

47
Índice
Puntos a tener en cuenta . . . . . . . . . . 48
Embalaje y aparatos usados
. . . . . . . 48
Antes del montaje . . . . . . . . . . . . . . . . . 49
Indicaciones de seguridad
. . . . . . . . . 49
Causas de los daños . . . . . . . . . . . . . . . 50
Su nuevo horno . . . . . . . . . . . . . . . . . . 51
El cuadro de mandos . . . . . . . . . . . . . . . 51
Funciones del horno . . . . . . . . . . . . . . . 51
Mandos escamoteables . . . . . . . . . . . . . 52
Alturas de colocación . . . . . . . . . . . . . . 52
El horno y sus accesorios . . . . . . . . . . 53
Antes del primer uso . . . . . . . . . . . . . . 54
Limpieza previa . . . . . . . . . . . . . . . . . . . 54
Calentamiento inicial en vacío . . . . . . . . 54
Limpieza ulterior . . . . . . . . . . . . . . . . . . . 54
Poner el reloj en hora . . . . . . . . . . . . . . . 54
Reloj electrónico . . . . . . . . . . . . . . . . . 55
El cuadro de mandos . . . . . . . . . . . . . . . 55
Las funciones especiales . . . . . . . . . . . . 55
Temporizador de corta duración . . . . . . 56
Temporizador automático . . . . . . . . . . . 56
Funciones del horno . . . . . . . . . . . . . . 58
Conexión y desconexión del horno . . 61
Dispositivos de seguridad . . . . . . . . . . 63
Bloquear el horno . . . . . . . . . . . . . . . . . 63
Bloqueo permanente . . . . . . . . . . . . . . . 64
Desconexión automática de seguridad . 64
Inhaltsverzeichnis
Hornear . . . . . . . . . . . . . . . . . . . . . . . . . 65
Tabla de horneado . . . . . . . . . . . . . . . . . 66
Hornear con el programa para pizzas . . 68
Sugerencias y consejos prácticos . . . . . 69
Asar . . . . . . . . . . . . . . . . . . . . . . . . . . . 70
Tabla de asado . . . . . . . . . . . . . . . . . . . 72
Asar con grill . . . . . . . . . . . . . . . . . . . . 73
Grill de infrarrojos con aire caliente . . . . . 74
Grill de superficie . . . . . . . . . . . . . . . . . . 75
Descongelar y cocer a fuego lento . . . 76
Horneado al vapor . . . . . . . . . . . . . . . . . 79
Conservación y limpieza del aparato . 80
Advertencias importantes . . . . . . . . . . . 80
Revestimiento catalítico del horno . . . . . 82
Sistema de limpieza HydroClean® . . . . . 83
Enganchar y desenganchar
la puerta del horno . . . . . . . . . . . . . . . . . 85
Abatir la resistencia de calefacción . . . . 85
Soportes laterales para colocar
las bandejas . . . . . . . . . . . . . . . . . . . . . . 86
Averías y reparaciones . . . . . . . . . . . . 87
¿Qué hacer en caso de una avería? . 88
Page 48

48
Qué hay que tener en cuenta
Antes de emplear el aparato nuevo deberá leer
detenidamente las instrucciones de servicio del
mismo. En ellas se facilitan informaciones y
consejos importantes para su seguridad personal,
así como para el correcto manejo y cuidado de la
cocina.
Las presentes instrucciones de servicio son válidas
para diferentes modelos de aparato; por ello puede
ser posible que se describan detalles y
características de equipamiento que no concuerden
íntegramente con las de su aparato concreto.
Guarde las instrucciones de servicio y de montaje
para un posible propietario posterior.
Embalaje y aparatos Un embalaje protector protege a su nuevo aparato
usados
durante el transporte hasta su hogar. Todos los
materiales de embalaje utilizados son respectuosos
con el medio ambiente y pueden ser reciclados o
reutilizados. Hay que intentar contribuir activamente
a la protección del medio ambiente insistendo en
unos materiales de embalaje respetuosos con el
medio ambiente.
Los aparatos usados incorporan materiales valiosos
que se pueden recuperar al final de su uso,
entregando el aparato a dicho efecto en un centro
oficial de recogida o recuperación de materiales
reciclables.
Antes de deshacerse de su aparato usado y
sustituirlo por una unidad nueva, hay que inutilizarlo
e identificarlo con un adhesivo: ”¡Atención!”
Este aparato cumple con la Directiva europea
2002/96/CE sobre aparatos eléctricos y electrónicos
identificada como (Residuos de aparatos eléctricos y
electrónicos).
La directiva proporciona el marco general válido en
todo el ámbito de la Unión Europea para la retirada y
la reutilización de los residuos de los aparatos
eléctricos y electrónicos.
Su distribuidor o administración local le informará
gustosamente sobre la vías y posibilidades más
eficaces y actuales para la eliminación respetuosa
con el medio ambiente de estos materiales.
Page 49

49
Antes del montaje
Daños por el transporte Comprobar el aparato tras sacarlo del embalaje.
En caso de daños por transporte no conectar el
aparato.
Conexión eléctrica Sólo un técnico especialista autorizado puede
conectar la cocina. En caso de daños por una
conexión errónea no se disfrutará del derecho de
garantía.
Indicaciones de Este aparato es de uso exclusivamente doméstico.
seguridad
Utilizar la cocina únicamente para preparar
alimentos.
Horno caliente Abrir con cuidado la puerta del horno. Puede salir
vapor caliente.
No tocar nunca las superficies interiores del horno ni
los elementos calefactores. ¡Peligro de quemaduras!
Es fundamental que los niños no se acerquen al
aparato.
No guardar nunca objetos inflamables dentro del
horno. ¡Peligro de incendio!
No colocar objetos inflamables sobre la placa de
cocción.
Los cables de conexión de los aparatos eléctricos
no deben entrar en contacto en ningún momento
con las zonas de cocción que estuvieran calientes o
incandescentes.
No aprisionar nunca los cables de conexión de los
aparatos eléctricos en la puerta caliente del horno.
El aislamiento del cable puede derretirse.
¡Peligro de cortocircuito!
Retire los restos del embalaje, por ejemplo trozos de
estiropor, completamente del interior del horno.
Reparaciones Las reparaciones inadecuadas son peligrosas.
¡Peligro de descarga eléctrica!
Sólo un técnico instruido por nosotros está
autorizado para realizar las reparaciones.
Si el aparato se ha averiado, desconectar el fusible
de la cocina en la caja de fusibles.
Llamar al Servicio de Asistencia Técnica.
Page 50

50
Causas de los daños
Bandeja de horno, papel No introduzca ninguna bandeja de horno en la
de aluminio o recipientes solera, no la cubra con papel de aluminio, ni coloque
en la solera ningún recipiente sobre ella, ya que se origina una
acumulación térmica, los tiempos de cocción dejan
de ser correctos y se daña el esmalte.
Piezas replegables Replegar las piezas con sumo cuidado a fin de evitar
daños.
Papel especial para hornear No colocar papel especial para hornear suelto sobre
las bandejas en caso de seleccionar la función «Aire
caliente forzado» * (por ejemplo al calentar el
horno). El ventilador podría aspirar el papel,
ocasionando así daños en la resistencia de
calentamiento y el ventilador.
Agua en el horno No verter nunca agua en el horno caliente. Se puede
dañar el esmalte.
Zumo de fruta No llenar demasiado la bandeja para preparar un
pastel de frutas jugoso. El zumo de fruta que gotea
de la bandeja produce manchas que no se pueden
eliminar.
Es mejor utilizar la bandeja universal honda.
Enfriamiento con la puerta Dejar enfriar el horno sólo cuando esté cerrado. No
del horno abierta aprisionar nada en la puerta del horno. Incluso si
sólo se abre un poquito la puerta del horno, podrían
dañarse con el tiempo los frontales de los muebles
adyacentes.
Junta del horno muy sucia Si la junta del horno está muy sucia, la puerta no
cerrará bien cuando el horno esté en funcionamiento.
Los frontales de los muebles limítrofes pueden
dañarse. Mantener limpia la junta del horno.
La puerta del horno como No subirse ni sentarse en la puerta del horno abierta.
superficie de apoyo
Cuidados y limpieza No utilizar limpiadores de alta presión ni máquinas
de limpieza a vapor.
Page 51

51
Su nuevo En este capítulo podrá familiarizarse con su nuevo
aparato. En él le explicaremos el cuadro de mandos
y sus elementos e indicaciones.
Además le informaremos sobre las diferentes
modalidades de calentamiento disponibles y los
accesorios suministrados con el aparato.
El cuadro de mandos
Funciones del horno
*
Aire caliente forzado
/
Calor superior e inferior
(
Grill variable de amplia
superficie
)
Grill de superficie reducida
,
Grill de infrarrojos con aire
caliente
&
Programa para pizza
.
Calor inferior
%
Horneado al vapor
d l
HydroClean
®
$
Iluminación interior del horno
;
Temperatura del horno
$
Calentamiento rápido
Advertencias:
La iluminación interior del horno se conecta cada vez
que se activa una función del horno.
Única excepción: La función de limpieza.
El piloto de aviso de la temperatura del horno ; se
ilumina de color rojo durante la fase de calentamiento, así como con cada ciclo de calentamiento del
mismo.
El piloto se paga tan pronto como se ha alcanzado
la temperatura ajustada.
La función «Calentamiento rápido»
s sólo se
puede seleccionar estando activada la función «Aire
caliente forzado».
La función «Horneado al vapor» % sólo puede
usarse en combinación con un sistema de horneado
al vapor (de venta en el comercio especializado).
Calentamiento rápido
para la función «Aire
caliente forzado»
*
Selector de temperatura con piloto de aviso
Reloj electrónico Funciones del horno
Mando selector de funciones
con ajuste de la temperatura
propuesta
Page 52

52
Mandos Para enclavarlos o desenclavarlos sólo hay que
escamoteables oprimirlos.
Alturas de El horno posee cuatro alturas distintas para colocar
colocación
colocar accesorios.
Las alturas o niveles de colocación se cuentan
de abajo hacia arriba y están debidamente
marcadas en el horno.
Al trabajar con la función «Aire caliente forzado»
*
no deberá usarse la altura de colocación «2»
a fin de no restar eficacia a la circulación del aire en
el interior del horno.
Page 53

53
Accesorios Su horno está equipado con los siguientes
accesorios:
Bandeja universal,
con parrilla
Bandeja de horneado,
de aluminio
Otros accesorios de venta en el comercio especializado: Nº de pedido
Advertencias:
La protección de la puerta del horno evita cualquier contacto fortuito con la puerta
estando ésta caliente.
Este detalle es muy importante en caso de haber niños en el hogar.
La bandeja de horneado o la bandeja universal pueden deformarse durante el
funcionamiento del horno. Esto se debe a la existencia de grandes diferencias de
temperatura, que pueden hacerse notar particularmente al cubrir sólo una parte del
accesorio o al colocar alimentos congelados, por ejemplo una pizza, sobre la
bandeja.
La deformación suele desaparecer durante el proceso de horneado, asado o la preparación al grill de alimentos.
Sistema de horneado a vapor
Bandeja de horneado, de aluminio
Bandeja de horneado esmaltada
Parrilla para horneado/asado, acodado
Parrilla para horneado/asado, tupido
Bandeja universal con parrilla CZ 1242 X0
CZ 1282 X0
CZ 1332 X0
CZ 1342 X0
CZ 1432 X0
CZ 1442 X0
Kit de equipamiento ulterior Carril telescópico CZ 1702 X0
Kit de equipamiento ulterior Carriles telescópicos para tres
alturas
CZ 1742 X0
Kit de equipamiento ulterior Guías extraíbles para cuatro
alturas
CZ 1752 X0
Protección para la puerta del horno 440651
Page 54

Antes del primer uso
Limpieza previa Retirar los accesorios del horno.
Retirar los restos de embalaje que pudiera haber en
el interior del horno, como por ejemplo los trozos de
estiropor.
1. Limpiar el exterior del aparato con un paño suave
y húmedo.
2. Retirar del horno los soportes laterales para las
bandejas.
3. Limpiar el interior del horno y los accesorios con
una solución de agua caliente y agente
lavavajillas.
Ténganse presentes las instrucciones de uso que
acompañan la placa de cocción.
Calentamiento Antes de usar el horno por vez primera hay que
inicial en vacío
poner en hora el reloj electrónico.
Calentar el horno en vacío durante aprox.
30 minutos.
Seleccionar para ello la opción «Calor superior e
inferior» a 240°C.
Limpieza ulterior Limpiar el horno con una solución de agua caliente y
agente lavavajillas. Montar los soportes laterales para
las bandejas en el horno.
Poner el reloj en hora Tras conectar el aparato a la red eléctrica o
producirse un corte en el suministro de energía
eléctrica, destella en la pantalla de visualización la
indicación 0:00.
Poner en hora Pulsar la tecla
>
y ajustar la hora actual con el
mando giratorio (En nuestro ejemplo: 15:00 horas).
Para corregir la hora actual, pulsar la tecla > hasta
que el símbolo
#
destelle.
Ajustar a continuación la hora actual.
Advertencia: La hora actual no se puede corregir en
caso de estar activada una de las funciones
automáticas del horno o el reloj programador de
corta duración. (Para borrar la hora ajustada, véase
el capítulo dedicado al reloj electrónico).
54
Page 55

55
Reloj El reloj electrónico se puede ajustar y
electrónico
manejar con una sola mano. Para ello sólo hay que
pulsar la tecla de selección de funciones y ajustar a
continuación la hora con el mando giratorio.
Las operaciones de ajuste se pueden realizar
mientras la pantalla de visualización destelle
(~ 4 segundos).
Cuadro de mandos
Temporizador de corta
duración
Temperatura actual
del horno
Duración del ciclo de horneado Fin del ciclo de horneado
Mando giratorio
Se puede enclavar y
desenclavar presionándolo
ligeramente.
Hora actual
Tecla de selección de
funciones
Funciones especiales
Oscurecer la pantalla de
1.
Pulsar la tecla > durante 7 segundos.
visualización Una vez transcurrido este tiempo, la pantalla de
visualización se oscurece; la hora actual y la
pantalla misma, sin embargo permanecen
activadas en un segundo plano.
2. Para activar la pantalla de visualización, pulsar
brevemente la tecla >.
Calentamiento rápido La función de calentamiento rápido se puede activar
a través de la tecla s(véase el apartado «Conectar
y desconectar el horno»).
Ajustar la hora actual Véase el apartado «Antes del primer uso».
Oscurecimiento nocturno Entre las 22.00 y las 6.00 horas la pantalla de
de la pantalla visualización se oscurece automáticamente.
Page 56

56
Temporizador El horno se puede conectar y desconectar a través
automático
del reloj electrónico.
Desconectar el horno El ciclo de horneado o asado comienza
automáticamente instantáneamente.
1. Selecccionar la modalidad de calentamiento y la
temperatura deseadas.
2. Pulsar la tecla > hasta que el símbolo ?
comience a destellar. Ajustar la duración del ciclo
de funcionamiento del horno con el mando
giratorio.
(En nuestro ejemplo: 1 hora y 30 minutos).
Tras concluir las operaciones de ajuste del
temporizador se muestra en pantalla durante
4 segundos hora actual.
El símbolo ? indica la activación del
funcionamiento automático del horno. .
3. Una vez transcurrido el período programado
(En nuestro ejemplo: 1 hora y 30 minutos), suena
una señal acústica y el símbolo ! destella.
El horno se desconecta automática.
Para desactivar la alarma acústica, pulsar la
tecla >.
4. Desconectar el horno.
5. Para poner fin al funcionamiento automático del
horno, pulsar nuevamente la tecla >.
Temporizador de 1. Pulsar la tecla > y ajustar el tiempo deseado.
corta duración
(En nuestro ejemplo: 5 minutos).
Tras conectar el aparato se muestra el tiempo por
transcurrir.
2. Una vez transcurrido el tiempo programado, se
produce una señal acústica y la indicación
,
^ destella. Para desactivar la señal acústica, pulsar
la tecla >.
Page 57

57
Conexión y desconexión En esta modalidad de funcionamiento, los ciclos de
automáticas horneado o asado comienzan a la hora de conexión
diferida que Vd. ha programado, durando el tiempo
programado.
1. Seleccionar la modalidad de calentamiento y la
temperatura deseadas.
2. Pulsar la tecla > hasta que el símbolo ?
comience a destellar. Ajustar la duración del ciclo
de funcionamiento del horno con el mando
giratorio.
(En nuestro ejemplo: 1 hora y 30 minutos).
3. Pulsar la tecla > hasta que el símbolo !
comience a destellar. Ajustar la hora de
desconexión del horno.
(En nuestro ejemplo: 12:30 horas).
Tras concluir las operaciones de ajuste del
temporizador se muestra en pantalla durante
4 segundos hora actual.
El símbolo ! indica la activación del
funcionamiento automático del horno.
4. El horno se conecta y desconecta
automáticamente a la hora programada.
(En nuestro ejemplo: Las 11:00 y 12:30 horas
respectivamente).
5. Una vez transcurrido el período programado,
suena una señal acústica y el símbolo ! destella.
Para desactivar la alarma acústica, pulsar la
tecla >.
6. Desconectar el horno.
7. Para poner fin al funcionamiento automático del
horno, pulsar nuevamente la tecla >.
Controlar, corregir y borrar 1. Para controlar los valores ajustados, pulsar la
valores ajustados tecla > hasta que el símbolo comience a
destellar.
2. En caso necesario, los valores ajustados se
pueden modificar mediante el mando giratorio.
3. Para borrar los valores ajustados, poner el tiempo
ajustado a cero 0:00 y desconectar el horno.
Advertencias La función de conexión y desconexión automática
del horno es particularmente adecuada para
aquellos platos que requieren poca atención durante
su preparación.
El temporizador de corta duración y la hora de
desconexión del horno se pueden se pueden
programar con una antelación máxima de 24 horas.
Page 58

Las funciones del horno
Aire caliente forzado Un ventilador situado en la pared del horno
distribuye uniformemente por el interior del horno el
aire caliente, con lo que se logra una perfecta
transmisión del calor hacia los alimentos que se
desean preparar.
Las principales ventajas de esta función:
– Posibilidad de hornear o asar simultáneamente
en hasta tres alturas diferentes
– El horno queda menos sucio que en caso de
trabajar con las funciones de calentamiento
– Se requieren cortos tiempos de calentamiento
– Las temperaturas requeridas son algo más bajas
que en caso de trabajar con los sistemas de
calentamiento convencionales
– Posibilidad de esterilizar alimentos
Calor superior e inferior Con esta función, el calor llega de modo uniforme
(sistema convencional) por arriba y por abajo a su tarta o asado de carne,
pan, bizcocho o tarta de frutas, que le saldrán
perfectamente.
En esta función sólo se puede hornear o asar en una
altura.
Ventaja:
– Función idónea para preparar pasteles con
guarnición húmeda, pizzas y quiches
Grill de superficie Con esta función, el calor generado por la resistencia
del grill situada en la parte superior del horno, es
transmitido a los alimentos.
– Esta función es particularmente adecuada para
asar al grill piezas de carne de escasa altura,
como por ejemplo bistecs, salchichas, pescado,
verdura y emparedados tostados.
Grill variable de amplia Ventajas:
superficie
– Se calienta toda la superficie de la resistencia del
grill
– Opción apropiada para preparar alimentos en
grandes cantidades
Grill variable de superficie Ventajas:
reducida
– Sólo se caliente la parte central de la resistencia
del grill
– Opción apropiada para preparar alimentos en
pequeñas cantidades.
– Se ahorra energía
*
/
(
)
58
Page 59

59
Grill de infrarrojos La resistencia del grill y el ventilador se conectan y
con aire caliente desconectan alternativamente. Durante los intervalos
de reposo de la resistencia, el ventilador hace
circular en torno a los alimentos el aire caliente
cedido por el grill.
De este modo los asados de carne adquieren un
sabroso color dorado en toda su superficie
Ventajas:
– Función ideal para asar grandes trozos de carne
y aves.
Calor inferior Con esta opción sólo se conecta la resistencia de
calefacción inferior del horno, llegando el calor por
abajo al alimento que debe prepararse.
Ventajas:
– La función es particularmente adecuada para
aquellos productos cuya base deba tener un
mayor grado de dorado o una corteza dorada y
crujiente.
Conectar esta función sólo al término del tiempo
de horneado o asado reglamentario.
Programa para pizzas En esta función se activa, además del aire caliente
forzado, el calor inferior.
Las ventajas:
– Las pizzas o los pasteles salen húmedos pero
crujientes por abajo.
– Opción particularmente apropiada para
productos ultracongelados como por ejemplo
pizzas, patatas fritas, etc.
Horneado al vapor Función para usar sólo con el sistema de horneado
a vapor (de venta en el comercio especializado).
,
.
&
%
Page 60

60
Sistema de limpieza
Con objeto de facilitar los trabajos de limpieza
HydroClean
®
interior del horno, el aparato está equipado con un
sistema de limpieza auxiliar. Mediante la evaporación
automática de una solución detergente y la acción
del calor, los restos de alimentos adheridos a las
superficies esmaltadas del horno se ablandan,
pudiéndose eliminar a continuación con gran
facilidad.
Más detalles sobre esta función se facilitan en el
apartado «Conservación del horno».
Ventajas:
– Mayor facilidad a la hora de limpiar el horno
–Protección de las superficies esmaltadas del
horno
– Respetuoso con el medio ambiente
Calentamiento rápido Advertencia
Sólo se puede activar en combinación con el aire
caliente forzado
d
s
Page 61

61
Conexión y desconexión del horno
Ejemplo: Aire caliente forzado
Antes de conectar su horno deberá decidir la
modalidad de calentamiento que desea usar.
Conexión del horno Girar el mando selector de funciones hasta que el
símbolo correspondiente a la modalidad de
calentamiento deseada se ilumine.
En la pantalla de visualización aparece la
temperatura propuesta por el sistema y la
iluminación interior del horno se activa.
La temperatura propuesta puede aumentarse o
reducirse en pasos de 5°C mediante el mando
selector de la temperatura (véanse al respecto las
temperaturas de referencia que se facilitan en las
tablas de horneado o asado).
Horneado a vapor
% Esta temperatura está fijamente ajustada y no puede
para el sistema de horneado modificarse.
a vapor (puede adquirirse En la pantalla de visualización aparece el
como accesorio opcional en el símbolo
2
.
comercio especializado).
Sistema de limpieza Esta temperatura está fijamente ajustada y no puede
HydroClean
®
d
modificarse. En la pantalla de visualización aparece
la indicación l.
Descongelación Para ajustar la función de descongelación, véase el
capítulo «Descongelar y preparar al horno».
Piloto de aviso
; El piloto de aviso de la temperatura del horno se
ilumina de color rojo durante la fase calentamiento
del horno, así como cada vez que se inicia un nuevo
ciclo de calentamiento. Al alcanzarse la temperatura
seleccionada, el piloto se apaga.
Indicación de temperatura
Calentamiento rápido para
el aire caliente forzado
Mando selector de la temperatura Mando selector de funciones
Page 62

62
Sólo durante la fase calentamiento del horno se
puede mostrar en pantalla la temperatura real
durante 5 segundos pulsando la tecla : una vez.
En las restantes funciones (excepto
%, d, $
,
descongelación) valor real de puede demandar.
Desconexión para desconectar el horno, girar el mando selector
de funciones a la posición de desconexión
{
.
Todas las funciones son borradas.
Advertencia El aparato está equipado con ventilador de
refrigeración, que continúa funcionando durante un
cierto tiempo después de haber desconectado el
horno, mientras éste aún esté caliente.
Indicación de calor
ä hasta Z 120° C.
para el horno â 120° hasta Z 80° C.
Temperatura actual del
horno
Calentamiento rápido
Conexión Tras conectar el horno y haber seleccionado la
opción «Aire caliente forzado»
* se puede activar
la opción «Calentamiento rápido» spulsando la
tecla.
El símbolo s permanece iluminado durante la
ejecución del ciclo de calentamiento, apagándose
tan pronto como se ha alcanzado la temperatura
ajustada.
Borrado prematuro del Pulsar la tecla s: El símbolo se apaga y la función
calentamiento rápido de calentamiento rápido es borrada.
Mando selector de
la temperatura
Mando selector de
funciones
Calentamiento
rápido para el aire
caliente forzado
Page 63

63
Sistema Temperatura Banda de
de preferencia, temperatura
en ° C en ° C
* 160 40 – 200
Desconge-
–– –– ––
sin
lación ajuste de
*
temperatura
/ 170 50 – 275
( 220 50 – 275
) 180 50 – 275
, 170 50 – 250
Sistema Temperatura Banda de
de preferencia, temperatura
en ° C en ° C
& 220 50 – 275
. 200 50 – 225
%
2
ajuste
fijo
d
l
ajuste
fijo
Dispositivos
de seguridad
Bloquear el horno Girar rápidamente el mando selector de funciones
3 veces consecutivas de la posición de desconexión
«0» a la izquierda, hasta el símbolo
$
y viceversa,
a la posición de desconexión.
En la pantalla de visualización aparece la
indicación – Å–.
El horno ya no se puede conectar fortuitamente
(por ejemplo por niños jugando).
Para desbloquear el horno, girar rápidamente el
mando selector de funciones 3 veces consecutivas
de la posición de desconexión «0» a la izquierda
hasta el símbolo
$
y viceversa.
En la pantalla de visualización se apaga la
indicación –
Å
–.
Bandas de temperatura de los sistemas de calentamiento
Mando selector de funciones
Page 64

64
Bloqueo
permanente
Girar rápidamente el mando selector de funciones
6 veces consecutivas de la posición de desconexión
«0» a la izquierda, hasta el símbolo
$
y viceversa, a
la posición de desconexión.
En la pantalla de visualización aparece la
indicación
1
.
El horno ya no se puede conectar fortuitamente
(por ejemplo por niños jugando).
Para conectar el horno hay que desbloquearlo,
girando rápidamente el mando selector de funciones
3 veces consecutivas de la posición de desconexión
«0» a la izquierda hasta el símbolo
$
y viceversa, a
la posición de desconexión.
Una vez que ha concluido el uso del horno y el
mando selector de funciones se ha encontrado
durante 30 segundos en la posición de desconexión
«0», el bloqueo permanente del horno se activa
automáticamente.
Para borrar el bloqueo permanente, girar rápidamente el mando selector de funciones 6 veces
consecutivas de la posición de desconexión «0» a la
izquierda, hasta el símbolo
$
y vicebersa, a la
posición de desconexión.
En la pantalla de visualización desaparece la
indicación
1
.
Desconexión
automática
Según el valor programado, el horno se desconecta
de seguridad
automáticamente al cabo de 6 a 30 horas
destellando la indicación
000
en la pantalla.
La desconexión sólo se produce si no han
modificado los ajustes del aparato.
Mando selector de funciones
Page 65

65
Hornear
Hornear con moldes Coloque el molde siempre en el centro de la
parrilla.
Se aconseja usar moldes oscuros de metal.
Advertencias Los moldes de horneado de color claro de paredes
delgadas o de vidrio prolongan los tiempos de
cocción, además el pastel se dora irregularmente.
En el grado de dorado se puede influir modificando
la temperatura.
Si la tarta queda aplastada al retirarla del horno,
deberá seleccionarse la próxima vez un tiempo de
horneado más prolongado o reducir ligeramente la
temperatura de horneado.
Hornear en bandejas Introduzca siempre la bandeja pastelera
completamente en el horno, de modo que el borde
oblicuo muestre hacia la pared posterior del horno.
Replegar las piezas con sumo cuidado a fin de evitar
daños.
Utilice sólo bandejas originales del fabricante.
Hornear en moldes de
* Aire caliente forzado
hojalata Altura de colocación 1
/ Calor superior e inferior
Altura de colocación 1
Si el pastel sale demasiado moreno por abajo:
Verifique la altura de colocación. Reduzca el tiempo
de horneado y seleccione una temperatura de
horneado más baja.
Si el pastel sale demasiado claro por abajo:
Verifique la altura de colocación. Prolongue el tiempo
de horneado, seleccione una temperatura de
horneado más baja o utilice un molde de chapa
negra.
No colocar los moldes o los pasteles altos
directamente delante de la pared posterior del
horno.
Page 66

66
Aire caliente forzado * Calor superior e inferior/
Tipo de pastel Altura de Temperatura, Duración, Altura de Temperatura,
colocación en ° C en minutos colocación en ° C
Masa batida
Pastel de escasa altura con guarnición
1 bandeja 1 160 – 170 30 – 050 1 170 – 180
2 bandejas 1 + 3 160 – 170 35 – 055 – –
Pastel en molde redondo /
molde rectangular 1 160– 170 60 – 080 2 170 – 180
Base para tartas de frutas 1 160 – 170 20 – 035 2 170 – 180
Masa quebrada
Pastel de escasa altura con guarnición seca,
por ej. bolitas de azúcar, mantequilla y harina
1 bandeja 1 160 – 170 60 – 070 1 200 – 210
2 bandejas 1 + 3 160 – 170 70 – 080 – –
Pastel de escasa alturacon guarnición húmeda,
por ej. crema
1 bandeja 1 160 – 170 70 – 090 – –
Pasteles en moldes
por ej. tarta de requesón 1 160 – 170 60 – 100 2 170 – 180
Base para tartas de frutas
(precalentar) 1 160 – 170 20 – 035 1 190 – 200
Masa de bizcocho
Brazo de gitano (precalentar) 1 180 – 190 10 – 015 1 200 – 220
Base para tartas de frutas 1 160 – 170 20 – 030 2 170 – 180
Tarta de bizcocho (6 huevos) 1 160 – 170 30 – 045 2 160 – 170
Tarta de bizcocho (3 huevos) 1 170 – 180 20 – 035 2 170 – 180
Tabla de horneado
Los valores reseñados en la tabla de horneado sólo son valores de referencia, válidos
para bandejas de aluminio y moldes oscuros.
Los valores pueden variar en función de los alimentos empleados y los moldes utilizados. Prestar atención a las indicaciones que se facilitan en la tabla con relación al
precalentamiento del horno.
Consejo práctico: Al preparar el pastel por vez primera, se aconseja utilizar el valor
más bajo. Recuerde: Una temperatura más baja hace que el pastel tome un color
dorado más uniforme.
En caso de preparar pasteles según propias recetas, deberá orientarse por los productos similares que figuren en la tabla.
Page 67

67
Aire caliente forzado * Calor superior e inferior/
Tipo de pastel Altura de Temperatura, Duración, Altura de Temperatura,
colocación en ° C en minutos colocación en ° C
Masa de levadura
Pastel de escasa altura con guarnición seca,
por ej. bolitas de azúcar, mantequilla y harina
1 bandeja 1 170 – 180 040 – 070 1 190 – 200
2 bandejas 1 + 3 170 – 180 050 – 070 – –
Pastel de escasa altura con guarnición húmeda,
por ej. crema
1 bandeja 1 160 – 170 065 – 085 1 190 – 200
Trenza
(500 g de harina) 1 160– 170 035 – 045 1 180 – 200
Pastel, molde bajo 1 160– 170 030 – 045 2 170 – 180
Pastel, molde alto 1 160 – 170 035 – 045 1 170 – 180
Pastas/galletas
Merengue 1 80 100 – 180 1 80
Hojaldres (precalentar)
1 bandeja 1 190 – 200 020 – 035 1 200 – 220
2 bandejas 1 + 3 190 – 200 025 – 035 – –
Pasta de lionesas
1 bandeja 1 190 – 200 020 – 035 1 200 – 220
2 bandejas 1 + 3 190 – 200 030 – 040 – –
Masa batida (bollos)
1 bandeja 1 160 – 170 020 – 030 2 170 – 180
2 bandejas 1 + 3 160 – 170 025 – 035 – –
Masa quebrada (
precalentar
)
por ej. galletas de mantequilla
1 bandeja 1 150 – 160 010 – 025 1 160 – 180
2 bandejas 1 + 3 150 – 160 015 – 025 – –
3 bandejas 1 + 3 + 4 150 – 160 015 – 025 – –
Pasteles picantes
Pizza (precalentar)
1 bandeja – – 030 – 040 1 180 – 190
2 bandejas 1 + 3 170 – 180 035 – 045 – –
Pan (precalentar) 1 200 – 220 10 – 15 2 220 – 240
Inicio rápido de horneado 1 220 010 – 015 1 240
Horneado lento 1 180 – 200 040 – 050 1 180 – 200
Page 68

68
Hornear con el programa para pizzas
&
Los valores reseñados en la tabla sólo son valores de referencia, válidos para bandejas esmaltadas.
Los valores pueden variar en función de los alimentos empleados y los moldes utilizados. Prestar atención a las indicaciones que se facilitan en la tabla con relación al precalentamiento del horno.
Consejo práctico: Al preparar el alimento por vez primera, se aconseja seleccionar el
valor más bajo de los consignados. Por cierto, una temperatura más baja hace que
los pasteles tomen un color dorado más uniforme.
En caso de preparar pasteles según propias recetas, deberá orientarse por los productos similares que figuren en la tabla.
Los valores que se facilitan en los cuadros han sido calculados exclusivamente
para la colocación de los alimentos en el horno frío.
Plato Recipiente Altura de Temperatura, Duración,
colocación en ° C en minutos
Pizza bandeja pastelera 1 180– 200 30 – 40
Pastel de de levadura bandeja pastelera 1 190– 210 20 – 30
Tarta tartera o molde
desarmable, de hojalata 1 180 – 200 30 – 45
Quiche tartera o molde
desarmable, de hojalata 1 190 – 200 40 – 50
Tarte de requesón molde desarmable 1 160– 170 60 – 80
Pastel de levadura suizo bandeja universal 1 210 – 230 30 – 50
Pastel de levadura hojaldre bandeja pastelera 1 190– 210 40 – 50
Platos preparados ultracongelados (ténganse en cuenta las indicaciones del fabricante)
Plato Recipiente Altura de Temperatura, Duración,
colocación en ° C en minutos
Pizza (precalentar) parrilla forrada con
base delgada papel para hornear 1 190 – 210 10 – 20
Pizza (precalentar) parrilla forrada con
base gruesa papel para hornear 1 180 – 200 15 – 25
Productos con patatas (precalentar)
(por ej. patatas fritas) bandeja universal 1 200 – 220 15 – 25
Pan y bollería (precalentar) parrilla forrada con
(por ejemplo panecillos) papel para hornear 1 200 – 220 05–15
Enrollado de hojaldre
(precalentar) bandeja pastelera 1 190 – 200 25 – 45
Page 69

69
Sugerencias y consejos prácticos
El pastel de escasa altura sale Retire del horno las bandejas pasteleras que no se
demasiado claro por abajo vayan a necesitar o la bandeja universal.
El pastel de molde sale No colocar el molde sobre la bandeja pastelera sino
demasiado claro por abajo sobre la parrilla.
Los pasteles y la repostería Coloque el pastel o la repostería en una altura superior.
salen demasiado morenos por
abajo
El pastel sale demasiado seco Seleccione la próxima vez una temperatura de horneado
más alta y reduzca el tiempo de horneado
El pastel está demasiado Seleccione una temperatura de horneado más baja.
húmedo por dentro Recuerde: Los tiempos de horneado no se pueden
modificar mediante unas temperaturas más elevadas
(exterior hecho, interior crudo). Seleccionar un tiempo
de horneado algo más prolongado. Poner menos líquido
en la masa.
Con la opción Aire caliente No coloque el molde directamente delante de las salidas
forzado, el pastel de molde de aire de la pared posterior del horno.
sale demasiado moreno por
detrás
Al preparar alimentos Abriendo cuidadosamente la puerta del horno
horneados húmedos, (1-2 veces; en caso de largos tiempos de horneado,
por ej. tarta de frutas, se más veces) se puede eliminar el vapor de agua del
produce vapor de agua que horno y reducir así la condensación del agua.
se condensa en la puerta
del horno.
Trabajando con «Aire caliente Verificar la altura de colocación
forzado», el pastel adquiere
un dorado muy irregular
El pastel se aplasta al Emplear menos líquido
sacarlo del horno
Consejos para ahorrar energía Utilizar la función de precalentado del horno sólo en el
caso de que la receta lo prescriba explícitamente.
Los moldes oscuros absorben mejor el calor.
Calor residual: En caso de largos períodos de
horneado, se puede desconectar el horno 5-10 minutos
antes de transcurrir el tiempo de horneado previsto,
aprovechando de este modo el calor residual para
terminar de preparar el pastel.
Page 70

70
Asar Colocar la parrilla en la bandeja universal.
Introducir la parrilla y la bandeja universal
conjuntamente en la misma altura de colocación.
Las piezas de carne con más de 750 gramos de
peso se pueden asar en el horno de modo
particularmente económico.
Asar en recipiente abierto Enjuague la bandeja universal o el recipiente
específico que vaya a usar para el asado con agua.
Coloque la pieza de carne en el mismo.
Agregue para piezas de carne grasas o aves, según
su tamaño y tipo concretos, entre
1
/8y 1/4de litro de
agua en la bandeja universal. En caso necesario,
agregar agua caliente. Al preparar piezas de carne
magra, untarlas a voluntad con grasa o cubrirlas con
lonchas de tocino.
Una salsa particularmente sabrosa se puede obtener
con el fondo de asado (el jugo del asado que se
forma y recoge en la bandeja universal: Agregar
agua caliente, cocerlo y espesarlo con fécula.
En caso necesario hacerlo pasar por un tamiz.
Introducir el asado en el horno frío (no es necesario –
ahorro de energía).
Asar en recipientes cerrados Colocar a pieza de carne en una cacerola adecuada,
cubrirla con la tapa. Introducirla en el horno,
colocándola sobre la parrilla.
Nuestro consejo práctico: Prepare el asado de buey
en una cacerola con tapa.
Page 71

71
Advertencias Piezas de carne de gran tamaño, ganso, pavo,
pato
= Tiempos de asado de larga duración, baja
= temperatura
Piezas de mediano tamaño y de poca altura
= Tiempos de asado de mediana duración, mediana
= temperatura
Piezas de pequeño tamaño, planas
= Cortos tiempos de asado, alta temperatura
Tiempo de asado por cm de altura de la pieza,
sin hueso aprox. 13-15 minutos
Tiempo de asado por cm de altura de la pieza,
con hueso aprox. 15-18 minutos
Consejo práctico Al preparar un plato o asado por
vez primera, se aconseja utilizar el valor más bajo.
Recuerde: Una temperatura más baja hace que el
pastel tome un color dorado más uniforme.
Al trabajar con la opción
/, se aconseja dar la
vuelta a la pieza de asado una vez que ha transcurrida aprox. la mitad o las dos terceras partes del
tiempo de asado previsto.
Utilice sólo recipientes de asado con asas
termorresistentes.
Preparar las piezas de asado de gran tamaño sin la
parrilla, directamente sobre la bandeja universal.
Las piezas de asado más pequeñas se pueden asar
en lámina o papel de aluminio. A tal efecto se hace
con el papel de aluminio una especie de molde con
bordes altos, que se coloca en la parrilla.
Una vez que el asado esté en su punto, dejarlo
reposar unos 10 minutos adicionales en el horno
desconectado, con la puerta cerrada.
La carne no está bien Reduzca un poco la temperatura de asado.
hecha por dentro Recuerde: Los tiempos de asado no se pueden
acortar aumentando la temperatura (la carne queda
hecha por fuera, pero cruda por dentro).
Prolongar el tiempo de asado.
Al preparar asados muy Abriendo cuidadosamente la puerta del horno
húmedos, por ejemplo con (1-2 veces; en caso de largos tiempos de asado,
agua, se produce vapor de más veces) se puede eliminar el vapor de agua
agua en el interior del horno, del horno y reducir así la condensación del agua.
que condensa en la puerta
del horno.
Page 72

72
Aire caliente forzado * Calor superior e inferior/
Tipo de carne Altura de Temperatura, Duración, Altura de Temperatura,
colocación en ° C en minutos colocación en ° C
Cerdo
Carne de cerdo, con corteza
(por ej. espaldilla, manos) 1 160 – 170 100 – 130 2 200 – 220
Asado / Redondo de cerdo 1 160 – 170 100 – 140 2 190 – 210
Costillas de cerdo, tipo
Kasseler (1 kg) 1 160– 170 70 – 80 2 190 – 210
Solomillo 1 180 – 190 30 – 45 3 210 – 230
Asado de carne picada 1 170 – 190 65 – 75 2 190 – 210
Buey
Solomillo 1 180 – 190 45 – 65 2 200 – 220
Roastbeef, poco hecho – – 40 – 60 2 230 – 240
Ter nera
Asado de ternera / Pecho 1 160 – 170 90 – 120 2 180 – 200
Manos 1 160 – 170 100 – 130 2 190 – 210
Cordero
Pierna de cordero 1 180 – 190 70 – 110 2 200 – 220
Lomo 1 160 – 170 90 – 120 2 200 – 220
Aves
Pollo, 1 kg 1 170 – 180 60 – 70 2 200 – 220
pato 1 160– 170 90 – 120 2 190 – 210
Ganso, 4 kg 1 150 – 160 130 – 180 2 180 – 200
(1, con piezas
altas)
Caza
Lomo de corzo 1 160 – 170 90 – 120 2 200 – 220
Asado de corzo 1 160 – 170 90 – 120 2 190 – 210
Asado de cerdo/
Asado de venado 1 160 – 170 100 – 120 2 190 – 210
Pescado 1 160 – 170 30 – 40 2 180 – 200
Tabla de asado Los tiempos consignados en el cuadro sólo tienen
valor orientativo y pueden variar en función de la
calidad y naturaleza de la carne, así como del
recipiente empleado.
Page 73

73
Asar al grill ¡Prestar siempre atención al preparar
alimentos al grill!
¡Mantener a los niños siempre alejados!
Advertencias Asar al grill con la puerta cerrada.
Las temperaturas del asado al grill pueden regularse.
Introducir siempre conjuntamente la bandeja
universal y la parrilla.
Colocar siempre la carne en el centro de la parrilla.
Si el cuerpo de calefacción del grill se desconectara,
ello es debido a la activación del circuito protector
contra sobrecalentamiento.
El cuerpo de calefacción volverá a conectarse al
cabo de unos breves instantes.
Colocar la parrilla en la bandeja universal.
Introducir ambas conjuntamente en la altura de
colocación prescrita para el plato que se desea
preparar.
Page 74

74
Asado con grill Para pollos o asados de carne particularmente
de infrarrojos
crujientes (asado de cerdo con corteza).
con aire caliente
,
Utilizar la parrilla y la bandeja universal. Emplear
preferentemente para el asado de carne recipientes
con asas resistentes al calor. Volver las grandes
piezas una vez transcurrida la mitad del tiempo de
asado prescrito.
No colocar los recipientes o utensilios de vidrio
usados que estuvieran calientes, sobre bases frías o
húmedas sino sobre un paño de cocina seco, a fin
de evitar que el vidrio salte.
Al realizar el asado al grill de infrarrojos con aire
caliente sobre la parrilla, puede originarse un mayor
grado de suciedad en el horno. Por ello deberá
limpiarse el horno tras ciclo de trabajo, a fin de evitar
que puedan quemarse e incrustarse los restos de
alimentos en el mismo.
Dar la vuelta a las aves enteras una vez transcurridas
las dos terceras partes de su tiempo de asado. En
los asados de pato y ganso, pinchar la piel debajo
de las alas a fin de permitir la salida de la grasa.
Una vez transcurrido el tiempo de asado prescrito,
dejar reposar la carne durante unos 10 minutos
aproximadamente en el horno desconectado y
cerrado
Los tiempos consignados en el cuadro sólo tienen
valor orientativo y pueden variar en función de la
cantidad y naturaleza de la carne. Los valores han
sido calculados para la introducción de los alimentos
en el horno frío.
Tipo de carne Peso Recipiente Ajuste de Altura de Duración
temperatura colocación
Carne de cerdo, Parrilla/Bandeja
con corteza 2 kg universal 170 – 190° C 2 130 – 140 min.
Buey
Roastbeef, Parrilla/Bandeja
poco hecho 1,5 kg universal 210 – 220° C 2 040 – 060 min.
Aves
Medios pollos, aprox. 400 g/ Parrilla/Bandeja 200– 220° C 2 140 – 150 min.
con corteza pieza universal
1 a 3 piezas
Pollos enteros aprox.1 kg/ Parrilla/Bandeja 200 – 210° C 2 150 – 160 min.
1 a 3 piezas pieza universal
Ganso aprox. 4 kg Parrilla/Bandeja 150 – 170° C 2 140 – 160 min.
universal
Page 75

75
Asado con el grill
de superficies
Para alimentos en pequeñas cantidades.
Utilizar siempre conjuntamente la parilla y la bandeja
universal.
Dar la vuelta a la pieza a asar una vez transcurridas
las dos terceras partes del tiempo de asado
prescrito.
Untar a voluntad la parrilla y el alimento de aceite.
Los tiempos consignados en el cuadro sólo tienen
valor orientativo y pueden variar en función de la
cantidad y naturaleza de la carne. Los valores han
sido calculados para la introducción de los alimentos
en el horno frío.
Tipo de Ajuste de Altura Duración Observaciones
carne temperatura de Primera Segunda
colocación cara cara
Cerdo
Filete de
solomillo máx. 4 08–11 min. 5 – 08 min.
(2 – 2,5 cm)
Filetes de
aguja 250° C 4 11 – 14 min. 7 – 10 min.
Salchichas 250° C 4 07–10 min. 5 – 07 min. practicar ligeros cortes
en las mismas
Buey según lo hecha que se
Filete de desee la carne, el
solomillo máx. 4 10 – 13 min. 5 – 08 min. tiempo de asado se
Tournedós máx. 4 09–12 min. 5– 08 min. puede reducir o aumentar.
Emparedados La altura de colocación
con guarnición 190° C 3 06–09 min. – en el horno depende de
la altura de la guarnición.
Pescado
Piezas
pequeñas 230 – 250° C 3 11– 15 min. 5 – 09 min. Dar la vuelta
(
)
Page 76

76
Descongelar y cocer a fuego lento
Descongelar y cocer
a fuego lento con el
sistema de aire
caliente forzado
*
Advertencias importantes Para descongelar o cocer a fuego lento
alimentos congelados, utilizar sólo la opción
«Aire caliente forzado».
Observar las instrucciones e informaciones de
los fabricantes consignadas en las envolturas de
los alimentos congelados.
Los alimentos congelados que se han
descongelado (en particular carne) requieren unos
tiempos de cocción más cortos que los alimentos
frescos, dado que el proceso de congelación
desarrolla un efecto semejante a una cocción previa.
En caso de preparar carne congelada directamente
en el horno, hay que sumar el tiempo necesario para
la descongelación al tiempo de cocción de la carne.
Descongelar las aves congeladas antes de
cocinarlas, dado que hay que vaciarlas primero.
Cocinar el pescado congelado a la misma
temperatura que el pescado fresco.
Los alimentos cocinados ultracongelados,
envasados en bandejas de porciones de aluminio, se
pueden preparar simultáneamente en el horno.
Las bandejas de aluminio con verduras congeladas
se pueden introducir en mayor número en el horno.
Alturas de colocación Para una bandeja: Altura 1
Para dos bandejas: Altura 1 + 3.
Los tiempos consignados en el cuadro sólo tienen
valor orientativo y pueden variar en función de la
cantidad y naturaleza de los productos congelados.
Page 77

77
Descongelar Descongelar los productos congelados crudos o
los alimentos congelados en un congelador a una
temperatura de 50°C. En caso de seleccionar una
temperatura más elevada, puede desecarse el
alimento.
Descongelar los alimentos envueltos en papel de
aluminio o contenidos en envases de aluminio
cerrados a una temperatura de 130 - 140°C.
Descongelar y calentar los productos de panadería
congelados a una temperatura de 100 a 140°C.
Untar ligeramente los panes, panecillos y productos
hechos con levadura con agua, a fin de que salgan
más crujientes.
Descongelar los pasteles congelados secos
planos a una temperatura de 160 - 170°C, durante
20 a 30 minutos.
Descongelar pasteles congelados húmedos
planos (con guarnición de frutas) a una temperatura
de 160 - 170°C, durante 30 a 50 minutos.
Envolverlos en papel aluminio para evitar que las
frutas se sequen.
Descongelar y hornear los emparedados
congelados (ya preparados) a una temperatura de
160 - 170°C, durante 20 minutos.
Para las pizzas congeladas:
Leer y cumplir las instrucciones del fabricante.
Page 78

78
Descongelar
Esta función es particularmente adecuada para
productos congelados delicados (por ejemplo tartas
o pasteles de nata).
1. Colocar el mando selector de funciones en la
posición *.
2. Reducir la temperatura del horno a través del
mando selector de la temperatura hasta que en
la pantalla de visualización aparezca la
indicación – – –.
El ventilador en la pared posterior del horno
funciona sin calefacción.
Descongelar los productos de pastelería y repostería,
según su tamaño y naturaleza, durante
25-45 minutos.
Retirar los alimentos del horno y dejarlos reposar
otros 30-45 minutos.
En caso de descongelar pequeñas cantidades
(piezas sueltas), el tiempo de descongelación se
reduce a 15-20 minutos y el de reposo, a
10-15 minutos.
Mando selector de la temperatura Mando selector de funciones
Page 79

79
Trabajar con la
función de
horneado al vapor
¡Atención! La función de horneado a vapor sólo se puede
activar y usar en combinación con el sistema de
horneado a vapor (accesorios opcional de venta
en el comercio especializado).
Utilizar la función de horneado a vapor sólo con el
horno completamente frío (a temperatura ambiente).
Seleccionar como modalidad de calentamiento sólo
la opción
%.
El uso de otras modalidades de calentamiento está
prohibido.
1. Girar el mando selector de funciones hasta el
símbolo %.
El piloto de aviso % se ilumina y en la pantalla
de visualización aparece la indicación
2
.
2. El ciclo de horneado a vapor se desarrolla
automáticamente.
Advertencia En caso de destellar la indicación
2
, el horno no
se ha enfriado completamente.
Una información más detallada figura en las
instrucciones de uso del sistema de horneado a
vapor.
Mando selector de funciones
Page 80

80
Conservación y limpieza del aparato
Advertencias No usar en ningún caso agentes de limpieza
importantes
agresivos, abrasivos o rayadores, ni tampoco
estropajos de acero.
No eliminar los restos de alimentos quemados e
incrustados con objetos rascadores, sino
ablandarlos con un paño húmedo y agente
lavavajillas
Frontal de acero inoxidable En caso de emplear agentes limpiadores de acero
inoxidable de uso corriente, los textos estampados
pueden resultar dañados.
No utilizar esponjas abrasivas.
Aplicar el lavavajillas de uso corriente sobre un paño
suave y húmedo, o una bayeta.
Esmalte y vidrio Utilizar una solución de agua caliente y agente
lavavajillas.
Para limpiar el frontal del horno (detrás de la puerta),
deberá desengancharse la junta de la puerta del
horno.
Cristal de la puerta del horno El cristal interior de la puerta del horno está
recubierto de una capa especial que refleja el calor.
Esto no afecta en absoluto a la buena visión a través
de la puerta del horno.
Estando la puerta del horno abierta, esta capa de
recubrimiento especial se puede percibir como una
especie de velo claro. Esto es debido a razones
técnicas y no constituye defecto alguno.
Page 81

81
Horno Limpiar el interior del horno, estando aún templado,
tras concluir su uso con un paño y una solución de
agua caliente y lavavajillas a fin de evitar que puedan
quemarse e incrustarse los restos de alimentos en el
mismo.
Téngase presente que los alimentos quemados e
incrustados son muy difíciles de eliminar. Trabajando
con la opción «Aire caliente forzado», se produce
menos suciedad en el horno que con otras
opciones.
¡No realizar ninguna limpieza en caliente con
detergentes específicos para hornos!
Utilizar la bandeja universal en caso de hornear
pasteles muy húmedos.
Utilizar recipientes adecuados para preparar plazos
de asado (fuentes, cacerolas, etc.).
Limpiar el horno, en caso de presentar un escaso
grado de suciedad, estando templado, con una
solución de agua caliente y lavavajillas.
Dejar secar el horno con la puerta abierta.
Page 82

82
Revestimiento
catalítico del horno
Superficies de autolimpieza La pared posterior del homo está recubierta de una
en el horno capa de revestimiento de esmalte con propiedades
de autolimpieza: El material se limpia automáticamente durante el funcionamiento del horno.
Las salpicaduras de mayor tamaño, sin embargo,
sólo desaparecerán tras ejecutarse varios ciclos de
autolimpieza.
¡No limpiar nunca la pared posterior del horno con
un detergente específico para hornos!
Una ligera decoloración del esmalte no tiene efecto
alguno sobre la eficacia de la función de
autolimpieza.
Limpieza del fondo del horno,
la parte superior y los Utilizar una solución de agua caliente y lavavajillas o
laterales una solución de agua y vinagre
En caso de fuerte grado de suciedad, lo mejor es
emplear un detergente especial para hornos.
Por cierto:
El horno está revestido de una capa de esmalte.
El esmalte tiene que aplicarse a una temperatura
muy elevada, por esta razón puede presentar
variaciones de color. Esto es un fenómeno normal y
no tiene la menor incidencia en el buen
funcionamiento de su aparato. No tratar de eliminar
o limpiar dichas decoloraciones con esponjas
frotadoras o detergentes agresivos.
Los bordes de las chapas delgadas no se pueden
recubrir por completo con capas de esmalte.
Por esta razón pueden resultar bastos al tacto.
La protección anticorrosiva, no obstante, está
garantizada.
Page 83

83
Sistema de limpieza
Con objeto de facilitar las tareas de limpieza del
HydroClean
®
d
interior del horno, su aparato dispone de un sistema
de limpieza auxiliar. Mediante la evaporación automática de una solución detergente adecuada, los
restos de alimentos acumulados o incrustados sobre
las superficies esmaltadas del horno son ablandados
gracias a la acción conjunta del calor y el vapor de
agua, pudiéndose concluir la limpieza con gran
facilidad y rapidez.
Atención:
Emplear esta opción sólo estando el horno
completamente frío (temperatura ambiente).
Utilizar sólo agua normal de red. ¡No utilizar en
ningún caso agua destilada!
Conexión de la función auxiliar:
1. Retirar del horno las bandejas para horneado y la
bandeja universal. La parrilla puede permanecer
en el horno.
2. Verter sobre el fondo del horno aproximadamente
0,4 litros de agua con un poco de lavavajillas.
En caso de fuerte grado de suciedad del horno.
Puede dejarse actuar la solución detergente
durante un período más prolongado, antes de
conectar la función auxiliar de limpieza..
3. Cerrar la puerta del horno.
¡El sistema de limpieza auxiliar sólo puede
activarse estando el horno completamente frío
(temperatura ambiente).
4. Girar el mando selector de funciones a la
posición
d
.
Los pilotos de aviso d y ; se iluminan. En la
pantalla de visualización aparece la indicación l.
En caso de destellar la indicación l, el horno no
esta completamente frío.
Una vez transcurrido el período de calentamiento del
horno (4 minutos), el piloto de aviso de la
temperatura del horno se apaga. Al cabo de
17 minutos, el programa de limpieza ha concluido.
El final del ciclo de limpieza es indicado mediante
una señal acústica.
Desconectar la función auxiliar de limpieza:
Girar el mando selector de funciones a la posición
0.
Mando selector de funciones
Page 84

84
Tras desconectar la función Advertencia:
auxiliar de limpieza ¡No dejar el agua residual de la limpieza el horno
durante un período prolongado (por ej. durante a
noche)
1. Abrir la puerta del horno y recoger al agua
residual que se encontrara en el horno con un
paño de esponja absorbente
2. Limpiar el horno con el paño de esponja
empapado con la solución detergente y un cepillo
blando, o un estropajo de plástico. Los restos de
suciedad fuertemente adherida o incrustada
pueden eliminarse con un raspador para placa
vitrocerámica.
Atención: Manejar con sumo cuidado el
raspador, no aplicándolo en un ángulo
excesivamente plano, dado que podría ocasionar
daños en el esmalte.
3. Las manchas de cal se pueden eliminar con un
paño empapado en vinagre.
4. Enjuagar con agua limpia y secar el horno con un
paño seco.
Consejos y advertencias:
En caso de fuerte grado de suciedad del horno, se
puede repetir la operación una vez que se ha
enfriado el horno.
En caso de fuerte grado de suciedad de grasa o
aceite, tras haber realizado un ciclo de asado normal
al grill, se aconseja aplicar lavavajillas en las zonas
sucias del horno antes de conectar la función auxiliar
de limpieza.
Dejar la puerta del horno entreabierta, enclavada en
ángulo de 30°, durante 1 hora, a fin de que se
sequen bien las superficies esmaltadas.
Secado rápido
1.
Colocar la puerta del horno en posición
entreabierta, enclavada en ángulo de 30°.
2. Girar el mando selector de funciones en la
posición *.
3. Reducir la temperatura del horno mediante el
mando selector de la temperatura, hasta que en
la pantalla de visualización aparezca 50º C.
4. Duración: 5 minutos.
5. Desconectar el horno.
Page 85

85
Desenganchar la puerta La puerta del horno se puede desenganchar con
total facilidad.
Prestar atención a la hora de extraer la puerta
del horno de no tocar las bisagras.
¡Peligro de lesiones!
1. Abrir la puerta completamente.
2. Abatir los bloqueos de cierre a izquierda y
derecha de la puerta.
3. Colocar la puerta en posición inclinada.
Sujetarla con ambas manos por abajo.
Cerrarla un poco y extraerla de su sujeción.
Tras concluir la limpieza, montar la puerta realizando
las operaciones en orden inverso al seguido para el
desmontaje.
Abatir la resistencia de Con objeto de poder acceder mejor a la parte
calefacción superior del horno, es posible abatir las resistencias
de calefacción.
Atención: La resistencia de calefacción tiene que
estar completamente fría.
1. Desplazar el estribo de sujeción hacia arriba,
hasta que desenclave de manera audible.
2. Sujetar el estribo y abatirlo hacia abajo.
Tras efectuar la limpieza
Devolver la resistencia a su posición normal.
Tirar del estribo de sujeción hacia adelante y
desplazarlo hacia arriba hasta que enclave.
Page 86

86
Soportes laterales para colocar las bandejas
Desengancharlos
Los soportes laterales para las bandejas se pueden
retirar de su emplazamiento para limpiarlos
1. Empujar la parte frontal del soporte hacia arriba;
desengancharlo.
2. Tirar del soporte por su parte posterior hacia
adelante; desengancharlo.
Limpiar los soportes laterales con un lavavajillas
manual y una esponja o un cepillo.
Enganchar los soportes
Los soportes encajan en los laterales izquierdo y
derecho.
El saliente (a) tiene que estar siempre hacia
abajo.
1. Introducir la parte posterior del soporte en su
emplazamiento, hasta el tope.
2. Empujar el soporte hacia atrás.
3. Hacer encajar el soporte en su parte frontal.
4. Presionarlo hacia abajo.
Page 87

87
Averías y reparaciones
En caso de no lograr subsanar las perturbaciones o
averías de su aparato con ayuda de nuestros
consejos y advertencias, deberá solicitar la
intervención del Servicio de Asistencia Técnica más
próximo a su zona de residencia.
La dirección y el número de teléfono del Servicio de
Asistencia Técnica más próximo a su domicilio
figuran en la lista adjunta de centros y delegaciones
del Servicio de Asistencia Técnica.
Atención: Tenga presente que el servicio de garantía
no cubre los gastos originados por un manejo
erróneo del aparaton.
Número de producto «E-Nr.» Los datos correspondientes se encuentran en la
y número de fabricación «FD» placa de características del aparato. Esta placa se
encuentra emplazada en la parte inferior izquierda
del horno, detrás de la puerta.
Al avisar al Servicio de Asistencia Técnica, no olvide
indicar el número de producto (E-Nr.) y el de
fabricación (FD) de su aparato:
E-Nr. FD
Sustituir la lámpara de la ¡Atención! ¡Dejar el horno sin corriente! Accionar
iluminación interior del horno a tal efecto el fusible de la caja de fusibles
automáticos o extraer los fusibles de la caja de
fusibles de su piso o vivienda.
1. Coloque un paño en el interior del horno frío para
proteger éste de posibles daños.
2. Retirar el recubrimiento protector de la lámpara,
girándolo hacia la izquierda.
3. Extraer la lámpara defectuosa de su alojamiento,
y sustituirla por una del mismo tipo.
–Tipo E 14, 220-240 V, 40 W, termorresistente
hasta 300°C.
– La lámpara de repuesto se puede adquirir en
el Servicio de Asistencia Técnica Oficial de la
marca o en el comercio especializadol.
Sustituir la junta de la Retirar la junta defectuosa desenganchándola de su
puerta del horno emplazamiento. La junta de repuesto deberá
adquirirla al Servicio de Asistencia Técnica Oficial de
la marca.
Page 88

88
¿Qué hacer en caso de una avería?
Hay pequeñas anomalías que no suponen necesariamente la existencia de una avería y, por
consiguiente, no requieren la intervención del Servicio de Asistencia Técnica. Con frecuencia se
trata de pequeñas anomalías fáciles de subsanar. Para evitar una intervención innecesaria del
servicio técnico, compruebe si la avería o fallo que usted ha constatado se encuentra recogida
en los siguientes consejos y advertencias..
Observaciones de carácter general:
Los trabajos que fuera necesario realizar en los sistemas electrónicos sólo deberán ser
ejecutados por técnicos especialistas del ramo. Antes de iniciar cualquier trabajo en el aparato,
éste deberá ser desconectado de la red eléctrica a través de la caja de fusibles automáticos o
extrayendo el fusible de la caja de fusibles de su piso o vivienda..
¿Qué hacer... Posible causa Forma de subsanarla
... si la función eléctrica general El fusible está verificar el fusible en la caja de fusibles;
del aparato está interrumpida y defectuoso sustituirlo en caso de defecto.
los pilotos de aviso, por ejemplo,
no se iluminan?
... si se concentra preferente- El aparato está Verificar la instalación del aparato.
mente en un solo lado el líquido desnivelado; no se ha
o la masa líquida de los pasteles? instalado o montado
correctamente
... si el horno deja de funcionar El reloj electrónico esta Ajustar el reloj electrónico a
de repente? ajustado a temporizador funcionamiento sin desconexión
automático (desconexión automática:
automática) del horno. 1. Pulsar la tecla :.
2. Poner la Duración de
funcionamiento
? a 0:00.
... si el horno no funciona de Se ha producido un Poner el reloj en hora.
repente y en el reloj electrónico breve corte de la
destella la indicación 0:00? alimentación de corriente
... si en la pantalla de Se ha producido un Activar el reloj electrónico y el control
visualización aparece la breve corte de la del horno
indicación ? alimentación de corriente
Page 89

89
¿Qué hacer... Posible causa Forma de subsanarla
...si en la pantalla de El horno está bloqueado Girar el mando selector de funciones
visualización aparece la 3 veces consecutivas de la posición
indicación – 5 –? «0» hasta el símbolo de la iluminación
del horno $y viceversa a la posición
de desconexión.
La indicación – 5 – desaparece.
...si en la pantalla de El horno está bloqueado Girar el mando selector de funciones
visualización aparece la (seguro para niños) 6 veces consecutivas de la posición
indicación
1
? «0» hasta el símbolo de la iluminación
del horno $y viceversa a la posición
de desconexión.
La indicación
1
desaparece.
... si los símbolos en el cuadro El horno ha sido Girar el mando selector de funciones
de mandos se iluminan, las bloqueado para evitar 5 veces consecutivas de la posición
modalidades de calentamiento su uso indebido (conexión (a la posición )y viceversa a la
correspondientes del horno, de demostración). posición inicial.
sin embargo, no funcionan? ❑ En pantalla de visualización tiene
que aparecer la indicación 333.
...si se produce una avería de Se han producido Volver a ajustar las funciones
las funciones controladas impulsos energéticos afectadas.
electrónicamente? (rayos)
...si tras conectar la función La temperatura es Aguardar a que el horno esté
auxiliar de limpieza, el piloto demasiado elevada, completamente frío antes de activar
de aviso rojo de la temperatura por ej. a causa del la función de limpieza auxiliar.
del horno no se ilumina? funcionamiento
prolongado del horno.
El piloto de aviso está Sustituirlo por un técnico autorizado.
defectuoso
Page 90

90
¿Qué hacer... Posible causa Forma de subsanarla
... si al utilizar las funciones de La temperatura de asado
asado o asado al grill se forma es demasiado elevada.
humo?
La parrilla o la bandeja Colocar la parrilla en la bandeja
universal no están universal e introducirla conjuntamente
colocadas correctamente. en una altura de colocación.
... si partes del revestimiento de Se trata de un fenómeno No es posible.
esmalte presentan manchas de natural, debido al jugo
color mate claro? que gotea de los asados.
... si el cristal de la puerta del Se trata de un fenómeno Conectar el horno durante 5 minutos
horno se empaña? natural debido a las a 100 °C.
diferencias de temperatura
que se producen.
...si se forma agua de Se trata de un fenómeno Abrir y cerrar brevemente la puerta
condensación en el horno? natural que se produce durante el ciclo de horneado; secar
con los pasteles con el agua de condensación tras concluir
guarnición muy húmeda el ciclo de horneado.
(tartas de frutas) o grandes
piezas de asado.
...si los cristales del horno están Acumulación de El cristal de la puerta del horno se
sucios por dentro tras largos suciedad normal puede desmontar para facilitar su
ciclos de uso? limpieza.
1. Desmontar la puerta del horno y
colocarla con la manilla hacia abajo,
sobre un paño.
2. Desatornille la tapa superior en la
puerta del horno. Para ello, afloje la
fijación izquierda y derecha.
(Figura A).
3. Extraer el cristal de su alojamiento
(Figura B).
Limpiar el cristal con un limpiacristales
y un paño suave.
4. Colocar el cristal en su sitio; prestar
atención a que la cara lisa esté
hacia fuera.
5. Montar la protección y enroscarla.
6. Montar la puerta del horno en su
sitio.
El horno sólo se podrá usar una vez
que el cristal esté correctamente
instalado en su sitio.
Page 91

91
Innehållsförteckning
Viktigt att veta . . . . . . . . . . . . . . . . 92
Förpackningsmaterialet och
ev. gammal ugn . . . . . . . . . . . . . . . 92
Före inbyggnad . . . . . . . . . . . . . . . 93
Säkerhetsanvisningar . . . . . . . . . . . 93
Orsaker till skador . . . . . . . . . . . . . . 94
Beskrivning av ugnen . . . . . . . . . . 95
Manöverpanelen . . . . . . . . . . . . . . . 95
Ugnsfunktioner . . . . . . . . . . . . . . . . 95
Pop-out-vred . . . . . . . . . . . . . . . . . 96
Falser . . . . . . . . . . . . . . . . . . . . . . . 96
Plåtar/galler . . . . . . . . . . . . . . . . . 97
Före första användningen . . . . . . 98
Rengör ugnen . . . . . . . . . . . . . . . . . 98
Bränn ur ugnen . . . . . . . . . . . . . . . 98
Rengöring efter användning . . . . . . 98
Ställ in rätt tid på klockan . . . . . . . . 98
Den elektroniska klockan . . . . . . . 99
Manöverpanelen . . . . . . . . . . . . . . . 99
Specialfunktioner . . . . . . . . . . . . . . 99
Timer . . . . . . . . . . . . . . . . . . . . . . .100
Automatiska inställningar . . . . . . . .100
Ugnsfunktioner . . . . . . . . . . . . . . .102
Ugn PÅ/AV . . . . . . . . . . . . . . . . . .105
Säkerhetsdetaljer . . . . . . . . . . . . .107
Låsa ugnen . . . . . . . . . . . . . . . . . .107
Permanent låsa ugnen . . . . . . . . . .108
Automatisk säkerhetsavstängning .108
Inhaltsverzeichnis
Bakning . . . . . . . . . . . . . . . . . . . . .109
Baktabeller . . . . . . . . . . . . . . . . . . .110
Grädda med pizzafunktionen . . . . .112
Råd och tips . . . . . . . . . . . . . . . . . .113
Kött, fågel, fisk . . . . . . . . . . . . . . .114
Stektabell . . . . . . . . . . . . . . . . . . . .116
Grillning . . . . . . . . . . . . . . . . . . . . .117
Termogrillning . . . . . . . . . . . . . . . . .118
Grill (stor och liten grillyta) . . . . . . . .119
Upptining och tillagning . . . . . . . .120
Ångkokningsfunktionen . . . . . . . . .123
Rengöring och skötsel . . . . . . . . .124
Viktigt att veta . . . . . . . . . . . . . . . . .124
Katalysemalj . . . . . . . . . . . . . . . . . .126
HydroClean®-rengöringsprogram . .127
Haka loss ugnsluckan . . . . . . . . . . .129
Fälla ned värmeelementen . . . . . . .129
Upphängningsgallret . . . . . . . . . . . .130
Fel och reparationer . . . . . . . . . . .131
Råd vid fel . . . . . . . . . . . . . . . . . .132
Page 92

92
Viktigt att veta
Läs noga igenom hela bruksanvisningen. Bara så kan
du lära dig använda ugnen på säkert och rätt sätt.
Denna bruksanvisning gäller för flera modeller. Därför
kan det förekomma beskrivningar av enstaka detaljer
som inte finns på just din ugn.
Spara bruks- och monteringsanvisningen. Låt den
följa med ugnen vid ett eventuellt ägarbyte.
Förpackningsmaterialet och ev.
gammal ugn
På sin väg till dig har din ugn skyddats mot skador
av förpackningen. Allt förpackningsmaterial är
miljövänligt och kan återvinnas.
Gamla produkter är inte värdelöst avfall. Om de tas
om hand på miljöriktigt sätt kan värdefulla råmaterial
återvinnas.
Innan den gamla ugnen lämnas för skrotning ska den
göras obrukbar. Klipp av sladden så nära ugnen som
möjligt.
Denna anhet är märkt i enlighet med der europeiska
direktivet 2002/96/EG om avfall som utgörs av eller
innehåller elektroniska produkter (waste electrical and
electronic equipment – WEEE).
Direktivet anger ramarna för inom EU giltigt
återtagande och korrekt återvinning av uttjänta
enheter.
Hör med din kommun eller det lokala
renhållningsverket var du kan lämna gamla produkter
och förpackningsmaterial så att de kan tas om hand
på bästa miljöriktiga sätt.
Page 93

93
Säkerhetsanvisningar
Denna ugn får endast användas för tillagning av mat i
ett privathushåll.
Het ugn Var försiktig när du öppnar ugnsluckan. Het ånga
kan tränga ut.
Ta aldrig med händerna på de heta ytorna inuti
ugnen eller på värmeelementen. Risk för
brännskador! Håll alltid barn borta från den heta
ugnen.
Förvara inga brännbara föremål inuti ugnen. Lägg
aldrig brännbara föremål på hällen. Risk för brand!
Lägg aldrig sladdar till andra elektriska apparater på
varma kokzoner.
Håll sladdar till andra elektriska apparater borta från
en varm ugnslucka. Det isolerande skiktet på slad
darna kan skadas. Risk för kortslutning!
Var noggrann med att avlägsna alla rester av för
packningsmaterialet, exempelvis bitar av styropor, ur
ugnen.
Reparationer Felaktigt utförda reparationer är farliga. Risk för
elchock!
Reparationer får endast utföras av fackman godkänd
av tillverkaren.
Skruva ur säkringarna eller slå ifrån
huvudströmbrytaren om det är fel på ugnen.
Kontakta därefter service.
Före inbyggnad
Transportskador Kontrollera att ugnen inte uppvisar några skador
sedan förpackningsmaterialet avlägsnats. Ugnen får
inte anslutas vid transportskada.
Elektrisk anslutning Den elektriska anslutningen får endast utföras av
behörig fackman. Vid felaktig anslutning gäller inte
konsumentbestämmelserna.
Page 94

94
Orsaker till skador
Bakplåtar, aluminiumfolie Lägg inte en plåt direkt på ugnens botten.
eller kärl på ugnens botten Lägg aldrig aluminiumfolie direkt på ugnens botten.
Placera aldrig kärl direkt på ugnens botten.
Då hindras värmetillförseln och bak- och stektider
stämmer inte längre. Dessutom kan emaljen skadas.
Tillbehör som skjuts in Var försiktig när du skjuter in plåtar/galler så att
ugnen inte skadas.
Bakplåtspapper Låt inte bakplåtspapper ligga löst inne i ugnen när du
använder varmluftsfunktionen
* (t.ex. i samband
med uppvärmningen).
Fläkten kan suga till sig papperet vilket kan skada
värmeelement och fläkt.
Vatten i ugnen Häll aldrig vatten direkt på ytorna i en varm ugn.
Emaljen kan skadas.
Fruktsaft Ha inte för mycket på plåten när du bakar saftiga
fruktkakor. Fruktsaft som droppar kan lämna fläckar
efter sig som inte går att få bort.
Använd därför gärna den djupa långpannan till
saftiga fruktkakor och liknande.
Att låta ugnen svalna med Låt alltid ugnen svalna med ugnsluckan stängd.
luckan öppen Kläm aldrig fast något mellan ugn och lucka. Även
om du bara låter ugnsluckan stå på glänt kan
omkringliggande köksinredning skadas med tiden.
Smutsig tätningslist runt Om tätningslisten är kraftigt nedsmutsad går det inte
ugnsluckan att stänga ugnsluckan ordentligt. Då kan
omkringliggande köksinredning skadas. Håll därför
ytorna på och kring luckan rena från smuts.
Använda ugnsluckan Stå eller sitt aldrig på ugnsluckan.
som stol
Skötsel och rengöring Rengör aldrig ugnen med högtrycksspruta eller
professionell ångrengörare som rengör med
ångtryck.
Page 95

Beskrivning av ugnen
Här följer en beskrivning av din nya ugn. Här beskrivs
manöverpanelen med dess vred och symboler. Här
förklaras också de olika ugnsfunktionerna och vilka
plåtar/galler som medföljer.
Manöverpanelen
Ugnsfunktioner
*
Varmluft
/
Över- och undervärme
(
Grill (stor grillyta)
)
Grill (liten grillyta)
,
Termogrill
&
Pizza
.
Undervärme
%
Ångkokning
d l
HydroClean
®
$
Ugnsbelysning
;
Ugnstemperatur
$
Snabbuppvärmning
Obs!
När du vrider på funktionsvredet tänds
ugnsbelysningen.
Undantag: Ugnsrengöring.
Kontrollampan för ugnstemperatur
; lyser röd
under uppvärmningen och när temperaturen sjunker
under den inställda varvid ugnen värms upp igen.
Lampan slocknar när inställd temperatur uppnåtts.
Snabbuppvärmning
s kan bara användas
tillsammans med varmluftsfunktionen.
Ångkokning % för systemångkokare (extra tillbehör
som finns att köpa i fackhandeln).
Snabbuppvärmning för
*
varmluftsfunktionen
Termostatvred med kontrollampa för ugnstemperatur
Elektronisk klockaUgnsfunktioner
Vred för att ställa in de olika ugnsfunktionerna
med förslag på temperatur
Page 96

96
Pop-out-vred Tryck mitt på resp vred/knapp för att trycka in/ut.
Falser Denna ugn har 4 falser/höjdlägen för plåtar/galler.
Falserna räknas nedifrån och upp.
De är markerade på ugnen.
Använd inte fals 2 tillsammans med varmluft
*för att inte negativt påverka luftcirkulationen.
Page 97

97
Plåtar/galler Denna ugn är utrustad med följande
plåtar/galler:
Långpanna med galler Bakplåt av aluminium
Ytterligare tillbehör som finns att köpa i fackhandeln: Best.nr.
Obs!
Skyddet hindrar händer från att komma i beröring med den heta ugnsluckan.
Detta är extra viktigt när små barn finns i närheten.
Bakplåten och långpannan kan slå sig när de står inne i den varma ugnen. Orsaken
till detta är stora temperaturskillnader på tillbehöret. Dessa temperaturskillnader kan
uppstå, när endast en del av plåten/långpannan täcks av det som tillagas eller täcks
av djupfryst, t.ex. pizza.
Bakplåten resp. långpannan planar åter ut sig redan medan de står inne i den varma
ugnen.
Systemångkokare
Bakplåt av aluminium
Bakplåt av emalj
Bak- och stekgaller, böjt
Bak- och stekgaller, med tätt rutmönster
Långpanna med galler CZ 1242 X0
CZ 1282 X0
CZ 1332 X0
CZ 1342 X0
CZ 1432 X0
CZ 1442 X0
Extra tillbehör teleskoputdragssystem för 2 nivåer CZ 1702 X0
Extra tillbehör teleskoputdragssystem för 3 nivåer CZ 1742 X0
Extra tillbehör teleskoputdragssystem för 4 nivåer, helt utdragbart CZ 1752 X0
Skydd framför ugnslucka 440651
Page 98

98
Före första användningen
Rengör ugnen Ta ut plåtar/galler ur ugnen.
Avlägsna alla rester av förpackningsmaterialet,
exempelvis bitar av styropor, ur ugnen.
1. Rengör ugnens utsida med en mjuk och fuktig
trasa.
2. Ta ut den löstagbara ställningen för plåtar/galler.
3. Rengör ugnens insida och plåtar/galler med varmt
vatten med lite diskmedel i.
Hällen: Läs i den bruksanvisning som följer
med hällen.
Bränn ur ugnen Innan ugnen kan användas för första gången
måste rätt tid ställas in på den elektroniska
klockan.
Låt den stängda tomma ugnen vara på i
ca. 30 minuter.
Gör så här: Vrid funktionsvredet till läge över- och
undervärme och ställ in 240º C.
Rengöring efter Rengör ugnen med hett vatten med lite diskmedel i.
användning
Sätt tillbaka den löstagbara ställningen för
plåtar/galler.
Ställ in rätt tid
på klockan
När ugnen anslutits till elnätet eller efter ett strömav
brott blinkar 0:00 i displayen.
Gör så här Tryck på knappen
>
och vrid inställningsknappen
tills rätt tid visas (i vårt exempel 15:00).
Om du vill ändra tiden, håll knappen > intryckt tills
klocksymbolen
#
blinkar.
Ställ därefter in rätt tid på klockan.
Obs! Det går inte att ändra tiden om du ställt in
ett automatikprogram eller använder timern
(läs i avsnittet om den elektroniska klockan hur du
gör i så fall).
Page 99

99
Den Du behöver bara använda en hand för att göra
inställningar med den elektroniska klockan. Tryck först
elektroniska
på funktionsknappen och ställ därefter in tiden med
inställningsknappen. Det går bra att göra olika
klockan
inställningar så länge det blinkar i displayen (ca. 4
sekunder).
Manöverpanelen
Timer
Aktuell
ugnstemperatur
Tillagningstid Färdigtid
Inställningsknapp
Tryck mitt på knappen för
att trycka in/ut.
Aktuellt klockslag
Funktionsknapp
Specialfunktioner
Tona bort informationen i 1. Håll knappen > intryckt i 7 sekunder. Displayen
displayen blir då svart men klockan och all information finns
kvar.
2. Tryck helt kort på knappen > när du åter vill
kunna se all information i displayen.
Snabbuppvärmning Starta snabbuppvärmningen med knappen s
(se avsnittet ”Ugn PÅ/AV”).
Ställa in rätt tid på klockan Se avsnittet ”Före första användningen”.
Nattljus Mellan kl 22.00 och 06.00 lyser displayen
automatiskt svagare.
Page 100

100
Automatiska
inställningar
Med hjälp av den elektroniska klockan kan du starta
resp. stänga av ugnen.
Du vill att ugnen Ugnen startar genast.
automatiskt ska stängas av
1.
Ställ in ugnsfunktion och ugnstemperatur.
2. Håll knappen > intryckt tills symbolen ?
blinkar i displayen. Vrid inställningsknappen till
önskad tillagningstid (i exemplet: 1 timme och 30
minuter).
Ca. 4 sekunder efter det att inställningen är gjord
visas aktuellt klockslag.
Symbolen l ? markerar att du gjort en
automatisk inställning.
3. När tiden är ute
(i exemplet: 1 timme och 30 minuter)
hörs en ljudsignal och ! blinkar i displayen.
Ugnen stängs automatiskt av.
Du kan stänga av ljudsignalen genom att trycka
på knappen
>.
4. Stäng av ugnen med funktionsvredet.
5. Avsluta den automatiska inställningen genom att
trycka på knappen > en gång till.
Timer 1. Tryck på knappen > och ställ in önskad tid
(t.ex. 5 minuter).
När inställningen är gjord visas resterande tid.
2. När tiden är ute hörs en ljudsignal och
,
blinkar
i displayen. Du kan stänga av ljudsignalen genom
att trycka på knappen >.
 Loading...