

Page 1
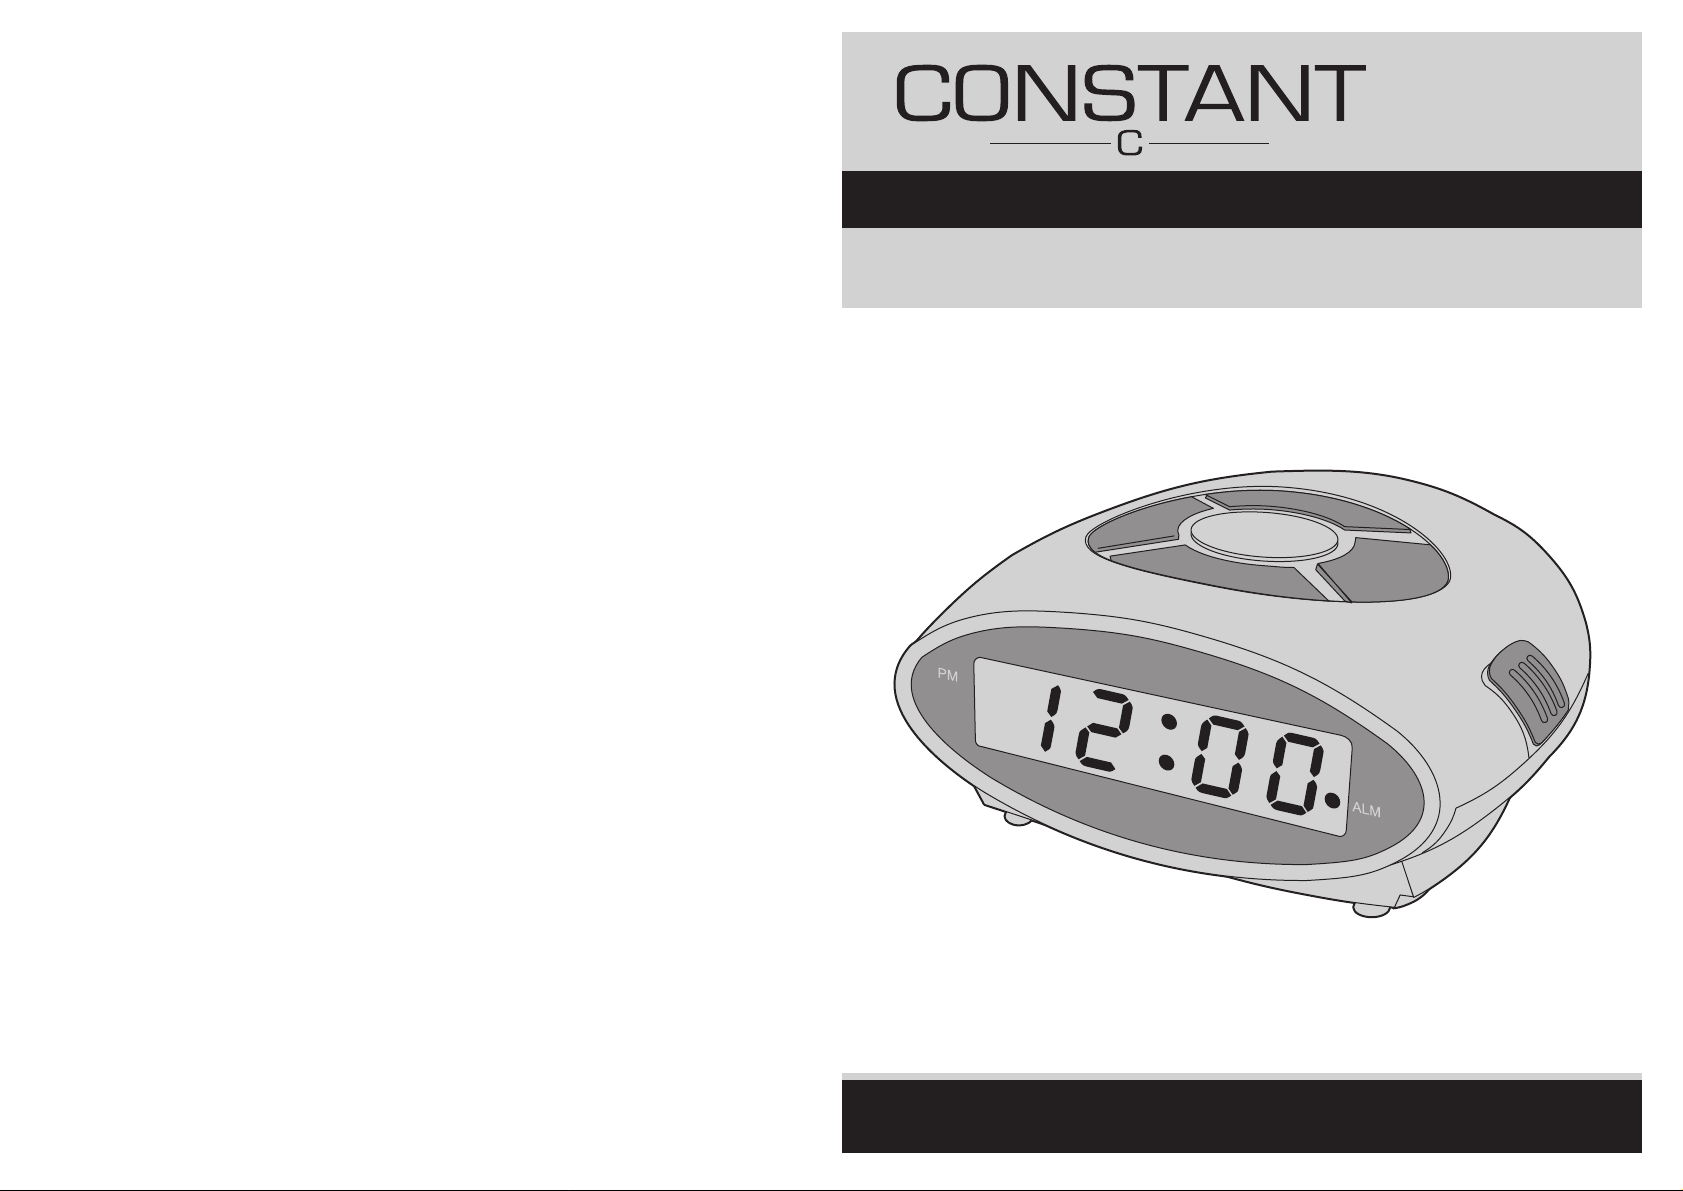
Instruction Manual - Please keep for future reference
Constant LED Alarm Clock
9-05
255-2460
Page 2
IMPORTANT SAFETY INSTRUCTIONS
Read all instructions before use and keep for future reference.
WARNING - To reduce the risk of fire or electric shock, do not expose
this appliance to rain or moisture.
CAUTION - Use of controls or adjustments or performance of procedures
other than those specified herein may result in a hazard.
PRECAUTIONS
To Maintain Optimum Performance
Do not use the unit in places which are extremely hot, cold, dusty or humid. Do not use or keep
the unit in following places.
• In a high humidity area such as a bathroom or near a heater.
• In an area exposed to direct sunlight (where it can become extremely hot).
•Near sources of strong magnetism, such as televisions, speakers, or magnets.
•Where there is a lot of movement, vibration or an unstable shelf.
For safety
•Take care not to drop the unit or subject it to strong shocks.
Children
•Children do not understand the dangers associated with operating electrical appliances. Never
allow children to use this appliance.
Mains Lead
•If this unit has a mains lead or is connected with a mains adaptor do not allow the lead to become
strained or damaged as it creates a hazard.
Ventilation Warning
•Do not allow water or liquids to splash onto the main body as it contains live parts.
•Do not cover the body with a cloth and allow the unit to be well ventilated.
Electrical Requirements
Check that the voltage on the rating plate of your product corresponds with your house
electricity supply which must be A.C. (Alternating Current).
If the socket outlets in your home are not suitable for the plug supplied with this product, check
with a qualified electrician for replacement.
1
Page 3
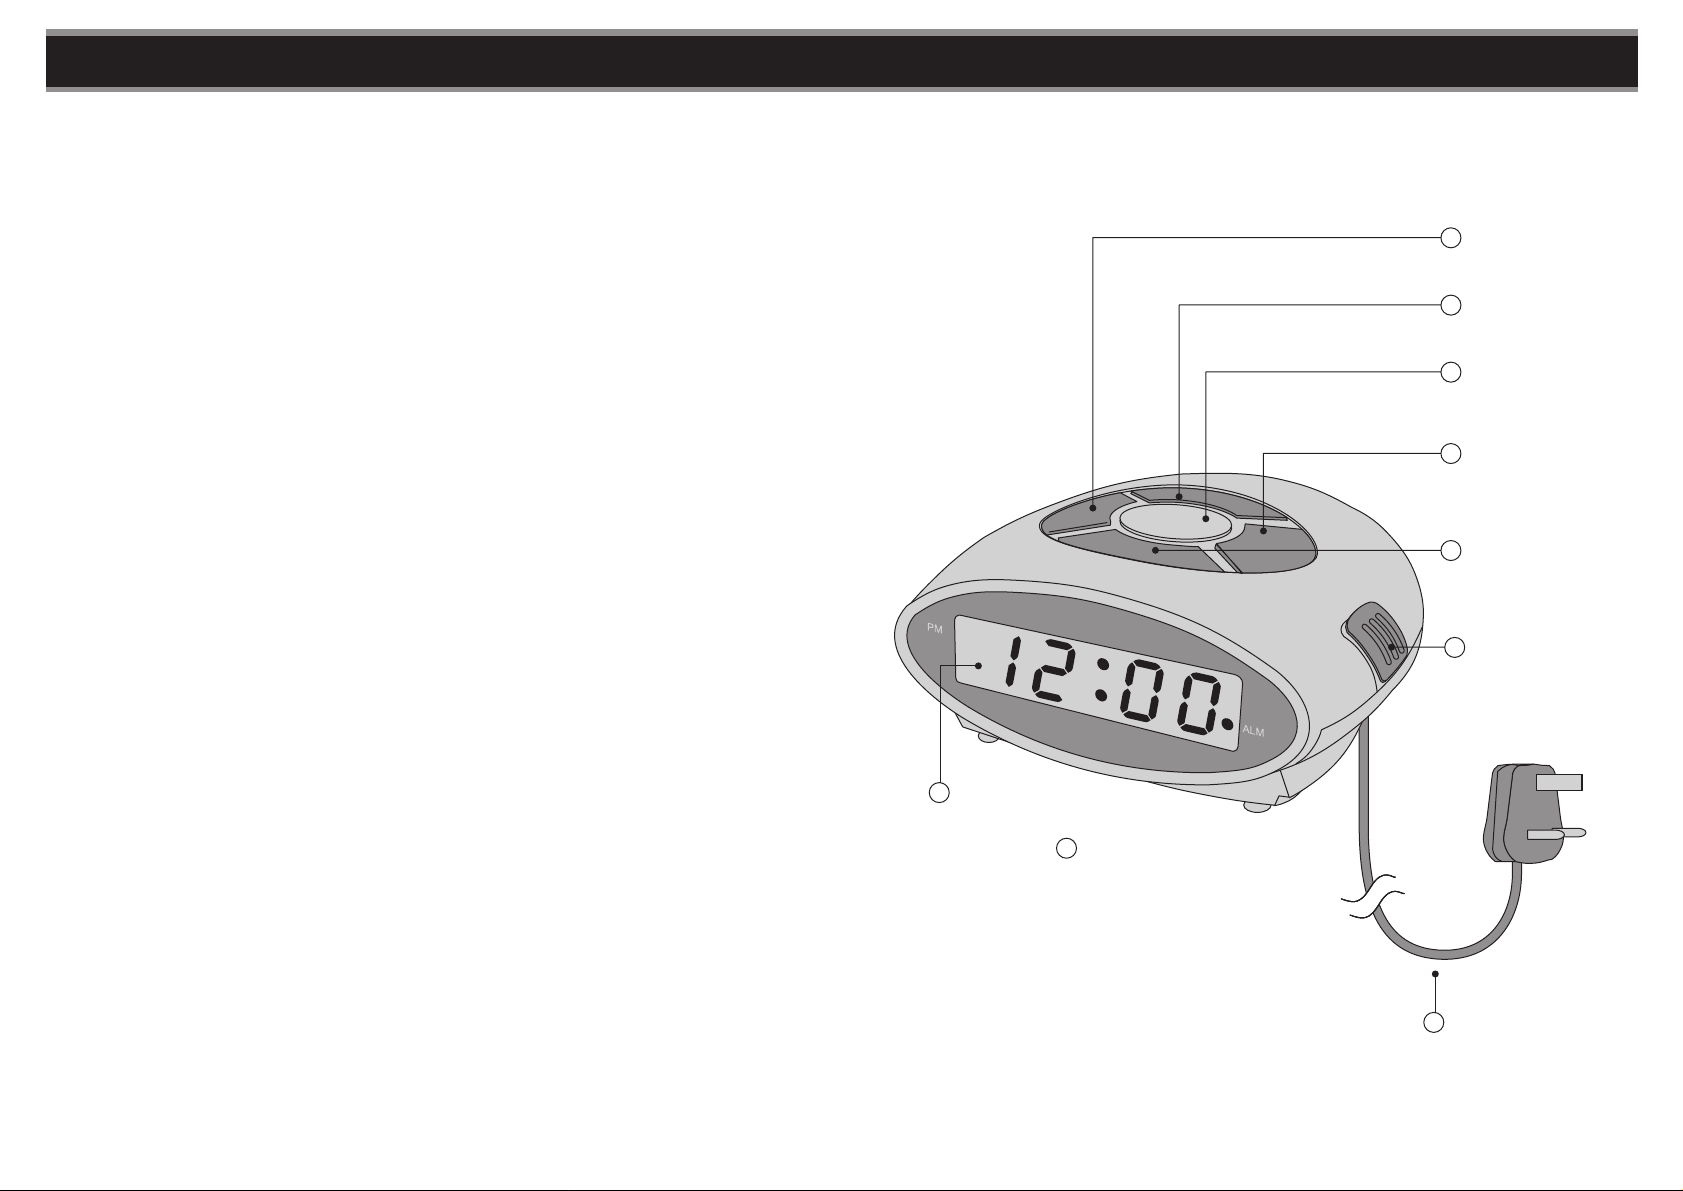
Know Your Machine .........................................................................................3
Using with Batteries......................................................................................... 4
KNOW YOUR MACHINEKNOW YOUR MACHINECONTENTS
Using with AC Power.........................................................................................5
Operation Of Clock ...........................................................................................6
Operation Of Alarm ...........................................................................................7
Specifications .................................................................................................. 8
Display
H
Hour Set Button
B
Minute Set Button
C
Touch Sensitive
D
Snooze Button
Time Set Button
E
Alarm Set Button
F
Alarm On/Off
G
Switch
A
1 x LED Alarm Clock
Power Cord
I
32
Page 4
NOTES:
- Please read the important safety
instructions before use.
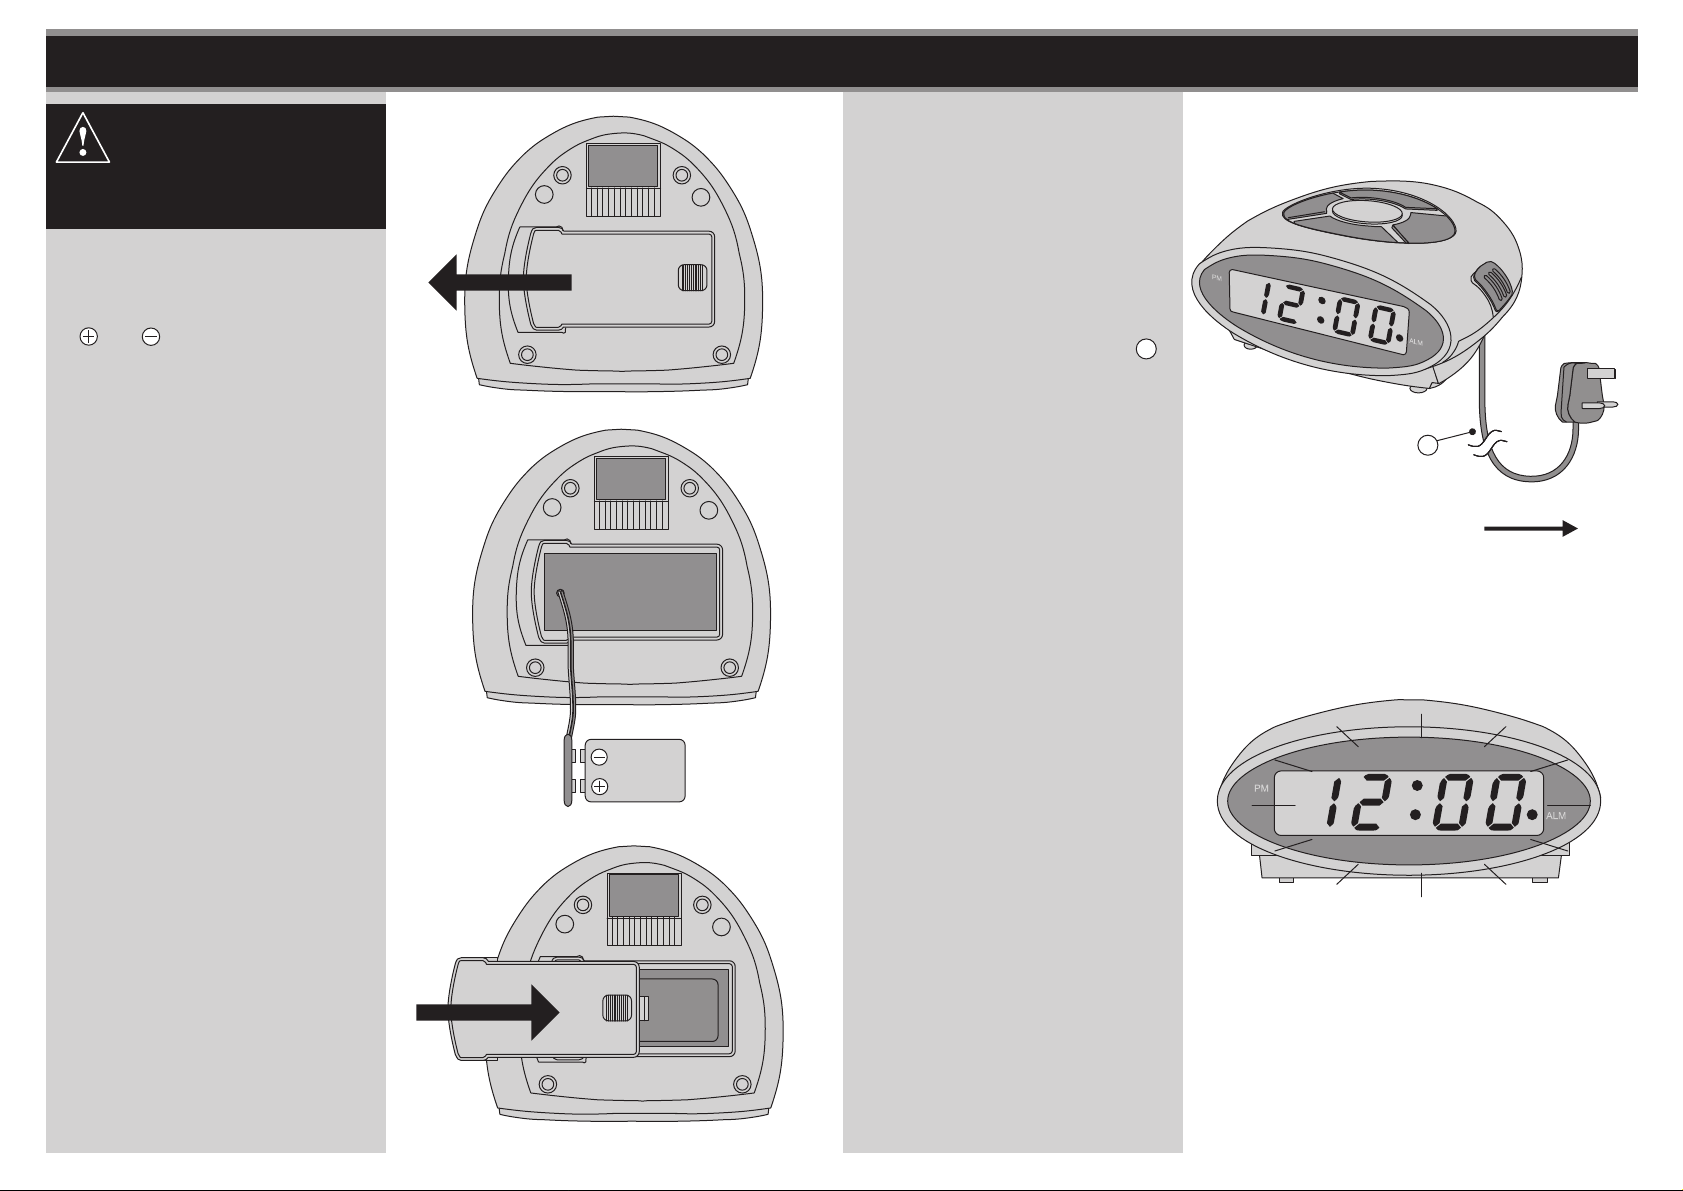
1. Open the battery compartment.
See fig. 1
2. Insert one new 9V battery with the
and marks correctly aligned.
See fig. 2
3. Carefully slide the battery door
closed.
See fig. 3
fig. 1
USING WITH AC POWERUSING WITH BATTERIES
NOTE: Make sure your local
voltage is 230V/240V~, 50Hz.
AC Power Cord Connection
1. Connect the AC Power Cord I
to the mains socket.
See fig. 4.
fig. 4
I
Battery replacement
• When the battery voltage drops,
there will be a reduction in
performance which might include
low sound, distortion, or failure of
the digital display to light. If this
happens, turn off the power, ensure
the unit is unplugged from the
mains and replace with a new
battery.
Note on batteries:
• To prevent the risk of leakage or
explosions, never recharge the
batteries, apply heat or take them
apart.
• When not using batteries, remove
them to prevent battery drain.
• If liquid leaks from the batteries,
throw them away. Thoroughly clean
the battery compartment with a dry
cloth.
fig. 2
fig. 3
2. A blinking signal will appear
indicating the time.
See fig. 5.
Power Failure
- You can insert a 9 volt battery in
the unit. Should there be a power
failure the clock will continue to
function. You will not see this
however because the battery does
not illuminate the clock display.
When the power is turned on
again the display will indicate the
correct time.
Replace the battery once a year.
"The supply cord cannot be
replaced. If the cord is damaged
the appliances should be
scrapped."
Mains Socket
fig. 5
4
5
Page 5
OPERATION OF CLOCK OPERATION OF ALARM
C
Setting the time
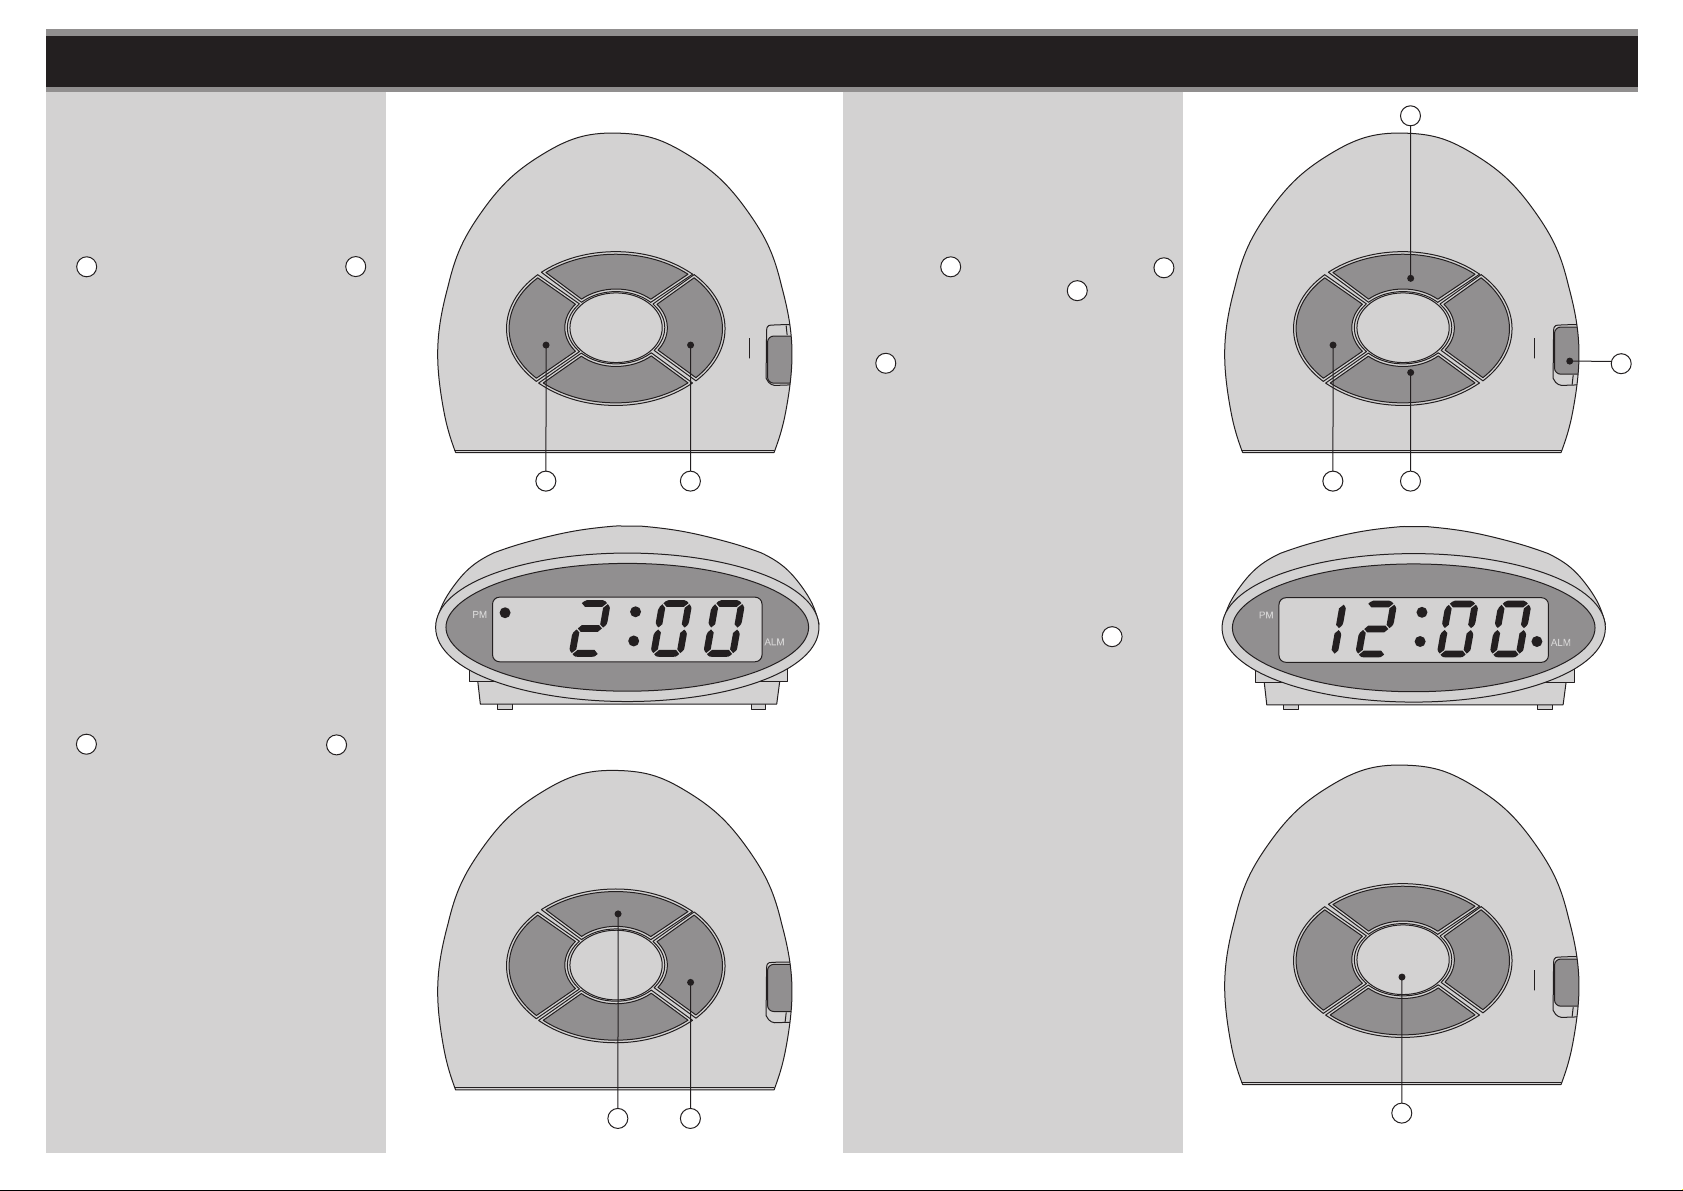
1. Press and hold the Time Set Button
E and press Hour Set Button B
together to set or advance the hour.
A dot will appear in the top left
corner when the time is PM, and
disappear when AM.
See fig. 6 and 7.
2. Press and hold the Time Set Button
E and press Minute Button C
together to set or advance the
minutes.
See fig. 8.
fig. 7
fig. 6
fig. 9
Setting the Alarm
1. Press and hold the Alarm Set
Button F and Hour Set Button B
or Minute Set Button C together
ON
ALM
OFF
to set or advance the alarm time.
Then slide the Alarm On/Off Switch
G to "ON" (the alarm indicator dot
will appear at the bottom of right
ON
ALM
OFF
G
corner of the LED Display).
See fig. 9 and 10.
EB
FB
Snooze Function
1. When you want a few extra
minutes of sleep after the alarm
wakes you, touch the Touch
Sensitive Snooze Button D. The
alarm will turn off and come back
on again in 9 minutes. You may
repeat this operation as often as
you like within a period of 1 hour
fig. 10
59 minutes after the pre-set alarm
time.
fig. 8
See fig. 11.
fig. 11
NOTE:
1. Do not place this unit on a shelf
or where it will not receive
adequate ventilation as this will
cause a hazard.
ON
ALM
OFF
2. If the unit is plugged into the
mains or an extension lead
always ensure you have easy
access to unplug the unit
EC
should a hazard occur.
D
76
Page 6
SPECIFICATIONS
Technical Data
Model no. 255-2460
Power Supply 230VAC-50Hz
Connecting to Power
Check that the voltage marked on the product corresponds with your supply voltage.
This product is fitted with a 13A plug complying with BS1363. If this plug is unsuitable
or needs to be replaced, please note the following :
Plug Replacement
If you need to replace the fitted plug.
WARNING :
Never connect live or neutral wires to the earth terminal of the plug.
Only fit an approved 13 Amp BS1363/A plug and the correct rated fuse.
If in doubt, consult a qualified electrician.
IMPORTANT
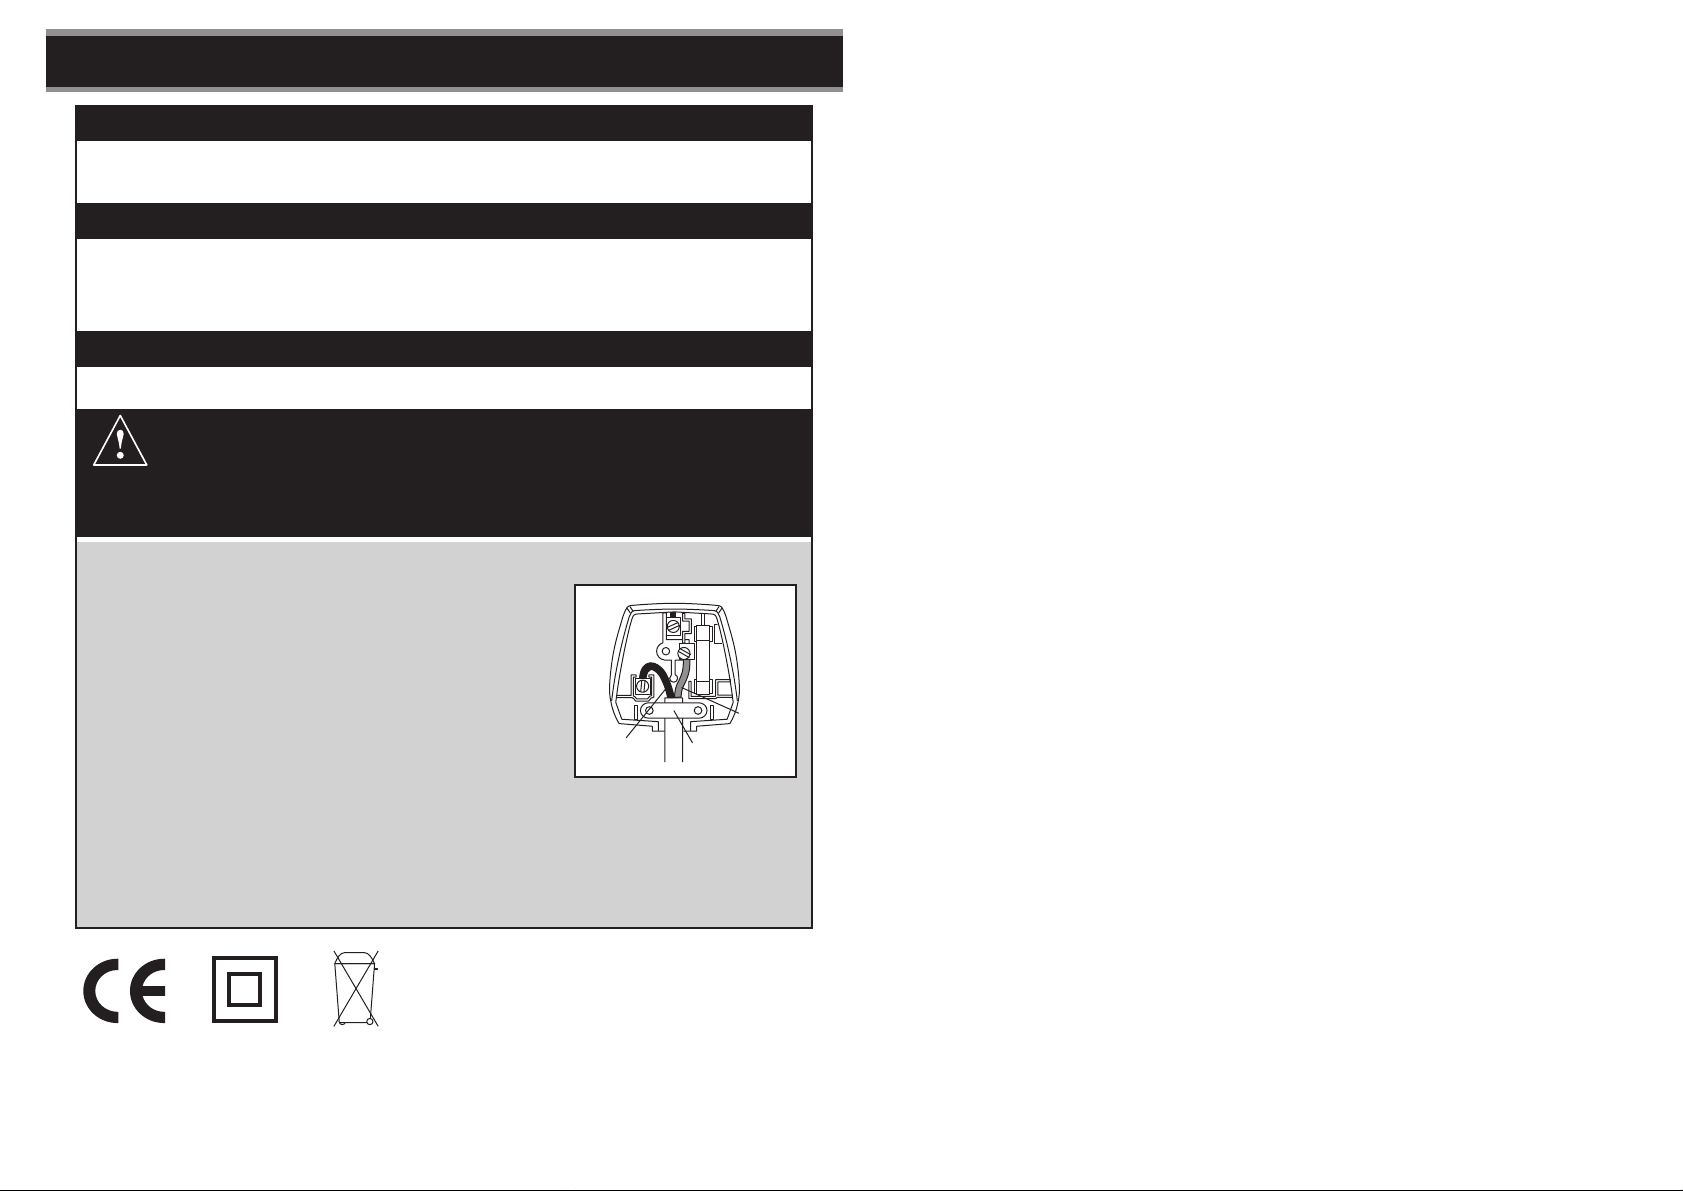
The wires in this mains lead are coloured as follows:
Blue-Neutral
Brown-Live
As the colours of the wires in the mains lead of this
apparatus may not correspond with the coloured
markings identifying the terminals in your plug,
proceed as follows:
BLUE
(NEUTRAL)
The wire which is coloured blue must be connected
to the terminal, which is marked with N or coloured blue. The wire which is coloured
brown must be connected to the terminal which is marked L or coloured brown.
Always ensure that the plug cord grip is fastened correctly. If a 13A (BS1363)
fused plug is used it must be fitted with a 3A fuse conforming to BS1362 and be
ASTA approved. If in doubt contact a qualified electrician.
CABLE
GRIP
BROWN
(LIVE)
8
 Loading...