

Consonance LP6.1 User Manual

LP6.1 Turntable
USER GUIDE
Congratulations on your new CONSONANCE!
Opera Audio products are based on a simple philosophy:
The component shall reproduce the original musical sound, purely and naturally.
The products are easy to operate and are manufactured according to the best quality
principles.
All CONSONANCE products are created with acoustical instruments in a concert situation
as point of reference. The music is reproduced exactly like the original and is limited only
by the quality of the recording.
Our aim is to give you the best possible music experience!
CONTENTS
Partlist p.1
Assembling the Turntable p.2
Technical specifications p.5
Use & Placement p.5
Cleaning p.5
Note & Warning p.6
Warranty p.7
Partlist
1. Platter
2. Plinth
3. Strobe disc
4.Record mat
5. Lubrication oil
6. 5mm allen wrench
7. Belt
8. T988 tone-arm
9. Power supply socket
10.Speed adjustment POT
11. On-off switch
Assembling the Turntable
1.Take out the plinth.
2.Fill the bearing with lubrication oil supplied to a level of approx 5mm above the bottom bearing.
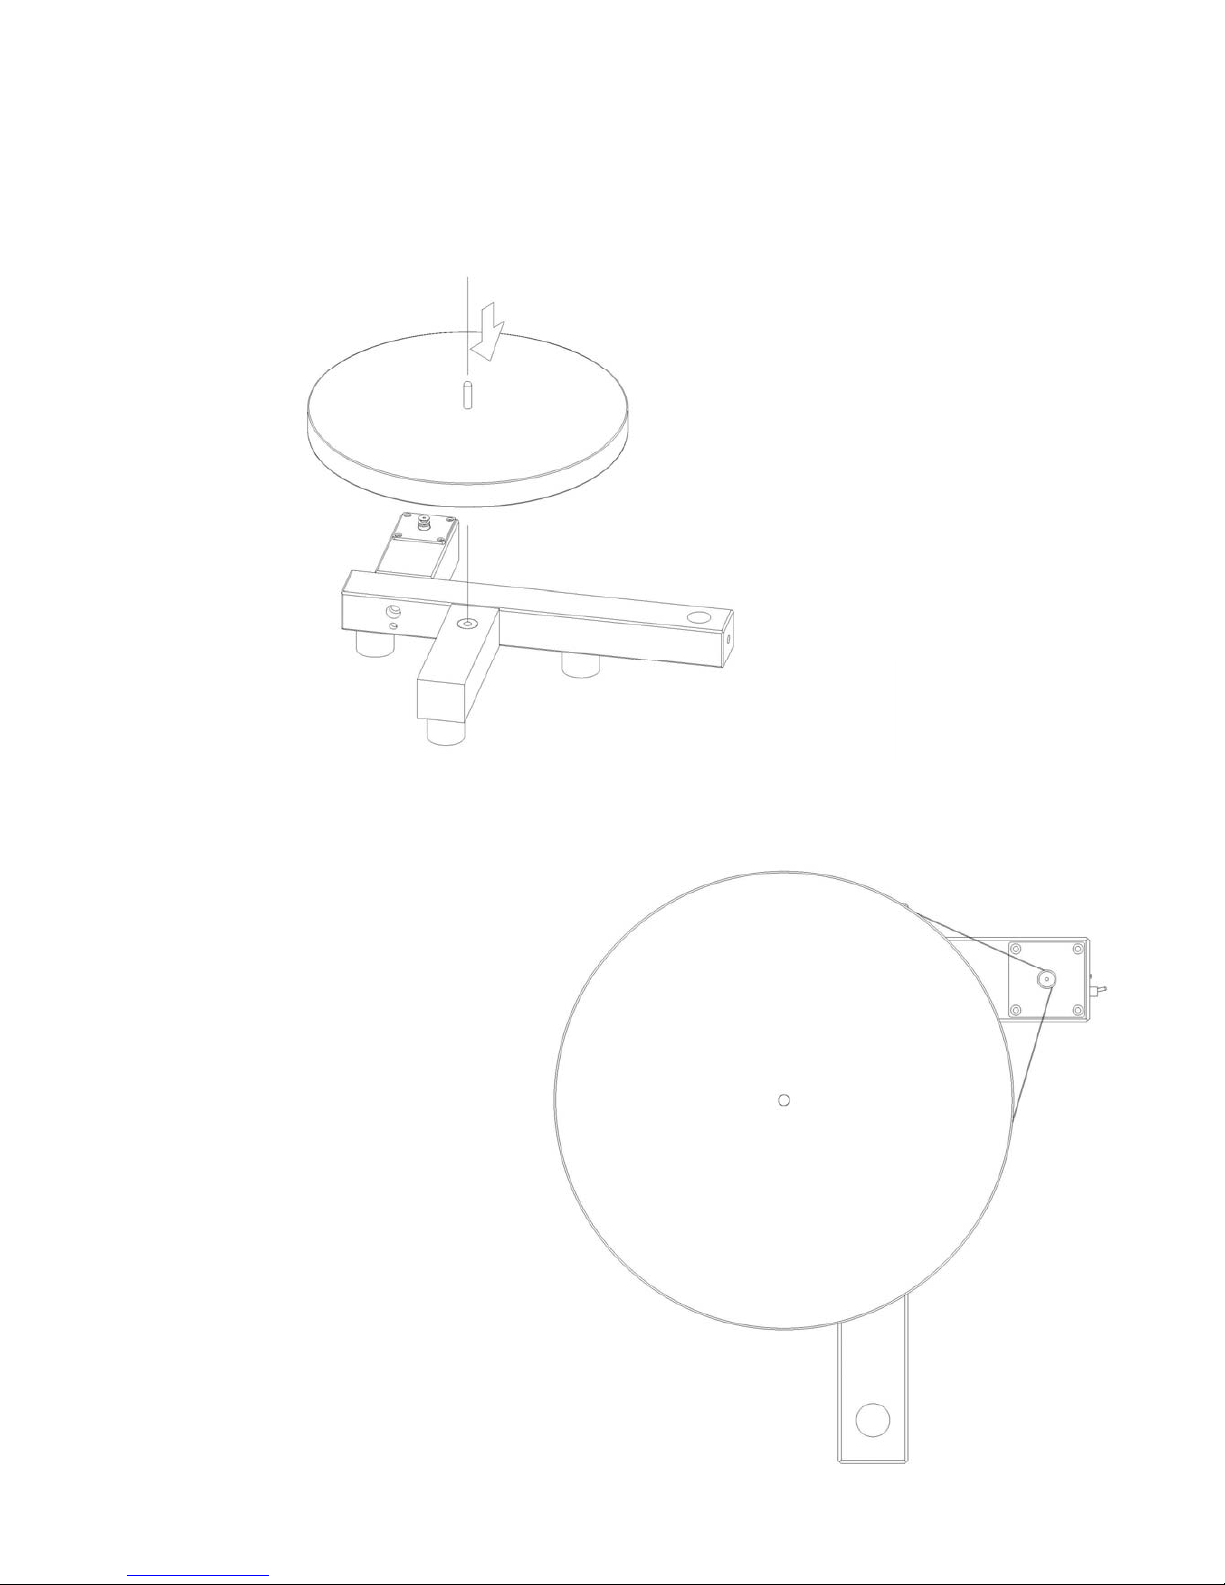
3. Installing the platter.Put on the cotton gloves and pick up the acrylic platter, with the dip for the record
label uppermost. Hold it level over the bearing housing, locate it carefully and gently lower it until it seats fully
over the bearing.
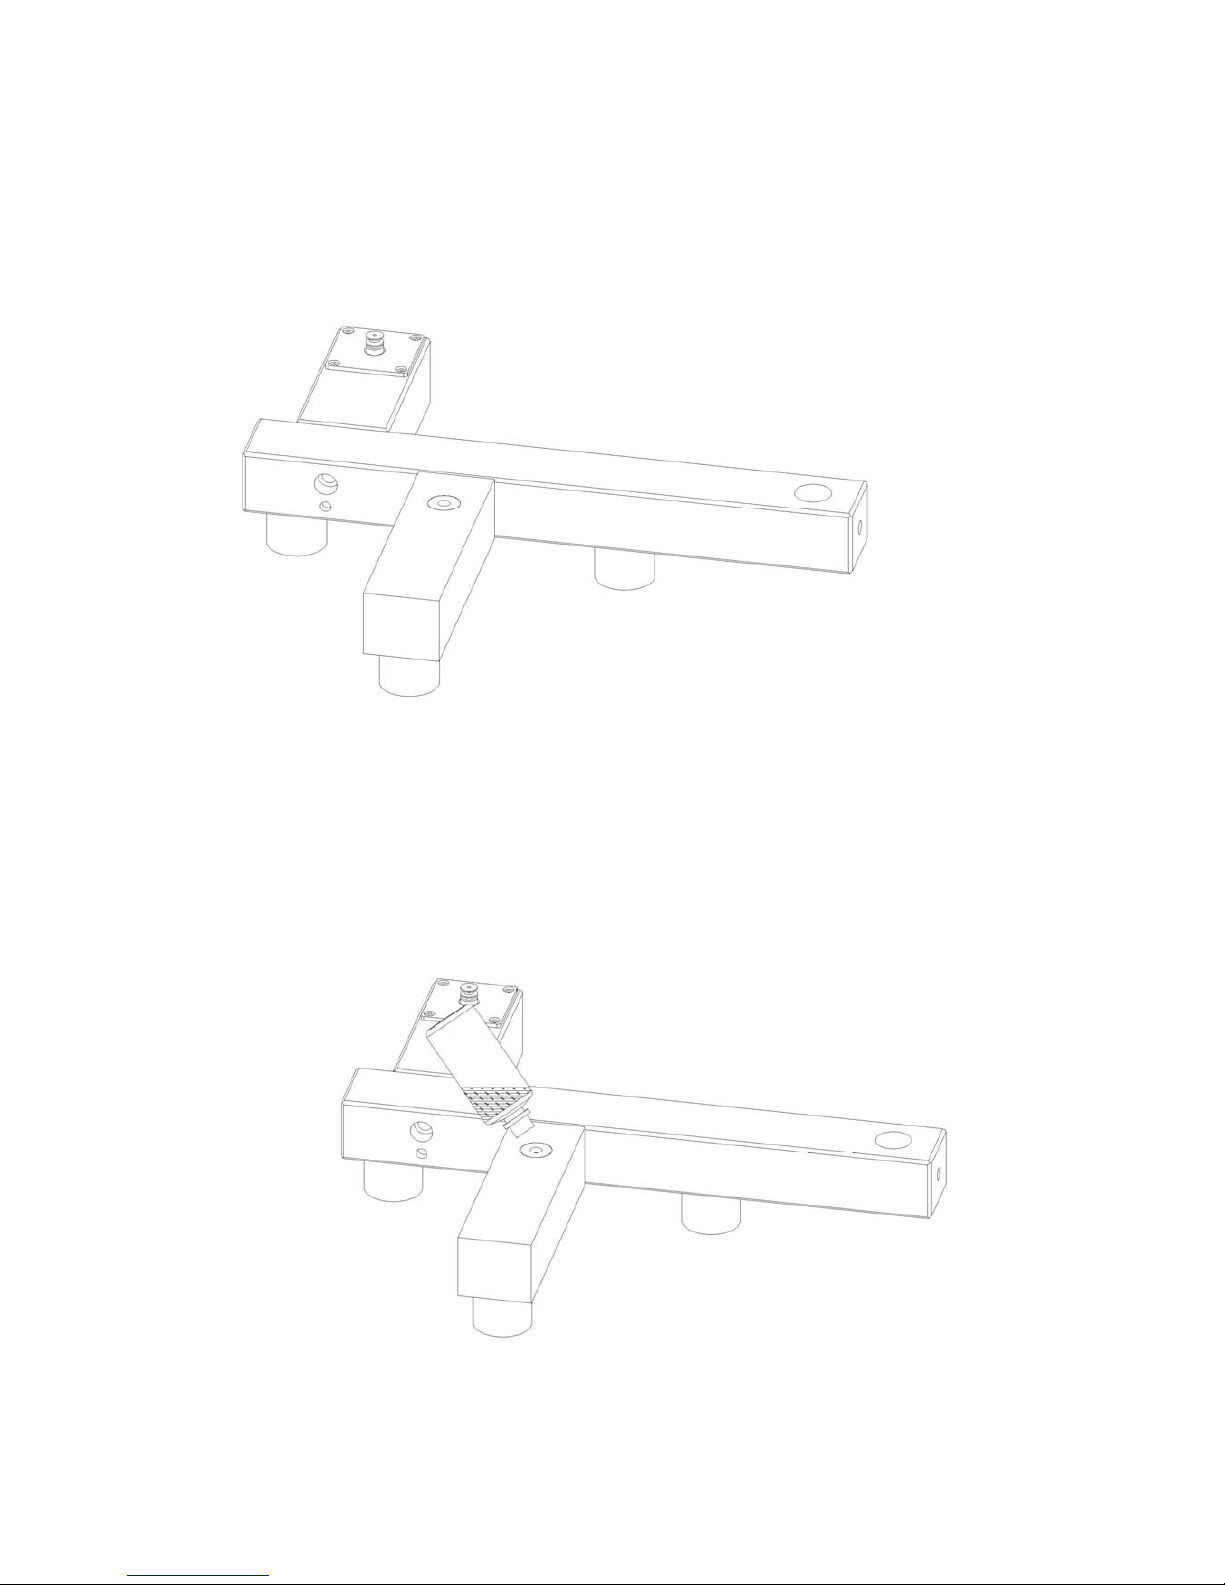
4.Installing the belt.Start with the belt
around the motor pully,take care the
other end clears the centre spindle and
rotate the platter,the belt will track
around the platter.
 Loading...