

Page 1
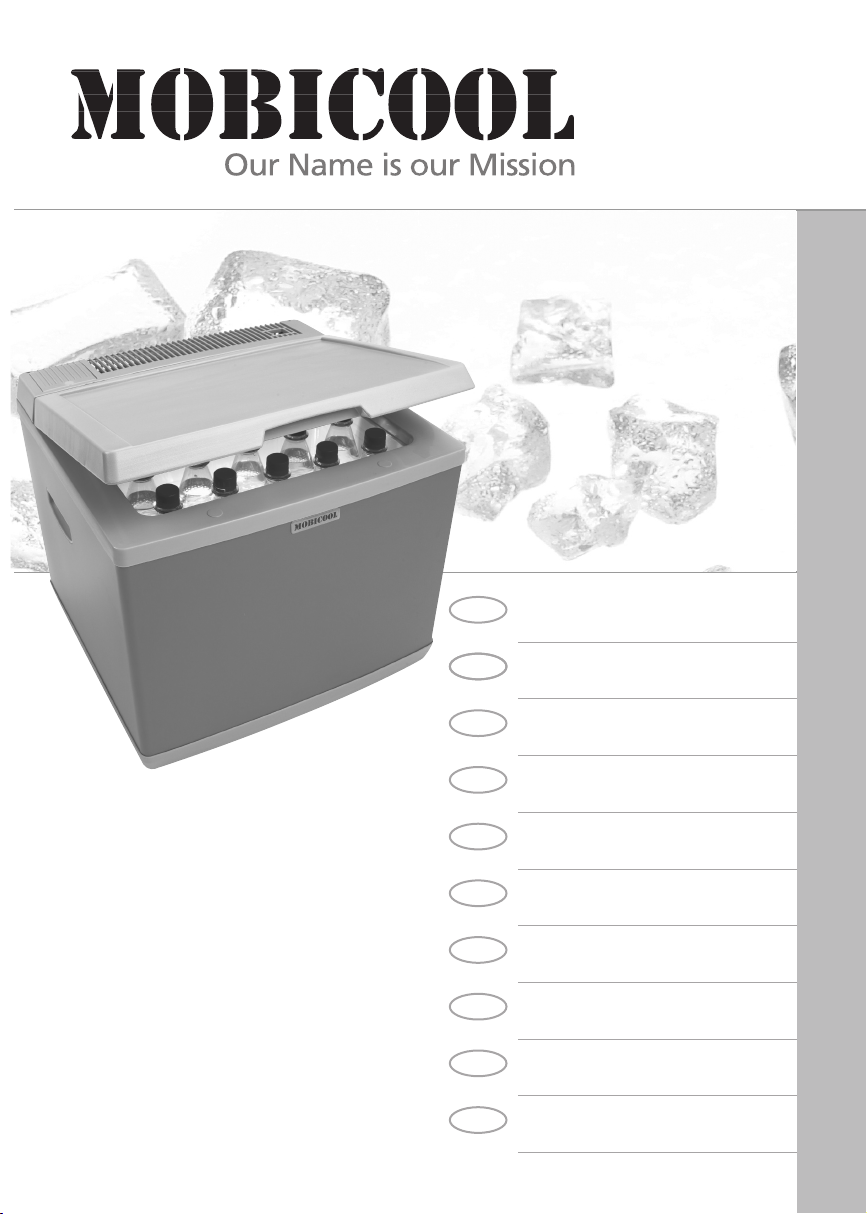
A40
Absorber Cooler
GB
Instruction Manual 5
Absorber-Kühlbox
D
Bedienungsanleitung 16
Glacière à absorption
F
Notice d’emploi 28
Nevera con extractor
E
Instrucciones de uso 41
Frigorifero ad assorbimento
I
Istruzioni per l’uso 54
Absorptie-koelbox
NL
Gebruiksaanwijzingen 66
Absorptionskøleboks
DK
Betjeningsanvisning 78
Absorbasjons-kjøleboks
N
Bruksanvisning 89
Kylbox med
S
Bruksanvisning 100
Absorbtio-kylmälaatikko
FIN
Käyttöohjeet 111
Page 2

Page 3
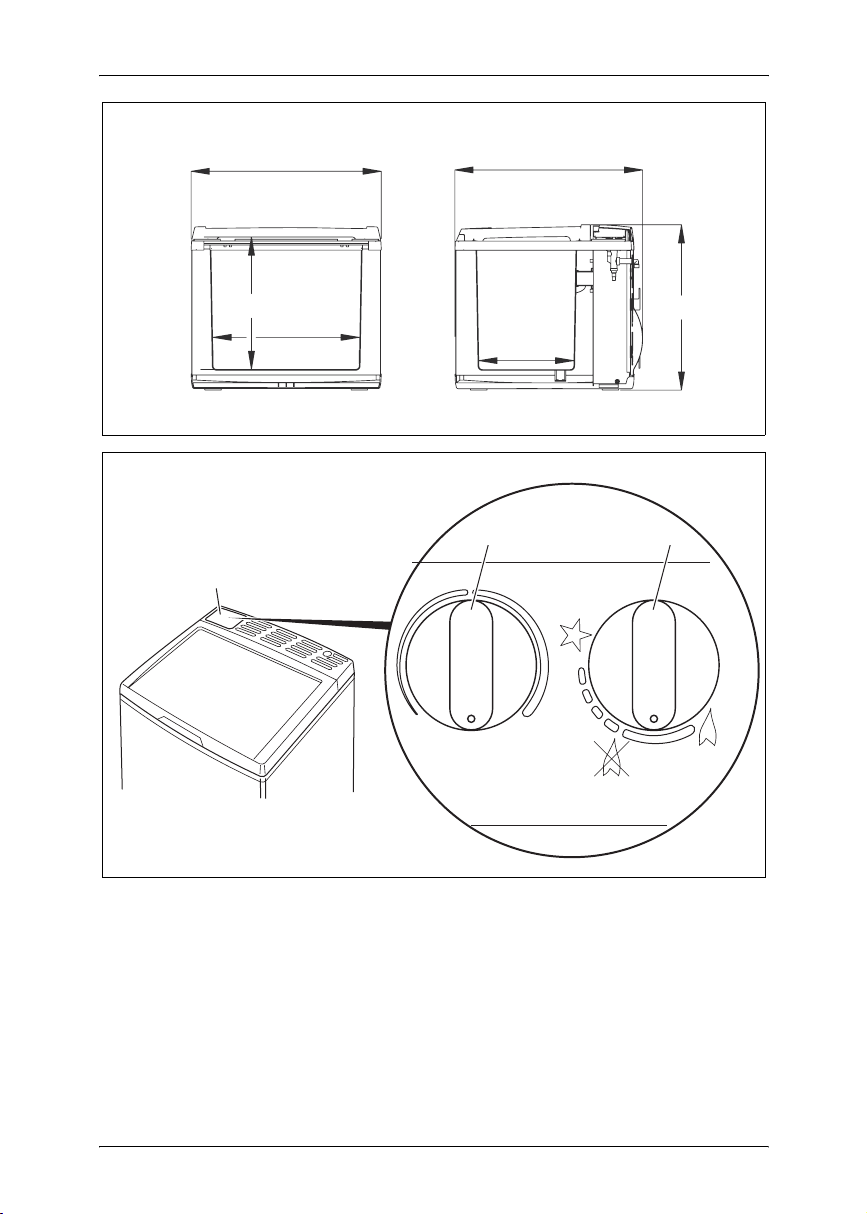
A-40
1
2
520
364
515
454
400
260
2 3
1
TEMPERATURE
PRESS
MIN
MAX
0
MAX
3
Page 4
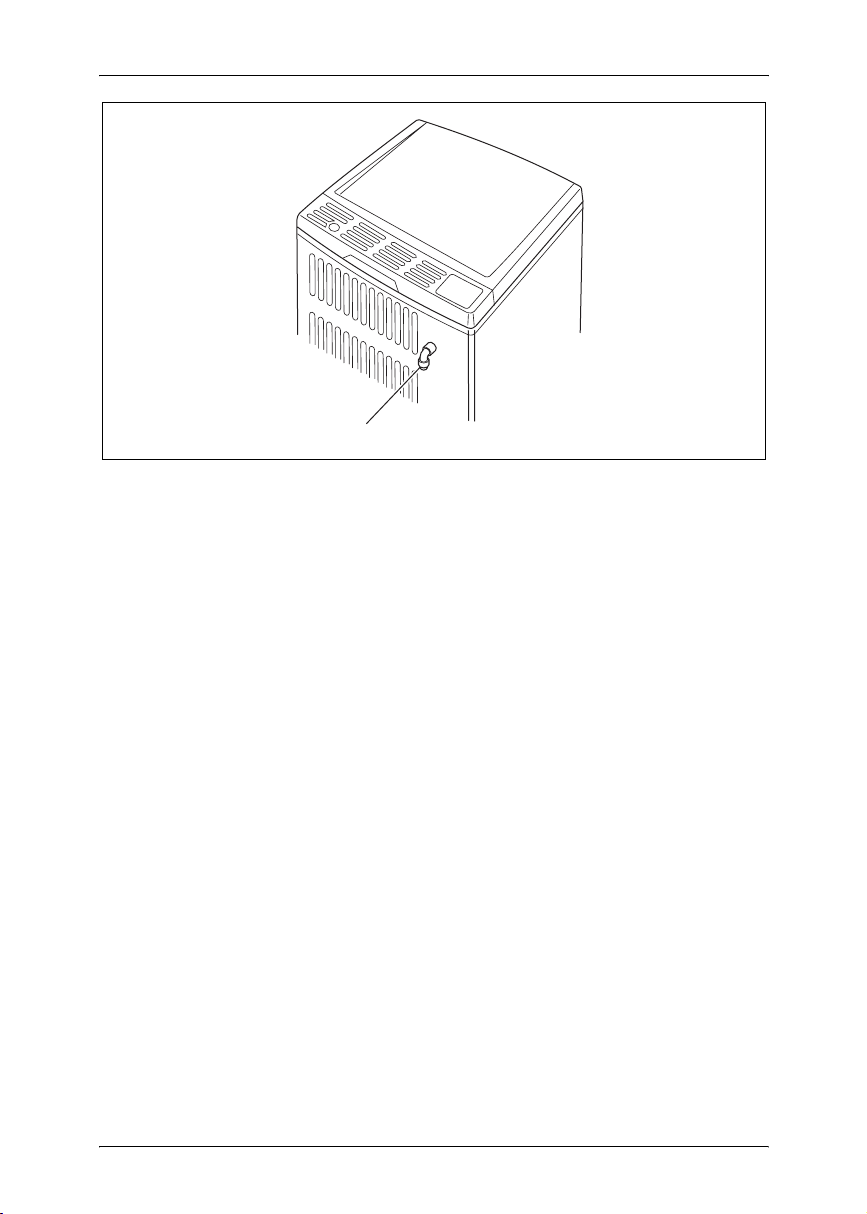
3
A-40
1
4
Page 5
A-40 Notes on using the instruction manual
Please read this manual carefully before starting the machine. Keep it
in a safe place for future reference. If the device is resold, this operating
manual must be handed over to the purchaser along with the device.
Contents
1 Notes on using the instruction manual . . . . . . . . . . . . . . . . . . . . . . 5
2 Safety instructions . . . . . . . . . . . . . . . . . . . . . . . . . . . . . . . . . . . . . . 6
3 Scope of delivery . . . . . . . . . . . . . . . . . . . . . . . . . . . . . . . . . . . . . . 8
4 Intended use . . . . . . . . . . . . . . . . . . . . . . . . . . . . . . . . . . . . . . . . . . 8
5 Technical description . . . . . . . . . . . . . . . . . . . . . . . . . . . . . . . . . . . 8
6 Operating the cooler . . . . . . . . . . . . . . . . . . . . . . . . . . . . . . . . . . . . 9
7 Cleaning and maintenance . . . . . . . . . . . . . . . . . . . . . . . . . . . . . . 13
8 Disposal . . . . . . . . . . . . . . . . . . . . . . . . . . . . . . . . . . . . . . . . . . . . 13
9 Troubleshooting . . . . . . . . . . . . . . . . . . . . . . . . . . . . . . . . . . . . . . 14
10 Technical data . . . . . . . . . . . . . . . . . . . . . . . . . . . . . . . . . . . . . . . . 15
1 Notes on using the instruction manual
The following symbols are used in this instruction manual:
Caution!
Safety instruction: failure to observe this instruction can cause
injury or damage the device.
Caution!
Safety instruction relating to a danger from an electrical current
or voltage. Failure to observe this instruction can damage the
device and impair its function and cause injury.
Note
Supplementary information for operating the device.
➤ Action: this symbol indicates that action is required on your part.
The required action is described step-by-step.
✓ This symbol indicates the result of an action.
1 5, page 3: this refers to an element in an illustration. In this case, item 5
in figure 1 on page 3.
Please observe the following safety instructions.
5
Page 6
Safety instructions A-40
2 Safety instructions
2.1 General safety
z Do not operate the device if it is visibly damaged.
z Do not damage the cooling system.
z Do not place any electrical devices inside the cooler.
z Ensure that the ventilation slots are not covered.
Keep to the following distances:
– a gap of at least 10 cm at the rear
– a gap of at least 5 cm on either side
z The cooling device is not suitable for transporting caustic
materials or materials containing solvents.
z Pull out the connection cable or disconnect the hose connection
– Before cleaning and maintenance
– After use
z This device may only be repaired by qualified personnel.
Inadequate repairs can lead to considerable hazards.
2.2 Operating the device safely
z
Electronic devices are not toys.
Always keep and use the device well out of the reach of children.
z Danger of fatal injury.
Do not touch exposed cables with your bare hands.
This especially applies when operating the device with
an AC mains power supply.
z Never immerse the device in water.
z Never expose the device to rain or moisture.
z Protect the device against splashing water.
z Protect the device and the cable against heat and moisture.
z Only use the device in well ventilated areas.
z The device may give off a smell for a short time when it is first
operated.
z Only operate the device from a single energy source.
z Do not place the device near naked flames or other heat
sources (heaters, direct sunlight, gas ovens etc.).
z Do not fill the inner container with ice or fluid.
6
Page 7

A-40 Safety instructions
z MOBICOOL cannot be held liable for damage resulting from
improper usage or incorrect operation.
2.3 Operating the device safely with 12 V DC
z The cable between the battery and the cooler must be protected
by a fuse of max. 15 A.
z Only use cables with the corresponding cable cross section
(see the table on page 10).
2.4 Operating the device safely with 220 V – 240 V
z Only use the connection cable supplied to connect the device
to the AC mains.
z Never pull the plug out of the socket by the cable.
z If the cable is damaged, it must be replaced by a cable with
the same technical specifications to prevent possible electrical
hazards.
z Before starting the device, ensure that the power supply line
and the plug are dry.
z Check that the voltage specification on the type plate
corresponds to that of the energy supply.
2.5 Operating the device safely with gas
z Only operate the device with gas outdoors.
z Do not use gas to operate the device in cars, boats or enclosed
spaces.
z When using the device in tents, awnings and on level patios,
ensure that there is sufficient air circulation and ventilation.
z Never place the device near flammable materials (paper, dry
leaves, textiles).
z Compare the pressure information on the type plate with the
pressure information on the propane or butane gas cylinder.
z Never store liquid gas cylinders in unventilated areas or below
ground level (funnel shaped holes in the ground).
z Keep liquid gas cylinders away from direct sunlight.
The temperature must not exceed 50 °C.
7
Page 8
Scope of delivery A-40
3 Scope of delivery
Quantity Description
1Cooler
1 Tray with cover for making ice cubes
1 Instruction manual
4 Intended use
The cooler is suitable for cooling and freezing foodstuffs.
The device is also suitable for camping.
If you wish to cool medicines, please check if the cooling capacity of the
device is suitable for the medicine in question.
The cooler has been designed for operation with a 12 V
source (e. g. the cigarette lighter of a vehicle) or alternatively for
operation with a mains voltage of 220 – 240 V
The cooler can be operated independently of a voltage supply with
liquid gas (propane or butane).
AC
.
voltage
DC
5 Technical description
The cooler is suitable for use when camping, on a patio, in the garden,
or anywhere where a 12 V DC power connection (such as the cigarette lighter
in a vehicle) or a 220 V – 240 V mains voltage is available. You can also
operate the cooler with liquid gas.
You can cool goods to up to 20 °C below ambient temperature.
The device cools with a maintenance-free absorber circuit. Concentrated
ammoniac solution is heated in a boiler and then driven out in gaseous form.
The gas which is subjected to high pressure, is liquefied in a condenser and
then evaporated by adding hydrogen. This removes warmth in the cooling area.
8
Page 9
A-40 Operating the cooler
6 Operating the cooler
Before starting your new cooler for the first time, you should
clean it inside and outside with a damp cloth for hygienic reasons
(please also refer to the “Cleaning and maintenance” chapter on
page 13).
Food may only be stored in its original packaging or in suitable
containers.
6.1 Energy saving tips
z Choose a well ventilated installation location which is protected against
direct sunlight.
z Allow food to cool down first before placing it in the device.
z Do not open the cooler more often than necessary.
z Do not leave the lid open for longer than necessary.
z Arrange the food in the cooler so that air can circulate inside.
6.2 Using the cooler
Cool the cooler for about 24 hours before starting your journey
using gas or electricity from the mains. This way your cooler will
attain the required cooling capacity faster when you reach your
destination.
The cooling capacity can be influenced by:
– The ambient temperature
– The amount of food to be conserved
– The frequency with which the lid is opened.
➤ Place the cooler on a firm and level base.
Check the horizontal position (±2°) with a spirit level if necessary.
➤ Open the lid of the control panel (2 1, page 3) by pressing down on it.
Press down on the lid again to close it.
The further you turn the corresponding control towards “MAX”,
the lower the refrigerating temperature.
Ensure that the objects placed in the cooler are suitable for
cooling to the selected temperature.
9
Page 10
Operating the cooler A-40
Ensure that food or liquids in glass containers are not excessively
refrigerated. Liquids expand when they freeze and can thus destroy
the glass containers.
Connecting to 220 V – 240 V
Check that the voltage specification on the type plate corresponds
to that of the energy supply.
➤ Plug the earthed plug into a properly installed safety plug socket.
➤ Set the thermostat control (2 2, page 3) to “MAX”.
➤ Wait until the temperature in the cooler has dropped.
➤ Set the thermostat control (2 2, page 3) to the desired temperature range.
➤ To switch off the cooler, set the thermostat control (2 2, page 3) to “0”
and pull out the plug.
Connecting to 12 V DC
You cannot set the temperature with the thermostat control
during battery operation. The device is simply switched on
and starts cooling.
Disconnect the cooler from the battery when the engine is not
running as otherwise the battery will be completely run down.
➤ Make sure that the cable from the battery to the cooler is protected by
a fuse (max. 15 A).
➤ Select a cable cross section for the cable between the battery and the
socket of the 12 V voltage supply in accordance with the following table:
Cable length Cable cross section
Up to 2.5 m 2.5 mm²
2.5 m to 4.0 m 4.0 mm²
➤ Make sure that the thermostat control for 220 V – 240 V operation (2 2,
page 3) is in the “0” position.
➤ Insert the plug of the connection cable into the 12 V socket
(e.g. cigarette lighter).
The polarity cannot be reversed.
➤ To switch off the cooler, pull the plug out of the socket.
10
Page 11
A-40 Operating the cooler
Connecting to a gas source
Only use propane or butane gas bottles with an approved
pressure reduction valve and suitable top part.
Compare the pressure information on the type plate with the
pressure information on the propane or butane gas cylinder.
The device is fitted with a pilot light. The gas supply is interrupted
when the flame goes out.
➤ Position the gas bottle vertically at a distance of at least 1 metre away
from the burner (on the back of the cooler).
➤ Check if the valve on the gas bottle is closed.
Only use approved hose lines (DIN 4815 part 2) with a maximum
length of 1.5 m.
Your connecting hose must be replaced in accordance with
national guidelines.
➤ Connect the hose line to the head of the valve on the gas bottle and the
cooler (3 1, page 4).
Use an open-ended spanner with the appropriate width for this.
➤ Make sure that the hose line
– Is not crushed or kinked
– Is a safe distance from the burner.
➤ Open the valve on the gas bottle.
Never check for leaks with an open flame or near sources of ignition.
➤ Check all connections with a leakage test spray.
There are no leaks if no bubbles form.
➤ Ensure that
– The thermostat control for 220 V – 240 V operation (2 2, page 3) is
in the “0” position
– The battery plug is not connected.
11
Page 12
Operating the cooler A-40
➤ Press in the rotary switch (2 3, page 3) and hold it in for approx. 10 s to
force out any air in the hose connection.
➤ Turn the rotary switch (2 3, page 3) towards “ ”.
✓ You will hear a regular clicking noise: the Piezo ignition is trying to light
the flame. When the flame is burning, the cooler is ready for use.
➤ If the flame does not ignite, repeat the procedure.
Tip!
If it is not possible to light the gas with the Piezo lighter due to high
air humidity, you can light the gas burner with a match at the opening
in the back panel of the device when the rotary switch is pressed in.
➤ Check that all hose lines and all connections are in a technically perfect
condition at regular intervals.
➤ To switch off the cooler, first close the valve on the bottle and then turn
the rotary switch (2 3, page 3) completely shut in a clockwise direction.
Replacing the gas bottle
Only change the gas bottle in well ventilated areas.
Make sure that there are no sources of ignition in the vicinity.
Only change the gas bottle when the cooler is switched off.
➤ Switch off the cooler by completely shutting the rotary switch (2 3,
page 3) by turning it clockwise.
➤ Completely close the valve on the gas bottle.
➤ Unscrew the valve from the bottle.
➤ Check the condition of the hose line.
Replace the hose line if the material is brittle or porous.
➤ Screw the pressure reduction valve tightly onto the new bottle.
Defrosting the cooler
Humidity can form frost in the interior of the cooler. This reduces the cooling
capacity. Defrost the device in good time to avoid this.
Caution!
Never use hard or pointed tools to remove ice or to loosen objects
which have frozen in place.
To defrost the cooler, proceed as follows:
➤ Take out the contents of the cooler.
➤ Place them in another cooling device to keep them cool, if necessary.
12
Page 13
A-40 Cleaning and maintenance
➤ Switch the cooler off.
➤ Leave the cover open.
➤ When everything has defrosted, empty the cooler and wipe it out.
Switching off and storing the cooler
If you do not intend to use the cooler for a long time, proceed as follows:
➤ Switch the cooler off.
➤ Disconnect the power supply or the hose line to the gas bottle.
➤ Clean the cooler (see “Cleaning and maintenance” chapter on page 13).
➤ Leave the cover slightly open.
This prevents odours from building up.
7 Cleaning and maintenance
Caution!
Before cleaning the cooler disconnect the power cable or the
hose line.
Caution!
Do not clean the cooler under running water or in dish water.
Caution!
Do not use abrasive cleaning agents or hard objects during
cleaning as these can damage the cooler.
➤ Clean the interior of the cooler with a damp cloth from time to time.
➤ Clean the exterior of the device with a damp cloth.
8 Disposal
8.1 Disposing of packaging material
Do not simply throw the packaging materials away. Please observe the
following instructions:
➤ Place cardboard and plastic packaging in the appropriate recycling
waste bins.
➤ Ask your local authority for the location of the recycling centre closest
to you.
13
Page 14

Troubleshooting A-40
8.2 Disposing of the device
If you wish to finally dispose of the device, take it to the nearest recycling
centre or return it to your specialist dealer who will be happy to take it back
for a small fee.
9 Troubleshooting
In the event of malfunction, please check the following:
Fault Possible cause Suggested remedy
The cooler does not
work.
The cooler does not
start up after a long
period of inactivity.
The cooler is not
properly connected to
the electricity supply.
The cooler is not
properly connected
to the gas.
The cooler has not
been set up properly.
The cooler has not
been filled properly.
The refrigerant circuit
is defective.
– Disconnect the device from the energy
Check if the voltage supply is in full
working order.
Check if all electrical contacts are in full
working order.
Check if the voltage supply corresponds to
the value on the type plate.
Check if the thermostat control is
switched on.
Check if several energy sources are
connected at the same time.
Check if the gas supply is in full
working order.
Check if the valve on the gas bottle is open.
Check if there is still gas in the bottle.
Check if several energy sources are
connected at the same time.
Hold the rotary switch down longer
when igniting.
Check if the device is horizontal.
Check if the ventilation of the device
is sufficient.
Check if warm food has been put into
the device.
Check if the cooling space has been
overfilled or packed too densely.
This can only be repaired by an authorised
customer services unit.
supply and turn the cooler upside down
and wait around five minutes.
Turn the cooler the right way up again
and switch it on again.
14
Page 15
A-40 Technical data
10 Technical data
Capacity: 40 l
Gas consumption: 13 g/h
Connection pressure by country Category I
D, AU, LU, CH, CZ, HU: 50 mbar
SE, NO, NL, FI, DK: 30 mbar
GB, E, FR, BE, IE, IT, PT: 28 – 30/37 mbar
Connection to 220 V – 240 V
Power consumption: 75 W
Current consumption: 0.33 A
Connection to 12 V
Power consumption: 75 W
Current consumption: 6.25 A
Cooling temperature range: Up to 20 °C below ambient temperature
Weight: approx. 19.5 kg
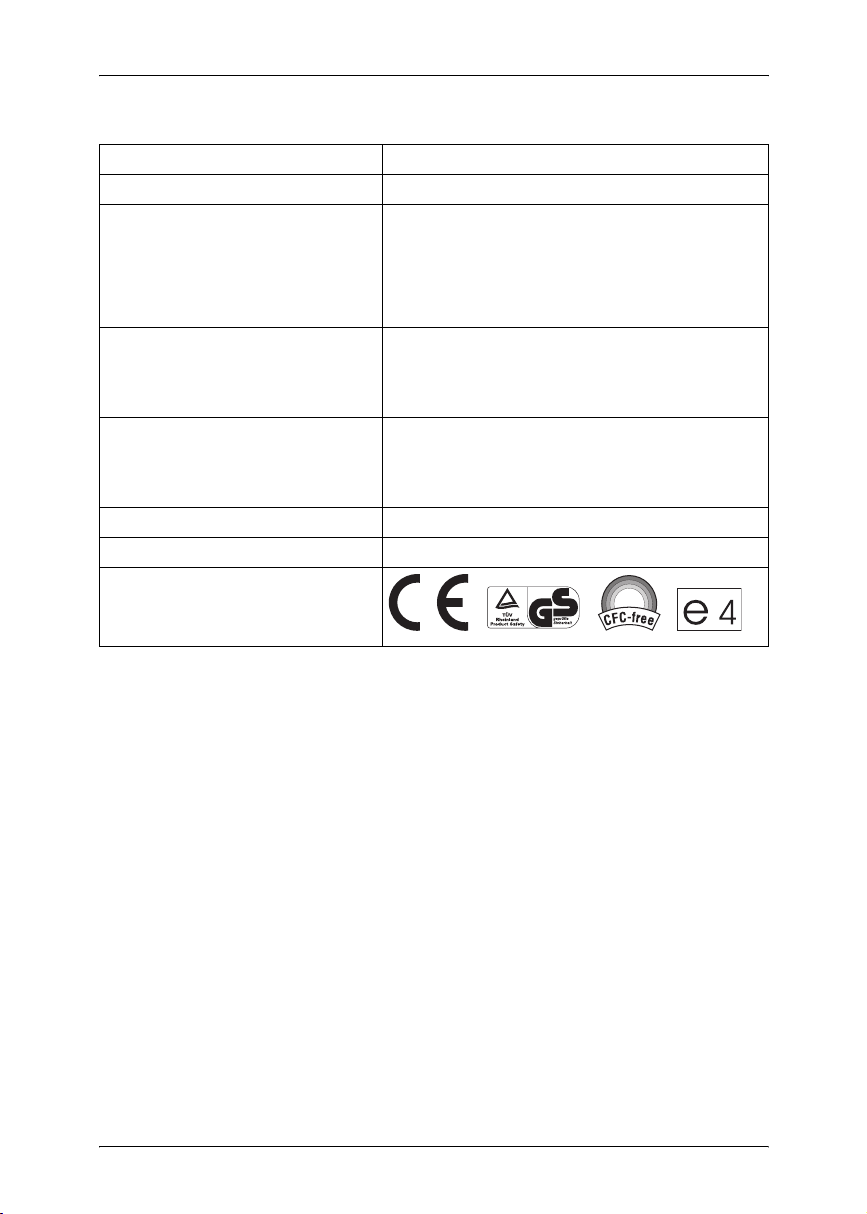
Testing/certification:
, liquid gas
3
Versions, technical modifications and delivery options reserved.
The device has the e4 approval.
This device is CFC-free.
This device carries the GS symbol to indicate tested and proven safety.
15
Page 16
Hinweise zur Benutzung der Anleitung A-40
Bitte lesen Sie diese Anleitung vor der Inbetriebnahme sorgfältig durch
und bewahren Sie sie auf. Geben Sie sie im Falle einer Weiterveräußerung des Gerätes an den Käufer weiter.
Inhaltsverzeichnis
1 Hinweise zur Benutzung der Anleitung . . . . . . . . . . . . . . . . . . . . . 16
2 Sicherheitshinweise . . . . . . . . . . . . . . . . . . . . . . . . . . . . . . . . . . . 17
3 Lieferumfang . . . . . . . . . . . . . . . . . . . . . . . . . . . . . . . . . . . . . . . . . 19
4 Bestimmungsgemäßer Gebrauch . . . . . . . . . . . . . . . . . . . . . . . . . 19
5 Technische Beschreibung . . . . . . . . . . . . . . . . . . . . . . . . . . . . . . . 20
6 Kühlbox bedienen . . . . . . . . . . . . . . . . . . . . . . . . . . . . . . . . . . . . . 20
7 Reinigung und Pflege . . . . . . . . . . . . . . . . . . . . . . . . . . . . . . . . . . 25
8 Entsorgung . . . . . . . . . . . . . . . . . . . . . . . . . . . . . . . . . . . . . . . . . . 25
9 Störungsbeseitigung . . . . . . . . . . . . . . . . . . . . . . . . . . . . . . . . . . . 26
10 Technische Daten . . . . . . . . . . . . . . . . . . . . . . . . . . . . . . . . . . . . . 27
1 Hinweise zur Benutzung der Anleitung
Die folgenden Symbole werden in dieser Bedienungsanleitung verwendet:
Achtung!
Sicherheitshinweis: Nichtbeachtung kann zu Personen- und
Geräteschäden führen.
Achtung!
Sicherheitshinweis, der auf Gefahren mit elektrischem Strom
oder elektrischer Spannung hinweist: Nichtbeachtung kann zu
Personen- und Geräteschäden führen und die Funktion des
Gerätes beeinträchtigen.
Hinweis
Ergänzende Informationen zur Bedienung des Gerätes.
➤ Handlung: Dieses Symbol zeigt Ihnen, dass Sie etwas tun müssen. Die
erforderlichen Handlungen werden Schritt für Schritt beschrieben.
✓ Dieses Symbol beschreibt das Ergebnis einer Handlung.
1 5, Seite 3: Diese Angabe weist Sie auf ein Element in einer Abbildung
hin, in diesem Beispiel auf „Position 5 in Abbildung 1 auf Seite 3“.
Beachten Sie bitte auch die nachfolgenden Sicherheitshinweise.
16
Page 17
A-40 Sicherheitshinweise
2 Sicherheitshinweise
2.1 Allgemeine Sicherheit
z Wenn das Gerät sichtbare Beschädigungen aufweist, dürfen
Sie es nicht in Betrieb nehmen.
z Beschädigen Sie das Kühlsystem nicht.
z Setzen Sie im Inneren der Kühlbox keine elektrischen Geräte
ein.
z Achten Sie darauf, dass die Lüftungsschlitze nicht abgedeckt
werden.
Halten Sie folgende Mindestabstände ein:
– zur hinteren Begrenzung mindestens 10 cm
– zur seitlichen Begrenzung mindestens 5 cm
z Das Kühlgerät ist nicht geeignet für den Transport ätzender
oder lösungsmittelhaltiger Stoffe!
z Ziehen Sie das Anschlusskabel oder lösen Sie die Schlauch-
verbindung
– vor jeder Reinigung und Pflege
– nach jedem Gebrauch
z Reparaturen an diesem Gerät dürfen nur von Fachkräften
durchgeführt werden. Durch unsachgemäße Reparaturen
können erhebliche Gefahren entstehen.
2.2 Sicherheit beim Betrieb des Gerätes
z Elektrogeräte sind kein Kinderspielzeug!
Verwahren und benutzen Sie das Gerät stets außerhalb der
Reichweite von Kindern.
z Lebensgefahr!
Fassen Sie nie mit bloßen Händen an blanke Leitungen. Dies
gilt vor allem beim Betrieb am Wechselstromnetz.
z Tauchen Sie das Gerät nie in Wasser.
z Schützen Sie das Gerät vor Spritzwasser.
z Schützen Sie das Gerät vor Regen und Feuchtigkeit.
z Schützen Sie das Gerät und die Kabel vor Hitze und Nässe.
17
Page 18
Sicherheitshinweise A-40
z Benutzen Sie das Gerät nur an gut belüfteten Orten.
z Beim erstmaligen Betrieb des Gerätes kann kurzzeitig Geruchs-
bildung entstehen.
z Betreiben Sie das Gerät immer nur mit einer einzigen Energie-
quelle.
z Stellen Sie das Gerät nicht in der Nähe von offenen Flammen
oder anderen Wärmequellen (Heizung, starke Sonneneinstrahlung, Gasöfen usw.) ab.
z Füllen Sie keine Flüssigkeiten oder Eis in den Innenbehälter.
z MOBICOOL haftet nicht für Schäden, die durch nicht
bestimmungsgemäßen Gebrauch oder falsche Bedienung
verursacht werden.
2.3 Sicherheit beim Betrieb des Gerätes mit 12 V DC
z Die Leitung zwischen Batterie und Kühlbox muss durch eine
Sicherung von max. 15 A abgesichert sein.
z Verwenden Sie nur Kabel mit dem entsprechenden Kabelquer-
schnitt (siehe Tabelle auf Seite 22).
2.4 Sicherheit beim Betrieb des Gerätes mit 220 V –
240 V
z Schließen Sie das Gerät nur mit dem zugehörigen Anschluss-
kabel an das Wechselstromnetz an.
z Ziehen Sie den Stecker nie am Anschlusskabel aus der Steck-
dose.
z Wenn das Anschlusskabel beschädigt ist, müssen Sie es erset-
zen, um Gefährdungen zu vermeiden. Tauschen Sie ein beschädigtes Anschlusskabel nur gegen ein Anschlusskabel
gleicher Art und Spezifikation aus.
z Achten Sie vor der Inbetriebnahme darauf, dass Zuleitung und
Stecker trocken sind.
z Vergleichen Sie die Spannungsangabe auf dem Typenschild
mit der vorhandenen Energieversorgung.
18
Page 19
A-40 Lieferumfang
2.5 Sicherheit beim Betrieb des Gerätes mit Gas
z Betreiben Sie das Gerät ausschließlich im Freien mit Gas.
z Betreiben Sie das Gerät nicht mit Gas in Straßenfahrzeugen,
Wasserfahrzeugen oder geschlossenen Räumen.
z Sorgen Sie bei Benutzung in Zelten oder Vorzelten und auf
ebenerdigen Terrassen für eine ausreichende Luftzufuhr und
Belüftung.
z Stellen Sie das Gerät nicht in der Nähe von entzündlichen Ma-
terialien (Papier, trockenes Laub, Textilien) auf.
z Vergleichen Sie die Druckangabe auf dem Typenschild mit der
Druckangabe auf der Propan- oder Butangasflasche.
z
Bewahren Sie Flüssiggasflaschen
zen oder unterhalb Bodenniveau (trichterförmige Erdmulden) auf.
z Schützen Sie Flüssiggasflaschen vor direkter Sonneneinstrah-
lung. Die Temperatur darf 50 °C nicht überschreiten.
niemals
an unbelüfteten Plät-
3Lieferumfang
Menge Bezeichnung
1 Kühlbox
1 Schale mit Deckel zum Herstellen von Eiswürfeln
1 Bedienungsanleitung
4 Bestimmungsgemäßer Gebrauch
Die Kühlbox eignet sich zum Kühlen und Tiefkühlen von Lebensmitteln. Das Gerät ist auch für Camping-Zwecke geeignet.
Falls Sie Medikamente kühlen wollen, überprüfen Sie bitte, ob die Kühlleistung des Gerätes den Anforderungen der jeweiligen Arzneimittel entspricht.
Die Kühlbox ist für den Betrieb an einer 12-V
(z. B. Zigarettenanzünder eines Fahrzeugs) und alternativ für den
Anschluss an eine Netzspannung von 220 – 240 V
Die Kühlbox kann stromunabhängig mit Flüssiggas (Propan oder
Butan) betrieben werden.
-Spannungsquelle
DC
ausgelegt.
AC
19
Page 20
Technische Beschreibung A-40
5 Technische Beschreibung
Die Kühlbox ist geeignet für den Einsatz z. B. beim Camping, auf der Terrasse, im Garten oder an anderen Orten, an denen ein 12-V-DC- (z. B.
Zigarettenanzünder im Fahrzeug) oder ein 220 V – 240 V-Netzanschluss
vorhanden ist. Außerdem können Sie die Kühlbox mit Flüssiggas betreiben.
Sie kann Waren bis zu 20 °C unter Umgebungstemperatur abkühlen.
Die Kühlung erfolgt durch einen wartungsfreien Absorberkreislauf. Konzen-
trierte Ammoniaklösung wird in einem Boiler erwärmt und dampfförmig ausgetrieben. Das unter hohem Druck stehende Gas wird in einem Kondensator
verflüssigt und dann unter Zusatz von Wasserstoff verdampft. Dabei wird
dem Kühlraum Wärme entzogen.
6 Kühlbox bedienen
Bevor Sie die neue Kühlbox in Betrieb nehmen, sollten Sie sie
aus hygienischen Gründen innen und außen mit einem feuchten
Tuch reinigen (siehe auch Kapitel „Reinigung und Pflege“ auf
Seite 25).
Lebensmittel dürfen nur in Originalverpackungen oder geeigneten
Behältern eingelagert werden.
6.1 Tipps zum Energiesparen
z Wählen Sie einen gut belüfteten und vor Sonnenstrahlen geschützten
Einsatzort.
z Lassen Sie warme Speisen erst abkühlen, bevor Sie sie einlagern.
z Öffnen Sie die Kühlbox nicht häufiger als nötig.
z Lassen Sie den Deckel nicht länger offen stehen als nötig.
z Ordnen Sie die Lebensmittel so an, dass die Luft in der Kühlbox zirku-
lieren kann.
20
Page 21
A-40 Kühlbox bedienen
6.2 Kühlbox benutzen
Kühlen Sie die Kühlbox vor Reisebeginn etwa 24 Stunden am
Netz oder mit Gas vor. Dadurch haben Sie am Einsatzort
schneller die gewünschte Kühlleistung.
Die Kühlleistung kann beeinflusst werden von
– der Umgebungstemperatur,
– der Menge der zu konservierenden Lebensmittel,
– der Häufigkeit des Deckelöffnens.
➤ Stellen Sie die Kühlbox auf eine feste und ebene Unterlage.
Prüfen Sie die Horizontalstellung (±2°) ggf. mit einer Wasserwaage.
➤ Öffnen Sie den Deckel des Bedienpanels (2 1, Seite 3), indem Sie
darauf drücken.
Durch erneutes Drücken wird der Deckel wieder geschlossen.
Je weiter Sie den entsprechenden Regler in Richtung „MAX“
drehen, desto niedriger wird die Kühltemperatur.
Achten Sie darauf, dass sich nur Gegenstände bzw. Waren in der
Kühlbox befinden, die auf die gewählte Temperatur gekühlt werden dürfen.
Achten Sie darauf, dass Sie Getränke oder Speisen in Glasbehältern nicht zu stark abkühlen. Beim Gefrieren dehnen sich
Getränke oder flüssige Speisen aus. Dadurch können die Glasbehälter zerstört werden.
An 220 V – 240 V anschließen
Vergleichen Sie die Spannungsangabe auf dem Typenschild mit
der vorhandenen Energieversorgung.
➤ Stecken Sie den Schutzkontaktstecker in eine vorschriftsmäßig installier-
te Schutzkontakt-Steckdose.
➤ Stellen Sie den Thermostatregler (2 2, Seite 3) auf „MAX“.
➤ Warten Sie, bis die Temperatur in der Kühlbox abgesunken ist.
➤ Stellen Sie den Thermostatregler (2 2, Seite 3) auf den gewünschten
Temperaturbereich ein.
➤ Zum Ausschalten der Kühlbox stellen Sie den Thermostatregler (2 2,
Seite 3) auf „0“ und ziehen Sie den Netzstecker.
21
Page 22
Kühlbox bedienen A-40
An 12 V DC anschließen
Bei Batteriebetrieb können Sie die Temperatur nicht mit dem
Thermostatregler einstellen. Das Gerät wird lediglich eingeschaltet und kühlt dann.
Trennen Sie die Kühlbox bei Motorstillstand von der Batterie, da
diese sonst entladen wird.
➤ Stellen Sie sicher, dass die Leitung zwischen Batterie und Kühlschrank
durch eine Sicherung (maximal 15 A) abgesichert ist.
➤ Wählen Sie den Kabelquerschnitt des Kabels zwischen Batterie und der
Buchse der 12-V-Spannungsversorgung gemäß folgender Tabelle:
Kabellänge Kabelquerschnitt
bis 2,5 m 2,5 mm²
2,5 m bis 4,0 m 4,0 mm²
➤ Stellen Sie sicher, dass sich der Thermostatregler für 220 V – 240 V-Be-
trieb (2 2, Seite 3) in Stellung „0“ befindet.
➤ Stecken Sie den Stecker des Anschlusskabels in die Buchse der 12-V-
Spannungsversorgung (z. B. Zigarettenanzünder).
Die Polung ist beliebig.
➤ Zum Ausschalten der Kühlbox ziehen Sie den Stecker aus der Buchse.
An eine Gasquelle anschließen
Verwenden Sie nur Propan- oder Butangasflaschen mit geprüftem
Druckreduzierventil und passendem Kopfstück.
Vergleichen Sie die Druckangabe auf dem Typenschild mit der
Druckangabe auf der Propan- oder Butangasflasche.
Der Austausch Ihrer Anschlussleitung muss entsprechend nationaler Richtlinien durchgeführt werden.
Das Gerät ist mit einer Flammsicherung ausgerüstet. Die Gaszufuhr wird unterbrochen, wenn die Flamme erlischt.
➤ Stellen Sie die Gasflasche senkrecht und mindestens einen Meter vom
Brenner (an der Rückseite der Kühlbox) entfernt auf.
22
Page 23
A-40 Kühlbox bedienen
➤ Prüfen Sie, ob das Ventil der Gasflasche geschlossen ist.
Verwenden Sie nur geprüfte Schlauchleitungen (DIN 4815 Teil 2)
mit einer maximalen Länge von 1,5 m.
➤ Verbinden Sie die Schlauchleitung mit dem Kopfstück des Ventils der
Gasflasche und des Kühlgeräts (3 1, Seite 4).
Verwenden Sie hierzu einen Gabelschlüssel mit der entsprechenden
Schlüsselweite.
➤ Achten Sie darauf, dass die Schlauchleitung
– nicht eingeklemmt oder abgeknickt wurde,
– in sicherem Abstand vom Brenner liegt.
➤ Öffnen Sie das Ventil der Gasflasche.
Prüfen Sie die Dichtheit niemals bei offener Flamme oder in der
Nähe von Zündquellen.
➤ Prüfen Sie alle Verbindungen mit Lecksuchspray auf Dichtheit.
Die Dichtheit ist gewährleistet, wenn sich keine Bläschen bilden.
➤ Achten Sie darauf, dass
– der Thermostatregler für den 220 V – 240 V-Betrieb (2 2, Seite 3) in
Stellung „0“ steht,
– der Batteriestecker nicht angeschlossen ist.
➤ Drücken Sie den Drehschalter (2 3, Seite 3) ein und halten Sie ihn etwa
10 s gedrückt, damit die in der Schlauchleitung befindliche Luft verdrängt
wird.
➤ Drehen Sie den Drehschalter (2 3, Seite 3) in Richtung „ “.
✓ Sie hören ein regelmäßiges, knackendes Geräusch: Der Piezozünder
versucht, die Flamme zu entzünden.
Wenn die Flamme brennt, ist die Kühlbox einsatzbereit.
➤ Falls die Flamme nicht entzündet wurde, wiederholen Sie den Zünd-
vorgang.
Tipp!
Wenn das Anzünden mit dem Piezozünder wegen hoher Luftfeuchtigkeit nicht möglich ist, können Sie den Gasbrenner bei
gedrücktem Gashebel mit einem Streichholz durch die Öffnung in
der Rückwand entzünden.
➤ Prüfen Sie in regelmäßigen Abständen den ordnungsgemäßen Zustand
der Schlauchleitung und aller Verbindungen.
23
Page 24
Kühlbox bedienen A-40
➤ Zum Ausschalten der Kühlbox schließen Sie zuerst das Flaschenventil
und drehen dann den Drehschalter (2 3, Seite 3) im Uhrzeigersinn ganz
zu.
Gasflasche auswechseln
Wechseln Sie die Gasflasche nur bei guter Belüftung aus.
Achten Sie darauf, dass keine Zündquelle in der Nähe ist.
Wechseln Sie die Gasflasche nur bei ausgeschalteter Kühlbox.
➤ Schalten Sie die Kühlbox aus, indem Sie den Drehschalter (2 3, Seite 3)
im Uhrzeigersinn ganz zudrehen.
➤ Schließen Sie das Ventil der Gasflasche ganz.
➤ Schrauben Sie das Ventil von der Flasche ab.
➤ Prüfen Sie den Zustand der Schlauchleitung.
Wechseln Sie die Schlauchleitung aus, falls das Material spröde oder
porös ist.
➤ Schrauben Sie das Druckreduzierventil auf der neuen Flasche fest.
Kühlbox abtauen
Luftfeuchtigkeit kann sich im Innenraum der Kühlbox als Reif niederschlagen, der die Kühlleistung verringert. Tauen Sie deshalb das Gerät rechtzeitig
ab.
Achtung!
Verwenden Sie nie harte oder spitze Werkzeuge zum Entfernen
von Eisschichten oder zum Lösen festgefrorener Gegenstände.
Gehen Sie wie folgt vor, um die Kühlbox abzutauen:
➤ Nehmen Sie das Kühlgut heraus.
➤ Lagern Sie es ggf. in einem anderen Kühlgerät, damit es kalt bleibt.
➤ Schalten Sie die Kühlbox aus.
➤ Lassen Sie den Deckel offen.
➤ Wenn alles abgetaut ist, entleeren Sie die Kühlbox und wischen Sie sie
aus.
Kühlbox ausschalten und aufbewahren
Wenn Sie die Kühlbox für längere Zeit nicht benutzen wollen, gehen Sie wie
folgt vor:
➤ Schalten Sie die Kühlbox aus.
24
Page 25
A-40 Reinigung und Pflege
➤ Ziehen Sie die Anschlussleitung ab oder nehmen Sie die Schlauchleitung
zur Gasflasche ab.
➤ Reinigen Sie die Kühlbox (siehe Kapitel „Reinigung und Pflege“ auf
Seite 25).
➤ Lassen Sie den Deckel leicht geöffnet.
So verhindern Sie, dass sich Gerüche bilden.
7 Reinigung und Pflege
Achtung!
Ziehen Sie vor jedem Reinigen der Kühlbox das Anschlusskabel
oder lösen Sie die Schlauchverbindung.
Achtung!
Reinigen Sie die Kühlbox niemals unter fließendem Wasser oder
gar im Spülwasser.
Achtung!
Verwenden Sie zur Reinigung keine scharfen Reinigungsmittel
oder harten Gegenstände, da diese die Kühlbox beschädigen
können.
➤ Reinigen Sie die Kühlbox innen gelegentlich mit einem feuchten Tuch.
➤ Reinigen Sie das Geräteäußere mit einem feuchten Tuch.
8 Entsorgung
8.1 Verpackungsmaterial entsorgen
Werfen Sie das Verpackungsmaterial nicht einfach weg. Beachten Sie bitte
folgende Hinweise:
➤ Geben Sie Verpackungsmaterial aus Karton und die Kunststoffverpa-
ckungen möglichst in den entsprechenden Recycling-Müll.
➤ Erfragen Sie ggf. bei Ihrer Kommunalverwaltung das für Sie zuständige
Recyclingcenter.
8.2 Altgerät entsorgen
Wenn Sie das Gerät endgültig außer Betrieb nehmen, bringen Sie es bitte
zum nächsten Recyclingcenter oder zu Ihrem Fachhändler, der es gegen
einen geringen Unkostenbeitrag zurücknimmt.
25
Page 26

Störungsbeseitigung A-40
9 Störungsbeseitigung
Bei Störungen überprüfen Sie bitte folgende Punkte:
Störung Mögliche Ursache Lösungsvorschlag
Die Kühlbox funktioniert
nicht.
Die Kühlbox läuft nach
längerem Nichtgebrauch nicht mehr an.
Die Kühlbox ist elektrisch nicht korrekt
angeschlossen.
Die Kühlbox ist nicht
korrekt am Gas angeschlossen.
Die Kühlbox wurde
nicht korrekt aufgestellt.
Die Kühlbox wurde
nicht korrekt gefüllt.
Der Kühlkreislauf ist
defekt.
– Stellen Sie die Kühlbox ohne angeschlos-
Kontrollieren Sie, ob die einwandfreie
Spannungsversorgung gewährleistet ist.
Kontrollieren Sie, ob die elektrischen Kontakte in Ordnung sind.
Kontrollieren Sie, ob die anliegende Spannung dem Wert auf dem Typenschild entspricht.
Kontrollieren Sie, ob der Thermostatregler
eingeschaltet ist.
Kontrollieren Sie, ob mehrere Energiequellen gleichzeitig angeschlossen sind.
Kontrollieren Sie, ob die einwandfreie
Gasversorgung gewährleistet ist.
Kontrollieren Sie, ob das Ventil der Gasflasche geöffnet ist.
Kontrollieren Sie, ob noch Gas in der Flasche ist.
Kontrollieren Sie, ob mehrere Energiequellen gleichzeitig angeschlossen sind.
Halten Sie den Drehschalter zum Entzünden länger gedrückt.
Kontrollieren Sie, ob das Gerät waagerecht steht.
Kontrollieren Sie, ob eine ausreichende
Belüftung gewährleistet ist.
Kontrollieren Sie, ob warme Speisen eingelagert wurden.
Kontrollieren Sie, ob der Kühlraum zu
dicht gepackt oder überfüllt wurde.
Die Reparatur kann nur von einem zugelassenen Kundendienstbetrieb durchgeführt werden.
sene Energiequellen auf den Kopf und
warten Sie etwa fünf Minuten.
Drehen Sie die Kühlbox wieder um und
schalten Sie sie erneut ein.
26
Page 27

A-40 Technische Daten
10 Technische Daten
Inhalt: 40 l
Gasverbrauch: 13 g/h
Anschlussdruck nach Bestim-
mungsland
D, AU, LU, CH, CZ, HU: 50 mbar
SE, NO, NL, FI, DK: 30 mbar
GB, E, FR, BE, IE, IT, PT: 28 – 30/37 mbar
Anschluss an 220 V – 240 V
Leistungsaufnahme: 75 W
Stromaufnahme: 0,33 A
Anschluss an 12 V
Leistungsaufnahme: 75 W
Stromaufnahme: 6,25 A
Kühltemperaturbereich: bis 20 °C unter Umgebungstemperatur
Gewicht: ca. 19,5 kg
Prüfung/Zertifikat:
Kategorie I
, Flüssiggas
3
Ausführungen, dem technischen Fortschritt dienende Änderungen und
Liefermöglichkeiten vorbehalten.
Das Gerät hat die e4-Zulassung.
Dieses Gerät ist FCKW-frei.
Das Gerät ist mit dem GS-Zeichen für geprüfte Sicherheit ausgezeichnet.
27
Page 28
Remarques concernant l’application des instructions A-40
Veuillez lire ce manuel avec attention avant la mise en service, puis le
conserver. En cas de revente de l’appareil, veuillez le transmettre au
nouvel acquéreur.
Table des matières
1 Remarques concernant l’application des instructions . . . . . . . . . . 28
2 Consignes de sécurité . . . . . . . . . . . . . . . . . . . . . . . . . . . . . . . . . 29
3 Pièces fournies . . . . . . . . . . . . . . . . . . . . . . . . . . . . . . . . . . . . . . . 31
4 Utilisation conforme . . . . . . . . . . . . . . . . . . . . . . . . . . . . . . . . . . . 32
5 Description technique . . . . . . . . . . . . . . . . . . . . . . . . . . . . . . . . . . 32
6 Utilisation de la glacière . . . . . . . . . . . . . . . . . . . . . . . . . . . . . . . . 32
7 Nettoyage et entretien . . . . . . . . . . . . . . . . . . . . . . . . . . . . . . . . . . 37
8 Retraitement du système usagé . . . . . . . . . . . . . . . . . . . . . . . . . . 38
9 Guide de dépannage . . . . . . . . . . . . . . . . . . . . . . . . . . . . . . . . . . 39
10 Caractéristiques techniques . . . . . . . . . . . . . . . . . . . . . . . . . . . . . 40
1 Remarques concernant l’application
des instructions
Les symboles suivants sont utilisés dans ce manuel :
Attention !
Consigne de sécurité : tout non respect des consignes
énoncées peut entraîner des dommages matériels ou
compromettre la sécurité des personnes.
Attention !
Consigne de sécurité relative aux dangers émanant du courant
électrique ou de la tension électrique : tout non respect des
consignes peut entraîner des dommages matériels ou compromettre
la sécurité des personnes et nuire au fonctionnement de l'appareil.
Remarque
Informations complémentaires sur l'utilisation de l'appareil.
➤ Manipulation : ce symbole vous indique que vous devez agir.
Les manipulations à effectuer sont décrites pas à pas.
✓ Ce symbole décrit le résultat d’une manipulation.
1 5, page3: cette donnée vous indique un élément dans une illustration,
dans cet exemple la « position 5 de l'illustration 1 à la page 3 ».
28
Page 29
A-40 Consignes de sécurité
Respectez également les consignes de sécurité ci-après.
2 Consignes de sécurité
2.1 Sécurité générale
z Si l’appareil est visiblement endommagé, il est interdit de le
mettre en service.
z N'endommagez pas le système de refroidissement.
z N'utilisez pas d'appareils électriques à l'intérieur de la glacière.
z Assurez-vous que les fentes d’aération ne sont pas masquées.
Respectez les écarts minimum suivants :
– par rapport à la limite arrière au moins 10 cm
– par rapport à la limite latérale au moins 5 cm
z N'utilisez pas la glacière pour le transport de produits corrosifs
ou de solvants !
z Débranchez le câble de raccordement ou détachez le flexible
– avant tout nettoyage et entretien
– après chaque utilisation
z Seul un personnel qualifié est habilité à effectuer des
réparations sur cet appareil. Toute réparation mal effectuée
risquerait d'entraîner de sérieux dangers.
2.2 Consignes de sécurité concernant l’utilisation de
l’appareil
z Les appareils électriques ne sont pas des jouets pour
enfants !
Conservez et utilisez l'appareil hors de portée des enfants.
z Danger de mort!
Ne touchez jamais les lignes électriques dénudées avec les
mains nues. Cela est surtout valable en cas de fonctionnement
sur secteur.
z Ne plongez jamais l’appareil dans l’eau.
z N'exposez jamais l'appareil à la pluie ou à l'humidité.
z Protégez l'appareil des éclaboussures.
z Tenez l’appareil et les câbles à l'abri de la chaleur et de
l’humidité.
29
Page 30

Consignes de sécurité A-40
z Utilisez l'appareil uniquement dans des lieux bien aérés.
z Lors de la première mise en marche de l'appareil, il est possible
que des odeurs se dégagent un court instant.
z Faites toujours fonctionner l'appareil avec une seule source
d'énergie.
z Ne placez pas l’appareil près de flammes ou d'autres sources
de chaleur (chauffage, rayons solaires, fours à gaz, etc.).
z Ne pas remplir le bac intérieur de substances liquides ou de glace.
z MOBICOOL décline toute responsabilité en cas de dommages
provoqués par une utilisation non conforme de l'appareil
ou par des erreurs de manipulation.
2.3 Consignes de sécurité concernant le
fonctionnement de l'appareil avec 12 V CC
z La ligne entre la batterie et la glacière doit être protégée par un
fusible de 15 A maximum.
z Utilisez uniquement des câbles au diamètre correspondant
(voir tableau à la page 34).
2.4 Consignes de sécurité concernant le
fonctionnement de l'appareil avec 220 V – 240 V
z Pour relier l'appareil au courant alternatif, veuillez utiliser
exclusivement le câble de raccordement correspondant.
z Ne tirez jamais directement sur le câble pour le débrancher de
la prise.
z Si le câble de raccordement est endommagé, vous devez le
remplacer par un câble de même spécification technique,
afin d’éviter tout danger.
z Avant de mettre l’appareil en service, assurez-vous que la ligne
d'alimentation électrique et la fiche sont sèches.
z Comparez la tension indiquée sur la plaque signalétique avec
l'alimentation électrique dont vous disposez.
30
Page 31

A-40 Pièces fournies
2.5 Consignes de sécurité concernant l’utilisation de
l’appareil avec le gaz
z Faites fonctionner l'appareil au gaz exclusivement à l'air libre.
z Ne faites pas fonctionner l'appareil au gaz dans les véhicules
automobiles, les bateaux ou les locaux fermés.
z En cas d'utilisation dans des tentes ou des auvents et sur les
terrasses de plain-pied, veillez à ce que l'arrivée d'air et
l'aération soient suffisantes.
z Ne placez pas l'appareil à proximité de matériaux inflammables
(papier, feuilles mortes, textiles).
z Vérifiez que les données inscrites sur la bouteille de propane ou
de butane correspondent aux données inscrites sur la plaque
signalétique.
z N'entreposez jamais les bouteilles de gaz liquide à des endroits
mal aérés ou sous le niveau du sol (dans des trous en forme
d'entonnoir).
z Protégez les bouteilles de gaz liquide d'un rayonnment
solaire direct.
La température ne doit pas dépasser 50 °C.
3 Pièces fournies
Quantité Désignation
1 glacière
1 bac à couvercle pour confectionner des glaçons
1 mode d'emploi
31
Page 32

Utilisation conforme A-40
4 Utilisation conforme
La glacière est conçue pour la réfrigération et la congélation
d'aliments. L'appareil convient également au camping.
Si vous souhaitez conserver au frais des médicaments, nous vous prions de
vérifier si la puissance frigorifique de l'appareil correspond à la température
de conservation recommandée pour les médicaments concernés.
La glacière est conçue pour l'utilisation à une source de tension
de 12 V
le raccordement à une tension du secteur de 220 – 240 V
Il est également possible de faire fonctionner la glacière indépendamment du courant, avec du gaz liquide (propane ou butane).
(p. ex. l'allume-cigare d'un véhicule) et également pour
CC
CA
.
5 Description technique
La glacière peut être utilisée p. ex. en camping, sur la terrasse, dans le
jardin ou dans d'autres lieux disposant d'une alimentation 12 V CC
(p. ex. allume-cigare du véhicule) ou d'une alimentation secteur 220 V –
240 V.
Il est également possible de faire fonctionner la glacière avec du gaz liquide.
La glacière peut refroidir des denrées jusqu'à 20 °C en dessous de la
température ambiante.
Le refroidissement s'effectue grâce à un circuit à absorption ne nécessitant
aucun entretien. Une solution ammoniaquée est chauffée dans un chauffeeau et expulsée sous forme de vapeur. Le gaz soumis à une grande pression
se liquéfie dans un condensateur, puis se vaporise, après ajout d'hydrogène.
La chaleur disparaît du compartiment de la glacière.
6 Utilisation de la glacière
Avant de mettre en service votre nouvelle glacière, vous devez,
pour des raisons d’hygiène, la nettoyer à l’intérieur et à l’extérieur
à l’aide d’un tissu humide (voir aussi chapitre « Nettoyage et
entretien », page 37).
Les aliments ne peuvent être conservés que dans leurs emballages originaux ou dans des récipients appropriés.
32
Page 33

A-40 Utilisation de la glacière
6.1 Comment économiser de l'énergie ?
z Choisissez un emplacement bien aéré et à l'abri du soleil.
z Laissez refroidir les aliments chauds avant de les déposer dans la glacière.
z N'ouvrez pas la glacière plus souvent que nécessaire !
z Ne laissez pas le couvercle ouvert plus longtemps que nécessaire !
z Rangez les aliments de telle sorte que l'air puisse circuler dans la glacière.
6.2 Mise en marche de la glacière
Refroidissez la glacière environ 24 heures avant votre départ,
en la branchant sur le secteur ou en utilisant du gaz.
Vous obtiendrez ainsi plus rapidement la puissance frigorifique
souhaitée sur le lieu d'utilisation de la glacière.
La puissance frigorifique peut être influencée par
– la température ambiante,
– la quantité des aliments à conserver,
– la fréquence de l'ouverture du couvercle.
➤ Placez la glacière sur une surface plane et stable.
Vérifiez éventuellement que la position est horizontale (±2°) avec un niveau.
➤ Ouvrez le couvercle du panneau de commande (2 1, page 3) en
appuyant dessus.
Pour le refermer, il suffit de rappuyer sur le couvercle.
Plus vous tournez le régulateur correspondant dans la direction
« MAX », plus la température de la glacière sera froide.
Veillez à ne déposer dans la glacière que des objets ou des
aliments qui peuvent être réfrigérés ou congelés à la température
sélectionnée.
Veillez à ce que les boissons ou aliments placés dans des
contenants en verre ne soient pas soumis à des températures trop
basses. En gelant, les boissons et aliments liquides augmentent
de volume. Les contenants en verre risquent alors de se casser.
33
Page 34

Utilisation de la glacière A-40
Raccordement au secteur 220 V – 240 V
Comparez la tension indiquée sur la plaque signalétique avec
l'alimentation électrique dont vous disposez.
➤ Enfichez la prise mâle de sécurité dans une prise femelle de sécurité,
installée selon les prescriptions.
➤ Placez le régulateur de thermostat (2 2, page 3) sur la position « MAX ».
➤ Attendez que la température dans la glacière ait diminué.
➤ Placez le régulateur de thermostat (2 2, page 3) sur la plage de
température souhaitée.
➤ Pour éteindre la glacière, placez le régulateur de thermostat
(2 2, page 3) sur « 0 » et débranchez la prise secteur.
Raccordement au courant 12 V CC
Lorsque l'appareil fonctionne sur batterie, vous ne pouvez
pas régler la température avec le régulateur de thermostat.
L'appareil est allumé et le refroidissement fonctionne.
En cas d'arrêt du moteur, débranchez la glacière de la batterie,
car celle-ci se déchargerait.
➤ Assurez-vous que la ligne entre la batterie et la glacière est protégée par
un fusible (15 A maximum).
➤ Choisissez le diamètre du câble entre la batterie et la prise d'alimentation
12 V en fonction du tableau suivant :
Longueur du câble Diamètre du câble
jusque 2,5 m 2,5 mm²
2,5 m à 4,0 m 4,0 mm²
➤ Assurez-vous que le régulateur de thermostat pour le fonctionnement
sur 220 V – 240 V (2 2, page 3) se trouve sur la position « 0 ».
➤ Enfoncez le connecteur du câble de raccordement dans la prise femelle
d'alimentation 12 V (p. ex. allume-cigares).
La polarité du connecteur peut être inversée.
➤ Pour éteindre la glacière, débranchez la prise mâle de la prise femelle.
34
Page 35

A-40 Utilisation de la glacière
Raccordement à une bouteille de gaz
Utilisez uniquement des bouteilles de gaz propane ou butane
dont la vanne de réduction de pression a été contrôlée et un
embout correspondant.
Vérifiez que les données inscrites sur la bouteille de propane
ou de butane correspondent aux données inscrites sur la
plaque signalétique.
L'appareil est équipé d'une protection de la flamme. L'arrivée de
gaz est coupée quand la flamme s'éteint.
➤ Placez la bouteille de gaz à la verticale et à une distance d'au moins un
mètre du brûleur (à l'arrière de la glacière).
➤ Vérifiez que la vanne de la bouteille de gaz est fermée.
Utilisez uniquement des flexibles ayant fait l'objet d'un contrôle
(DIN 4815 Partie 2), d'une longueur maximale de 1,5 m.
Votre flexible de raccordement doit être changé conformément
aux directives nationales.
➤ Reliez le flexible à l'embout de la vanne de la bouteille de gaz et de la
glacière (3 1, page 4).
Pour cela, utilisez une clé plate de dimensions correspondantes.
➤ Veillez à ce que le flexible
– ne soit pas compressé ou plié,
– se trouve à une distance suffisante du brûleur.
➤ Ouvrez la vanne de la bouteille de gaz.
Ne contrôlez jamais l'étanchéité lorsque la flamme est nue ou
à proximité de sources d'étincelles.
➤ Vérifiez l'étanchéité de tous les branchements à l'aide d'un spray
détecteur de fuites.
L'étanchéité est assurée, lorsqu'il n'y a pas de formation de bulles.
35
Page 36

Utilisation de la glacière A-40
➤ Veillez à ce que
– le régulateur de thermostat pour le fonctionnement sur 220 V – 240 V
(2 2, page 3) soit positionné sur « 0 »,
– la prise de la batterie ne soit pas branchée.
➤ Appuyez sur le commutateur rotatif (2 3, page 3) et maintenez-le
enfoncé pendant 10 s environ, afin que l'air présent dans le flexible soit
expulsé.
➤ Tournez le commutateur rotatif (2 3, page 3) dans la position « ».
✓ Vous entendez un bruit régulier, comme un craquement : l'allumeur
piézo-électrique tente d'allumer la flamme.
Lorsque la flamme est allumée, la glacière est prête pour l'utilisation.
➤ Si la flamme n'a pas été allumée, répétez le processus d'allumage.
Conseil !
Si l'allumage avec l'allumeur piézo-électrique n'est pas possible
en raison d'une humidité de l'air trop élevée, vous pouvez allumer
le brûleur à gaz avec une allumette, par l'ouverture dans la paroi
arrière, tout en appuyant sur le levier du gaz.
➤ Vérifiez à intervalles réguliers que le flexible et tous les branchements
sont en bon état.
➤ Pour éteindre la glacière, fermez d'abord la vanne de la bouteille puis
fermez complètement le commutateur rotatif (2 3, page 3) en le tournant
dans le sens des aiguilles d'une montre.
Changement de la bouteille de gaz
Ne changez la bouteille de gaz que lorsque l'aération est suffisante.
Veillez à ce qu'aucune source d'étincelles ne soit à proximité.
Ne changez la bouteille de gaz que lorsque la glacière est éteinte.
➤ Eteignez la glacière en fermant complètement le commutateur rotatif
(2 3, page 3). Pour cela, tournez-le dans le sens des aiguilles d'une montre.
➤ Fermez complètement la vanne de la bouteille de gaz.
➤ Dévissez la vanne de la bouteille.
➤ Vérifiez l'état du flexible.
Changez le flexible si le matériel est cassant ou poreux.
➤ Fixez la vanne de réduction de pression en la vissant sur la
nouvelle bouteille.
36
Page 37

A-40 Nettoyage et entretien
Dégivrage de la glacière
L'humidité de l'air peut se condenser en forme de givre à l'intérieur de la
glacière et diminuer ainsi la puissance frigorifique. Veillez donc à dégivrer
l'appareil bien à temps.
Attention !
N'utilisez jamais d'outils durs ou pointus pour enlever les couches
de glace ou pour détacher des objets pris dans le givre.
Procédez de la manière suivante pour dégivrer la glacière :
➤ Retirez les aliments.
➤ Placez-les éventuellement dans une autre glacière, pour qu'ils restent froids.
➤ Eteignez la glacière.
➤ Laissez le couvercle ouvert.
➤ Lorsque tout est dégivré, videz la glacière et essuyez-la.
Eteindre et conserver la glacière
Lorsque vous ne voulez pas utiliser la glacière pendant une période
prolongée, procédez de la façon suivante :
➤ Eteignez la glacière.
➤ Débranchez la prise secteur ou le flexible de la bouteille de gaz.
➤ Nettoyez la glacière (voir chapitre « Nettoyage et entretien », page 37).
➤ Laissez le couvercle légèrement ouvert.
Vous évitez ainsi la formation d'odeurs.
7 Nettoyage et entretien
Attention !
Avant de nettoyer la glacière, retirez toujours son câble de la prise
secteur ou débranchez le flexible.
Attention !
Ne nettoyez jamais la glacière en y faisant couler de l'eau ou en la
plongeant dans l’eau.
Attention !
N’utilisez ni détergents abrasifs, ni objets durs pour le nettoyage,
ceux-ci pouvant endommager la glacière.
➤ Nettoyez de temps en temps l'intérieur de la glacière avec un chiffon humide.
➤ Nettoyez l’extérieur de l’appareil avec un chiffon humide.
37
Page 38

Retraitement du système usagé A-40
8 Retraitement du système usagé
8.1 Elimination du matériel d'emballage
Ne jetez pas le matériel d'emballage à la poubelle. Veuillez respecter les
consignes suivantes :
➤ Jetez les emballages en carton et en plastique dans les conteneurs de
déchets recyclables prévus à cet effet.
➤ Renseignez-vous auprès de votre commune sur le centre de
recyclage compétent.
8.2 Elimination de l'appareil usagé
Quand vous mettrez votre appareil définitivement hors service, remettez-le
au centre de retraitement le plus proche ou à votre revendeur spécialisé qui
le reprendra en échange d'une petite participation aux frais.
38
Page 39

A-40 Guide de dépannage
9 Guide de dépannage
En cas de panne, veuillez vérifiez les points suivants :
Problème Cause éventuelle Solution proposée
La glacière ne
fonctionne pas.
Après une période
prolongée où elle n'a pas
été utilisée, la glacière ne
se met pas en marche.
La glacière n'est
pas correctement
branchée.
La glacière n'est
pas correctement
branchée à la bouteille
de gaz.
La glacière n'est pas
correctement installée.
La glacière n'est pas
correctement remplie.
Le circuit de
refroidissement est
défectueux.
– Après l'avoir débranchée de toutes les
Vérifiez que l'alimentation en
tension est correctement assurée.
Vérifiez que tous les contacts électriques
sont corrects.
Vérifiez que la tension actuelle correspond
à la valeur indiquée sur la plaque
signalétique.
Vérifiez que le régulateur de thermostat
est allumé.
Vérifiez que l'appareil est branché sur une
seule source d'énergie.
Vérifiez que l'alimentation en gaz est
correctement assurée.
Vérifiez que la vanne de la bouteille
de gaz est ouverte.
Assurez-vous qu'il y a encore du gaz dans
la bouteille.
Vérifiez que l'appareil est branché sur une
seule source d'énergie.
Maintenez plus longtemps la pression sur
le commutateur rotatif pour l'allumage.
Vérifez que l'appareil est en position
horizontale.
Assurez-vous que l'aération est suffisante.
Vérifiez que des aliments chauds ne se
trouvent pas dans la glacière.
Assurez-vous que le compartiment de
réfrigération n'est pas trop plein.
La réparation peut être effectuée unique-
ment par un service après-vente agréé.
sources d'énergie, placez la glacière la tête
en bas et attendez cinq minutes environ.
Retournez la glacière et mettez-la de
nouveau en marche.
39
Page 40

Caractéristiques techniques A-40
10 Caractéristiques techniques
Capacité : 40 l
Consommation en gaz : 13 g/h
Pression d'alimentation selon
le pays de destination
D, AU, LU, CH, CZ, HU : 50 mbars
SE, NO, NL, FI, DK : 30 mbars
GB, E, FR, BE, IE, IT, PT : 28 – 30/37 mbars
Raccordement au
secteur 220 V – 240 V
Puissance absorbée : 75 W
Intensité absorbée : 0,33 A
Raccordement au
secteur 12 V
Puissance absorbée : 75 W
Intensité absorbée : 6,25 A
Plage de refroidissement : jusqu’à 20 °C en dessous
Poids : env. 19,5 kg
Contrôle/certificat :
Catégorie I
de la température ambiante
, gaz liquide
3
Spécifications sous réserve de modifications liées aux évolutions techniques
et de disponibilités de livraison.
Cet appareil possède la certification e4.
Cet appareil ne contient pas de CFC.
L'appareil porte le label GS de sécurité prouvée.
40
Page 41

A-40 Indicaciones para el uso del manual de instrucciones
Lea atentamente este manual antes de la puesta en funcionamiento
del aparato y consérvelo en un lugar seguro para futuras consultas.
En caso de vender o entregar el aparato a otra persona, entregue
también este manual.
Índice
1 Indicaciones para el uso del manual de instrucciones . . . . . . . . . 41
2 Indicaciones de seguridad . . . . . . . . . . . . . . . . . . . . . . . . . . . . . . 42
3 Contenido del envío . . . . . . . . . . . . . . . . . . . . . . . . . . . . . . . . . . . 44
4 Uso adecuado . . . . . . . . . . . . . . . . . . . . . . . . . . . . . . . . . . . . . . . . 45
5 Descripción técnica . . . . . . . . . . . . . . . . . . . . . . . . . . . . . . . . . . . . 45
6 Utilización de la nevera . . . . . . . . . . . . . . . . . . . . . . . . . . . . . . . . . 46
7 Limpieza y mantenimiento . . . . . . . . . . . . . . . . . . . . . . . . . . . . . . 51
8 Eliminación . . . . . . . . . . . . . . . . . . . . . . . . . . . . . . . . . . . . . . . . . . 51
9 Eliminación de averías . . . . . . . . . . . . . . . . . . . . . . . . . . . . . . . . . 52
10 Datos técnicos . . . . . . . . . . . . . . . . . . . . . . . . . . . . . . . . . . . . . . . 53
1 Indicaciones para el uso del manual
de instrucciones
En el manual de instrucciones se utilizan los siguientes símbolos:
¡Atención!
Indicación de seguridad: No observar estas indicaciones puede
ocasionar daños personales o materiales.
¡Atención!
Indicación de seguridad que hace referencia a peligros por
la corriente o tensión eléctrica. No observar estas indicaciones
puede ocasionar daños personales o materiales, así como influir
en el funcionamiento del aparato.
Nota
Información adicional para el manejo del aparato.
➤ Procedimiento: Este símbolo le indica que debe hacer algo.
Los procedimientos necesarios se describirán paso a paso.
✓ Este símbolo describe el resultado de un procedimiento.
1 5, página 3: Esta indicación hace referencia a un elemento de
una figura, en este ejemplo a “Posición 5 en la figura 1 de la página 3”.
41
Page 42
Indicaciones de seguridad A-40
Tenga en cuenta también las siguientes indicaciones de seguridad.
2 Indicaciones de seguridad
2.1 Seguridad general
z No ponga el aparato en funcionamiento si presenta
deterioros visibles.
z No dañe el sistema de refrigeración.
z No introduzca aparatos eléctricos en el interior de la nevera.
z Procure que no se obstruya la rejilla de ventilación.
Mantenga las siguientes distancias mínimas:
– hacia el límite trasero mínimo de 10 cm
– hacia el límite lateral mínimo de 5 cm
z ¡Este aparato refrigerador no es apto para transportar
sustancias corrosivas o disolventes!
z Extraiga el cable de conexión o suelte la conexión
de mangueras
– antes de cada limpieza y mantenimiento
– después de cada uso
z Las reparaciones en el aparato solamente pueden ser
realizadas por personal cualificado. Las reparaciones
inadecuadas pueden dar lugar a situaciones de peligro
considerable.
2.2 Seguridad durante el funcionamiento del aparato
z ¡Los dispositivos eléctricos no son juguetes!
Mantenga y utilice el dispositivo fuera del alcance de los niños.
z ¡Peligro de muerte!
No toque con las manos desnudas un cable o conexión sin
aislamiento. Esto es válido especialmente en caso de
funcionamiento con corriente alterna.
z Nunca sumerja el aparato en agua.
z Nunca exponga el aparato a la lluvia o la humedad.
z Proteja el aparato de posibles salpicaduras de agua.
z Proteja el aparato y los cables del calor y de la humedad.
42
Page 43

A-40 Indicaciones de seguridad
z Utilice este aparato sólo en lugares bien ventilados.
z En su primer uso, puede que el aparato emita un leve olor.
z Utilice el aparato con una única fuente de energía.
z No coloque el aparato cerca de llamas vivas u otras fuentes de
calor (calefacción, radiación directa del sol, estufas de gas, etc.).
z No introduzca líquidos o hielo en el contenedor interior.
z MOBICOOL no se hace responsable de los daños causados
por el uso inadecuado o por el manejo incorrecto del
aparato.
2.3 Seguridad durante el funcionamiento del aparato
con 12 V CC
z El cable entre la batería y la nevera debe poseer un fusible de
al menos 15 A.
z Utilice sólo cables con la sección de cable especificada
(consultar tablas página 47).
2.4 Seguridad durante el funcionamiento del aparato
con 220 V – 240 V
z Conecte el aparato a la red de corriente alterna sólo con el
cable correspondiente.
z Nunca tire del cable de alimentación para sacar el enchufe.
z Sustituya el cable de conexión por otro cable que cumpla las
especificaciones técnicas indicadas cuando esté dañado,
para evitar cualquier peligro.
z Antes de la puesta en funcionamiento, asegúrese de que el
cable de alimentación y el enchufe estén secos.
z Compare el valor de tensión indicado en la placa de tipo con el
suministro de energía existente.
43
Page 44

Contenido del envío A-40
2.5 Seguridad durante el funcionamiento del aparato
con gas
z Utilice el aparato con gas única y exclusivamente al
aire libre.
z Utilice este aparato sin gas en vehículos de carretera,
embarcaciones o habitaciones cerradas.
z En caso de utilización del aparato en tiendas de campaña
o cerca de ellas o en terrazas a ras de suelo, asegúrese de que
la ventilación y el suministro de aire son suficientes.
z No coloque el aparato cerca de materiales inflamables
(papel, hojas secas, materiales textiles, etc.).
z Compare la indicación de la placa de características con la
de la bombona de gas butano o propano.
z Nunca guarde las bombonas de gas licuado en lugares
sin ventilación o bajo el nivel del suelo (hoyos en forma
de embudo).
z Proteja las bombonas de gas licuado de las radiaciones
solares directas.
La temperatura no debe superar los 50 °C.
3 Contenido del envío
Cantidad Descripción
1 Nevera
1 Cuenco con tapadera para la producción de cubitos de hielo
1 Instrucciones de uso
44
Page 45
A-40 Uso adecuado
4 Uso adecuado
La nevera es apta tanto para enfriar como para congelar los
alimentos. También es adecuada para su uso en acampadas.
En caso de que necesite enfriar medicamentos, compruebe que la capacidad
de refrigeración se corresponde con los requisitos del medicamento.
La nevera es apta para su utilización con una fuente de
alimentación de 12 V
o mediante la conexión a una red de 220 – 240 V
La nevera también puede funcionar independientemente de la
corriente con una bombona de gas licuado (propano o butano).
(p. ej. mechero de un automóvil)
CC
CA
.
5 Descripción técnica
La nevera es apta para su uso p. ej. en acampadas, en terrazas, en
el jardín o en cualquier lugar en el que esté disponible una tensión de
12 V CC (p. ej. el mechero de un vehículo) o una conexión de red de 220 V
– 240 V. Además, también podrá usar la nevera con gas licuado.
La nevera puede enfriar productos hasta 20 °C por debajo de la
temperatura ambiente.
El enfriamiento se realiza mediante el ciclo de un extractor sin necesidad
de mantenimiento. La disolución de amoniaco concentrada se calienta en
una caldera y es expulsada en forma de vapor. El gas que se encuentra bajo
una presión elevada se licua en un condensador y de ahí se evapora bajo
la adición de hidrógeno. Al mismo tiempo, se extrae el calor de la
cámara frigorífica.
45
Page 46

Utilización de la nevera A-40
6 Utilización de la nevera
Por razones de higiene, debería limpiar la nueva nevera por dentro y
por fuera con un paño húmedo antes de ponerla en funcionamiento
(véase también capítulo “Limpieza y mantenimiento” en la
página 51).
Los alimentos sólo se pueden guardar en los envases originales o
en recipientes adecuados.
6.1 Consejos para el ahorro de energía
z Elija un lugar de montaje correctamente ventilado y protegido de los
rayos del sol.
z Antes de introducir alimentos calientes, deje que se enfríen.
z Evite abrir la nevera más de lo necesario.
z No deje la tapa abierta más tiempo del necesario.
z Coloque los alimentos dentro de la nevera de forma que el aire pueda
circular libremente en el interior.
6.2 Utilización de la nevera
Enfríe la nevera con corriente o gas 24 horas antes del inicio del
viaje. De esta forma, al llegar al lugar de colocación de la nevera,
se alcanzará el nivel de refrigeración deseado más rápidamente.
La capacidad de refrigeración puede verse afectada por
– la temperatura ambiente,
– la cantidad de alimentos a refrigerar y
– la frecuencia de apertura de la tapadera de la nevera.
➤ Coloque la nevera sobre una base firme y llana.
Compruebe la posición horizontal (± 2°) con un nivel de agua, en
caso necesario.
➤ Para abrir la tapa del panel de funcionamiento (2 1, página 3), presiónela.
Para cerrar la tapa, vuelva a presionarla.
Cuanto más gire el regulador hacia la posición “MAX”, menor será
la temperatura de refrigeración.
Asegúrese de que en la nevera solo hay objetos o productos que
puedan enfriarse a la temperatura seleccionada.
46
Page 47
A-40 Utilización de la nevera
Asegúrese de que las bebidas o los alimentos envasados
en recipientes de cristal no se enfríen demasiado. Si dichos
productos llegaran a congelarse, los recipientes de cristal
podrían romperse.
Conexión a 220 V – 240 V
Compare el valor de tensión indicado en la placa de tipo con el
suministro de energía existente.
➤ Conecte la clavija bipolar con toma a tierra en un enchufe de toma a tierra
instalado según las normas.
➤ Coloque el regulador de termostato (2 2, página 3) en la
posición “MAX”.
➤ Espere hasta que descienda la temperatura de la nevera.
➤ Seleccione la temperatura deseada con el regulador de termostato
(2 2, página 3).
➤ Para desconectar la nevera, coloque el regulador del termostato
(2 2, página 3) en “0” y extraiga el enchufe.
Conexión a 12 V CC
En el funcionamiento con baterías, no se podrá regular la
temperatura con el regulador de termostato. Con este modo
de funcionamiento, el aparato sólo se encenderá y enfriará.
Con el motor parado, desconecte la nevera de la batería para
evitar su descarga.
➤ Asegúrese de que el cable que conecta la batería con la nevera posee un
fusible (máximo 15 A).
➤ Seleccione una sección de cable adecuada entre la batería y clavija de la
fuente de alimentación de 12 V según la siguiente tabla:
Longitud del cable Sección de cable
hasta 2,5 m 2,5 mm²
de 2,5 m hasta 4,0 m 4,0 mm²
➤ Asegúrese de que el regulador del termostato para el funcionamiento
a 220 V – 240 V (2 2, página 3) se encuentra en posición “0”.
47
Page 48

Utilización de la nevera A-40
➤ Conecte el enchufe del cable de conexión en la clavija de la fuente de
alimentación de 12 V (p. ej. encendedor del coche).
La polaridad es discrecional.
➤ Para desconectar la nevera, desconecte el enchufe de la clavija.
Conexión a una fuente de gas
Utilice sólo bombonas de gas butano o propano equipadas con
una válvula autorizada de reducción de la presión y un cabezal
adecuado.
Compare la indicación de la placa de características con la de la
bombona de gas butano o propano.
El aparato está equipado contra incendios. El suministro de gas
se interrumpirá en caso de que se apague la llama.
➤ Coloque la bombona en posición vertical y al menos a un metro de
distancia del quemador (situado en la parte trasera de la nevera).
➤ Compruebe si la válvula de la bombona de gas está cerrada.
Use sólo conductos de tubo flexible autorizados
(DIN 4815 parte 2) con una longitud máxima de 1,5 m.
El cambio de la manguera de conexión se debe realizar conforme
a las directivas nacionales.
➤ Conecte el conducto del tubo flexible al cabezal de la válvula de la
bombona de gas y a la nevera (3 1, página 4).
Para ello, conecte una llave de boca con el ancho de llave adecuado.
➤ Compruebe que el conducto de tubo flexible
– no se doble ni quede atrapado y
– colóquelo a una distancia prudencial de seguridad del quemador.
➤ Abra la válvula de la bombona de gas.
Nunca compruebe la estanqueidad con una llama abierta o cerca
de fuentes de encendido.
➤ Compruebe la estanqueidad de todas las conexiones con un vaporizador
detector de fugas.
Si no aparece ninguna burbuja, la estanqueidad será la adecuada.
48
Page 49

A-40 Utilización de la nevera
➤ Compruebe que
– para el funcionamiento a 220 V – 240 V (2 2, página 3), el regulador
de termostato se encuentra en posición “0” y
– el conector de la batería no está conectado.
➤ Presione el interruptor rotativo (2 3, página 3) y manténgalo pulsado du-
rante aproximadamente 10 s para que el tubo flexible expulse todo el aire.
➤ Gire el interruptor rotativo (2 3, página 3) hacia la posición “ ”.
✓ Escuchará un chasquido regular: el encendedor Piezo está intentando
encender la llama.
Cuando se produzca la llama, la nevera estará lista para su
funcionamiento.
➤ En caso de que la llama no se produzca, vuelva a repetir la operación
anteriormente indicada.
¡Sugerencia!
Si no se puede encender la llama con el encendedor Piezo
debido a la alta humedad ambiente, puede encender el quemador
de gas presionando la palanca de gas y colocando una cerilla por
el orificio de la pared trasera.
➤ Compruebe regularmente el estado de los conductos del tubo flexible y
de todas las conexiones.
➤ Para desconectar la nevera, en primer lugar cierre la válvula de la
bombona y gire el interruptor rotativo (2 3, página 3) en sentido horario
hasta el tope.
Sustitución de la bombona de gas
Sustituya la bombona de gas sólo en lugares con una buena
ventilación.
Compruebe que no haya ninguna fuente de calor en las
inmediaciones.
Desconecte siempre la nevera antes de realizar el cambio de bombona.
➤ Desconecte la nevera girando el interruptor rotativo (2 3, página 3) en
sentido horario hasta el tope.
➤ Cierre completamente la válvula de la bombona de gas.
➤ Desatornille la válvula de la bombona.
➤ Compruebe el estado del conducto de tubo flexible.
Sustituya el conducto de tubo flexible si el material está demasiado seco
o presenta porosidades.
49
Page 50

Utilización de la nevera A-40
➤ Enrosque segura y firmemente la válvula de reducción de presión a la
nueva bombona.
Descongelación de la nevera
Es posible que el vapor de la humedad del aire se deposite en forma
de escarcha en el interior de la nevera, disminuyendo de este modo la
capacidad de refrigeración. Por este motivo, descongele regularmente
el aparato.
¡Atención!
Nunca utilice herramientas duras o puntiagudas para retirar la
capa de escarcha o soltar productos que se hayan adherido
tras congelarse.
Para descongelar la nevera, proceda como se indica a continuación:
➤ Saque los productos del interior de la nevera.
➤ En caso necesario, coloque los productos en otro refrigerador para
mantenerlos fríos.
➤ Desconecte la nevera.
➤ Deje abierta la tapadera de la nevera.
➤ Cuando se haya descongelado por completo, vacíela y límpiela.
Desconexión y almacenamiento de la nevera
Si no va a usar la nevera durante un largo período de tiempo, proceda como
se indica a continuación:
➤ Desconecte la nevera.
➤ Extraiga el cable de conexión o retire el conducto de tubo flexible de la
bombona de gas.
➤ Limpie la nevera (véase capítulo “Limpieza y mantenimiento” en la
página 51).
➤ Deje la tapadera de la nevera ligeramente abierta.
De esta forma, evitará la aparición de olores.
50
Page 51

A-40 Limpieza y mantenimiento
7 Limpieza y mantenimiento
¡Atención!
Desenchufe el cable de conexión o suelte el conducto de tubo
flexible antes de cada limpieza de la nevera.
¡Atención!
Nunca limpie el aparato debajo de agua corriente ni lo sumerja en
agua de fregar.
¡Atención!
No emplee productos de limpieza corrosivos u objetos duros
o puntiagudos que puedan arañar o deteriorar la nevera durante
su limpieza.
➤ Limpie regularmente el interior de la nevera con un paño húmedo.
➤ Limpie el exterior del aparato con un paño húmedo.
8Eliminación
8.1 Eliminación del material de embalaje
No deseche el material de embalaje junto con la basura doméstica.
Tenga en cuenta las siguientes indicaciones:
➤ Deseche el material del embalaje de cartón y los envases de material
sintético en el contenedor de reciclaje correspondiente.
➤ En caso necesario, pregunte en su administración municipal por el centro
de reciclaje adecuado.
8.2 Eliminación del aparato usado
En caso de que ponga el aparato definitivamente fuera de funcionamiento,
llévelo al centro de reciclaje más cercano o devuélvalo a un comercio
especializado pagando unos costes mínimos.
51
Page 52

Eliminación de averías A-40
9 Eliminación de averías
En caso de avería, compruebe los siguientes puntos:
Avería Causa posible Propuesta de solución
La nevera no funciona. La nevera no se ha
conectado
adecuadamente a la
red eléctrica.
La nevera no está
adecuadamente
conectada a la fuente
de gas.
La nevera no
se ha colocado
adecuadamente.
La nevera no
se ha llenado
adecuadamente.
El circuito de
refrigeración está
averiado.
La nevera no se
enciende tras un
tiempo prolongado
de desconexión.
– Mantenga la nevera boca abajo
Asegúrese de que se realiza la
alimentación eléctrica correctamente.
Asegúrese de que los contactos eléctricos
están en buen estado.
Asegúrese de que el valor de tensión se
ajusta al indicado en la placa de
características.
Asegúrese de que el regulador de
termostato está accionado.
Asegúrese de que no haya varias
fuentes de alimentación conectadas al
mismo tiempo.
Asegúrese de que la alimentación de gas
es adecuada.
Asegúrese de que la válvula de la
bombona de gas está abierta.
Asegúrese de que queda gas en la
bombona.
Asegúrese de que no haya varias fuentes
de alimentación conectadas al mismo
tiempo.
Para el encendido, mantenga pulsado el
interruptor rotativo.
Asegúrese de que la nevera está en
posición totalmente horizontal.
Asegúrese de que la ventilación es
adecuada.
Compruebe si se han introducido
elementos calientes en la nevera.
Compruebe que el interior de la nevera
no esté demasiado lleno o esté cerrada
demasiado estanca.
Las reparaciones sólo las puede realizar un
servicio de asistencia técnica autorizado.
desconectada y espere unos cinco minutos.
Dele la vuelta y vuelva a conectarla.
52
Page 53

A-40 Datos técnicos
10 Datos técnicos
Contenido: 40 l
Consumo de gas: 13 g/h
Presión de conexión
según el país de destino
D, AU, LU, CH, CZ, HU: 50 milibares
SE, NO, NL, FI, DK: 30 milibares
GB, E, FR, BE, IE, IT, PT: 28 – 30/37 milibares
Conexión a 220 V – 240 V
Consumo de potencia: 75 W
Consumo de corriente: 0,33 A
Conexión a 12 V
Consumo de potencia: 75 W
Consumo de corriente: 6,25 A
Gama de temperatura
de refrigeración:
Peso: aprox. 19,5 kg
Inspección / Certificado:
Categoría I
hasta 20 ºC por debajo de
la temperatura ambiente
, gas licuado
3
Reservado el derecho de realizar modificaciones en los modelos y envíos
debidos a los avances técnicos.
El aparato cumple con la homologación e4.
Este aparato no contiene CFC.
El aparato posee la marca GS de seguridad comprobada.
53
Page 54

Indicazioni per l'uso del manuale di istruzioni A-40
Prima di effettuare la messa in funzione leggere accuratamente questo
manuale di istruzioni, conservarlo e in caso di rivendita dell'apparecchio
consegnarlo al cliente successivo.
Indice
1 Indicazioni per l'uso del manuale di istruzioni . . . . . . . . . . . . . . . . 54
2 Indicazioni di sicurezza . . . . . . . . . . . . . . . . . . . . . . . . . . . . . . . . . 55
3 Dotazione . . . . . . . . . . . . . . . . . . . . . . . . . . . . . . . . . . . . . . . . . . . 57
4 Uso conforme alla destinazione . . . . . . . . . . . . . . . . . . . . . . . . . . 58
5 Descrizione tecnica . . . . . . . . . . . . . . . . . . . . . . . . . . . . . . . . . . . . 58
6 Uso del frigorifero portatile . . . . . . . . . . . . . . . . . . . . . . . . . . . . . . 58
7 Pulizia e cura . . . . . . . . . . . . . . . . . . . . . . . . . . . . . . . . . . . . . . . . 63
8 Smaltimento . . . . . . . . . . . . . . . . . . . . . . . . . . . . . . . . . . . . . . . . . 63
9 Eliminazione dei disturbi . . . . . . . . . . . . . . . . . . . . . . . . . . . . . . . . 64
10 Specifiche tecniche . . . . . . . . . . . . . . . . . . . . . . . . . . . . . . . . . . . . 65
1 Indicazioni per l'uso del manuale di
istruzioni
Nel presente manuale di istruzioni sono impiegati i seguenti simboli:
Attenzione!
Indicazione di sicurezza: la mancata osservanza di questa
indicazione può causare danni a persone o apparecchi.
Attenzione!
Indicazione di sicurezza che indica pericoli riconducibili
alla corrente o alla tensione elettrica: la mancata osservanza di
questa indicazione può causare danni a persone o apparecchi
e compromettere il funzionamento dell'apparecchio.
Nota
Informazioni integranti relative all'impiego dell'apparecchio.
➤ Modalità di intervento: questo simbolo indica all'utente che è necessario
un intervento. Le modalità di intervento necessarie saranno descritte
passo dopo passo.
✓ Questo simbolo descrive il risultato di un intervento.
1 5, pagina 3: questi dati si riferiscono ad un elemento in una figura,
in questo caso alla “posizione 5 nella figura 1 a pagina 3”.
Osservare anche le indicazioni di sicurezza riportate qui di seguito.
54
Page 55

A-40 Indicazioni di sicurezza
2 Indicazioni di sicurezza
2.1 Sicurezza generale
z Se l'apparecchio presenta danni visibili, evitare di metterlo
in funzione.
z Non danneggiare il sistema di raffreddamento.
z Non collocare nessun apparecchio elettrico all'interno del
frigorifero portatile.
z Fare attenzione che le feritoie di aerazione non vengano coperte.
Tenere le seguenti distanze minime:
– dal limite interno almeno 10 cm
– dal limite laterale almeno 5 cm
z Il frigorifero non è adatto per il trasporto di sostanze corrosive
o solventi!
z Estrarre il cavo di allacciamento oppure staccare il raccordo per
tubo flessibile
– prima di effettuare la pulizia e la cura
– dopo ogni utilizzo
z L'apparecchio deve essere riparato solo da personale
specializzato. Le riparazioni effettuate in modo scorretto
potrebbero causare rischi enormi.
2.2 Sicurezza durante il funzionamento
dell'apparecchio
z Gli elettrodomestici non devono essere considerati
giocattoli!
Conservare ed impiegare l'apparecchio sempre lontano dalla
portata dei bambini.
z Pericolo di morte!
Non toccare mai i cavi nudi a mani nude. Questo vale
soprattutto per il funzionamento con rete di alimentazione
in corrente alternata.
z Non immergere mai l'apparecchio in acqua.
z Non esporre mai l'apparecchio alla pioggia o all'umidità.
z Proteggere l'apparecchio da spruzzi d'acqua.
z Proteggere l'apparecchio e i cavi dal caldo e dall'umidità.
55
Page 56

Indicazioni di sicurezza A-40
z Utilizzare l'apparecchio solo in luoghi ben aerati.
z Durante la prima messa in funzione dell'apparecchio è possibile
che si sprigionino odori per poco tempo.
z Azionare l'apparecchio sempre e unicamente con una sola
fonte di energia.
z Non collocare l'apparecchio nelle vicinanze di fiamme libere
o altre fonti di calore (riscaldamento, intensa esposizione ai
raggi solari, forni a gas ecc.).
z Non versare nessun tipo di liquido o ghiaccio nel
contenitore interno.
z MOBICOOL declina ogni responsabilità per danni risultanti da un
uso non conforme alla destinazione o da un
impiego scorretto.
2.3 Sicurezza per il funzionamento dell'apparecchio
con 12 V CC
z La linea fra batteria e frigorifero deve essere protetta da un
fusibile con un max. di 15 A.
z Impiegare solamente cavi con una sezione cavo adeguata
(vedi tabella a pagina 60).
2.4 Sicurezza per il funzionamento dell'apparecchio
con 220 V – 240 V
z Collegare l'apparecchio alla rete di alimentazione in corrente
alternata corrispondente usando esclusivamente il cavo
previsto per l'allacciamento.
z Non estrarre mai la spina dalla presa tirando il cavo
di allacciamento.
z Se il cavo di allacciamento è danneggiato è necessario
sostituirlo con un cavo con le stesse specifiche tecniche
per evitare pericoli.
z Prima della messa in funzione assicurarsi che la linea di
alimentazione e la spina siano asciutte.
z Confrontare i dati della tensione riportati sulla targhetta con
quelli delle prese e degli attacchi disponibili.
56
Page 57

A-40 Dotazione
2.5 Sicurezza durante il funzionamento
dell'apparecchio con gas
z Azionare l'apparecchio con gas esclusivamente all'aperto.
z Non azionare l'apparecchio con gas all'interno di veicoli
stradali, natanti o in ambienti chiusi.
z Per l'uso in tende o verande e terrazze a livello del suolo fare in
modo che ci siano un'apporto d'aria e un'aerazione sufficienti.
z Non mettere l'apparecchio in prossimità di materiali infiammabili
(carta, fogliame secco, prodotti tessili).
z Confrontare i dati della pressione riportati sulla targhetta con
quelli indicati sulla bombole di gas propano e butano.
z Non conservare mai le bombole di gas liquido in luoghi non
aerati o al di sotto del livello del terreno (avvallamenti del
terreno a forma di imbuto).
z Proteggere le bombole di gas liquido dalla diretta esposizione
dei raggi solari.
La temperatura non deve superare i 50 °C.
3Dotazione
Quantità Denominazione
1 Frigorifero portatile
1 Bacinella con coperchio per la produzione di cubetti di ghiaccio.
1 Istruzioni per l'uso
57
Page 58

Uso conforme alla destinazione A-40
4 Uso conforme alla destinazione
Il frigorifero è adatto per raffreddare e surgelare gli alimenti.
L'apparecchio è adatto anche per il campeggio.
Qualora si debbano conservare medicinali in frigorifero, controllare se
l'apparecchio dispone di una potenza frigorifera in grado di soddisfare
i requisiti dei rispettivi farmaci.
Il frigorifero è stato ideato per poter funzionare con una sorgente di
tensione di 12 V
con l'allacciamento ad una tensione di rete di 220 – 240 V
Il frigorifero può essere azionato indipendentemente dalla corrente
con gas liquido (propano o butano).
(ad es. l'accendisigari di un veicolo) e in alternativa
CC
CA
.
5 Descrizione tecnica
Il frigorifero portatile può essere usato ad es. in campeggio, sulla terrazza,
in giardino o in altri luoghi dove sia possibile collegarlo ad una rete di
12 V CC (ad es. all'accendisigari del veicolo) o di 220 V – 240 V. È possibile
inoltre azionare il frigorifero con gas liquido.
Questo frigorifero può raffreddare prodotti fino a 20 °C al di sotto della
temperatura ambiente.
Il raffreddamento avviene mediante un ciclo ad assorbimento che non ha
bisogno di manutenzione. Una soluzione di ammoniaca concentrata viene
scaldata in un boiler ed eliminata sottoforma di vapore. Il gas sottoposto
ad una grossa pressione viene liquefatto in un condensatore e successivamente vaporizzato con l'aggiunta di idrogeno. In questo modo viene
sottratto calore all'interno del frigorifero.
6 Uso del frigorifero portatile
Per motivi igienici, prima della messa in funzione iniziale del
frigorifero, pulirne l'interno e l'esterno con un panno umido
(vedi anche capitolo “Pulizia e cura” a pagina 63).
I prodotti alimentari possono essere conservati solo nella confezione originale o in contenitori adeguati.
58
Page 59

A-40 Uso del frigorifero portatile
6.1 Suggerimenti per risparmiare energia
z Scegliere un luogo di impiego ben aerato e riparato dai raggi solari.
z Prima di immagazzinare cibi caldi, lasciarli prima raffreddare.
z Non aprire il frigorifero più spesso del necessario.
z Non lasciare il coperchio aperto più del necessario.
z Disporre gli alimenti in modo tale che l'aria possa circolare nel frigorifero.
6.2 Come usare il frigorifero
Iniziare a raffreddare il frigorifero circa 24 ore prima di partire per il
viaggio allacciandolo alla rete o al gas. In questo modo è possibile
ottenere la potenza frigorifera desiderata più velocemente sul
luogo di utilizzo.
La potenza frigorifera può essere influenzata
– dalla temperatura ambiente,
– dalla quantità di alimenti da conservare,
– dalla frequenza delle aperture del coperchio.
➤ Collocare il frigorifero su una base stabile e piana.
Verificare la posizione orizzontale (±2°) se necessario con una livella
aacqua.
➤ Aprire il coperchio del pannello di controllo (2 1, pagina 3), premendolo.
Premere nuovamente sul coperchio per richiuderlo.
Le posizioni del regolatore più prossime a “MAX” corrispondono
alle temperature di raffreddamento più basse.
Assicurarsi che nel frigorifero si trovino solo oggetti o prodotti che
possono essere raffreddati alla temperatura selezionata.
Prestare attenzione a non raffreddare eccessivamente bevande o
vivande liquide conservate in contenitori di vetro in quanto esse si
dilatano se congelate, provocando la rottura dei contenitori di vetro.
Allacciamento a 220 V – 240 V
Confrontare i dati della tensione riportati sulla targhetta con quelli
delle prese e degli attacchi disponibili.
➤ Inserire la spina con messa a terra in una presa con messa a terra
installata conformemente alle norme.
59
Page 60
Uso del frigorifero portatile A-40
➤ Posizionare il termoregolatore (2 2, pagina 3) su “MAX”.
➤ Attendere finché la temperatura all'interno del frigorifero non si è abbassata.
➤ Posizionare il termoregolatore (2 2, pagina 3) nell'intervallo di
regolazione della temperatura desiderato.
➤ Per spegnere il frigorifero posizionare il termoregolatore (2 2, pagina 3)
su “0” ed estrarre la spina.
Allacciamento a 12 V CC
Per l'azionamento a batteria non è possibile regolare la
temperatura con il termoregolatore. L'apparecchio viene
semplicemente acceso e così comincia a raffreddarsi.
A motore spento, staccare il frigorifero dalla batteria per
non scaricarla.
➤ Assicurarsi che la linea fra batteria e frigorifero sia protetta da un fusibile
(massimo di 15 A).
➤ Scegliere la sezione del cavo fra batteria e presa di alimentazione
di tensione da 12 V conformemente alla tabella seguente.
Lunghezza cavo Sezione cavo
fino a 2,5 m 2,5 mm²
da 2,5 m a 4,0 m 4,0 mm²
➤ Assicurarsi che il termoregolatore per l'esercizio a 220 V – 240 V (2 2,
pagina 3) sia in posizione “0”.
➤ Inserire la spina del cavo di allacciamento nella boccola
dell'alimentazione di tensione da 12 V (ad-es. l'accendisigari).
La polarità non è vincolante.
➤ Per spegnere il frigorifero estrarre la spina dalla presa.
Allacciamento ad una fonte di gas
Impiegare solo bombole di gas propano o butano con valvola di
riduzione della pressione certificata e con un cappuccio appropriato.
Confrontare i dati della pressione riportati sulla targhetta con quelli
indicati sulla bombole di gas propano o butano.
60
Page 61

A-40 Uso del frigorifero portatile
L'apparecchio è provvisto di parafiamma. L'approvvigionamento
del gas viene interrotto quando la fiamma è spenta.
➤ Posizionare la bombola del gas perpendicolarmente e almeno ad un
metro di distanza dal bruciatore (posizionato sul retro del frigorifero).
➤ Verificare se la valvola della bombola del gas è chiusa.
Impiegare solo tubi flessibili certificati (DIN 4815 parte 2) con una
lunghezza massima di 1,5 m.
La sostituzione del vostro tubo flessibile di allacciamento deve
avvenire in conformità delle direttive nazionali.
➤ Collegare la conduttura flessibile con il cappuccio della valvola della
bombola a gas e del frigorifero (3 1, pagina 4).
Impiegare a proposito una chiave fissa con l'apertura corrispondente.
➤ Assicurarsi che la conduttura flessibile
– non sia stata bloccata o piegata,
– che si trovi ad una distanza di sicurezza dal bruciatore.
➤ Aprire la valvola della bombola del gas.
Non controllare mai la tenuta in presenza di fiamme libere o in
prossimità di fonti di accensione.
➤ Controllare se tutti i collegamenti sono a tenuta utilizzando uno spray
rilevatore di perdite.
La tenuta è garantita se non si sono formate bolle.
➤ Assicurarsi che
– il termoregolatore per il funzionamento a 220 V – 240 V (2 2,
pagina 3) si trovi in posizione “0”,
– la spina della batteria non sia allacciata.
➤ Premere l’interruttore rotante (2 3, pagina 3) e tenerlo premuto per circa
10 sec. affinché venga espulsa l'aria presente nella conduttura flessibile.
➤ Ruotare l’interruttore rotante (2 3, pagina 3) verso “ ”.
✓ Si potrà sentire uno scricchiolio costante: l'accenditore piezoelettrico
cerca di accendere la fiamma.
Se la fiamma brucia il frigorifero è pronto per l'impiego.
➤ Nel caso in cui la fiamma non dovesse accendersi, ripetere il processo
di accensione.
61
Page 62

Uso del frigorifero portatile A-40
Suggerimento!
Se a causa del tasso di umidità dell'aria troppo alto non è possibile
accendere il bruciatore a gas con l'accenditore piezoelettrico
è possibile invece farlo, quando la leva del gas è premuta,
inserendo un fiammifero nell'apertura della parete posteriore.
➤ Controllare ad intervalli regolari il corretto stato della conduttura e di tutti
i collegamenti.
➤ Per spegnere il frigorifero chiudere prima la valvola della bombola e poi
ruotare l’interruttore rotante (2 3, pagina 3) in senso orario.
Sostituzione della bombola del gas
Sostituire la bombola del gas solo se l'ambiente è aerato bene.
Assicurarsi che non ci sia nessuna fonte di accensione
nelle vicinanze.
Sostituire la bombola del gas solo se il frigorifero è stento.
➤ Spegnere il frigorifero ruotando completamente l’interruttore rotante
(2 3, pagina 3) in senso orario.
➤ Chiudere completamente la valvola della bombola del gas.
➤ Svitare la valvola dalla bombola.
➤ Controllare lo stato della conduttura flessibile.
Sostituire la conduttura flessibile se il materiale dovesse risultare
infragilito o poroso.
➤ Fissare con viti la valvola di riduzione della pressione sulla nuova bombola.
Sbrinamento del frigorifero portatile
L'umidità dell'aria all'interno del frigorifero può condensarsi formando brina
la quale diminuisce la potenza frigorifera. Sbrinare perciò l'apparecchio
prima che si verifichi questa situazione.
Attenzione!
Non impiegare mai utensili duri o accuminati per rimuovere gli
strati di ghiaccio o per liberare oggetti congelati.
Per sbrinare il frigorifero, procedere come segue:
➤ Togliere i prodotti dal frigorifero.
➤ Immagazzinarli eventualmente in un altro frigorifero affinché si
mantengano freddi.
➤ Spegnere il frigorifero.
➤ Lasciare il coperchio aperto.
62
Page 63

A-40 Pulizia e cura
➤ Quando è completamente sbrinato, svuotarlo e pulirlo.
Spegnimento e conservazione del frigorifero
Nel caso in cui il frigorifero non venga utilizzato per un lungo periodo di tempo,
procedere come segue:
➤ Spegnere il frigorifero.
➤ Estrarre la linea di allacciamento oppure rimuovere la conduttura
flessibile della bombola del gas.
➤ Pulire il frigorifero (a riguardo vedi capitolo “Pulizia e cura” a pagina 63).
➤ Lasciare il coperchio leggermente aperto.
In questo modo si impedisce la formazione di odori.
7 Pulizia e cura
Attenzione!
Prima di effettuare la pulizia del frigorifero estrarre il cavo di
allacciamento oppure staccare il raccordo per tubo flessibile.
Attenzione!
Non lavare mai il frigorifero sotto acqua corrente e non immergerlo
in acqua per risciacquarlo.
Attenzione!
Per la pulizia non impiegare detergenti corrosivi oppure oggetti
ruvidi, perché potrebbero danneggiare il frigorifero.
➤ Pulire di tanto in tanto l'interno del frigorifero con un panno umido.
➤ Pulire l'esterno dell'apparecchio con un panno umido.
8 Smaltimento
8.1 Smaltimento del materiale di imballaggio
Non gettare il materiale di imballaggio senza prima averlo differenziato.
Osservare in particolare le seguenti indicazioni.
➤ Raccogliere il materiale di imballaggio in cartone e in plastica
possibilmente negli appositi contenitori di riciclaggio.
➤ Chiedere eventualmente alla propria Amministrazione Comunale
informazioni sul centro di riciclaggio competente.
63
Page 64

Eliminazione dei disturbi A-40
8.2 Smaltimento dell'apparecchio vecchio
Quando l'apparecchio viene messo fuori servizio definitivamente, portarlo al
centro di riciclaggio più vicino, oppure al proprio rivenditore specializzato che
lo ritirerà in cambio di un minimo contributo spese.
9 Eliminazione dei disturbi
In caso di disturbi controllare i seguenti punti:
Disturbo Possibile causa Proposta di soluzione
Il frigorifero non
funziona.
Dopo un periodo di
inutilizzo prolungato il
frigorifero non si avvia.
Il frigorifero non è
allacciato
correttamente alla rete
elettrica.
Il frigorifero non è
allacciato
correttamente alla rete
del gas.
Il frigorifero non è
stato posizionato
correttamente.
Il frigorifero non è
riempito
correttamente.
Il circuito di
raffreddamento è
guasto.
– Prima di collegare il frigorifero con una
Controllare se è garantito il funzionamento
corretto dell'alimentazione di tensione.
Controllare se i contatti elettrici sono corretti.
Controllare se il valore della tensione
presente corrisponde a quello indicato
sulla targhetta.
Controllare se il termoregolatore è accesso.
Controllare se diverse fonti di energia
sono collegate contemporaneamente.
Controllare se è garantito il funzionamento
corretto del rifornimento di gas.
Controllare se la valvola della bombola del
gas è aperta.
Controllare se nella bombola c'è ancora gas.
Controllare se diverse fonti di energia
sono collegate contemporaneamente.
Tenere premuto l’interruttore rotante fino
ad accensione avvenuta.
Controllare se l'apparecchio è in posizione
orizzontale.
Controllare se è garantita un'aerazione
sufficiente.
Controllare se sono stati immagazzinati
cibi caldi.
Controllare se l'interno del frigorifero è
troppo pieno.
I lavori di riparazione devono essere
effettuati solo da un Punto Assistenza
Clienti autorizzato.
fonte di energia capovolgerlo in modo che
la parte superiore sia rivolta verso il basso
e aspettare cinque minuti.
Girare di nuovo il frigorifero e riaccenderlo.
64
Page 65

A-40 Specifiche tecniche
10 Specifiche tecniche
Capienza: 40 l
Consumo di gas: 13 g/h
Pressione di collegamento
sulla base del paese di
destinazione
D, AU, LU, CH, CZ, HU: 50 mbar
SE, NO, NL, FI, DK: 30 mbar
GB, E, FR, BE, IE, IT, PT: 28 – 30/37 mbar
Collegamento a 220 V – 240 V
Potenza assorbita: 75 W
Corrente assorbita: 0,33 A
Collegamento a 12 V
Potenza assorbita: 75 W
Corrente assorbita: 6,25 A
Campo di temperatura di
raffreddamento:
Peso: ca. 19,5 kg
Certificati di controllo:
Categoria I
fino a 20 °C al di sotto
della temperatura ambiente
, gas liquido
3
Con riserva di versioni successive e di modifiche conformi al progresso della
tecnica, nonché di variazioni nella consegna.
L'apparecchio dispone dell'omologazione e4.
Questo apparecchio non contiene CFC.
L'apparecchio si è guadagnato il marchio di conformità GS per la
sicurezza certificata.
65
Page 66

Instructies voor het gebruik van de handleiding A-40
Lees deze handleiding voor de ingebruikname zorgvuldig door en
bewaar deze. Geef de handleiding bij doorverkoop van het toestel door
aan de koper.
Inhoudsopgave
1 Instructies voor het gebruik van de handleiding . . . . . . . . . . . . . . 66
2 Veiligheidsinstructies . . . . . . . . . . . . . . . . . . . . . . . . . . . . . . . . . . 67
3 Omvang van de levering . . . . . . . . . . . . . . . . . . . . . . . . . . . . . . . . 69
4 Gebruik volgens de voorschriften . . . . . . . . . . . . . . . . . . . . . . . . . 69
5 Technische beschrijving . . . . . . . . . . . . . . . . . . . . . . . . . . . . . . . . 70
6 Koelbox bedienen . . . . . . . . . . . . . . . . . . . . . . . . . . . . . . . . . . . . . 70
7 Reiniging en onderhoud . . . . . . . . . . . . . . . . . . . . . . . . . . . . . . . . 75
8 Afvoer . . . . . . . . . . . . . . . . . . . . . . . . . . . . . . . . . . . . . . . . . . . . . . 75
9 Verhelpen van storingen . . . . . . . . . . . . . . . . . . . . . . . . . . . . . . . . 76
10 Technische gegevens . . . . . . . . . . . . . . . . . . . . . . . . . . . . . . . . . . 77
1 Instructies voor het gebruik van de
handleiding
De volgende symbolen worden in deze gebruiksaanwijzing gebruikt:
Waarschuwing!
Veiligheidsinstructie: Het niet naleven kan lichamelijk letsel of
schade aan het toestel veroorzaken.
Waarschuwing!
Veiligheidsinstructie, wijst op gevaren met betrekking tot
elektrische stroom of elektrische spanning: Het niet naleven
kan tot lichamelijk letsel of schade aan de machine leiden en
de werking van het toestel beperken.
Instructie
Aanvullende informatie voor het bedienen van het toestel.
➤ Handeling: dit symbool geeft aan dat u iets moet doen. De vereiste
handelingen worden stap voor stap beschreven.
✓ Dit symbool beschrijft het resultaat van een handeling.
1 5, pagina 3: deze aanduiding wijst u op een element in een afbeelding,
in dit voorbeeld op „positie 5 in afbeelding 1 op pagina 3”.
Neem ook de volgende veiligheidsinstructies in acht.
66
Page 67

A-40 Veiligheidsinstructies
2 Veiligheidsinstructies
2.1 Algemene veiligheid
z Als het toestel zichtbaar beschadigd is, mag het niet in gebruik
worden genomen.
z Beschadig het koelsysteem niet.
z Plaats geen elektrische apparaten in de koelbox.
z Let erop dat de ventilatiesleuven niet worden afgedekt.
Houd de volgende minimumafstanden aan:
– aan de achterkant minstens 10 cm
– aan de zijkant minstens 5 cm
z Het koeltoestel is niet geschikt voor het transport van bijtende
of oplosmiddelhoudende stoffen!
z Maak de aansluitkabel of de slangverbinding los
– voor iedere reiniging en ieder onderhoud
– na elk gebruik
z Reparaties aan dit toestel mogen enkel door vaklui uitgevoerd
worden. Door ondeskundige reparaties kunnen grote gevaren
ontstaan.
2.2 Veiligheid bij het gebruik van het toestel
z Elektrische toestellen zijn geen speelgoed!
Bewaar en gebruik het toestel altijd buiten het bereik
van kinderen.
z Levensgevaar!
Neem nooit blanke leidingen met blote handen vast. Dit geldt
vooral bij het gebruik aan het wisselstroomnet.
z Dompel het toestel nooit onder water.
z Stel het toestel nooit aan regen of vochtigheid bloot.
z Bescherm het toestel tegen spatwater.
z Bescherm het toestel en de kabel tegen hitte en vocht.
67
Page 68

Veiligheidsinstructies A-40
z Gebruik het toestel alleen op goed geventileerde plaatsen.
z Bij het eerste gebruik van het toestel kan er kort sprake zijn
van geurvorming.
z Gebruik het toestel alleen met één enkele energiebron.
z Zet het toestel niet in de buurt van open vlammen of
andere warmtebronnen (verwarming, sterke zonnestraling,
gasovens enz.).
z Doe geen vloeistoffen of ijs in het binnenreservoir.
z MOBICOOL kan niet aansprakelijk worden gesteld voor schade
die door gebruik tegen de voorschriften in of door verkeerde
bediening wordt veroorzaakt.
2.3 Veiligheid bij het gebruik van het toestel met
12 V DC
z De leiding tussen accu en koelbox moet door een zekering van
max. 15 A zijn beveiligd.
z Gebruik alleen kabels met de bijbehorende kabeldiameter
(zie tabel op pagina 72).
2.4 Veiligheid bij het gebruik van het toestel met 220 V
– 240 V
z Sluit het toestel enkel met de bijbehorende aansluitkabel op het
wisselstroomnet aan.
z Trek de stekker nooit aan de aansluitkabel uit het stopcontact.
z Als de aansluitkabel is beschadigd, moet deze door een kabel
met dezelfde technische specificatie worden vervangen om
gevaren te voorkomen.
z Let er voor de ingebruikneming op dat de voedingskabel en de
stekker droog zijn.
z Vergelijk de spanning op het typeplaatje met de voorhanden
energievoorziening.
68
Page 69

A-40 Omvang van de levering
2.5 Veiligheid bij het gebruik van het toestel met gas
z Gebruik het toestel uitsluitend buiten met gas.
z Gebruik het toestel niet met gas in voertuigen (wagens, boten e.d)
of in gesloten ruimtes.
z Zorg bij gebruik in tenten of voortenten en op gelijkvloerse
terrassen voor voldoende luchttoevoer en ventilatie.
z Stel het toestel niet in de buurt van ontvlambare materialen
(papier, droge bladeren, textiel) op.
z Vergelijk de aangegeven druk op het typeplaatje met de
aangegeven druk op de propaan- of butaangasfles.
z Bewaar de flessen met vloeibaar gas nooit op ongeventileerde
plaatsen of onder vloerniveau (trechtervormige kuilen in de grond).
z Bescherm flessen met vloeibaar gas tegen directe zonnestraling.
De temperatuur mag niet hoger zijn dan 50 °C.
3 Omvang van de levering
Aantal Omschrijving
1 Koelbox
1 Schaal met deksel voor het maken van ijsblokjes
1 Gebruiksaanwijzing
4 Gebruik volgens de voorschriften
De koelbox is geschikt voor het koelen en diepvriezen van
levensmiddelen. Het toestel is ook voor op de camping geschikt.
Als u medicijnen wilt koelen, gelieve dan te controleren of het koelvermogen
van het toestel aan de vereisten van het betreffende medicijn voldoet.
De koelbox is voor het gebruik met een 12-V
(b. v. sigarettenaansteker van een voertuig) en alternatief voor de
aansluiting op een netspanning van 220 – 240 V
De koelbox kan onafhankelijk van stroom met vloeibaar gas
(propaan of butaan) worden gebruikt.
-spanningsbron
DC
bestemd.
AC
69
Page 70

Technische beschrijving A-40
5 Technische beschrijving
De koelbox is geschikt voor het gebruik op b. v. de camping, op het terras,
in de tuin of op andere plaatsen waar een 12-V-DC- (b. v. sigarettenaansteker
in het voertuig) of een 220 V – 240 V-netaansluiting aanwezig is. Bovendien
kunt u de koelbox met vloeibaar gas gebruiken.
U kunt waren tot 20 °C onder omgevingstemperatuur afkoelen.
De koeling gebeurt door een onderhoudsvrij absorptie-koelcircuit.
Geconcentreerde ammoniakoplossing wordt in een boiler verwarmd en in
de vorm van damp weggedreven. Het onder hoge druk staande gas wordt in
een condensator vloeibaar en dan met toevoeging van waterstof verdampt.
Daarbij wordt er warmte aan de koelruimte onttrokken.
6 Koelbox bedienen
Voor u de nieuwe koelbox in gebruik neemt, moet u hem om
hygiënische redenen van binnen en van buiten reinigen met een
vochtige doek (zie ook hoofdstuk „Reiniging en onderhoud” op
pagina 75).
Levensmiddelen mogen alleen in originele verpakkingen of in geschikte bakken worden opgeslagen.
6.1 Tips om energie te sparen
z Kies een goed geventileerde en tegen zonnestralen beschermde plaats.
z Laat warme spijzen eerst afkoelen, voor u ze in de koelbox steekt.
z Open de koelbox niet vaker dan nodig.
z Laat het deksel niet langer open staan dan nodig.
z Plaats de levensmiddelen zodanig dat de lucht in de koelbox kan circuleren.
6.2 Koelbox gebruiken
Koel de koelbox voor aanvang van de reis ongeveer 24 uur
aan het net of met gas voor. Daardoor heeft u op de plaats
waar u de koelbox gebruikt sneller het gewenste koelvermogen.
Het koelvermogen kan worden beïnvloed door
– de omgevingstemperatuur,
– de hoeveelheid levensmiddelen die geconserveerd dienen
te worden,
– het aantal keren dat het deksel wordt geopend.
70
Page 71

A-40 Koelbox bedienen
➤ Plaats de koelbox op een vaste en vlakke ondergrond.
Controleer de horizontale stand (±2°) evt. met een waterpas.
➤ Open het deksel van het bedieningspaneel (2 1, pagina 3) door erop
te drukken.
Door er opnieuw op te drukken wordt het deksel opnieuw gesloten.
Hoe verder u de betreffende regelaar in de richting „MAX” draait,
hoe lager de koeltemperatuur wordt.
Zorg ervoor dat er zich enkel voorwerpen of waren in de koelbox
bevinden die op de gekozen temperatuur gekoeld mogen worden.
Zorg ervoor dat drank of eten in glazen flessen/potten niet te sterk
afkoelt. Bij het bevriezen zetten drank of vloeibare voeding uit.
Hierdoor kunnen de glazen flessen/potten kapot gaan.
Aan 220 V – 240 V aansluiten
Vergelijk de spanning op het typeplaatje met de aanwezige
energievoorziening.
➤ Steek de geaarde stekker in een volgens de voorschriften geïnstalleerd,
geaard stopcontact.
➤ Zet de thermostaatregelaar (2 2, pagina 3) op „MAX”.
➤ Wacht tot de temperatuur in de koelbox is gedaald.
➤ Stel de thermostaatregelaar (2 2, pagina 3) op het gewenste
temperatuurbereik in.
➤ Voor uitschakelen van de koelbox zet u de thermostaatregelaar
(2 2, pagina 3) op „0” en trekt u de netstekker uit het stopcontact.
Aan 12 V DC aansluiten
Bij gebruik van de accu kunt u de temperatuur niet met de
thermostaatregelaar instellen. Het toestel wordt uitsluitend
ingeschakeld en koelt dan.
Scheid de koelbox bij motorstilstand van de accu, aangezien
deze anders wordt ontladen.
➤ Controleer of de leiding tussen accu en koelbox door een zekering
(maximaal 15 A) is beveiligd.
71
Page 72

Koelbox bedienen A-40
➤ Kies de kabeldiameter van de kabel tussen accu en de bus van de
12-V-spanningsvoorziening aan de hand van de volgende tabel:
Kabellengte Kabeldiameter
tot 2,5 m 2,5 mm²
2,5 m tot 4,0 m 4,0 mm²
➤ Controleer of de thermostaatregelaar voor 220 V – 240 V-gebruik (2 2,
pagina 3) op stand „0” staat.
➤ Steek de stekker van de aansluitkabel in de bus van de
12-V-spanningsvoorziening (b. v. sigarettenaansteker).
De poling is willekeurig.
➤ Voor uitschakelen van de koelbox trekt u stekker uit de bus.
Aan een gasbron aansluiten
Gebruik uitsluitend propaan- of butaangasflessen met gekeurd
drukreduceerventiel en passend kopstuk.
Vergelijk de aangegeven druk op het typeplaatje met de
aangegeven druk op de propaan- of butaangasfles.
Het toestel is met een vlambeveiliging uitgerust. De gastoevoer
wordt onderbroken als de vlam uitgaat.
➤ Stel de gasfles verticaal en minstens een meter van de brander
(aan de achterkant van de koelbox) verwijderd op.
➤ Controleer of het ventiel van de gasfles is gesloten.
Gebruik uitsluitend gekeurde slangleidingen (DIN 4815 deel 2)
met een maximale lengte van 1,5 m.
Het vervangen van uw aansluitslang moet volgens de betreffende
nationale richtlijnen worden uitgevoerd
➤ Verbind de slangleiding met het kopstuk van het ventiel van de gasfles en
het koeltoestel (3 1, pagina 4).
Gebruik hiervoor een steeksleutel met de passende sleutelwijdte.
72
Page 73

A-40 Koelbox bedienen
➤ Let erop dat de slangleiding
– niet ingeklemd of geknikt is,
– op veilige afstand van de brander ligt.
➤ Open het ventiel van de gasfles.
Controleer de lekdichtheid nooit bij open vuur of in de buurt van
ontstekingsbronnen.
➤ Controleer alle verbindingen met lekspray op lekdichtheid.
De lekdichtheid is gegarandeerd als er zich geen luchtbellen vormen.
➤ Let erop dat
– de thermostaatregelaar voor het 220 V – 240 V-gebruik (2 2,
pagina 3) op stand „0” staat,
– de accustekker niet aangesloten is.
➤ Druk de draaischakelaar (2 3, pagina 3) in en houd deze ongeveer 10 s
ingedrukt, zodat de lucht uit de slangleiding verdwijnt.
➤ Draai de draaischakelaar (2 3, pagina 3) in richting „ ”.
✓ U hoort een regelmatig, knakkend geluid: de piëzo-ontsteker probeert de
vlam te ontsteken.
Als de vlam brandt, is de koelbox klaar voor gebruik.
➤ Als de vlam niet is ontstoken, herhaal dan de ontstekingsprocedure.
Tip!
Als het ontsteken met de piëzo-ontsteker wegens hoge
luchtvochtigheid niet mogelijk is, kunt u de gasbrander met
ingedrukte gashendel met een lucifer door de opening in de
achterkant ontsteken.
➤ Controleer regelmatig of de toestand van de slangleiding en alle
verbindingen in orde is.
➤ Voor uitschakelen van de koelbox sluit u eerst het flesventiel en dan
draait u de draaischakelaar (2 3, pagina 3) met de wijzers van de klok
mee helemaal dicht.
73
Page 74

Koelbox bedienen A-40
Gasfles vervangen
Vervang de gasfles uitsluitend bij goede ventilatie.
Let erop dat er geen ontstekingsbron in de buurt is.
Vervang de gasfles uitsluitend als de koelbox uitgeschakeld is.
➤ Schakel de koelbox uit door de draaischakelaar (2 3, pagina 3) met de
wijzers van de klok mee helemaal dicht te draaien.
➤ Sluit het ventiel van de gasfles volledig.
➤ Schroef het ventiel van de gasfles af.
➤ Controleer de toestand van de slangleiding.
Vervang de slangleiding als het materiaal broos of poreus is.
➤ Schroef het drukreduceerventiel op de nieuwe fles vast.
Koelbox ontdooien
Luchtvochtigheid kan zich in de binnenruimte van de koelbox als rijp
afzetten, waardoor het koelvermogen verminderd wordt. Ontdooi het
toestel daarom tijdig.
Waarschuwing!
Gebruik nooit hard of spits gereedschap voor het verwijderen van
ijslagen of het losmaken van vastgevroren voorwerpen.
Ga als volgt te werk om de koelbox te ontdooien:
➤ Neem de waren eruit.
➤ Bewaar deze evt. in een ander koeltoestel zodat ze koud blijven.
➤ Schakel de koelbox uit.
➤ Laat het deksel open.
➤ Als alles ontdooid is, maakt u de koelbox leeg en veegt u deze schoon.
Koelbox uitschakelen en bewaren
Als u de koelbox lange tijd niet wilt gebruiken, gaat u als volgt te werk:
➤ Schakel de koelbox uit.
➤ Trek de aansluitleiding eraf of neem de slangleiding naar de gasfles weg.
➤ Reinig de koelbox (zie hoofdstuk „Reiniging en onderhoud” op pagina 75).
➤ Laat het deksel licht geopend.
Zo verhindert u geurvorming.
74
Page 75

A-40 Reiniging en onderhoud
7 Reiniging en onderhoud
Waarschuwing!
Trek voor het reinigen van de koelbox altijd de aansluitkabel eruit
of maak de slangverbinding los.
Waarschuwing!
Reinig de koelbox nooit onder stromend water of in afwaswater.
Waarschuwing!
Gebruik voor het reinigen geen bijtende schoonmaakmiddelen
of harde voorwerpen, de koelbox zou hierdoor beschadigd
kunnen raken.
➤ Reinig de koelbox af en toe met een vochtige doek.
➤ Reinig de buitenkant van het toestel met een vochtige doek.
8Afvoer
8.1 Verpakkingsmateriaal afvoeren
Werp het verpakkingsmateriaal niet gewoon weg. Neem de volgende
instructies in acht:
➤ Laat het verpakkingsmateriaal van karton en de kunststofverpakkingen
indien mogelijk recyclen.
➤ Vraag evt. aan uw gemeentelijke administratie naar een recyclingcentrum
in uw buurt.
8.2 Oud toestel afvoeren
Als u het toestel definitief buiten bedrijf stelt, gelieve het dan naar het
dichtstbijzijnde recyclingcentrum of naar uw speciaalzaak te brengen,
dat het toestel in ruil voor een kleine vergoeding terugneemt.
75
Page 76

Verhelpen van storingen A-40
9 Verhelpen van storingen
Controleer bij storingen de volgende punten:
Storing Mogelijke oorzaak Voorstel tot oplossing
De koelbox
functioneert niet.
De koelbox start niet
meer na langere tijd niet
gebruikt te zijn.
De koelbox is
elektrisch niet correct
aangesloten.
De koelbox is niet
correct op het gas
aangesloten.
De koelbox is niet
correct opgesteld.
De koelbox is niet
correct gevuld.
Het koelcircuit is
defect.
– Zet de koelbox zonder aangesloten
Controleer of de spanningsvoorziening
optimaal functioneert.
Controleer of de elektrische contacten in
orde zijn.
Controleer of de aanwezige spanning
overeenkomt met de waarde op het
typeplaatje.
Controleer of de thermostaatregelaar is
ingeschakeld.
Controleer of er meerdere energiebronnen
tegelijk zijn aangesloten.
Controleer of de gasvoorziening optimaal
functioneert.
Controleer of het ventiel van de gasfles is
geopend.
Controleer of er nog gas in de fles is.
Controleer of er meerdere energiebronnen
tegelijk zijn aangesloten.
Houd de draaischakelaar voor het
ontsteken langer ingedrukt.
Controleer of het toestel waterpas staat.
Controleer of er voldoende ventilatie is.
Controleer of er warme spijzen zijn
opgeslagen.
Controleer of de koelruimte te dicht bepakt
is of te vol gevuld is.
De reparatie kan enkel door een
geautoriseerd servicebedrijf uitgevoerd
worden.
energiebronnen op zijn kop en wacht
ongeveer vijf minuten.
Draai de koelbox weer om en schakel hem
opnieuw in.
76
Page 77

A-40 Technische gegevens
10 Technische gegevens
Inhoud: 40 l
Gasverbruik: 13 g/h
Aansluitdruk volgens
bestemmingsland
D, AU, LU, CH, CZ, HU: 50 mbar
SE, NO, NL, FI, DK: 30 mbar
GB, E, FR, BE, IE, IT, PT: 28 – 30/37 mbar
Aansluiting op 220 V – 240 V
Vermogen: 75 W
Stroomgebruik: 0,33 A
Aansluiting op 12 V
Vermogen: 75 W
Stroomgebruik: 6,25 A
Koeltemperatuurbereik: tot 20 °C onder omgevingstemperatuur
Gewicht: ca. 19,5 kg
Keurmerk/certificaat:
Categorie I
, vloeibaar gas
3
Uitvoeringen, wijzigingen in verband met de technische vooruitgang en
levermogelijkheden voorbehouden.
Het toestel heeft het e4-certificaat.
Dit toestel is CFK-vrij.
Het toestel is met het GS-keurmerk voor geteste veiligheid onderscheiden.
77
Page 78

Henvisninger vedr. brug af vejledningen A-40
Læs denne vejledning omhyggeligt igennem før ibrugtagning, og gem
den. Giv den til køberen, hvis du sælger apparatet.
Indholdsfortegnelse
1 Henvisninger vedr. brug af vejledningen . . . . . . . . . . . . . . . . . . . . 78
2 Sikkerhedshenvisninger . . . . . . . . . . . . . . . . . . . . . . . . . . . . . . . . 79
3 Leveringsomfang . . . . . . . . . . . . . . . . . . . . . . . . . . . . . . . . . . . . . 81
4 Korrekt brug . . . . . . . . . . . . . . . . . . . . . . . . . . . . . . . . . . . . . . . . . 81
5 Teknisk beskrivelse . . . . . . . . . . . . . . . . . . . . . . . . . . . . . . . . . . . . 81
6 Betjening af køleboksen . . . . . . . . . . . . . . . . . . . . . . . . . . . . . . . . 82
7 Rengøring og vedligeholdelse . . . . . . . . . . . . . . . . . . . . . . . . . . . 86
8 Bortskaffelse . . . . . . . . . . . . . . . . . . . . . . . . . . . . . . . . . . . . . . . . . 86
9 Udbedring af fejl . . . . . . . . . . . . . . . . . . . . . . . . . . . . . . . . . . . . . . 87
10 Tekniske data . . . . . . . . . . . . . . . . . . . . . . . . . . . . . . . . . . . . . . . . 88
1 Henvisninger vedr. brug af
vejledningen
Følgende symboler anvendes i denne betjeningsvejledning:
Vigtigt!
Sikkerhedshenvisning: Manglende overholdelse kan føre til
kvæstelser eller skader på apparatet.
Vigtigt!
Sikkerhedshenvisning, der henviser til farer med elektricitet eller
elektrisk spænding: Manglende overholdelse kan føre til kvæstelser
og skader på apparatet og begrænser apparatets funktion.
Bemærk
Supplerende informationer om betjening af apparatet.
➤ Handling: Dette symbol viser dig, at du skal gøre noget. De påkrævede
handlinger beskrives trin for trin.
✓ Dette symbol beskriver resultatet af en handling.
1 5, side 3: Denne information henviser til et element på en figur, i dette
eksempel til „Position 5 på figur 1 på side 3“.
Overhold også de efterfølgende sikkerhedshenvisninger.
78
Page 79

A-40 Sikkerhedshenvisninger
2 Sikkerhedshenvisninger
2.1 Generel sikkerhed
z Hvis apparatet har synlige beskadigelser, må du ikke tage det
ibrug.
z Undgå at beskadige kølesystemet.
z Stil ikke elektriske apparater i køleboksens indre.
z Ventilationsåbningerne må ikke tildækkes.
Overhold følgende minimumafstande:
– min. 10 cm til den bageste afgrænsning
– min. 5 cm til afgrænsningen i siden
z Køleapparatet er ikke egnet til transport af stoffer,
der er ætsende eller indeholder opløsningsmidler!
z Træk tilslutningskablet ud, eller løsn slangeforbindelsen
– før rengøring og vedligeholdelse
– efter brug
z Reparationer på dette apparat må kun foretages af fagfolk.
Ved ukorrekte reparationer kan der opstå betydelige farer.
2.2 Sikkerhed under anvendelse af apparatet
z El-apparater er ikke legetøj!
Opbevar og anvend apparatet uden for børns rækkevidde.
z Livsfare!
Tag aldrig fat i uisolerede ledninger med bare hænder.
Dette gælder frem for alt ved tilslutning til vekselstrømnettet.
z Dyb aldrig apparatet i vand.
z Udsæt aldrig apparatet for regn eller fugt.
z Beskyt apparatet mod stænkvand.
z Beskyt apparatet og kablet mod varme og fugtighed.
z Anvend kun apparatet på steder, der er godt ventileret.
z Når apparatet anvendes første gang, kan der kortvarigt
forekomme lugtgener.
z Tilslut altid kun apparatet til en energikilde.
z Stil ikke apparatet i nærheden af åben ild eller andre
varmekilder (varmeapparater, stærk sol, gasovne osv.).
z Fyld ikke væsker eller is i den indvendige beholder.
79
Page 80

Sikkerhedshenvisninger A-40
z MOBICOOL hæfter ikke for skader, der er forårsaget af
ukorrekt brug eller forkert betjening.
2.3 Sikkerhed ved anvendelse af apparatet med
12 V DC
z Ledningen mellem batteriet og køleboksen skal være sikret med
en sikring på maks. 15 A.
z Anvend kun kabler med det pågældende kabeltværsnit
(se tabel på side 83).
2.4 Sikkerhed ved anvendelse af apparatet med 220 V –
240 V
z Tilslut kun apparatet til vekselstrømsnettet med det tilhørende
tilslutningskabel.
z Træk aldrig stikket ud af stikdåsen med tilslutningskablet.
z Hvis tilslutningskablet er beskadiget, skal du udskifte det med et
kabel med samme tekniske specifikation for at undgå farer.
z Kontrollér før ibrugtagning, at ledningen og stikket er tørre.
z Sammenlign spændingsangivelsen på typeskiltet med
energiforsyningen, der er til rådighed.
2.5 Sikkerhed under anvendelse af apparatet med gas
z Tilslut udelukkende apparatet til gas i det fri.
z Tilslut ikke apparatet til gas i biler, både eller lukkede rum.
z Sørg for tilstrækkelig lufttilførsel og ventilation, når apparatet
anvendes i telte eller fortelte eller på terrasser i jordniveau.
z Stil ikke apparatet i nærheden af brændbare materialer
(papir, tørt løv, tekstilprodukter).
z Sammenlign trykangivelsen på typeskiltet med trykangivelsen
på propan- eller butangasflasken.
z Opbevar aldrig F-gasflasker på steder, der ikke er ventilerede,
eller under gulvniveau (tragtformede fordybninger i jorden).
z Beskyt F-gasflasken mod direkte sol.
Temperaturen må ikke overskride 50 °C.
80
Page 81

A-40 Leveringsomfang
3 Leveringsomfang
Mængde Betegnelse
1 Køleboks
1 Skål med låg til at lave isterninger
1 Betjeningsvejledning
4 Korrekt brug
Køleboksen egner sig til at køle og dybfryse levnedsmidler.
Apparatet er også egnet i forbindelse med camping.
Hvis du vil køle medicin, skal du kontrollere, om apparatets kølekapacitet
svarer til kravene for det pågældende lægemiddel.
Køleboksen er beregnet til tilslutning til en 12 V
(f.eks. cigarettænderen i et køretøj) og som alternativ til tilslutning til
en netspænding på 220 – 240 V
Køleboksen kan i stedet for strøm tilsluttes til F-gas
(propan eller butan).
AC
.
-spændingskilde
DC
5 Teknisk beskrivelse
Køleboksen er egnet til anvendelse f.eks. i forbindelse med camping,
på terrassen, i haven eller på andre steder, hvor der findes en 12 V-DC(f.eks. cigarettænderen i køretøjet) eller en 220 V – 240 V-nettilslutning.
Derudover kan du tilslutte køleboksen til F-gas.
Du kan afkøle varer indtil 20 °C under udenomstemperaturen.
Afkølingen foretages med et vedligeholdelsesfrit absorptionskredsløb.
En koncentreret ammoniakopløsning opvarmes i en kedel og uddrives
i dampform. Gassen, der er under højt tryk, kondenseres i en kondensator
og fordamper derefter under tilførsel af brint. Derved bortledes varme
fra kølerummet.
81
Page 82

Betjening af køleboksen A-40
6 Betjening af køleboksen
Før du tager den nye køleboks i brug, bør du af hygiejniske
årsager rengøre den indvendigt og udvendigt med en fugtig klud
(se også kapitlet „Rengøring og vedligeholdelse“ på side 86).
Levnedsmidler må kun opbevares i original emballage eller
egnede beholdere.
6.1 Tips til energibesparelse
z Vælg et anvendelsessted, der er godt ventileret og beskyttet mod sol.
z Lad først varm mad afkøle, før du lægger den i.
z Åbn ikke køleboksen hyppigere end nødvendigt.
z Lad ikke låget være åbent længere end nødvendigt.
z Placér levnedsmidlerne, så luften kan cirkulere i køleboksen.
6.2 Anvendelse af køleboksen
Foretag en forkøling af køleboksen i ca. 24 timer med tilslutning til
nettet eller med gas, før en rejse påbegyndes. Derved har du på
anvendelsesstedet hurtigere den ønskede kølekapacitet.
Kølekapaciteten kan påvirkes af
– udenomstemperaturen
– mængden af levnedsmidlerne, der skal konserveres
– hvor tit låget åbnes
➤ Stil køleboksen på et fast og jævnt underlag.
Kontrollér evt. den horisontale position (±2°) med et vaterpas.
➤ Åbn dækslet på betjeningspanelet (2 1, side 3) ved at trykke på det.
Luk dækslet igen ved at trykke på det igen.
Jo mere du drejer reguleringen i retning af „MAX“, desto lavere
bliver køletemperaturen.
Sørg for, at der kun er genstande eller varer i køleboksen, der må
afkøles til den valgte temperatur.
Vær opmærksom på, at drikkevarer eller mad i glasbeholdere ikke
afkøles for kraftigt. Drikkevarer og mad med stort væskeindhold
udvider sig, når de fryses. Derved kan glasbeholdere blive ødelagt.
82
Page 83

A-40 Betjening af køleboksen
Tilslutning til 220 V – 240 V
Sammenlign spændingsangivelsen på typeskiltet med
energiforsyningen, der er til rådighed.
➤ Sæt schukostikket i en schukostikdåse, der installeret i henhold til
forskrifterne.
➤ Stil termostatreguleringen (2 2, side 3) på „MAX“.
➤ Vent, indtil temperaturen i køleboksen er faldet.
➤ Stil termostatreguleringen (2 2, side 3) på det ønskede
temperaturområde.
➤ For at frakoble køleboksen skal du indstille termostatreguleringen
(2 2, side 3) på „0“ og trække netstikket ud.
Tilslutning til 12 V DC
Ved anvendelse med batterier kan du ikke indstille med
termostatreguleringen. Apparatet tilkobles blot og afkøler derefter.
Afbryd køleboksen fra batteriet, når motoren er standset, da det
ellers bliver afladet.
➤ Kontrollér, at ledningen mellem batteriet og køleskabet er sikret med en
sikring (maks. 15 A).
➤ Vælg kabeltværsnittet for kablet mellem batteriet og bøsningen på
12 V-spændingsforsyningen i henhold til følgende tabel:
Kabellængde Kabeltværsnit
indtil 2,5 m 2,5 mm²
2,5 m til 4,0 m 4,0 mm²
➤ Kontrollér, at termostatreguleringen for 220 V – 240 V-drift (2 2, side 3)
står på positionen „0“.
➤ Sæt tilslutningskablets stik i bøsningen på 12 V-spændingsforsyningen
(f.eks. cigarettænderen).
Forbindelsen af polerne er uden betydning.
➤ For at frakoble køleboksen skal du trække stikket ud af bøsningen.
83
Page 84

Betjening af køleboksen A-40
Tilslutning til en gaskilde
Anvend kun propan- eller butangasflasker med kontrolleret
trykreduktionsventil og passende topstykke.
Sammenlign trykangivelsen på typeskiltet med trykangivelsen på
propan- eller butangasflasken.
Apparatet er udstyret med en flammesikring.
Gastilførslen afbrydes, hvis flammen slukker.
➤ Stil gasflasken lodret og mindst en meter væk fra brænderen
(på bagsiden af køleboksen).
➤ Kontrollér, om gasflaskens ventil er lukket.
Anvend kun kontrollerede slangeforbindelser (DIN 4815 del 2)
med en maks. længde på 1,5 m.
Udskiftningen af tilslutningsslangen skal foretages i henhold til de
nationaler forskrifter.
➤ Forbind slangeforbindelsen med topstykket på gasflaskens ventil og på
køleapparatet (3 1, side 4).
Anvend en gaffelnøgle med den pågældende nøglevidde.
➤ Kontrollér, at slangeforbindelsen
– ikke klemmes eller knækkes,
– ligger i en sikker afstand fra brænderen.
➤ Åbn gasflaskens ventil.
Kontrollér aldrig tætheden, når flammer brænder, eller i nærheden
af antændelseskilder.
➤ Foretag en tæthedskontrol af alle forbindelser med læksøgningsspray
Tætheden er garanteret, når der ikke dannes blærer.
➤ Kontrollér, at
– termostatreguleringen for 220 V – 240 V-driften (2 2, side 3) står
på positionen „0“.
– batteristikket ikke er tilsluttet.
84
Page 85

A-40 Betjening af køleboksen
➤ Tryk drejekontakten (2 3, side 3) ind, og hold den inde i ca. 10 sekunder,
så luft, der befinder sig i slangeforbindelsen, fortrænges.
➤ Drej drejekontakten (2 3, side 3) i retning af „ “.
✓ Du hører en regelmæssig, knitrende lyd: Piezotænderen forsøger at
tænde flammen.
Når flammen brænder, kan køleboksen anvendes.
➤ Gentag tændingen, hvis flammen ikke antændes.
Tip!
Hvis der på grund af høj luftfugtighed ikke kan tændes med
piezotænderen, kan du i åbningen i bagvæggen tænde
gasbrænderen med en tændstik, når gashåndtaget er trykket ned.
➤ Kontrollér med regelmæssige mellemrum, at slangeforbindelsen og alle
forbindelser er i korrekt tilstand.
➤ For at frakoble køleboksen skal du først lukke flaskeventilen og derefter
lukke drejekontakten (2 3, side 3) helt med uret.
Udskiftning af gasflasken
Udskift kun gasflasken ved god ventilation.
Kontrollér, at der ikke er en antændelseskilde i nærheden.
Udskift kun gasflasken, når køleboksen er frakoblet.
➤ Frakobl køleboksen ved at lukke drejekontakten (2 3, side 3) helt
med uret.
➤ Luk gasflaskens ventil helt.
➤ Skru ventilen af flasken.
➤ Kontrollér slangeforbindelsens tilstand.
Udskift slangeforbindelsen, hvis materialet er skørt eller porøst.
➤ Skru trykreduktionsventilen på den nye flaske.
Afrimning af køleboksen
Luftfugtighed kan sætte sig som rim i køleboksens indvendige rum og derved
reducere kølekapaciteten. Afrim derfor apparatet rettidigt.
Vigtigt!
Anvend aldrig hårdt eller spidst værktøj til at fjerne islag eller til at
løsne fastfrosne genstande.
Gå frem på følgende måde for at afrime køleboksen:
➤ Tag indholdet ud.
➤ Opbevar det evt. i et andet køleapparat, så det forbliver koldt.
85
Page 86

Rengøring og vedligeholdelse A-40
➤ Slå køleboksen fra.
➤ Lad låget stå åbent.
➤ Når alt er afrimet, skal du tømme køleboksen og tørre den af.
Frakobling og opbevaring af køleboksen
Hvis du ikke vil anvende køleboksen i længere tid, skal du gå frem på
følgende måde:
➤ Slå køleboksen fra.
➤ Træk tilslutningsledningen ud, eller tag slangeforbindelsen til gasflasken af.
➤ Rengør køleboksen (se kapitlet „Rengøring og vedligeholdelse“ på side 86).
➤ Lad låget stå lidt åbent.
På den måde forhindrer du, at der opstår lugtgener.
7 Rengøring og vedligeholdelse
Vigtigt!
Træk tilslutningskablet ud eller løsn slangeforbindelsen,
før køleboksen rengøres.
Vigtigt!
Rengør aldrig køleboksen under rindende vand eller i opvaskevand.
Vigtigt!
Anvend ikke skrappe rengøringsmidler eller hårde genstande ved
rengøringen, da de kan beskadige køleboksen.
➤ Rengør af og til køleboksen indvendigt med en fugtig klud.
➤ Rengør apparatets yderside med en fugtig klud.
8 Bortskaffelse
8.1 Bortskaffelse af emballagen
Smid ikke emballagen væk. Overhold følgende henvisninger:
➤ Bortskaf så vidt muligt emballage af pap og kunststof sammen med det
tilsvarende genbrugsaffald.
➤ Spørg evt. din kommunalforvaltning om det ansvarlige recyclingcenter.
86
Page 87

A-40 Udbedring af fejl
8.2 Bortskaffelse af brugte apparater
Hvis du tager apparatet endegyldigt ud af drift, skal du bringe det til det
nærmeste recyclingcenter eller til din faghandel, der tager det tilbage mod
et mindre beløb.
9 Udbedring af fejl
Kontrollér ved fejl følgende punkter:
Fejl Mulig årsag Løsningsforslag
Køleboksen
fungerer ikke.
Køleboksen fungerer
ikke.
Køleboksen starter ikke,
efter at den ikke har
været anvendt i
længere tid.
Den elektriske
tilslutning af
køleboksen er
ikke korrekt.
Køleboksen er ikke
tilsluttet korrekt
til gassen.
Køleboksen blev ikke
opstillet korrekt.
Køleboksen blev ikke
fyldt korrekt.
Kølekredsløbet er
defekt.
– Stil køleboksen på hovedet uden
Kontrollér, om der er sikret en fejlfri
spændingsforsyning.
Kontrollér, om de elektriske kontakter er
i orden.
Kontrollér, om den tilsluttede spænding
svarer til værdien på typeskiltet.
Kontrollér, om termostatreguleringen
er tilkoblet.
Kontrollér, om der samtidig er tilsluttet
flere energikilder.
Kontrollér, om der er sikret en
fejlfri gasforsyning.
Kontrollér, om gasflaskens ventil er åbnet.
Kontrollér, om der stadig er gas i flasken.
Kontrollér, om der samtidig er tilsluttet
flere energikilder.
Hold drejekontakten trykket ind længere,
når der tændes.
Kontrollér, om apparatet står vandret.
Kontrollér, om en tilstrækkelig ventilation
er sikret.
Kontrollér, om der blev lagt varm mad i.
Kontrollér, om kølerummet blev pakket for
tæt eller blev overfyldt.
Reparationen kan kun foretages af en
tilladt kundeservice.
tilsluttede energikilder, og vent i ca.
fem minutter.
Vend køleboksen om igen, og slå den
til igen.
87
Page 88

Tekniske data A-40
10 Tekniske data
Indhold: 40 l
Gasforbrug: 13 g/h
Tilslutningstryk iht.
bestemmelsesland
D, AU, LU, CH, CZ, HU: 50 mbar
SE, NO, NL, FI, DK: 30 mbar
GB, E, FR, BE, IE, IT, PT: 28 – 30/37 mbar
Tilslutning til 220 V – 240 V
Effektforbrug: 75 W
Strømforbrug: 0,33 A
Tilslutning til 12 V
Effektforbrug: 75 W
Strømforbrug: 6,25 A
Køletemperaturområde: Indtil 20 °C under udenomstemperaturen
Vægt: ca. 19,5 kg
Godkendelse/certifikat:
Kategori I
, F-gas
3
Der tages forbehold for udførelser, ændringer som følge af teknisk udvikling
og for muligheder for levering.
Apparatet har e4-godkendelsen.
Dette apparat er CFC-frit.
Apparatet har GS-mærket for kontrolleret sikkerhed.
88
Page 89

A-40 Tips for bruk av bruksanvisningen
Les bruksanvisningen nøye før du tar apparatet i bruk og ta vare
på den. Hvis apparatet selges videre, må man sørge for å gi
bruksanvisningen videre også.
Innhold
1 Tips for bruk av bruksanvisningen . . . . . . . . . . . . . . . . . . . . . . . . 89
2 Sikkerhetsregler . . . . . . . . . . . . . . . . . . . . . . . . . . . . . . . . . . . . . . 90
3 Leveringsomfang . . . . . . . . . . . . . . . . . . . . . . . . . . . . . . . . . . . . . 92
4 Forskriftsmessig bruk . . . . . . . . . . . . . . . . . . . . . . . . . . . . . . . . . . 92
5 Teknisk beskrivelse . . . . . . . . . . . . . . . . . . . . . . . . . . . . . . . . . . . . 92
6 Betjene kjøleboksen . . . . . . . . . . . . . . . . . . . . . . . . . . . . . . . . . . . 93
7 Rengjøring og stell . . . . . . . . . . . . . . . . . . . . . . . . . . . . . . . . . . . . 97
8 Deponering . . . . . . . . . . . . . . . . . . . . . . . . . . . . . . . . . . . . . . . . . . 97
9 Feilretting . . . . . . . . . . . . . . . . . . . . . . . . . . . . . . . . . . . . . . . . . . . 98
10 Tekniske spesifikasjoner . . . . . . . . . . . . . . . . . . . . . . . . . . . . . . . . 99
1 Tips for bruk av bruksanvisningen
Følgende symboler er benyttet i denne bruksanvisningen:
Merk!
Sikkerhetsregel: Hvis man ikke overholder denne regelen,
kan det føre til skade på personer eller apparatet.
Merk!
Sikkerhetsregel som viser til farer forbundet med elektrisk strøm
eller elektrisk spenning: Hvis man ikke overholder dette, kan det
føre til skade på personer og apparat og skade funksjonen til
apparatet.
Tips
Utfyllende informasjon om bruk av apparatet.
➤ Handling: Dette symbolet indikerer at du må gjøre noe. De nødvendige
handlingene beskrives trinnvis.
✓ Dette symbolet beskriver resultatet av en handling.
1 5, side 3: Denne angivelsen henviser til et element i en illustrasjon,
i dette eksemplet til «Posisjon 5 i illustrasjon 1 på side 3».
Følg også de følgende sikkerhetsreglene.
89
Page 90

Sikkerhetsregler A-40
2 Sikkerhetsregler
2.1 Generell sikkerhet
z Apparatet må ikke tas i bruk hvis det har synlige skader.
z Ikke skad kjølesystemet.
z Sett ikke elektriske apparater inn i kjøleboksen.
z Pass på at lufteåpningene ikke blir blokkert.
Sørg for å overholde følgende minimumsavstander:
– bak minimum 10 cm
– på sidene minimum 5 cm
z Kjøleapparatet er ikke egnet for transport av etsende eller
løsemiddelholdige stoffer!
z Trekk ut tilkoblingskabelen eller løsne slangeforbindelsen
– før rengjøring og stell
– hver gang etter bruk
z Reparasjoner på dette apparatet må kun utføres av fagfolk.
Feil reparasjoner kan føre til betydelige skader.
2.2 Sikkerhet ved bruk av apparatet
z Elektriske apparater er ikke beregnet for barn!
Oppbevar og bruk apparatet utenfor barns rekkevidde.
z Livsfare!
Ta ikke i bare ledninger med bare hender. Dette gjelder spesielt
ved drift fra vekselstrømnettet.
z Dypp aldri apparatet i vann.
z Utsett aldri apparatet for regn eller fuktighet.
z Beskytt apparatet mot vannsprut.
z Beskytt apparatet og kabelen mot varme og fuktighet.
z Bruk apparatet kun på steder med god lufting.
z Når apparatet tas i bruk første gang, kan det oppstå lukt en
kort stund.
z Driv alltid apparatet kun med bare én energikilde.
z Ikke plasser apparatet i nærheten av åpen flamme eller andre
varmekilder (oppvarming, sterk solbestråling, gassovner osv.).
z Fyll ikke væsker eller is i den innvendige beholderen.
90
Page 91

A-40 Sikkerhetsregler
z MOBICOOL påtar seg intet ansvar for skader som skyldes ikke
forskriftsmessig bruk eller feil bruk.
2.3 Sikkerhet ved drift av apparatet med 12 V DC
z Ledningen mellom batteri og kjøleboks må sikres med en
sikring på maks. 15 A.
z Bruk kun kabel med tilstrekkelig kabeltverrsnitt
(se tabell på side 94).
2.4 Sikkerhet ved drift av apparatet med 220 V – 240 V
z Koble apparatet til vekselstrømforsyningen kun med
tilkoblingskabelen som følger med.
z Trekk aldri støpslet ut av stikkontakten etter ledningen.
z Hvis tilkoblingskabelen er skadet, må den byttes i en kabel med
samme tekniske spesifikasjoner for å unngå fare.
z Før du tar apparatet i bruk, må du passe på at ledningen og
støpslet er tørre.
z Sammenlign spenningsspesifikasjonene på merkeskiltet med
tilgjengelig strømtilførsel.
2.5 Sikkerhet ved bruk av apparatet med gass
z Bruk apparatet med gass kun ute i det fri.
z Driv ikke apparatet med gass i kjøretøy som kjører på vei,
i båter eller i lukkede rom.
z Ved bruk i telt eller fortelt og på terrasser i gatehøyde må man
sørge for tilstrekkelig lufttilførsel og lufting.
z Sett ikke apparatet i nærheten av lettantennelige materialer
(papir, tørt løv, tekstiler).
z Sammenlign trykkangivelsen på typeskiltet med
trykkangivelsen på propan- eller butangassflasken.
z Oppbevar aldri flasker med flytende gass på steder uten lufting
eller under bakkenivå (traktformede grøfter).
z Utsett ikke flasker med flytende gass for direkte sollys.
Temperaturen må ikke overskride 50 °C.
91
Page 92

Leveringsomfang A-40
3 Leveringsomfang
Antall Betegnelse
1 Kjøleboks
1 Skål med lokk for å lage isbiter
1 Bruksanvisning
4 Forskriftsmessig bruk
Kjøleboksen er beregnet på å kjøle ned og dypfryse
næringsmidler. Apparatet er også egnet til camping-bruk.
Hvis apparatet benyttes til kjøling av medikamenter, må man kontrollere
at kjøleeffekten til apparatet er tilpasset kravene legemidlet stiller.
Kjøleboksen er beregnet for bruk på en 12-V
(f. eks. sigarettenner i et kjøretøy) og alternativt for tilkobling til
en nettspenning på 220 – 240 V
Kjøleboksen kan drives uavhengig av strøm med flytende gass
(propan eller butan).
AC
.
-spenningskilde
DC
5 Teknisk beskrivelse
Kjøleboksen er egnet for bruk ved f. eks. camping, på terassen, i haven eller
andre steder hvor et 12-V DC (f. eks. sigarettenner i bilen) eller et 220 V –
240 V nett. Dessuten kan du drive kjøleboksen med flytende gass.
Du kan kjøle ned varer til 20 °C under omgivelsestemperatur.
Kjølingen skjer via et vedlikeholdsfritt absorberkretsløp. Konsentrert
ammoniakkløsning varmes opp i en kjele og drives ut i form av damp.
Gassen som står under høyt trykk kondenseres i en kondensator og
fordampes deretter ved at man tilsetter hydrogen. Dermed trekkes det
varme ut av kjølerommet.
92
Page 93

A-40 Betjene kjøleboksen
6 Betjene kjøleboksen
Før den nye kjøleboksen tas i bruk, skal man av hygieniske
årsaker rengjøre den innvendig og utenpå med en fuktig klut
(se også Kapittel «Rengjøring og stell» på side 97).
Næringsmidler må oppbevares i originalforpakning eller i egnede
beholdere.
6.1 Tips for energisparing
z Velg et montasjested som har god ventilasjon og er beskyttet mot solstråling.
z Avkjøl varm mat før du plasserer den i kjøleboksen.
z Ikke åpne kjøleboksen oftere enn nødvendig.
z La ikke lokket stå åpent lenger enn nødvendig.
z Legg matvarene slik at luften i kjøleboksen kan sirkulere.
6.2 Bruk av kjøleboksen
Avkjøl kjøleboksen drevet fra nettet eller med gass i omlag
24 timer før reisen starter. Da oppnår du raskere ønsket
kjøleeffekt på stedet den skal brukes.
Kjøleeffekten kan bli påvirket av
– omgivelsestemperaturen,
– mengden matvarer som skal kjøles,
– hvor ofte lokket blir åpnet.
➤ Sett kjøleboksen på et fast og flatt underlag.
Kontroller evt. at den står vannrett (±2°) med et vater.
➤ Åpne dekslet på betjeningspanelet (2 1, side 3) ved å trykke på det.
Når du trykker en gang til på det lukkes dekslet.
Jo lenger du dreier regulatoren i retning «MAX», desto lavere
blir kjøletemperaturen.
Pass på at kun gjenstander hhv. varer som befinner seg i
kjøleboksen og som tåler nedkjøling blir nedkjølt til innstilt
temperatur.
Pass på at drikkevarer eller matvarer i glassbeholdere ikke blir
for kalde. Når drikkevarer eller flytende matvarer fryser, utvider de
seg. Glassbeholderen kan derfor bli ødelagt.
93
Page 94

Betjene kjøleboksen A-40
Tilkobling til 220 V – 240 V
Sammenlign spenningsspesifikasjonene på merkeskiltet med
tilgjengelig strømtilførsel.
➤ Plugg det jordete støpslet inn i en forskriftsmessig montert og jordet
stikkontakt.
➤ Still termostatregulatoren (2 2, side 3) på «MAX».
➤ Vent til temperaturen i kjøleboksen har sunket.
➤ Still termostatregulatoren (2 2, side 3) på ønsket temperaturområde.
➤ For å slå av kjøleboksen stiller du termostatregulatoren (2 2, side 3)
på «0» og trekker ut nettstøpslet.
Tilkobling til 12 V DC
Ved batteridrift kan du ikke stille inn temperaturen med
termostatregulatoren. Apparatet slås på og starter avkjølingen.
Når motoren ikke går, må du skille kjøleboksen fra batteriet,
ellers blir det utladet.
➤ Forsikre deg om at ledningen mellom batteri og kjøleskap er sikret med
en sikring (maks. 15 A).
➤ Velg kabeltverrsnittet til kabelen mellom batteri og kontakten til
12-V spenningstilførselen iht. følgende tabell:
Kabellengde Kabeltverrsnitt
inntil 2,5 m 2,5 mm²
2,5 m til 4,0 m 4,0 mm²
➤ Forsikre deg om at temperaturregulatoren for 220 V – 240 V drift (2 2,
side 3) står i stilling «0».
➤ Plugg støpslet til tilkoblingskabelen inn i kontakten til
12-V spenningstilførselen (f. eks. sigarattenner).
Valgfri polaritet.
➤ For å slå av kjøleboksen trekker du støpslet ut av kontakten.
94
Page 95

A-40 Betjene kjøleboksen
Tilkobling til gasskilde
Bruk kun propan- eller butangassflasker med testet
trykkreduksjonsventil og et hodestykke som passer.
Sammenlign trykkangivelsen på typeskiltet med trykkangivelsen
på propan- eller butangassflasken.
Apparatet er utstyrt med flammesikring. Gasstilførselen blir
avbrutt når flammen slukker.
➤ Sett gassflasken loddrett og minst en meter fra brenneren (på baksiden
av kjøleboksen).
➤ Kontroller om ventilen på gassflasken er lukket.
Bruk kun testede slangeledninger (DIN 4815 del 2) med maks.
lengde på 1,5 m.
Tilkoblingsslangen må byttes i henhold til nasjonale forskrifter.
➤ Koble slangeledningen til hodestykket på ventilen til gassflasken
og kjøleapparatet (3 1, side 4).
Bruk en fastnøkkel med tilsvarende nøkkelbredde til dette.
➤ Påse at slangeledningen
– ikke blir klemt eller skarpt bøyd,
– ligger i sikker avstand fra brenneren.
➤ Åpne ventilen på gassflasken.
Sjekk aldri at flasken er tett ved hjelp av åpen flamme eller
i nærheten av tennkilder.
➤ Kontroller om alle forbindelser er tette med lekkasjesøkespray.
Alt er tett når det ikke danner seg blærer.
➤ Pass på at
– termostatregulatoren for 220 V – 240 V drift (2 2, side 3) står i stilling
«0»,
– batteripluggen ikke er tilkoblet.
95
Page 96

Betjene kjøleboksen A-40
➤ Trykk inn dreiebryteren (2 3, side 3) og hold den inne i ca. 10 s, slik at
luften inne i slangeledningen slipper ut.
➤ Drei dreiebryteren (2 3, side 3) i retning « ».
✓ Du hører en jevn, knakende lyd: Piezotenneren forsøker å tenne flammen.
Når flammen brenner, er kjøleboksen klar til bruk.
➤ Hvis flammen ikke ble antent, gjentar du tenningsprosessen.
Tips!
Når det ikke er mulig å tenne med piezotenneren på grunn av høy
luftfuktighet, kan du tenne gassbrenneren ved å holde gasshendelen
nede og tenne med en fyrstikk gjennom åpningen på bakveggen.
➤ Kontroller med jevne mellomrom at slangeledningen og alle forbindelsene
er i god stand.
➤ For å slå av kjøleboksen lukker du først flaskeventilen og skrur deretter
dreiebryteren (2 3, side 3) helt igjen med urviseren.
Bytte gassflaske
Bytt gassflasken kun på steder hvor det er god lufting.
Pass på at det ikke er tennkilder i nærheten.
Bytt gassflasken kun når kjøleboksen er avslått.
➤ Slå av kjøleboksen ved å skru dreiebryteren helt igjen (2 3, side 3) med
urviseren.
➤ Lukke ventilen på gassflasken helt.
➤ Skru ventilen av flasken.
➤ Kontroller tilstanden til slangeledningen.
Bytt slangeledningen hvis den er sprø eller porøs.
➤ Skru trykkreduksjonsventilen fast på den nye flasken.
Avriming av kjøleboksen
Luftfuktigheten felles ut i kjøleboksen som rim, noe som reduserer
kjøleeffekten. Avrim derfor apparatet til riktig tid.
Merk!
Bruk aldri harde eller spisse redskaper for å fjerne islag eller for
å løsne fastfrosne gjenstander.
Gå fram på følgende måte for å avrime kjøleboksen:
➤ Ta ut matvarene.
➤ Oppbevar dem evt. i et annet kjøleapparat, slik at de holder seg kalde.
96
Page 97

A-40 Rengjøring og stell
➤ Slå av kjøleboksen.
➤ La lokket stå åpent.
➤ Når alt er avrimet, tømmer du kjøleboksen og tørker ut av den.
Slå av kjøleboksen og lagring av kjøleboksen
Hvis kjøleboksen ikke skal brukes på lang tid, gjør du følgende:
➤ Slå av kjøleboksen.
➤ Trekk ut ledningen eller ta av slangeledningen til gassflasken.
➤ Rengjør kjøleboksen (se Kapittel «Rengjøring og stell» på side 97).
➤ La lokket stå litt åpent.
På den måten forhindrer man at det danner seg lukt.
7 Rengjøring og stell
Merk!
Før kjøleboksen rengjøres skal tilkoblingskabelen trekkes ut,
eller du kan løsne slangeforbindelsen.
Merk!
Apparatet må aldri rengjøres under rennende vann eller spyles.
Merk!
Bruk ikke sterke vaskemidler eller harde gjenstander til rengjøring,
da det kan skade kjøleboksen.
➤ Rengjør kjøleboksen innvendig med en fuktig klut.
➤ Rengjør apparatet utvendig med en fuktig klut.
8 Deponering
8.1 Deponering av emballasje
Kast ikke emballasjen. Følg disse rådene:
➤ Lever emballasje av kartong og plastemballasje til resirkulering så langt
det er mulig.
➤ Spør evt. avfallsseksjonen i kommunen.
97
Page 98

Feilretting A-40
8.2 Deponering av gammelt apparat
Hvis apparatet skal tas helt ut av bruk, lever det til nærmeste
gjenvinningsstasjon eller til fagforhandleren, som tar i mot det.
9 Feilretting
Ved feil må man kontrollere følgende:
Feil Mulig årsak Forslag til løsning
Kjøleboksen
fungerer ikke.
Kjøleboksen
fungerer ikke.
Kjøleboksen starter ikke
lenger når det er lenge
siden den har vært brukt.
Kjøleboksen er feil
tilkoblet.
Kjøleboksen er koblet
til gassen feil.
Kjøleboksen er satt
opp feil.
Kjøleboksen er ikke
fylt riktig.
Kjølekretsløpet er
defekt.
– Sett kjøleboksen på hodet og vent i
Kontroller om spenningsforsyningen
er feilfri.
Kontroller om de elektriske kontaktene er
i orden.
Kontroller om spenningen tilsvarer
spenningen som står på typeskiltet.
Kontroller om termostatregulatoren er
slått på.
Kontroller om flere energikilder er slått på
samtidig.
Kontroller om gassforsyningen er feilfri.
Kontroller om ventilen på gassflasken er
åpen.
Kontroller om det er gass i flasken.
Kontroller om flere energikilder er slått på
samtidig.
Hold dreiebryteren inne lenger når du
tenner.
Kontroller at apparatet står vannrett.
Kontroller at det er nok lufting.
Kontroller om det er blitt lagt i
varme matvarer.
Kontroller om kjølerommet er for
tettpakket eller om det er overfylt.
Reparasjonen kan kun utføres øres av en
godkjent kundeservicebedrift.
ca. fem minutter - det skal ikke være
tilkoblet noen energikilder.
Snu kjøleboksen igjen og slå den på.
98
Page 99

A-40 Tekniske spesifikasjoner
10 Tekniske spesifikasjoner
Innhold: 40 l
Gassforbruk: 13 g/h
Tilkoblingstrykk etter
bestemmelsesland
D, AU, LU, CH, CZ, HU: 50 mbar
SE, NO, NL, FI, DK: 30 mbar
GB, E, FR, BE, IE, IT, PT: 28 – 30/37 mbar
Tilkobling til 220 V – 240 V
Effektforbruk: 75 W
Strømforbruk: 0,33 A
Tilkobling til 12 V
Effektforbruk: 75 W
Strømforbruk: 6,25 A
Kjøletemperaturområde: inntil 20 °C under omgivelsestemperatur
Vekt: ca. 19,5 kg
Test/Sertifikat:
Kategori I
, flytende gass
3
Vi tar forbehold om utførelser, endringer som følge av tekniske forbedringer
og leveringsmuligheter.
Apparatet har e4-godkjenning.
Dette apparatet inneholder ikke FCKW.
Apparatet er påført GS-merket for kontrollert sikkerhet.
99
Page 100

Information om bruksanvisningen A-40
Läs igenom anvisningarna noga innan systemet tas i drift.
Spara bruksanvisningen för senare bruk. Överlämna bruksanvisningen
till den nya ägaren vid ev. vidareförsäljning.
Innehållsförteckning
1 Information om bruksanvisningen . . . . . . . . . . . . . . . . . . . . . . . . 100
2 Säkerhetsanvisningar . . . . . . . . . . . . . . . . . . . . . . . . . . . . . . . . . 101
3 Leveransomfattning . . . . . . . . . . . . . . . . . . . . . . . . . . . . . . . . . . 103
4 Ändamålsenlig användning . . . . . . . . . . . . . . . . . . . . . . . . . . . . . 103
5 Teknisk beskrivning . . . . . . . . . . . . . . . . . . . . . . . . . . . . . . . . . . 103
6 Handhavande . . . . . . . . . . . . . . . . . . . . . . . . . . . . . . . . . . . . . . . 104
7 Rengöring och skötsel . . . . . . . . . . . . . . . . . . . . . . . . . . . . . . . . 108
8 Avfallshantering . . . . . . . . . . . . . . . . . . . . . . . . . . . . . . . . . . . . . 108
9 Felsökning . . . . . . . . . . . . . . . . . . . . . . . . . . . . . . . . . . . . . . . . . . 109
10 Tekniska data . . . . . . . . . . . . . . . . . . . . . . . . . . . . . . . . . . . . . . . 110
1 Information om bruksanvisningen
Följande symboler används i bruksanvisningen:
Observera!
Säkerhetsanvisning: oaktsamhet kan leda till personskador eller
skador på apparaten.
Observera!
Säkerhetsanvisning, som upplyser om risker med elektrisk
ström och elektrisk spänning: om anvisningarna inte beaktas kan
det leda till person- och materialskador, och apparatens funktion
kan påverkas negativt.
Anvisning
Kompletterande information om användning av apparaten.
➤ Arbetssteg: denna symbol står framför en arbetsinstruktion.
Tillvägagångssättet beskrivs steg för steg.
✓ Denna symbol står framför beskrivningen av resultatet.
1 5, sidan 3: anger en detalj på en bild, i detta exempel ”position 5 på bild
1 på sidan 3”.
Beakta även nedanstående säkerhetsanvisningar.
100
 Loading...