

Page 1
1
Q U I C K - S T A R T I N S T R U C T I O N S www.conrad.com
Version 02/11
Q U I C K - S T A R T I N S T R U C T I O N S
Wireless radiator thermostat set
Order no.: 56 18 00
Please perform the following steps for commissioning and operation in the indicated order.
For a detailed description of the individual steps and additional information, please read the included main instructions for the product.
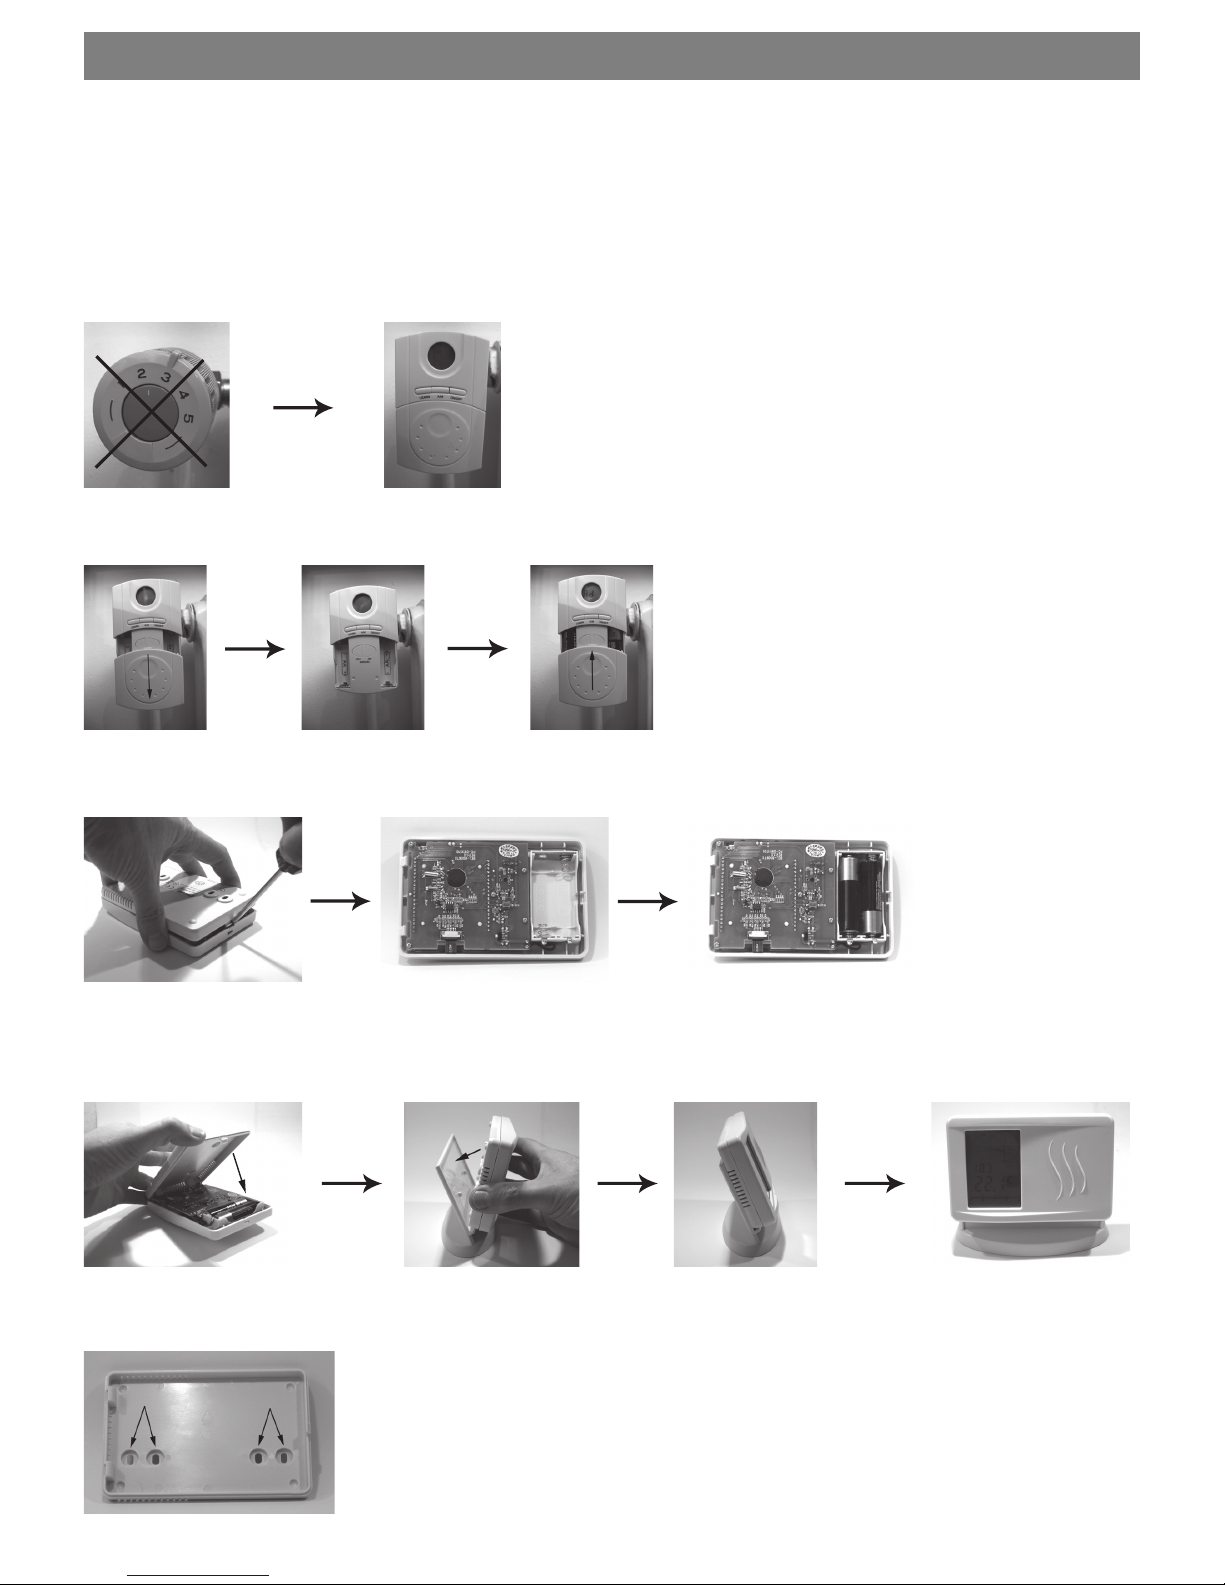
Wireless Actuator Assembly
The batteries must not be inserted before assembly!
Remove the old thermostat and install the wireless actuator on the radiator valve instead. Use one of the
enclosed valve adapters if necessary.
Inserting batteries into the wireless actuator
The wireless actuator now automatically calibrates for the installed heating valve
(display shows AD) and then goes into reception operation for no more than 60
minutes (the reception icon ((• in the display flashes).
Inserting batteries into the wireless basis station
When the batteries are inserted, the wireless basis station will establish contact with the wireless actuator immediately. The flashing reception symbol ((• in wireless actuator display lights
permanently after successful reception.
Mounting the wireless basis station on the table holder
Wall mounting of the wireless basis station
Mount the base plate of the cashing on the wall with the marked screw apertures. Then you can lock the other casing half on
the basic plate (also see Mounting the wireless basis station on the table holder).
Page 2
2
SET
SET
SET
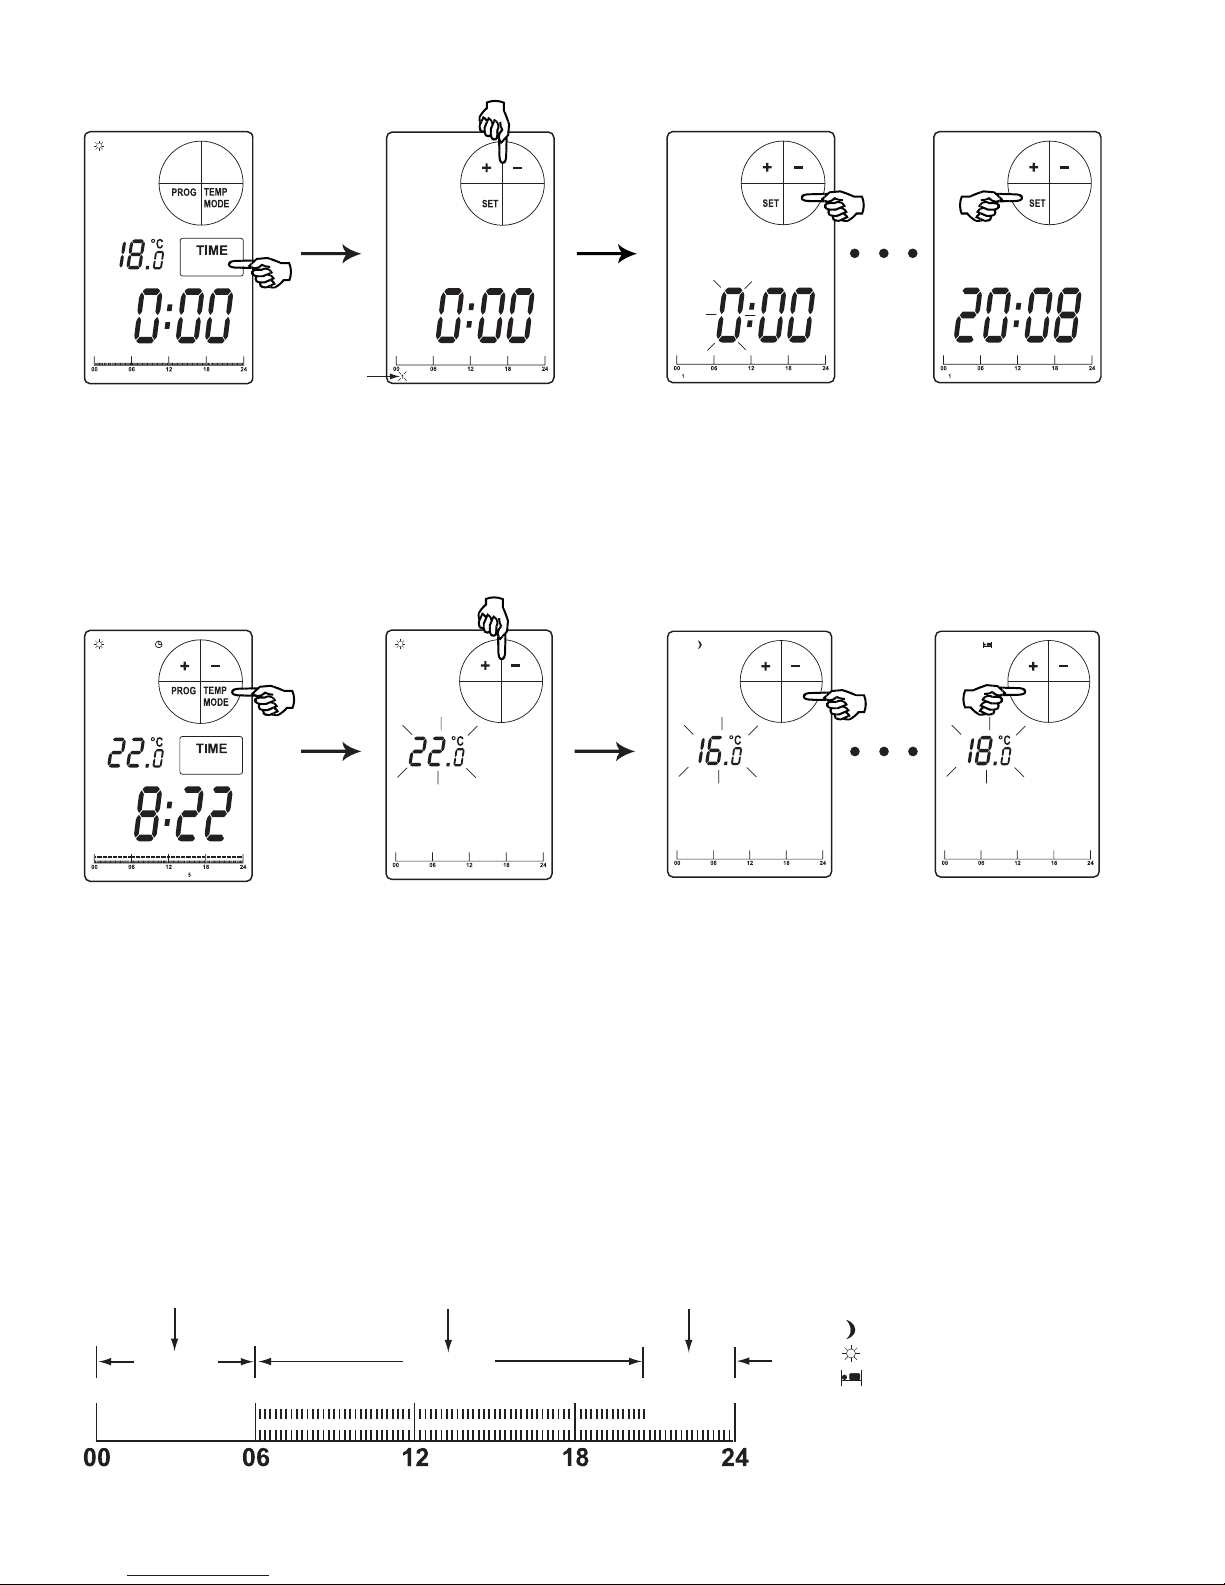
Time
If no button is pressed for 15 seconds during setting, programming must be restarted.
Press TIME Set day with +/-.
1=Monday to 7=Sunday.
Press the button as indicated.
Set hours with +/-.
Press the button again.
Set minutes with +/-.
Press SET to store.
Temperature for day/night/sleep
If no button is pressed for 15 seconds during setting, programming must be restarted.
Press the TEMP MODE button
for 3 seconds.
Set day-mode temperature
with +/-.
Press the button as indicated.
Set night-mode temperature
with +/-.
Press the button again as
indicated.
Set sleep-mode temperature
with +/-.
Press SET to store.
Times for day/night/sleep
If no button is pressed for 15 seconds during setting, programming must be restarted.
Before starting this setting, decide the times for which the individual modes (day/night/sleep) should be active.
Then programme the whole range from 0:00 to 24:00 hours.
Always use the time bar chart at the bottom of the display for support. It indicates the complete time between 0:00 and 24:00 hours.
Programming example:
Night mode = no dashes
Day mode = dashes top and bottom
Sleep mode = dashes bottom only
day modenight mode sleep mode
0:00-6:00h
6:00-21:00h
21:00-24:00h
day
Page 3

3
Times for day/night/sleep (continued)
Press the button PROG. Use +/- to set the desired day or
days of the week (1-5, for
example, is Mon-Fri) for the
interval to be programmed.
Press the button as indicated.
Start programming at 0:00
hours and assign the desired
mode to the interval (here, e.g.,
sleep mode).
Set the time at which another
mode is to be activated with
the +button (here, e.g., 6:00
hours).
Assign the desired mode to
the following interval (here,
e.g., day mode).
Important: Programme the
complete duration from 0:0024:00 hours for all days of the
week.
Press SET to store the settings.
day
Page 4

4
These operating instructions are published by Conrad Electronic SE, KlausConrad-Straße 1, D-92240 Hirschau/Germany.
These operating instructions reflect the current technical specifications at time of
print. We reserve the right to change the technical or physical specifiations.
© 2011 by Conrad Electronic SE. Printed in Germany. v1_0211_01
Operation
Manual Temperature Setting
Set the desired temperature with +/-.
The display shows the “hand” symbol.
The setting is accepted automatically after 15 seconds.
The setting is maintained until the next time the interval switches.
To return to time control manually, press SET.
Manually selecting the operating mode
Press the TEMP MODE button until the display shows the symbol with the desired operating mode:
Time control
Day mode
Night mode
Sleep Mode
Antifreeze function
Key lock
Keep the button TIME pressed until the key symbol appears in the display.
To unlock, keep the button TIME pressed again until the key symbol disappears.
 Loading...