

connexx RP-3000BT Instruction Manual
(BT/DVD/CD/MP3/SD/USB/AM/FM/CLOCK)
(Instruction Manual)
BEFORE USING PLEASE READ THIS MANUAL CAREFULLY
Receiver System RP-3000
USB
A/B /C
AUX
BT
1
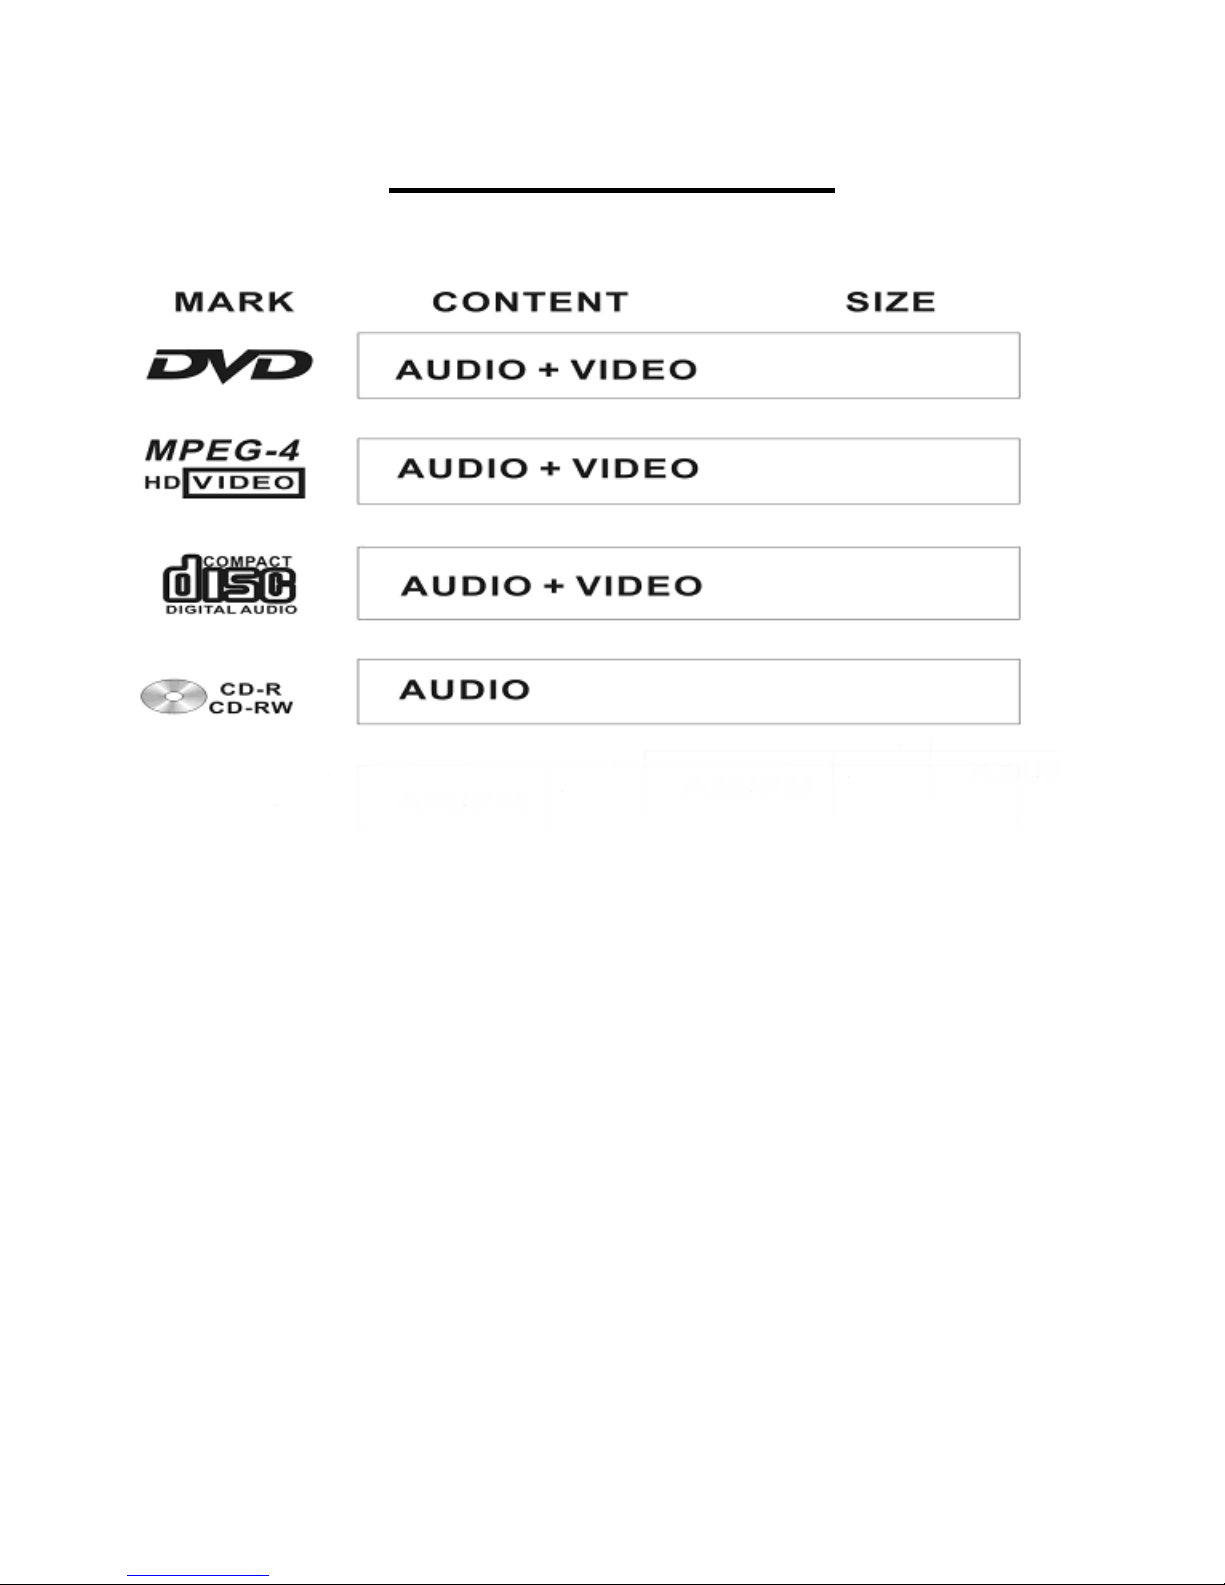
COMPATIBLE DISCS
ACCESSORIES
1 X Instruction manual
1 X Remote control
1 X FM-Antenna (Pig Tail)
One composite audio/video cable
6 X Mounting Screws
Wire Harness for DC power and speakers
DC Power extension (Red and Black wire) wires
Optional AC/DC Adapter
4.72"
4.72"
4.72"
4.72"
2 X Batteries

12 Play/ Pause button
2
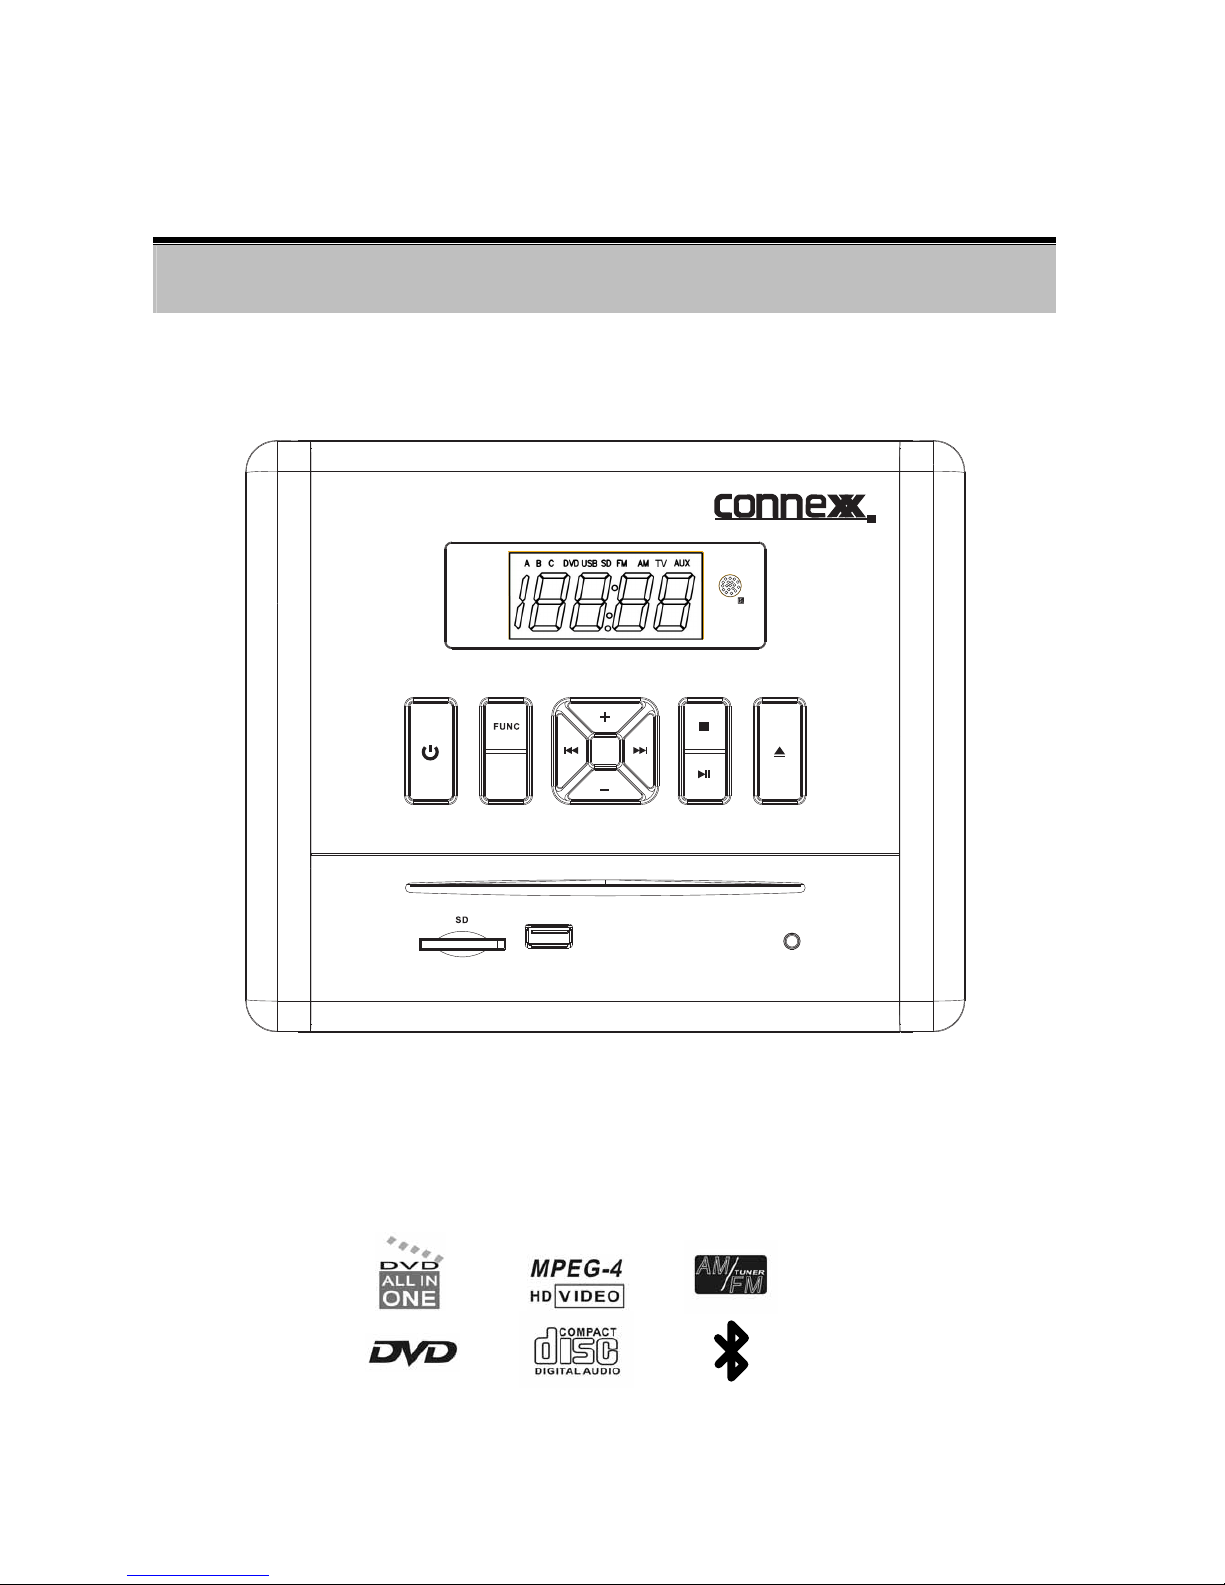
Location of Controls
3
8
2
9
10
11
13
14
16
17
A/B /C
4
USB
1
5
15
6
7
12
AUX
NOTE 4:This reset button is under screw cover.when unit is frozen for some reason,remove the left side
screw cover,use a paper clip and reset.
3 Standby button
6 Volume - button
9 USB port
15 Volume+ button
4 Reset button
5 Audio channel switch
(NOTE)
1 Tune-/Previous button
2 Function button
7 Disc loader
8 SD card slot
10 AUX
11 Tune+ / Next button
13 Eject button
14 Stop button
16 LED display
17 Remote sensor
3
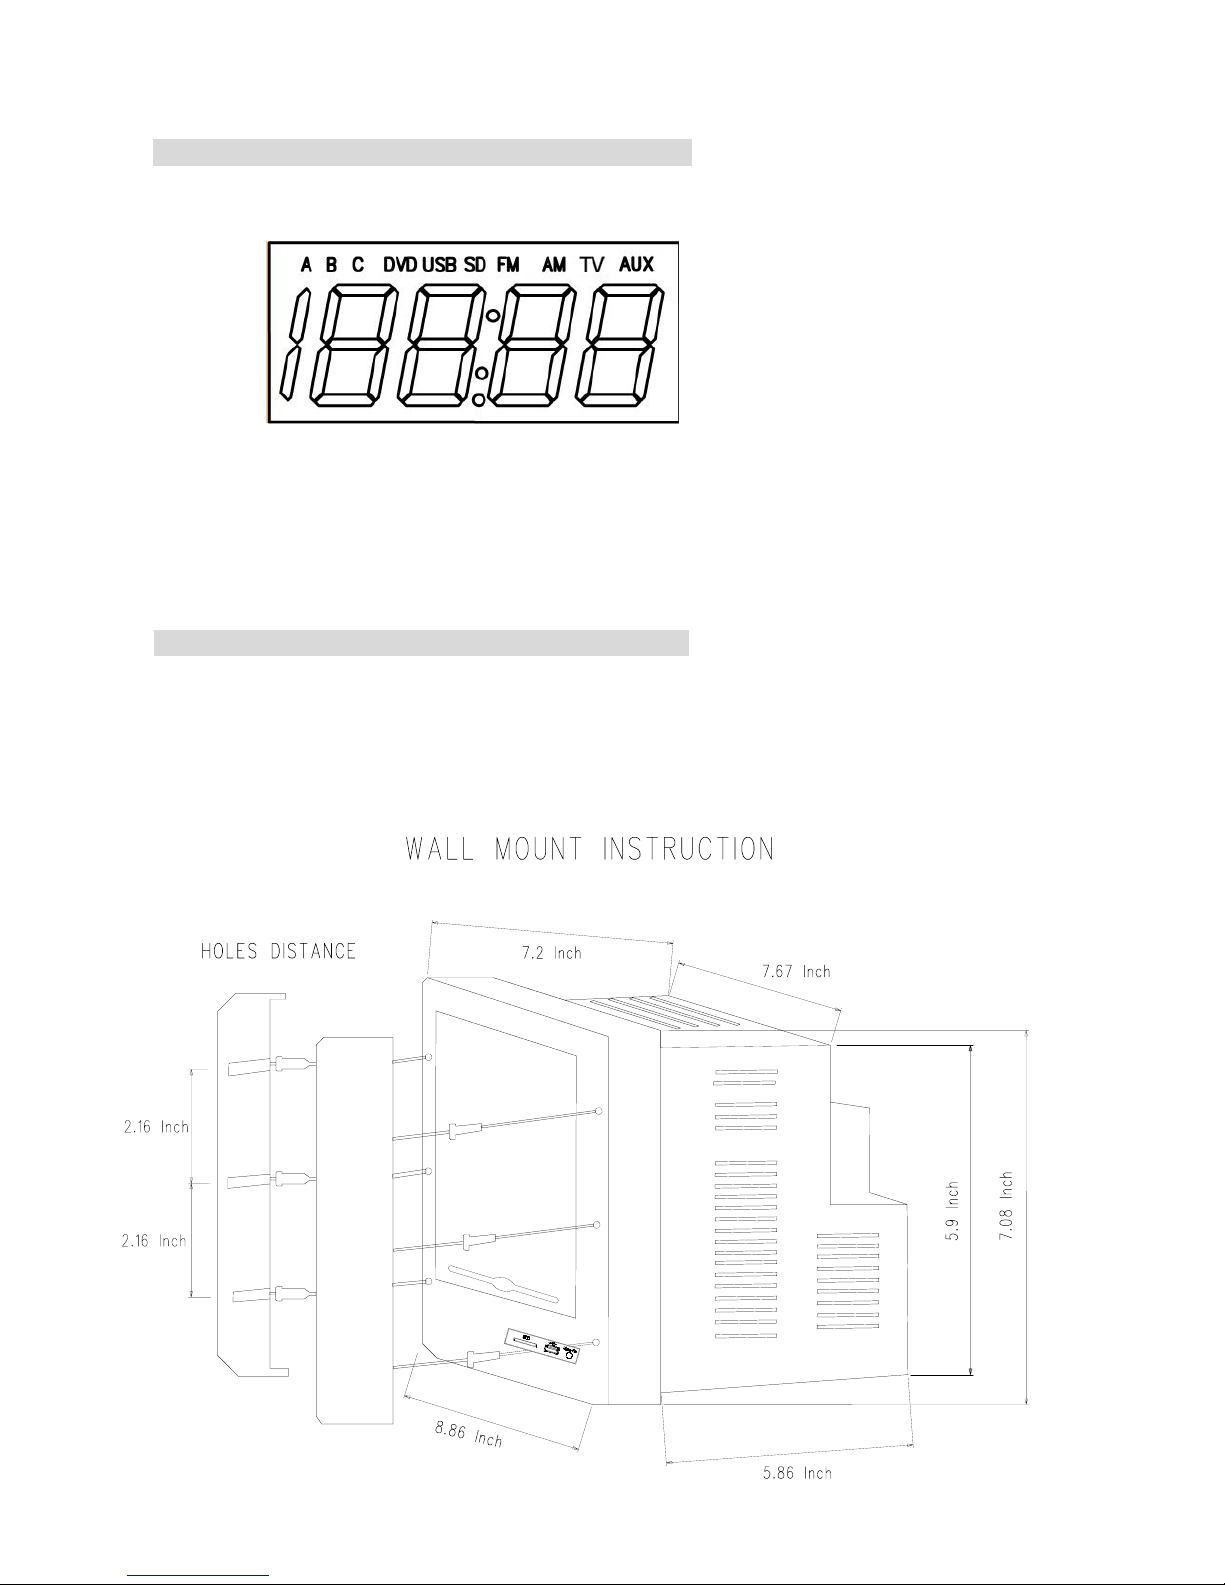
DVD/USB/SD/RADIO/TV/AUX ICONS DISPLAY
MOUNTING AND CUT OUT INSTRUCTIONS
The 6X mounting screws are in the owner’s manual bag.
Note:
·Remove screw caps and carefully take mounting covers off.
·Connect and test hareness and wiring before wiring.
·Screw the unit in place, replace screw caps.
Time
 Loading...