

Connects2 Vision CAM-KIT7 User Manual

Connects2Vision
www.connects2.com
CAM-KIT7
Rear View Mirror Camera
Connects2Vision
www.connects2.com
2
Connects2Vision
ABOUT THIS PRODUCT...
CAM-KIT7
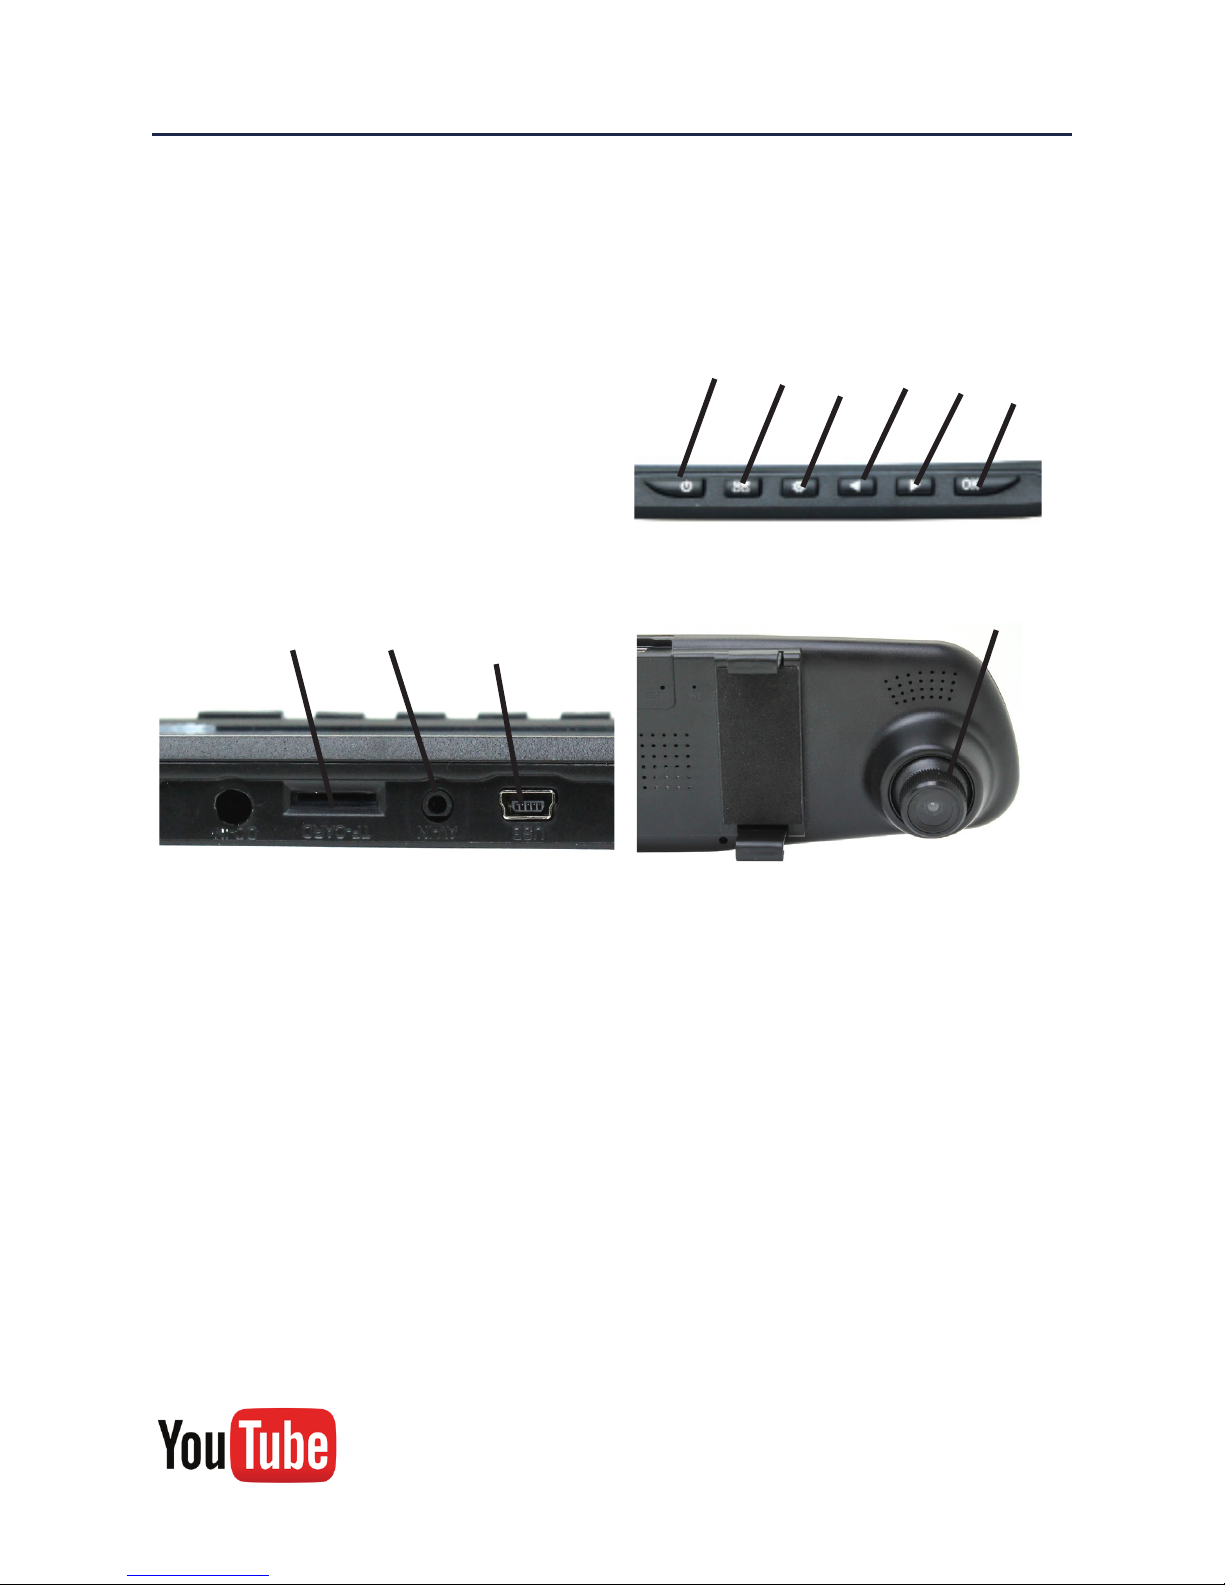
Functionality
1. Power Button/Toggle Screen Backlight
2. Menu/Emergency Recording Lock
3. Mode
4. Up/Rewind
5. Down/Mute/Fast Forward
6. OK
7. USB Port
8. AV-In
9. SD Card Slot
10. HD Camera
Prior to Installation
Read the manual prior to installation. Technical knowledge is necessary for installation. The place of installation must be free of moisture and away from heat sources.
Please ensure you use the correct tools to avoid damage to the vehicle or product.
Connects2 can not be held responsible for the installation of this product.
Technical Support
Connects2 want to provide a fast and suitable resolution should you encounter any
technical issues. With this in mind, when contacting Connects2, try to provide as
much Information as possible. This will speed up the process and help us to help you.
Please use our dedicated online technical support centre: support.connects2.com
Subscribe to our YouTube Channel for installation
guides and tips... www.youtube.com/connects2
1 2 3 4 5 6
10
7
89

www.connects2.com
3
Connects2Vision
FITTING GUIDE
1. Turn off the car engine
2. Insert the SD card into the SD card slot (9)
[Note] Please use a high-speed SD card (Class6 above) with a capacity of no less than
4GB, SD card maximum support = 32GB.
3. Attach the camera to the car’s original rear view mirror
4. Insert the car charger into the car 12V power source
5. Use an extension cord (not supplied) to connect the USB and car charger to the
camera if required
6. When installing the rear mirror camera, pay attention to the direction of the wiring.
Wiring can be laid along inside the roof lining of the vehicle. After the installation is
complete, connect the camera’s AV input
7. Adjust the lens to your chosen position
8. Start the engine and check for correct operation
[Note] When the product is installed correctly, the system working indicator light will be lit,
the machine will enter the recording state and the recording indicator light will ash.
USER GUIDE
1. Power Button
Short press to turn on, long press to turn off. When on, short press to toggle the camera
display on and off.
2. Menu/Emergency Recording Lock
In Standby mode, press Menu to enter the main menu table, press Up or Down keys to
select the desired settings, and press OK to conrm. To initiate emergency recording lock,
press the Mode button when recording a video. The ‘lock le’ icon will appear on the
screen, the image will be saved and not recorded over.
3. Mode
In Standby mode, press the Mode key to switch between different modes
(video/camera/playback)
4. Up Key/Rewind
Press to navigate menus or to rewind during playback
5. Down/Mute/Fast Forward
Press to navigate menus, to fast forward during playback, or to toggle the mute function
during video mode
6. OK
In video mode, press to start or stop recording and in camera mode, press to take a
picture. Used to enter selection in menus
 Loading...