

Connects2 CT23TY82 Installation Manual

CT23TY82
VEHICLE APPLICATION
Toyota
2003-09 4 RUNNER (Base Sport Edition)
2003-09 4 RUNNER SR5
2000-05 CELICA
2000-05 ECHO
2007-14 FJ CRUISER
2001-07 HIGHLANDER
2013 HIGHLANDER
2005-08 MATRIX
2000-05 M2 SPYDER
2001-05 RAV4
2007-11 YARIS (w/o 3” Radio Display)
2012-17 YARIS
Scion
2013-16 FR-S
2012-15 IQ
2005-16 TC
2004-06 XA
2004-15 XB
2008-14 XD
TRIM CHART
Use 969 Trim on these applications
Toyota
l2007-14 FJ CRUISER
2007-17 YARIS (Excluding radio w/2”x4” LCD
display)
Scion
2004-06 xA
2004-15 xB
2008-14 xD
2005-10 TC
Use 975 Trim on these applications
Toyota
2003-09 4-RUNNER SR 5 & SPORT EDITION
(w/o RDS RADIO)
2000-05 CELICA
2000-05 ECHO
2001-07 HIGHLANDER (Excluding Hybrid w/
Factory Navigation)
2013 HIGHLANDER
2005-08 MATRIX
2000-05 MR2 SPYDER
2001-05 RAV4
Scion
2011-15 TC
DASH DISASSEMBLY & RADIO REMOVAL INSTRUCTIONS
2000-05 TOYOTA CELICA
1. Gently lift upward shift lever trim panel and slide back, disconnect harness
and remove.
2. Remove the (4) knobs from the A/C-heater controls.
3. Remove the (2) Phillips screws below the A/C-heater controls.
4. Remove the (2) Phillips screws securing the bottom edge of the climate controls
to the subdash.
5. Gently pry upward and towards you the radio trim panel/climate control trim bezel
and remove.
6. Remove the (4) 10mm bolts securing the radio.
7. Slide the radio forward, disconnect the wire harnesses and antenna lead
and remove the radio.
2000-05 TOYOTA ECHO
1. Remove the (2) outer A/C-heater control knobs.
2. Remove the (2) Phillips screws from these locations.
3. Gently unsnap the A/C-heater control panel, disconnect the harnesses and remove.
4. Gently unsnap the trim from around the radio and remove.
5. Depress the tabs securing the heater controls in place and pull slightly forward
and upward to allow access to the top radio mounting screws.
6. Remove the (4) Phillips screws securing the radio.
7. Gently slide the radio forward and disconnect the wire harnesses and antenna
lead and remove the radio.
2000-05 TOYOTA MR2 SPYDER
1. Gently remove the screw cover caps from the lower sides of the radio mounting rails.
2. Remove the (2) phillips screws from the base of each side of the main radio
support bracket covers, and remove the covers.
3. Remove the (4) phillips screws securing the radio to the sub-dash.
4. Remove the (4) screws securing the Drink Tray/Ashtray assembly, and lower the
assembly out of the way.
5. Gently pull the radio forward.
6. Disconnect the harness and antenna lead from the radio and remove the radio.
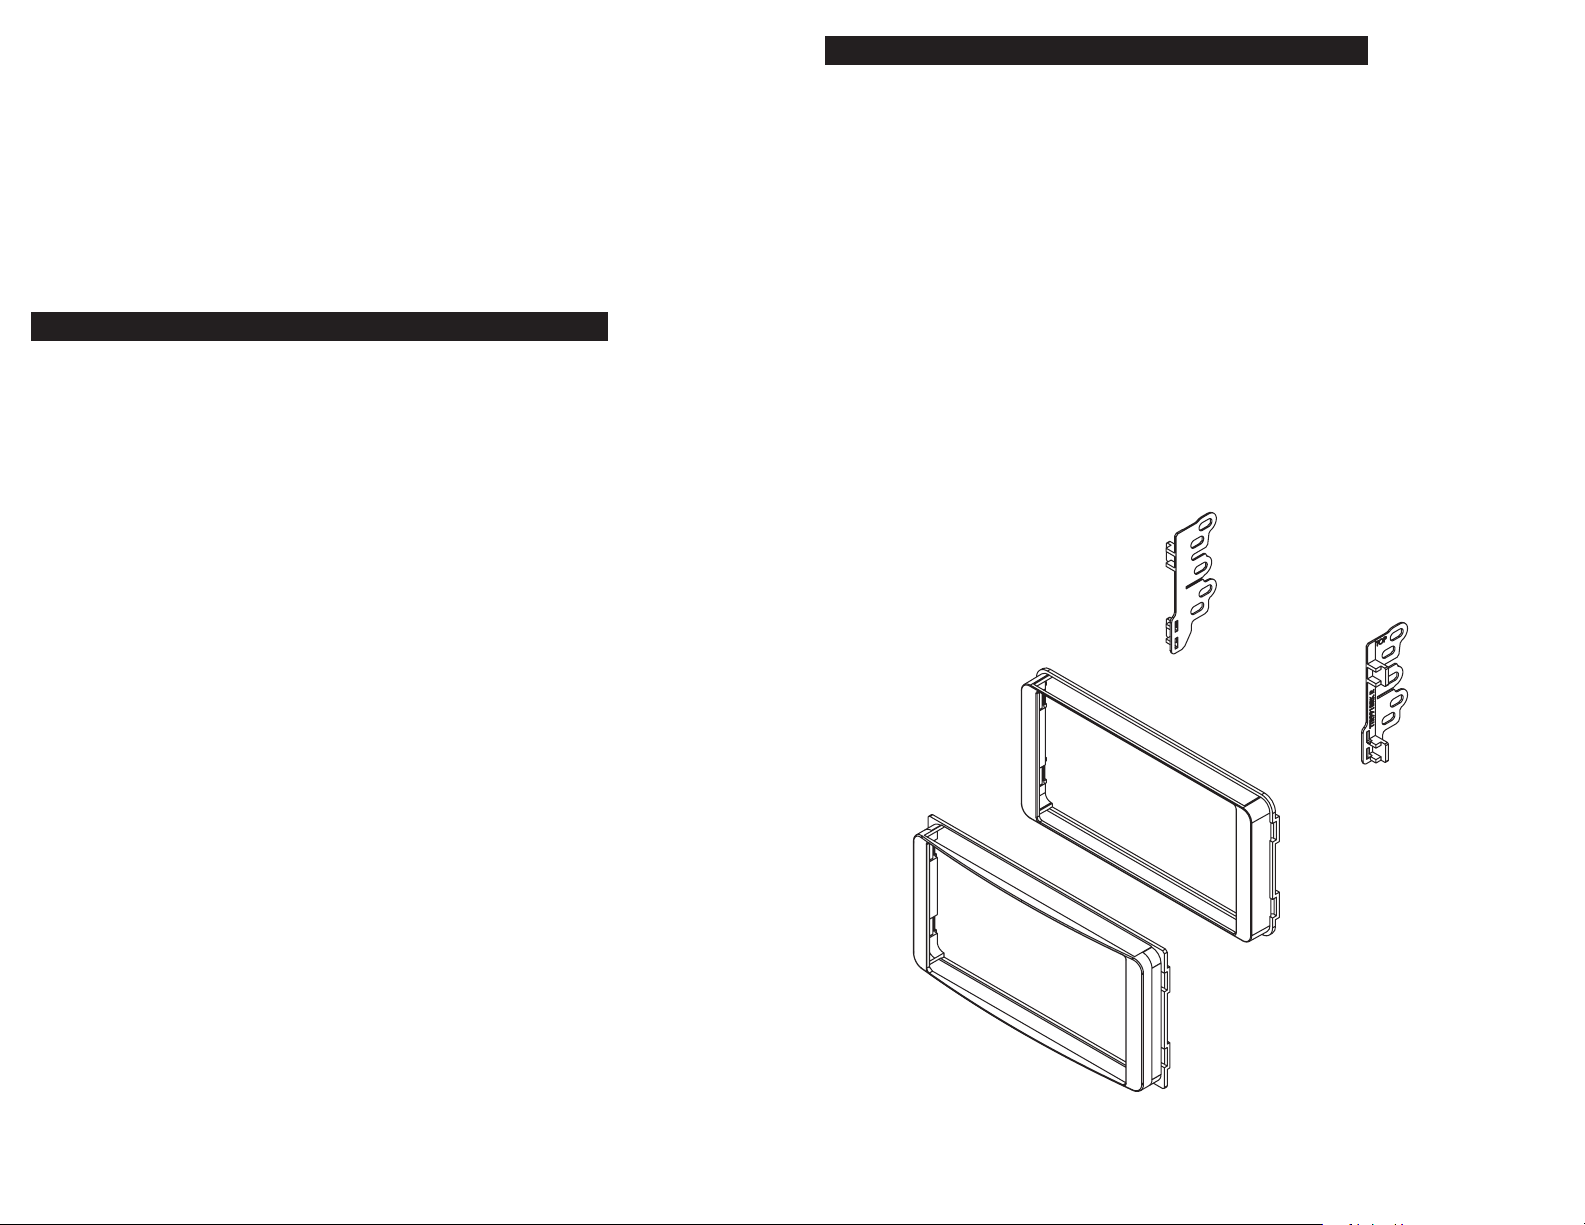
DOUBLE DIN INSTALLATION INSTRUCTIONS
DOUBLE DIN KIT ASSEMBLY INSTRUCTIONS
1. Select the trim needed for your application, from trim chart.
2. Attach ISO brackets to the rear of the Main Frame Trim.
3. Attach the factory metal mounting brackets to the left and right sides of the
aftermarket radio using the screws removed from the factory radio.
4. Align the Main Frame Trim to the aftermarket radio and attach, If the metal bracket
interferes with the plastic TTR brackets, then remove the factory brackets,
and install over the TTR bracket.
Note: Some TTR bracket locations may share the same mounting locations as the
factory brackets.
Note: Factory bracket alignment nubs can be removed if you are needing to move
radio backwards because of a large nose radio, you also will need to drill additional
holes in the factory brackets.
Figure B
USE ONLY THE PROPER MAINFRAME NEEDED(FLAT OR CURVED FACE).
FROM CHART ON PAGE 1
TTR975 TRIM
TTR969 TRIM
1
6
 Loading...