

Connects2 AdaptivMini ADVM-AU6 Quick Start Manual
iii
ADVM-AU6
v
iv
i
ii
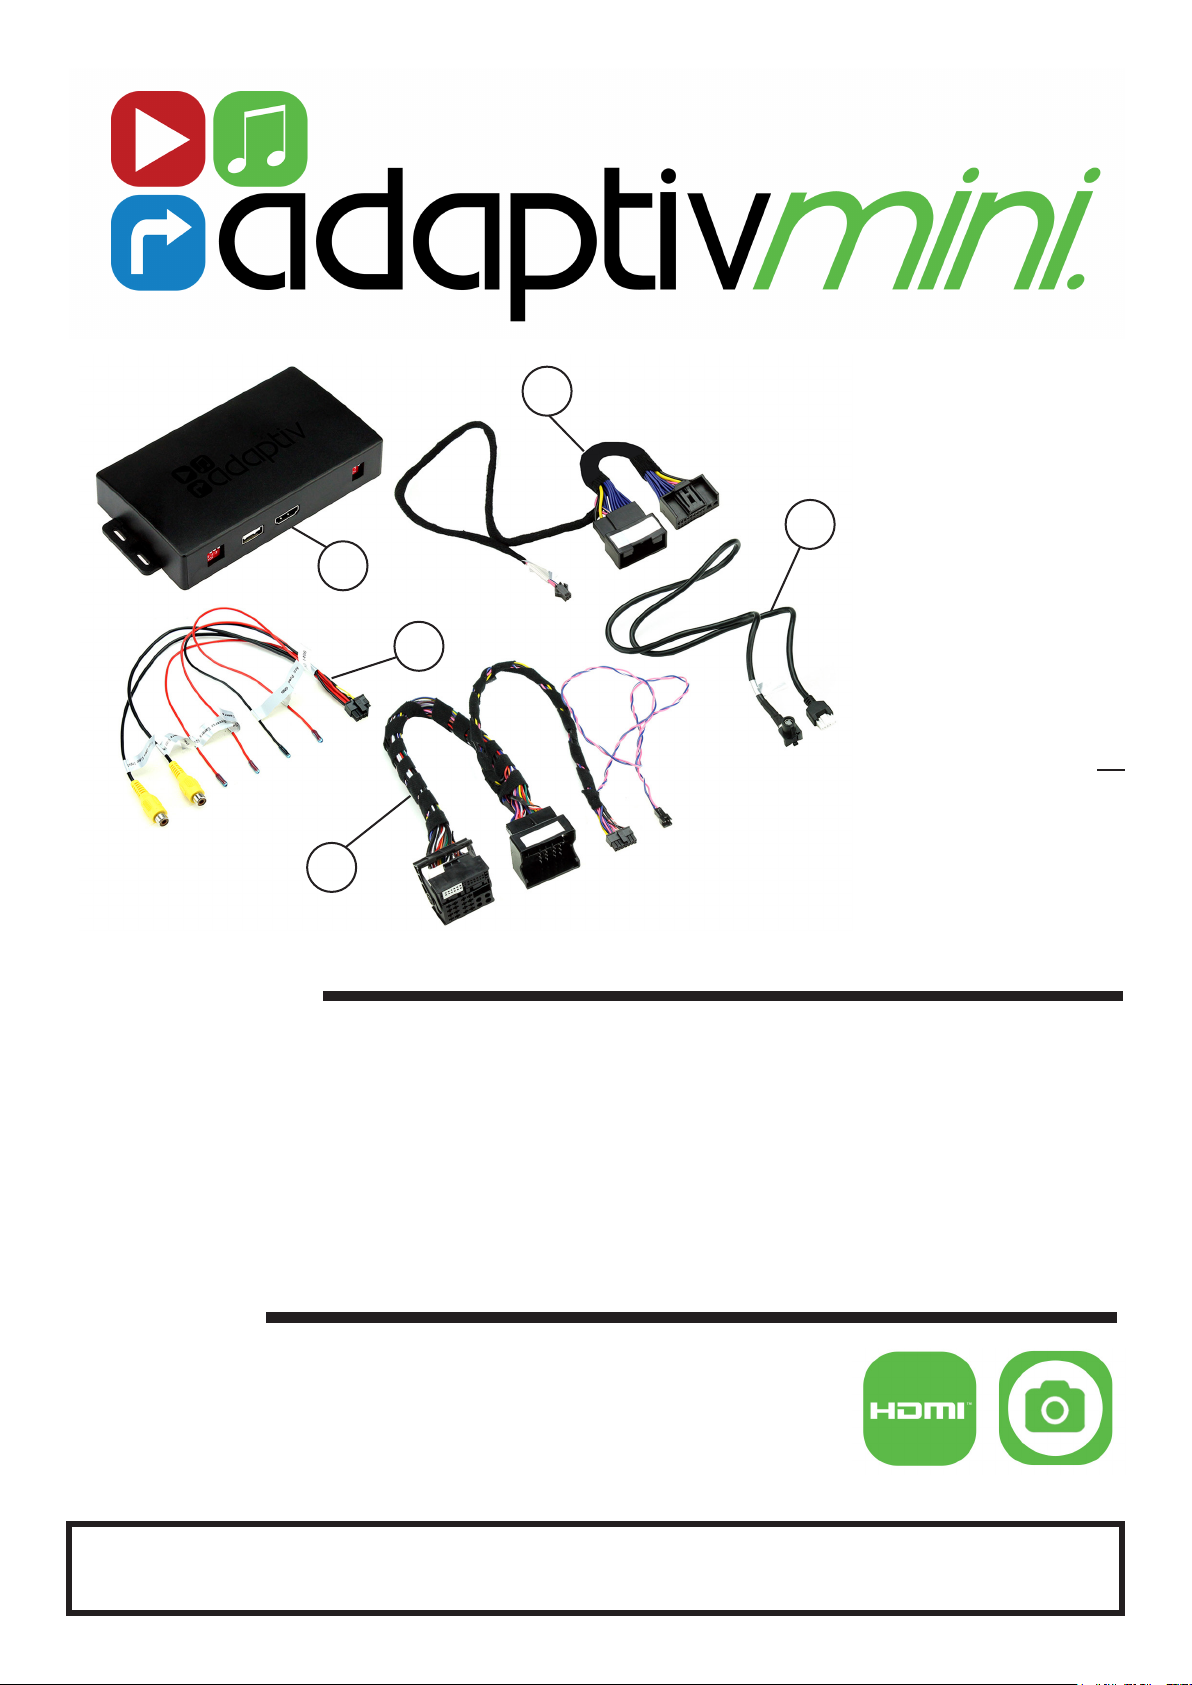
Key
i. Adaptiv Mini Interface
ii. A/V Cable
iii. Main Wiring Harness
iv. LVDS Cable
v. Climate Control Harness
Note: Application data is subject to change at any time
APPLICATION
Audi A5 2009 - 2017
Audi A6 2009 - 2017
Audi A8 2009 - 2017
Audi Q5 2009 - 2017
Audi Q7 2009 - 2017
For MMI Vehicles with 3 Basic 6.5” Screen, 3G/3G+ 7” Screen, & 8” Screen
FEATURES
• Provides HDMI Input
• Provides Inputs for 2x Cameras (Front/Rear)
The information provided in this document is subject to change without notice due to manufacturer changes and/or improvements to the product/s. This
instruction manual is based on documented data and research. The manufacturer of this product cannot be held responsible for any changes made to the
vehicle by the manufacturer or damages that may occur through the installation of this product in accordance with the steps outlined herein.
DISCLAIMER
ADVM-AU6_UG_en-GB_v1
PRIOR TO INSTALLATION
Read the manual prior to installation. Technical knowledge is necessary for installation. The place of installation
must be free of moisture and away from heat sources. Please ensure that the correct tools are using during the
installation to avoid damage to the vehicle or product. Connects2 can not be held responsible for the installation
of this product.
For further help and support, please contact us directly at support.connects2.com/tickets/technical and ll out a
support ticket with the full details of your issue.
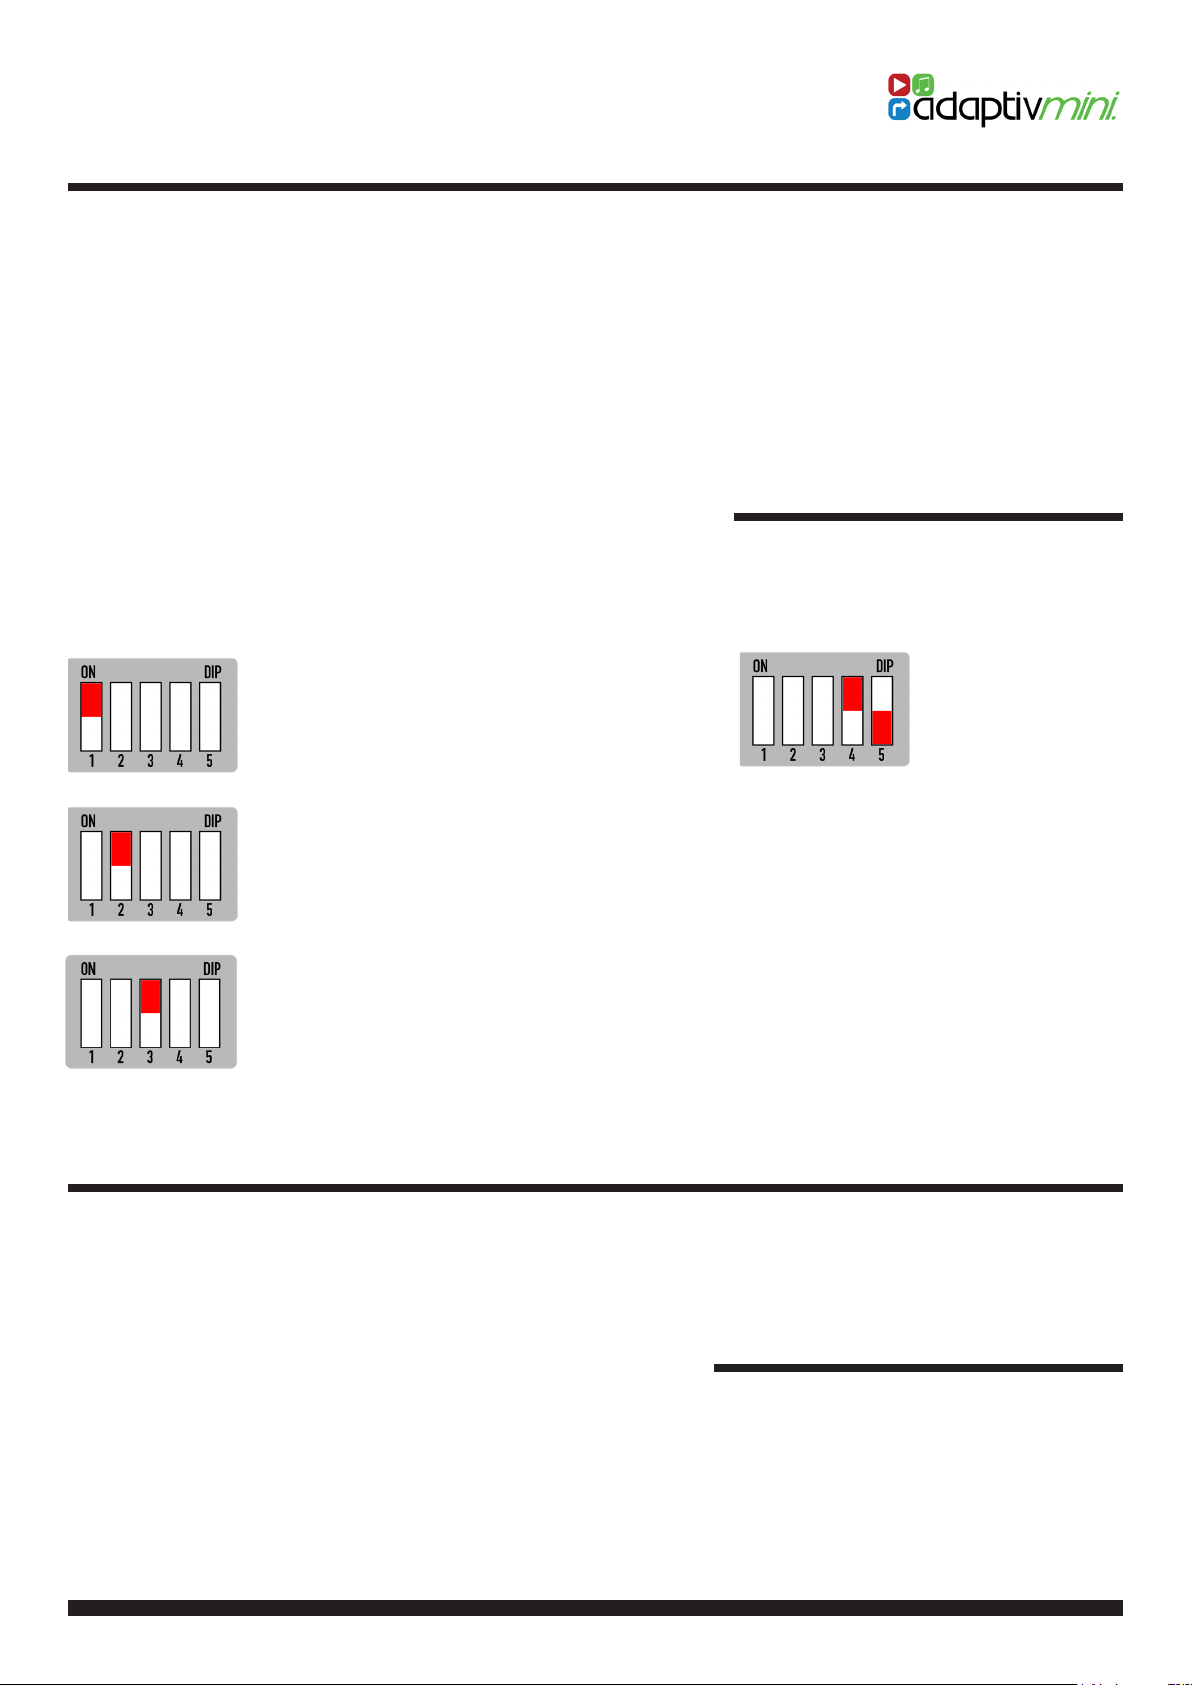
a. Setting the Dipswitches
Before installing the Adaptiv Mini interface into the vehicle, please set the dipswitches on the interface box
(i.) according to the specications as outlined below:
DIP 1
If the vehicle has OEM reverse camera:
Yes - ‘ON’
No - ‘OFF’
DIP 2
If the vehicle has aftermarket front camera:
Yes - ‘ON’
No - ‘OFF’
DIP 3
If the vehicle has aftermarket reverse camera:
Yes - ‘ON’
No - ‘OFF’
DIP 4
Low Resolution (400 x 240) - ‘ON’
High Resolution (800 x 480) - ‘OFF’
DIP 5
New Fakra A - ‘ON’
New Fakra B or Old Fakra - ‘OFF’
CONNECTION INFORMATION
Please note: All connections from the Adaptiv Mini interface are made to the rear of the OEM head unit, except for the climate control harness which must be connected to the rear of the OEM climate control panel.
a. Climate Control Harness
Please see Page 3 for connector images and connect the climate control harness according to the below
instructions:
1. Remove Conn. D from the back of the OEM climate control panel
2. Plug Conn. D into Conn. A of the Adaptiv climate control harness
3. Plug Conn. B from the Adaptiv climate control harness into the space previously occupied by Conn. D
4. Connect Conn. C to the 2 pin connector on the Main Wiring Harness (purple/pink wire)
2
ADVM-AU6_UG_en-GB_v1
 Loading...