

Page 1
Trouble Shooting:
•Possible reasons for not compatible with
XG2 2-Port Mini KVM Switch
1.The BIOS in the mother board.(Basic Input/Ouput
System).
2.The hardware equipment.(Keyboard.Mouse)
3.Software.OS(Operating System)
SITUATION SOLUTION
•Check whether the correct mouse
driver was installed.
•Change to other mouse.
Mouse Hanged
Keyboard Hanged
Improper Operation
(PS/2 mouse only for user side)
•Connect the mouse to PC directly.
•Change to the PC port.
•Try to select other port and then
switch back.
•Change to other keyboard.
•Connect the keyboard to PC directly.
•Change to the PC port.
•Try to select other port and then
switch back.
•Do not move keyboard, mouse or
select PC if the initial turn-on
operation procedure is not completed.
•Reboot after the PC is turned off for
5 seconds later.
•Try to select other port and then
switch back.
Limited Warranty:
I
N NO EVENT THE DIRECT VENDOR'S LIABILITY EXCEED THE PRICE
PAID FOR THE PRODUCT FROM DIRECT, INDIRECT, SPECIAL,
INCIDENTAL,OR CONSEQUENTIAL DAMAGES RESULTING FROM
THE USE OF THE PRODUCT, DIST, OR ITS DOCUMENTATION.
The direct vendor makes no warranty or representation, expressed,
implied, or statutory with respect to the contents or use of this
documentation, and specially disclaims its quality, performance,
merchantability, or fitness for any particular purpose. The direct
vendor also reserves the right to revise or update device or
documentation without obligation to update. For further inquires
please contact your direct vendor.
Preventing Radio & TV Interference:
WARNING!!! This equipment generates, uses, and can
radiate radio frequency energy and if not installed and used
in accordance with the instructions MANUAL, may cause
interference to radio communications. It has been tested
and found to comply with the limits for a Class A computing
device pursuant to Subpart J of part 15 of FCC Rules, which
are designed to provide reasonable protection against such
interference when operated in a commercial environment.
Operations of this equipment in a residential area is likely to
cause interference in which case the user at his own expense
will be required to take whatever measures may be required
to correct the interference.
2 PORT AUTO MINI KVM
2 PORT AUTO MINI KVM
2 PORT AUTO MINI KVM
with Built-in cables
with Built-in cables
with Built-in cables
USER'S MANUAL
XG2
Please read this manual thoroughly and follow the
instruction procedures to prevent any damage to the
CPU SWITCH and or the connecting devices.
SPECIFICATIONS:
Transmission Distance
Built-in with 4ft (1.2m) Coaxial cable
SPECIFICATION
XG2
2 PCs to 1 User
PLASTIC CASE
Yes
16ft (5m)
10ft (3m)
43-120Hz
1600 x 1200
200MHz
30-100KHz
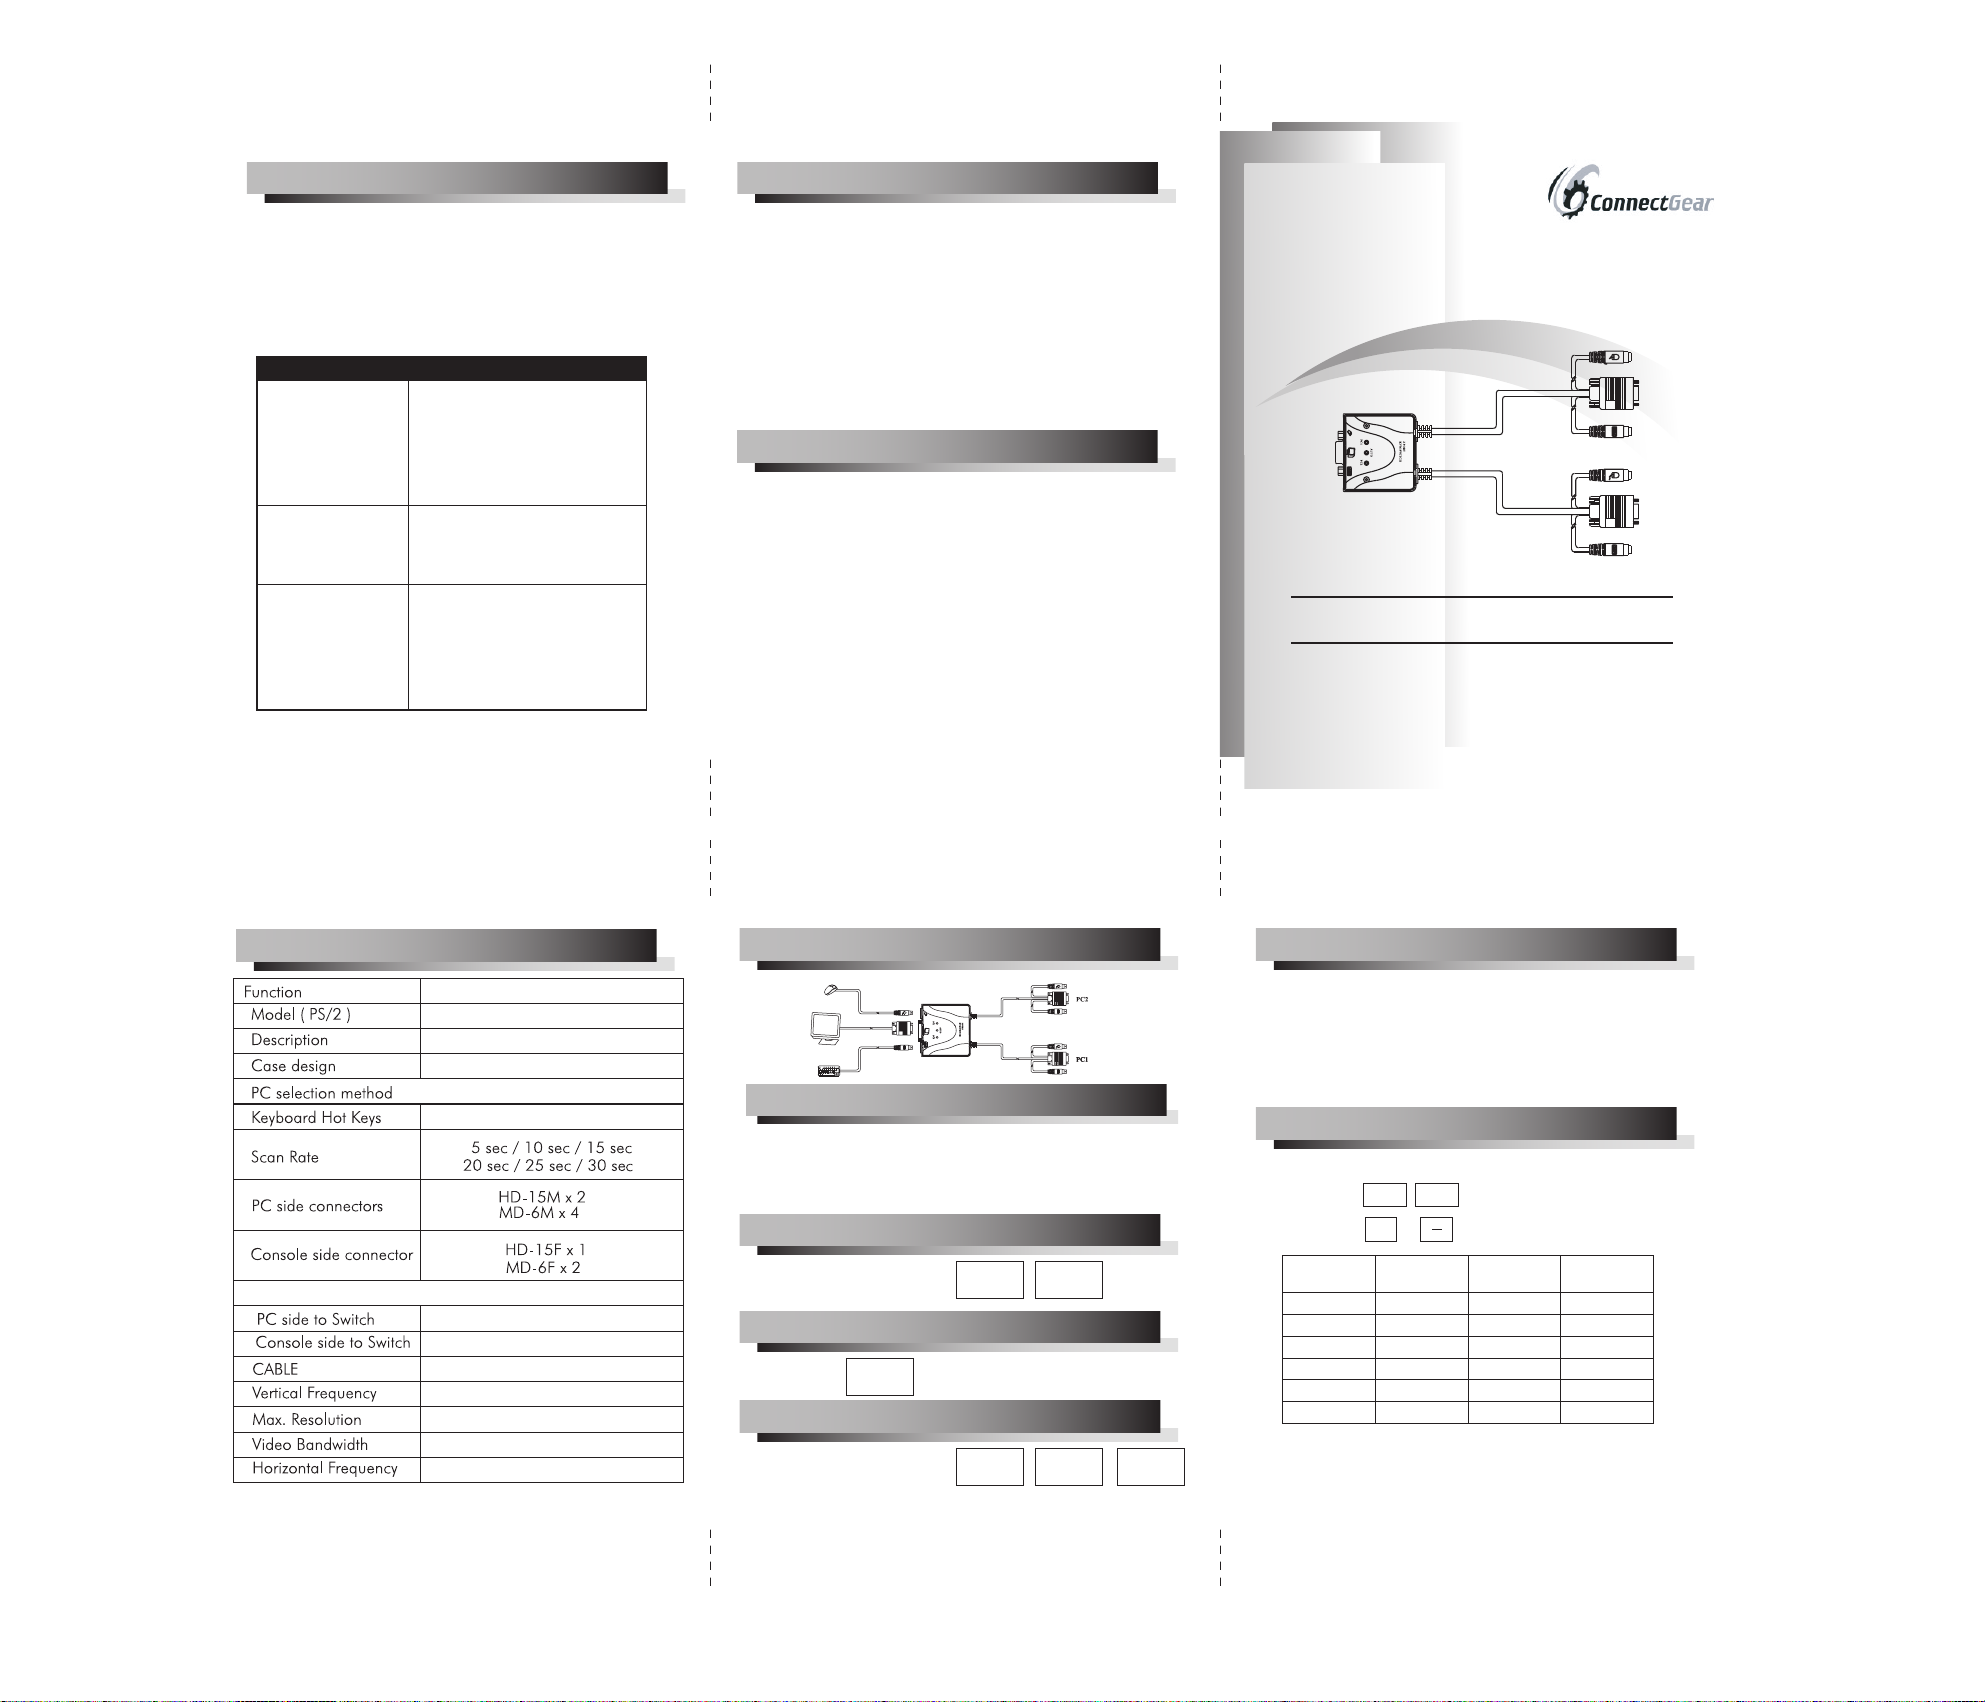
INSTALLATION:
OPERATION:
1.First turn on the monitor followed by the PCs.
2.Make sure each PC is boot-up completely before
switching the KVM Switch.
To activate the scan mode(Auto status):
*Hot Key operation :
Scroll
Lock
To deactivate the scan mode (Manual status):
*Press on the keyboard.
ESC
Scroll
Lock
To select PC:
*Hot Key operation:
Scroll
Lock
Scroll
Lock
ESC
LED:
After the computers are turned on, the front panel shows:
PC1/PC2 LED : The LED will be lit for the PC
which is selected or scanned.
AUTO LED : Lit when in Auto Scan mode.
Adjust the SCAN TIME:
1. 5 sec Default setting .
2. Press into the Auto Scan mode.
3. Press or to choose the scan rate.
SCAN RATE
5 sec.
10 sec.
15 sec.
20 sec.
25 sec.
30 sec.
*Note:If the power was turned off,tfe scan rate will
back to the default setting-5 seconds.
Scroll
Lock
+
Num Lock
OFF
ON
ON
OFF
OFF
ON
LED
Scroll
Lock
Caps Lock
LED
OFF
OFF
OFF
ON
ON
ON
Scroll Lock
LED
ON
OFF
ON
OFF
ON
OFF
 Loading...