

Connect A7 Slim User Manual

User Manual
A7 Slim

Table of Contents
1 Introduction ................................................................................................. 1
1.1 Acknowledgements ................................................................................... 1
1.2
Precautions ................................................................................................ 1
1.3 Safety Notice .............................................................................................. 1
2 Brief introduction for A7 SLIM product .................................................... 3
2.1 Diagram for A7 SLIM .................................................................................. 3
2.2 What’s inside the box ................................................................................ 4
2.3 Preparation Using A7 SLIM ....................................................................... 4
3 Quick Start ................................................................................................... 4
3.1 Key function ............................................................................................... 4
3.2 Starting up and turning off ........................................................................ 4
3.3 Unlocking and closing of the screen ........................................................ 5
3.4 Use of touch screen ................................................................................... 5
3.5 Homepage interface ................................................................................... 6
3.6 Access to application program ................................................................. 9
3.7 USB connection ......................................................................................... 9
3.8 Memory card ............................................................................................. 11
3.9 Character input ........................................................................................ 11
3.10 Quick Access Tips ................................................................................... 13
4 Connection Establishment ....................................................................... 14
4.1 WIFI Connection ....................................................................................... 14
5 Communication ......................................................................................... 15
5.1 E-mail ........................................................................................................ 15
6 Multimedia ................................................................................................. 18

6.1 Music ......................................................................................................... 18
6.2 Camera ...................................................................................................... 19
6.3 Media Browser ......................................................................................... 21
7 Internet ....................................................................................................... 23
7.1 Browser ..................................................................................................... 23
8 Other Applications .................................................................................... 26
8.1 Alarm clock ............................................................................................... 26
8.2 Calculator ................................................................................................. 26
8.3 File Management ...................................................................................... 27
9 Basic Settings ........................................................................................... 28
9.1 Sound and Display ................................................................................... 28
9.2 Security and Location .............................................................................. 29
9.3 Storage ...................................................................................................... 29
9.4 Date and Time .......................................................................................... 30
9.5 Language and Input Method ................................................................... 30
9.6 About Tablet ............................................................................................. 31
9.7 Restore Factory Settings ......................................................................... 31
10 Installation and Management of Program .............................................. 32
10.1 Installation ................................................................................................ 32
10.2 Management and Uninstall ...................................................................... 32
11 Troubleshooting........................................................................................ 33

1
1 Introduction
1.1 Acknowledgements
Thank you for choosing A7 SLIM. This product belongs to A7 range of Tablets
manufactured by Connectphone Ltd., which is a delicate, small and portable mobile
internet device. The device is equipped with a piece of touch LCD screen, which can be
used to watch videos and pictures. It supports installation of multiple application programs
on office and entertainment. The fantastic operation interface will give you a brand-new
user experience.
This manual systematically introduces diversified functions, using skills and matters
needing attention of this A7 SLIM, please read this manual carefully before using it.
1.2 Precautions
Maintenance and Curing
Please keep the device dry. Please don’t let the device, battery and charger contact
water and water vapor or operate device or charger with wet hand to avoid short circuit
of the device, breakdown caused by corrosion and electric shock of personnel.
Please don’t let the device, battery and charger receive strong impact or shock to
prevent breakdown and damage.
Please don’t place the device, battery and charger in regions with too high or too low
temperature, or it might lead to breakdown, catching fire, or explosion of device,
battery or charger.
Please don’t hit, throw, drop or bend the A7 SLIM.
Please don’t dismantle the device and its accessories by yourself, or this will result that
the device and its accessories will be out of the warranty scope.
1.3 Safety Notice
Before using A7 SLIM, please read the information in this section, and make your children
learn about the information. About more detailed information, please refer to safety
instructions.
Please don’t use A7 SLIM when you are driving.
In medical places, please observe relevant stipulations and regulations. And in regions
near the medical devices, please shutdown A7 SLIM.

2
Please shutdown A7 SLIM or enable the airplane mode when boarding, so that the
wireless signals will not interfere control signal of the airplane.
Please shutdown A7 SLIM when getting close to electronic equipments with high
accuracy, otherwise, breakdown of electronic equipments may be brought about.
Please don’t dismantle the A7 SLIM and its accessories on yourself.
Please keep A7 SLIM far away from magnetic equipment, radiation from A7 SLIM will
erase information stored on the magnetic equipment.
Please don’t use A7 SLIM in places with high temperature and inflammable gas (such
as nearby gas station).
Please put A7 SLIM and its accessories in places beyond children’s touch and please
don’t let children use A7 SLIM without supervision.
During using of A7 SLIM, please observe related laws and regulations, respect privacy
and legitimate rights of others.
Please strictly abide by relevant explanations in this manual when using USB data line,
otherwise, the A7 SLIM or the personal computer may be damaged.
Please don’t use the A7 SLIM in humid environment such as bathroom, etc., and avoid
to the A7 SLIM being soaked or rinsed by liquid.
3
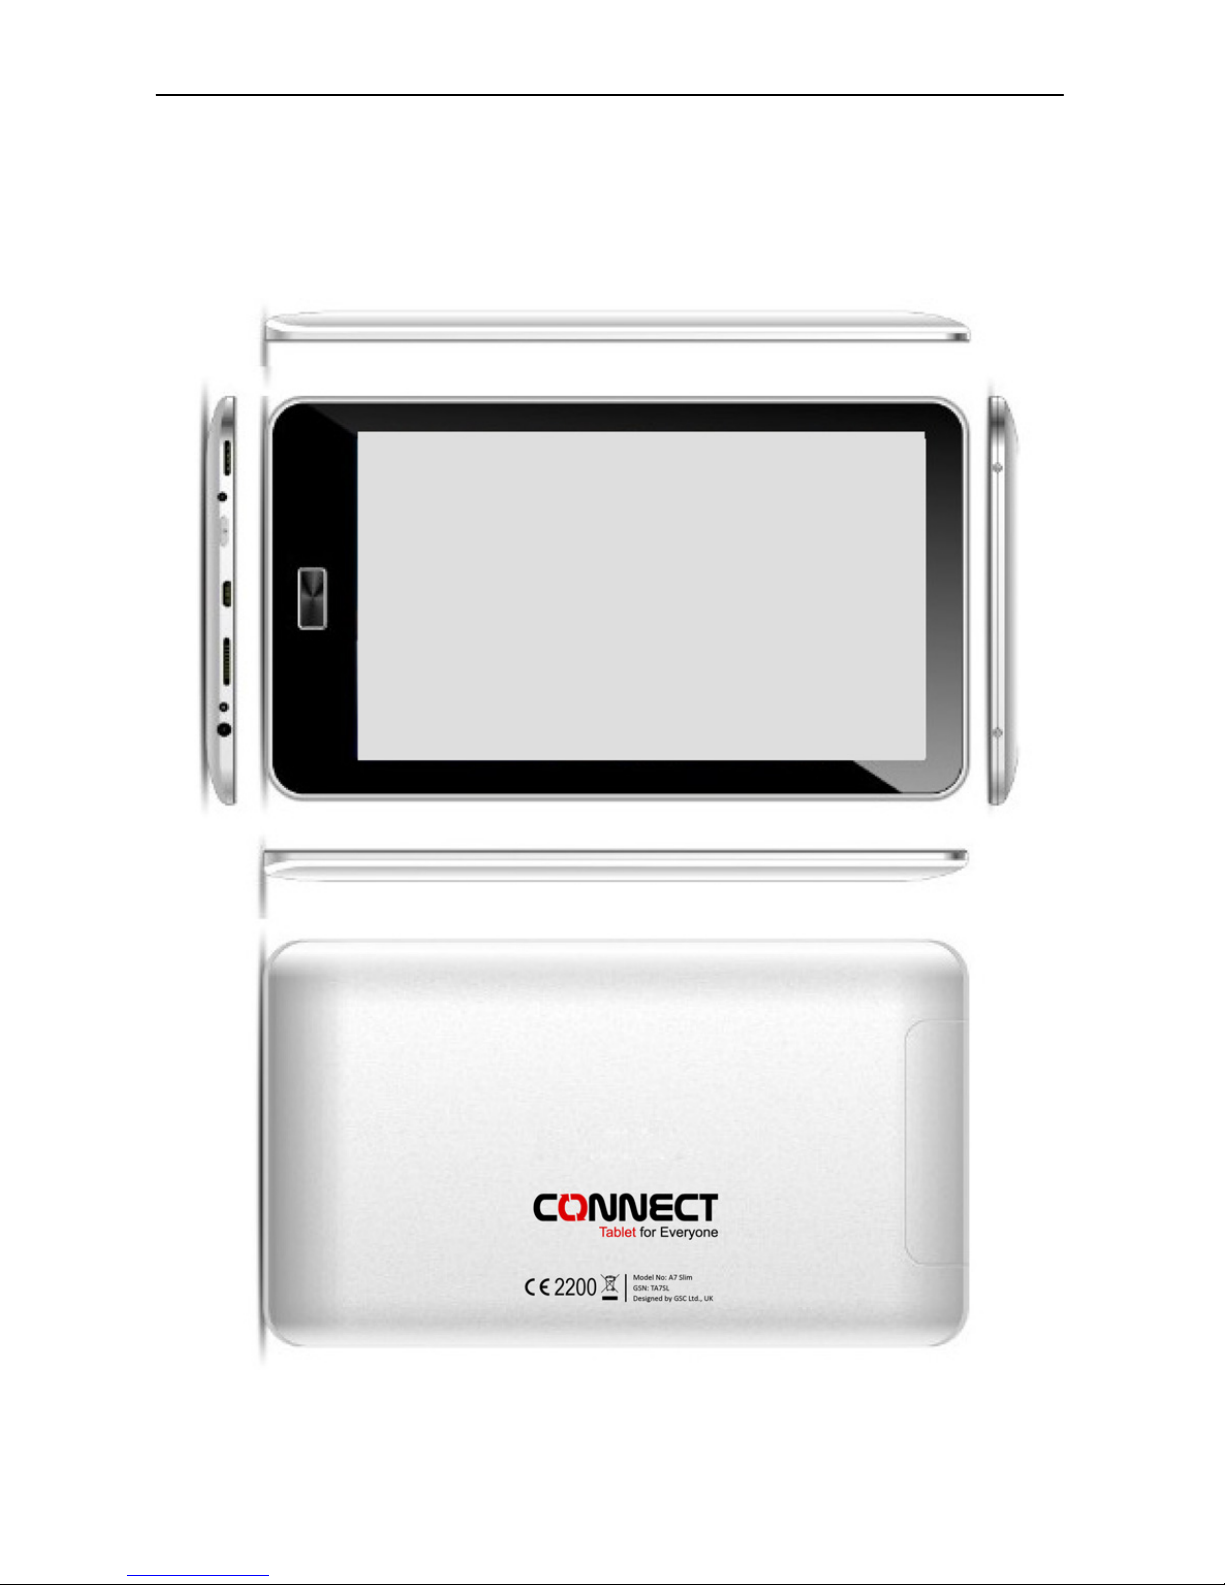
2 Brief introduction for A7 SLIM product
2.1 Diagram for A7 SLIM

4
2.2 What’s inside the box
Packing list
The following articles are included in your packing box of A7 SLIM:
Complete machine of A7 SLIM
Power adaptor
USB connecting line
OTG Cable
User’s manual
Warranty Card
2.3 Preparation Using A7 SLIM
Battery charging
Before using A7 SLIM for the first time, the battery needs to be charged.
Use power adaptor to charge A7 SLIM.
In order to have full battery charge, please charge it for over 4 hours.
3 Quick Start
3.1 Key function
Descriptions for key function:
Power key Press this key for a long time to start up
Under starting up state, press this key for a long time
to pop up shutdown option
Under starting up state, press this key to close the
screen
Volume
key
Press it can increase or decrease machine volume
3.2 Starting up and turning off
Starting up
Press the power key for 3 seconds, you can see the starting up picture. After the system is
started, the machine enters into screen lock state, please unlock according to direction
5
indication of sliding icon on the interface.
Turning off
1. After pressing the power key for a long time, the shutdown option will pop up.
2. Click OK.
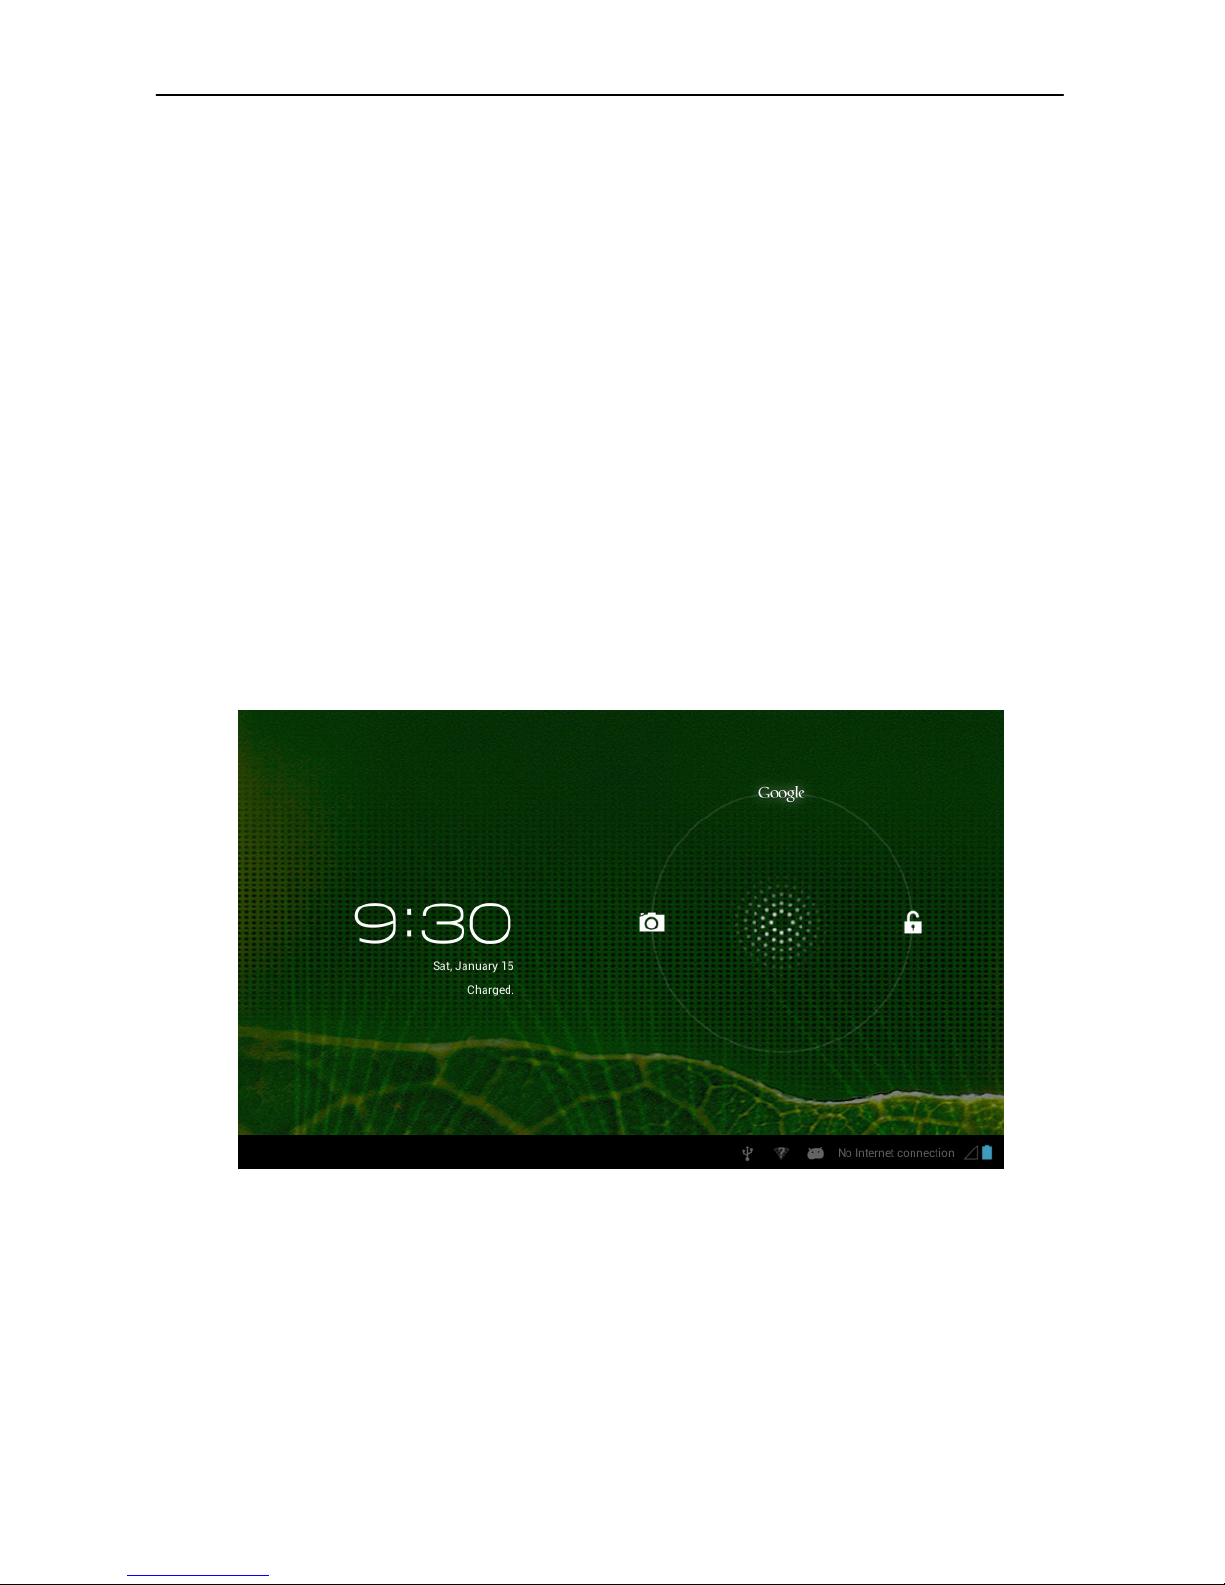
3.3 Unlocking and closing of the screen
The device will turn off screen, when left unused
1.After the screen being left unused for a period of time, the machine will close screen
automatically, so as to save battery power.
2.Under screen on state, press the power key, the screen will close immediately.
Turning on under screen off state
If the screen is in off state, you can unlock the screen by pressing power key for a short
time. After opening, the screen will enter lock state, press “lock” icon by your finger and
slide rightwards, the screen will be unlocked, press “lock” icon and slide leftwards, you can
enter the camera function.
Figure 3-1
3.4 Use of touch screen
Operating mode in A7 SLIM
There are various ways to access the main screen, menu and applications on your A7 SLIM.
Click to select
6
When you want to use screen keyboard entry, and you want to select items on the
homepage interface such as application program, you only use your finger to click.
Press on
If you want to unlock the available option of a certain item (such as textbox or interlinking
in the webpage), or move shortcut on the homepage interface and menu of main program,
only press the item.
Slide
Sliding means doing rapid vertical or horizontal drag movement by using finger on the
picture.
Drag
Before you starting to drag, you must press it with your finger and impose a certain
pressure, and don’t loosen the finger before dragging to the wanted position.
Rotate
Aiming at most of pictures, only turn the A7 SLIM in side direction, the screen direction can
be shifted from cross direction to vertical direction. For example, when you input
characters, watch cinema, etc.
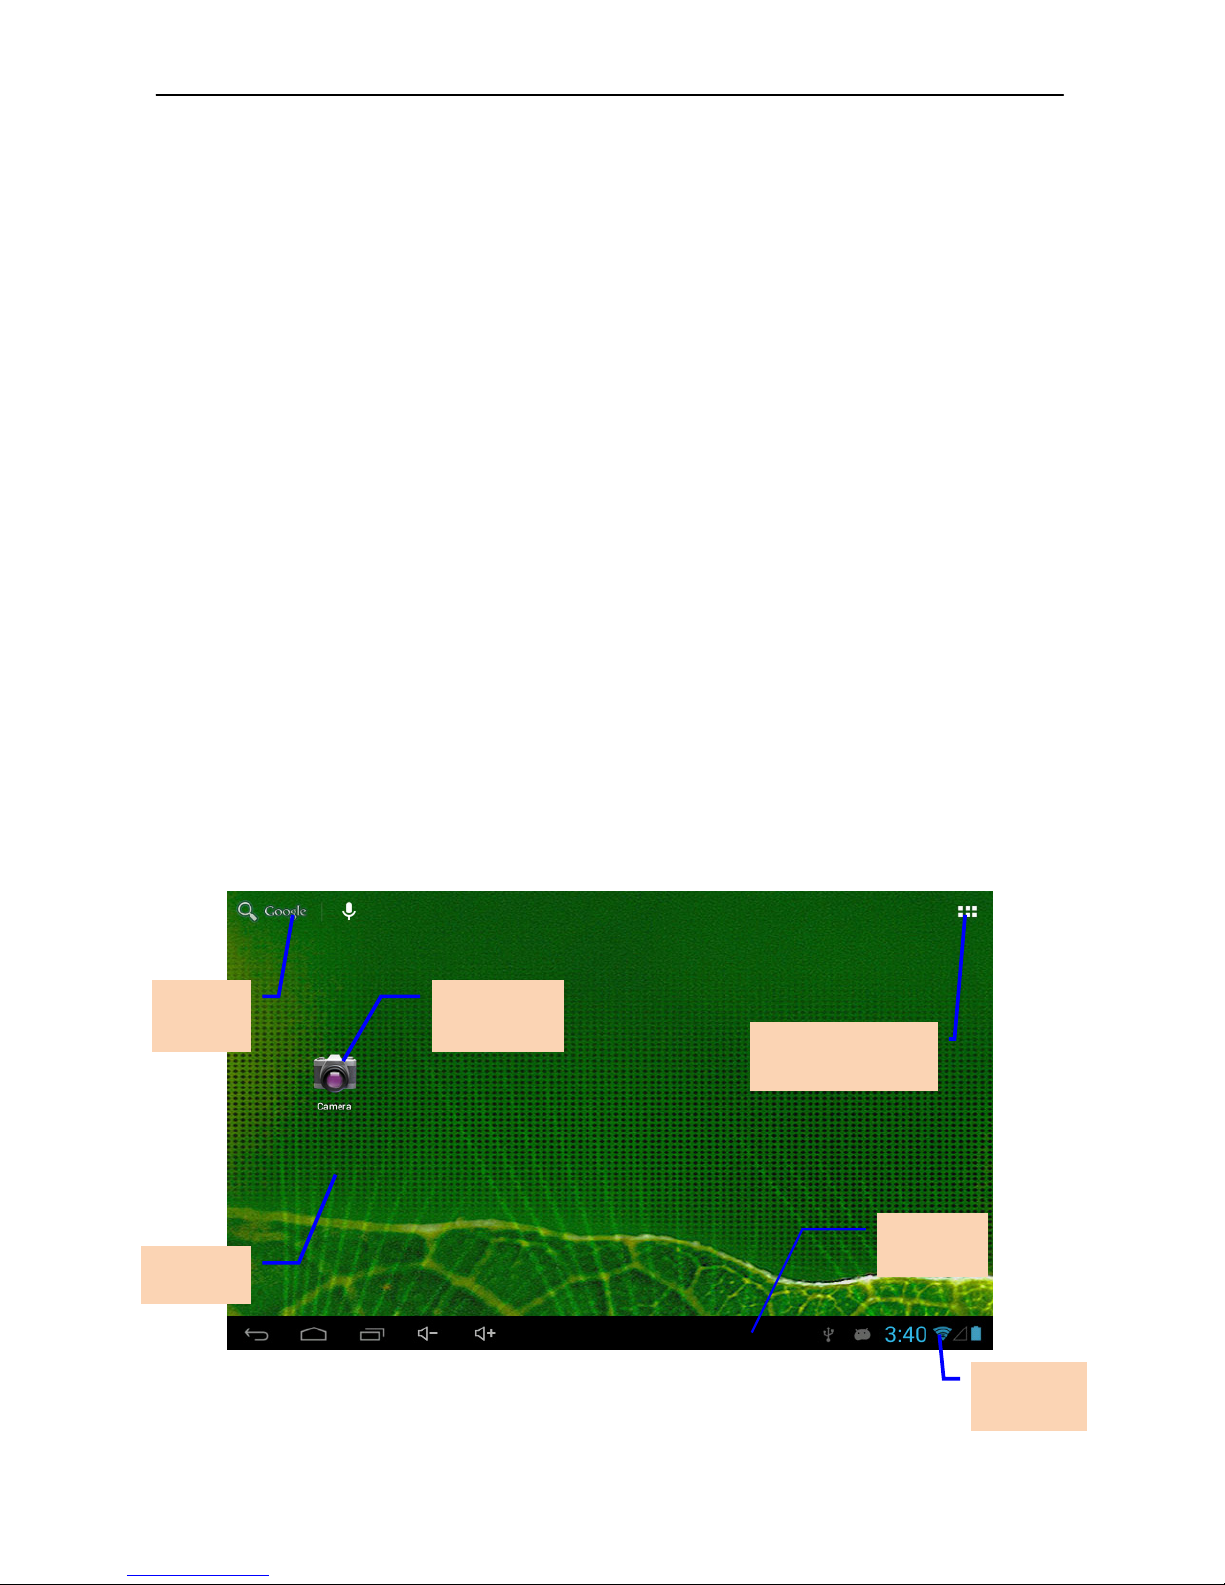
3.5 Homepage interface
All application programs on the machine will be displayed on the main menu screen. You
may use application program, shortcut and user-defined mode to set wallpaper of your
homepage interface.
Figure 3-2
Notice Bar
Connection
state
Application program
menu button
Application
program
Search
bar
Wallpaper

7
Note: In any application, you can press homepage key to return homepage interface.
Outstretched homepage interface
Homepage interface may extend beyond the width of screen, so as to provide more space,
so that you can place the newly increased shortcut, widget, etc. Press blank of homepage
interface, then slide around quickly in vertical direction by finger to jump to left side or right
side outside the screen. There are more than 2 stretched pictures on the homepage
interface.
Figure 3-3
Custom homepage interface
Change desktop wallpaper
1. Press blank region on the homepage interface to pop up the menu.
2. When the menu popping up, choose source of homepage interface wallpaper you want
to change.
3. After clicking source of wallpaper, click picture you want, and then select “setting
wallpaper”.

8
Figure 3-4
Add widgets
1. Please click application program menu. As shown in Figure 3-5.
2. After entering application program menu, click “WIDGETS” button on the top left of
interface.
3. After pressing the desktop widgets you want, the system will return back main
interface, put the selected widget to the wanted place, then loose.
Figure 3-5
Wid gets
 Loading...