

Page 1
secure open
Conlan ApS • Speditorvej 2A • DK-9000 Aalborg • Tel: +45 72 40 60 03 • Fax: +45 96 32 00 22
www.conlan.eu • [email protected]
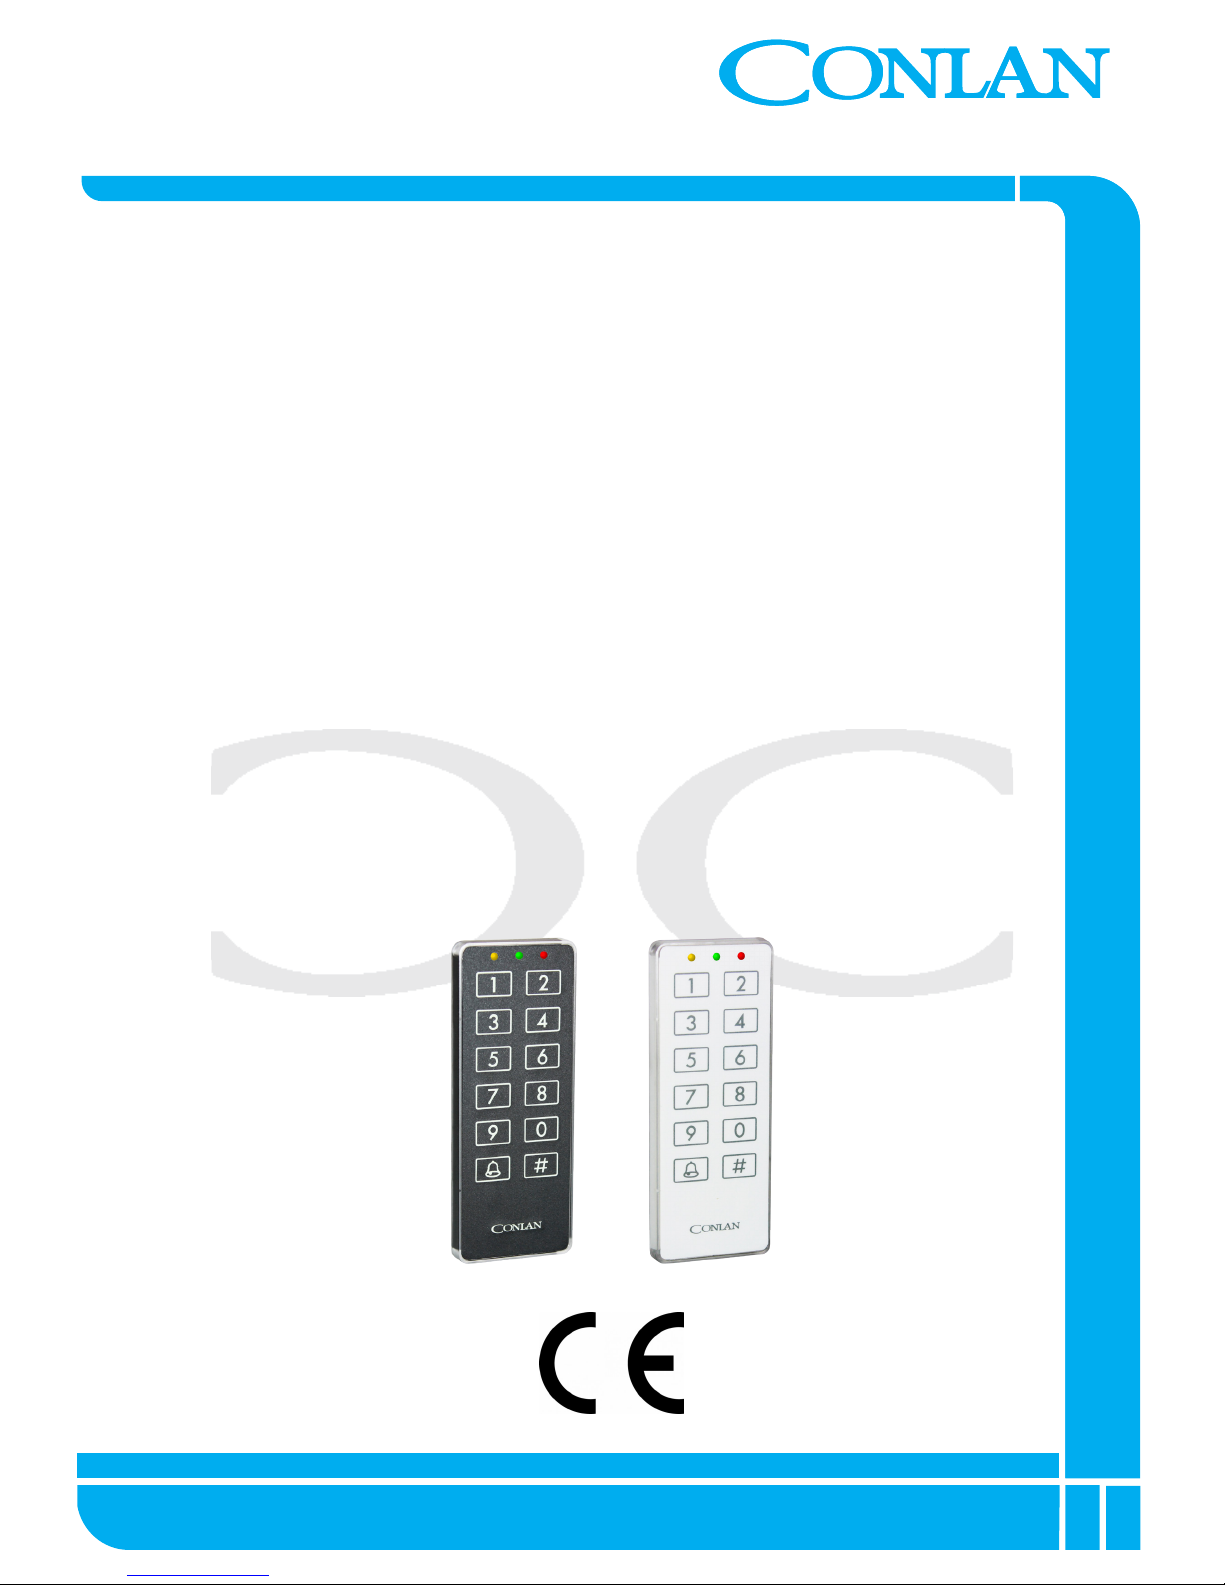
Keypad
CT2000
Art. No.: 460001, 460005 (black)
Art. No.: 460007, 460014 (white)
Master manual
CT2000_master_ENGmar15
Page 2

2
Introduction
CT2000 is a exible keypad, which can be used for many dierent purposes.
One CT2000 can handle maximum 100 dierent user codes.
No matter what purpose the CT2000 is used for (e.g. access keypad to alrm
systems On/O switch, or control of electric lock), the method of operation is
always the same
The keypad is operated / activated as follows:
Enter a user code e.g. < 4 5 6 7 > and conrm by pressing < # >.
If the entered code is correct and valid the CT2000 activates when you press
< # >.
System Changes
Generally it is your system provider, who changes the systems settings for you.
However, changes like adding, changing and deleting user codes can be made
by the user himself, after entering the Master Code. This code does not activate
the keypad.
Master Code
The Master Code is a restricted Service Code, which only enables you to change
user codes (positions 00 - 99). The Master Code should be used by the person
who is responsible for everyday operation of the system and therefore must be
able to add, change and delete user codes.
The Master Code is not programmed form the factory, it is therefore very important that you have it set by your system provider before taking over the sys-
tem.
Each user shall be assigned a user number (positions 00 - 99) and a personal
user code (1 - 8 digits). Example: User 08 has a user code < 3 8 5 6 7 >.
Page 3
3
Adding user codes
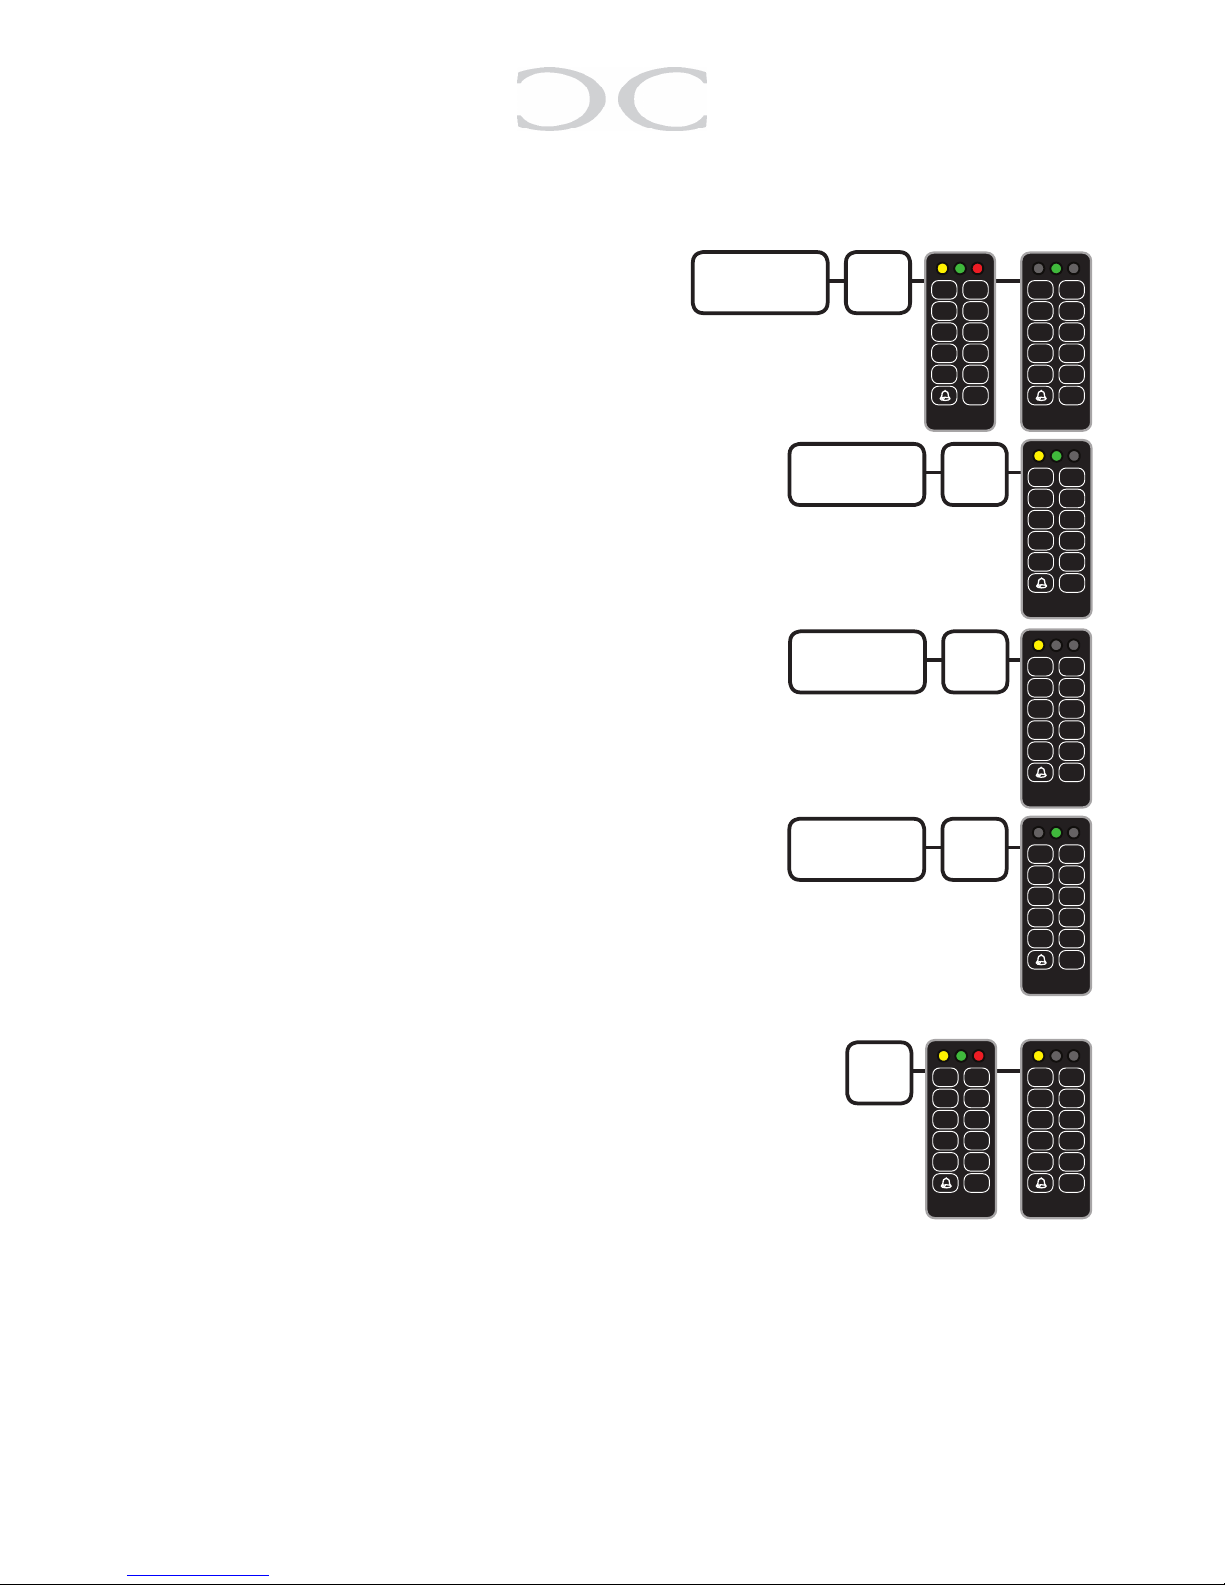
1. Enter the Master code and conrm by
pressing < # >. All 3 LEDs illuminates
for a moment, after which only the
green LED stays on.
2. Enter a user number (00 - 99) and conrm by
pressing < # >. The yellow and the green LEDs
illuminates.
3. Enter a code and conrm by pressing < # >.
The yellow LED illuminates alone.
4. Repeat the code and conrm by pressing < # >.
If something went wrong, the red LED illumina tes shortly and you must go back to point 2.
If the entered code was correct, it is conrmed
by illumination of the green LED. The new user
code is now set.
5. If you want to add more user codes, go back to
point 2. Press < # > if you wish to quit the program-
ming mode. All 3 LEDs illuminate for a moment,
afterwards only the LED which indicates normal
operation stays on. By default this is the yellow
LED.
Changing user codes
Is the same as adding new user codes. You just have to overwrite the positions.
1
3
5
7
9
2
4
6
8
0
#
1
3
5
7
9
2
4
6
8
0
#
Enter
Master code
#
user
number
#
1
3
5
7
9
2
4
6
8
0
#
Enter
user code
#
1
3
5
7
9
2
4
6
8
0
#
Repeat
user code
#
1
3
5
7
9
2
4
6
8
0
#
#
1
3
5
7
9
2
4
6
8
0
#
1
3
5
7
9
2
4
6
8
0
#
Page 4
Deleting user codes
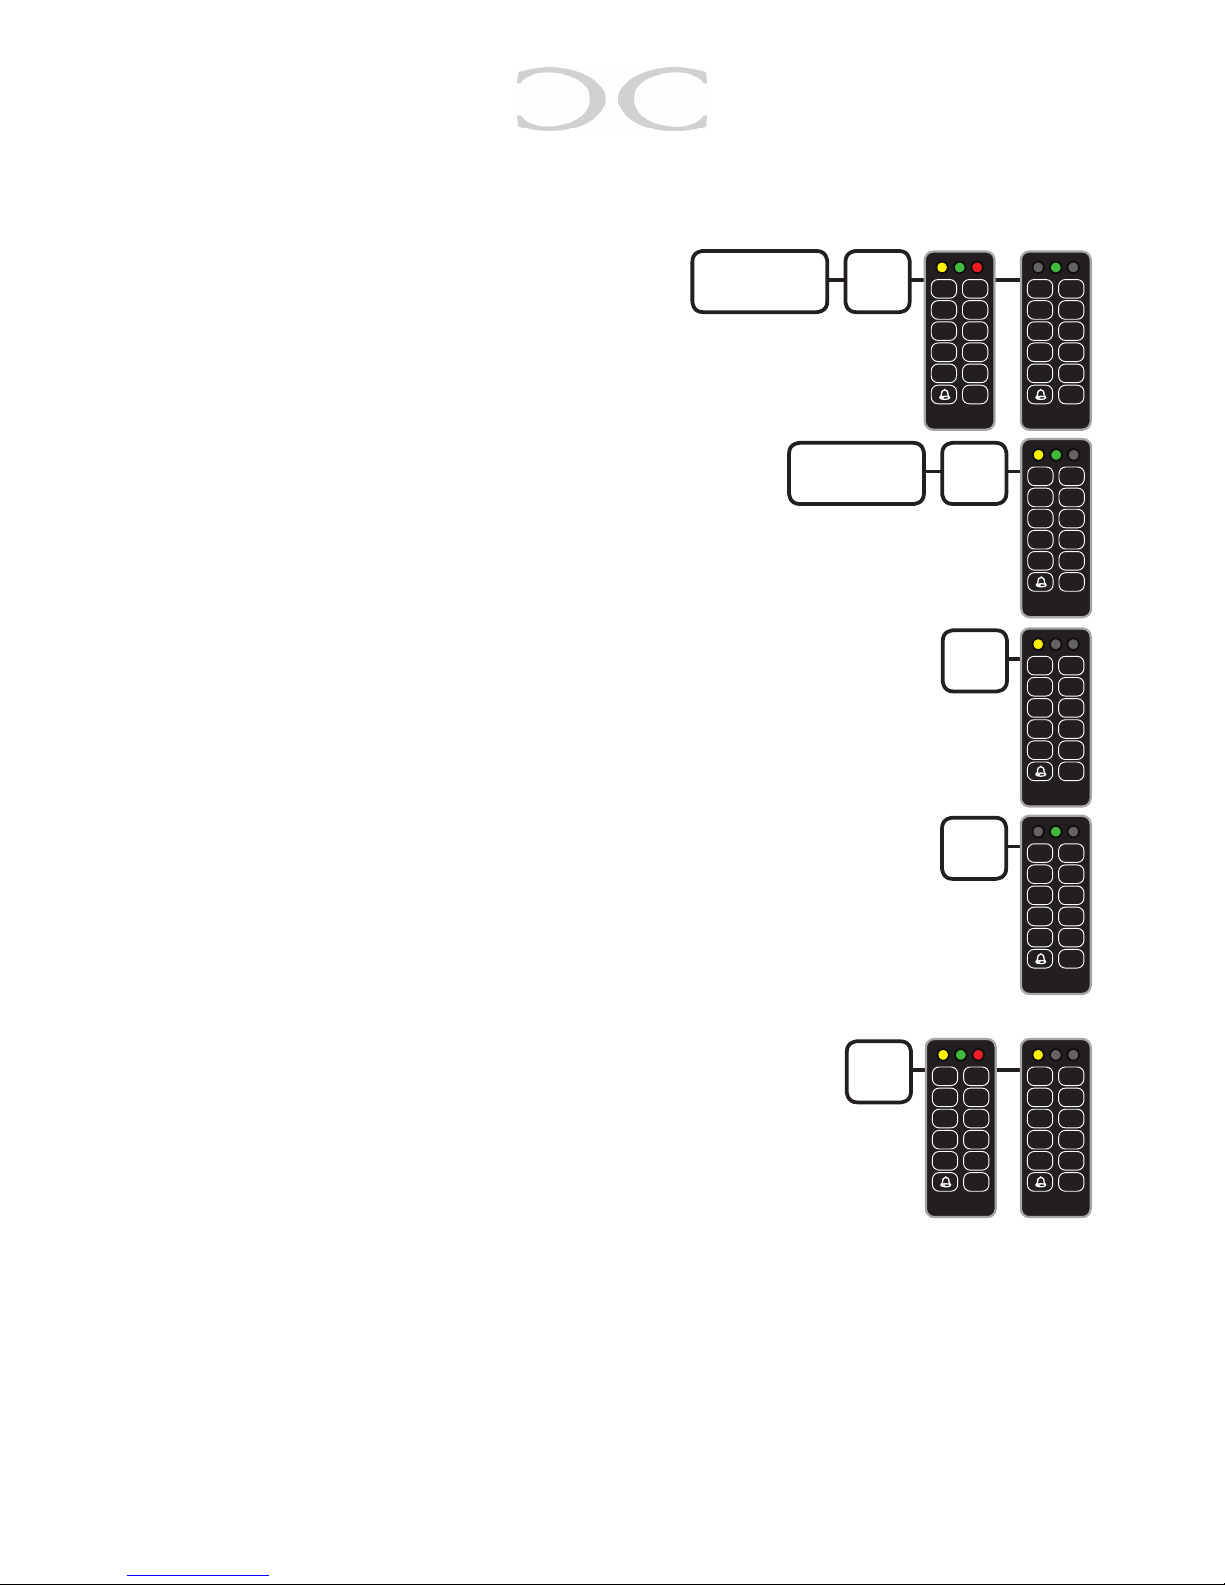
1. Enter the Master code and conrm by
pressing < # >. All 3 LEDs illuminates
for a moment, after which only the
green LED stays on.
2. Enter a user number (00 - 99) and conrm by
pressing < # >. The yellow and the green LEDs
illuminates.
3. Enter < # > (equals to entering nothing in place
of user code). The yellow LED illuminates alone.
4. Press < # > again (equals to entering nothing in place
of user code). Illumination of the green LED conrms
that the code has been deleted.
5. If you want to add more user codes, go back to
point 2. Press < # > if you wish to quit the program-
ming mode. All 3 LEDs illuminate for a moment,
afterwards only the LED which indicates normal
operation stays on. By default this is the yellow
LED.
1
3
5
7
9
2
4
6
8
0
#
1
3
5
7
9
2
4
6
8
0
#
Enter
Master code
#
user
number
#
1
3
5
7
9
2
4
6
8
0
#
#
1
3
5
7
9
2
4
6
8
0
#
#
1
3
5
7
9
2
4
6
8
0
#
#
1
3
5
7
9
2
4
6
8
0
#
1
3
5
7
9
2
4
6
8
0
#
 Loading...