

Page 1

Designed for
®
BrightLink® Pro
Installation guide for workITdesk interactive table
®
for
BrightLink® Pro
Page 2

Mounting the table unit
1
Unpack boxes 1 of 4 (Mobile base) and 2 of 4 (Motorized
center column) and attach base to column using the
4 x M8 x 40 (1/3" x 1.6") Allen screws + 4 washers.
2
Unpack box 3 of 4 (Board frame w. tilt actuator) and attach
frame to column using the 4 x M8 x 40 (1/3" x 1.6") Allen
screws + 4 washers.
3 4
Unpack box 4 of 4 (50" x 67" table top) and hang the board
onto the frame.
Secure the board
to the frame using
the 4 x M6 x 70
(0.23" x 2.75")
Allen head screws.
They need to be
inserted in the
outer most holes
on top and bottom
of the frame.
Make sure to run the two cables exiting the column through the
cut out of the board frame before securing the 4 bolts.
Release the two bolts on the brackets on the back of the
board and slide in the projector arm. Align the stripe on
the arm, 6.8" from the top, with the upper edge of the top
bracket. Secure the arm by
tightening the bolts on both top
and bottom bracket.
6.8"
2
Page 3
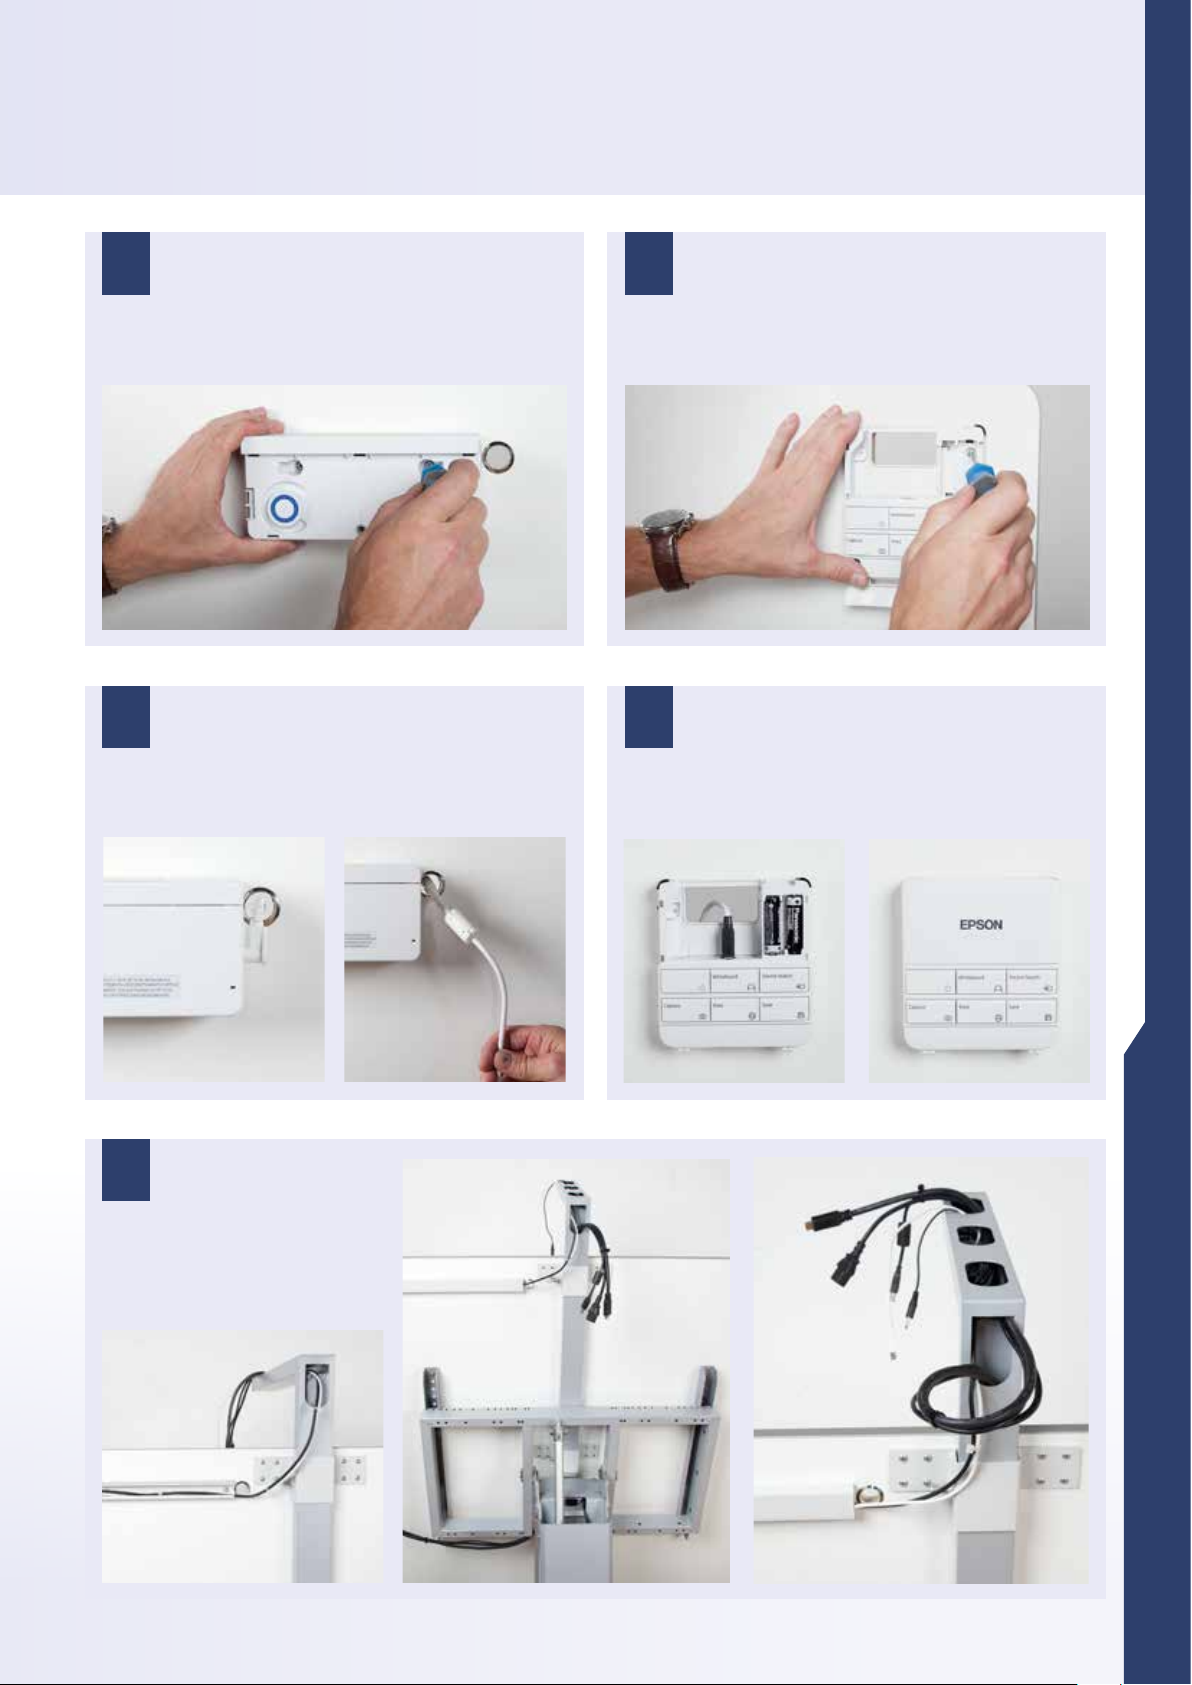
Attach Control Pad & Finger Touch Unit and feed cables (parts supplied with projector)
5 6
Attach Finger Touch Unit with 3 x Phillips head screws
(0.165” x 1.25”).
7 8
Feed the cable, which links FTU to the projector, through
the opening in the board and plug in the connector.
Attach Touch Panel with 4x Phillips head screws
(0.165" x 0.63").
Plug in both cables into the Control Pad (USB + 3.5mm
audio).
9
Feed all cables to the projector
through the projector arm (from
bottom to top of the arm).
workITdesk interactive table
3
Page 4
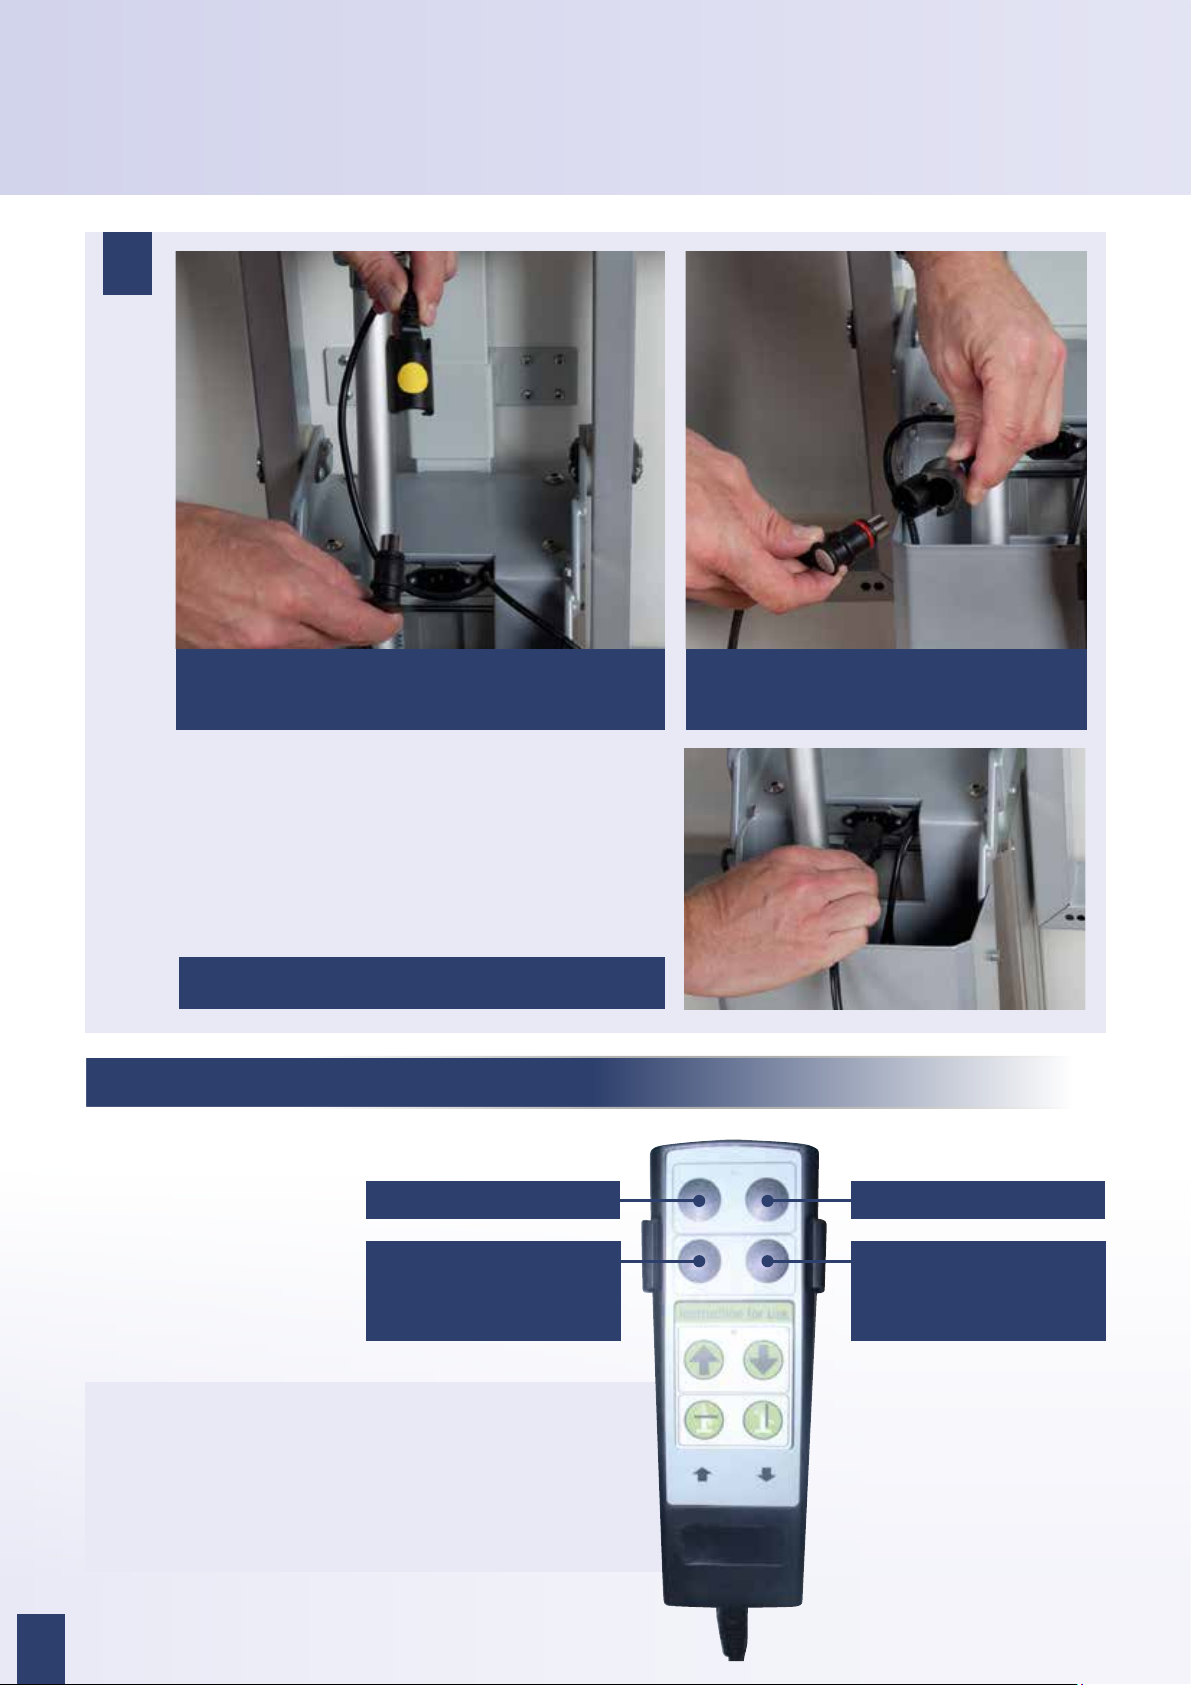
Power up the unit
10
Put the plug of the external actuator into the connector
marked with the yellow dot.
Note the different numbers of pins on both plugs!
User guide for electrical height adjustable unit
Pressing knob raises lift unit
Plug in the remote control into the remaining
connector.
Pressing knob lowers lift unit
Pressing knob moves frame
unit to the horizontal position
(tiltable units only)
Use of the remote control
For moving the unit up or down just press the buttons on
the control unit. Releasing the button will immediately stop the
movement. In case of emergency just unhand the control unit
(watch dog switch). For further information your dealer will be
at your disposal.
4
Pressing knob moves frame
unit to the horizontal position
(tiltable units only)
Page 5
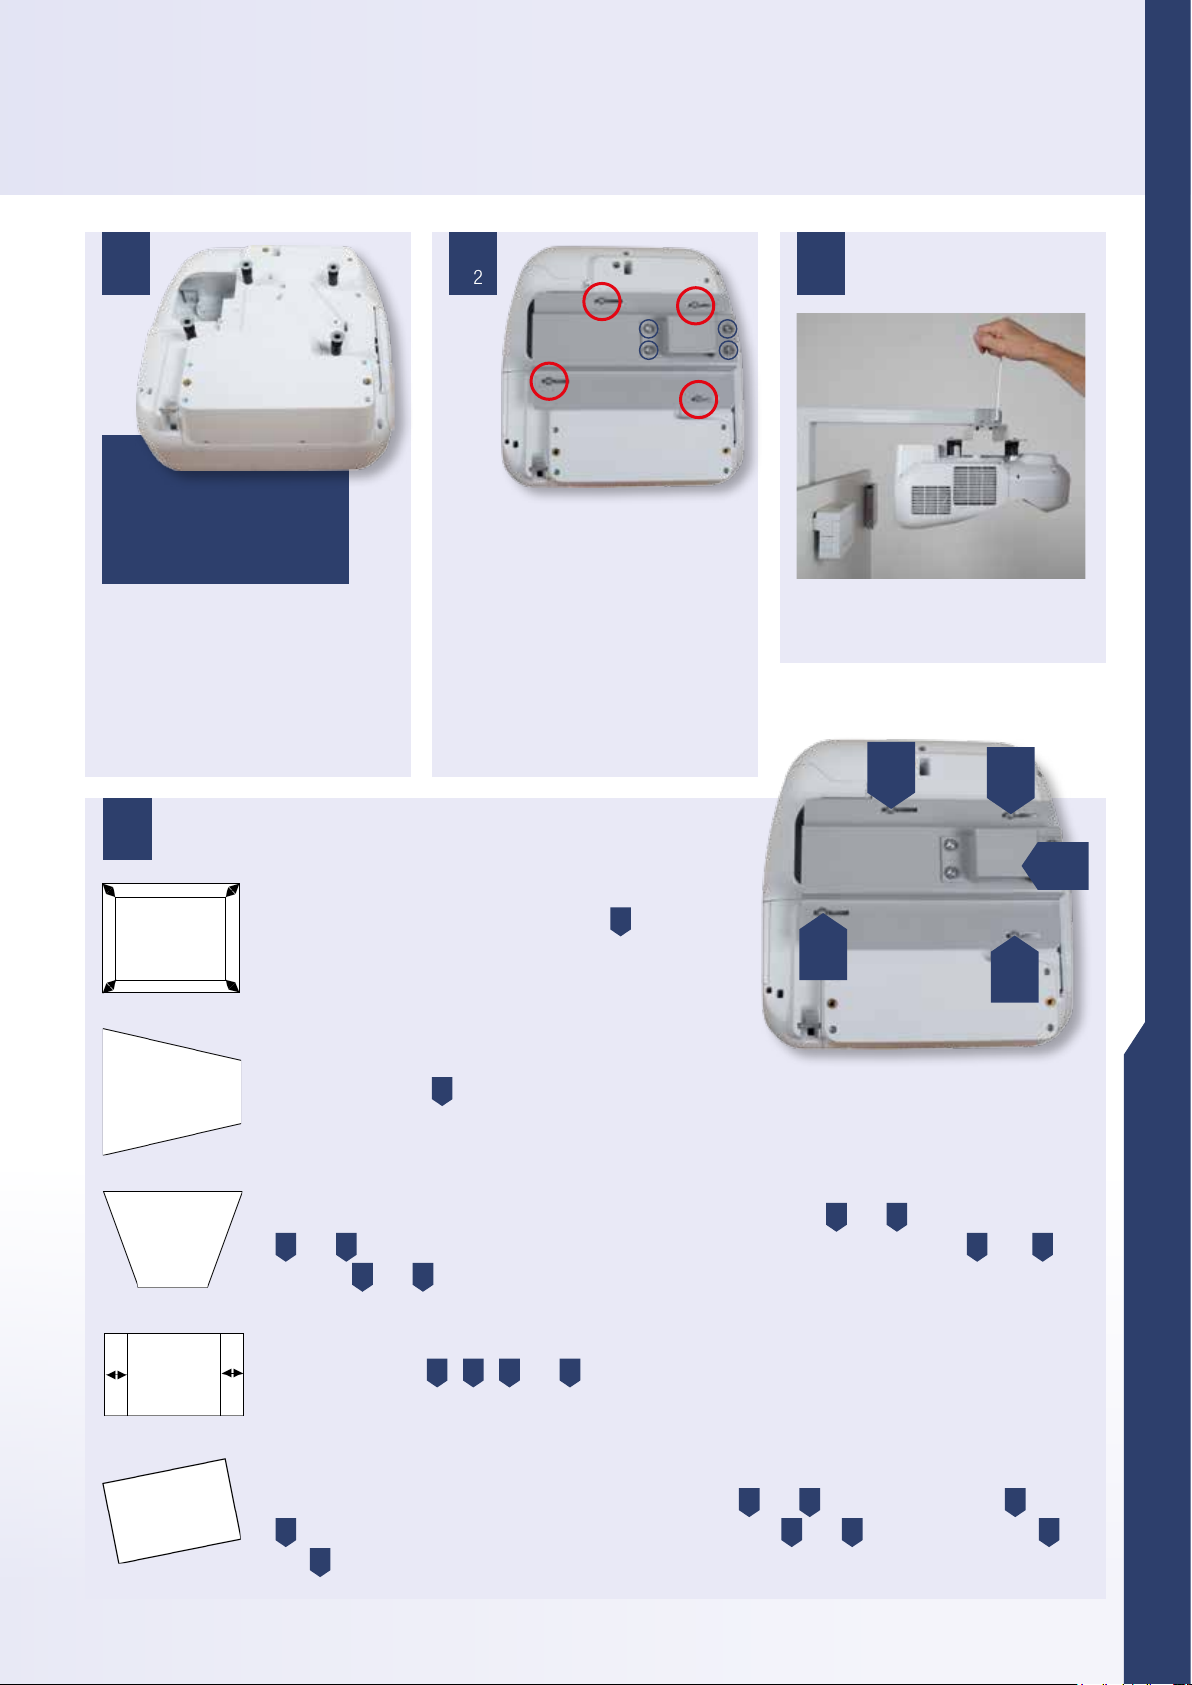
Mount the projector
11
4 x distance tube 20 mm
4 x rubber buffer 13 mm
4 x washer 8 mm
Mount the projector plate to the
projector. Start by placing the 0.8"
plastic spacers on all 4 inserts.
Place the 0.5" rubber buffers on top
of the plastic spacers and nally put
the washers on top.
14
Adjust the projector
Picture is too small or too big:
To increase picture size loosen the adapter
over the tube away from the board. To decrease picture
size move the projector towards the board. Tighten all
screws securely afterwards.
Carefully place the projector plate on
top of the spacers and washers and
secure the plate with 4 x allen head
screws M4 x 45 (0.15" x 1.8").
Attach the bracket, which will hold
the projector to the projector arm, to
the projector plate with 4 x allen head
screws M6 x 10 (0.24" x 0.39").
Do not tighten the screws yet.
E
and slide it
1312
Attach the projector to the arm and
tighten the screws.
A
B
E
C
D
Horizontal keystone correction:
Loosen the adapter
side. Turn the projector the other way around, if the picture is too small in the left side.
Vertical keystone correction:
If the picture is bigger at the top than at the bottom, secure the screws
A
or loosen
Picture is not centered:
Loosen the screws
Tighten all screws again.
Picture is not straight:
If the picture does fall down the left side, tighten the screws
D
and
B
and
. If the picture does fall down the right side, tighten the screws
at the same time. If the picture is smaller in the top than in the bottom, tighten
C
and
C
.
E
and turn the projection to the right side if the picture is too small in the right
C
D
.
A
B
C
,
,
and
D
. Move the projector in the right direction.
A
and
C
and loosen the screws
B
and
D
and
D
or loosen the screws
or loosen the screws
A
and
B
B
and
A
workITdesk interactive table
5
Page 6
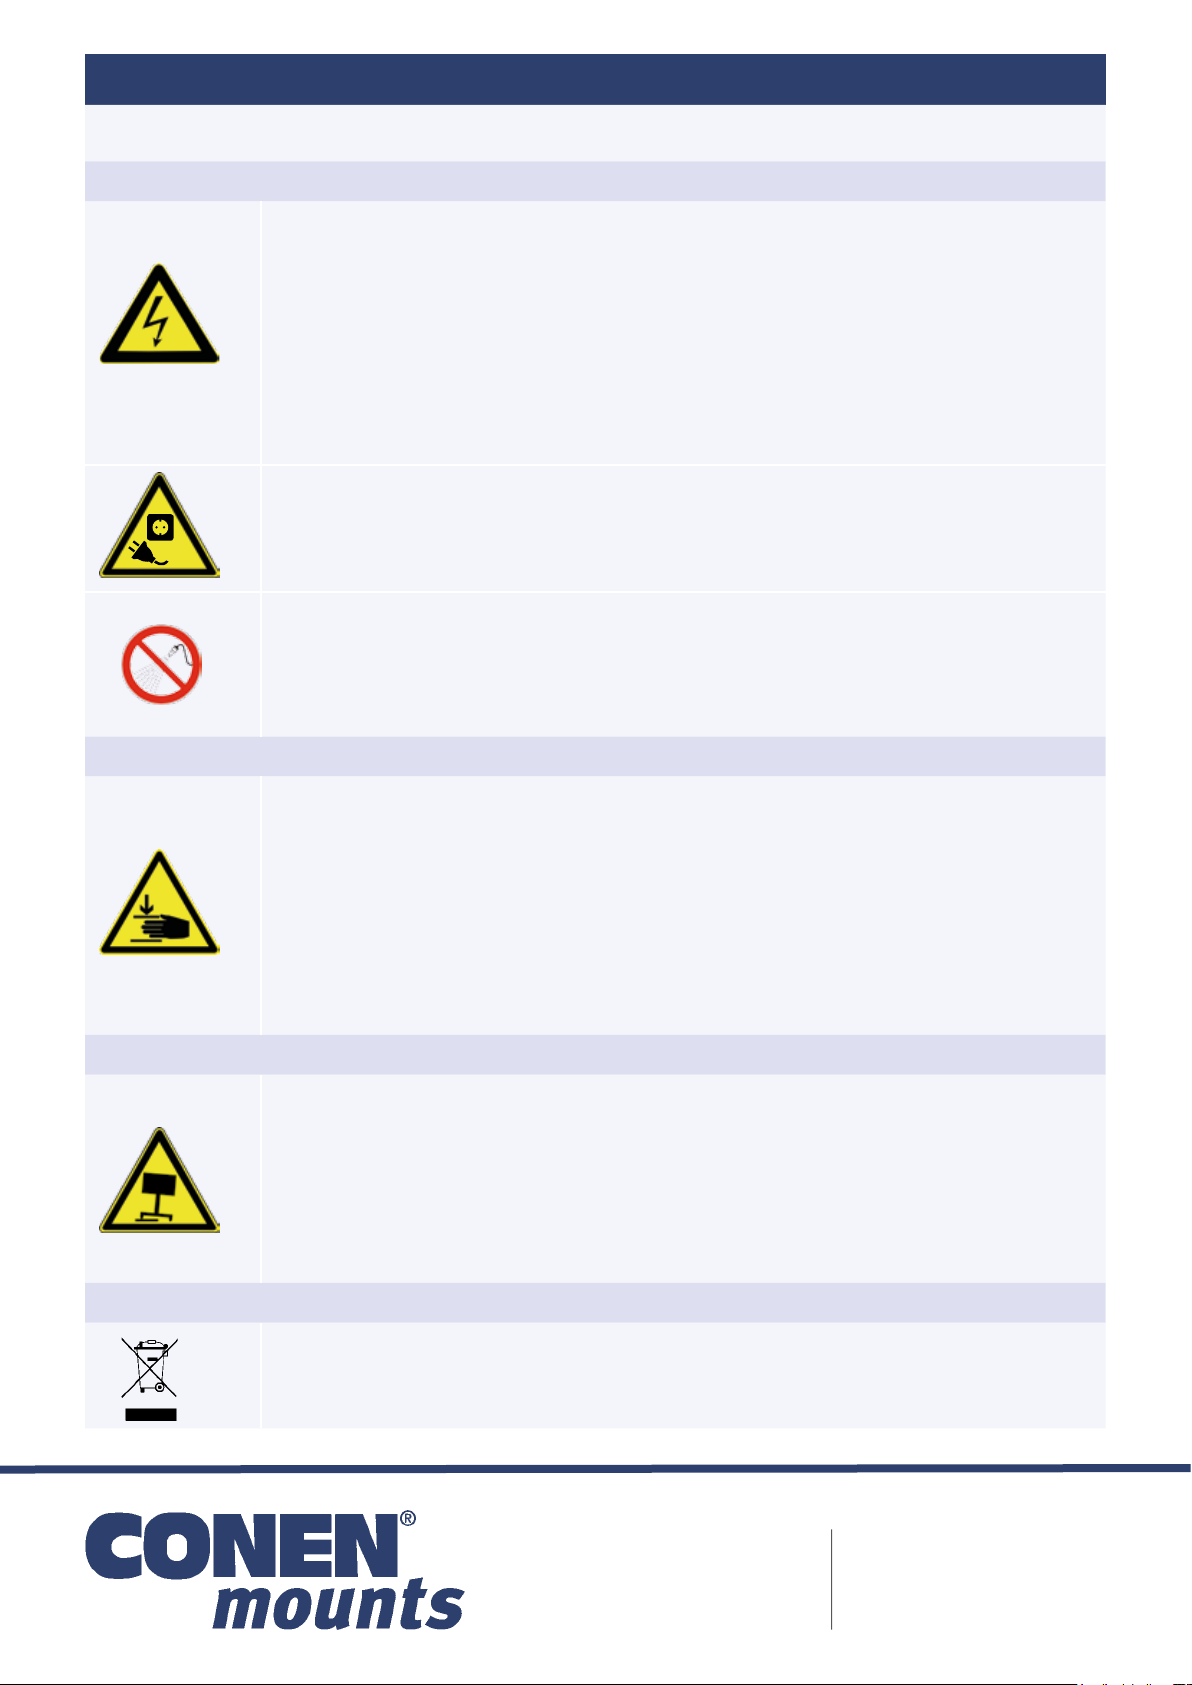
Important hazard and safety notes
Please carefully read the below hazard and safety notes before using the hight adjustment unit.
Electrical safety
Connect unit to a free accessible 110 – 230 V / 50 Hz grounded power outlet only.
Make sure, the unit can be immediately separated from the power outlet.
Only use unit in dry rooms, protect unit from water and other liquids.
Clean center column with dry cloth only.
Do not open lift unit. RISK OF ELECTRIC SHOCK. There are no serviceable parts inside.
In case of malfunction unplug unit from power outlet and call your dealer.
Do not overrun the power cord or damage it in any other way. Replace damaged power
cord immediately.
Ensure easy access of wall socket and power strip attached to the unit.
The device is not water proof.
Do not place liquids on the table.
General hints for mechanical safety
Max. load capacity of the lift unit is 300 lbs. Do not add any additional weight to the system,
other than the components described in this manual.Do not sit, hang or lie on the table!
! VERY HEAVY UNIT.
Severe risk of injury when unit tips over due to improper use.Before adjusting height or tilt of
the table, ensure no person or object is within 20 cm from the moving parts of the table, in
order to avoid getting trapped or squeezed. In case of accident immediately release the button
on the remote.
This will immediately stop the unit.
Special hints for moveable und free standing units
Only operate unit on plane and stable oors. Move unit on plane oors only.
Beware when moving the unit; risk of tipping over when overrunning oor unevenness,
wdoor sils or similar.
! VERY HEAVY UNIT.
Severe risk of injury when unit tips over.
Lock brakes of front wheels when operating unit.
I
nstructions for disposal
Do not dispose to consumer waste.
Conen Produkte GmbH & Co. KG
Conenstr. 4
54497 Gonzerath
Germany
[email protected]
www.conenmounts.com
 Loading...