

Condura ROOM AIR CONDITIONER Owner's Manual
OWNER’S MANUAL
ROOM AIR CONDITIONER
SAFETY PRECAUTIONS
Please observe the following safety precautions when using the air conditioner.
Failure or negligence in observing these safety
precautions could cause fire, electrical shock or
personal injury.
Precautions during installation
WARNING
Please ask your sales agent or qualified technician for the installation of your unit. Water
leakage, short circuit or fire may occur if you
install the unit by yourself.
CAUTION
Please use earth line.
Do not place the earth line near water or gas
pipes, lightning-conductor, or earth line of
telephone. Improper grounding could cause
electric shock.
A circuit breaker should be installed depending on
the mounting site of the unit. Without a circuit
breaker, the danger of electric shock exists.
Do not install near location where there is
flammable gas. The unit may catch fire if
flammable gas leaks around it.
Precautions during operation
CAUTION
Avoid an extended period of direct air flow. It
could lead to health problems.
Do not modify the length of power cord or use an
extension cord. It could cause electrical shock or
fire.
Do not attempt to operate the unit with wet
hands, this could cause fatal accident.
Do not turn on the unit by inserting the power
cord.
Please switch off the unit and turn off the circuit
breaker during cleaning, the high speed fan
inside the unit may cause danger.
Turn off the circuit breaker if the unit is not
operated for a long period.
Do not splash or direct water to the body of the
unit when cleaning as it may cause short circuit.
Do not block the air intake and outlet vanes,
cooling performance will be affected.
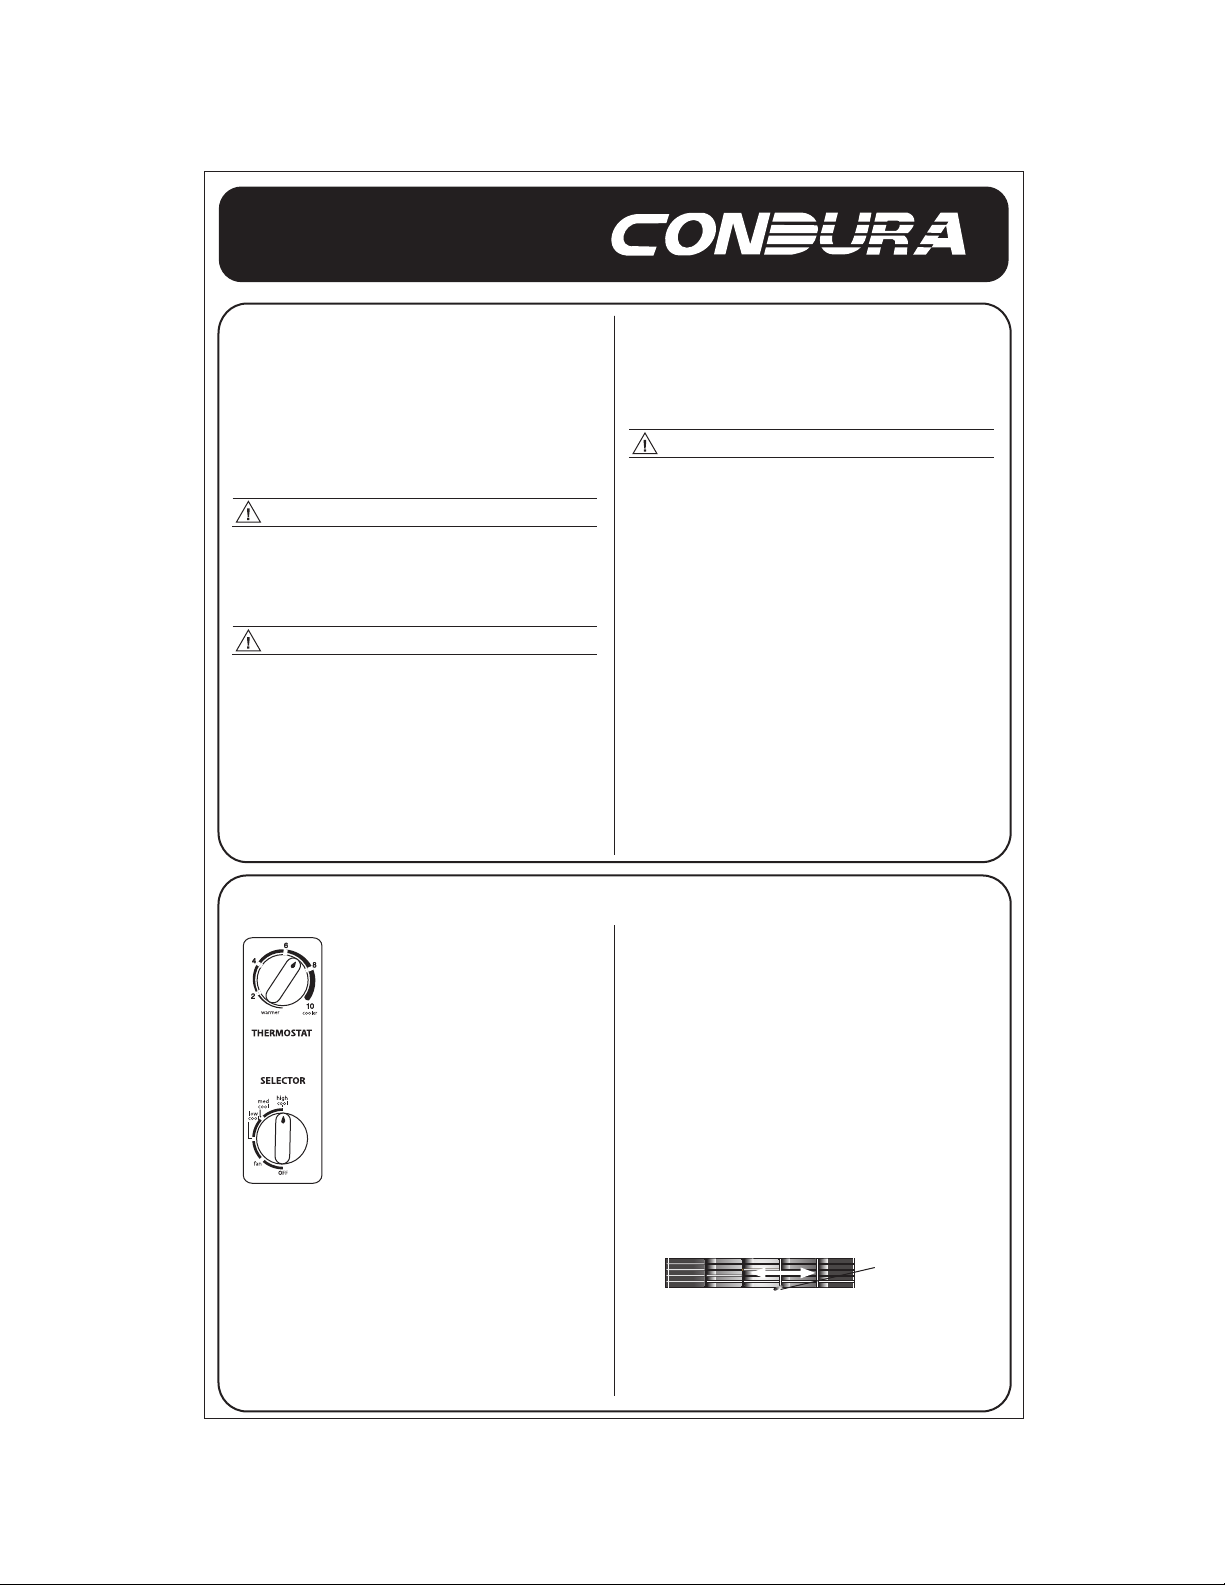
OPERATION INSTRUCTIONS (Open the control door to access the controls)
Selector knob
OFF
This position stops all operations
of the air conditioner.
HIGH COOL
This position provides the
maximum air flow for rapid
cooling, dehumidifying and dust
removing operations (use this
position on sultry summer days).
MED COOL
This position provides the moderate air flow for
quiet cooling, dehumidifying and dust removing
operations (use this position when the outdoor
temperatures are likely to be lower).
LOW COOL
This position provides the minimum air flow for
quiet cooling, dehumidifying and dust removing
operations. (Suitable for night-time use)
FAN ONLY
This position provides fan operation alone
for air circulation and dust removal from
air.
Thermostat knob
The thermostat automatically starts and
stops the operation in order to keep the
room temperature at a proper level, and
this results in efficient use of power and
cooling. Turn the knob clockwise for cooler
temperature and counterclockwise for
warmer temperature settings.
Air Directional Louvers
Center handle
The louvers will allow you to direct the air flow
Left or Right throughout the room as needed.
Move the Center handle from side to side until
the desired Left/Right direction is obtained.
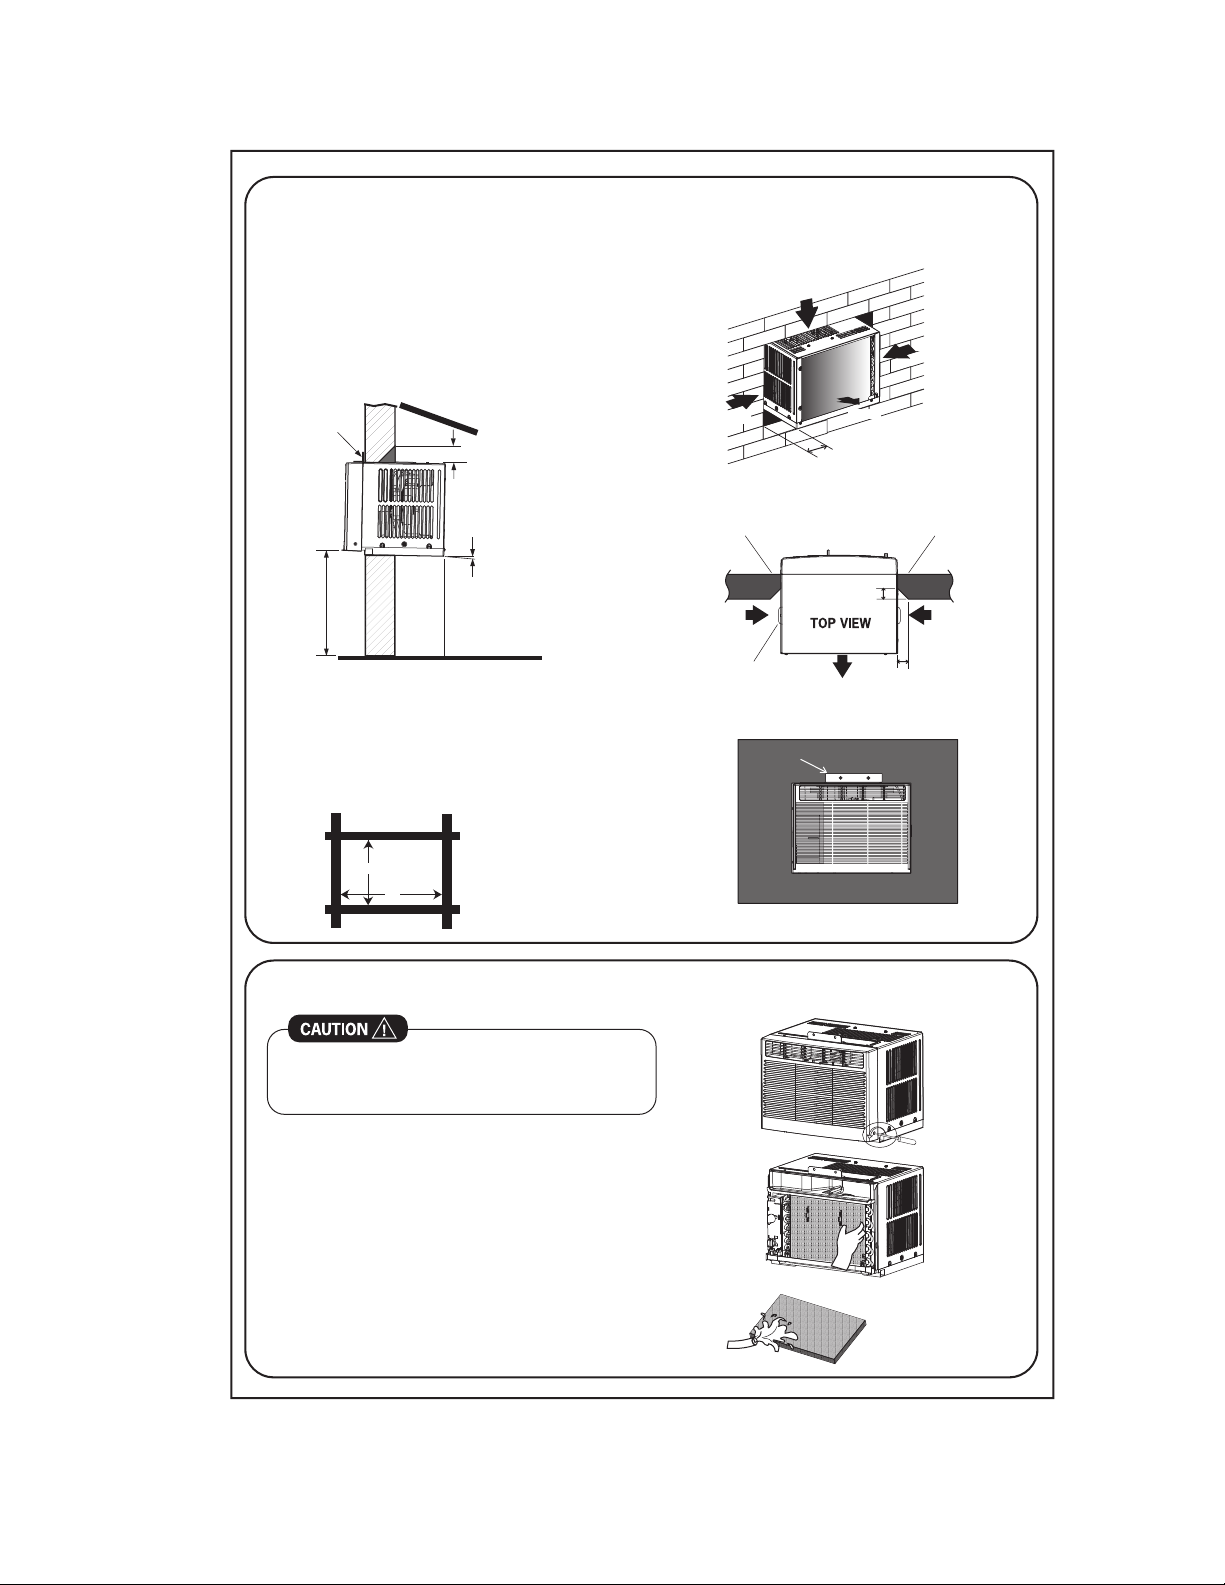
AIR CONDITIONING INSTALLATION
Location
Avoid installing the air conditioner where it is
exposed to direct sunlight.
The air conditioner should be installed with a
strong external support to minimize noise and
vibration and for the purpose of safe installation,
repair, replacement and secure positioning.
AWNING
BRACKET
100mm
About 10mm
75~150cm
Note: Unit may be supported by a solid frame
from below or by a hanger from a solid
overhead support.
Dimension (Clearances)
Prepare an installation hole slightly bigger
than the outer wrapper size.
Installations of the unit into the wall
AIR IN
AIR IN
AIR IN
45° BRICK CUT AWAY
TO CLEAR LOUVERS
BRICK
WALL
AIR IN
LOUVER
Fix the unit with bracket and secure it with screws
Bracket
AIR OUT
100mm minimum
FRONT
100mm
AIR OUT
45° BRICK CUT AWAY
TO CLEAR LOUVERS
BRICK
WALL
AIR IN
100mm
H
W
H = 314mm
W = 412mm
CARE AND MAINTENANCE
Clean your air conditioner occasionally to keep it
looking new. Be sure to unplug the unit before
cleaning to prevent shock or fire hazards.
Air Filter Cleaning
If the air filter becomes clogged with dust, smooth
air flow is obstructed and cooling efficiency
becomes low.
Unscrew the front grille on both sides. Pull the filter
out of the unit.
Wash the filter using liquid dishwashing detergent
and warm water. Rinse filter thoroughly.
Gently shake excess water from the filter. Be sure
the filter is thoroughly dry before replacing.
 Loading...