

Condor 242 DC Operation And Installation Manual
Operation and
Installation manual

2
Introduction
Thank you for choosing our Fish Finder and welcome to the innovations of Condor Marine!
Your Fishfinder is a high -quality sonar designed for both professional and novice fisherman
with trouble-free use in a variety of water areas. To familiarize yourself 7better with the
product’s operation and maximize the utilization, we invite you to read the User’s Manual
carefully.
Carefully read the installation steps and properly mounting the transducer and sonar unit
which will pay off in optimum performance of your Fishfinder.
An improper installation, especially the improper transducer installation may cause your
sonar unit working abnormally or not working at all.
For any possible problems you may encounter during the operation, please switch to the
Trouble shooting section for reference.
All right reserved! Except as expressly provided herein, no part of this manual may be
copied, reproduced, republished, transmitted or distributed for any purpose, without prior
written consent of Condor Marine.
Condor Marine may find it necessary to change or end our policies, regulations, and
special offers at any time. We reserve the right to change or improve our products and to
make changes in the content without obligation to notify any person or organization.
Note: Our company holds the right to update the products, and it is not obligated for our
company to update the former products according the new standard.

3
INDEX
Understand sonar .......................... …………………………………………………………………………………….……4
No-skipping detection .…………………………………………………..………………………………………………………....4
Dual Beam Sonar .….……………….………………………………………..…..……………………………………………………..5
Installation ………………………………….…… ...........................................…………………………………………………………..6
Tranducer transom location, suction cup version …….. …………………………………………………………….6
Portable Sonar Installation …………………….. ………………………..…………………………………………………………7
Installing the batteries ...…………………………………………………..…………………………………………………………8
Mounting the unit ...………………..……………………………..………………………………………………………………………8
Floating transducer version ……….. ...................…………………………………………………………...……………………9
Operation ………………………….…………………………………………………………………………………………….………….10
Understanding the Fishfinder screen ….……………………………………………………………...….…………10
Real time sonar window …………………….……………………………………………………………………………. .10
Keyboard instruction ……………………………………………..……. ................................................11
Sonar ………………..........................………………………………………………………………………………………………………...12
Sensitivity …………………..…………………………………………………………………………………………………………. 12
Noise filter ………………………………………………………………………………………………………….…………………. 13
White Line ……………………………………….......................................................................................................................13
Fish ID. Sens ….…………………………….…………………………………………………………………………….…….….14
Frequency …………………....................…………………………………………………………………………………….………15
TCG Control ………………………………………………………………………….………………………………….……….…16
Display …………………………………………………………………………………………………..................……............................16
Chart Speed …………………………………………………………………………………………………………....................... 16
Depth Range …………………………………………………………………………………………………………………….….. 17
Zoom Range ………………………………………………………………………………………………………….…………….. 18
Backlight ……..………………………………………………………………………………………………………………………… 19
Contrast ………………………………………………………………………………………………………………………………… 20
Overlap Data …………………………………………………………………………………………………………......................20
Alarm …………………… ....................... …………………………………………………………………………...................……………20
Depth Alarm …………..……………………………………………………………………………………………………………... 20
Fish Alarm …..…………………………………………………………………………………………………………………...…….21
Battery Alarm …..………………………………………………………………………………………………………….….…….. 21
System ……………………………………………………………………………………………...................…………...........................22
Beeper …………………………………………………… . ………………………………………………………………….….……...22
Units ……......................……………………………………………………………………………………………………………….…23
Language …………………………………………………………………………………………………………………….………...23
System Reset ………………..……………………………………………………………………………………………….………24
Simulator……………..………………………………………………………………………………………………………………..….24
Trouble shooting..………………….…. ………….……………………………………………………………………………………26
Specifications and features………...………….…………………………………………………………………………….....27

4
Understand sonar
If you are familiar with how sonar works, skip ahead
to the next segment. But, if you have never owned
sonar Fishfinder before, this segment will tell you the
basic working theory about sonar.
Based on the sonar technology, the Fishfinder could
detect the underwater condition, including fish,
structure, or bottom. After you finished the installation
of transducer and sonar unit, connect the sonar unit
to the transducer. The transducer sends a sound
wave signal into the water in a cone shape. At the
source, the wave is narrow; however as it penetrates
deeper, the sound wave spreads forming a cone
(think flashlight). The sound wave bounce back to the
transducer when it strikes any object, the object
could be fish, structure, bottom or any other object
with density being different from the water.
The transducer amplifies the return signal and sends it back to the Fishfinder by measuring
the time between the transmission of the sound wave and when the sound wave bounce
back, the Fishfinder could calculate the distance by the inner microprocessor. Then the
Fishfinder display the information on the screen for you to interpret.
No-skipping detection
Adopted high detecting technique, your fishfinder has
a high detecting precision, which enable a
“No-skipping detection”.
When sonar works, it continually samples the echo at
same interval (for your fishfinder, it is 0.06ms). And
the continuous signals form different sampling point.
The shorter the distance between 2 sampling points is,
the higher precision your fishfinder will be able to
detect minimal object (thinking about the fishing net,
the smaller the hole is, the smaller fish that not being
able to leak).
5
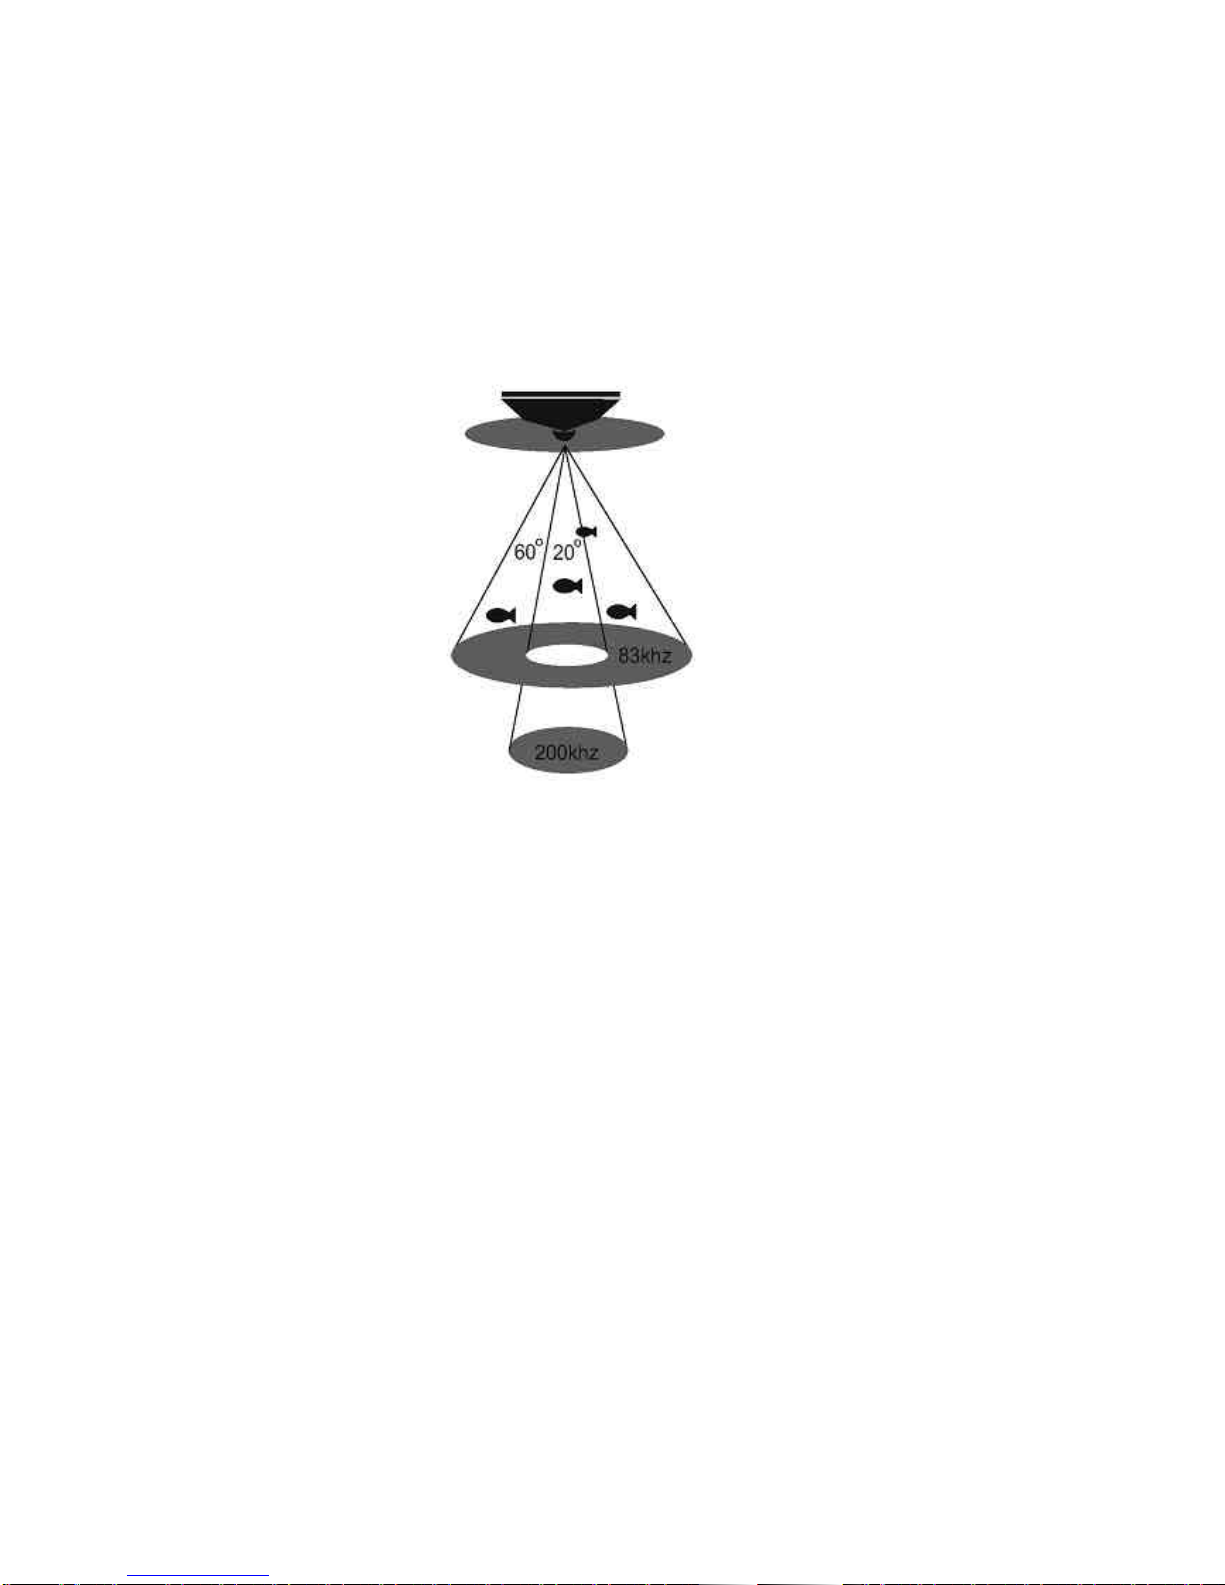
Dual Beam Sonar
The Condor 242 dc fishfinder adopts a Dual Beam 200 / 83 kHz sonar system (or Double
Cone), with which the sonar coverage has two different areas of 20°/60°, which enable you
to get better performances in deep sounding and best bottom information. By the dual
beam sonar setting, you can use the narrow 20° beam to penetrate the deep bottom, while
you are still able to use the wide 60° beam for a wide detection
With the dual beam sonar system, the sonar provides you an excellent detecting
performance from shallow to very deep water in both fresh and salt water.
6
Installation
Do not begin the installation unless you have read the manual instruction carefully, which
contains information critical to the correct installation of your Fishfinder. And for any
problems you meet during the installation, please contact your local dealer for help.
Tranducer transom location (suction cup version)
1. Select the mounting location
When you select a mounting location for the transducer, the flowing should be considered
in advance.
The sonar transmission / reception can be affected severely in turbulent water, so please
do not mount transducer behind strakes, rows of rivet, water intake, discharge port, the
immediate area of the propeller(s). These areas can create turbulence when the boat
moves in a high speed.
Do not mount the transducer in locations where it may be vibrate severely when the boat’s
engine launches or stop.
After the installation is finished, make sure the transducer is pointed down straightly to the
water surface.
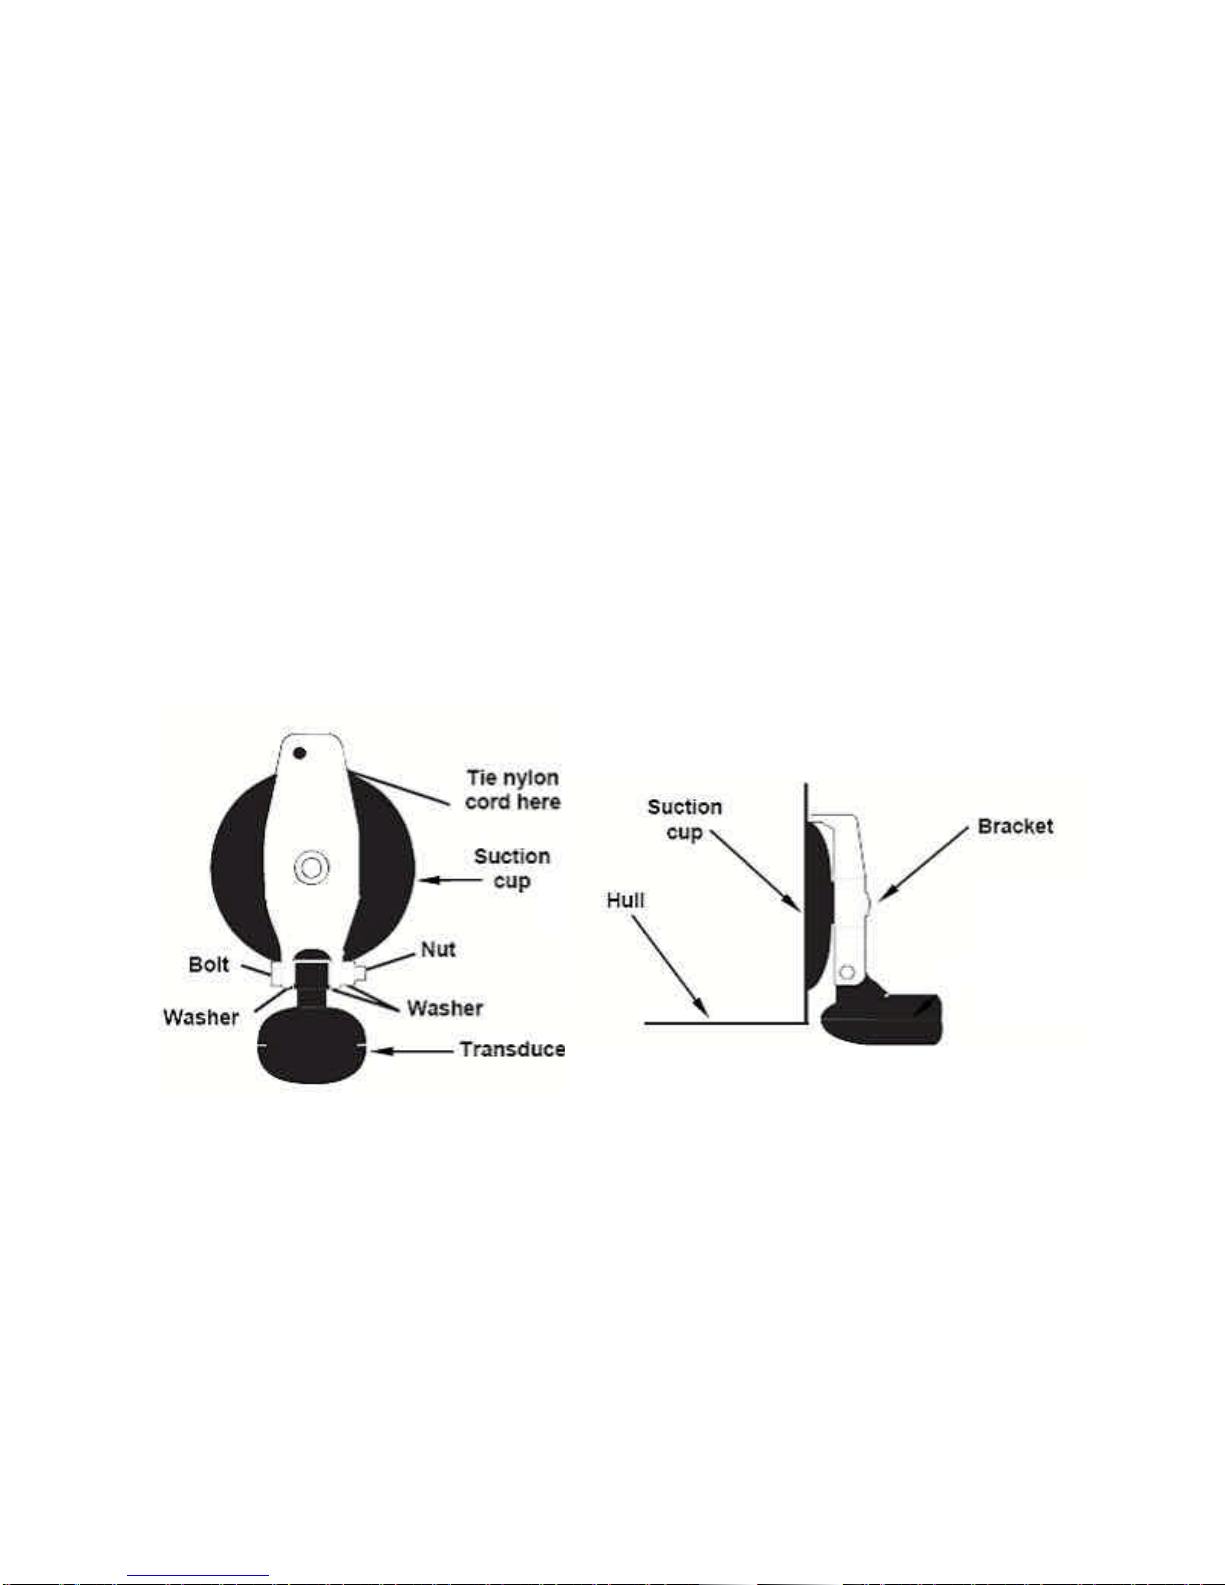
2. Portable Transducer Assembly
Assemble the transducer and the suction cup as shown in the following illustrations.
Make sure there is one washer on each side of the transducer, inside the bracket. Slide the other
washer over the end of the bolt and screw on the nut.
Screw the suction cup onto the bracket using the supplied screw and flat washer. Tie the
nylon cord through the hole in the top of the bracket. When using the transducer, tie the
other end of the nylon cord to the boat. This will help prevent losing the transducer if it
comes off.

7
Clean the chosen area of the hull before attaching the suction cup. Locate the transducer
on the hull as shown in the following figure. Don't let the bracket extend below the hull,
because water pressure against it can cause the suction cup to come off at speed.
For optimum operation, the portable transducer should be adjusted so that it is parallel to
the ground. For more information on this, see the segment in the unit's operation manual
on Transducer Orientation and Fish Arches.
Moisten the suction cup, then press it onto the hull as firmly as possible. Tie the nylon cord
to the boat and set the power pack and sonar unit in a location for easy viewing. Your
portable sonar is now ready for use.
3. Test the initial installation
To get a better installation of the transducer, we suggest you testing the initial installation
and adjust the transducer according to the test outcome. Before the test, please make
certain you have finished the installation of the sonar unit and properly connect the
transducer cable to the sonar unit. Also make sure the distance between the transducer
and bottom is not beyond the depth capability of your Fishfinder.
a) Power up the sonar unit and see whether there is sonar information on display. If yes, it
means the sonar unit is properly connected to the transducer. If not, please check the
connection between the sonar unit and the transducer.
b) First run your boat at a low speed. See the sonar information on the screen. If the sonar
display comes out normal, then speed up your boat. Always observe the sonar display
during the course. If signal losing or abnormal sonar display happens when the boat
run at a certain speed, note the speed of your boat.
c) Adjust the transducer in a small scope and run the boat at the noted speed (step 2).
Then observe the sonar display. If the sonar display is normal, go to the next step. If not,
please adjust the transducer until it comes out normal. If by any means a normal sonar
display can not be obtained, then it is necessary for you to relocate the position of the
transducer.
Portable Sonar Installation
You have the sonar Condor 242 DC portable version, that uses the portable power box.
The power pack and the portable transducer expand the uses for your sonar.
It doesn’t matter whether you have the portable version with the suction cup transducer
or with the floating transducer, you can use your unit on your boat or take it to the dock,
on a float tube, on an ice fishing trip or use it as a second sonar in a friend's boat.
The portable power pack includes the battery box and a portable transducer. The instrument
to be powered requires eight AA alkaline batteries (batteries are not included).
To use a portable power pack, you have to install the batteries and then attach the sonar
unit to the power pack's bracket. Plug in the power and the transducer cables and you're
ready to fish. The portable box has a quick-release mounting bracket built into the case.
8
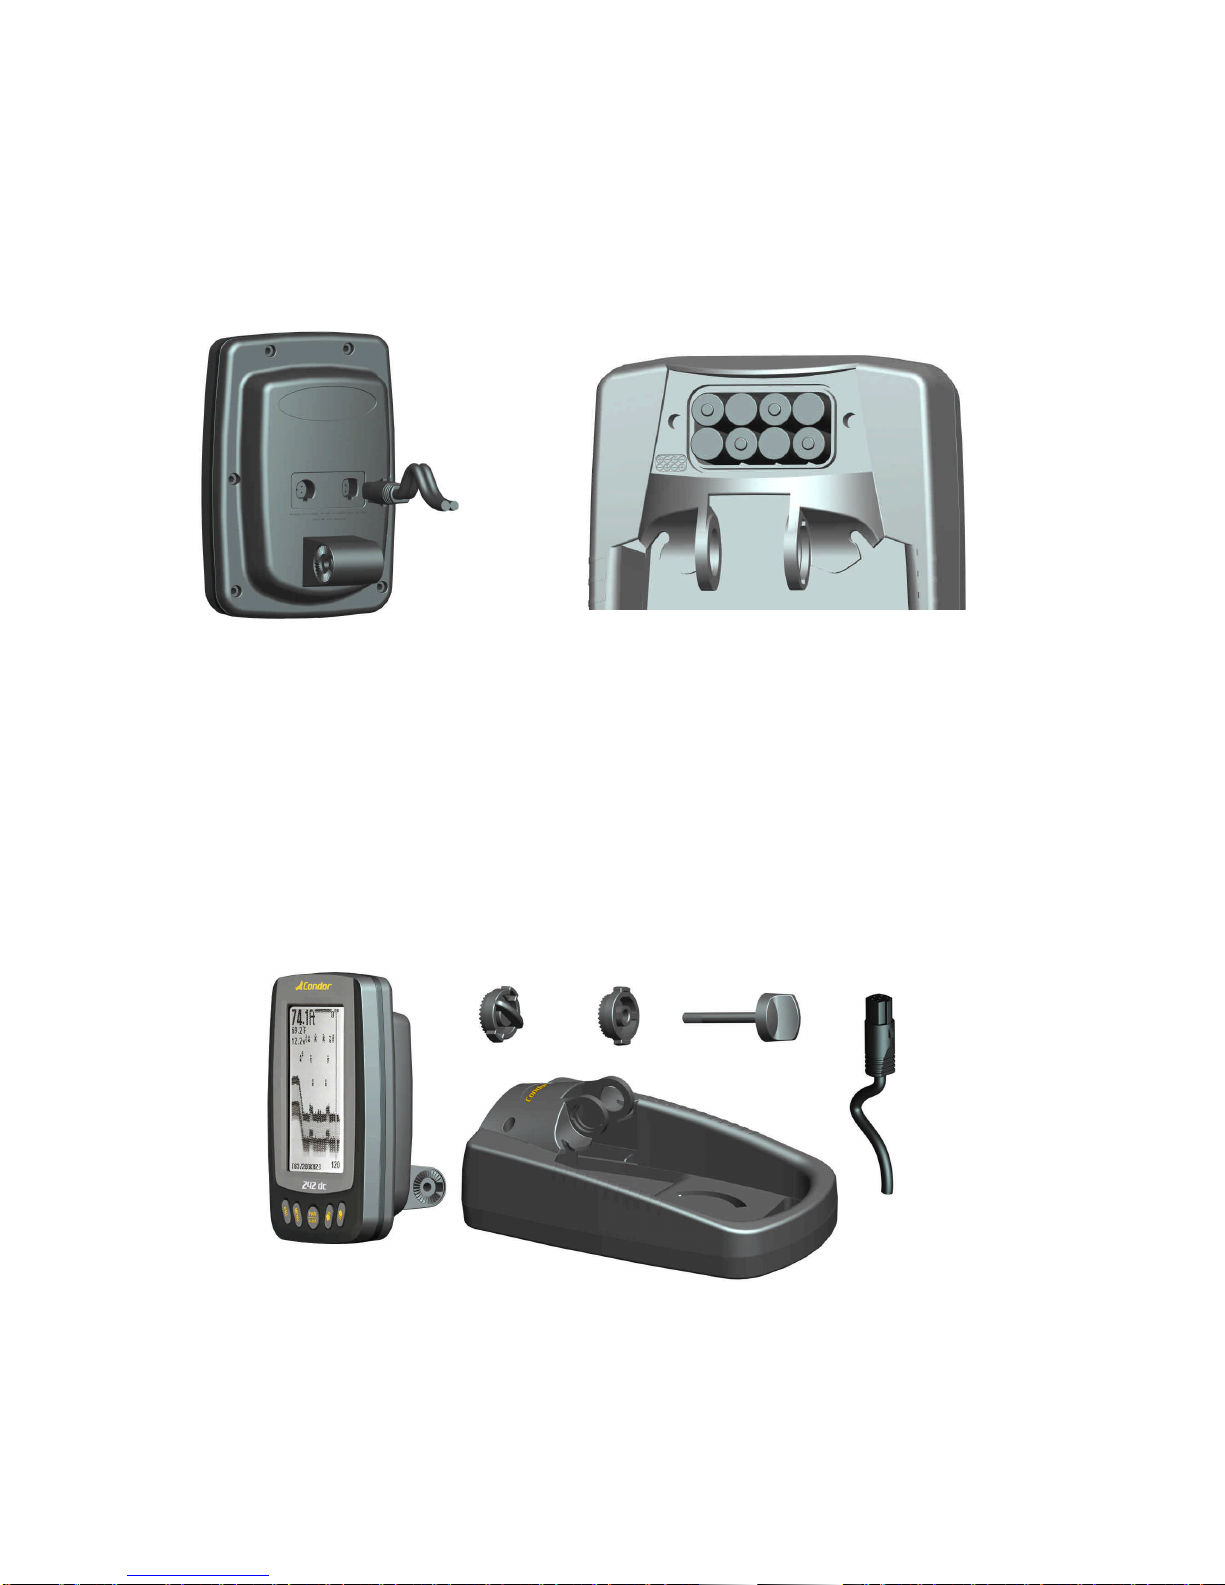
Installing the Batteries
Open the battery case, that is on the rear top of the box, with a screw driver. Insert eight
"AA" size batteries into the battery adapter, place it into the battery compartment and then
close the battery cover with the screw driver. To correctly orient the batteries follow the
small image that is shown near the battery slot.
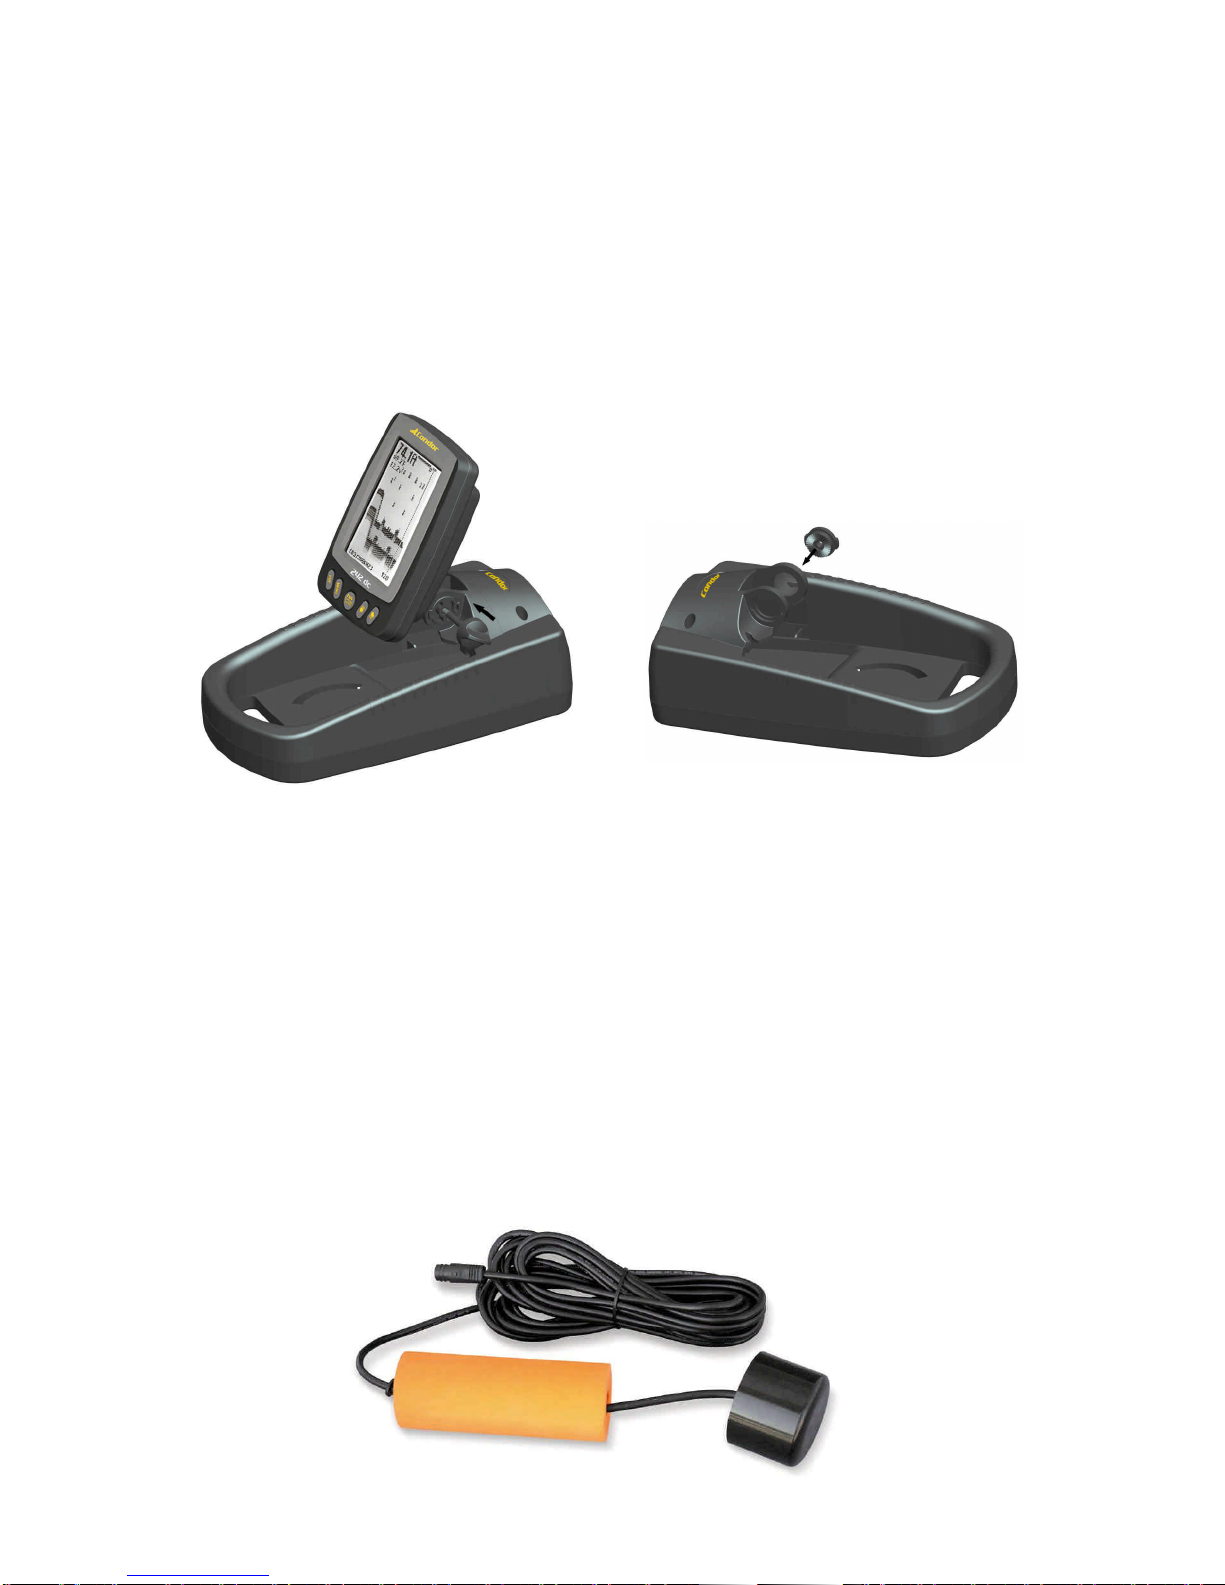
Mounting the Unit
A quick-release mount is built into the top of the portable power pack. To attach the unit, first
plug in the cable connector. Then, hold the sonar unit vertically and slide it onto the bracket
from above. (The back of the unit should be touching the front of the bracket as you lower it
into position). Finally you should lock the display unit to the bracket tightening the rear nut.s To
adjust the viewing angle, release the nut with one hand, then tilt the unit with your other
hand. Tight again the nut, and the unit locks into the new position. To remove the unit from
the power box, release the nut completely and pull the unit to you.
Turn the sonar unit on. If it works, turn it off and finish assembling the portable transducer.
If it doesn't work, make sure the batteries are making good contact against the battery
contacts. Also make sure the batteries are oriented correctly in the battery case.
9
If it still doesn't work, check the battery voltage. Most complaints we hear about portable
units result from stale batteries. Make sure you buy fresh ones. Always remove batteries
from the compartment when storing the unit because dead batteries can leak and corrode
the contacts.
In cold weather the efficiency of dry cell batteries drops with the temperature. We find it a
good idea to have the batteries and the sonar unit good and warm before we leave home.
If the batteries do lose a charge, you can sometimes restore them by placing them in a
warm room or car interior. A better way is to replace them with batteries that have been
kept warm.
WARNING: Never heat batteries over an open flame or direct hot air onto them. A fire or
explosion could result.
Floating transducer version
If you have the floating transducer portable version the installation and the working
operation are more simple than ever.
You have only to insert the plug of the transducer into the rear side of the unit and put the
round transducer into the water. This special and easy-to-use transducer has a floating
element (see the image below) that floats on the water surface, allowing the round sensor
to go automatically into the right position to read the bottom and fish!
 Loading...