

Conde LaserMPrints C8600, LaserMPrints C8800 Quick Start Up Manual
LaserMPrints™ C8600 / C8800 Quick Start-Up Guide
This document will guide you through the proper set-up in order to achieve the best possible output
to our line of heat transfer papers.
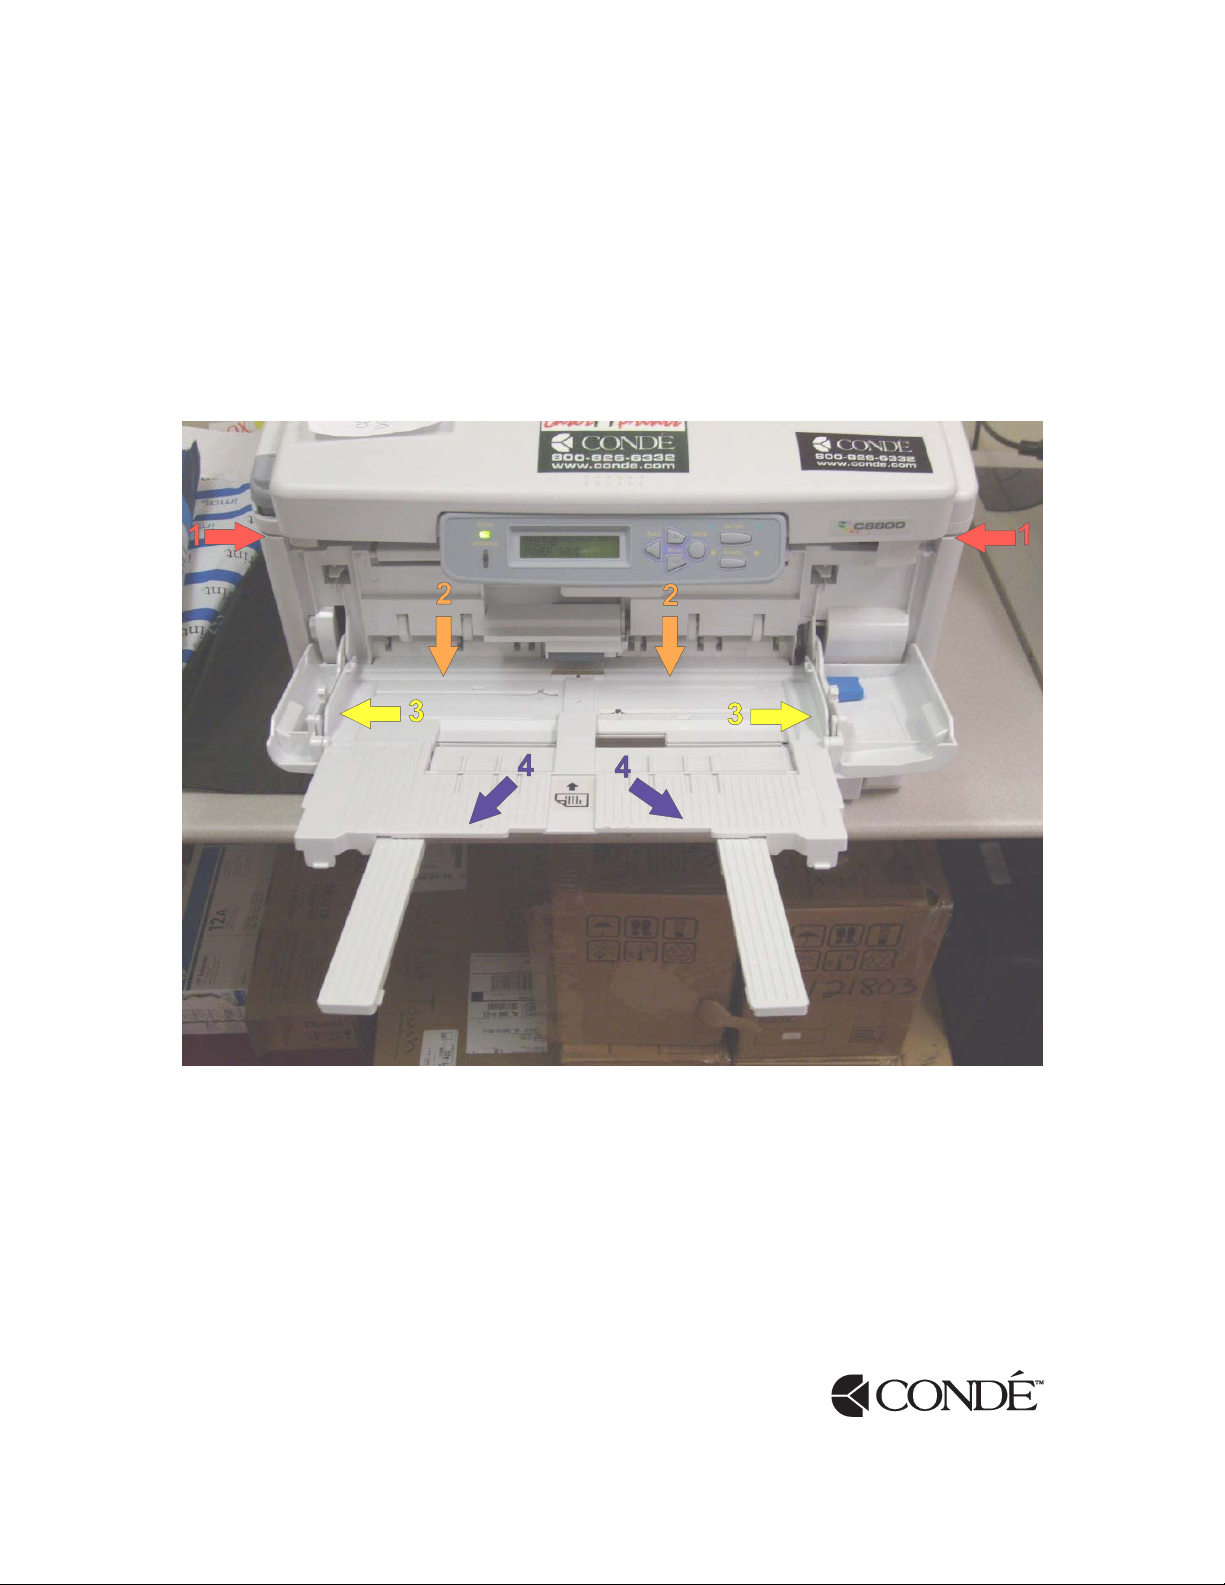
Step 1 – Set Up Multi-Purpose Tray
Transfer paper should always load in the Multi-Purpose Tray of the LaserMPrints C8600/C8800
unit. Do not load transfer paper in Tray 1.
1) Pull the Multi-Purpose Tray down from the front of the printer. Tabs are located on either
side of the Multi Purpose Tray.
2) Gently push down on the base of the Multi-Purpose Tray until it locks into the LOAD
position.
3) Adjust paper guides to feed 11” side of media (for both Letter and Tabloid printing).
4) Extend Tray Tab to hold paper in place.
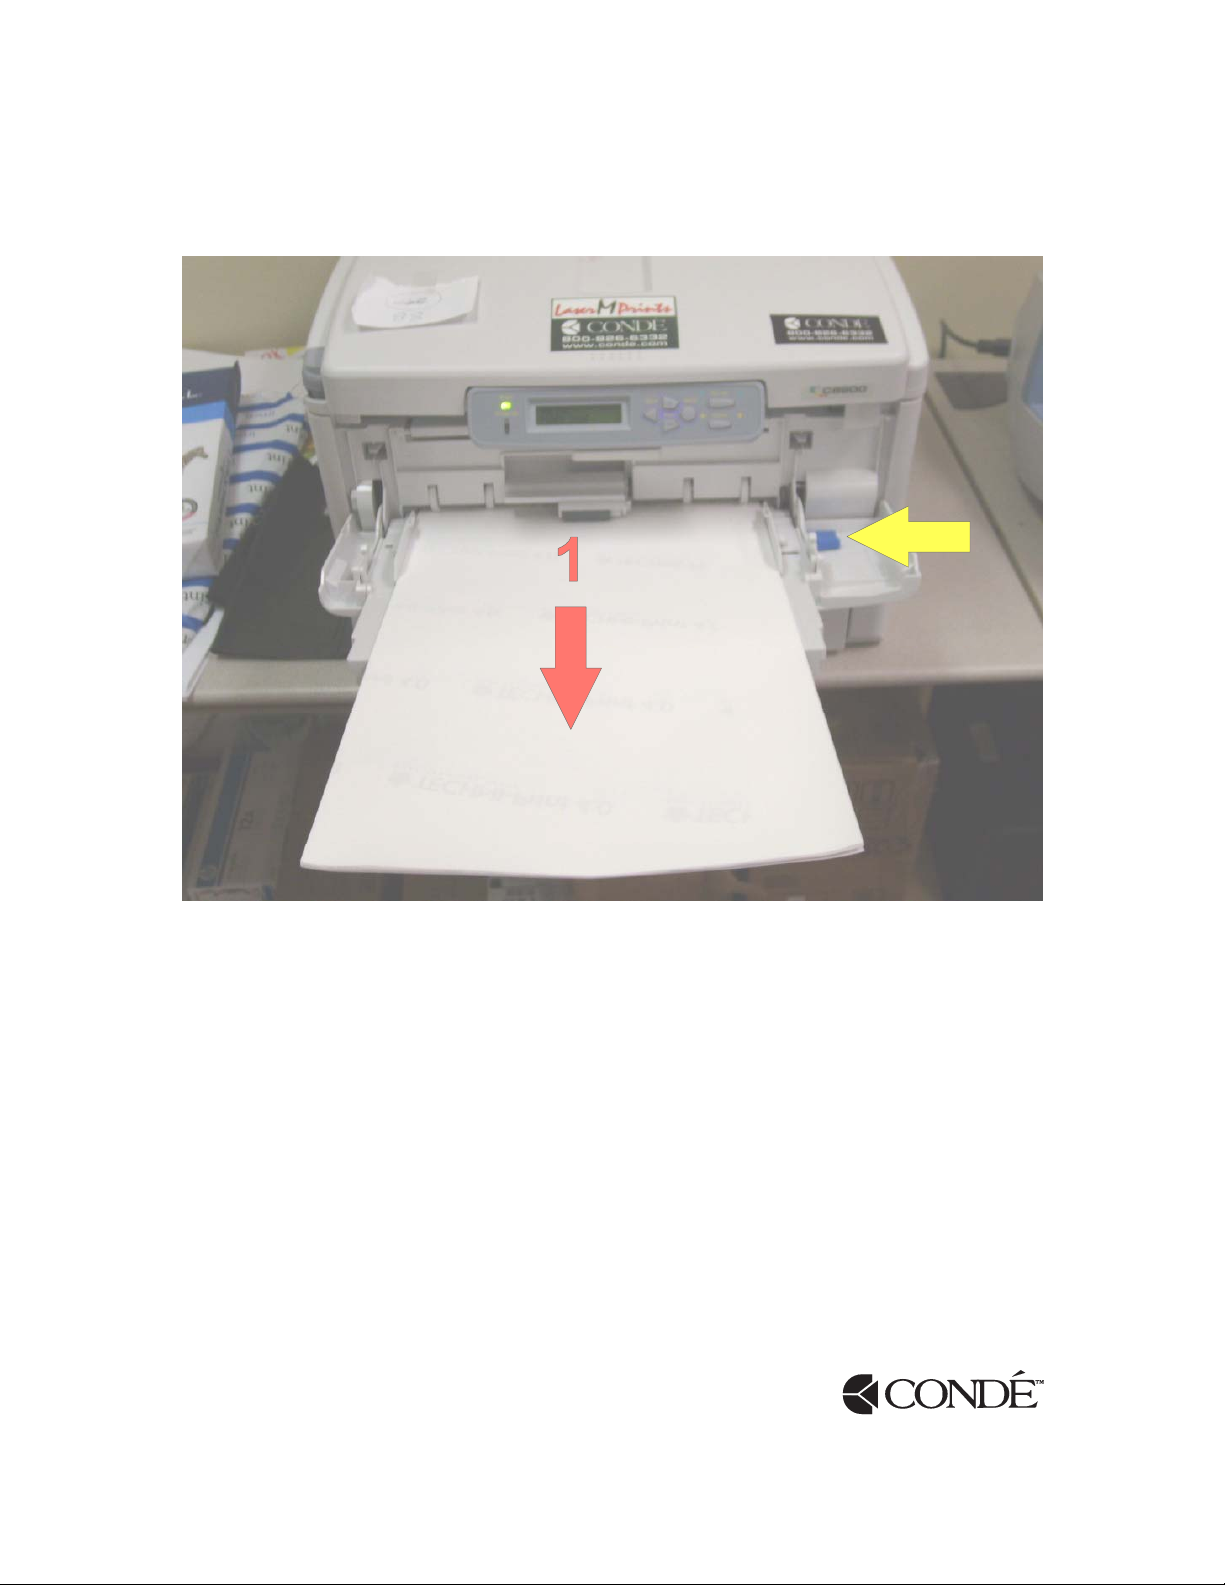
Step 2 – Load Transfer Paper in Multi-Purpose Tray
2
(1) Load Transfer Paper “Image Side Up” in Multi-Purpose Tray.
(2) Press Blue Tab to lock Transfer Paper in Multi-Purpose Tray.
Note: Remember that both Letter (8.5” x 11”) and Tabloid (11” x 17”) transfer papers should
always load into the Multi-Purpose Tray with the 11” side of the page inserted into the tray.
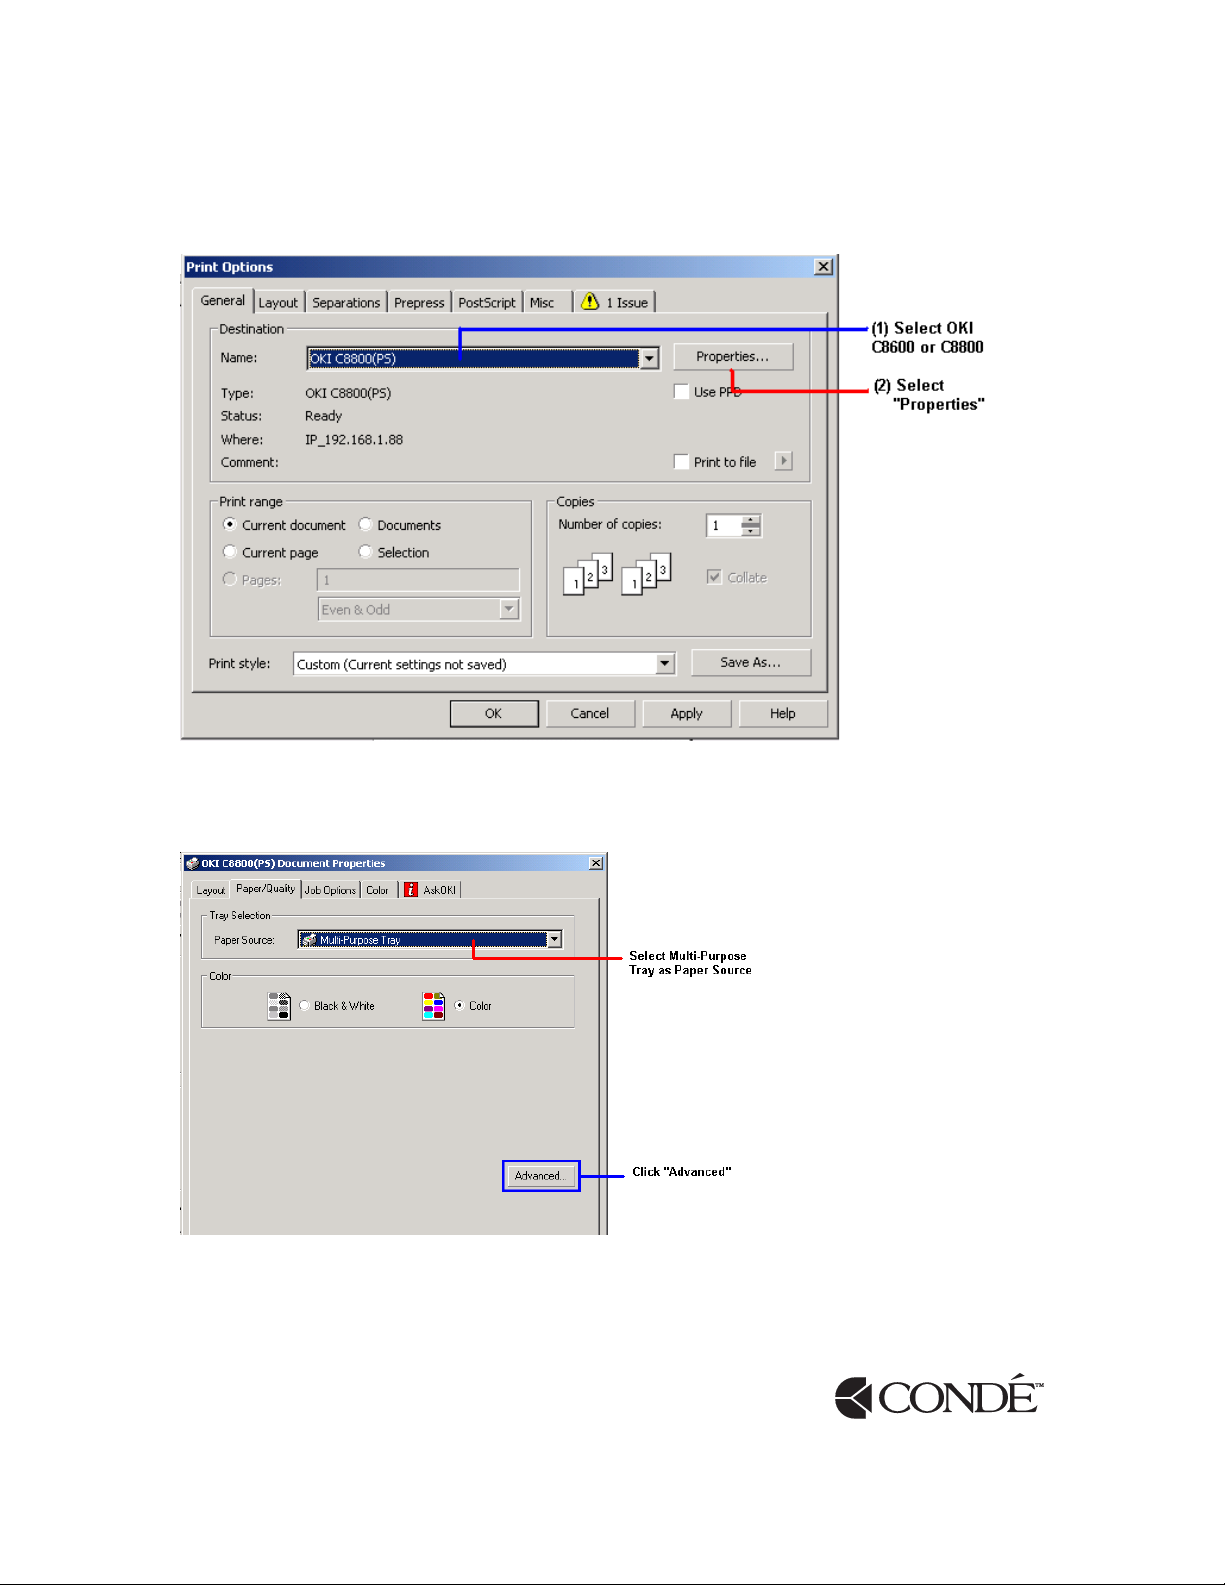
Step 3 – Select Paper Settings for Transfer Paper
On “Print Options”, Select OKI C8600 or C8800 and click “Properties” Tab.
On “OKI C8600/C8800 Document Properties” Screen:
1) Set your Paper Source as Multi-Purpose Tray.
2) Click Advanced button.
 Loading...