

Page 1
Installation Guide
ACMG10
+61 3 9012 6126 conciergedisplays.co
Page 2
Thank you and congratulations on purchasing your
Concierge ACMG10 product. Your package should contain
the following:
• ACMG10 - 10” Room Booking Panel,
• Plug Pack Power Supply,
• T-Bar Table Stand,
• Connector Locking Bracket, and
• Concierge Details Card.
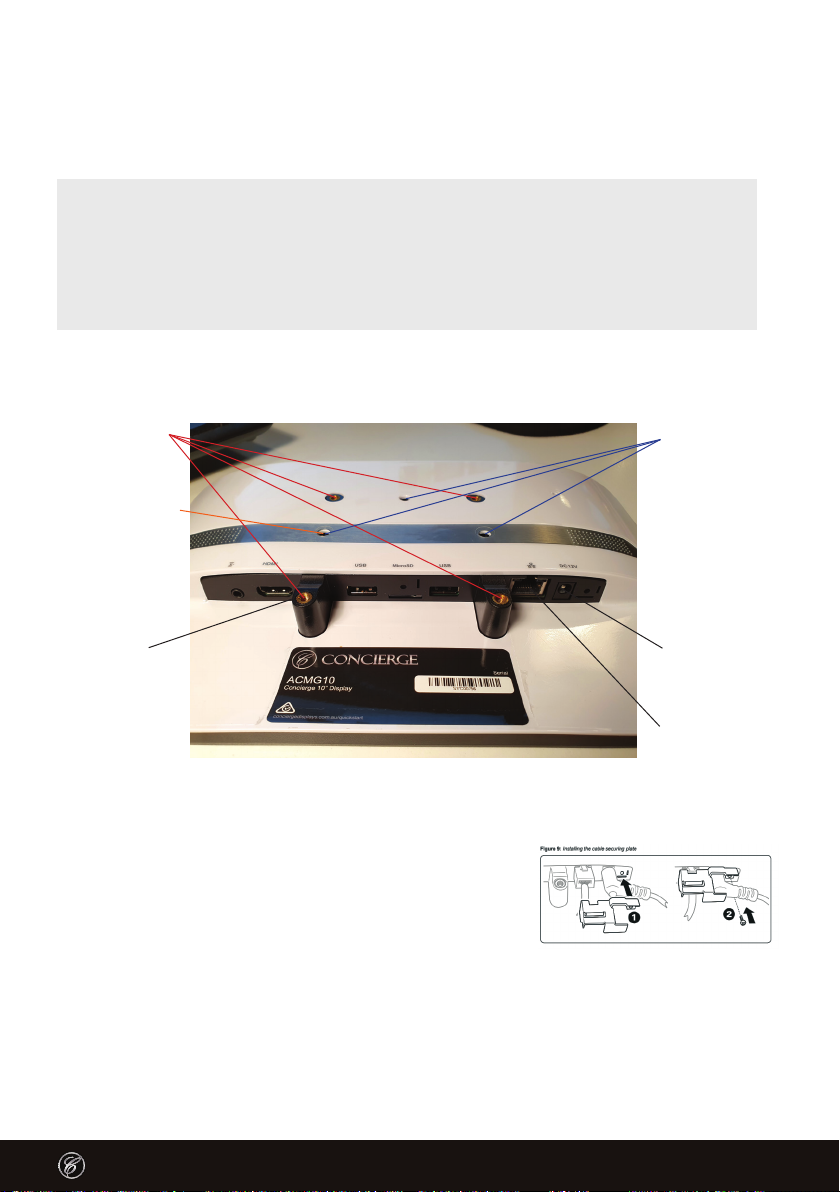
Hardware features
VESA Mounts
T-Bar Stand
Mounting Point
Power LED
Securing the network and power connections
1. Insert the Network connector only if Power over
Ethernet (PoE) is available. Insert both Network
and Power connections when PoE is not available.
2. Secure the connectors with the supplied bracket
and screw as shown on right.
Please note: The bracket is designed for network connectors with no cable boot.
The bracket will not t moulded network cables or cables with boots installed.
Wall mounting
Screw Holes
12VDC Power
PoE LAN Port
Note: When installed on a wall, the LAN connector locking tab can be dicult to access. Using a small at
bladed screwdriver may help. Removal of the panel may also be required. Please be careful when connecting and
disconnecting the network cable. Excessive force can damage the connector.
Concierge Displays Pty Ltd
Page 3
Mounting your Concierge ACMG10
Your Concierge ACMG10 panel can be mounted using the Plastic Rear Cover or an
aftermarket 75 x 75 VESA mounting bracket. Prepare the location and cable access holes
as required for your specic application.
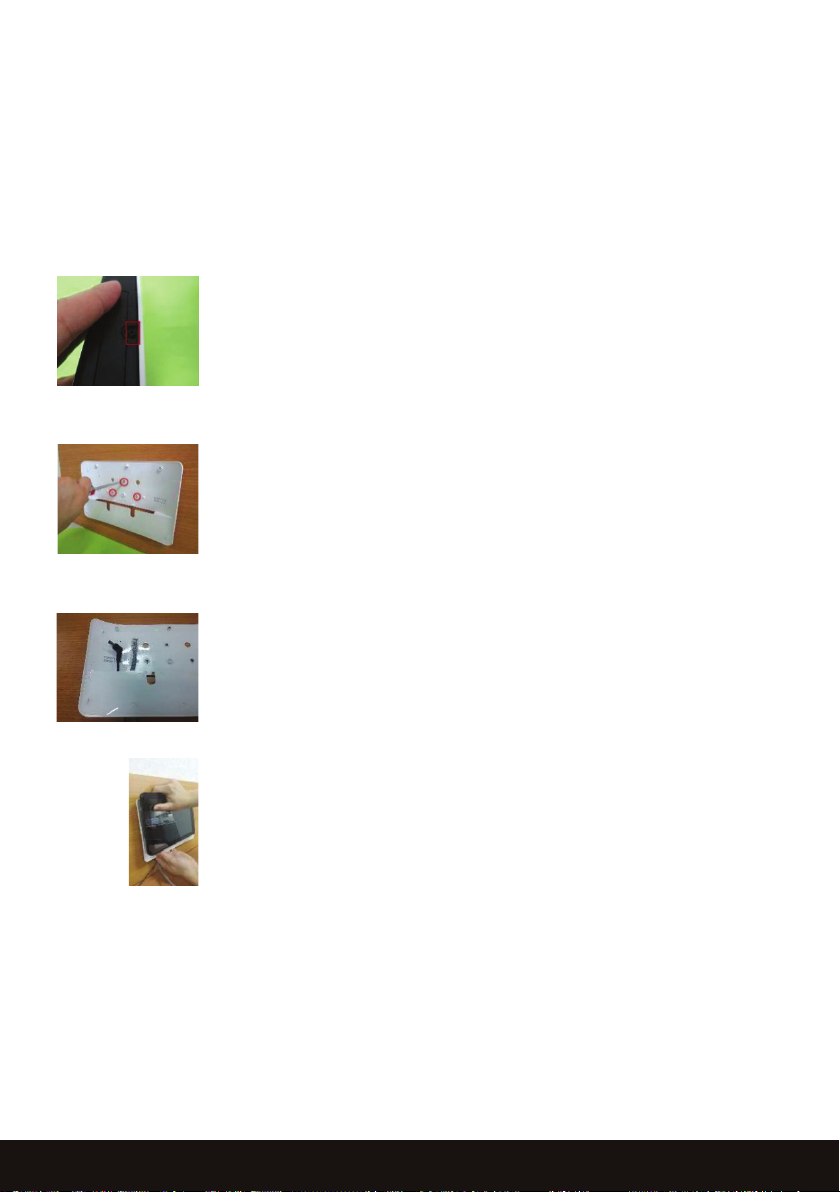
Rear Cover Mounting Bracket
1. Remove the rear cover screw at the top and place
the unit face down on the supplied packaging
then gently prise off the cover starting from the
top left and right corners working your way down.
2. Secure the back cover to the mounting surface
and secure with screws appropriate for the
material using the 3 holes shown. Ensure that the
height of the screw heads is no more than 3mm.
3. Route the network and or power cables through
the cover as shown in the image to the right.
4. Plug and network and power connectors and
carefully press the ACMG10 into the rear cover
until it clicks. Gently squeeze each corner
between your thumb and forenger until the
cover is completely in place. Re-install the screw
in the top of the panel.
+61 3 9012 6126 conciergedisplays.co
Page 4
VESA Mounting Bracket
Secure the 75 x 75 VESA mounting bracket to the panel
using 4 x M4 screws where the thread will be no longer
than 4mm into the panel.
After installing your ACMG10, please remove the two
plastic lms protecting the front of the LCD.
Window Mounting (ACMG10WM) and Flush Wall Mounting (ACMG10FM) options are also
available, please consult your Concierge Dealer or visit www.conciergedisplays.co for
information on these mounting options.
IP network connection and addressing
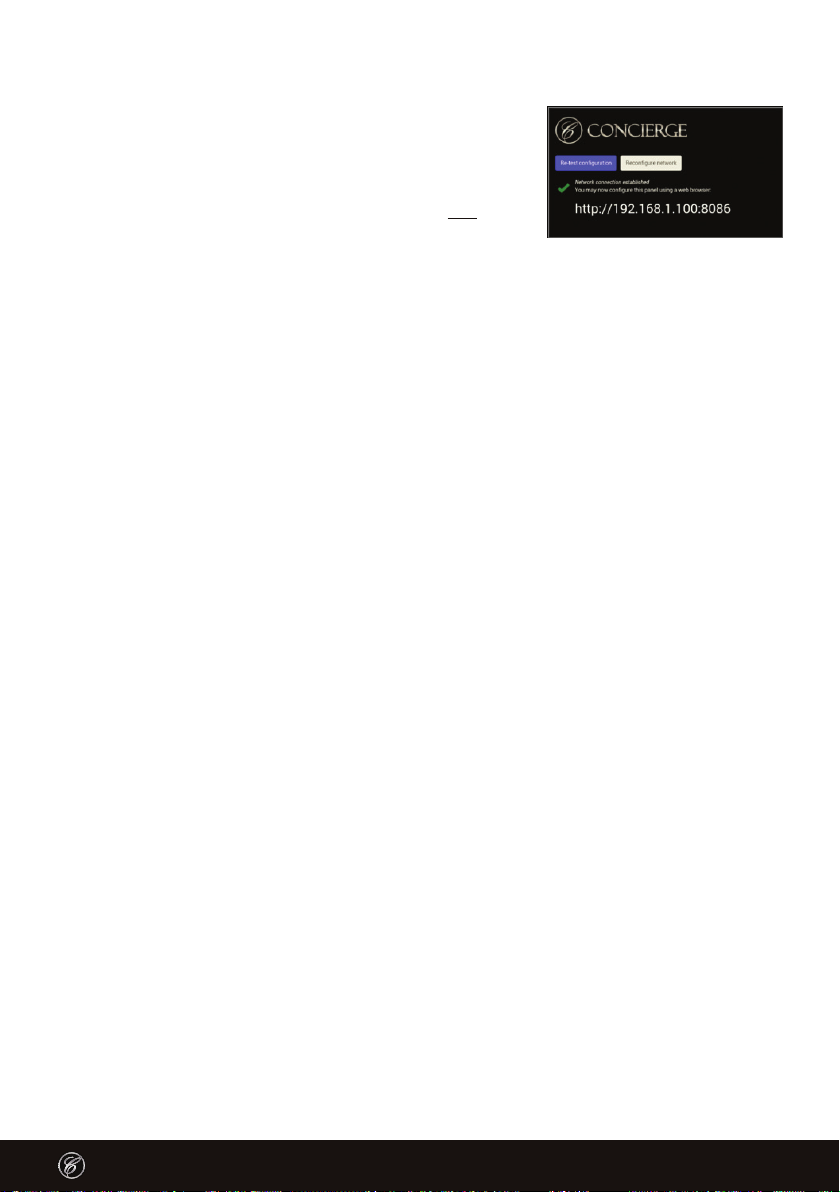
When your Concierge ACMG10 panel powers up it will try to connect to a network.
The unit is congured for DHCP.
After powering up, the panel will show the IP Address details on the splash screen shown
below. If the unit does not show an IP address, and for additional conguration instructions
please refer to the User Guide available at: https://conciergedisplays.co/quickstart/
Concierge recommends network and power connections by Power over Ethernet
installation. WiFi is turned off by default. To turn WiFi on, select Basic Setting on the
ACMG10 during boot up, default password is admin. Then follow the prompts to
active WiFi.
Recording your installation details
Your Concierge ACMG10 was supplied with a Concierge Details Card. Use this card
to record specic information about this panel like location and IP Address.
This information is important to anyone conguring and setting up the unit particularly if
there are multiple locations.
Concierge Displays Pty Ltd
+61 3 9012 6126 conciergedisplays.co
 Loading...