

Page 1
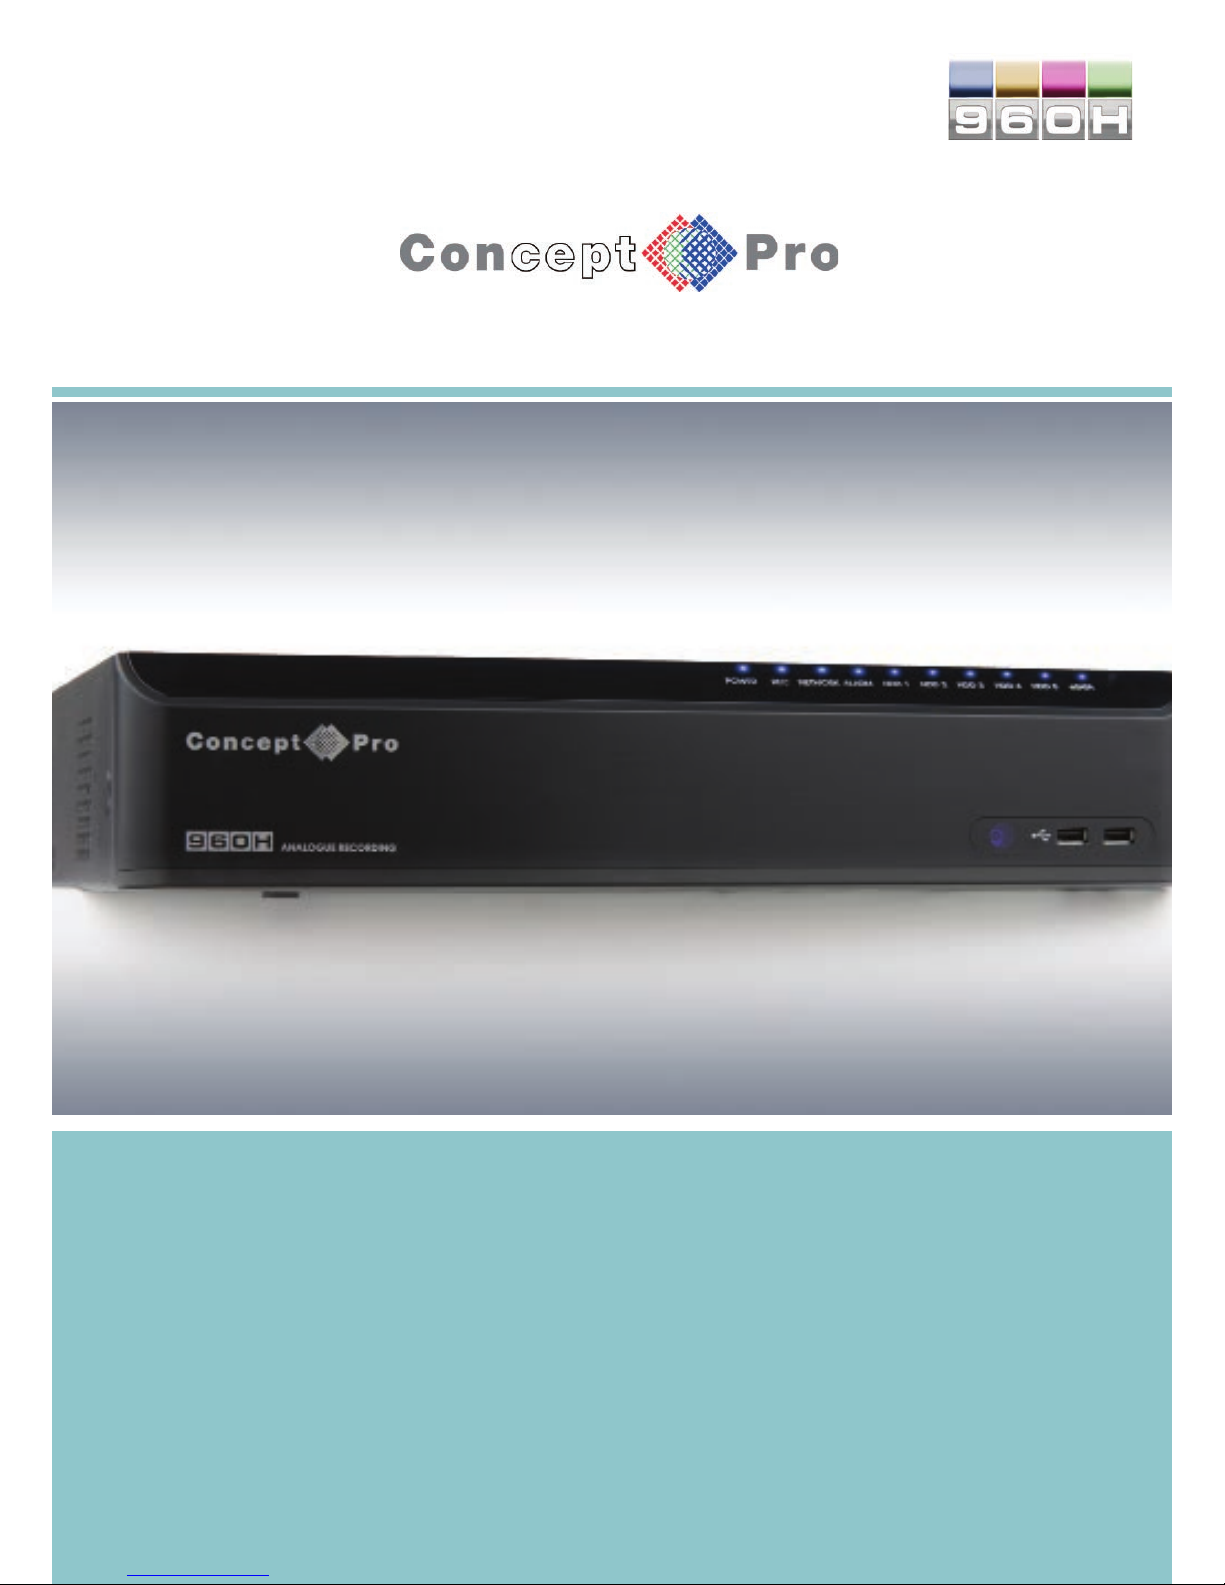
USER MANUAL
4, 8 & 16 Channel Full HD DVR
VXH960-4 | VXH960-8 | VXH960-16
Page 2

Copyright
This manual without the manufacturer’s approved copy and reprinted partially or in full, or translated into another language is prohibited.
Limitation of Liability
This product is designed to prevent re and theft is not the main means. We shall not be liable for accidents or damage by using this
product can result in liability for accidents or damage
In order to improve the performance of the product without prior notice to the product may be a rmware upgrade.
Page 3
Content
Contents
Overview 1
1 Safety Instruction
2 Key Features
3 What’s included
4 Front Panel
5 Rear Panel
6 Remote Control At a Glance
Installation 7
7 Basic Layout
8 Connecting to an external device
Getting Started 14
14 Log in / out
16 Live Screen At a Glance
System Setting 25
25 To enter to the System Setup menu
26 Camera Setting
32 Display Setting
36 Audio Setup
37 User Setting
39 Network Setup
43 System Setting
47 Storage
50 Event Set
Record Setting 60
60 To enter the Record Setup menu
60 Record Setup
Search 65
65 To enter to the Search menu while
in monitoring
66 Time search menu while in
playback mode
67 Thumbnail search menu
67 Event Search menu
Playback 68
68 Playback Control
70 Bookmarking
Archiving 71
71 To enter the Archive menu
72 Reserved data management
Web Viewer 74
74 What is the Web Viewer?
76 Live
80 Search
82 Setup
Mobile Viewer 93
93 VXH264 Pro APP
Archive Viewer 100
100 Getting started with the Backup Player
101 Backup Player At a Glance
Appendix 103
103 Appendix A: Speci cation
105 Appendix B. Troubleshooting (FAQ)
106 Appendix C: Con guring a Netgear DG384 router
109 Appendix D: Open Source License Report on
the Product
Page 4
11
Remove the power supply before proceeding.
Check the input voltage (AC100V–AC240V) to the power supply before connecting it.
Keep the product away from humidity.
Ensure that all devices connected to the product are correctly earthed.
Do not connect multiple devices to a single power socket.
Keep the product away from dust or combustible substances (ex: propane gas).
Do not touch it with wet hand.
Do not insert a conductor in the vent of the ventilation
Do not apply excessive force to unplug the power cord.
When cleaning on the surface, use a dry cloth.
Do not wipe the product using water, paint thinner or organic solvents.
Do not dismantle, repair or modify the product by your own, contact your supplier.
Do not apply force to or shake it while in use.
Warranty is void if the “warranty void if broken” sticker is broken
Secure at least 18 centimeter of distance between cooling fan and wall for a proper ventilation.
Install the product on a fl at surface.
Keep it away from direct sunlight.
Concept Pro will not have any responsibility for any accident or damage that may occur during the use
of the VXH960. For your safety, we provide a few instructions about installation, control, and cleaning
of the product. Please read carefully and comply with the instructions. The warranty will be void if the
“warranty void if broken” sticker is damaged or has been removed.
Before installation
Comply with the following instructions to prevent a re, explosion, system failure shock. or electric
shock.
In operation mode
Comply with the following instructions to prevent a re, explosion, system failure or electric shock.
Disassembly & Cleaning
While in use
During installation
To prevent an accident or physcial injury to operate the DVR correctly, please comply with the following:
Overview
Safety Instruction
Page 5

2
Overview
Key Features
Overview
Up to 16 channels of 960H camera video can be displayed at 400 fps in real time
Up to 16 channels of 960H camera video can be saved at maximum 400 (PAL) fps.
Simultaneous recording and playback of maximum 16 channels (at 120 fps @ 960H)
Supports H.264 HP (High Pro le) CODEC
Auto alarm feature with self-diagnostics on the system (HDD S.M.A.R.T, system temperature,
network error, FAN error, etc.)
Supports dual streaming for remote access service
Supports HDD extension (eSATA)
Various search methods (time, event, bookmark and thumbnail)
Mass storage backup via USB port or FTP server
Supports remote access and search using web browser
Dedicated smart phone applications that can be used with iOS and Andriod
1080p Full HD GUI
This product is capable of receiving up to 16 960H video and audio inputs, it is also able to record onto
a hard disk drive in realtime, as well as providing monitoring, playback and backup footages in excellent
quality of 960H resolution. It also provides transferring of video and audio data to the networked external
devices, which allows a remote monitoring environment for computers and smart phones.
Page 6
Overview
3 3
Overview
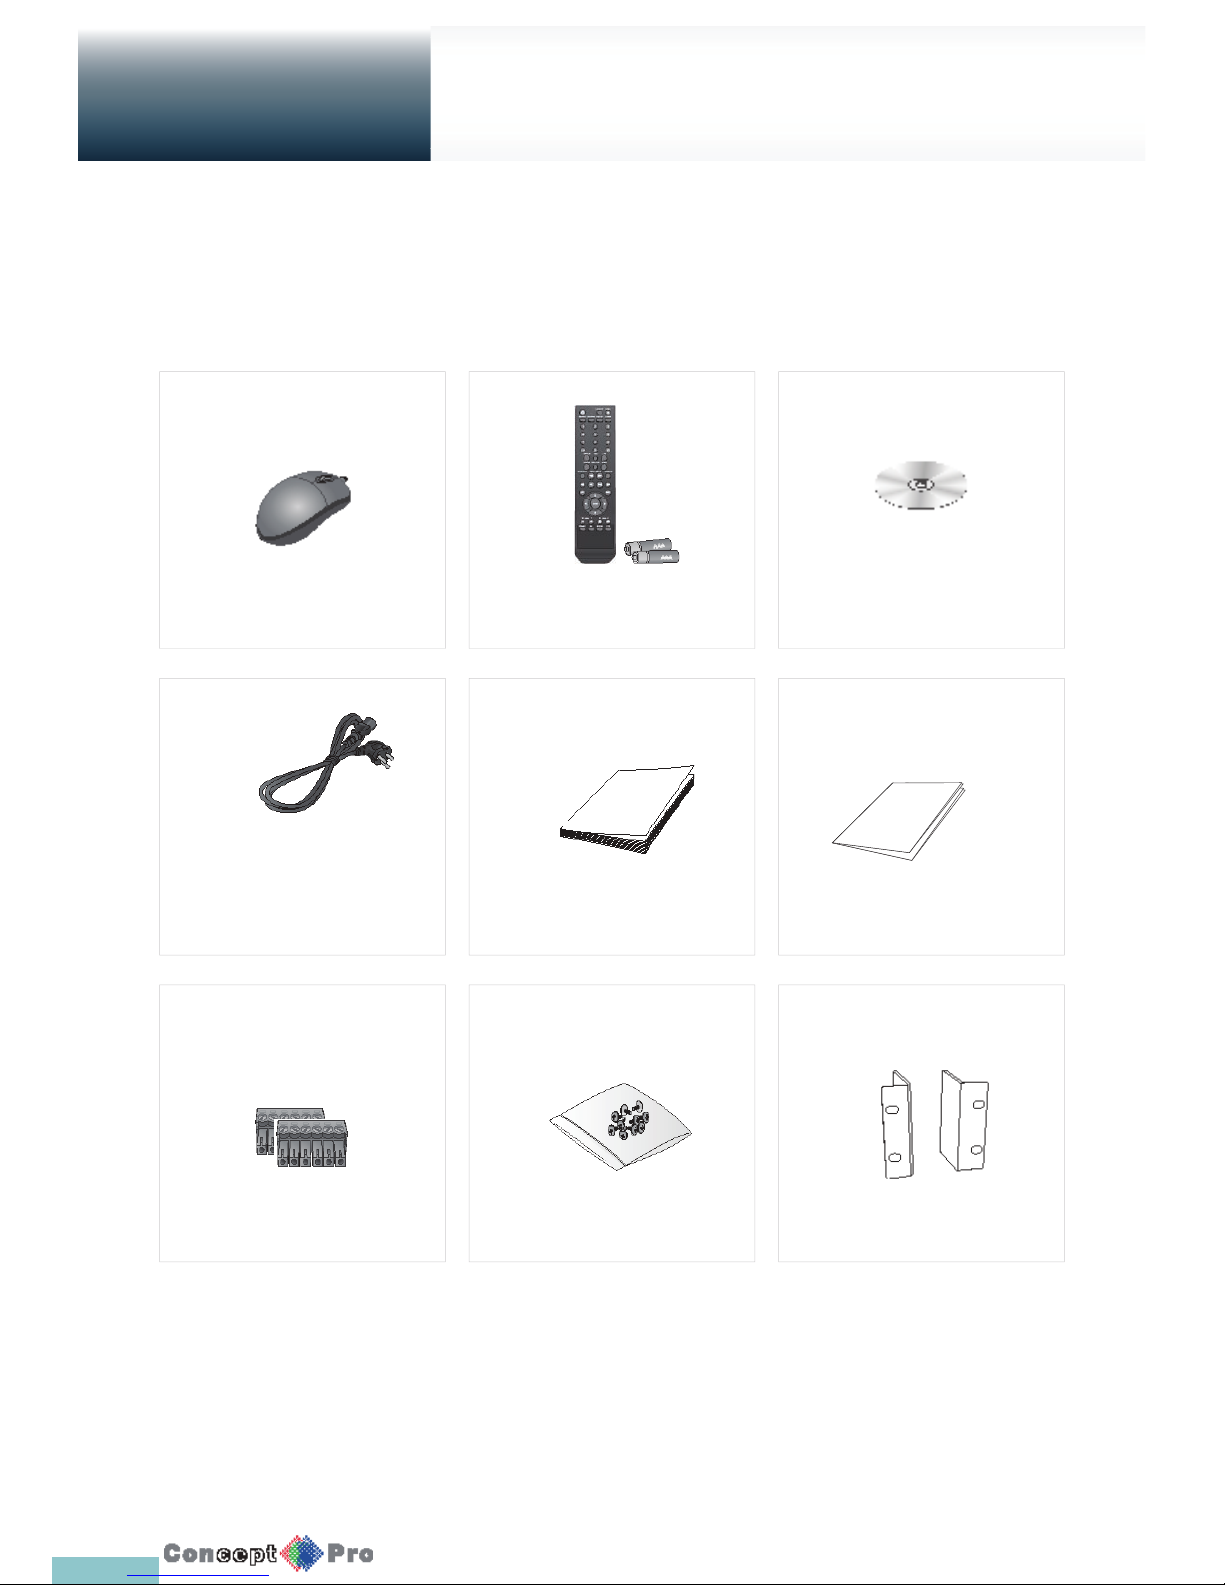
Mouse x1 User Manual CD x1
Terminal Blocks x2
Power Cable x1 User Manual x1
Screws (for fi xing rack mount)
Quick Guide x1
Rack Mounts
Remote Control x1
& Batteries (AAA x2)
Whats Included
Page 7
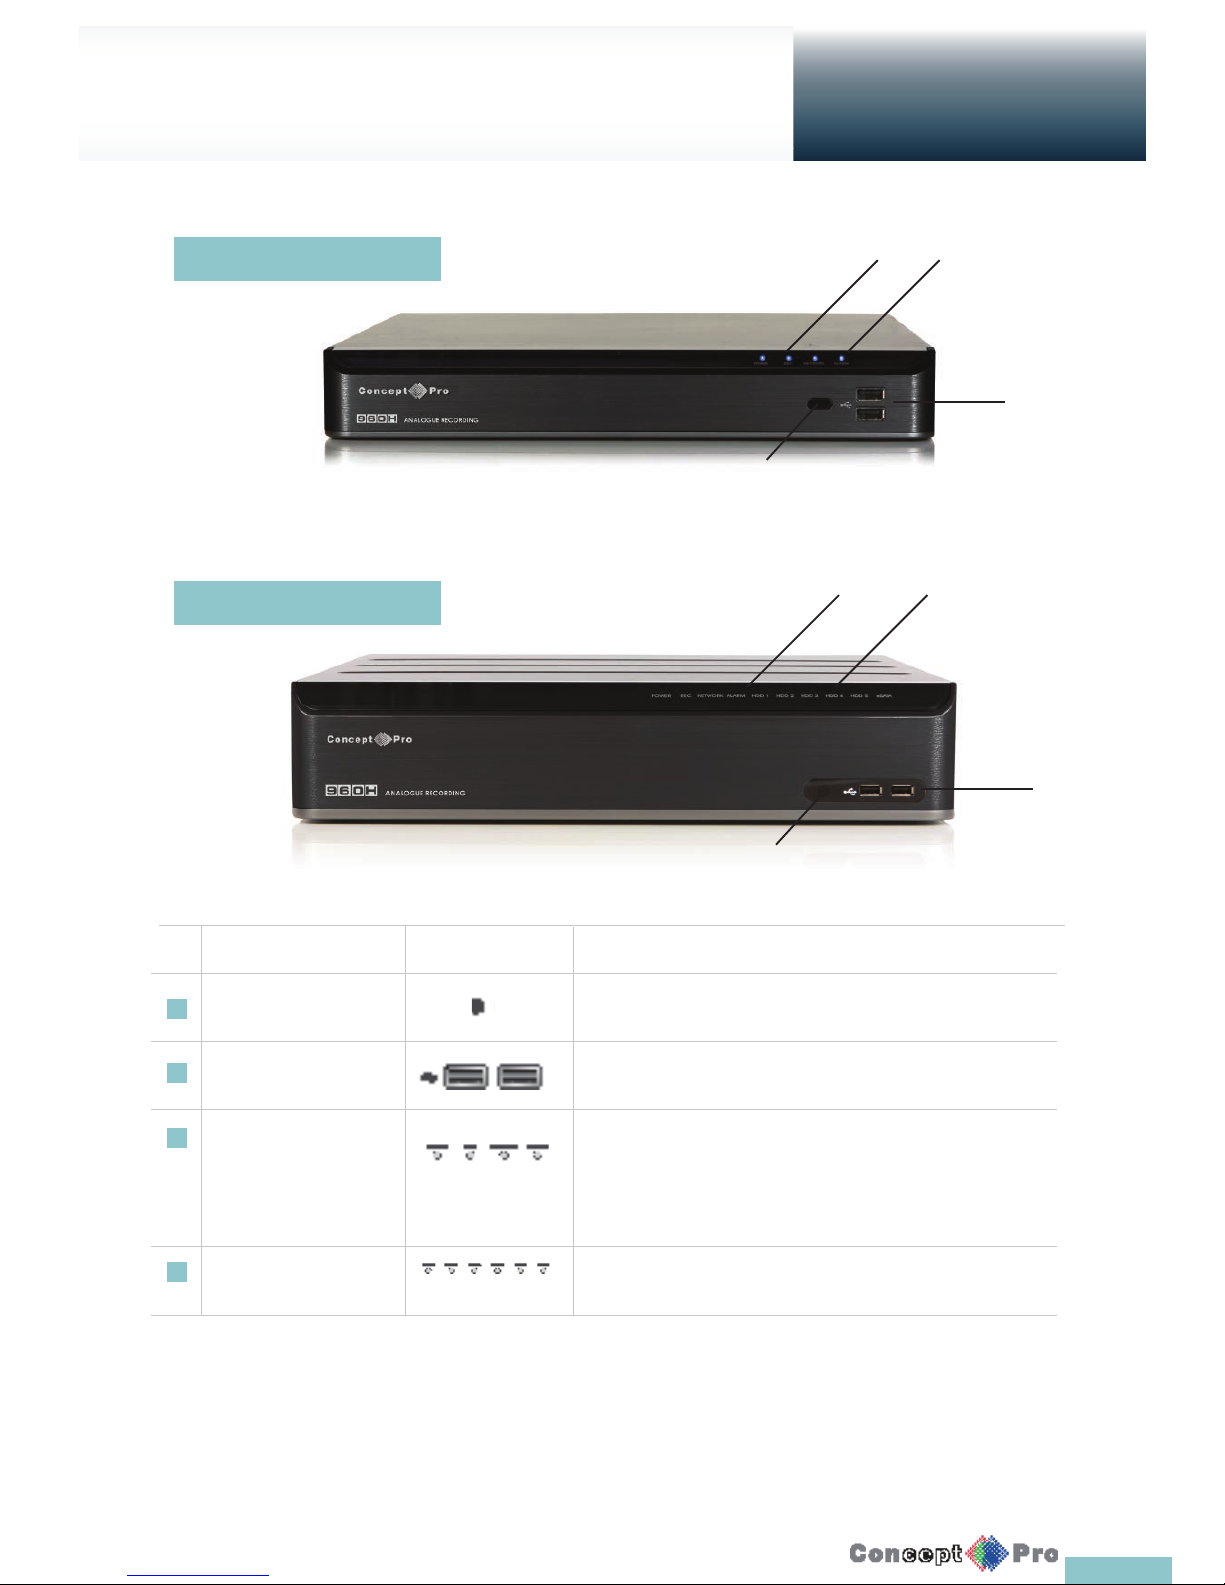
4
Front Panel
Overview
No. Name Description
1 IR Remote Control Receiver Receive the signal from the remote control.
2 USB For connecting USB devices such as a mouse or memory stick.
3 Status LED Show the status of power, recording or network connection together
with any corresponding alarm. 4
4 HDD 1~5 / eSata Indicates connection status of internal/external storage devices
1
3 4
2
1
3 4
2
4 Channel
8 & 16 Channel
Page 8
5
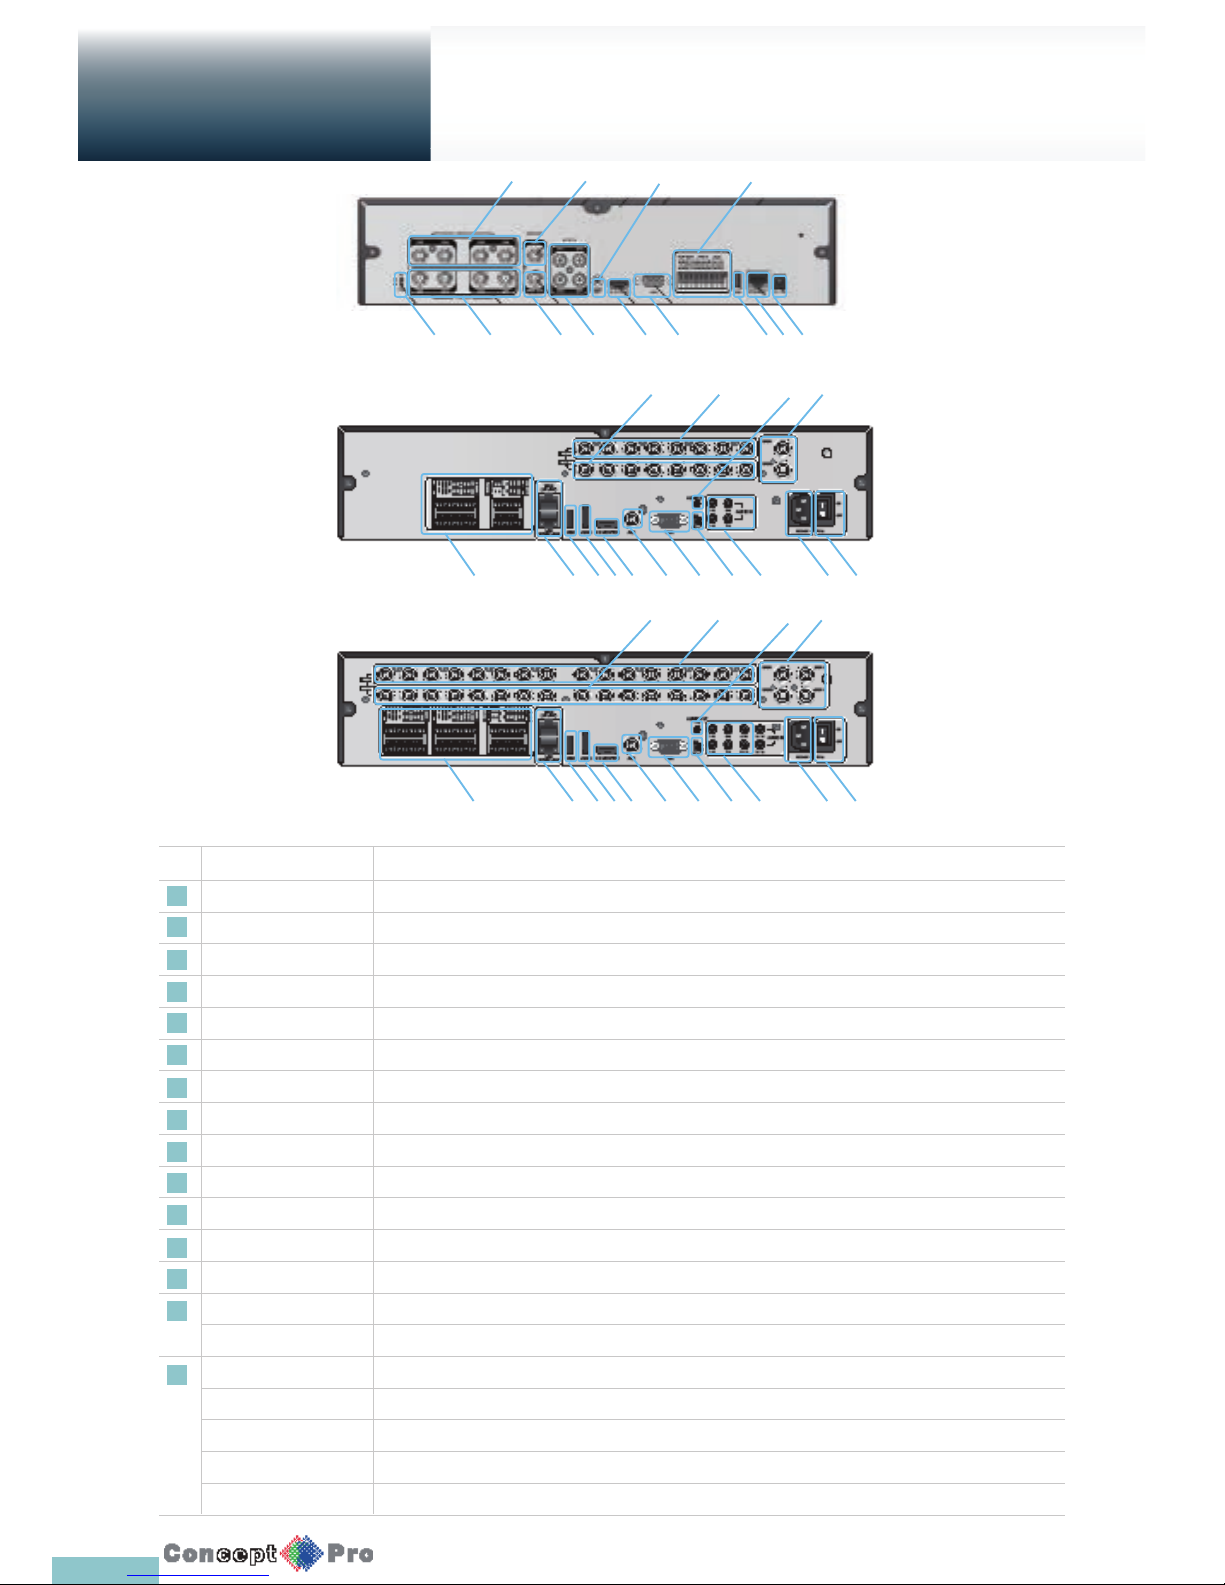
Rear Panel
Overview
No. Name Description
1 VIDEO IN Video input terminal for cameras.
2 LOOP OUT Video output to send a signal to an external video device.
3 AUDIO OUT Port for speaker connection.
4 SPOT Exclusive port for SPOT output only. (Connect to a monitor.)
5 Power Switch DVR power switch. Plug the power cord and turn this switch on.
6 100-240V (50/60Hz) Power input port.
7 AUDIO IN Port for audio input.
8 DIP Switch Switch to select a video type or an output type. Set to PAL
9 VGA VGA monitor video output port.
10 AUX Additional SPOT OUT port. (Connect to a monitor.)
11 HD-MONITOR HD monitor video output port (HDMI).
12 eSATA Connection port for external eSATA storage.
13 USB Used for connecting USB storage or mouse.
14 WAN(UPLINK) Network port for connection to the Internet, router or hub.
LAN(DOWN LINK) Port for connecting the dedicated network device. Do not share it with other device.
15 ALARM IN Alarm input port.
ALARM OUT Alarm out port. (TTL)
RELAY Relay terminal port.
RS485 Ports for communication with external devices such as PTZ camera and system keyboard.
RS232 Connection ports for signal cables to external devices such as PTZ camera, POS and ATM devices.
4 Channel
1
8
2 4 7 11 9 13 14 16
10 3 15
1
15 14 13 12 11 10 9 8 7 6 5
2
3
4
1
15 14 13 12 11 10 9 8 7 6 5
2
3
4
Page 9
6
Overview
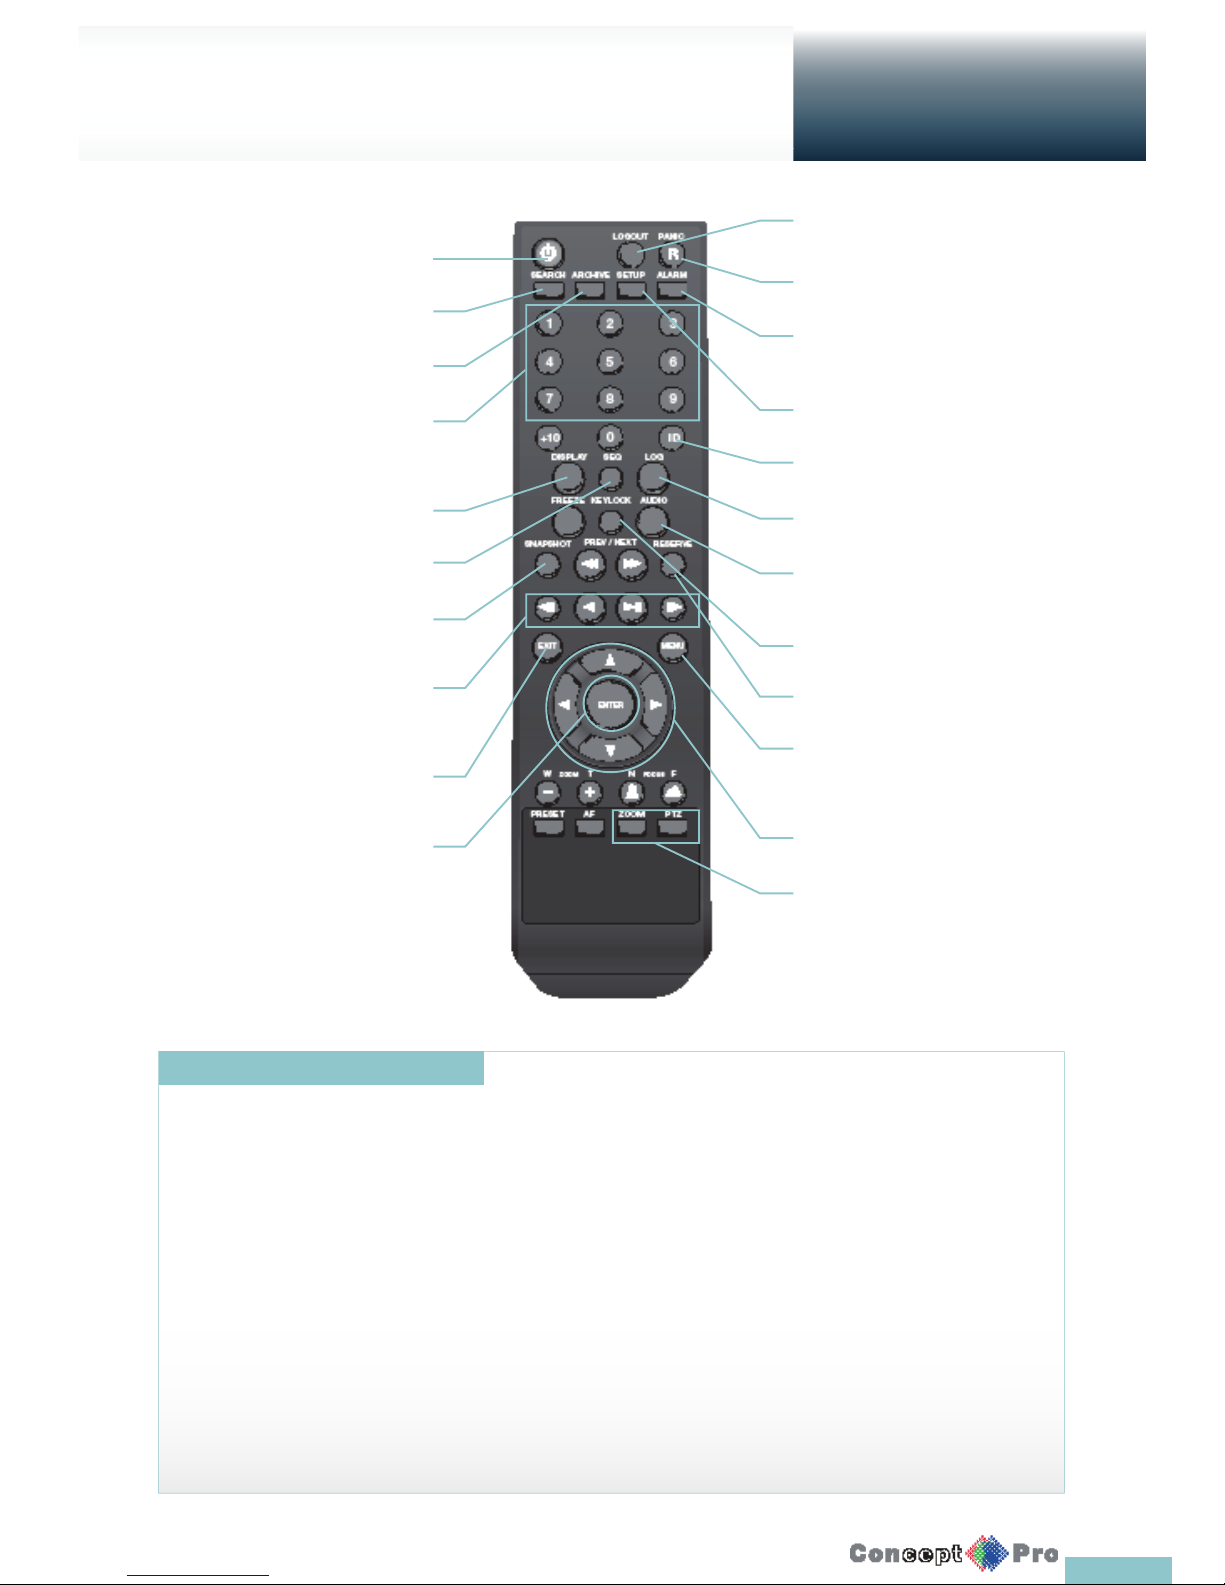
Remote Control at a Glance
Power
Turn on or off the power.
Search
Display the search window
Archive
Display the backup window
Channel
Function as channel selection button
in live or playback mode, or used for
entering the password.
Display
Switch the split mode
SEQ
Switch the sequence mode
Snapshot
Take a snapshot of the video
pqtu
Used to change the direction or
adjust the play speed in playback
mode.
Exit
Exit from the current screen and
return to the previous screen
Enter
Select a menu item or apply your
settings.
Logout
Log out
Panic
Start the emergency recording
Alarm
Show the alarm status with a popup
window
Setup
Display the system setup menu
ID
Set the remote contol ID
Log
Display the log list
Audio
Display the audio channel selection
window
Keylock
Lock the operation unit
Reserve
Reserve the current video
Menu
Dislpay the tool bar on the live
screen
pqtu
Use to move through the menus
Zoom/PTZ
Enter the PTZ or digital zoom mode
and control the operation
Change the remote control ID
The remote control works only if the remote control ID matches that speci ed on the DVR.
If multiple DVRs are used with a single remote control, use the ID button to set the remote control ID.
Only the ID-matching the DVR can be controlled.
From <SYSTEM> - <CONTROL DEVICE> under the System Setup menu,
set the <REMOTE CONTROLLER ID> and press <APPLY >.
Select between 00 and 99. For more details, refer to <SYSTEM SETUP>.
Press the [ID] button on the remote control. The default remote control ID is 00.
Use the number buttons to provide a two-digit ID. If you want to enter 01, for instance,
enter the number 0 and 1 in sequence.
Check if the remote control ID is set properly by manipulating the remote control.
To reset the ID to 00, press and hold the [ID] button.
Page 10
7
Installation
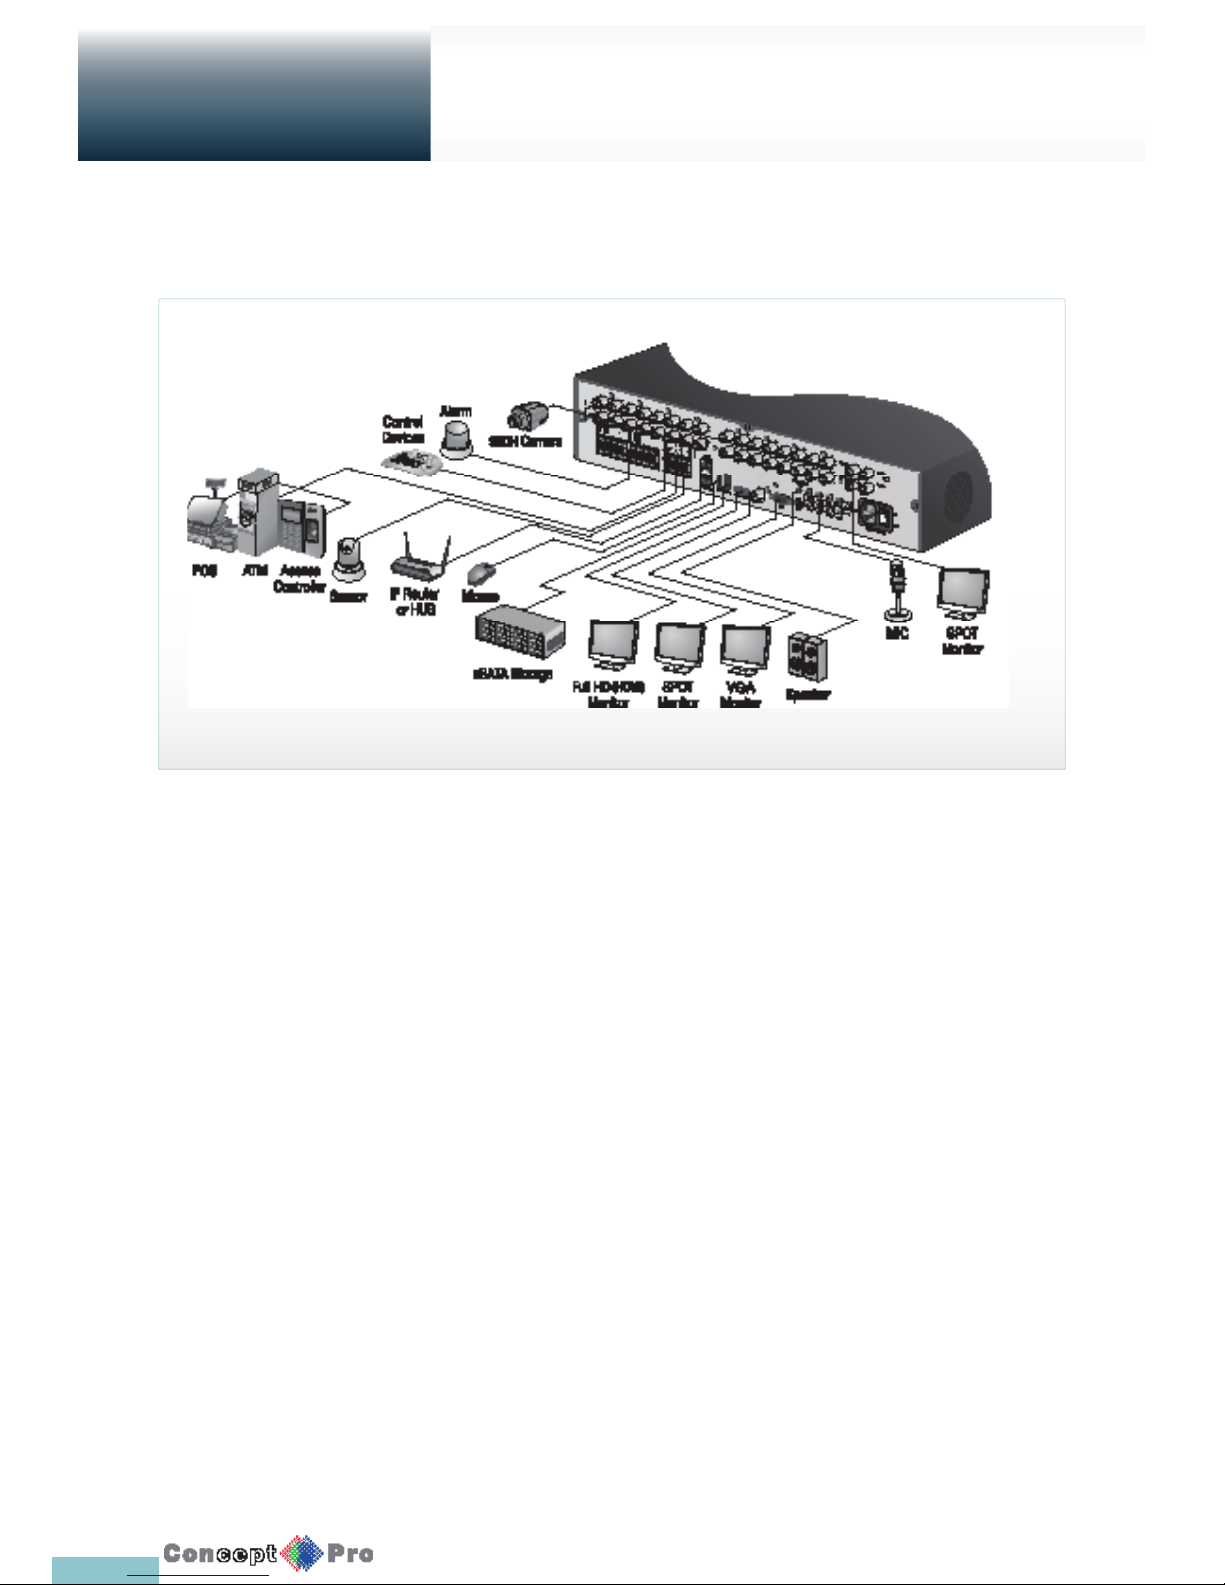
Basic Layout
Precautions
Since the cable quality may aff ect the video quality depending on the distance between the camera and DVR, it is
recommended to consult an authorized installer when installing the DVR.
Page 11
8
Connecting to an external device
Installation
This product supports 1080p 60 Hz HDMI monitors and regular monitors that support VGA inputs.
Connect a HDMI cable to the port on the rear of the VXH960 or use a VGA cable to connect the
DVR with a VGA monitor
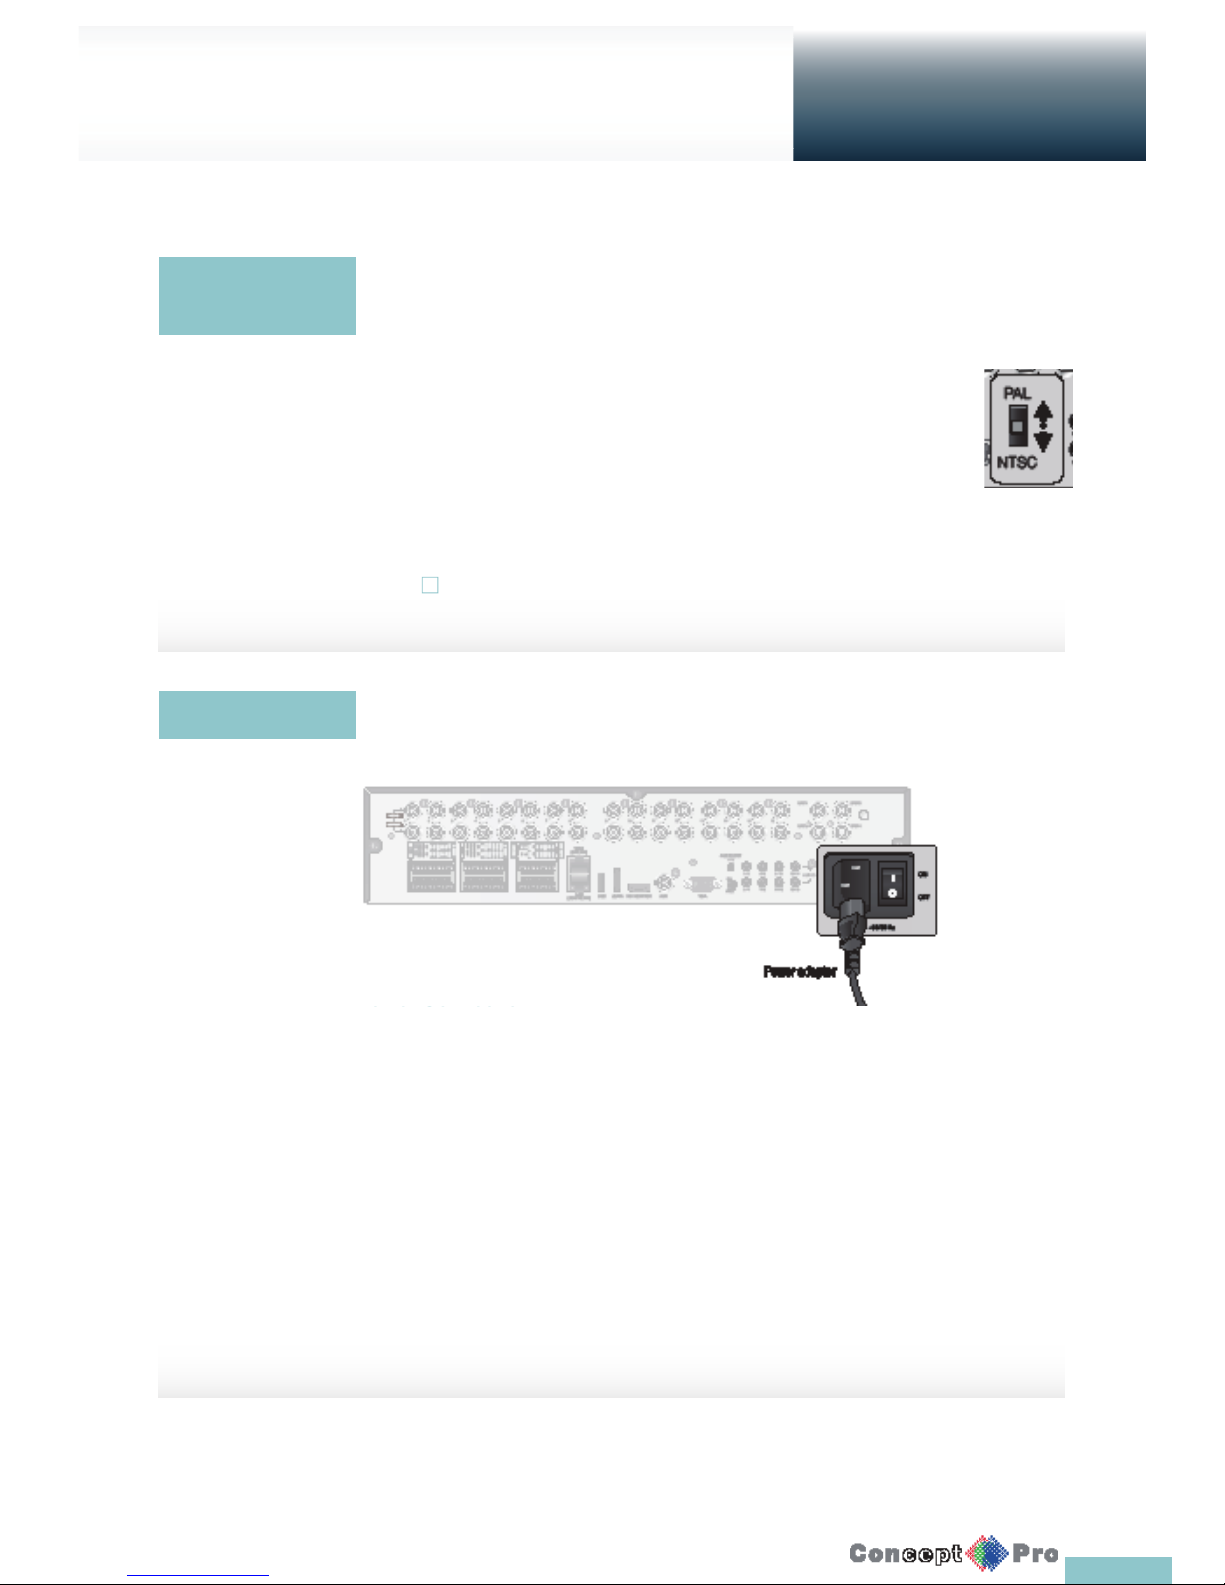
Once the product is set to NTSC or PAL connect cameras of the corresponding
videostandard for proper operations.
Setting the product to NTSC or PAL decides available display output modes too.
R The monitor’s displaying operates at 50Hz if the product has been set
to PAL output and the connected monitor supports both 50Hz and
60 Hz inputs.
For NTSC setting, it works at 60 Hz.
! Make sure to connect the product to a monitor that supports 1920x1080
at 60Hz.
Power Connection
Apply power to DVR main unit, and connect the provided DC 48V power supply adaptor to the external
PoE switch (Power over ethernet).
Plug the power cable into the unit whilst the power is off at the wall.
Arrange up the cables and be careful not to peel off the cable coating.
Do not place the power cord under the carpet or rug. The power cord is usually
earth-grounded. However, even if it’s not earth-grounded, do not modify it for earth-grounding.
Do not insert multiple devices in a single power socket. Otherwise, it may cause a power
overload.
For a stable power supply, this product provides two separate separate adaptors and two
corresponding AC cords by factory default. Make sure all cables are connected properly.
Power Connection
Connecting to a
monitor
Page 12
99
Connecting to an external device
Installation
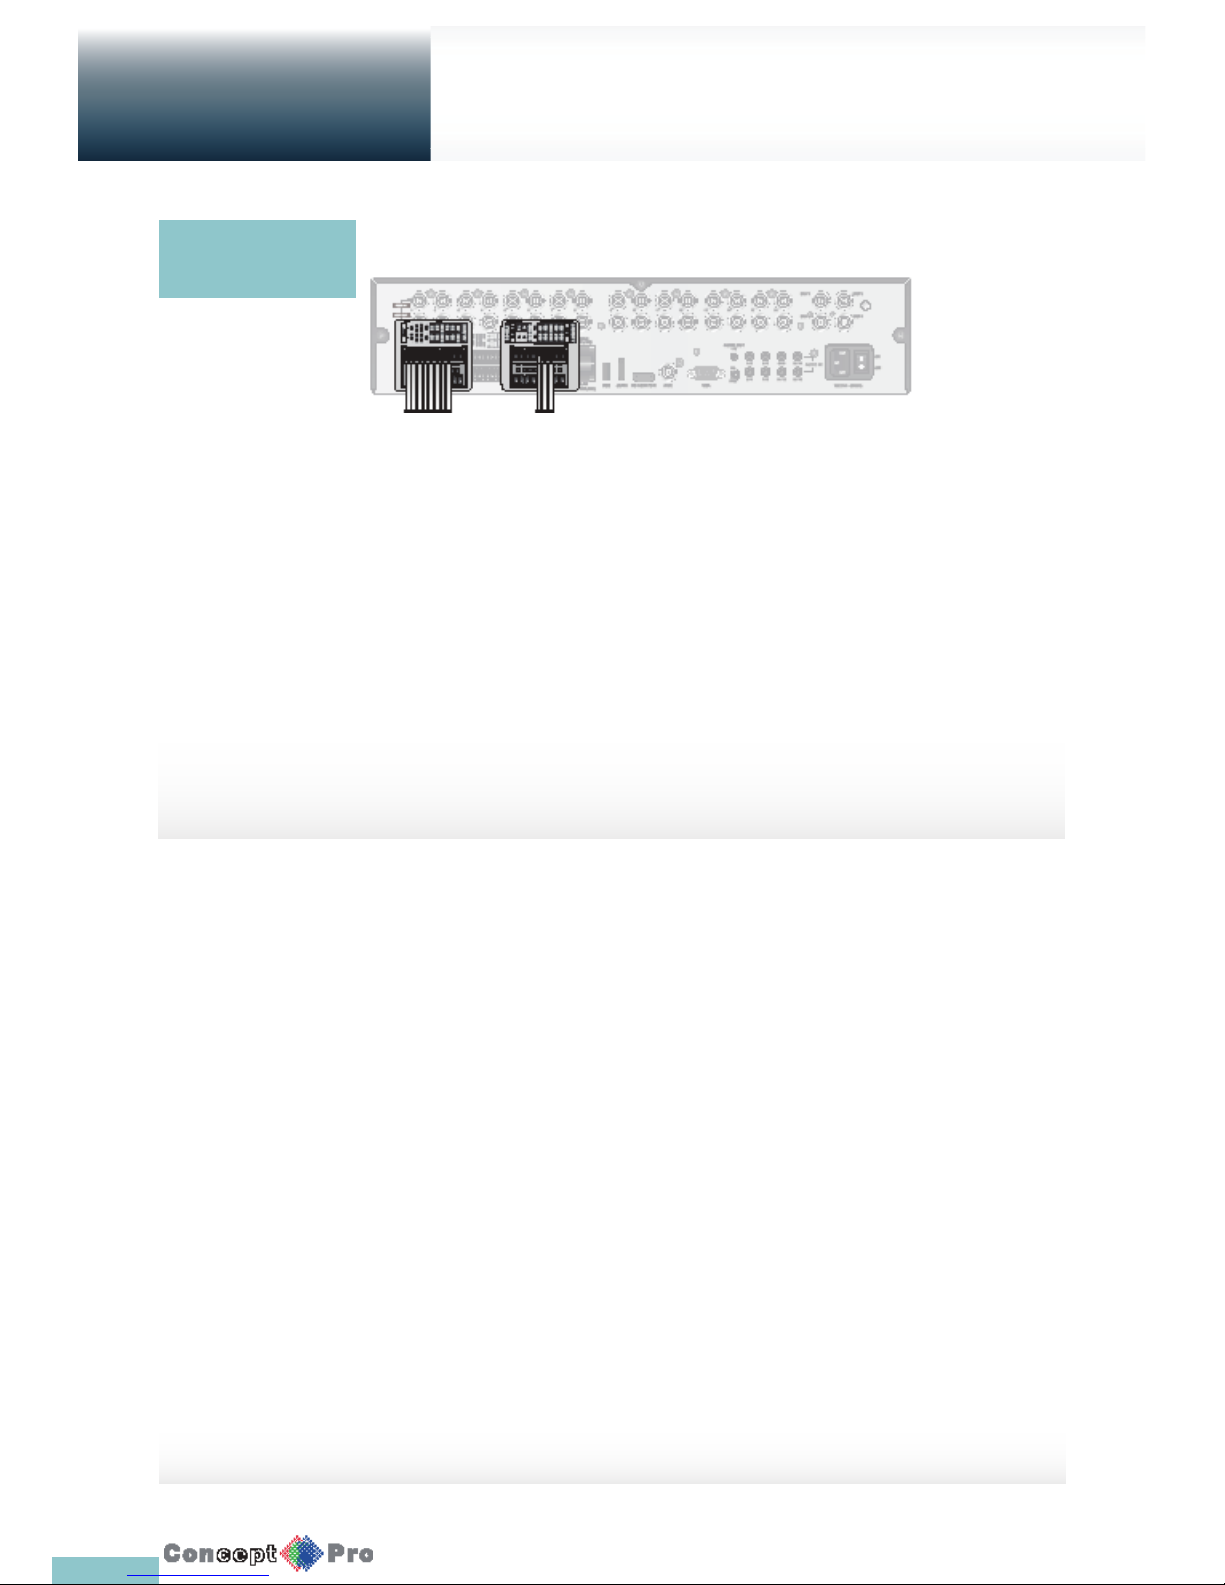
To connect the alarm input signal
Connect the signal line of an alarm input device such as sensor to the rear [ALARM IN] port.
1. Loosen the screws on both the alarm input port and [GND] port of the provided terminal block plug.
2. Insert one end of alarm signal cable through the [IN1] or [IN8] terminal hole below the screw hole, and then
fasten the screw
3. Insert the ground signal wire into the hole of the [GND] port, and tighten the screw.
4. To check correct attachement of the cable, stop pushing and gently pull the cable and test whether it disconnects.
To disconnect the cable, push the bottom side of the terminal block and pull out the cable.
To connect the alarm output signal
Connect the signal line of an alarm output device to the rear [RELAY] port.
1. Loosen the screws on the [NO] and [NC] ports and the [COM] port of the provided terminal block plug.
2. Insert the alarm signal wire into the hole of the [NO] or [NC] input port.
Check the relay output type of Normal Open or Normal Close before selecting a proper type (NO or NC).
> NO (Normal Open): Normally Open but switching to Close if an alarm out occurs.
> COM: Insert the grounding wire.
> NC (Normal Close): Normally Close but switching to Open if an alarm out occurs.
3. Insert the ground signal wire into the hole of the [COM] port.
Or, you can connect the signal cable of the alarm output device to the [ALARM OUT] port on the rear side.
1. Loosen the screws on the [AO1] and [AO8] ports and the [GND] port of the provided terminal block plug.
2. Insert the alarm signal wire into the hole of the [AO1] or [AO8] input port
3. Insert the ground signal wire into the hole of the [GND] port
4. To check the correct attachment of the cable, stop pushing and gently pull the cable and test whether it disconnects.
To diconnect the cable, push the bottom side of the terminal and pull out the cable.
5. Put the wire-connected terminal block in the rear port.
Alarm I/O
Connection
Page 13
1010
Connecting to an external device
Installation
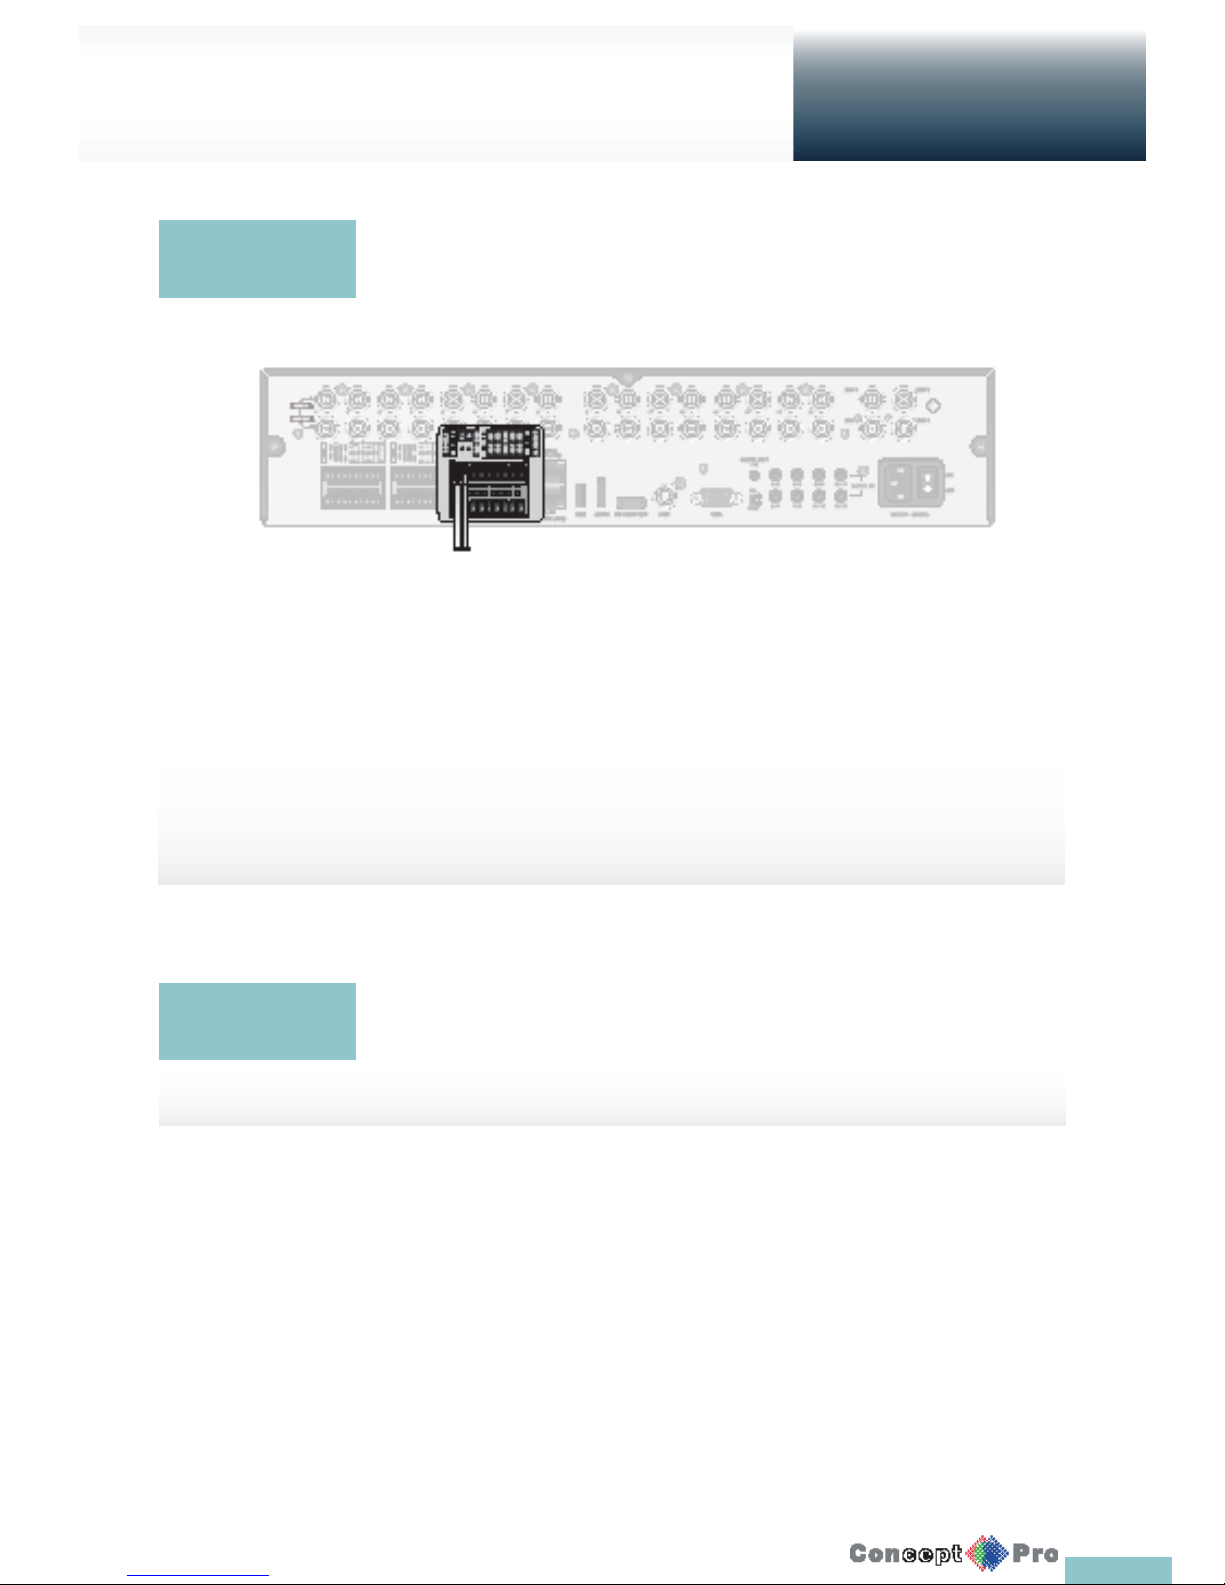
RS-485 Connection
Connect a PTZ Camera or Keyboard Controller.
After connecting the control device, be sure to match the connection settings between DVR and device.
Communication settings are in <Control Device>. (page 46)
1. Use a signal cable to connect the [D+] port of the terminal block plug and the [D+] port of the keyboard controller.
2. Connect the [D+] port of the terminal block plug and the [D+] port of the keyboard controller.
3. Connect the [GND] port of the terminal block plug and the [GND] port of the keyboard controller.
R For RS-485 communication con guration, refer to the user’s manual of the applicable PTZ camera or
keyboard controller.
You can connect an audio output device such as speaker ampli er.
Connect the audio input device such as microphone to the rear Audio In port, connect the audio
output device such as speaker ampli er to the Audio Out port.
Communication
Port
Audio Device
Connection
Page 14
11
Installation
Connecting to an external device
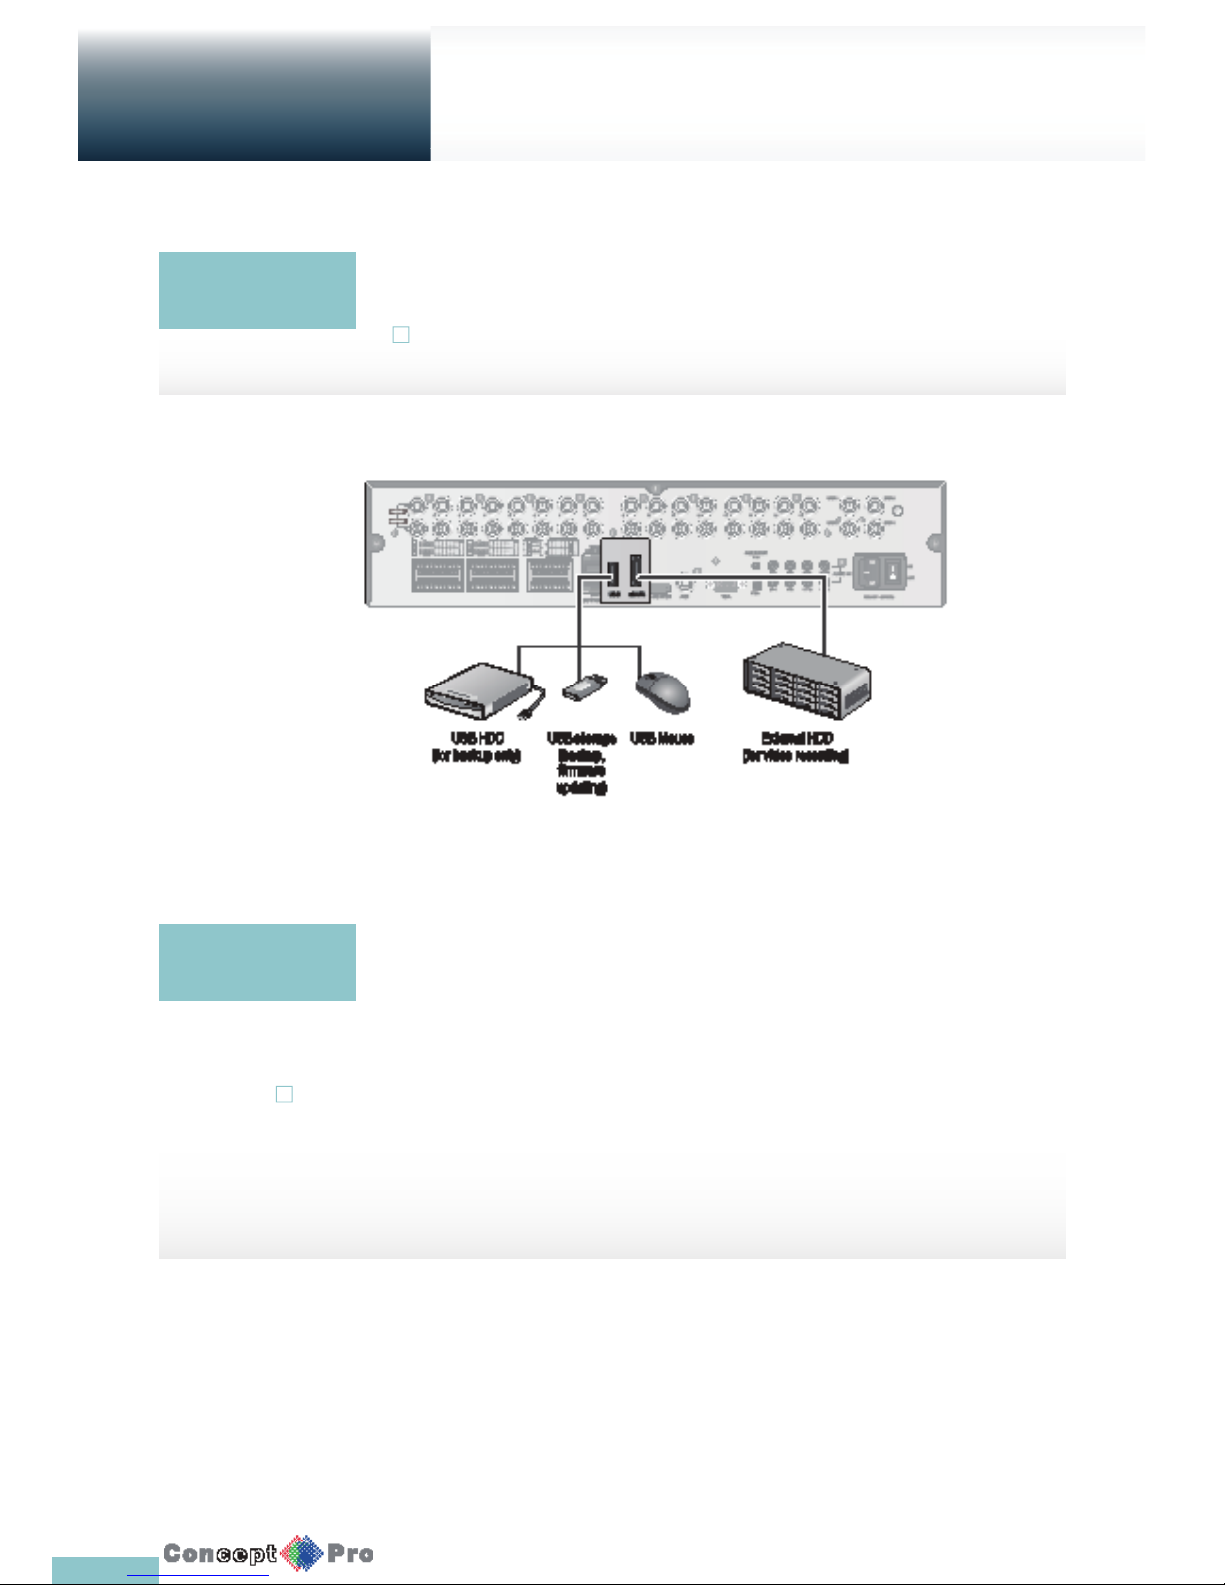
If the internal storage space is insuffi cient, you can extend your storage capacity by adding an eSATA
storage device to the rear eSATA port.
! Using devices other than recommended eSATA products may cause a serious problem.
You can connect and use USB storage devices to backup recorded video, saving snapshots,
rmware updating, importing/exporting user con gurations. A USB mouse can be connected to
control the VXH960
eSATA Storage
USB Device
! If you need to connect a USB HDD with a high power consumption, it is recommended to use a
separate power source for that HDD.
Page 15
12
Network Connection
Installation
Network
Connection
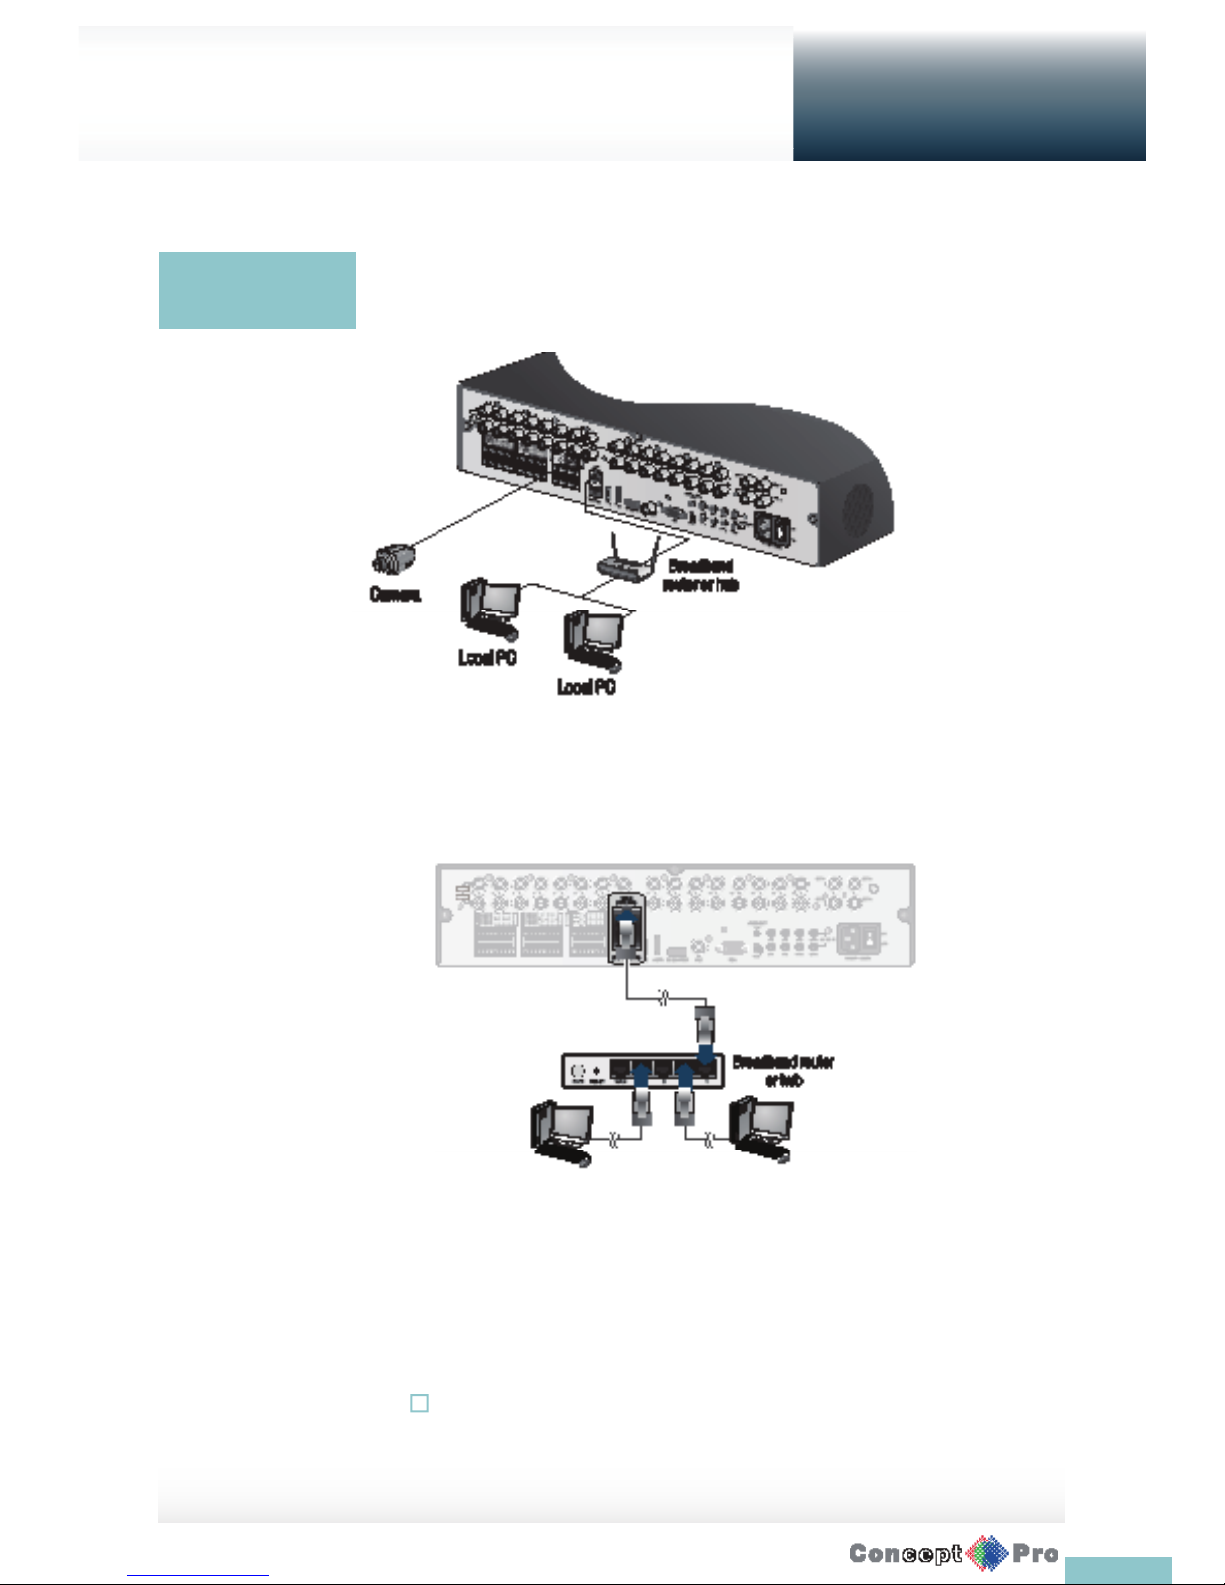
PC connection in the local network
You can connect the VXH960 to a network so that it can be accessed via a PC.
1. Connect the [WAN(UPLINK)] port in the rear panel to the router or hub.
R The LAN (DOWN LINK) port is reserved and only for servicing and development.
(Do not connect devices to this port.)
2. Connect the local PC to the router or hub.
3. Enter the address in the Web browser of your PC in the format of: “http://IP address:Web service port”
(Ex: http://192.168.0.23:8080) The web service port is set to 8080 by default. From the Network
Setup screen, you can change the port number.
R If using the dedicated PC S/W, refer to the user manual of the program.
4. Provide the ID and password bfore logging in, then you can view the monitoring screen.
Factory defaults are: User ID: ADMIN, Password: 1234
! For security purpose, change the password before you use the product for the rst
time after purchasing it.
Page 16
13
Network Connection
Installation
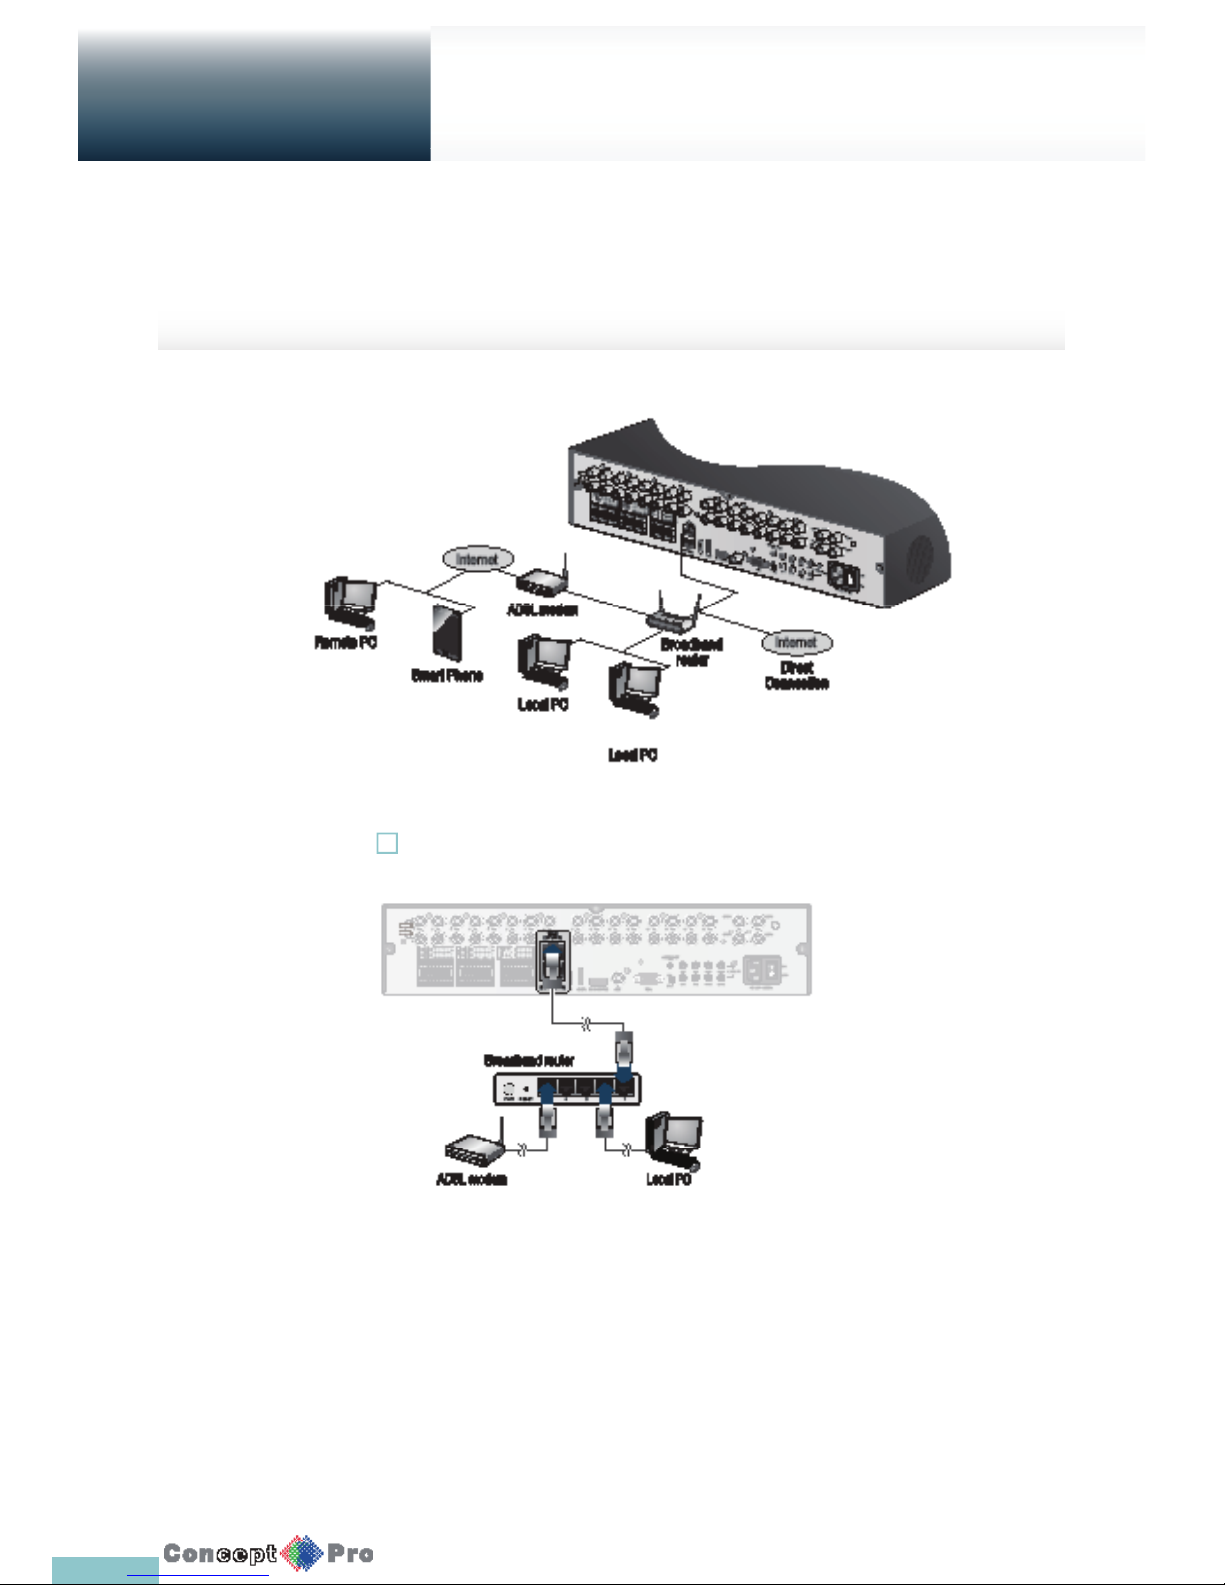
PC connection from the network
You can connect the DVR to a PC or mobile device on the same network and control it on the PC or mobile device
1. Connect the [WAN(UPLINK)] port to the router or switch on the
! The LAN (DOWN LINK) port is reserved and only for servicing and development.
(Do not connect devices to this port.)
2. If using the router, set the port forwarding and ener the DDNS or IP address in the address bar of a
web browser on the PC, dedicated software or smart phone.
For the IP and DDNS address settings, refer to “Network Setup”. (page 39)
3. If the MAC address of the DVR is 00-11-5F-12-34-56 and the web port number s 8080, enter
“http://00115f123456.dvrlink.net:8080” in the address bar of the web broswer. If you have renamed
DDNS as “mydvr”, you can enter http://mydvr.dvrlink.net:8080 in the address bar of the web broswer.
Page 17
14
Log-in / Log-out
Getting
Started
Start
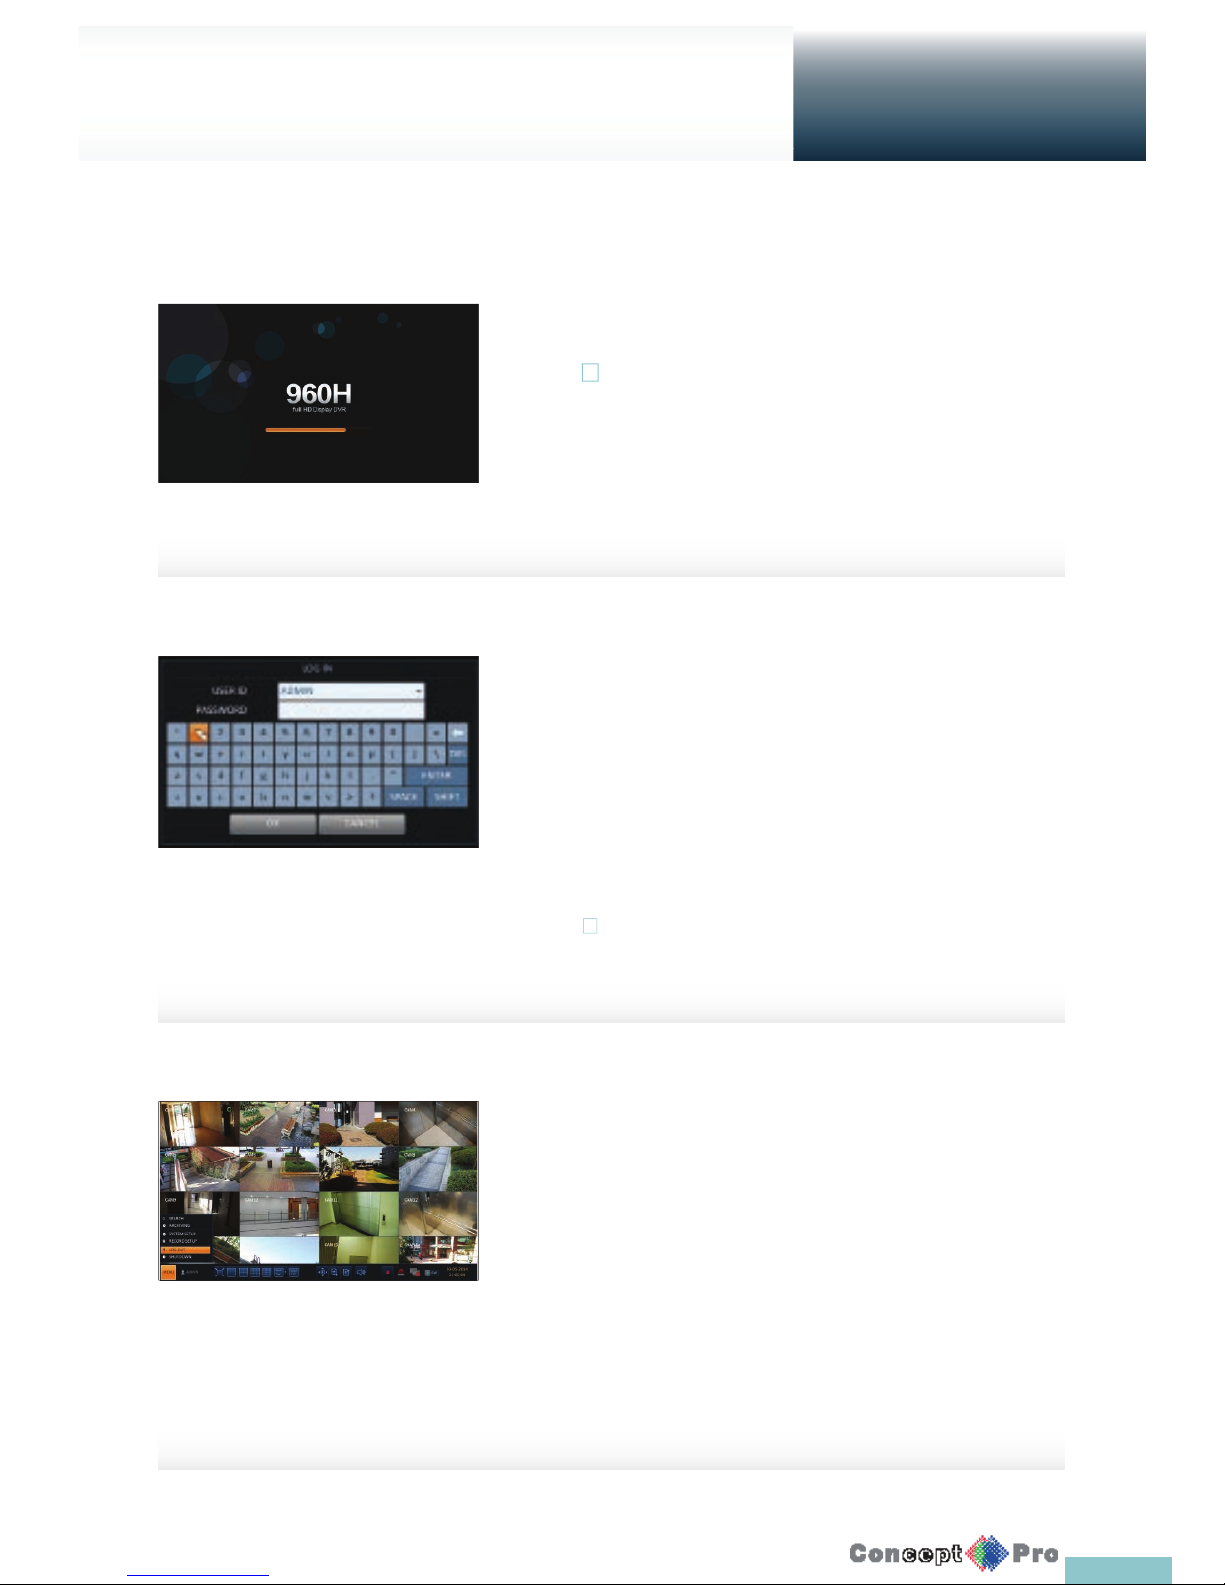
1. Connect the power adapter to the poer input port on the DVR’s rear side
! Make connection when the power is not applied yet..
2. The front LED turns on and it will be when the unit boots up, you
will also see the boot up screen
3. When the booting process is completed, the live screen then the login
screen appears
Log Out
To prevent unauthorized access, it is recommended to log out when
you leave the screen.
R Hover the cursor near the bottom of the screen to display the
menu.
1. In the monitoring screen, click <MENU> in the bottom left corner of the
screen and then click <LOGOUT>, or press the [LOGOUT] button on
the remote control.
2. While logged out, Search, Backup, System Settings, Record
Settings and Exit menus are unavailable to use.
Log In
To access the menus of the DVR, you need to log in.
1. When the system starts, the login screen appears.
2. Select a user and provide the password.
The default password of the “ADMIN” account is “1234”.
3. Click <OK>.
If the login information is correct and valid, you will
see the live screen.
! For security purpose, change the password before you
use the product for the fi rst time
Page 18
15
Log-in / Log-out
Getting
Started
System Shutdown
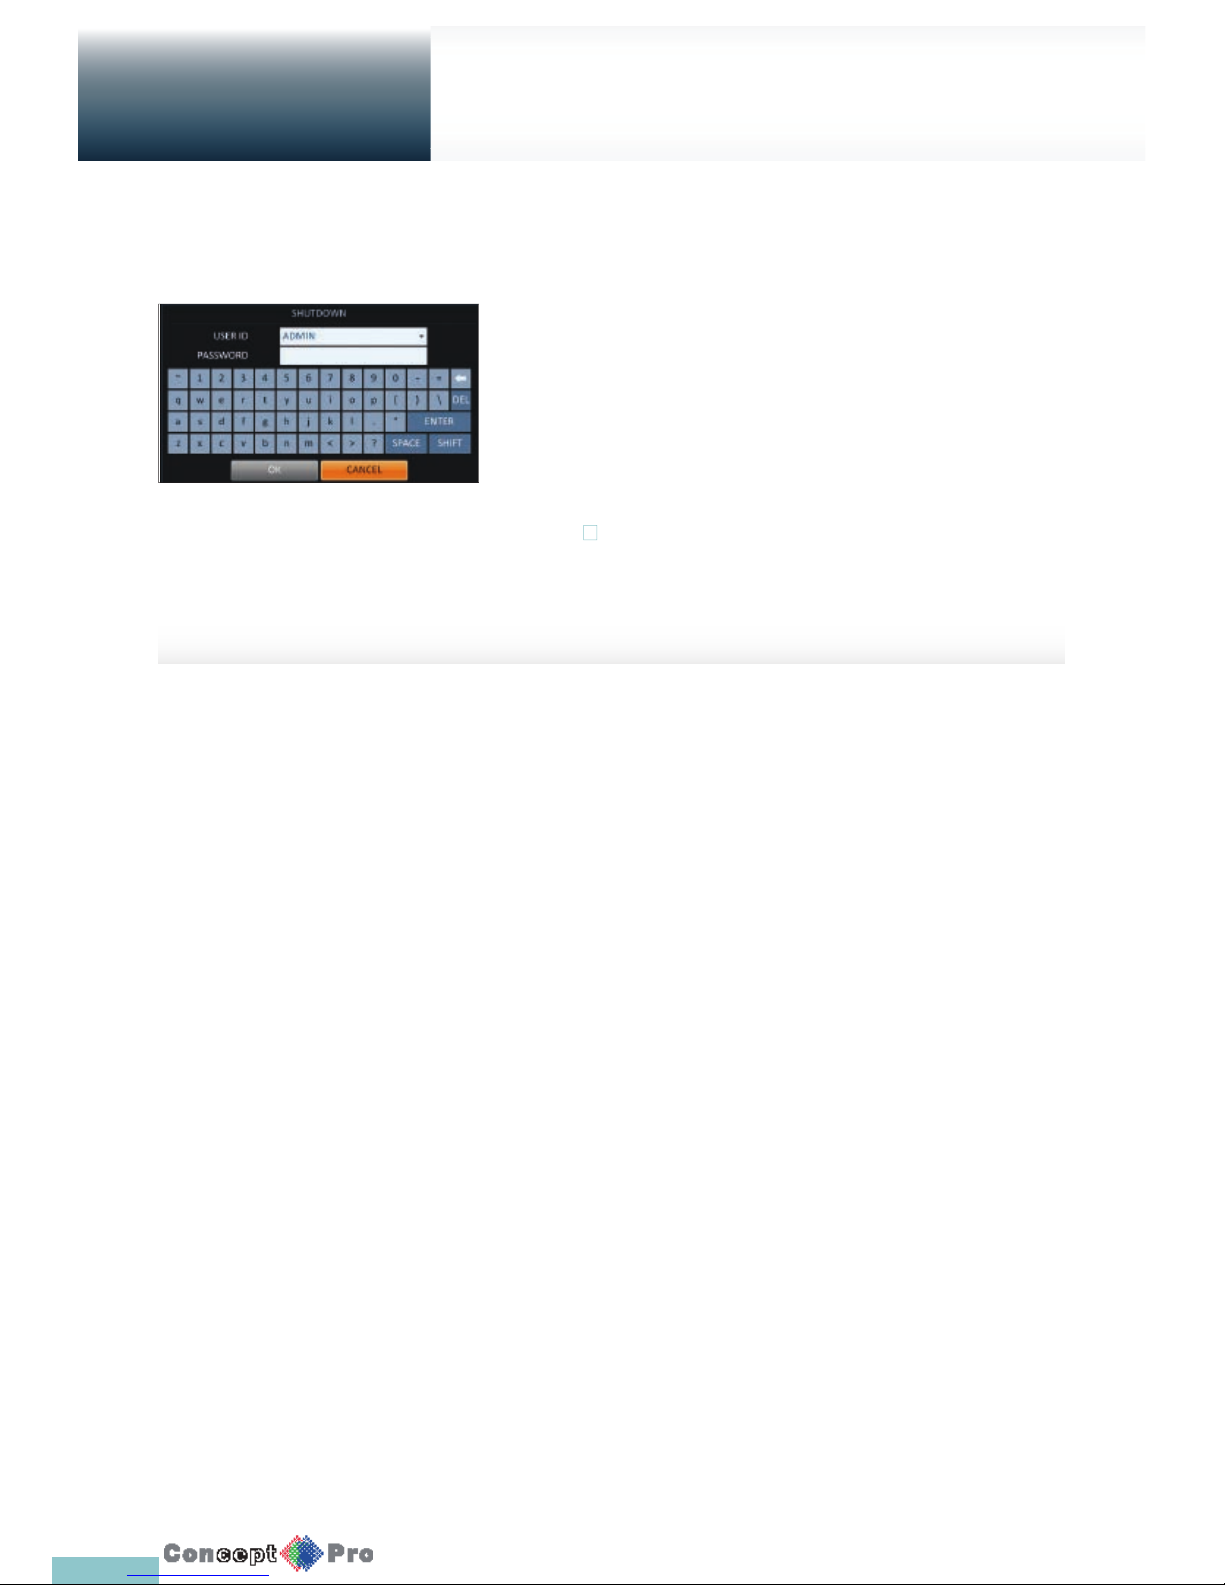
1. In the monitoring screen, click <MENU> in the bottom left corner of the
screen click <SHUTDOWN> the system, or press the [POWER] button
on the remote control.
2. Use the virtual keyboard to enter the password.
3. Be sure to turn off the power switch on the rear panel.
! If you turn off the system in an abnormal manner such as
removing the power cord while the system is in operation,
the disk will create or increase the bad sectors, causing
data loss and shortening the life cycle of the disk.
Page 19
16
Live Screen at a glance
Getting
Started
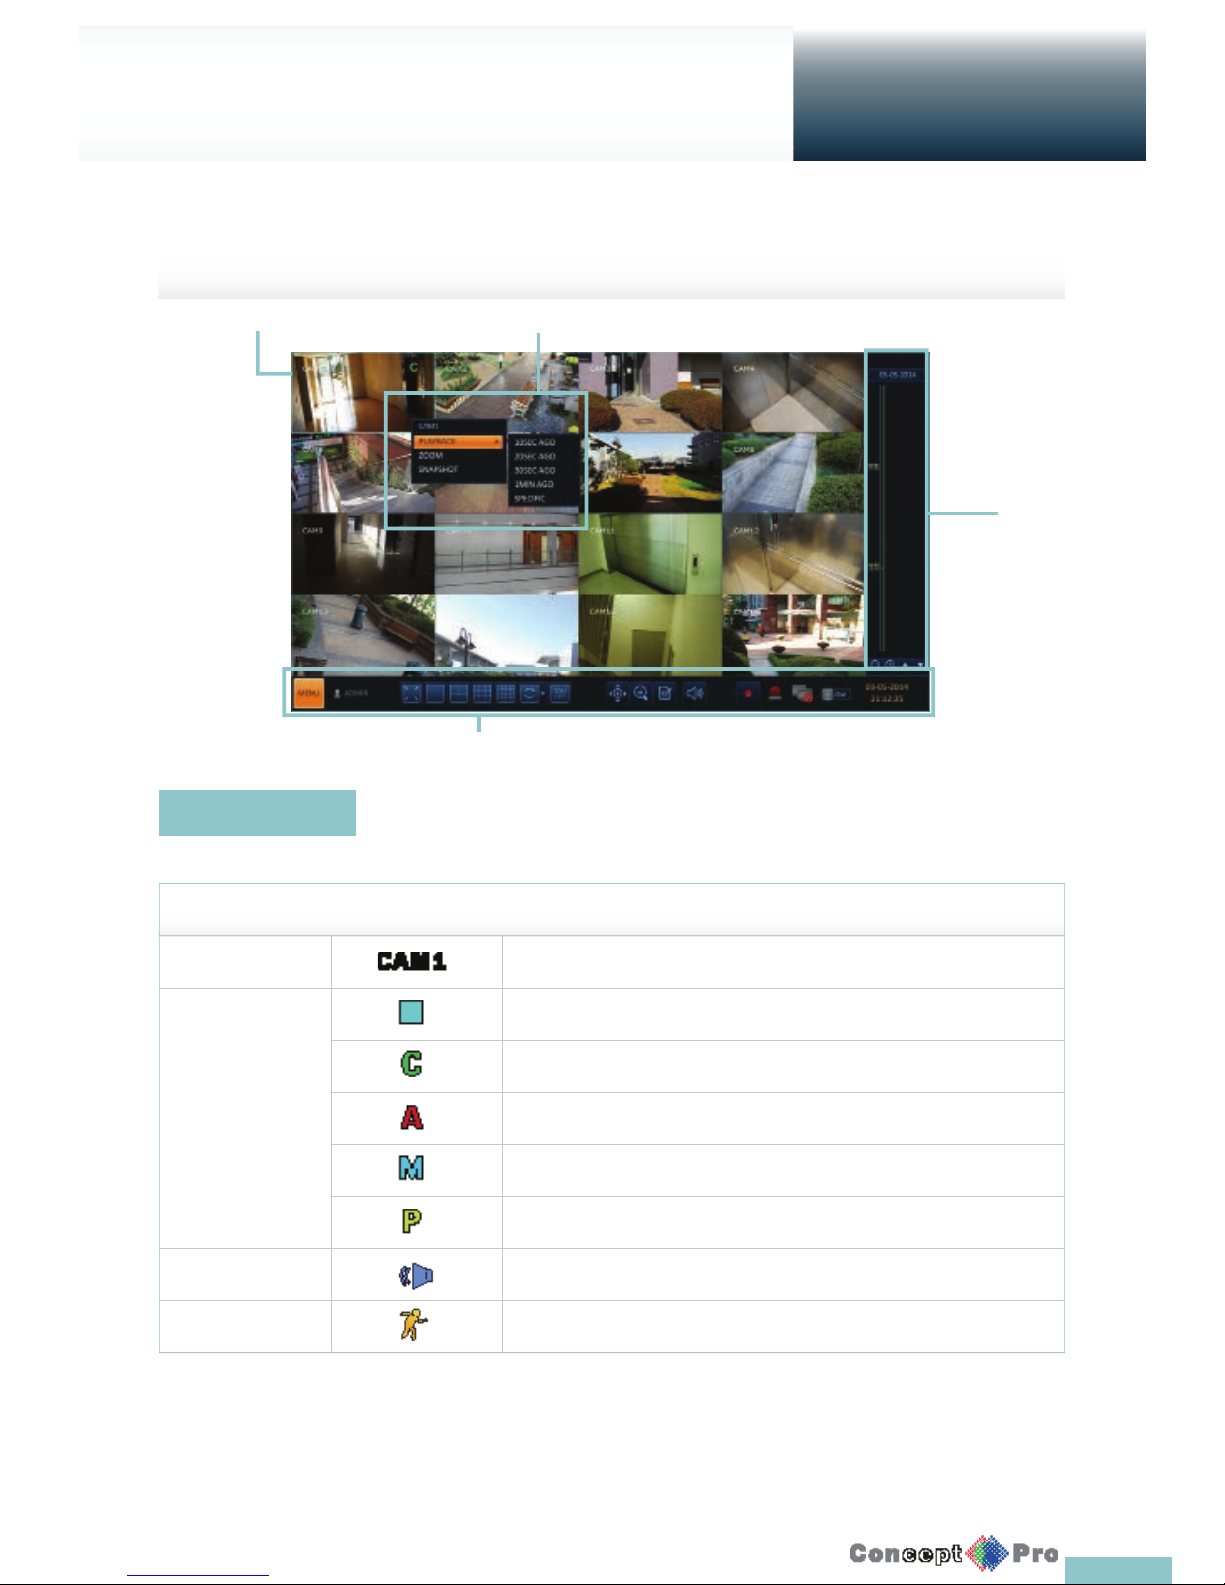
The live screen largely consists of four components: video window, status bar, timeline zone and quick menu
Icons used in the video window.
ITEM Description
Camera ID Show the camera ID.
Record Mode Icons Displayed if an event recording is reserved.
Display if continuous recording is active
Display if an alarm recording is active.
Display if a motion event recording is active.
Display if emergency recording is active.
Audio I/O Icons Displays if the audio signal of the connected camera is operational.
Motion Detection Icon Displays if motion detection is active.
Video Window
Video Window
Quick Menu
Timeline
Status Bar
Page 20
17
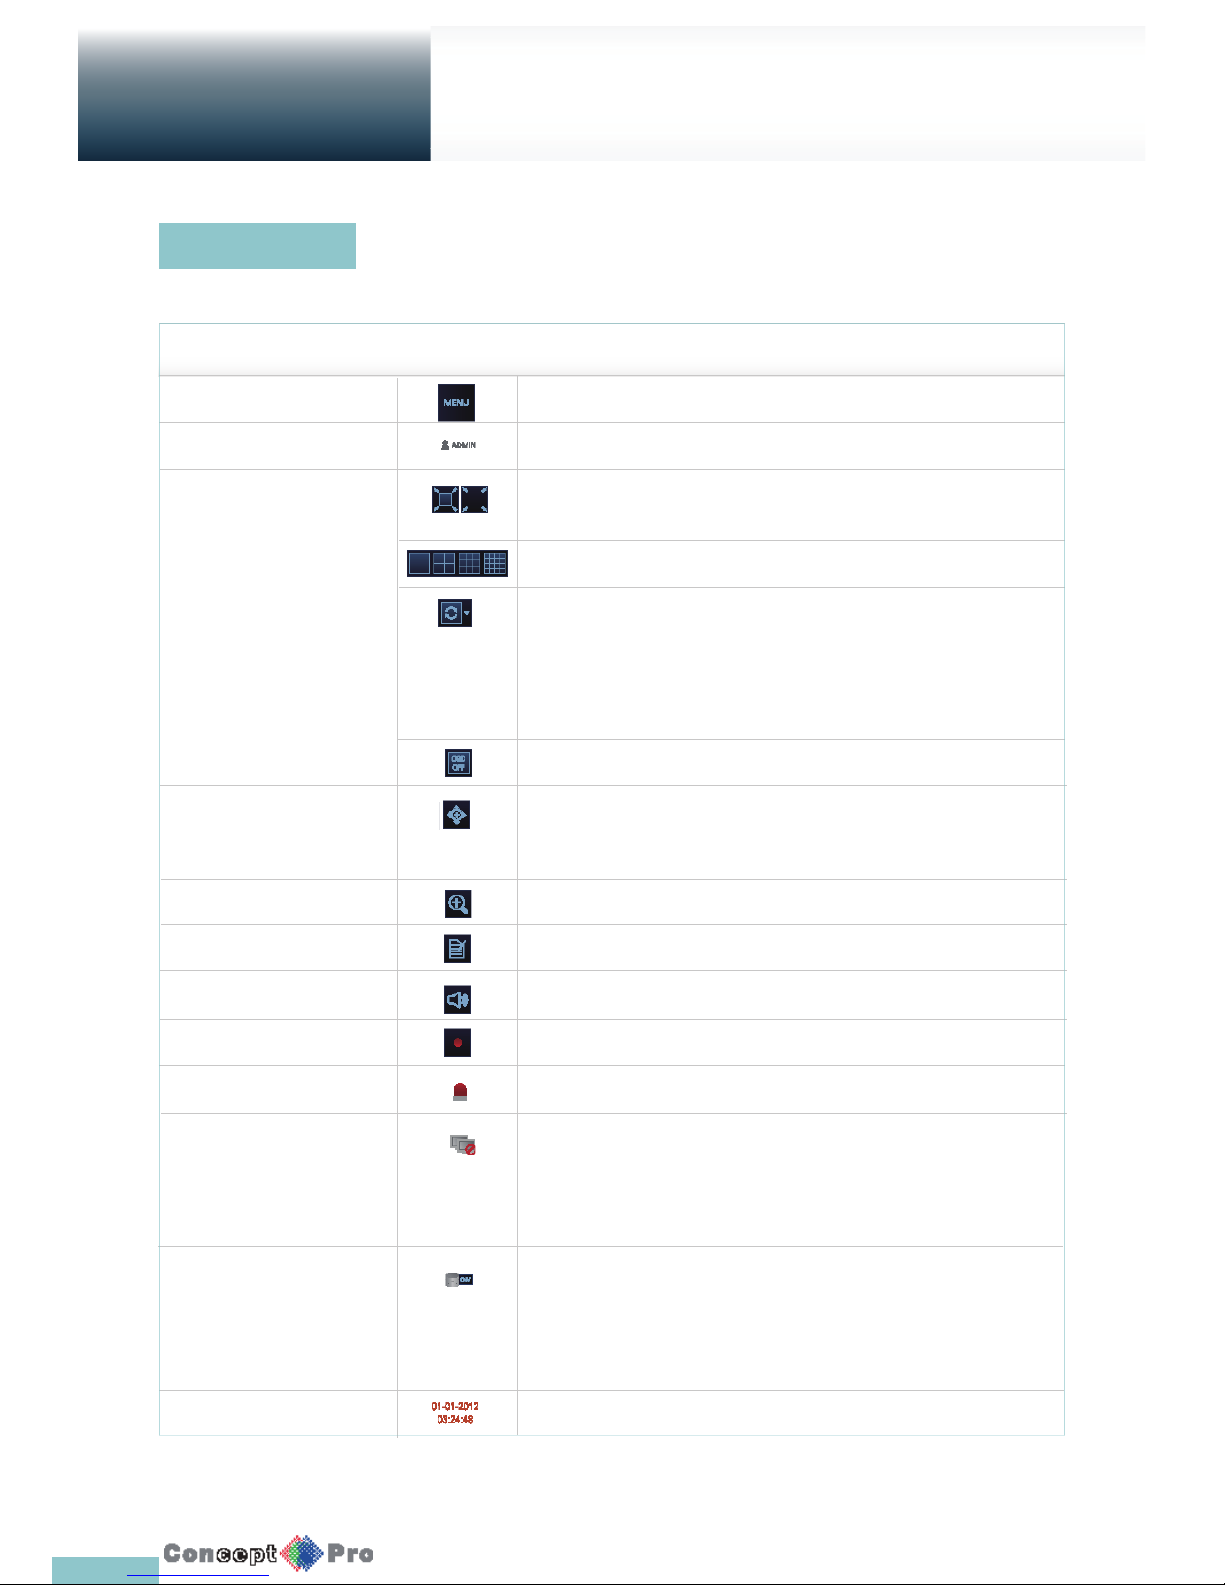
Press the q button on the remote control, or place the mouse in the lower area of the screen to display the status bar.
ITEM Description
Menu Button Select either the system setup, search and archiving menu.
User ID Show the ID of the user who has currently logged in.
Screen Control Buttons Edit the screen layout to show the status bar and timeline at all times or only when
the mouse cursor hovers on the status bar/timeline.
Select a split screen mode.
Select Auto Sequence Mode.
When a user arranges channels on desired tiles of split screen, such setting is listed
for later access. Selecting a screen setup directly switches the screen mode as con gured.
Display or hide the OSD menu on the screen.
PTZ Move to the PTZ screen. You can control the PTZ operations of a PTZ-compliant
camera on the PTZ screen.
Zoom Activate the Digital Zoom.
Quick Log Display the log list of the recent recording events.
Audio Channel Selection Button You can use the camera supporting the audio input to listen to the audio.
Panic Record Start/stop the panic recording.
Alarm Indicator Turns on if an event occurs. Click this to check the information of the event that occurred.
Network Connection Status Check if a connection is made to the networok, a PC or a mobile device. Click
this to view the details of the concurrent users and to check the network connection status.
For more information, refer to “Network Setup”. (Page 39)
Disk Space Show the disk space information. If you have set the disk overwrite mode, it will be
displayed “OW” (Over Write) from the start point of the overwriting. Click this to view
the details of the disk status. For more information, refer to “Disk Operations”. (page 48).
Date & Time Display the current time and date.
Live Screen at a glance
Getting
Started
Status Bar
Page 21
18
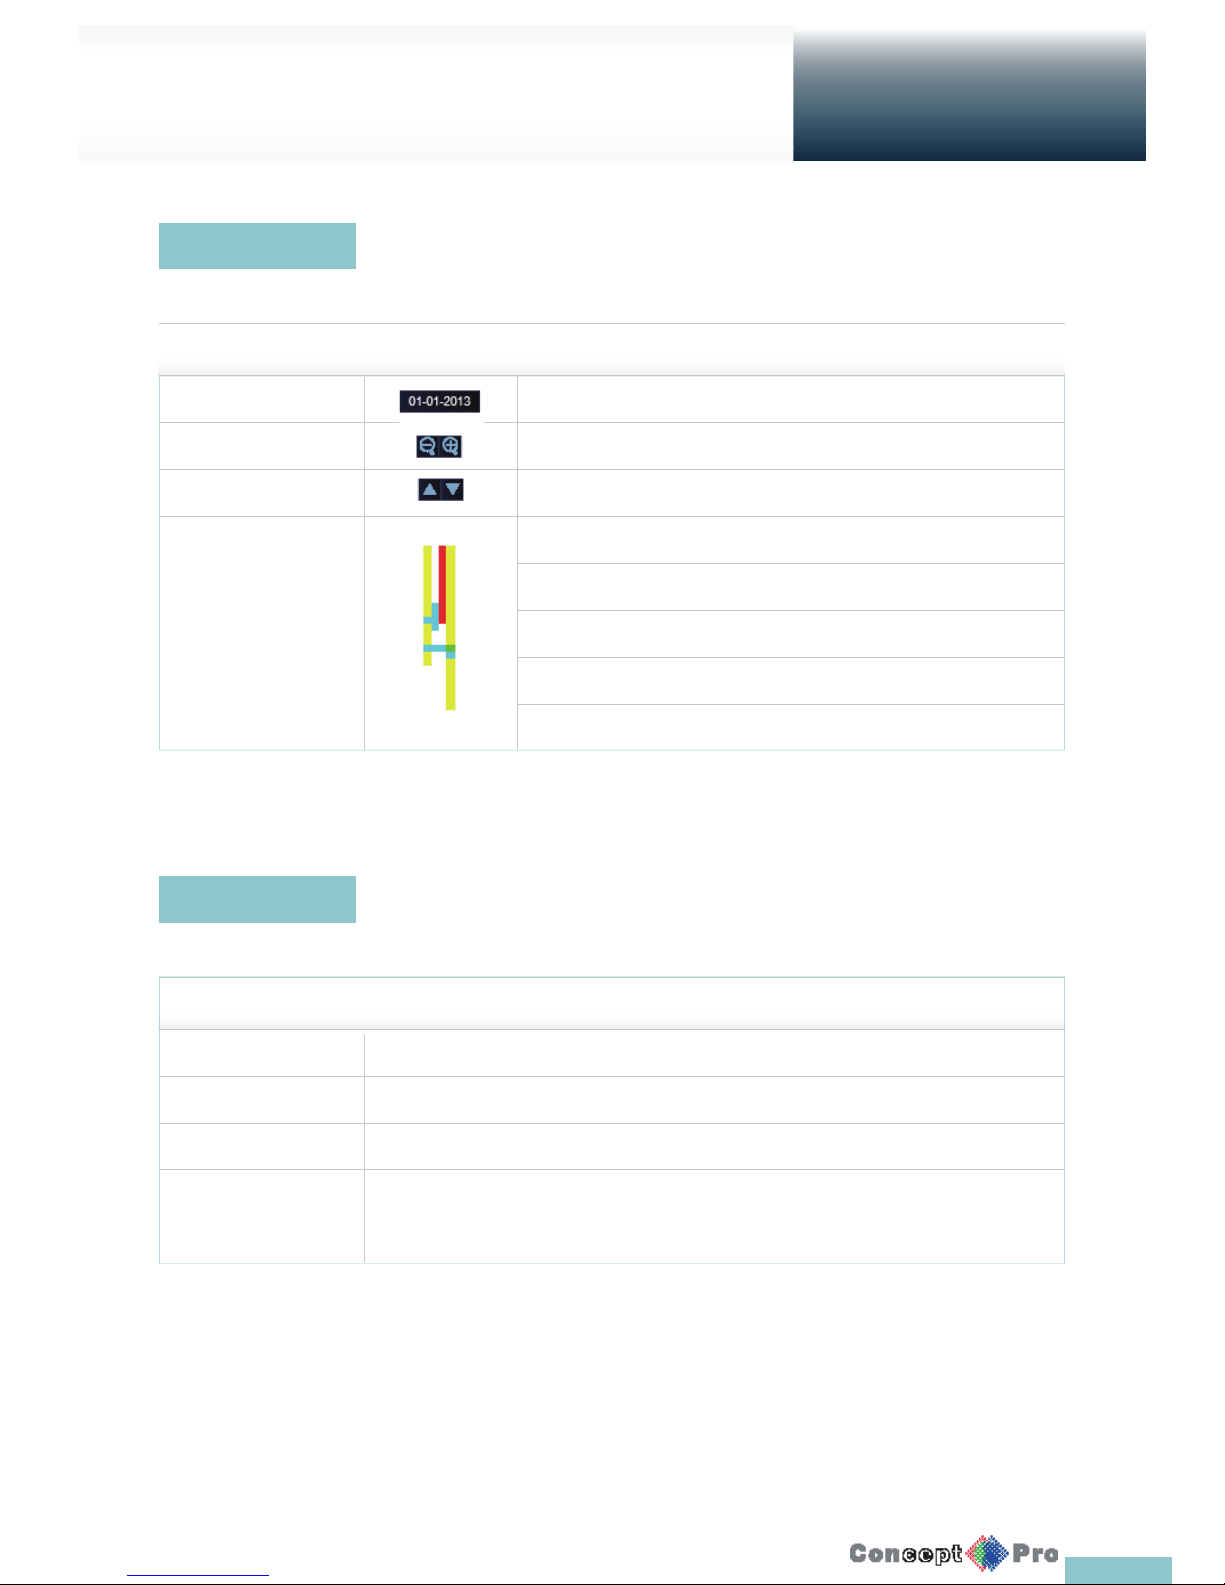
Press the u button on the remote control or move the cursor to the right of the screen to display the timeline.
Double-click the timeline to move to the video screen. Drag and drop it to make backup or event search for the speci ed area.
Right click on a channel to display the quick menu
ITEM Description
Timeline Date Display the date of the current timeline. Click this to select a desired date of the timeline.
Expand/Collapse the timeline Expand or collapse the timeline.
Navigation through Timeline Navigate through the timeline, or use the mouse wheel.
Timeline Bar Display the recording data. The colour of each bar indicates the following:
Green: Continuous Recording
Red: Alarm Recording
Blue: Motion Recording
Yellow: Panic Recording
Timeline
Quick Menu
Live Screen at a glance
Getting
Started
ITEM Description
Channel No Display the number of the current channel.
Play Start playing the video of the selected channel from the speci ed time.
Zoom Operates (digital) zooming on the selected channel.
Snapshot Capture Capture a snapshot of the current video in a .jpeg format.
R Then, you can save the captured video in the HDD or export it to an external USB memory device.
Page 22
19
Live Screen at a glance
Getting
Started
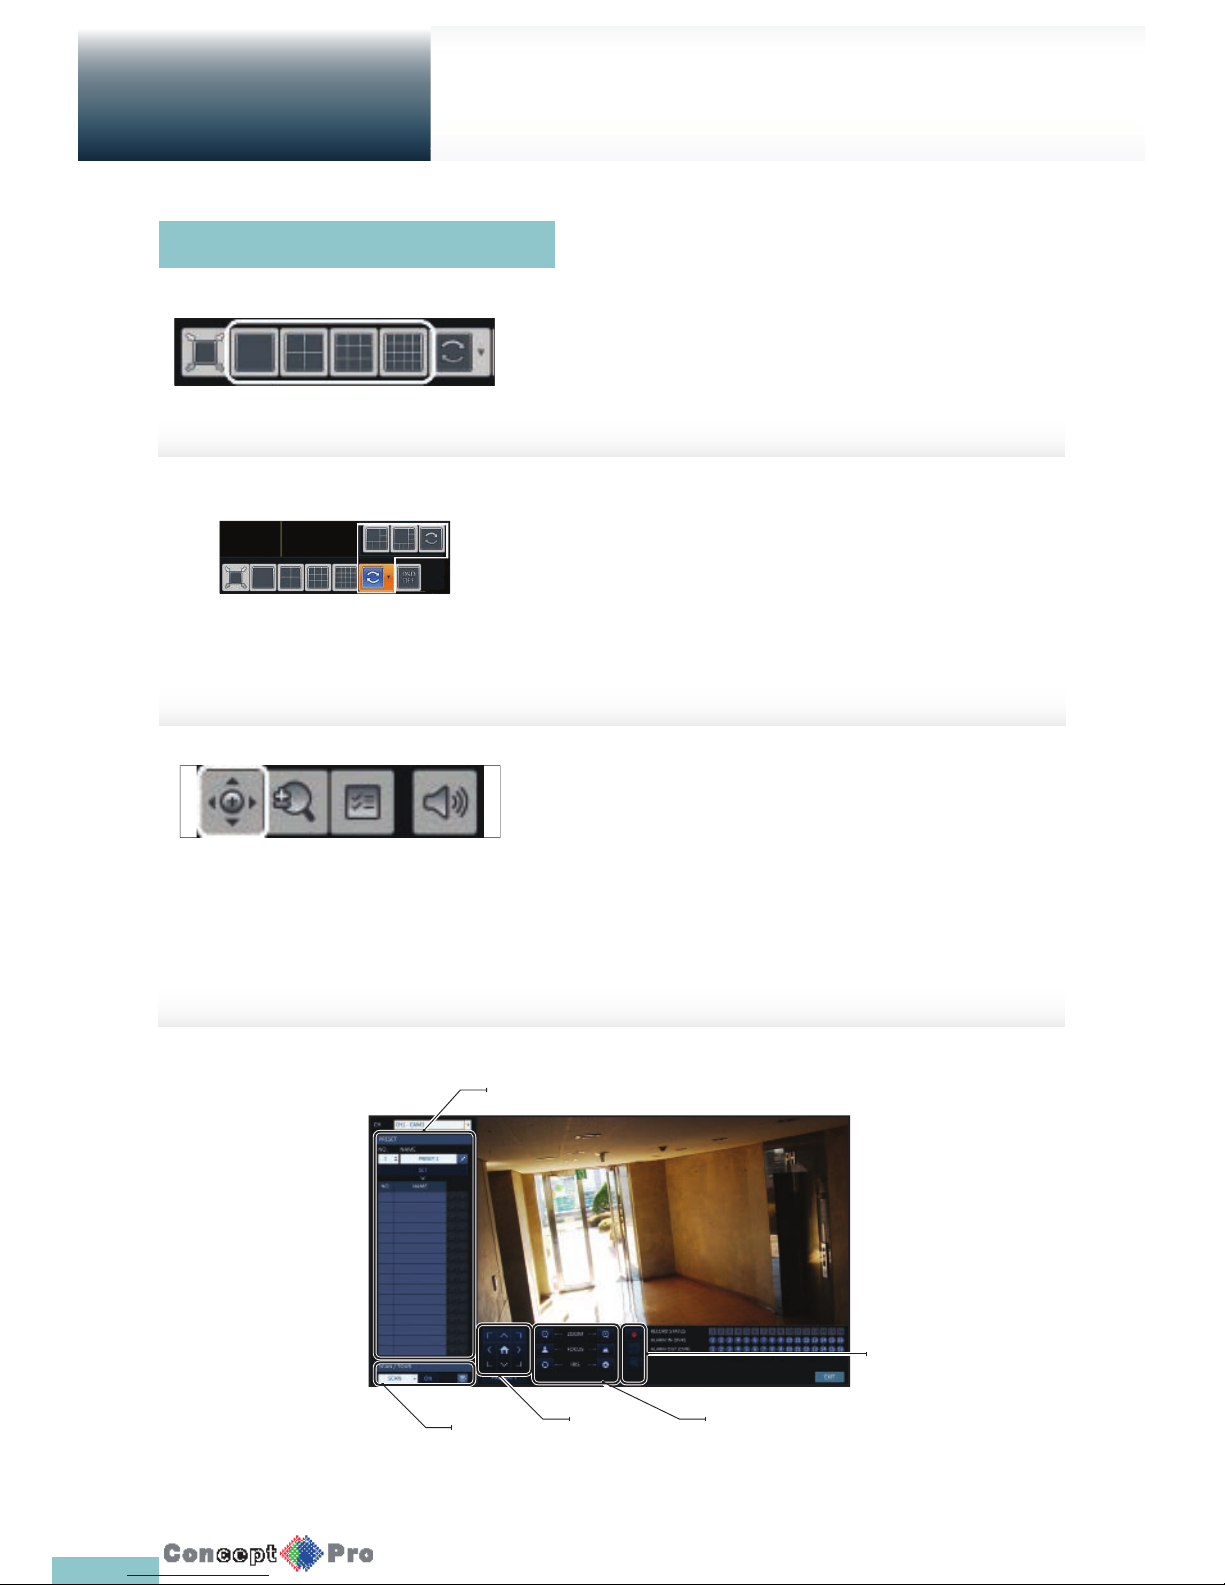
Selecting a split screen mode
Click a desired split mode from 1, 4, 9 and 16 split
screen. Or press the [DISPLAY] button on the remote
control until a desired split mode is displayed.
Auto sequence
Click the Sequence button in the status bar, or press the [SEQ] button on
the remote control to perform the speci ed sequence mode.
You can con gure the sequence settings in <SEQUENCE>.
For details, refer to “Sequence”. (page 33)
Controlling PTZ
You can control PTZ cameras connected to each channel. Use the mouse to
click PTZ button on the status bar, or press the [PTZ] button on the remote
control to initiate the prede ned sequence.
In PTZ mode, use buttons on the screen to control PTZ or use [ZOOM],
[FOCUS] and [PRESET] buttons on the remote control.
Using the status bar in the live mode
Select Preset
Zoom/Focus/
Iris Adjustment
Record/Mic
Pan/Tilt
SCAN/
TOUR
Settings
Page 23
20
Live Screen at a glance
Getting
Started
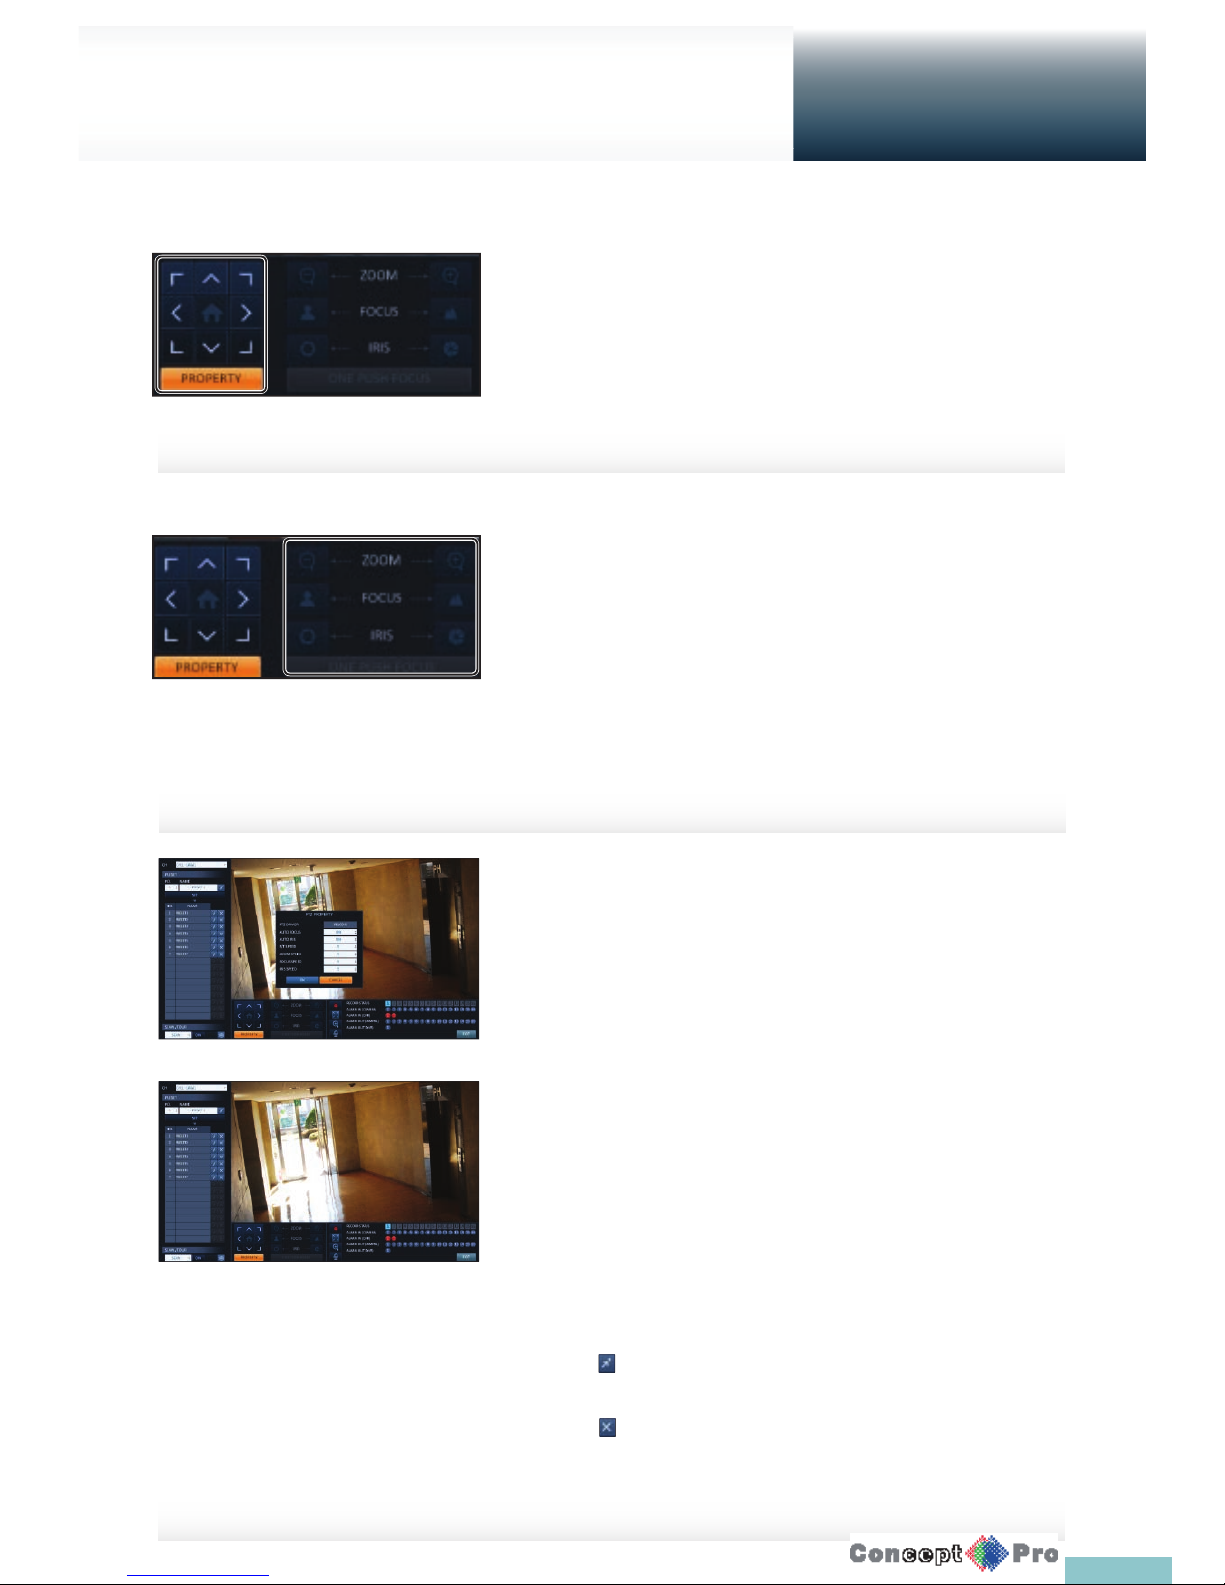
Pan/Tilt Control
Use the mouse to rotate the PTZ camera in the direction of up/ down/left/
right and diagonal directions.
You can control Pan/Tilt with [pqtu] buttons of the
remote control.
Zoom / Focus Control
You can control the PTZ camera for zooming and focus adjustment.
Click <ONE PUSH FOCUS> button to adjust the camera’s
focus automatically. (Requires a supported camera)
If the connected camera supports manual iris adjustment,
you can adjust the iris setting.
With the remote control use the [ZOOM] and [FOCUS] button
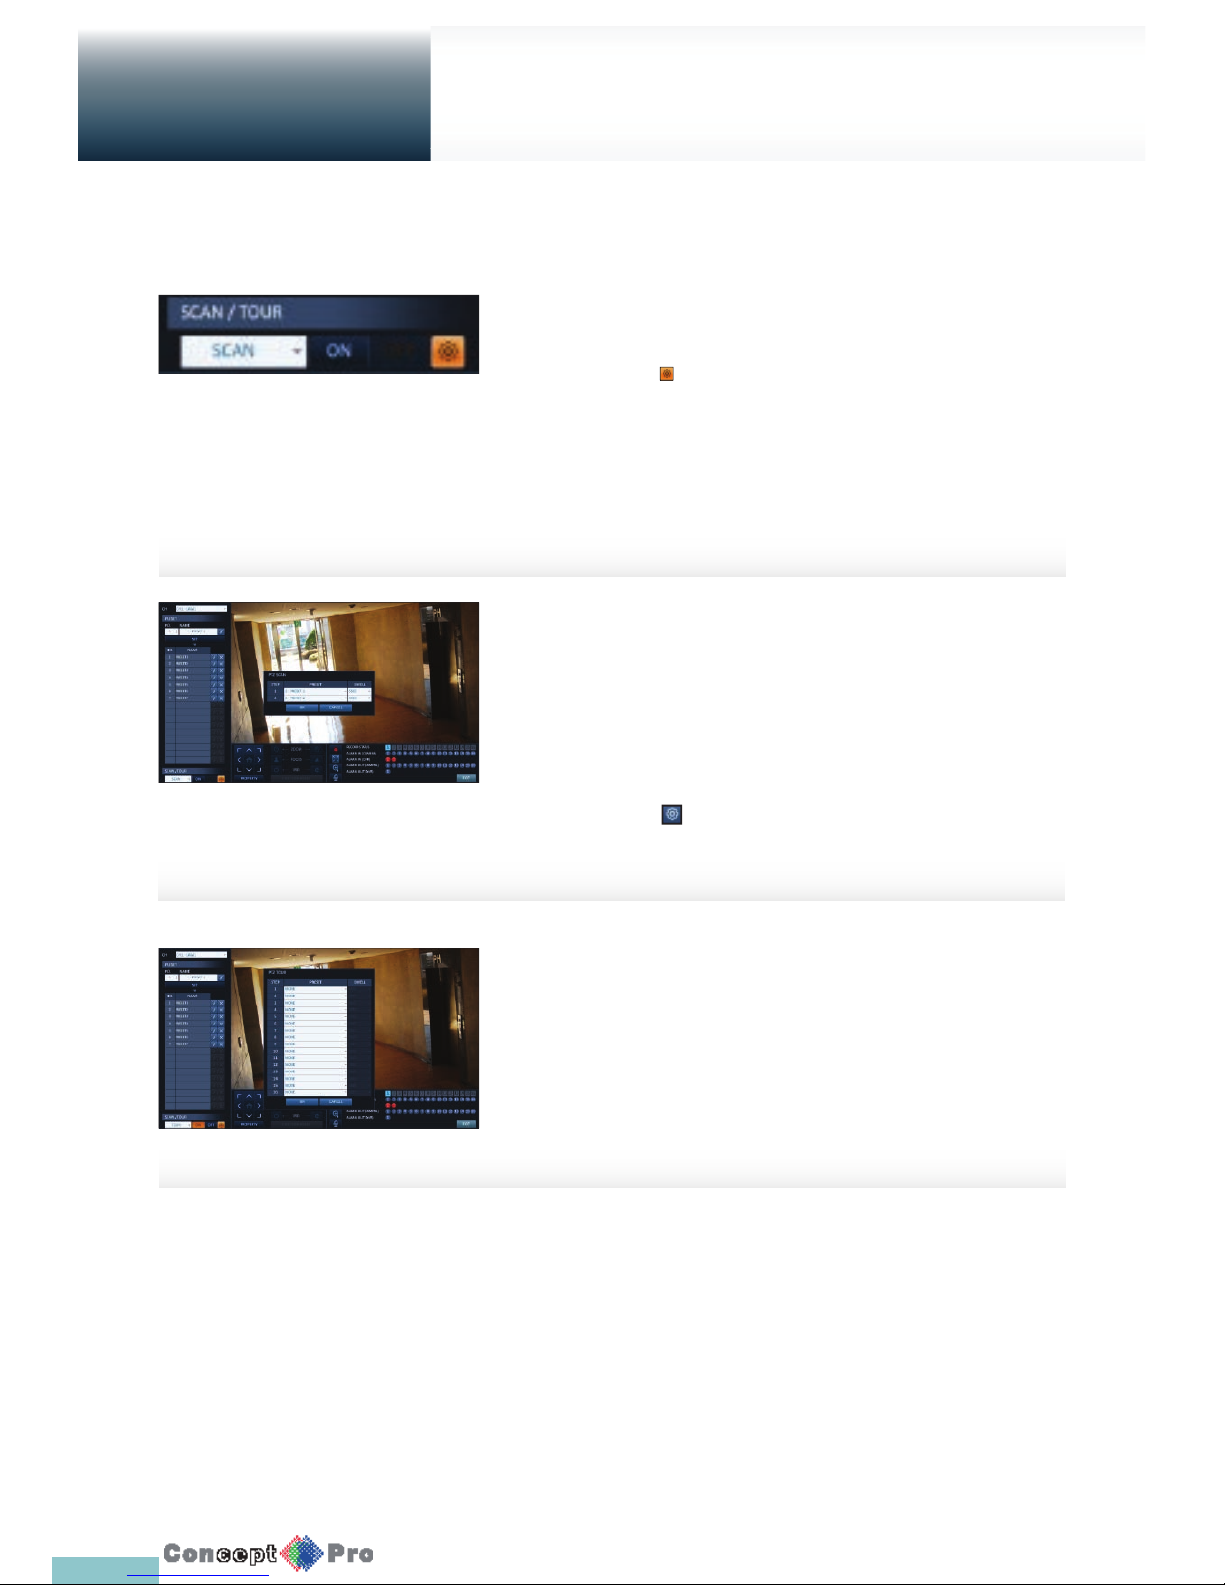
1. To change the individual PTZ setting click <PROPERTY> (for auto focus,
auto IRIS, pan/tilt speed, zoom speed, focusing speed, iris speed).
R Depending on the PTZ camera manufacturer and model,
some of the PTZ properties may not be applicable.
> CH: Selects the PTZ camera connected to the DVR.
> PRESET (No. / Name): You can select the preset
number and name.
R Up to 255 presets can be selected for a PTZ camera, while
up to 16 presets can be registered to one DVR.
2. Control the Camera’s PTZ while watching the video. Press the <SET>
button to append the preset.
> Click the shortcut icon to move to the corresponding PTZ
(preset) position.
> Click Delete icon to delete the corresponding preset.
R PRESET: Memorizes the PTZ camera’s eld of view for direct
access at a later time.
Page 24
21
Live Screen at a glance
Getting
Started
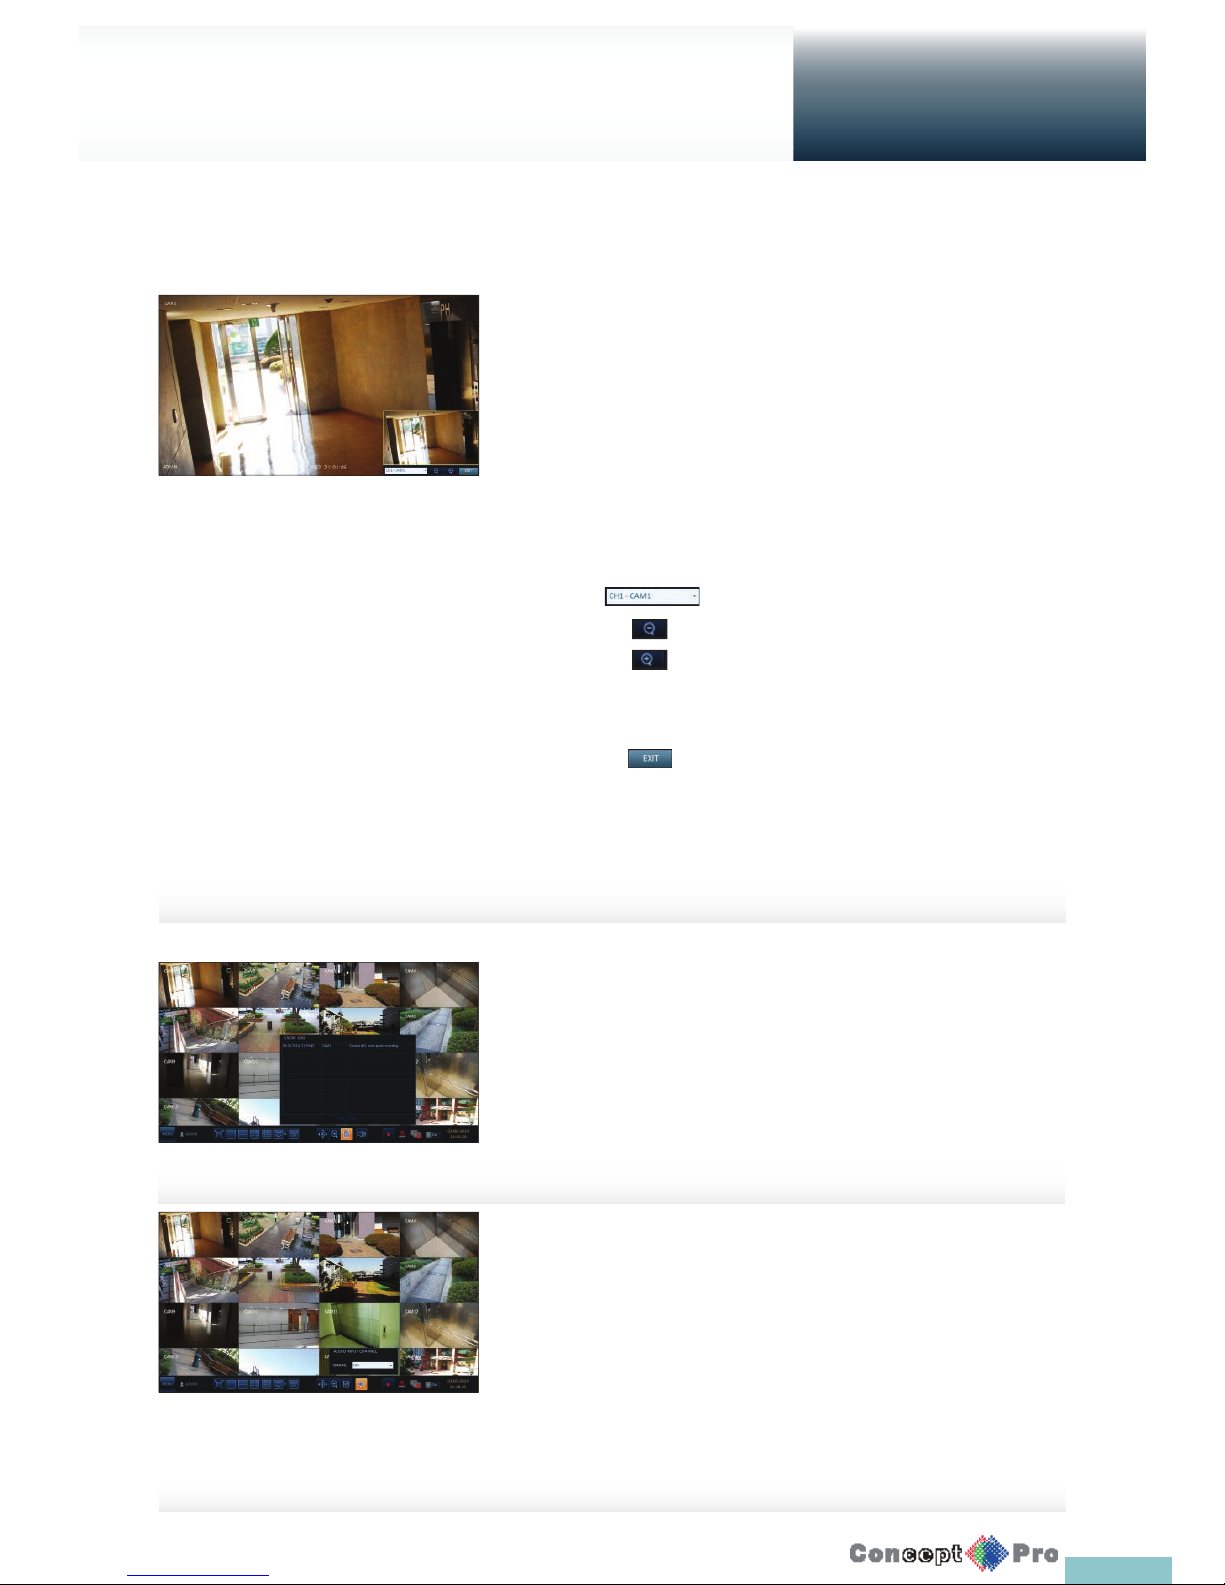
Scan / Tour
1. Select <SCAN> and click the <ON> button.
2. Click the < > icon.
3. Select a user-de ned preset and register it.
> DWELL: Sets the dwell time of 00 seconds before
moving to the next preset location.
R <SCAN> function patrols two preset positions at the speci ed
speed and interval for back-and-forth monitoring.
4. Select <TOUR> and click the <ON> button.
5. Click the < > icon.
6. Select a user-de ned preset and register it.
> DWELL: Sets the dwell time of 00 seconds before
moving to the next preset location.
R <TOUR> function patrols multiple presets in order
(PRESET 1 ; PRESET 2 ; PRESET 3 ;…) for automated
patrolling monitoring.
Page 25
22
To check the event log
You can check the log of the events that occurred
1. Click Log to display the “EVENT LOG” window.
The log list is sorted with the latest one at the top.
2. Double-click a desired log to display the event video.
You will move to the play screen of the selected log
To select an audio input channel
Select a channel from which the audio signal will bereceived.
> CHANNEL: Produces the selected channel’s audio, regardless of
the split screen mode.
> LINK TO FULL SCREEN: When switching the DVR display
mode to view one channel (Single Split), it produces the selected
channel’s audio.
R A camera supports audio input should be used, and the
DVR is connected to a speaker
Live Screen at a glance
Getting
Started
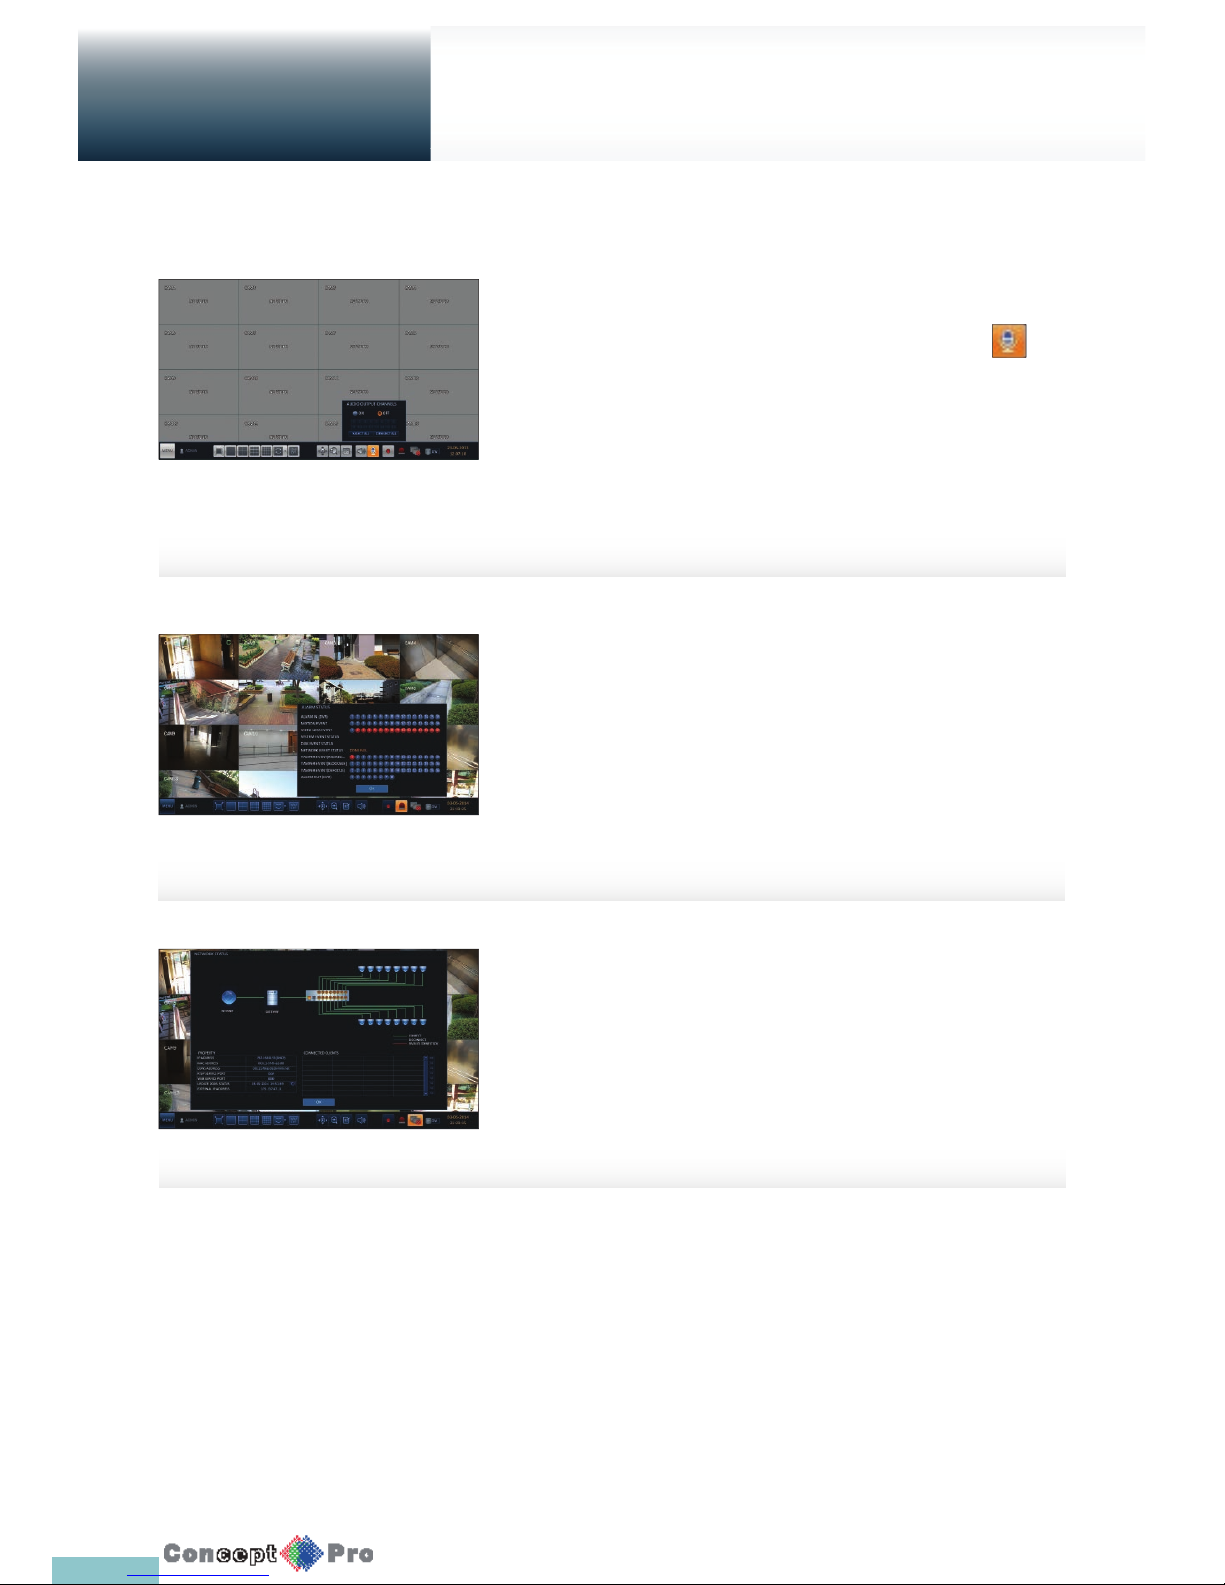
Digital Zooming
You can enlarge the monitoring screen for better view.
Zooming will enlarge the video of the selected channel. If no channel is
selected, channel 1 will be zoomed.
1. Click Zoom in the status bar or move the cursor to a desired channel
and right-click it to display the context menu. Select <ZOOM> or press
the [ZOOM] button on the remote control.
2. Move to the zoom control screen. When the menu bar appears in the
right bottom, use the buttons to control the zooming.
> Select a channel to zoom in/out.
> Zoom out the current image step by step.
> Enlarge the current image step by step.
> Zoom Box Use the yellow box to move to or select a desired
zooming area.
> Exit the zooming screen and return to the live screen.
R Digital zooming magni es the video image digitally and produces
enlarged images that may not be sharp and clear.
For sharper and clearer magni cation, it is recommended to use
cameras supporting optical zoom.
Page 26
23
Live Screen at a glance
Getting
Started
To select an audio output channel
Select the audio output from a connected microphone by clicking
Alarm status
You can check alarms and events from each camera and the system.
Click <OK> to close the window.
Network status
Shows connection status of cameras and network devices.
Click to display detailed information on current users and network
connections.
Click <OK> to close the window.
R For more information, refer to “Network Status”. (page 42).
Page 27
24
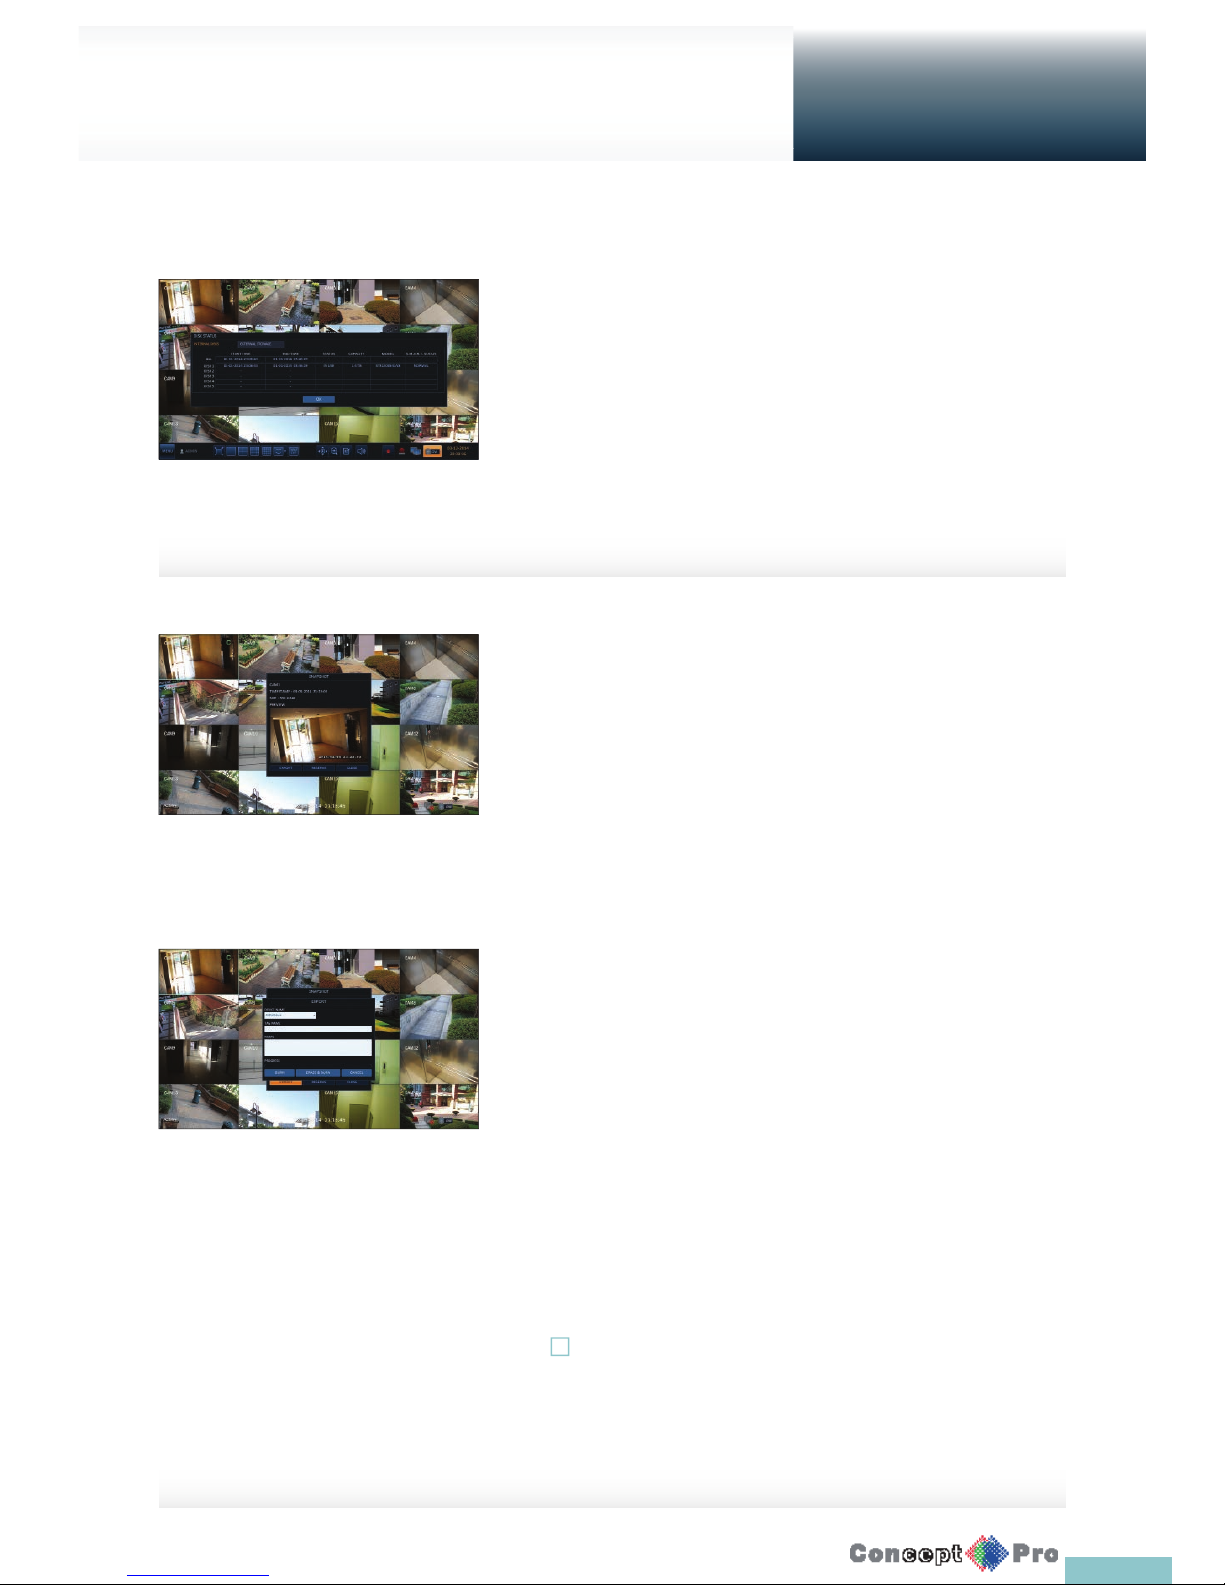
Disk status
You can check status and information on storage devices currently
connected to the system.
Click <OK> to close the window.
R For more information, refer to “Disk Information”. (page 47).
Saving captured snapshots
You can capture the current video screen and save or export to a connected
storage device.
1. Select a channel rst, and right click to open the popup menu, and
select <SNAPSHOT> menu item, or press the [SNAPSHOT] button on
the remote control.
2. Connect a storage device, and click the <EXPORT> button.
To save the captured image onto the built-in HDD, press the <RESERVE>
button.
R Saved image can be found in the “Archive>Reserved data
management” and can be backed up (Page 72)
3. Enter the <TAG NAME> and <MEMO> and press <BURN> or
<ERASE & BURN> button.
> A progress bar appears and indicates the progress of exporting to
storage device.
> BURN: Snapshot is stored in the connected USB storage device.
> ERASE & BURN: Deletes all les in the connected USB storage and
then saves the snapshot.
! Note that <ERASE & BURN> option erases all data in the USB storage
device and will not be restored once deleted.
Live Screen at a glance
Getting
Started
Page 28
25
System
Setting
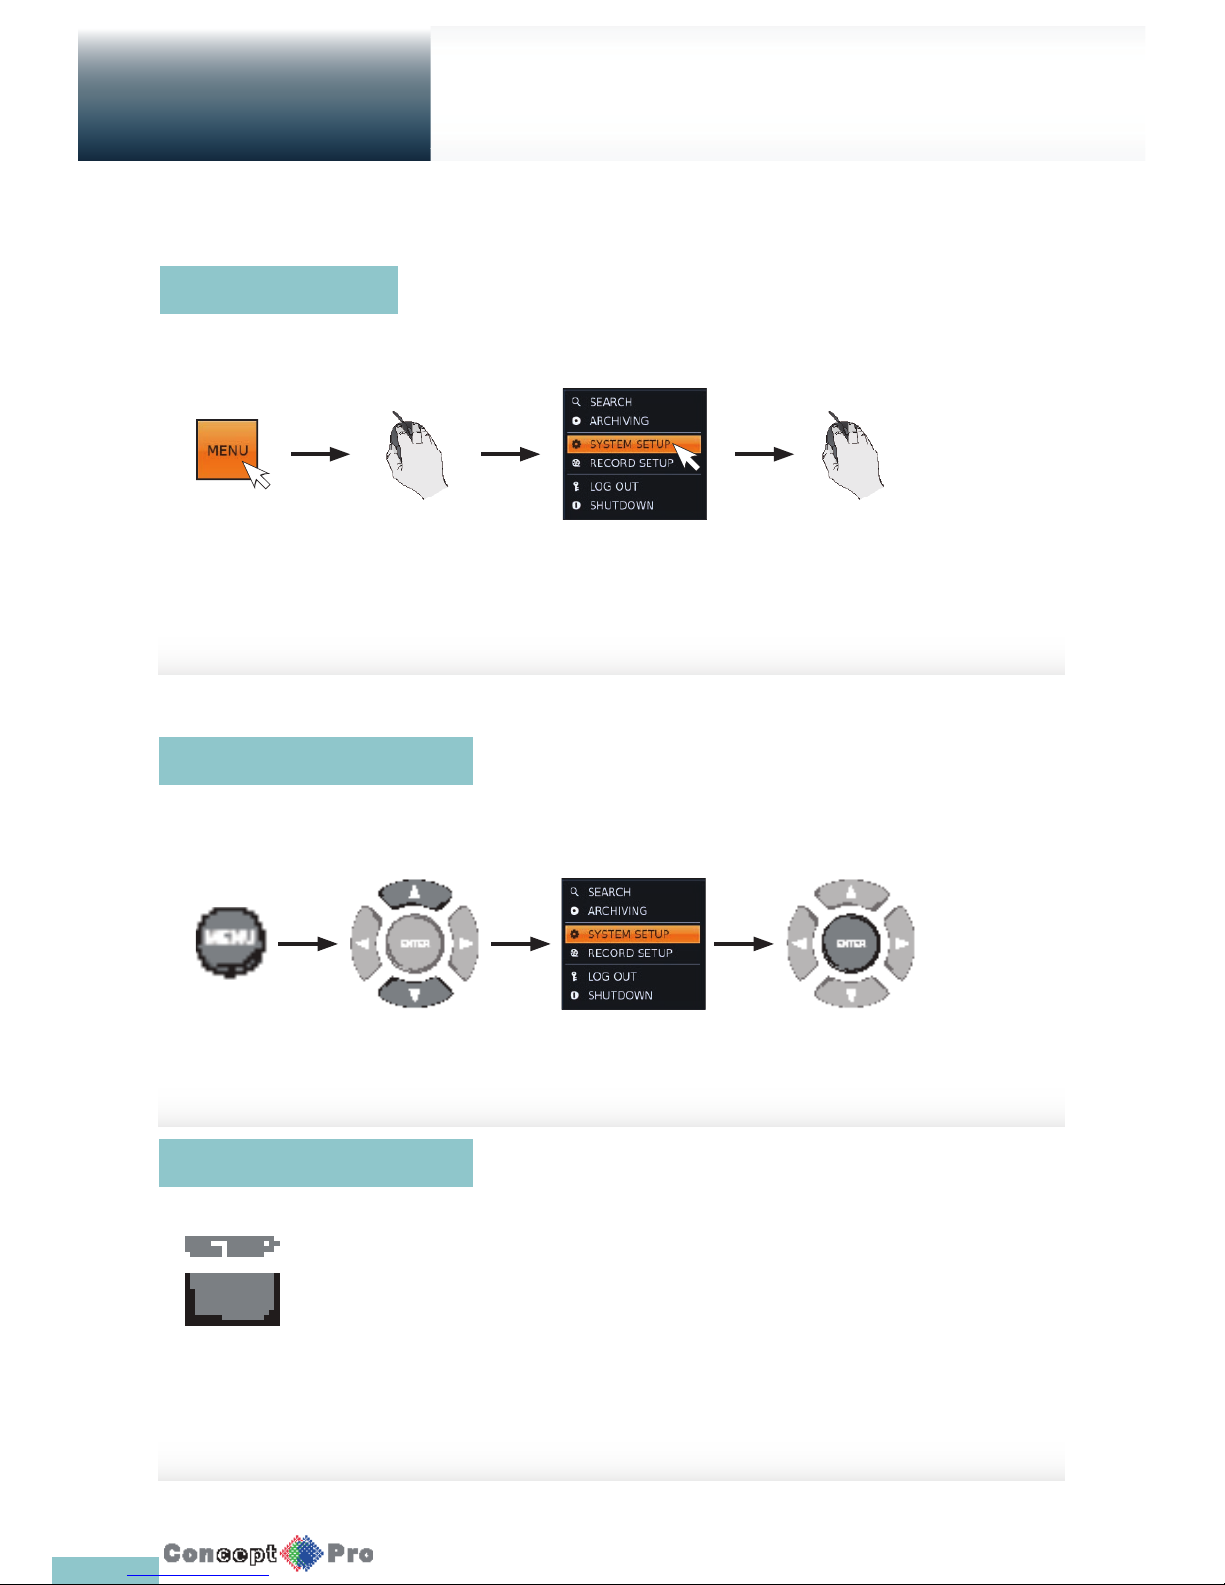
Using the mouse
Using the remote control 1
Using the remote control 2
To enter the System Setup menu
How to use the mouse
How to use the remote control 1
How to use the remote control 2
Page 29
2626
Camera Setting
System
Settings
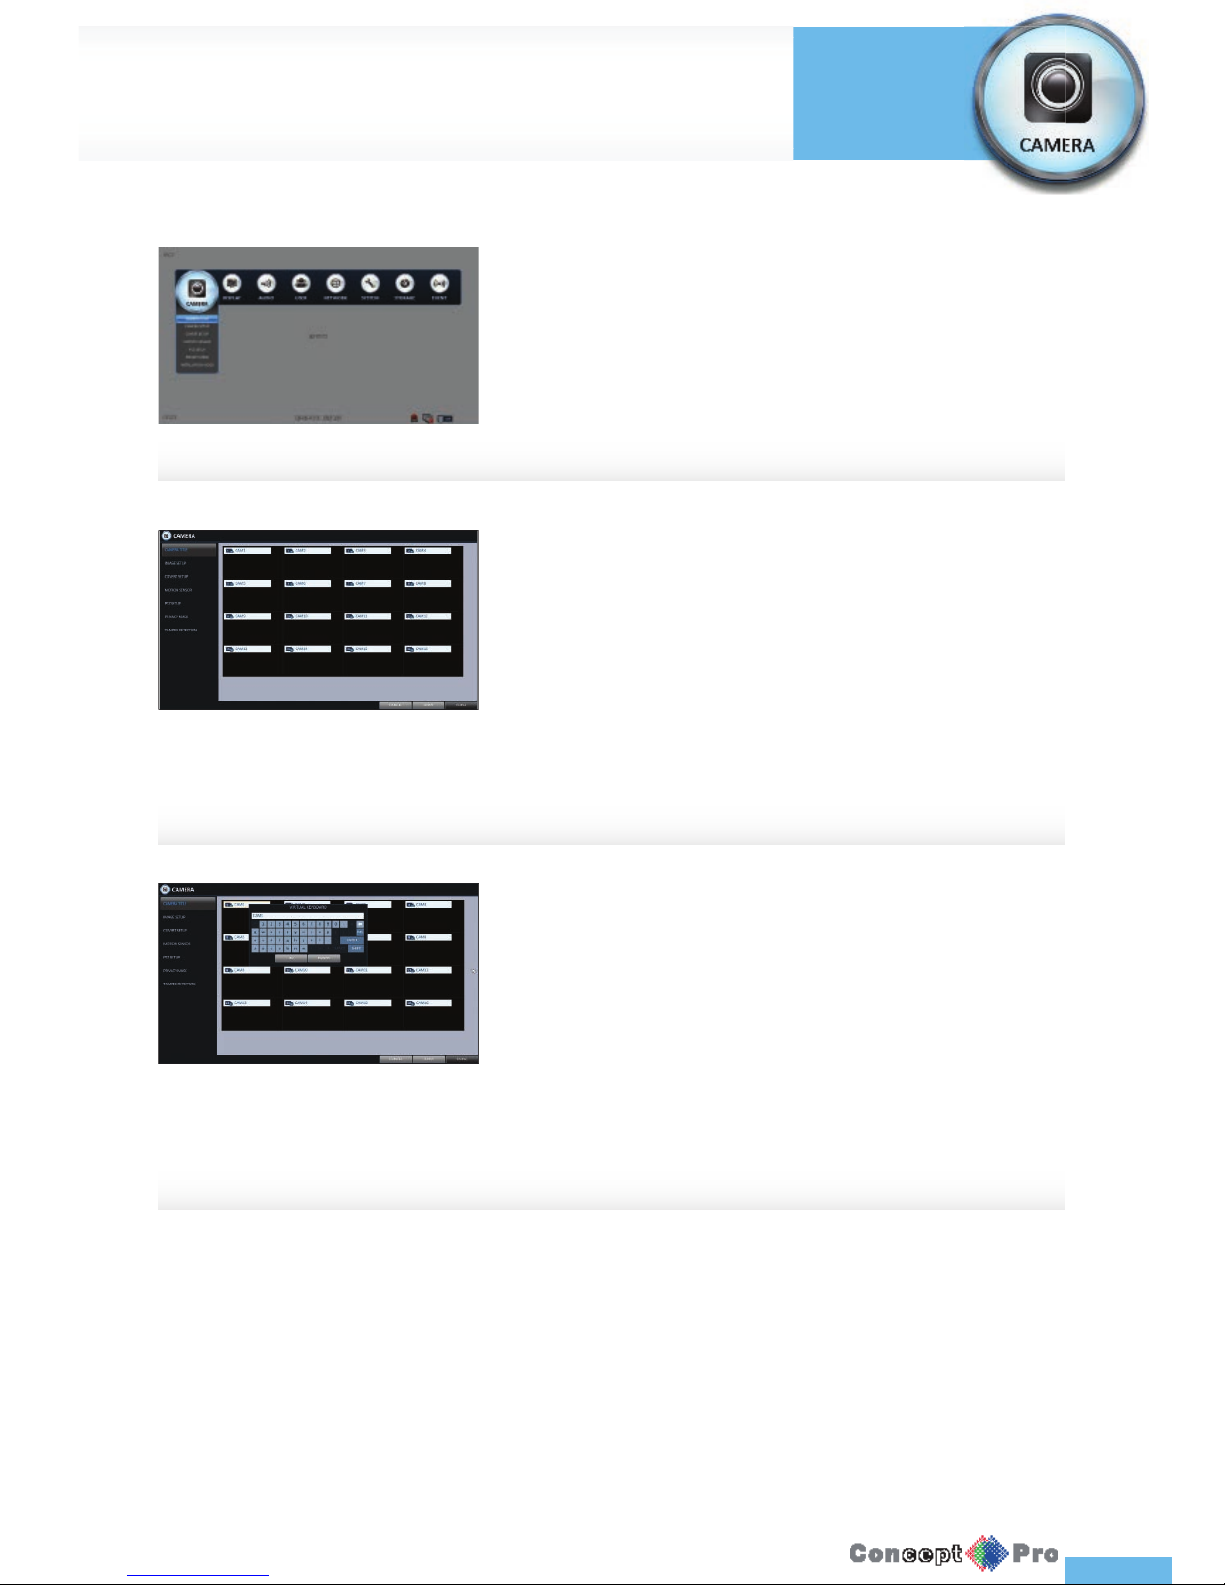
Camera Title
You can change the camera ID that is displayed on the screen.
1. From <SYSTEM SETUP> - <CAMERA>, select <CAMERA TITLE>.
2. Use the [pqtu/ENTER] buttons on the remote control or use the
mouse to select a channel that you want to rename.
Alternatively, double-click the camera to rename from the top left corner.
You can con gure the display settings of the: camera title, image setup,
covert setup, mtion sensor, PTZ settings, privacy mask and
tamper detection
3. Once the virtual keyboard appears, select the desired alphanumeric
characters to input, and press the <OK> button.
R The <SHIFT> key toggles case sensitivty.
4. To apply the change, click <APPLY> in the bottom of the screen.
5. When done, press the [EXIT] button on the remote control or click
<CLOSE> in the lower screen. The con rmation message appears and
you will return to the previous menu.
R Camera name allows up to 8 letters, combining numbers and
upper/lower case letters.
Page 30
27
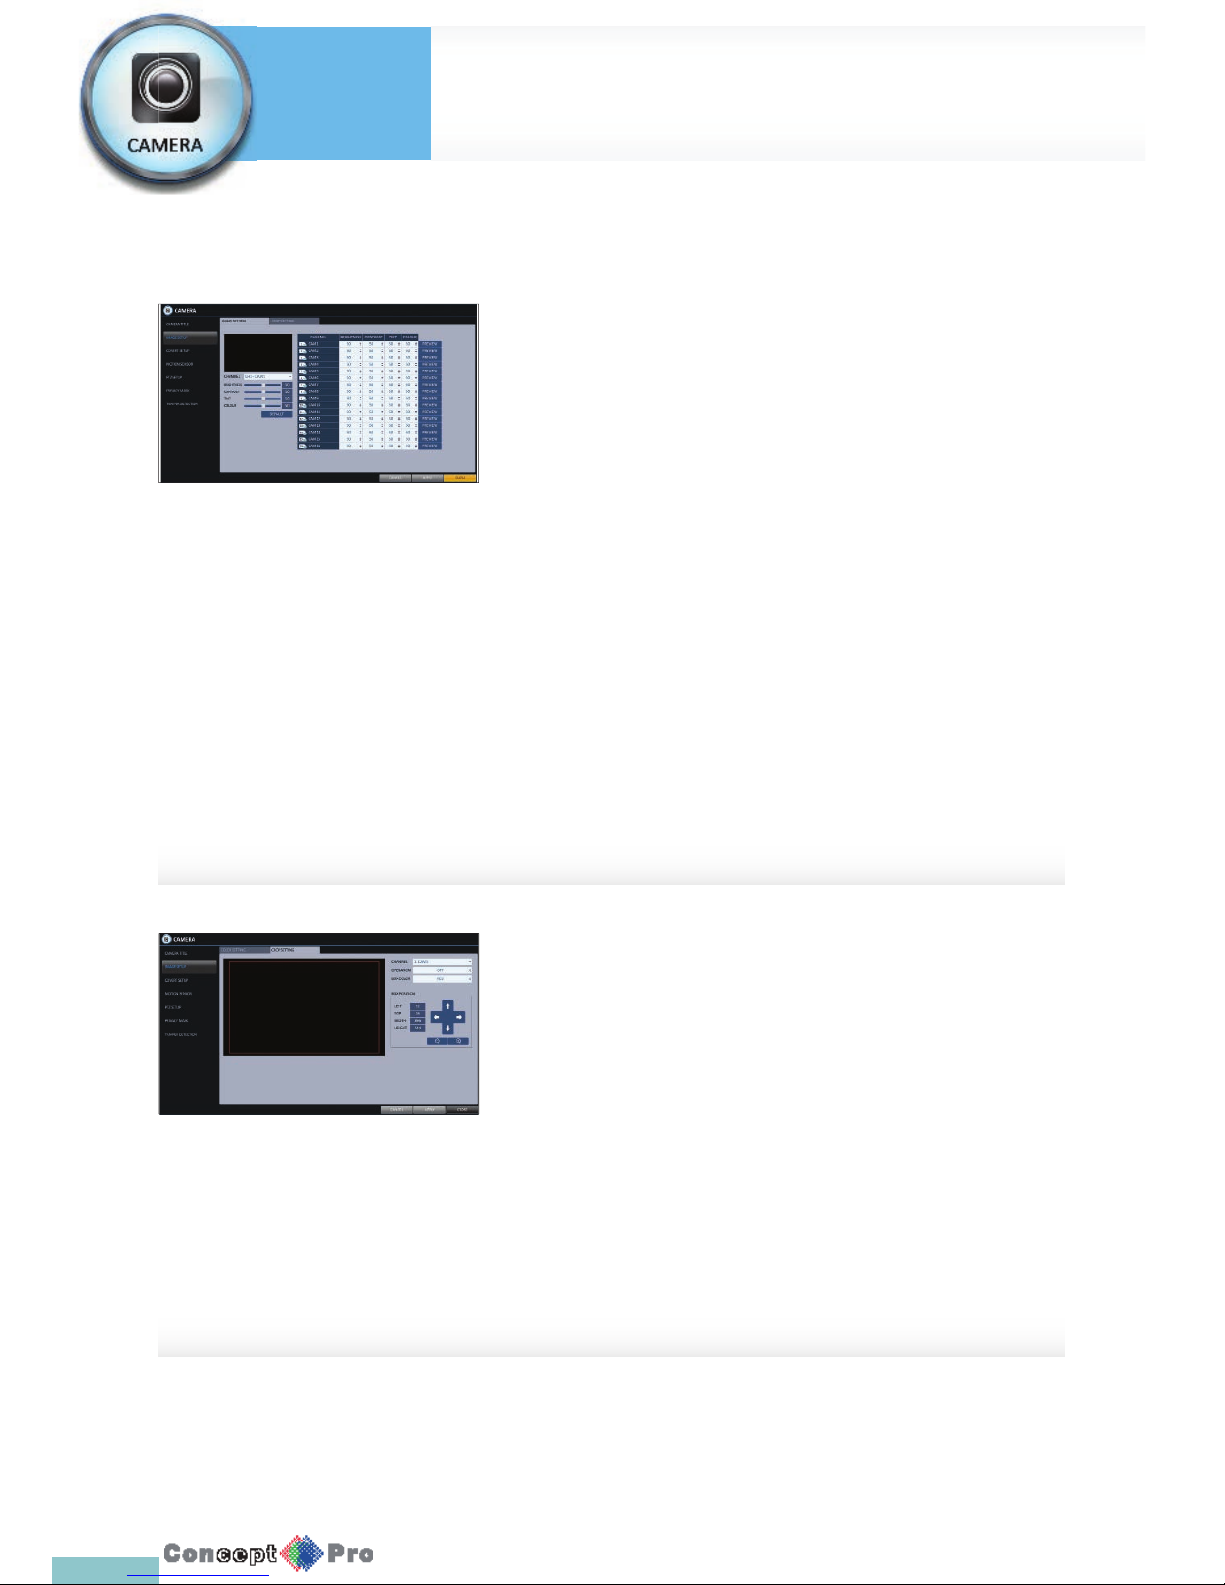
Image Setup
You can adjust the brightness, contrast, color and quality setting of each
channel’s camera.
1. From <SYSTEM SETUP> - <CAMERA>, select <IMAGE SETUP>.
2. Use [pqtu/ENTER] buttons on the remote control or the mouse to
edit the settings.
3. To apply the changes, click the <APPLY> button.
4. Once completed with the setup, press the [EXIT] button on the remote
control or click the <CLOSE> button on the bottom of the screen. A
con rmation dialog appears and returns to the previous menu.
Press <PREVIEW> button for adjusting with preview image.
Crop Setup
You can crop a picture to remove any unwanted view from the camera
1. From <IMAGE SETUP> click the tab
< CROP SETTING>.
2. Use the [pqtu / ENTER] buttons on the
remote control or the mouse to change the channel
or the box position.
3. To apply the changes, click <APPLY> in the
bottom of the screen.
Camera Setting
System
Settings
Page 31
28
Covert Setup
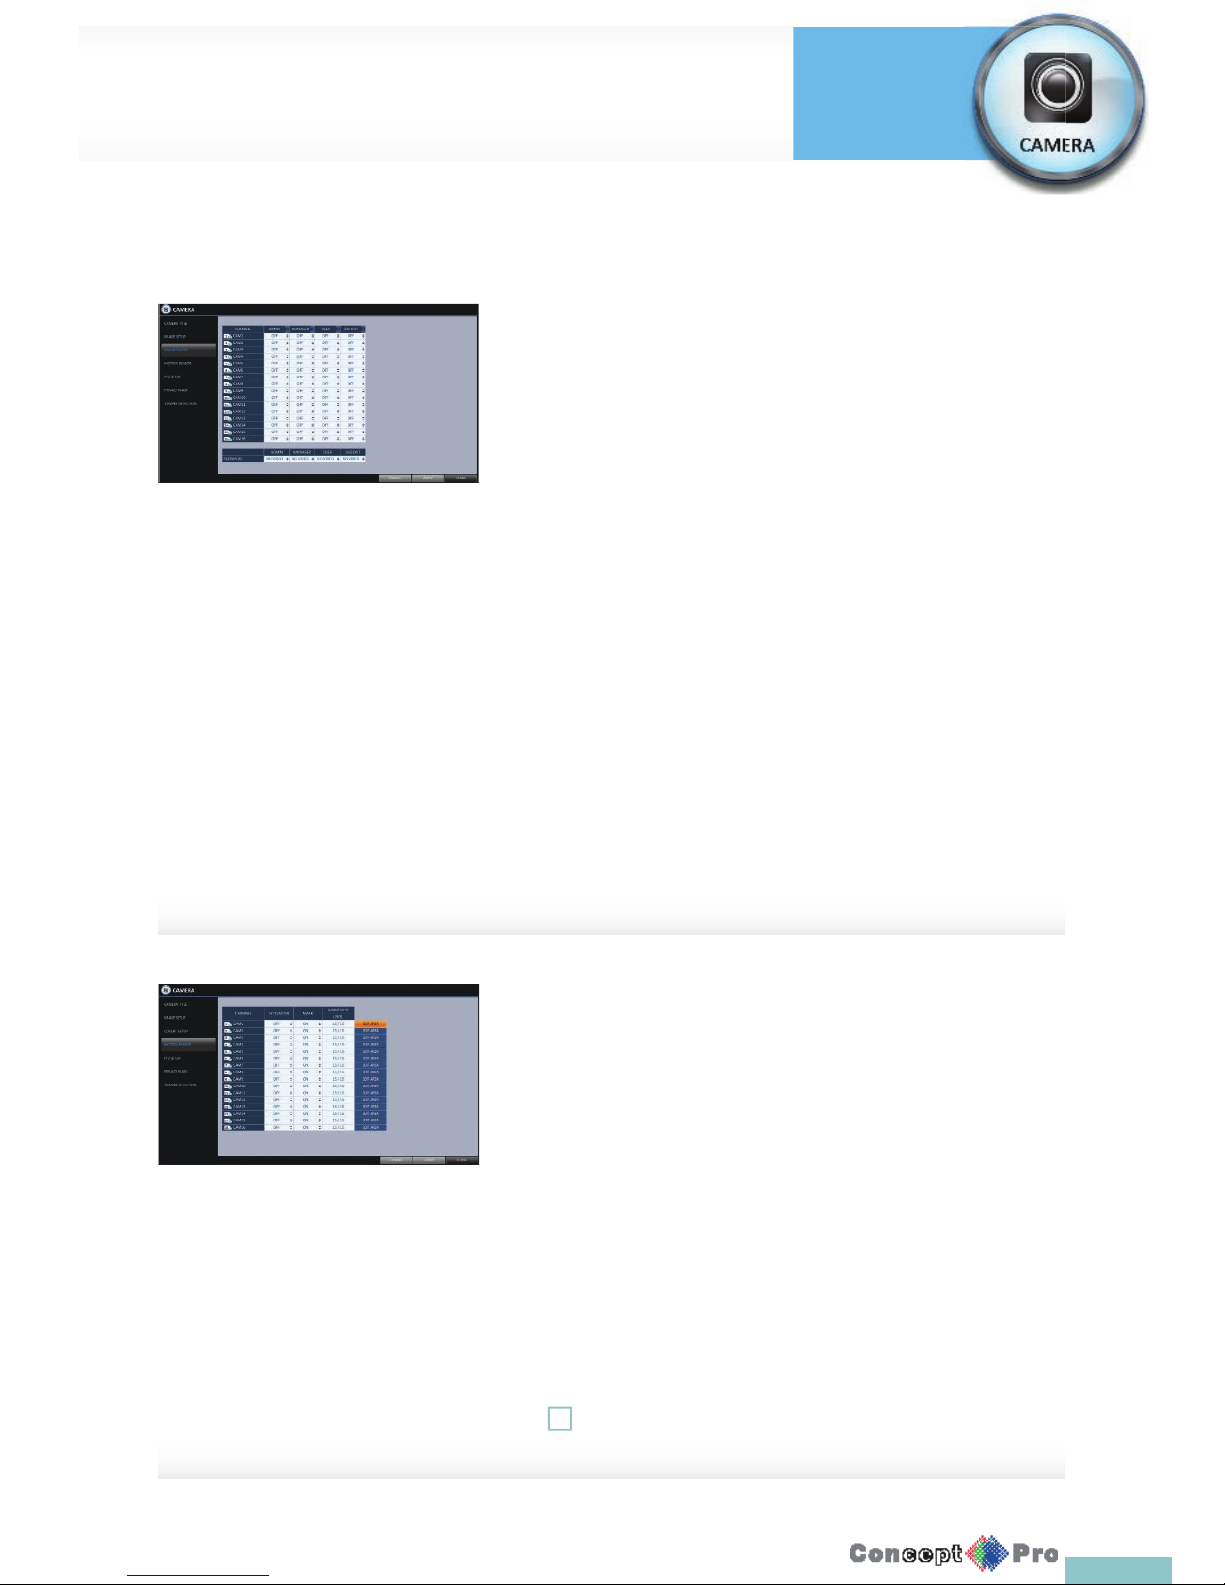
You can set the VXH960H to hide the video so that a speci c user’s or user
group’s can not view it. Set the channel(s) that you want to hide from a
speci c user or user group.
1. From <SYSTEM SETUP> - <CAMERA>, select <COVERT SETUP>.
2. Use the [pqtu/ENTER] buttons on the remote control or use the
mouse to select a covert channel(s) from a speci c user group.
> ADMIN, MANAGER, USER: Set them to <ON>.
The selected channel will be covert from the applicable user
account.
> LOG OUT: Set it to <ON>. When the user logs out, the current
channel will be set to a covert channel.
> SHOWN AS: Sets how a <COVERT> channel will be displayed on
the monitor.
- No Video: Nothing is displayed on the monitor for the
<COVERT> channel as if it is not connected to a camera.
- COVERT: Hides only the live monitoring.
3. To apply the change, click <APPLY> in the bottom of the screen.
4. When done, press the [EXIT] button on the remote control or click
<CLOSE> in the lower screen. The con rmation message appears and
you will return to the previous menu.
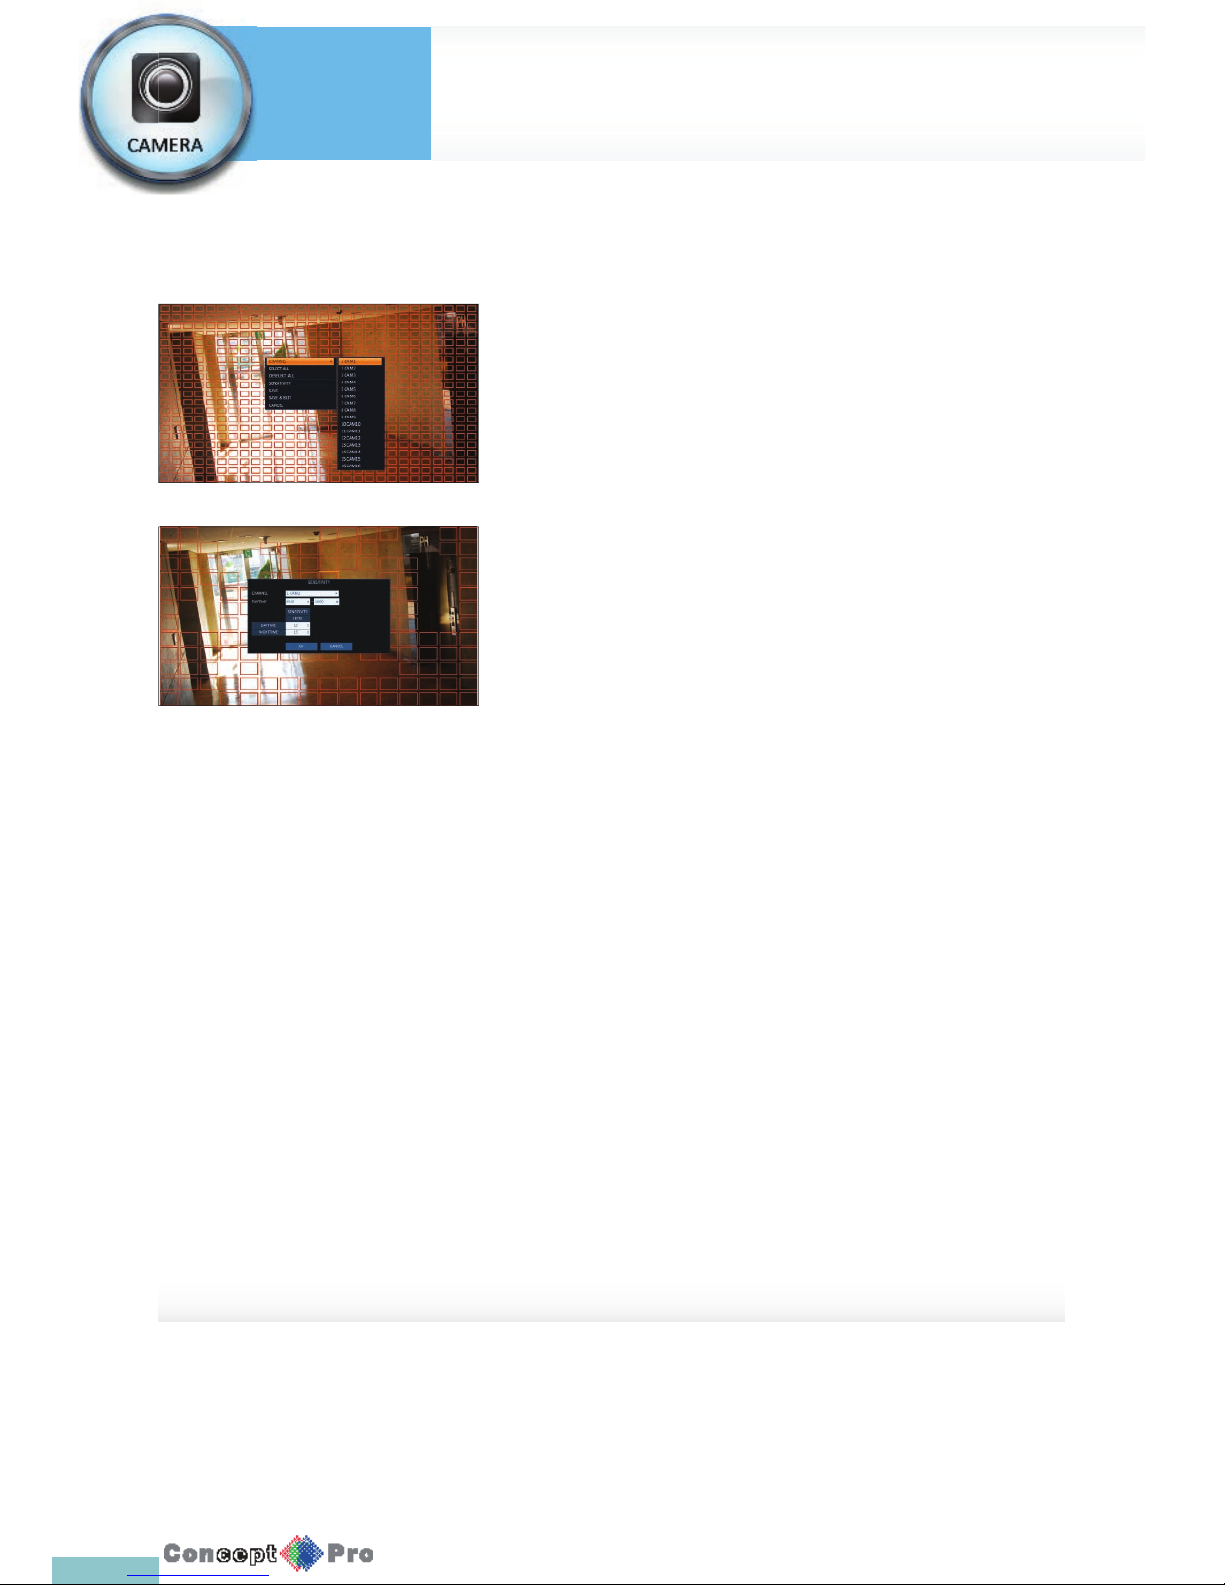
Motion Sensor
Set the motion sensor of the camera so that it can detect a motion event.
1. From <SYSTEM SETUP> - <CAMERA>, select <MOTION SENSOR>.
2. Use the [pqtu/ENTER] buttons on the remote control or use the
mouse to specify the use of each option item.
> ACTIVATION: turn on or off the motion sensor.
> MARK: Set to <ON> to display the motion detection indicator on
each video tile where applicable.
> SENSITIVITY: Set the sensitivity level of the motion sensor to
either Daytime or Nighttime.
> EDIT AREA: Specify the motion detection area.
3. To apply the change, click <APPLY> in the bottom of the screen.
4. When done, press the [EXIT] button on the remote control or click
<CLOSE> in the lower screen. The con rmation message appears and
you will return to the previous menu.
! The motion detection sensitivity may diff er depending on the
characteristics of the connected camera or the installation environment.
Camera Setting
System
Settings
Page 32
29
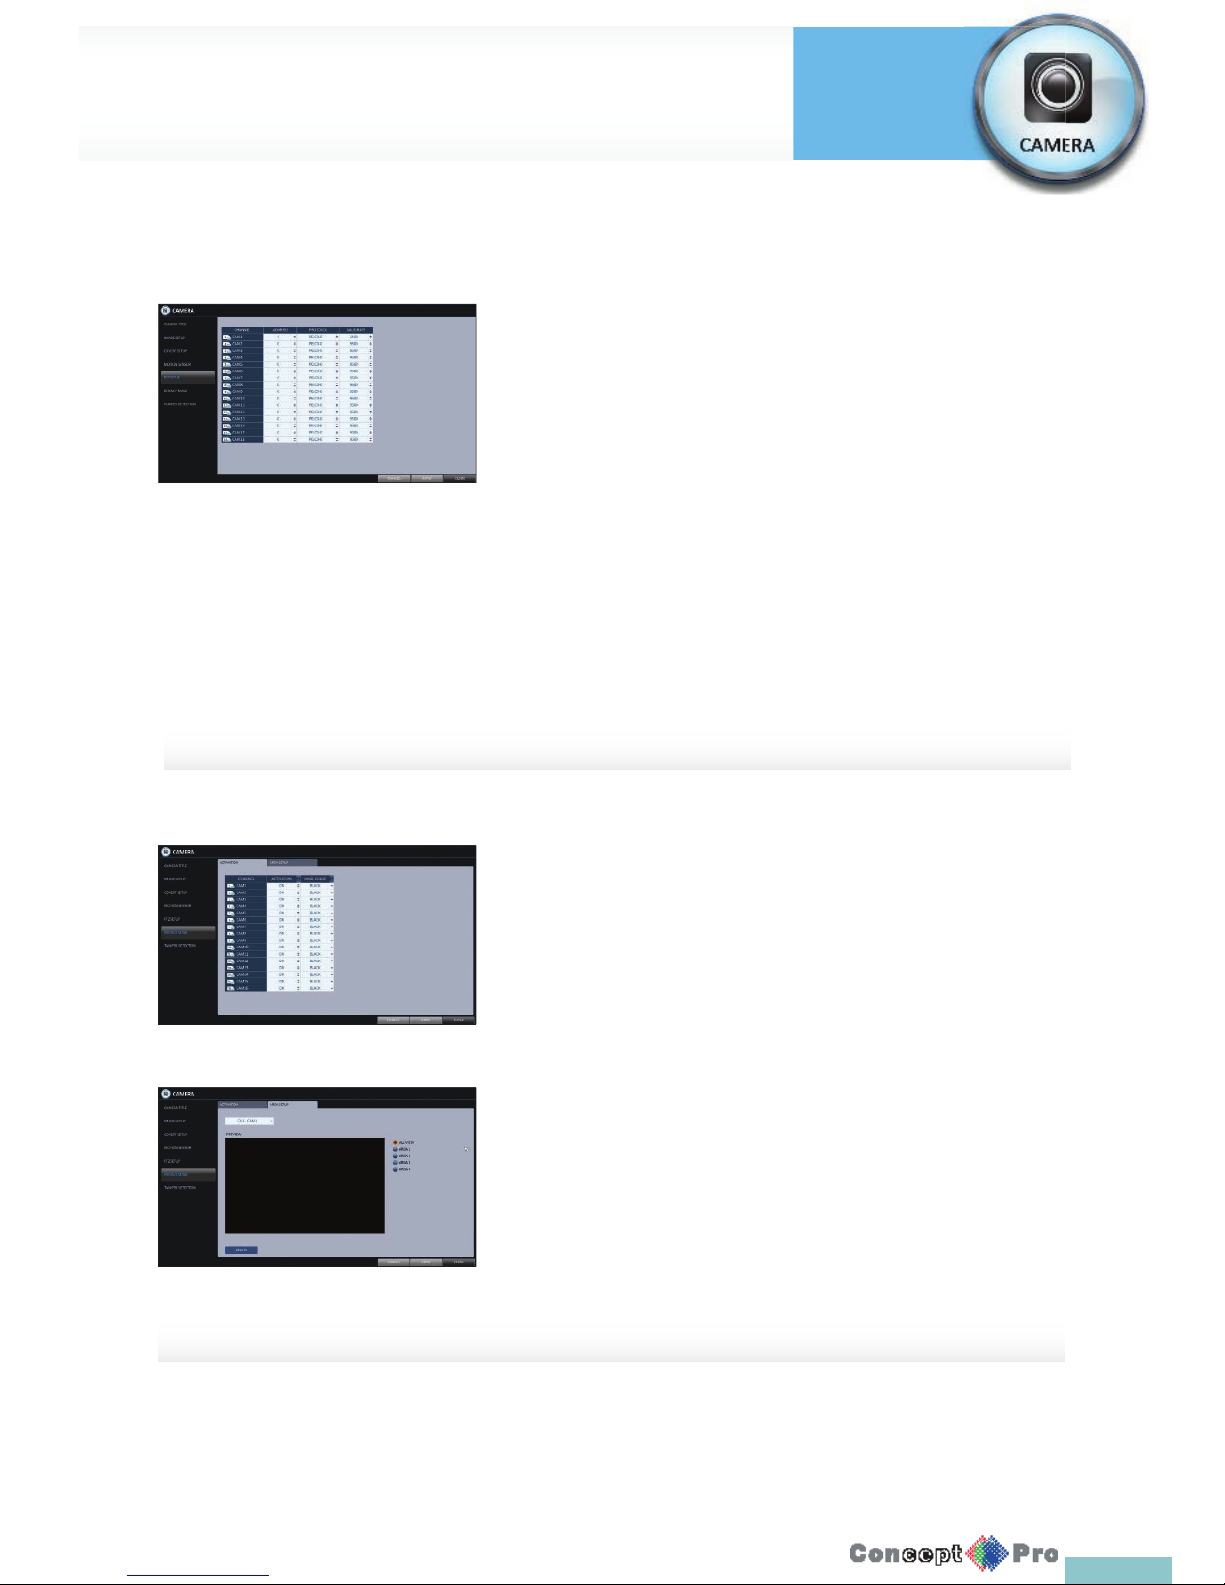
Motion Area Setup
From the motion setup window, click <EDIT AREA> in the right corner to
display the area setup screen.
Setting the motion area may diff er depending on the camera model. Below is
a typical setting of the motion area.
1. Click <EDIT AREA> to move to the motion area setup screen.
2. If using the remote control, press the [ENTER] button to mark the
current position.
3. Use the arrow buttons to move to a desired block and press [ENTER].
The area setup will begin.
Then, use the arrow buttons to specify the area.
R Alternatively, you can use the drag-and-drop method to specify or
release the area when using the mouse.
4. If you select the speci ed area again, it will be released.
5. Press the [EXIT] button on the remote control or right-click any area to
display the popup window as shown in the picture to the left.
6. While the popup window is displayed, select <Sensitivity> to set the
motion detection sensitivity of the channel currently selected.
> Channel: Select the channel to set the motion sensitivity.
> SENSITIVITY: 1 (Low) ~ 30 (High) - The higher
the number is, the higher the sensitivity level becomes.
> DAYTIME: specify the time period that will be considered as
daytime.
- DAYTIME: specify the <SENSITIVITY> for the daytime.
- NIGHTTIME: specify the <SENSITIVITY> for the nighttime.
R Images recorded in a low contrast scene such as at night cause severe
noise, triggering the motion event too often.
R If unwanted events occur frequently at night, you may want to reduce
the motion sensitivity during the night .
Camera Setting
System
Settings
Page 33
30
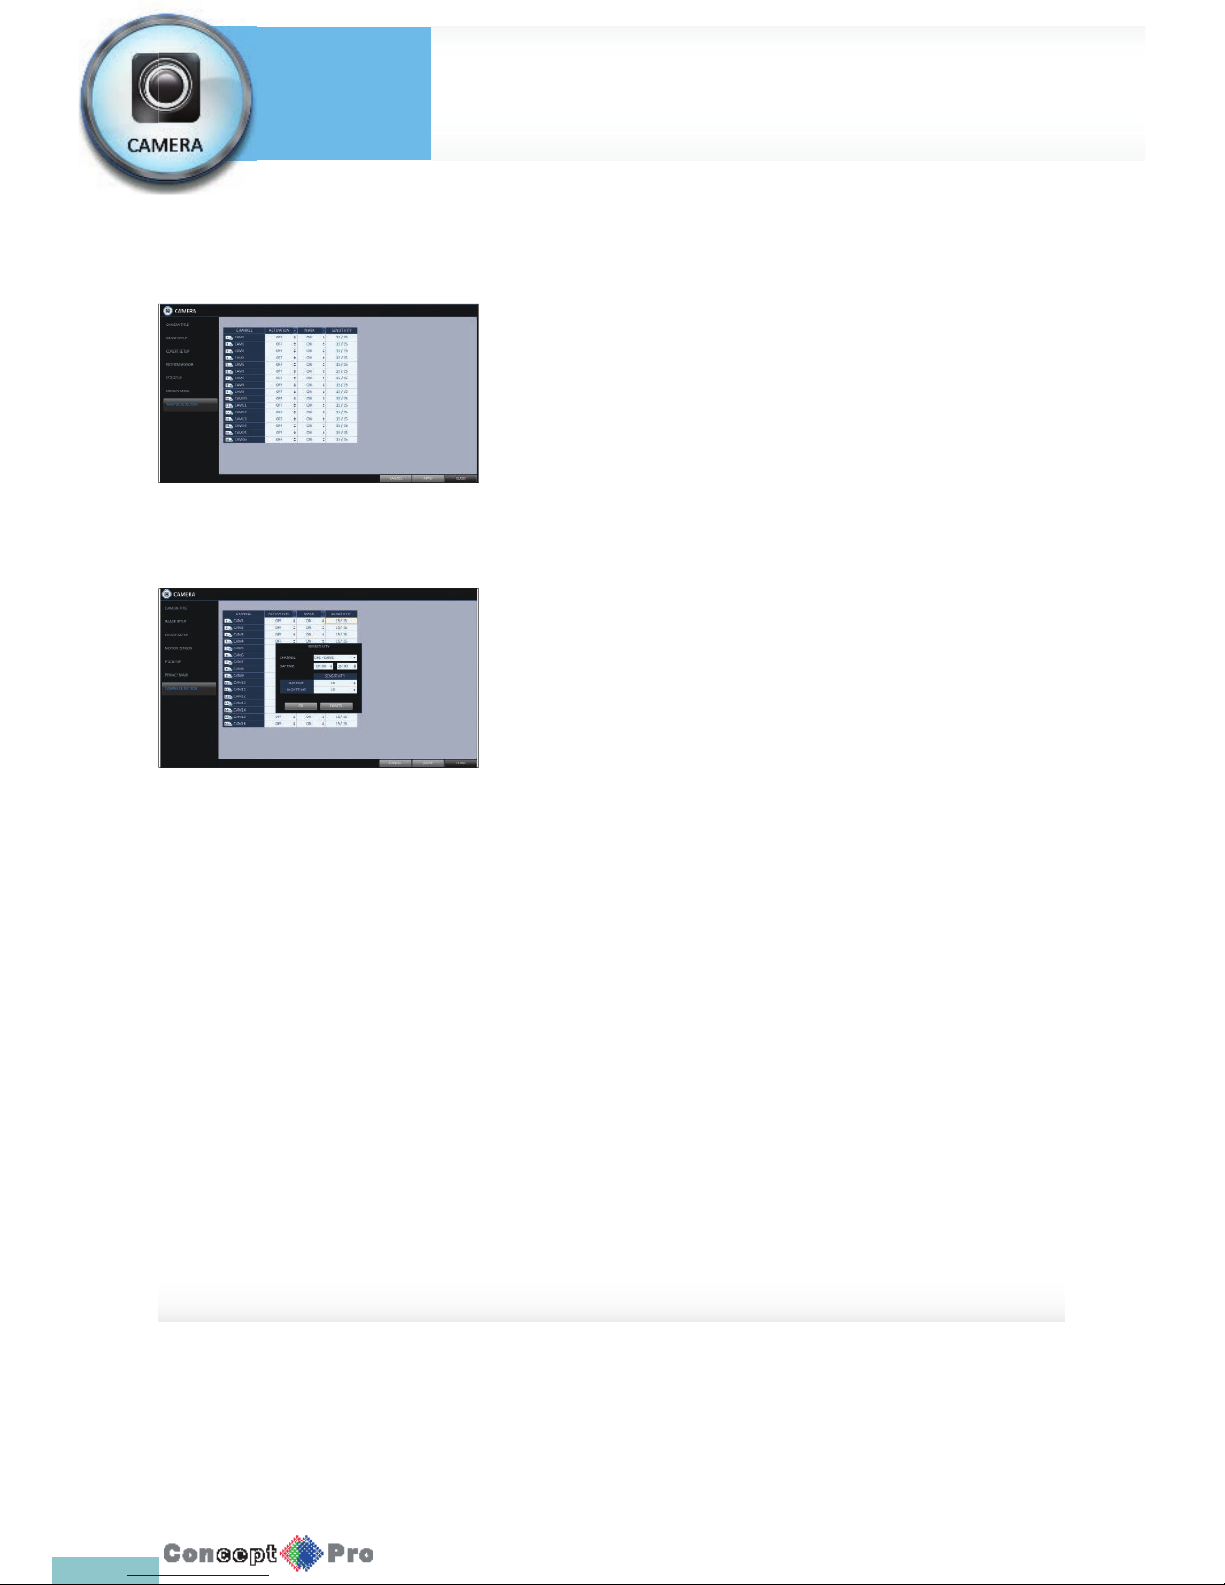
PTZ Settings
You can con gure PTZ cameras connected to each channel. Set the camera
ID, protocol, baud rate and PTZ control speed for each channel.
1. From <SYSTEM SETUP> - <CAMERA>, select <PTZ SETUP>.
2. Use [pqtu/ENTER] buttons of the remote control or mouse to set
protocol and baud rate of each channel.
R Refer to user’s manual of the camera or consult the camera installation
service provider for further details on setting the PTZ camera, such as
the camera’s address, protocol and baud rate.
3. To apply your changes, click <APPLY> button.
4. Once the setup is completed, press the [EXIT] button on the remote
control or click the <CLOSE> button to display the con rmation dialog.
Click <CANCEL> to return to the previous menu.
Privacy mask
Set the privacy mask of the camera so that it can block certain areas of the
camera’s view.
1. From <SYSTEM SETUP> - <CAMERA>, select <PRIVACY MASK>
2. Use the [pqtu/ ENTER] buttons on the remote control or the mouse
to activate or de-activate and change the colour of the mask.
3. To apply the changes, click <APPLY> in the bottom of the screen.
4. To set the mask area, click the <AREA SEUP> tab at the top. You can
set 4 areas per camera.
5. Click <AREA 1> and drag where you would like the mask on the
preview. You can do this for each area.
6. Click <ALL VIEW> to see all the privacy masks for that camera.
7. To delete a mask either click <ALL VIEW> or specify an area then
click <DELETE>.
8. To apply the changes, click <APPLY> in th bottom of the screen.
Camera Setting
System
Settings
Page 34
31
Tamper Detection
You can set the VXH960H to detect tampering with the installed camera
1. Select the <TAMPER DETECTION> from the <CAMERA> menu items in
<SYTEM SETUP >
2. Use [pqtu] buttons on the remote or the mouse to select
<MARK, SENSITIVITY> and set the tampering detection conditions
appropriately.
3. For each channel, set the day/night sensitivity.
4. Set the activation of each channel, and set whether to display indicator
on the screen.
> SENSITIVITY LEVEL: The detection sensor’s sensitivity for each
detection block. (Can be separately set for day / night modes)
> ACTIVATION: Set the detection for each channel to be enabled/
disabled.
> MARK: Turns on or off the detection indicator to be displayed on
the screen.
5. To apply the change, click <APPLY> in the bottom of the screen.
6. When done, press the [EXIT] button on the remote control or click
<CLOSE> in the lower screen. The con rmation message appears and
you will return to the previous menu.
Camera Setting
System
Settings
Page 35
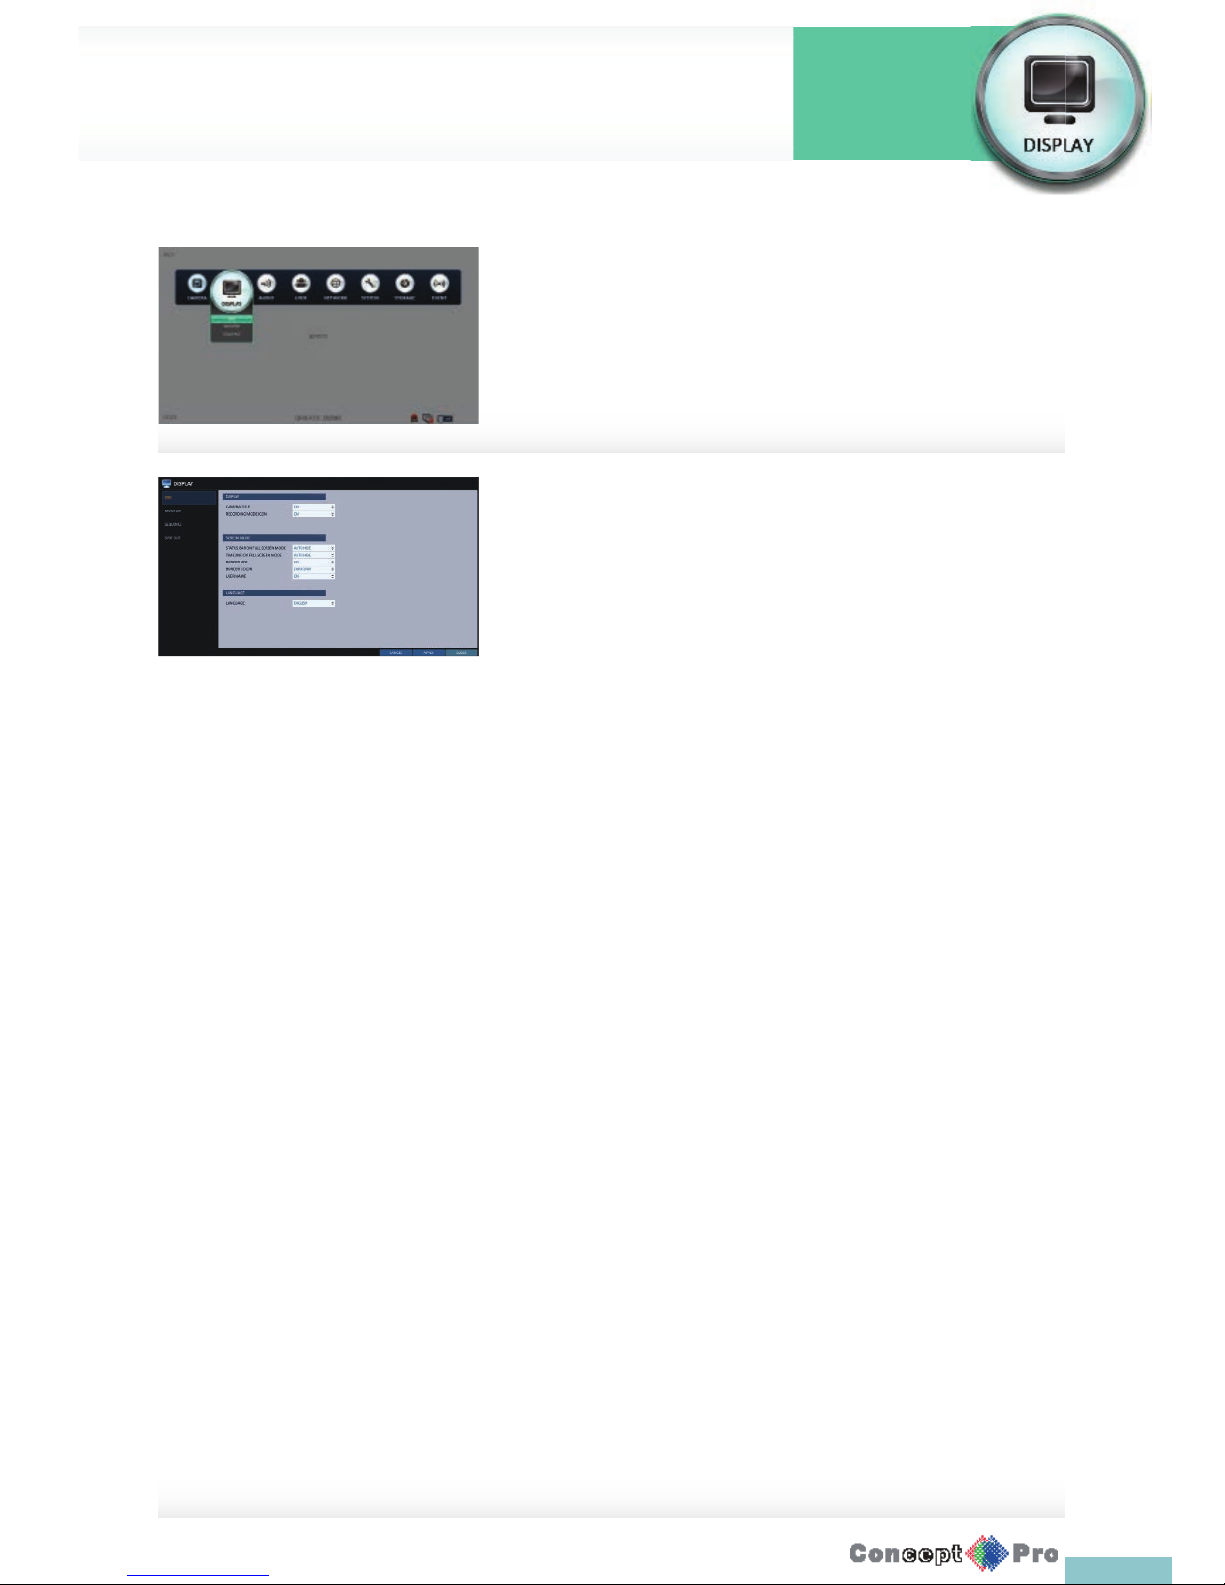
32
OSD
You can set the Camera Name, Icon, Status Bar, Timeline, Borderline, User
Name and Language.
1. From <SYSTEM SETUP> - <DISPLAY>, select <OSD>.
2. Use the [pqtu/ENTER] buttons on the remote control or use the
mouse to set each option of the OSD item.
> CAMERA TITLE: specify the display of the camera title on the
screen.
> RECORDING MODE ICON: specify the display of the record mode
icon on the screen.
> STATUS BAR ON FULL SCREEN MODE: select to show or hide
the status bar in full screen mode.
- AUTO HIDE: place the cursor in the lower area of the screen to
display the status bar. If moving the cursor up, the status bar will
disappear.
- ALWAYS ON: The status bar will be displayed at all times.
- 5 SEC ~1 MIN: If there is not any mouse movement from 5
seconds to 1 minute, the status bar will disappear.
> TIMELINE ON FULL SCREEN MODE: select to show or hide the
timeline in full screen mode.
- AUTO HIDE: place the cursor in the right corner to display
the timeline. If moving the cursor to the left, the timeline will
disappear.
- ALWAYS ON: The timeline will be displayed at all times.
- ALWAYS OFF: The timeline will not be displayed.
> BORDER LINE: specify the display of the border between
channels in a split mode
> BORDER COLOUR: select a colour for the border.
> USER NAME: specify the display of the currently logged-in users
on the status bar.
> LANGUAGE: select a menu display language.
3. To apply the change, click <APPLY> in the bottom of the screen.
4. When done, press the [EXIT] button on the remote control or click
<CLOSE> in the lower screen. The con rmation message appears and
you will return to the previous menu.
You can con gure the display settings regarding the OSD menus, monitor
and sequence settings.
Display Settings
System
Settings
Page 36
33
Display Settings
System
Settings
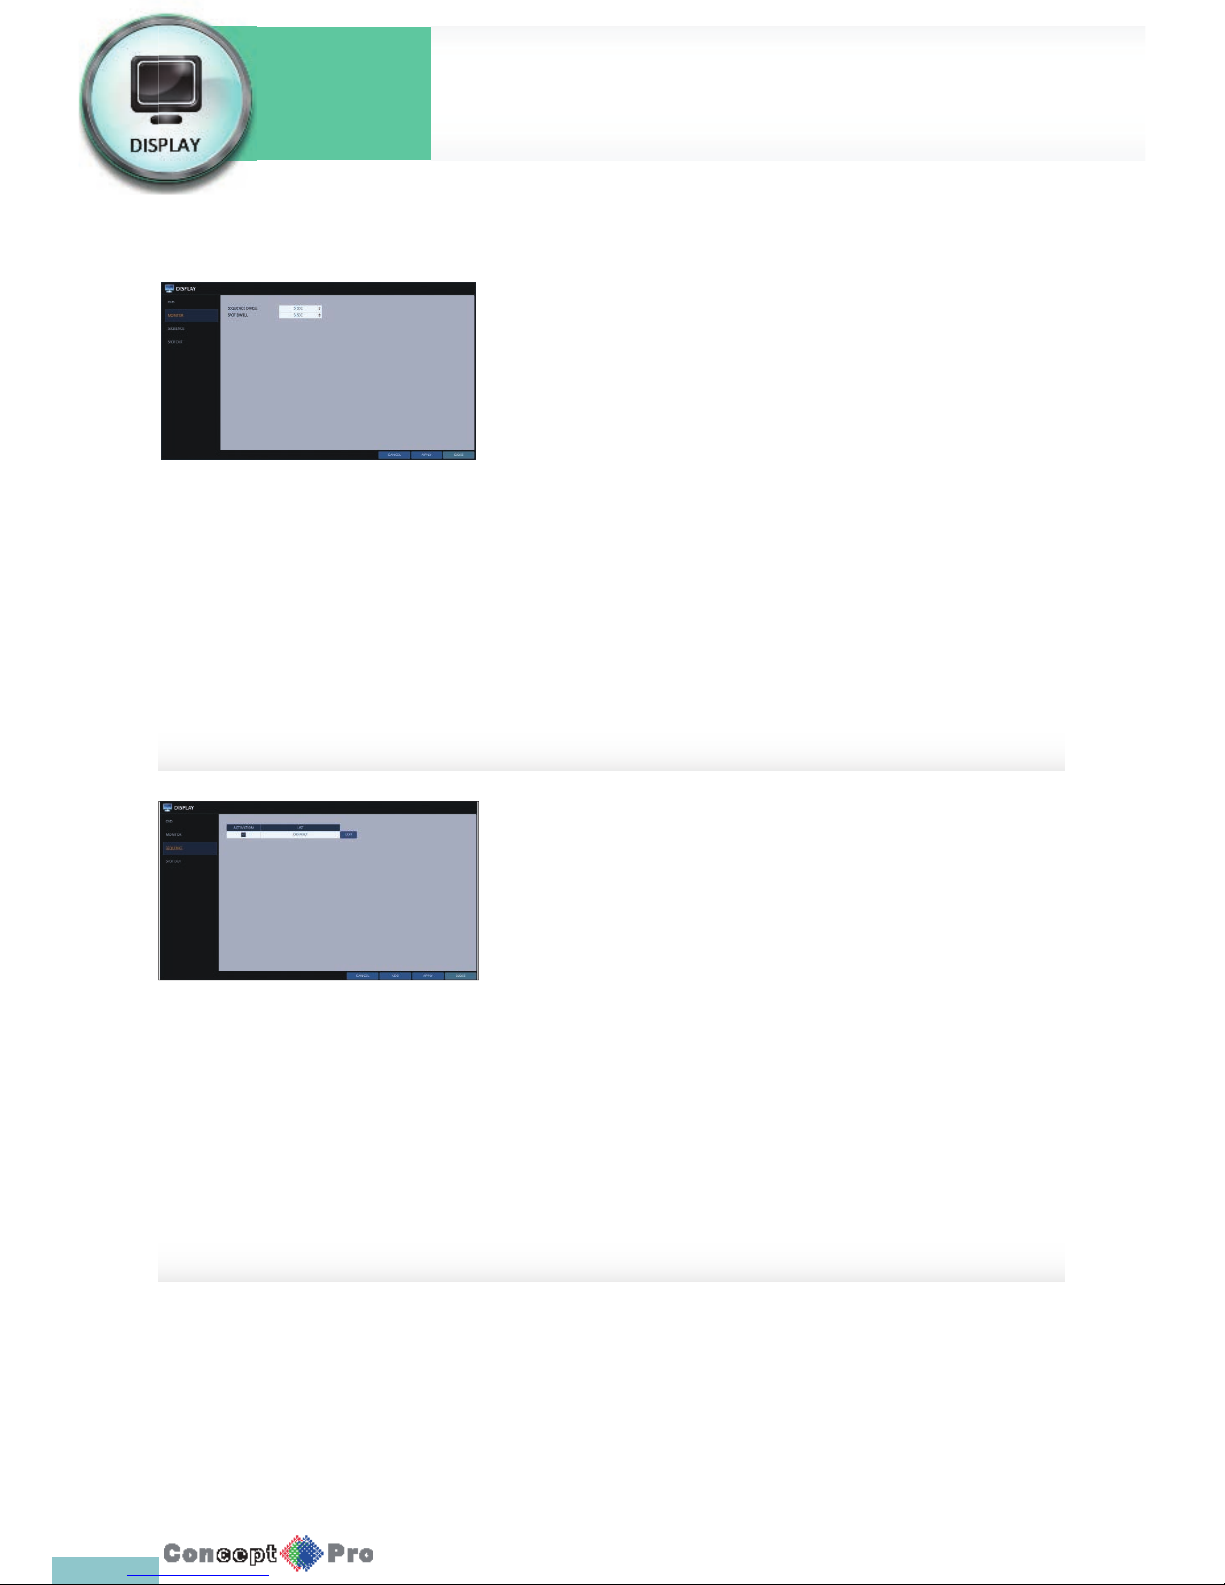
Monitor
If you change from monitoring mode to sequence, you will have to set the
interval of the sequence.
1. From <SYSTEM SETUP> - <DISPLAY>, select <MONITOR>.
2. Use the [pqtu/ENTER] button of the remote control or mouse to set
the dwell for Sequence mode and SPOT dwell.
> SEQUENCE DWELL: Sets the time interval to the next screen
mode for Live monitoring, which de nes individual screen mode’s
dwell time in the Sequence. (Can set to 1 sec ~ 60 sec)
> SPOT DWELL: Sets the time interval to the next view type, which
de nes individual view type’s dwell time for SPOT OUT.
(Can set to 1 sec ~ 60 sec)
3. To apply the change, click <APPLY> in the bottom of the screen.
4. When done, press the [EXIT] button on the remote control or click
<CLOSE>
Sequence
Select a split mode for the sequence, and also select a list of active items
when the sequence is performed.
1. From <SYSTEM SETUP> - <DISPLAY>, select <SEQUENCE>.
2. Use the [pqtu/ENTER] buttons on the remote control or use the
mouse to add a sequence or change the settings of the existing
sequence.
> ACTIVATION: Select a list that you want to activate the sequence
for, only one list will become active.
> ADD: add a sequence.
3. To apply the change, click <APPLY> in the bottom of the screen.
4. When done, press the [EXIT] button on the remote control or click
<CLOSE> in the lower screen. The con rmation
message appears and you will return to the previous menu.
Page 37
34
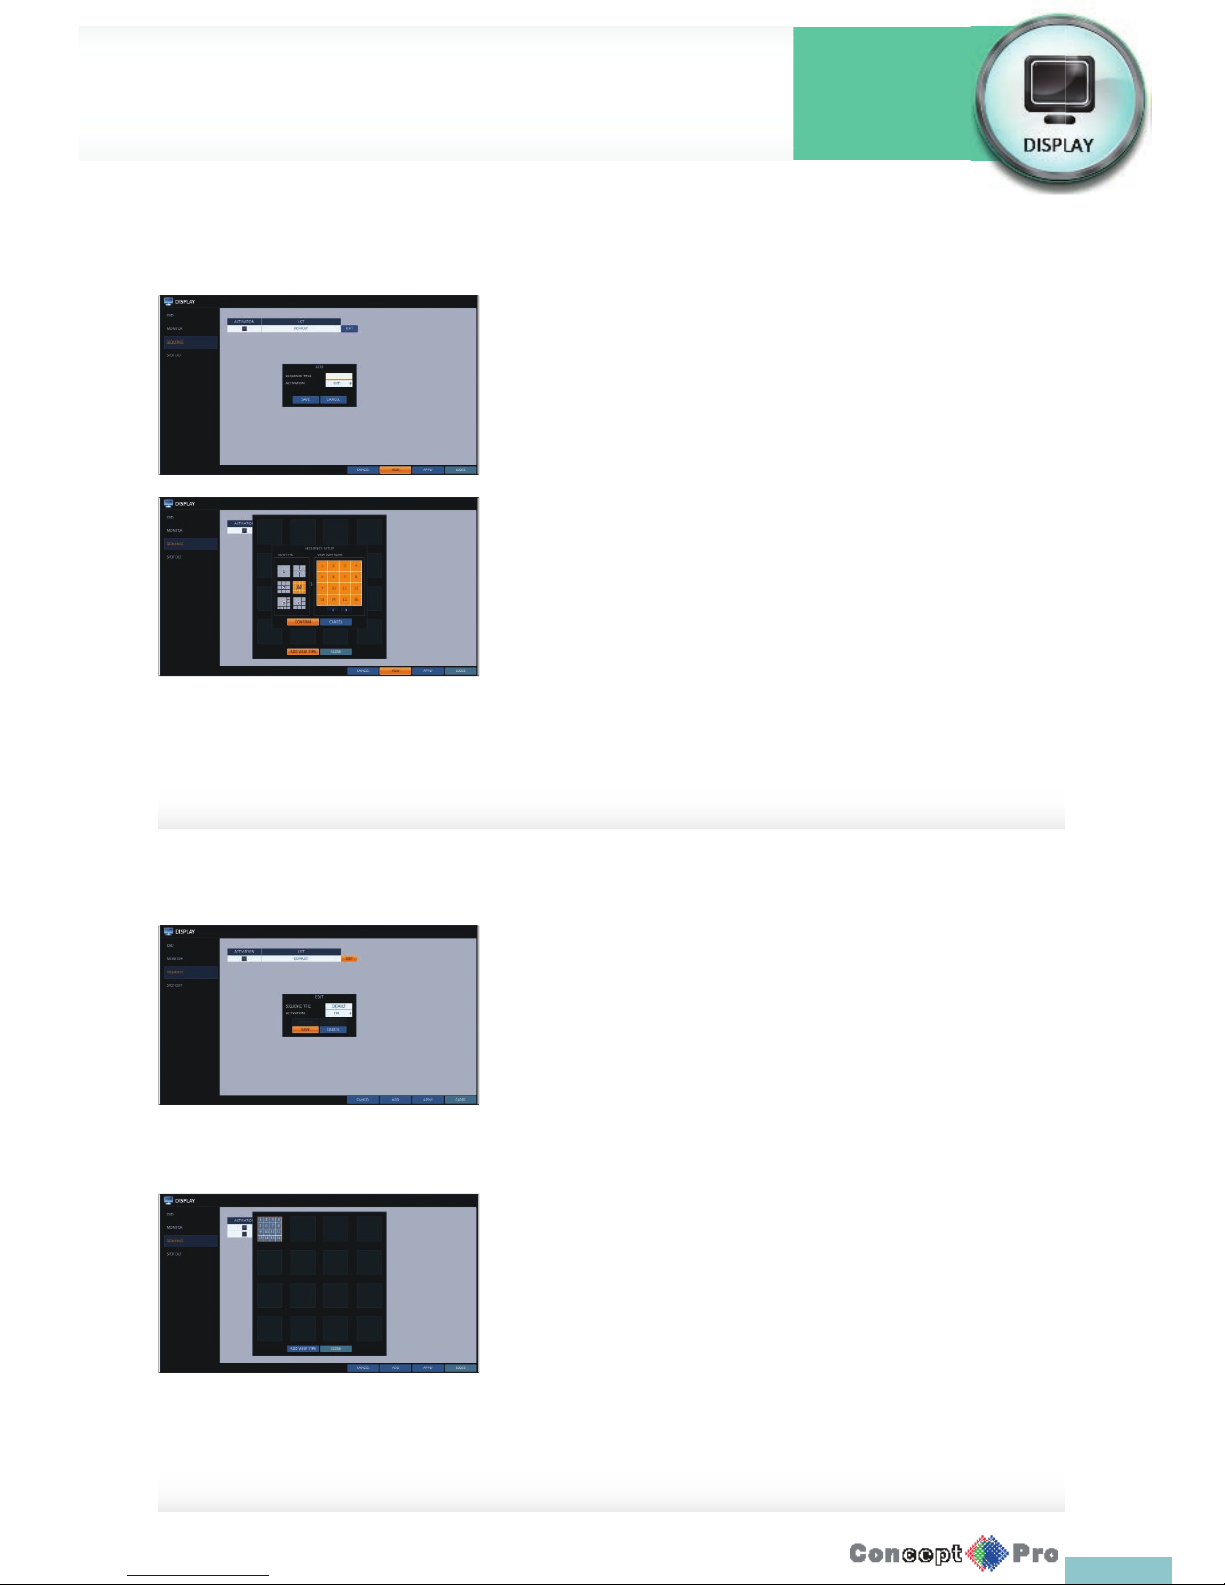
To add a sequence
1. Click <ADD> in the bottom of the screen.
2. When the “ADD” dialog appears, enter a title using the virtual keyboard.
3. Enter the name of the sequence and click <SAVE>.
4. When the <ADD VIEW TYPE> dialog appears, click<ADD>.
5. When the “SEQUENCE SETUP” dialog appears, select a split mode that
you want to add from <VIEW TYPE>.
6. If the selected split mode is CONFIGURE displayed on <VIEW >, select
a channel you want to display in each split screen.
7. Click <CONFIRM>. The set sequence mode is con rmed and will be
added to the Add Sequence list in order
8. When done, click <CLOSE> in the bottom of the screen.
After the sequence type is saved, you will return to the previous screen.
9. Place your mouse cursor over a desired tile of added
Sequence, right click on it or press the [ENTER] button of the remote
control to edit or delete it.
To edit a sequence
1. Select a sequence that you want to edit in the list.
2. The “EDIT” dialog appears.
3. Use the [pqtu/ENTER] buttons on the remote control or use the
mouse to edit the selected sequence.
> SEQUENCE TITLE: enter a new sequence name.
> ACTIVATION: specify the use of the sequence.
> MODIFY: change the settings of the sequence mode.
> DELETE: delete the selected sequence list.
> CANCEL: cancel the changes.
4. Pressing the <MODIFY> button will display the Edit Sequence window.
5. To change the existing settings, select a screen mode that you want
to edit and right-click to display the context menu. Then, select
<MODIFY>.
6. When done, click <CLOSE> to close the window.
7. To apply your changes, click <AP
Display Settings
System
Settings
Page 38
35
Display Settings
System
Settings
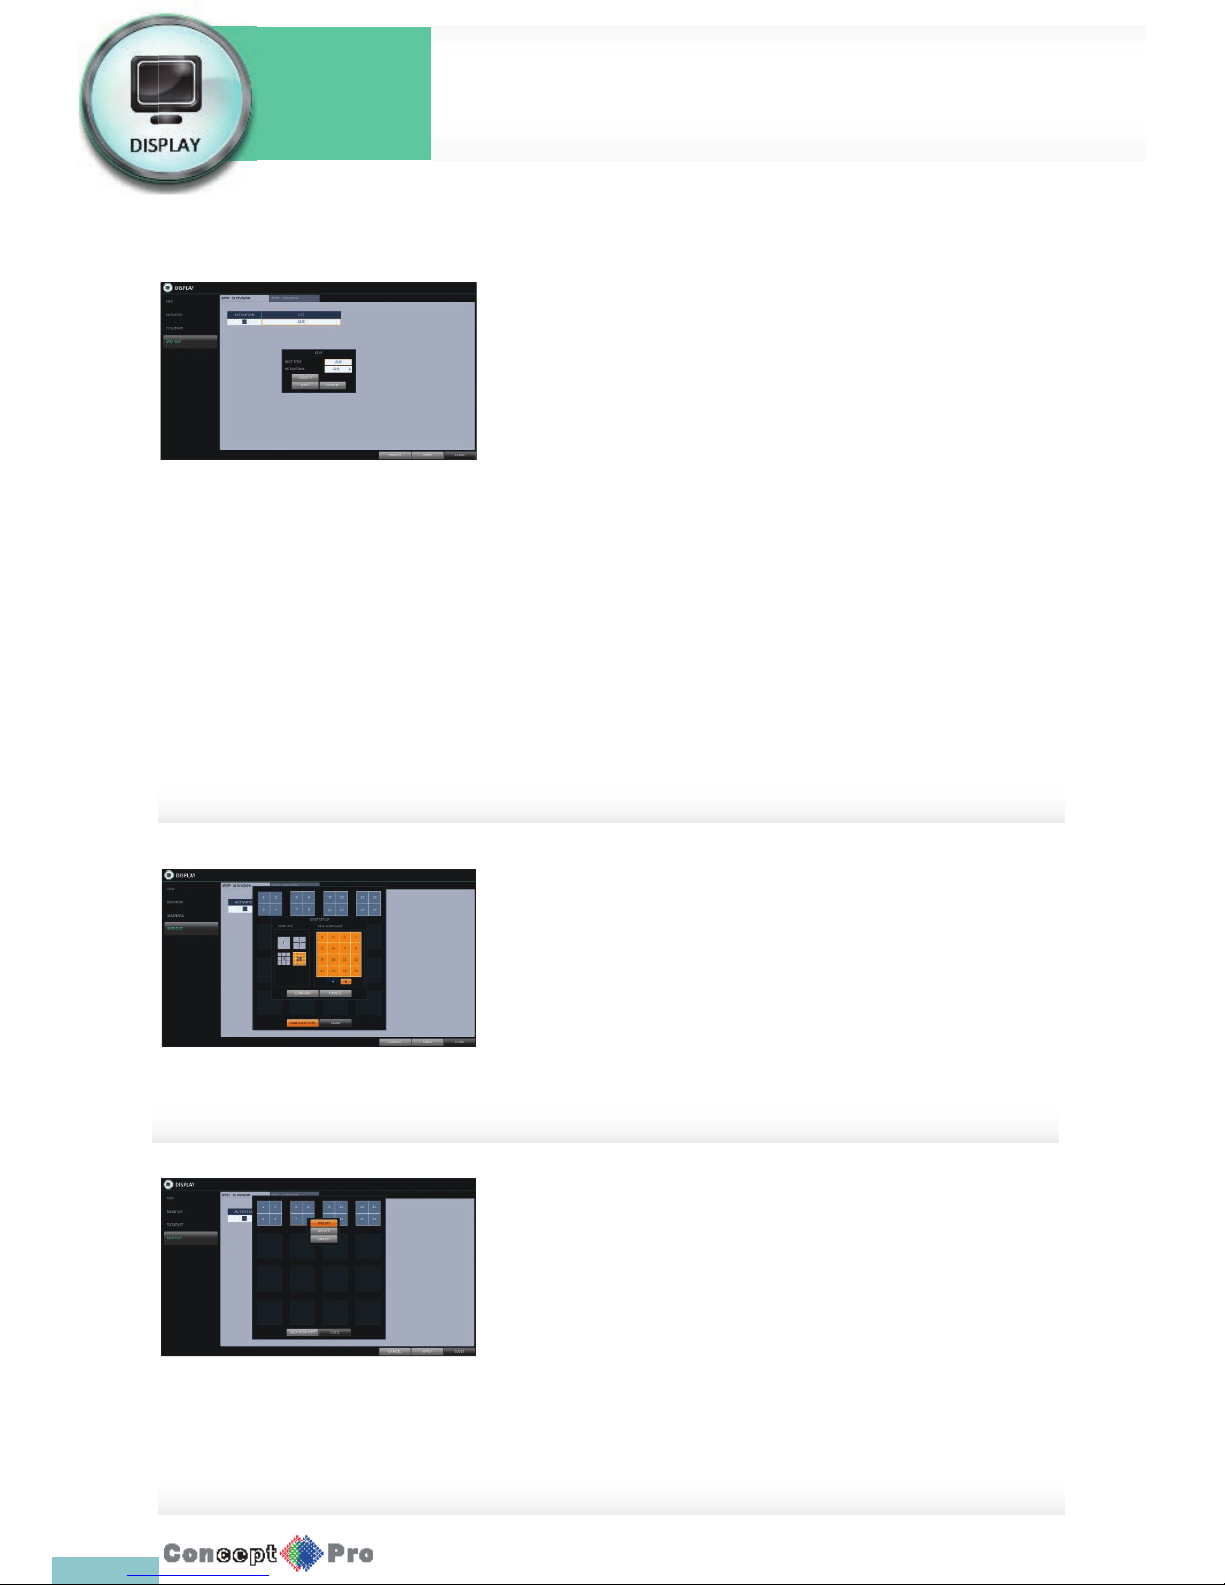
Spot out
Apart from the main screen display, you can con gure the Spot Out to
display a live channel as needed in various live view types. To set the live
view type of display output through the [SPOT] terminal and activate/
deactivate it.
1. From <SYSTEM SETUP> - <DISPLAY>, select <SPOT OUT>.
2. Use [pqtu/ENTER] button of the remote control or mouse to edit
Spot Out properties.
> SPOT TITLE: Name the Spot Out setup.
> ACTIVATION: Set whether to activate/deactivate the spot out
setup.
> MODIFY: Edit the view type of the spot output.
> SAVE: Save the changes of spot output settings.
3. To apply your changes, click <APPLY> button.
4. Once completed with setup, press [EXIT] button of the remote control
or click <CLOSE> button on the bottom ofthe screen. A con rmation
dialog appears and returns to the previous me
To add a View Type to a Spot Out
1. Select an item from the SPOT Output list to be changed.
2. The “MODIFY” window appears, click <MODIFY> button.
3. When the View Type selection window appears, click
<ADD VIEW TYPE> button.
4. Select the desired View Type and con guration, and click
<CONFIRM> button.
5. Complete adding and click <CLOSE> to close the edit window
To edit or delete View Type of the SPOT Output
1. Select an item from the SPOT Output list to be changed.
2. The “MODIFY” window appears, click <MODIFY> button.
3. When the View Type selection window appears, select the desired View
Type to be edited or deleted, and press [ENTER] button of the remote
control or right click on it.
> MODIFY: Displays “SPOT SETUP” window for
editing View Type and other properties.
> DELETE: Deletes the selected View Type.
4. Complete editing and click <CLOSE> to close the edit window
Page 39
36
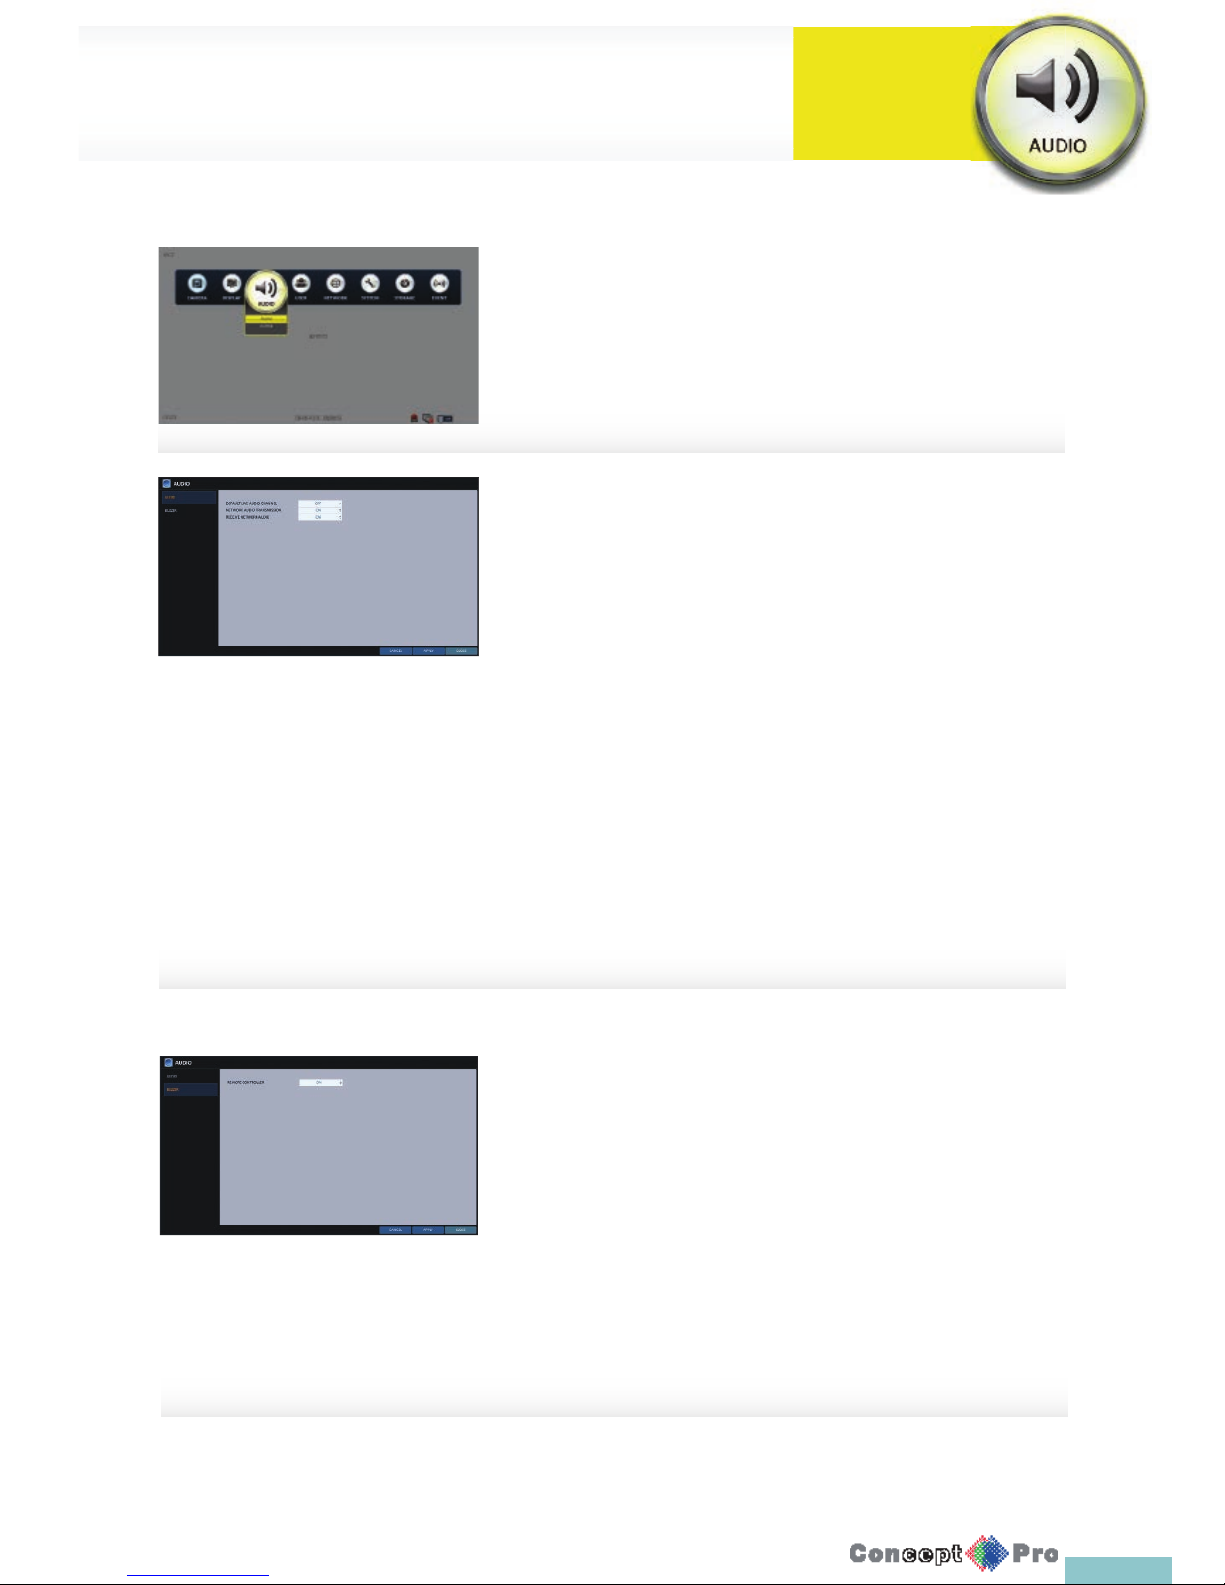
Audio
Choose whether to receive the live sound source and select an audio
channel.
1. From <SYSTEM SETUP> - <AUDIO>, select <AUDIO>.
2. Use the [pqtu/ENTER] buttons on the remote control or use the
mouse to select an item that you want to edit.
> DEFAULT LIVE AUDIO CHANNEL: select an audio channel to
monitor on the live screen.
> NETWORK AUDIO TRANSMISSION: decide if the DVR transfers
the audio signal to the remote client. DVR ªPC (Remote Client)
> RECEIVE NETWORK AUDIO: decide if DVR receives the audio
signal from the remote client. PC (Remote Client) ªDVR
3. To apply the change, click <APPLY> in the bottom of the screen.
4. When done, press the [EXIT] button on the remote control or click
<CLOSE> in the lower screen. The con rmation message appears and
you will return to the previous menu.
Buzzer Output
You can set to output the buzzer, if you use the remote control.
1. From <SYSTEM SETUP> - <AUDIO>, select <BUZZER>.
2. Use the [pqtu/ENTER] buttons on the remote control or use the
mouse to select an item that you want to edit.
> REMOTE CONTROLLER: specify the output of the beep when
you press a button on the remote control.
3. To apply the change, click <APPLY> in the bottom of the screen.
4. When done, press the [EXIT] button on the remote control or click
<CLOSE> in the lower screen. The con rmation message appears and
you will return to the previous menu.
You can con gure audio related settings (channel and network transfer) and
signal beep for remote control operations
Audio Settings
System
Settings
Page 40
37
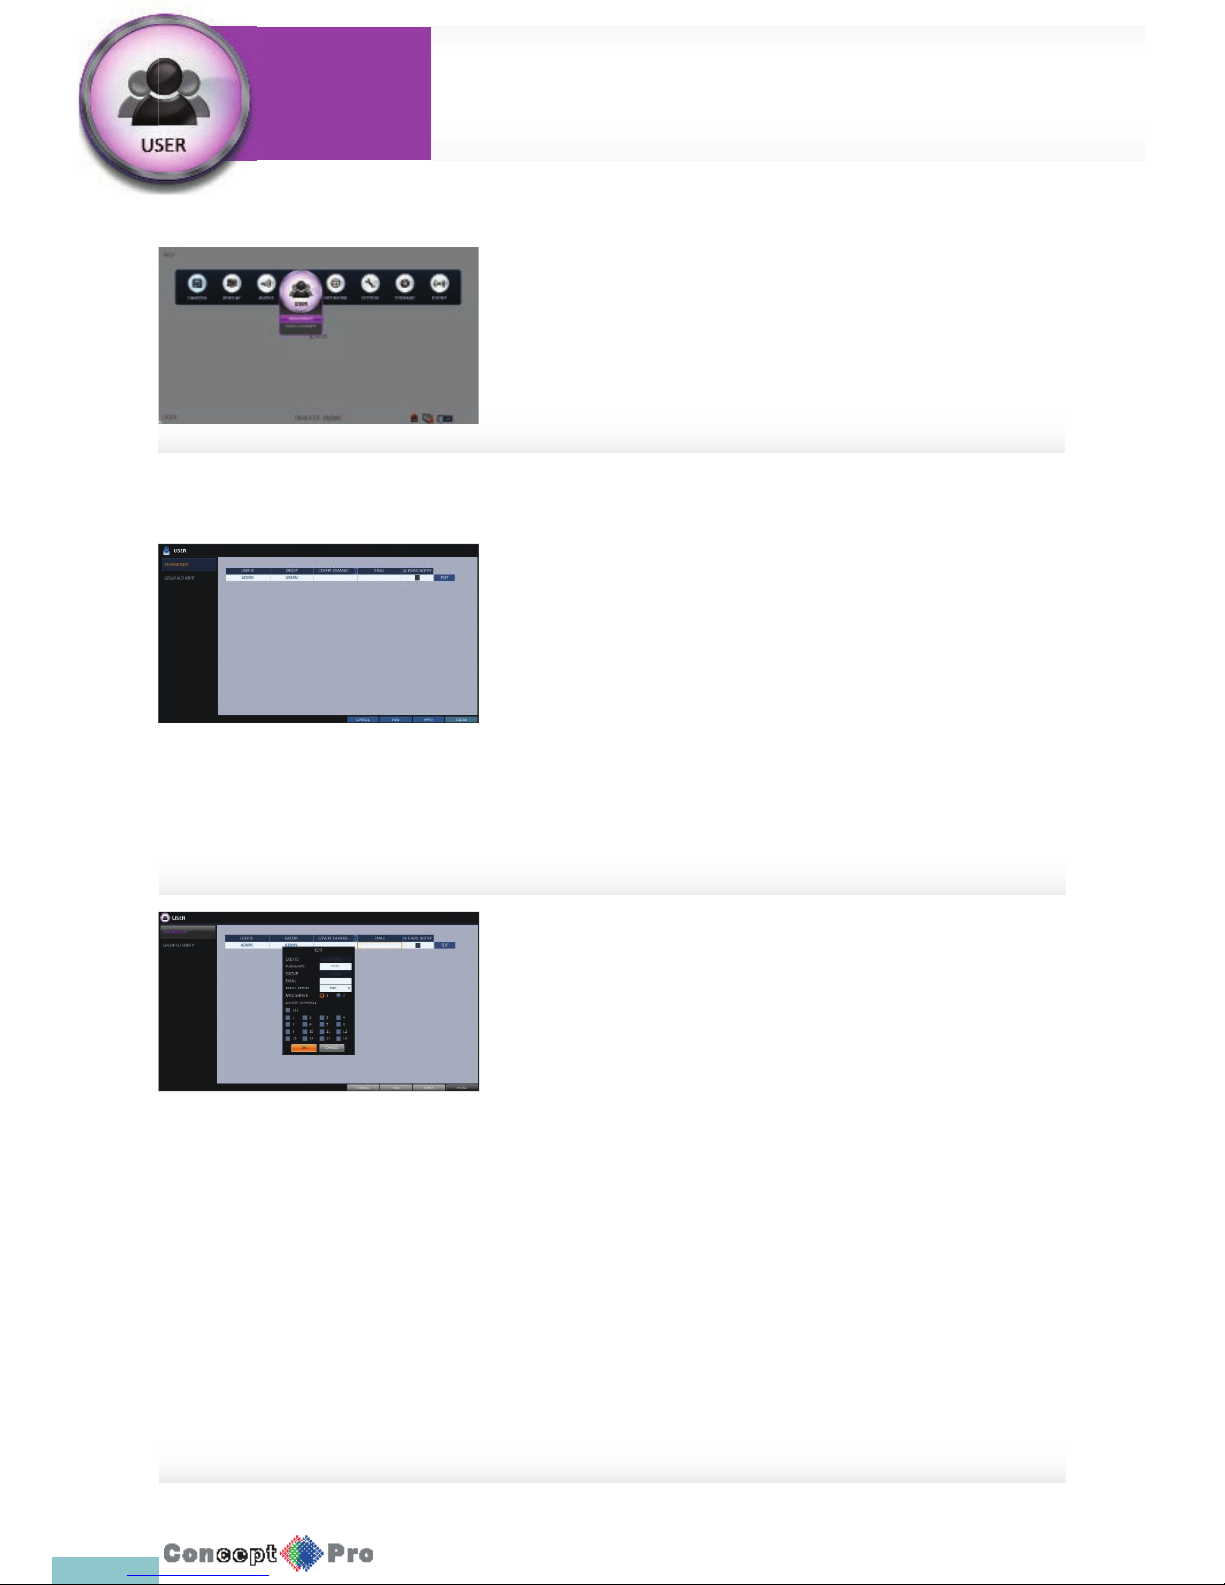
Management
You can add a user account(s) that can be edited at a later time.
1. From <SYSTEM SETUP> - <USER>, select <MANAGEMENT>.
2. Use the [pqtu/ENTER] buttons on the remote control or use the
mouse to add a user account or select an item that you want to edit.
3. To apply the change, click <APPLY> in the bottom of the screen.
4. When done, press the [EXIT] button on the remote control or click
<CLOSE> in the lower screen. The con rmation message appears and
you will return to the previous menu.
To add a user account
1. Click <ADD> in the bottom of the screen.
2. Use the [pqtu] buttons on the remote control and move to a desired
item. Then, press [ENTER] to select the item.
> USER ID: enter the user ID using the virtual keyboard.
> PASSWORD: With the virtual keyboard, enter the password.
> EMAIL: Type in the e-mail address to which you will receive
noti cation of an event if it occurs.
> EMAIL NOTIFY: Choose whether you will receive noti cation of an
event if it occurs.
R To use <EMAIL NOTIFY>, To con gure the email server go to page
41 <EMAIL>
> COVERT CHANNEL: You can set the channel to be
hidden from a speci c user.
R <COVERT CHANNEL> option hides the video of the selected
channel from being displayed on the screen.
3. When done, click <OK>.
The added user account will be listed.
You can con gure the user management settings and the user/group
permissions.
User Settings
System
Settings
Page 41
38
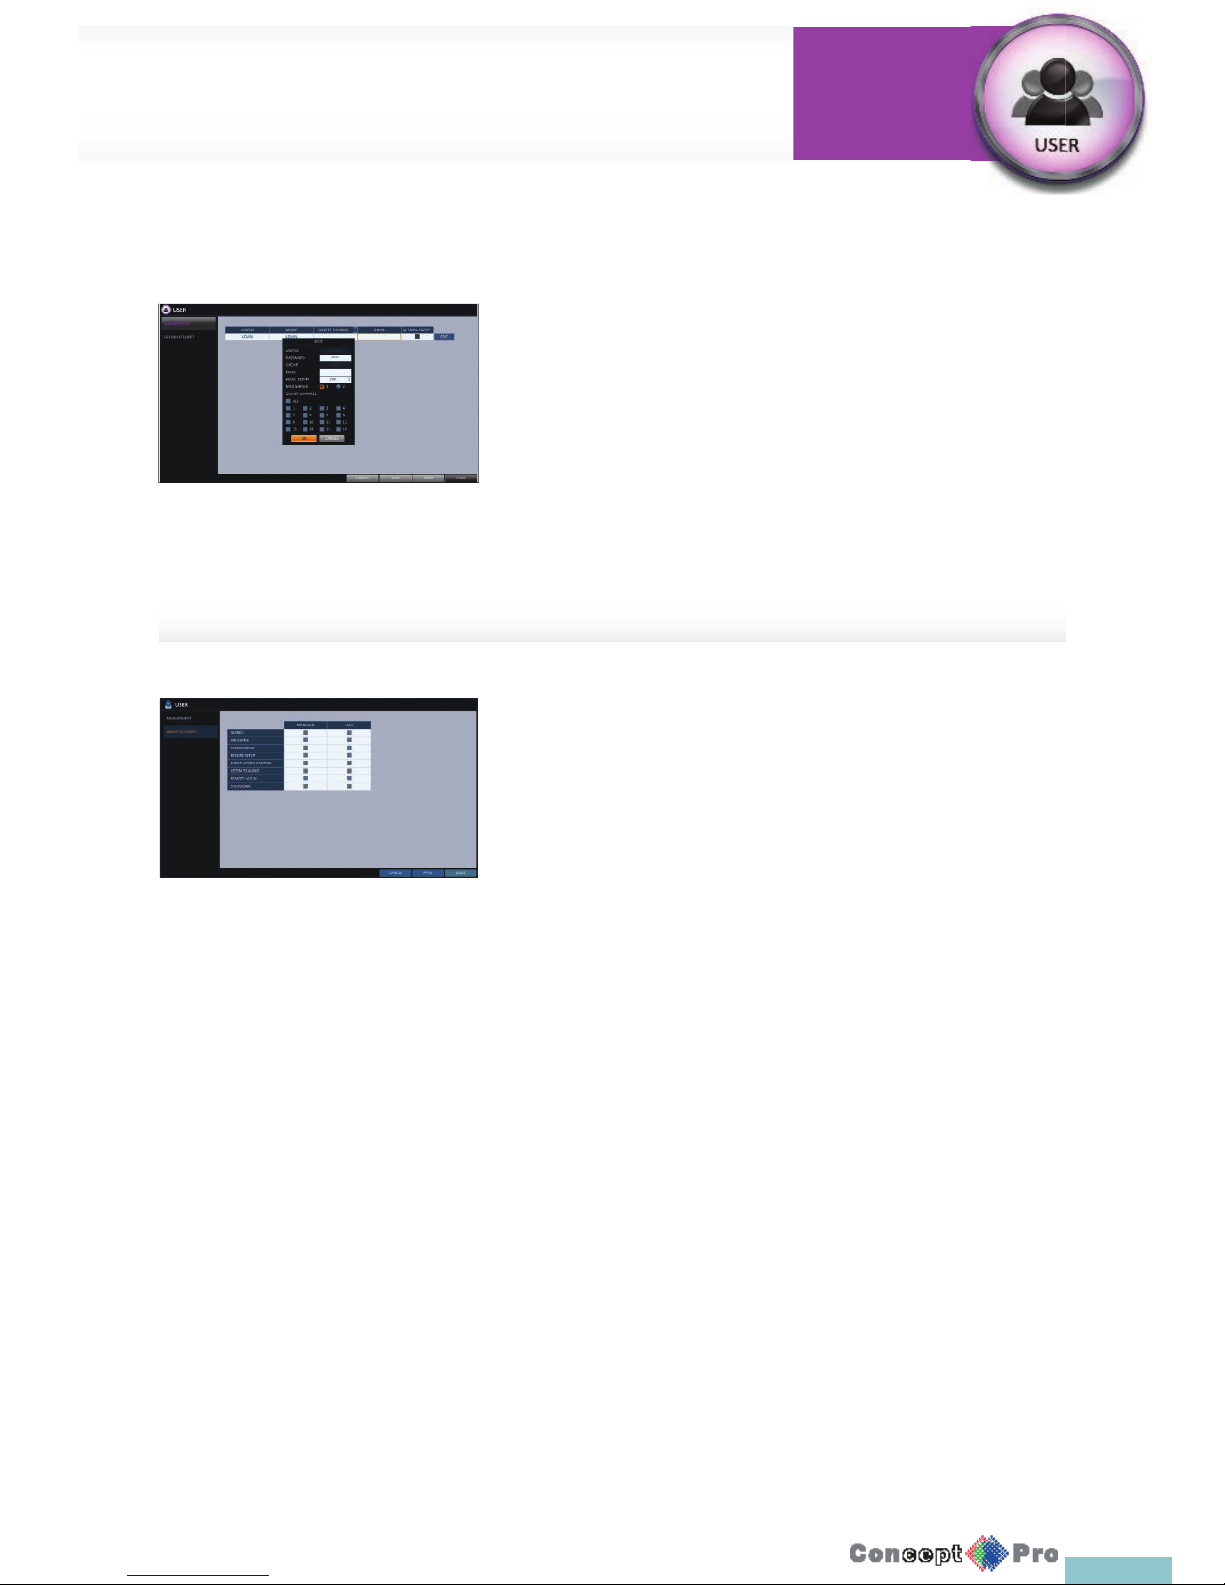
To edit the user account information
You can add a user account(s) that can be edited at a later time.
1. From the list of users, select a user account to edit and click <EDIT>
next to it.
2. From the Edit window, make necessary changes and click <OK>.
3. To delete the user account, click <DELETE>.
The <ADMIN> account can not be changed or edited.
Group Authority
You can grant diff erent user groups diff erent permissions to a speci c menu.
1. From <SYSTEM SETUP> - <USER>, select <GROUP AUTHORITY>.
2. Use the [pqtu/ENTER] buttons or use the mouse to set the
permissions for both <MANAGER> and <USER> groups.
> SEARCH: Set the permissions for the Search menu.
> ARCHIVING: Set the permissions for the Backup menu.
> SYSTEM SETUP: Set the permissions for the System Setup menu.
> RECORD SETUP: Set the Access Permissions for the Record
Setup menu.
> EVENT ACTION CONTROL: Set the permissions to output the
alarm or control the buzzer if an event such as alarm occurs.
> LISTEN TO AUDIO: Set the permission to listen to the audio.
> REMOTE LOG IN: Set the permission to access the VXH960H
remotely.
> SHUTDOWN: Set the permission to shut down the VXH960H from
the System menu.
R The <ADMIN> account is the master account allowed for all
permissions, which is not edited for individual permissions.
3. To apply the change, click <APPLY > in the bottom of the screen.
4. When done, press the [EXIT] button on the remote control or click
<CLOSE> in the lower screen. The con rmation message appears and
you will return to the previous menu
User Settings
System
Settings
Page 42
39
You can set the IP address, DDNS, E-mail settings, and check network
status.
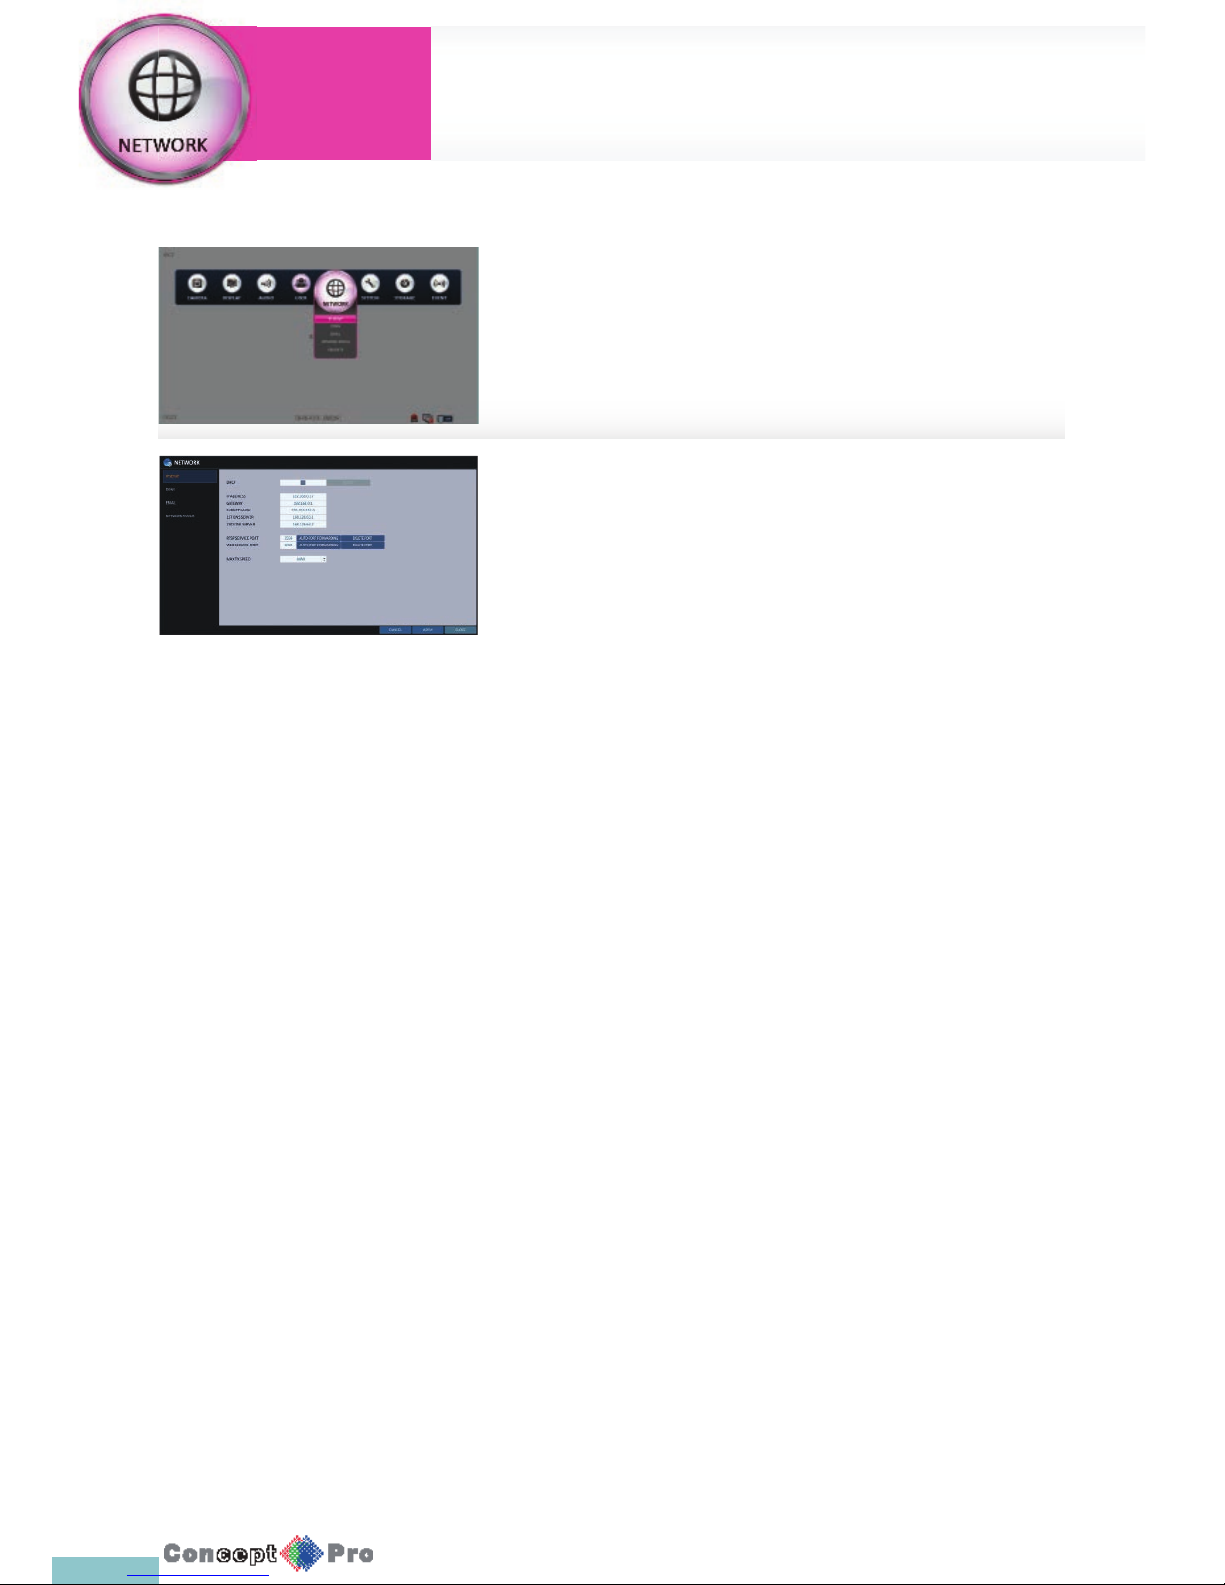
IP Setup
Edit the IP address related properties and remote service port of the DVR.
1. From <SYSTEM SETUP> - <NETWORK>, select <IP SETUP>.
2. Use the [pqtu/ENTER] buttons on the remote control or use the
mouse to specify each item of the network settings.
> DHCP: If it is checked, the IP address will be allocated
automatically.
R For DHCP address allocation, the DVR should be connected to
a network environment such as router that provides DHCP
server service.
3. Deselect DHCP option to enable manual static address con guration.
> IP ADDRESS: Provide the IP address.
> GATEWAY: Provide the gateway address.
> SUBNET MASK: Provide the subnet mask address.
> 1ST DNS SERVER: Enter the address of the primary DNS server.
> 2ND DNS SERVER: Enter the address of the secondary DNS
server.
> RTSP SERVICE PORT: Port number that the remote client
receives the DVR video from.
> WEB SERVICE PORT: Port number used for connecting to the
DVR with the web browser.
> PORT FORWARDING: If you are using a router, you can set the
port forwarding so that external access to the DVR is allowed.
If the router does not support the uPnP protocol, you must set
the port forwarding manually. For more information, contact your
network administrator.
> DELETE PORT: Release the port forwarding settings for the router.
> MAX TX SPEED: Limit the network transfer rate to access a
remote client.
The video signal may be transferred at a less rate than speci ed,
which depends on the status of your network connection.
4. To apply the change, click <APPLY> in the bottom of the screen.
5. When done, press the [EXIT] button on the remote control or click
<CLOSE> in the lower screen. The con rmation message appears and
you will return to the previous menu.
Network Setup
System
Settings
Page 43
40
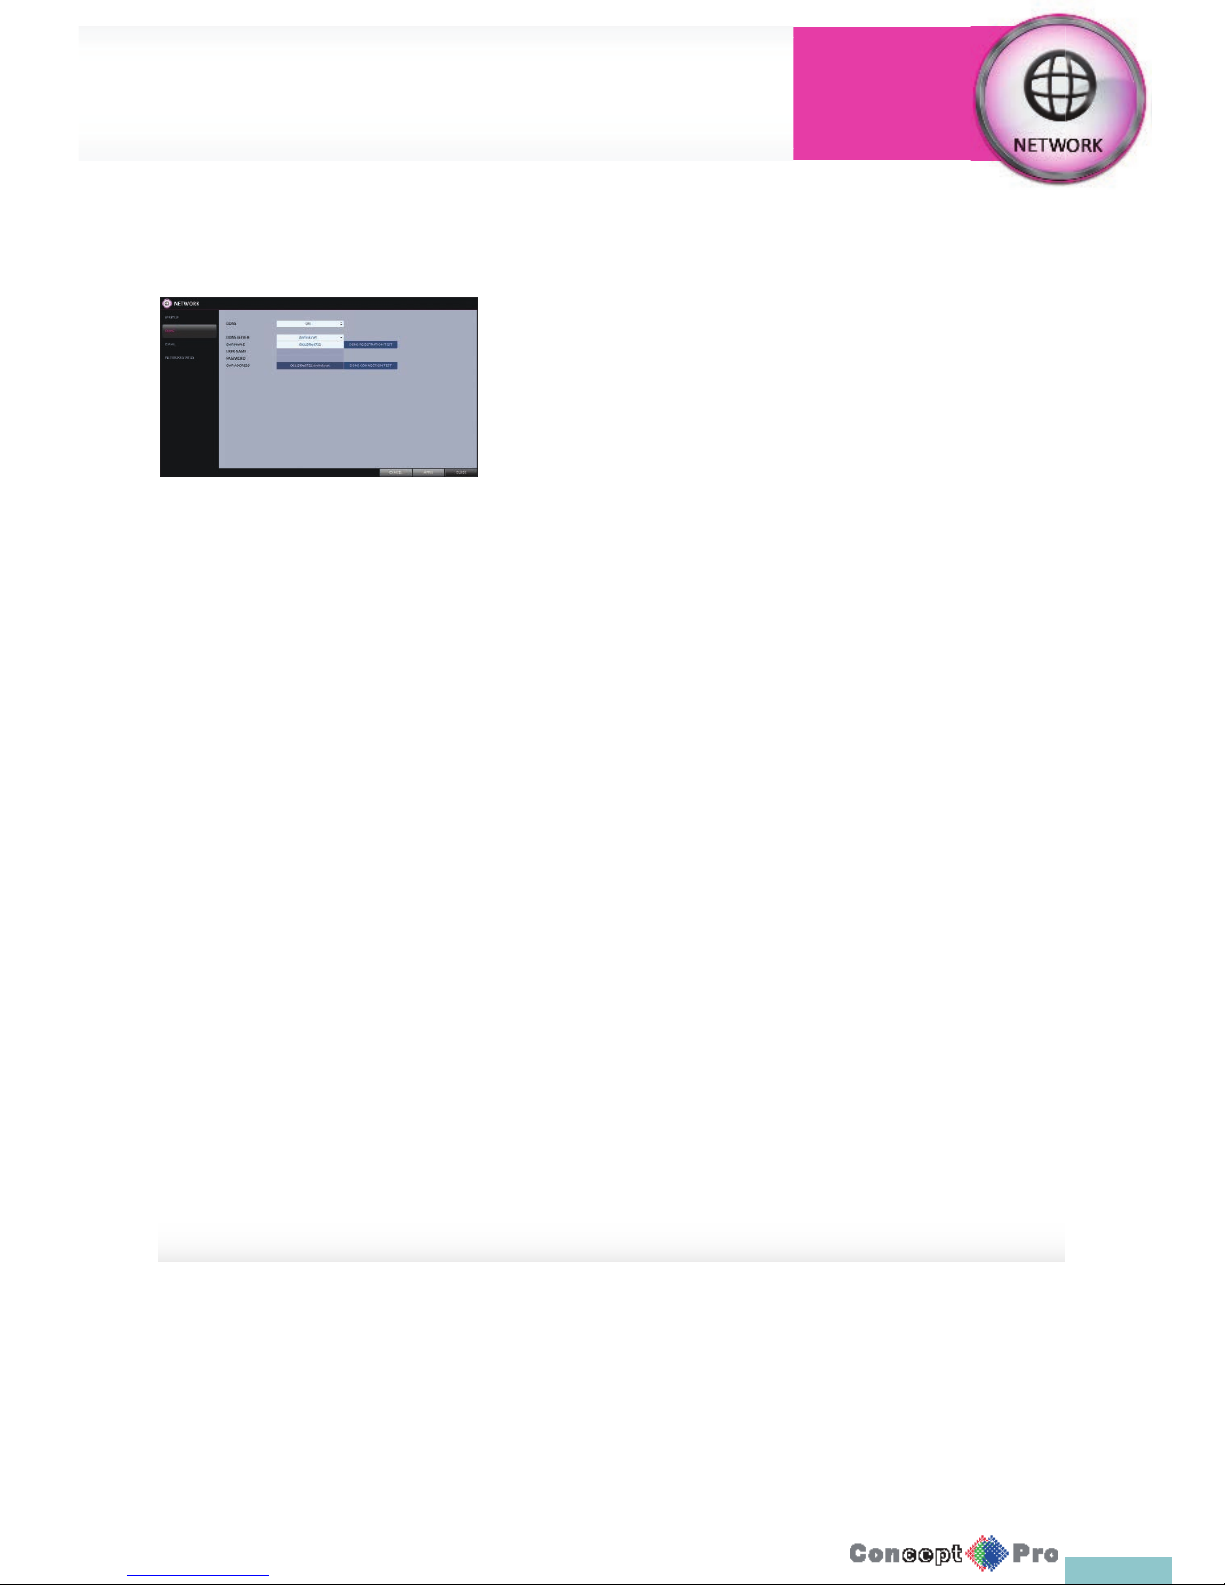
DDNS
You can con gure the DDNS settings so remote users who are connected to
the network can access the VXH960H remotely
R DDNS is an IP redirection service in a dynamic IP environment that
redirects the new IP address to a registered domain name each
time the IP address is changed..
1. From <SYSTEM SETUP> - <NETWORK>, select <DDNS>
2. Use the [pqtu/ENTER] buttons on the remote control or use the
mouse to specify the use of DDNSand select a server.
> DDNS: Specify the use of DDNS connection.
> DDNS SERVER: Select a server to connect to.
> DVR NAME: Enter the name of the DVR that you want to use
as DDNS.
> DDNS REGISTRATION TEST: Check if the <DVR NAME>
can be set as DDNS. If there is a duplicate name in the server,
the registration will fail. If this is the case, rename the
<DVR NAME> and presstest to check if it works properly.
> DVR ADDRESS: Provide the <DVR NAME> and press the
<DDNS REGISTRATION TEST> button. The name will be added
automatically.
> DDNS CONNECTION TEST: Perform the connection test to
check if DDNS is normally registered
3. To apply the change, click <APPLY> in the bottom of the screen.
4. When done, press the [EXIT] button on the remote control or click
<CLOSE> in the lower screen. The con rmationmessage appears and
you will return to the previous menu.
Network Setup
System
Settings
Page 44
41
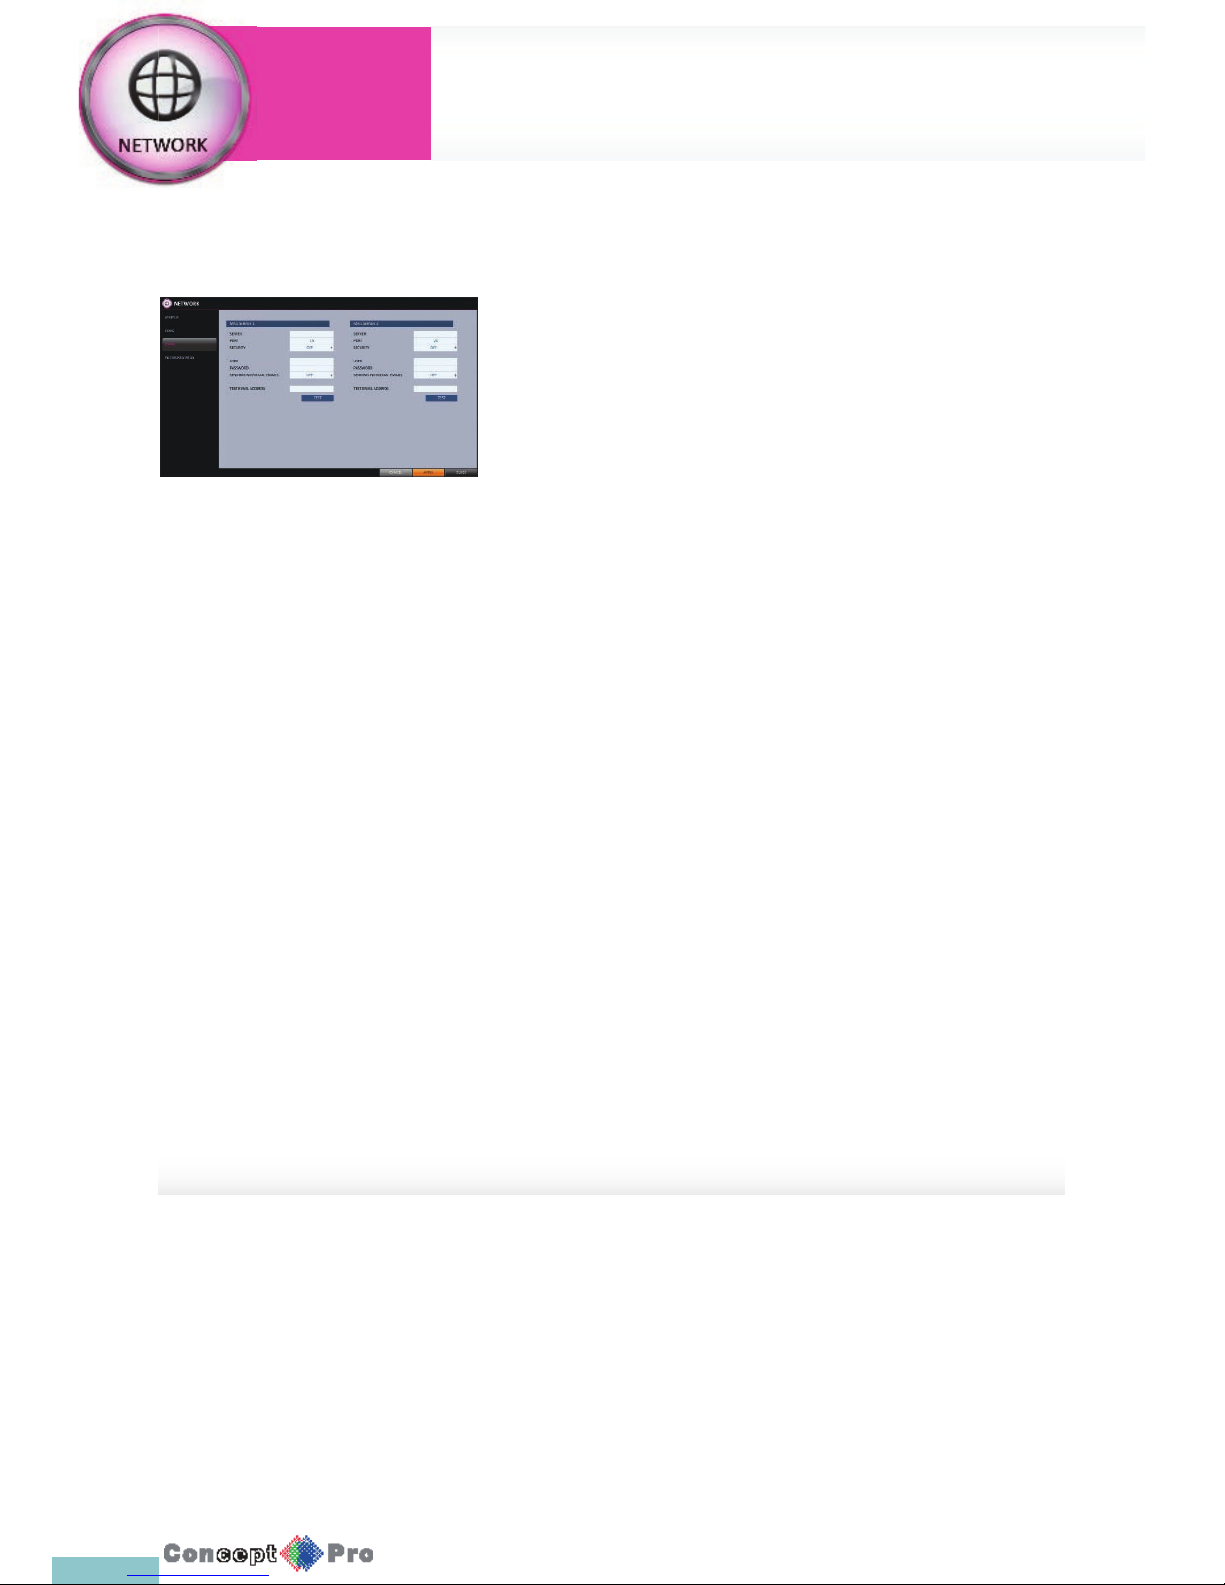
Email
You can register and test an two email address so that an email noti cation
is delivered at a speci c interval or if an event occurs.
1. From <SYSTEM SETUP> - <NETWORK>, select <EMAIL>.
2. Use the [pqtu/ENTER] buttons on the remote control or use the
mouse to specify the use of email and select a server.
> SERVER: Set up the mail server.
Set the mail server that will be used for noti cation for the
VXH960.
Use the virtual keyboard to enter your mail settings.
> PORT: Enter the mail server port.
> SECURITY: If it is set to <ON>, the email will be transferred to a
server that does not support SSL.
> USER: Provide the email account (ID) of the sender
> PASSWORD: Provide the password of the sender.
> TEST EMAIL ADDRESS: Enter an email address for the test
purpose.
> TEST: Send a test email and check if the test email is delivered
normally.
3. To apply the change, click <APPLY > in the bottom of the screen.
4. When done, press the [EXIT] button on the remote control or click
<CLOSE> in the lower screen. The con rmation message appears and
you will return to the previous menu.
Network Setup
System
Settings
Page 45
42
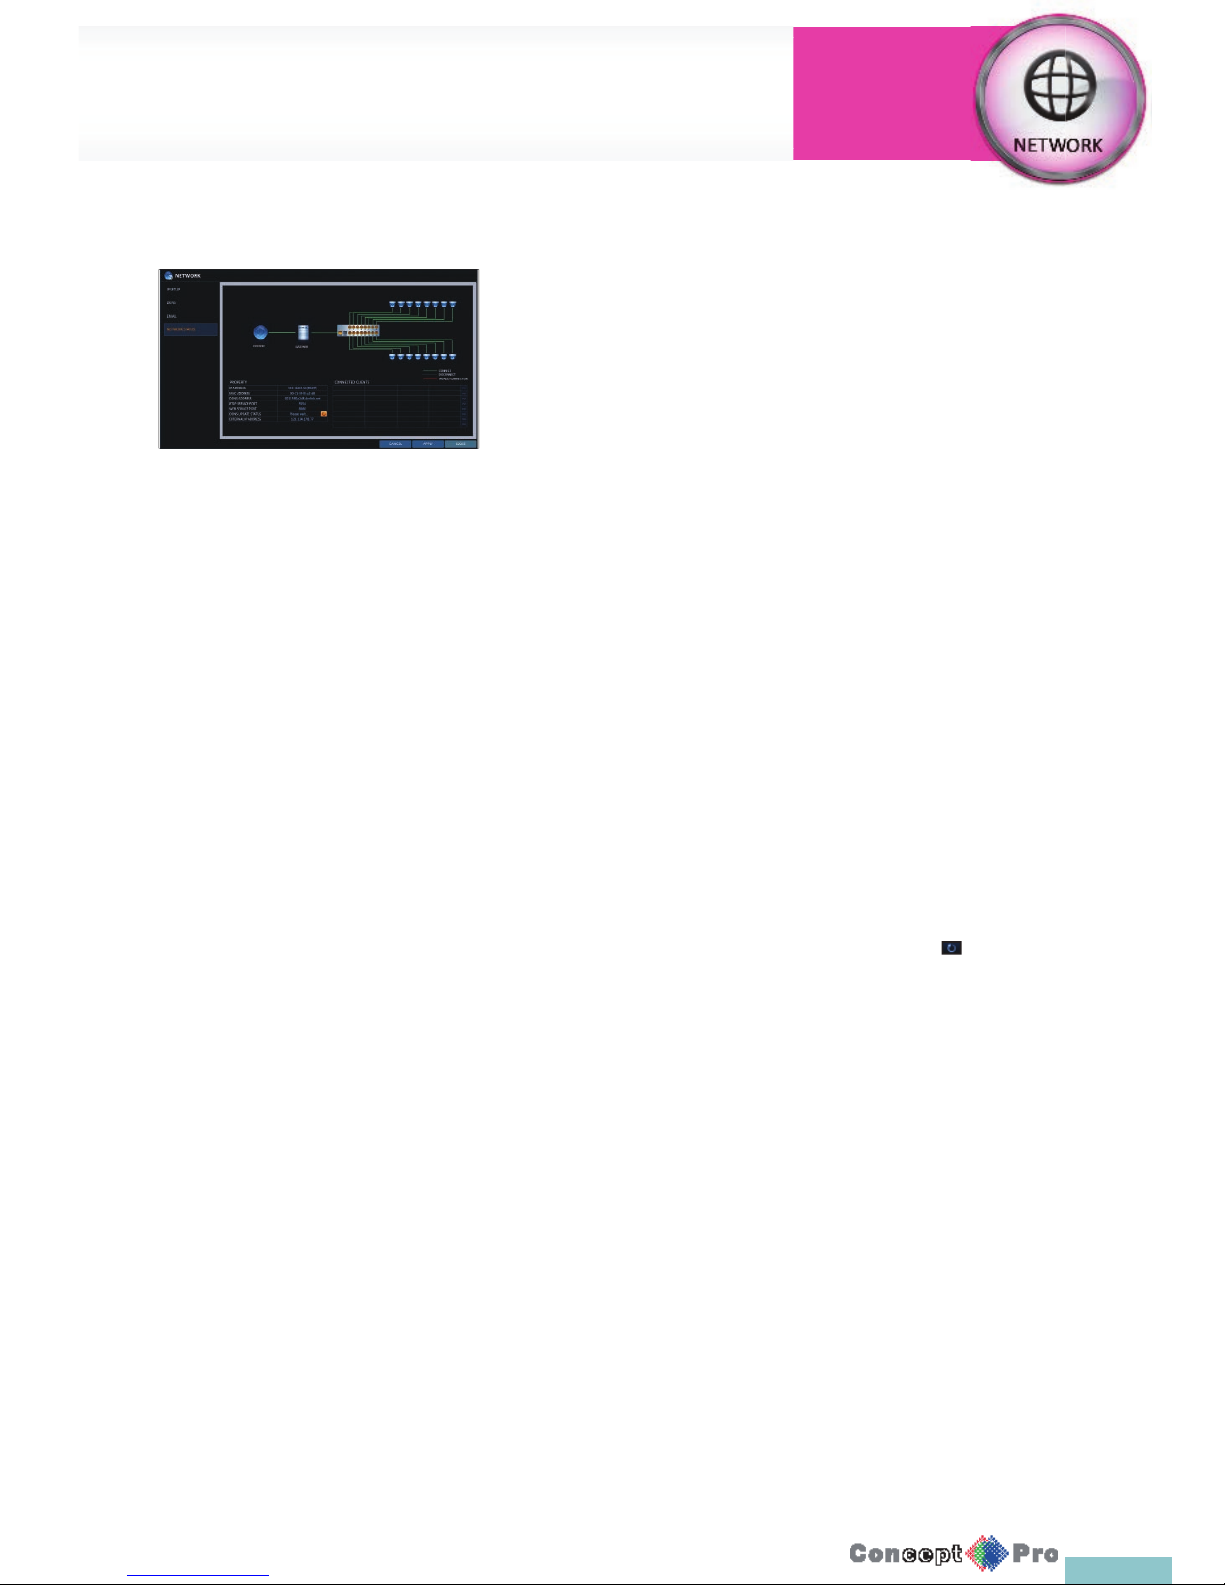
Network Status
From the network map screen, you can check the internet connection status
and the details and camera connection status, and check also the details of
the connection status for each camera.
1. From <SYSTEM SETUP> - <NETWORK>, select
<NETWORK STATUS>.
2. Use the [pqtu/ENTER] buttons on the remote control or use the
mouse to select <NETWORK STATUS>
Network Status
> IP ADDRESS: Indicates the internal IP address of the VXH960.
> MAC ADDRESS: Indicates the internal MAC address of the
VXH960.
> DDNS ADDRESS: Indicates the internal DDNS address of the
VXH960.
> RTSP SERVICE PORT: Indicates the network port of the video
service.
For remote service, port forwarding must be correctly set to the
router.
> WEB SERVICE PORT: Indicates the web service network port.
For remote service, port forwarding must be correctly set on the
router.
> DDNS UPDATE STATUS: Shows if the DDNS address was
registered to the DDNS server normally. Press < > to try to
register the DDNS address manually
> EXTERNAL IP ADDRESS: Indicate the IP address for the Internet,
accessible externally to the local network.
The DVR can be granted access ith the web browser at
“http://<EXTERNAL IP ADDRESS>:<WEB SERVICE PORT>”
The IP address can vary in a dynamic IP environment
> CONNECTED CLIENTS: Shows the list of remote users that are
currently connected.
Press < > to terminate the connection of an unwanted client
manually.
R Termination is limited to only users in a lower group than the current user
3. When done, press the [EXIT] button on the remote control or click
<CLOSE> in the lower screen. The con rmation message appears and
you will return to the previous menu.
Network Setup
System
Settings
Page 46
43
System Setup
System
Settings
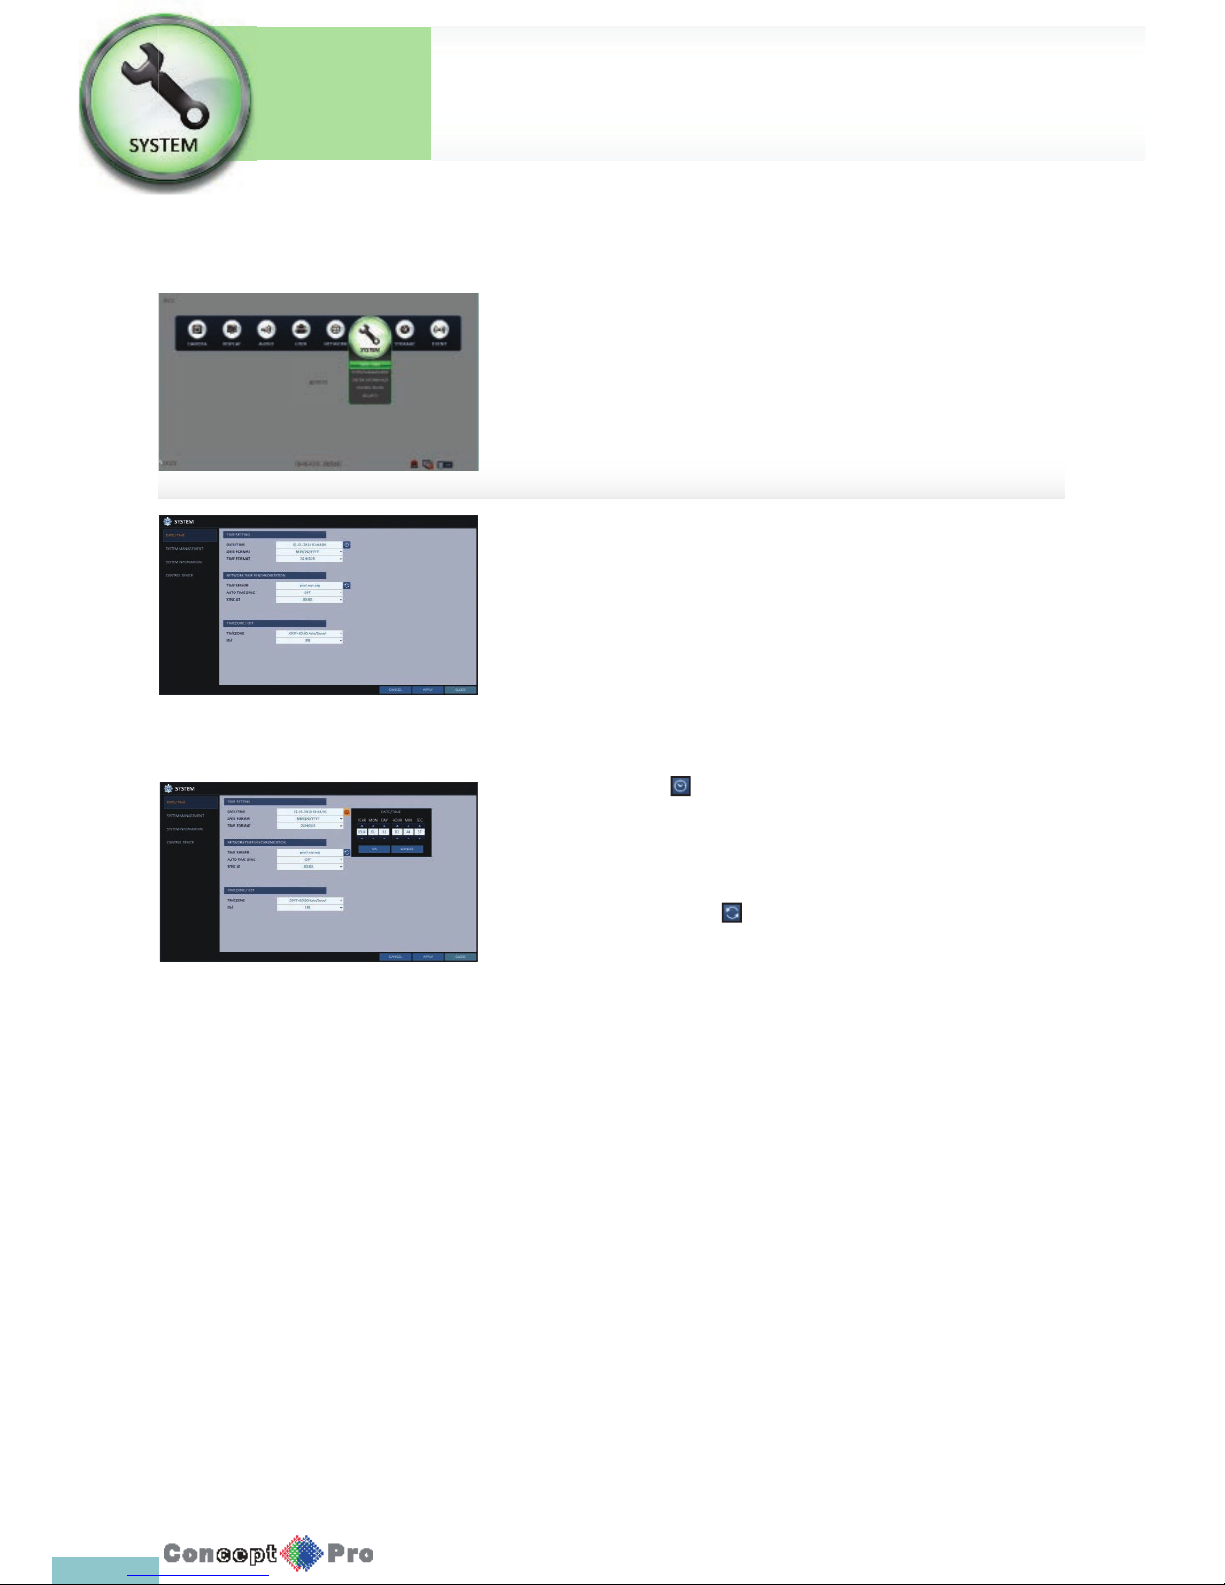
Date/Time
Specify the current date and time.
1. From <SYSTEM SETUP> - <SYSTEM>, select <DATE / TIME>.
2. Use the [pqtu/ENTER] buttons on the remote control
or use the mouse to change the time or set the options as necessary.
> DATE/TIME: Allows the operator to set or modify the current date
and time.
Click< > to adjust the time manually.
> DATE FORMAT: specify the date format.
> TIME FORMAT: specify the time format.
> TIME SERVER: obtain the current time from the time
server. Click < > to get the current time.
> AUTO TIME SYNC: automatically synchronize the time with the
time server at a speci c time.
> SYNC AT: Set the time to sync with the time server.
> TIMEZONE: Specify the GMT standard time for your local area.
> DST: You can set up or release the DST (Daylight Saving Time).
R Both <TIME SERVER> and <TIME SYNC> will been abled
only if the DVR is connected to the Internet.
3. To apply the change, click <APPLY > at the bottom of the screen.
4. When done, press the [EXIT] button on the remote control or click
<CLOSE> in the lower screen. The con rmation message appears and
you will return to the previous menu.
You can con gure the settings of date/time, system management, control
device and system security.
Page 47
44
System Setup
System
Settings
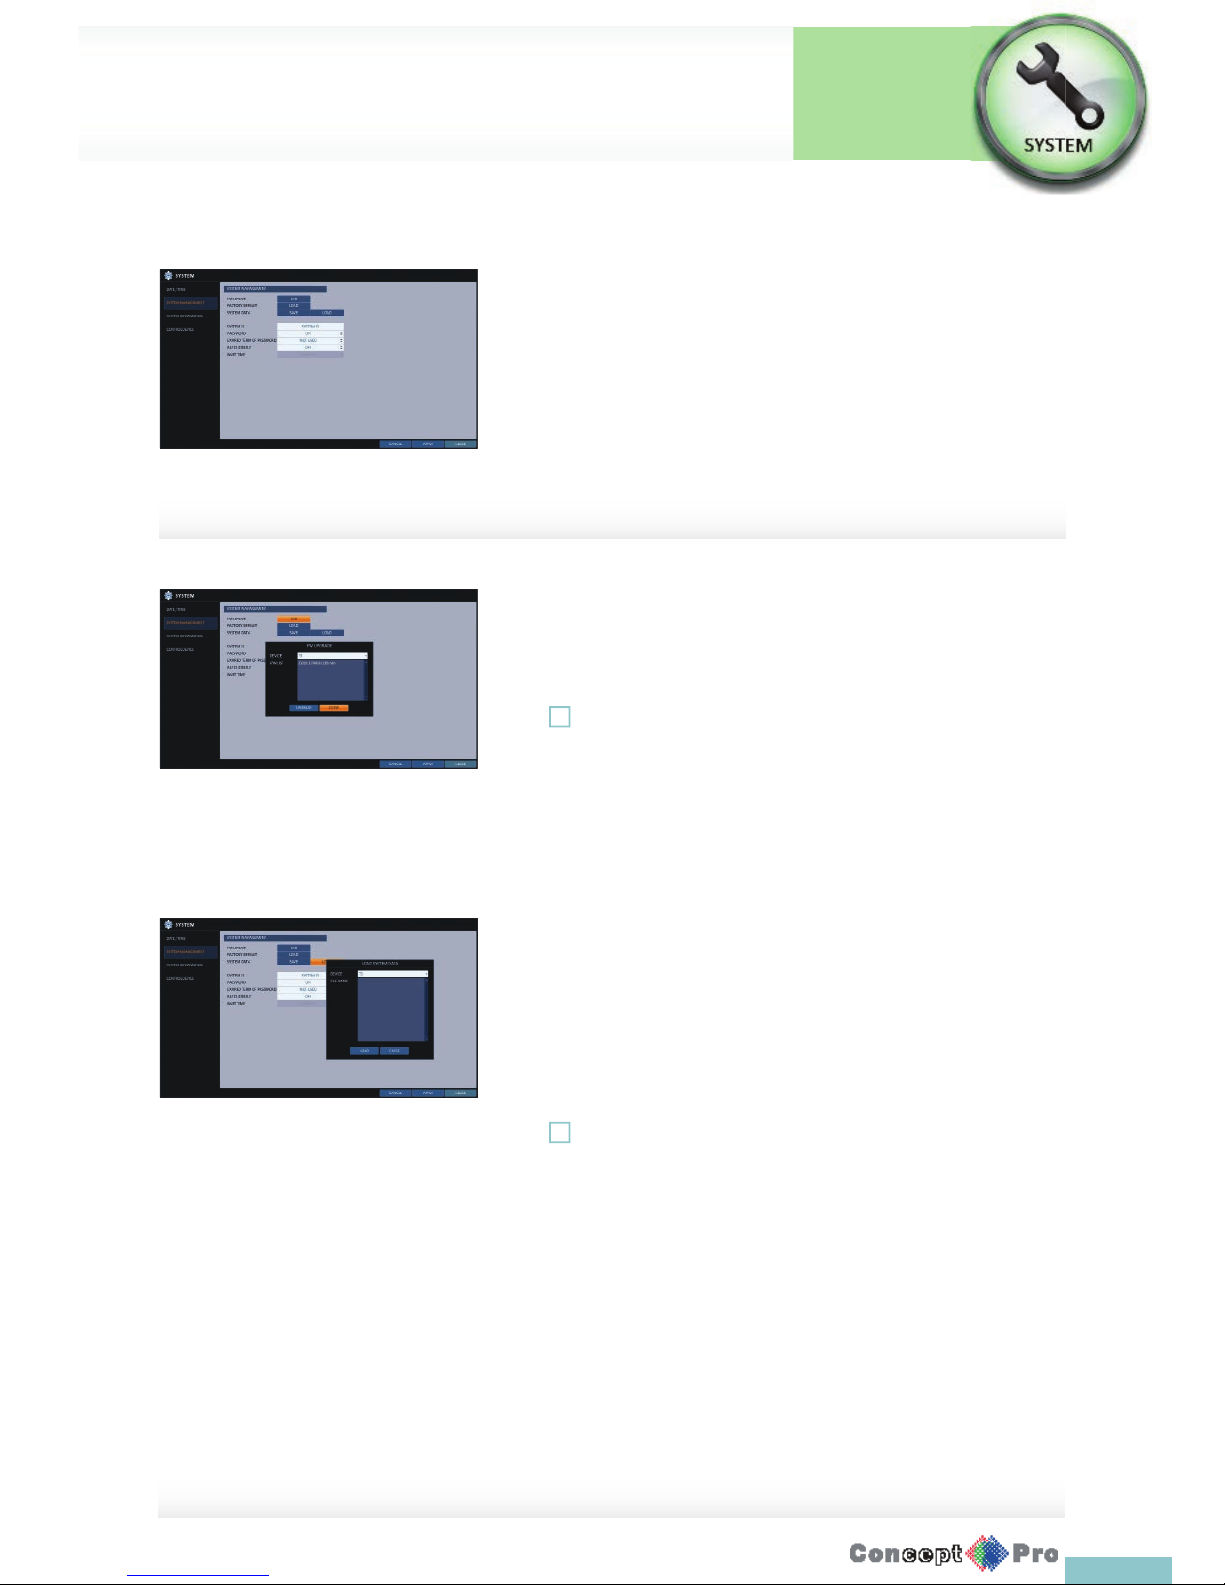
System Management
You can check, update or reset the system information.
1. From <SYSTEM SETUP> - <SYSTEM>, select <SYSTEM
MANAGEMENT>.
2. Use the [pqtu/ENTER] buttons on the remote control
or use the mouse to set each option of the system management.
> FW UPDATE: you can update the current software with the latest
version.
> FACTORY DEFAULT: Return the VXH960 settings to the factory
default.
! If you proceed to upgrade the rmware or reset the VXH960 to the
factory default, all current settings of the DVR will be erased. The
settings of the DVR will have to be con gured again.
> SYSTEM DATA: Save the system settings or get the system
information from another device.
- SAVE: Store the DVR settings to a storage device. Connect
the storage device to the USB port of the DVR
- LOAD: Apply the settings of the storage device to the DVR.
Connect the storage device to the USBportofDVR.
> SYSTEM ID: Set the main unit’s system ID.
> PASSWORD: Open or close the dialog box for setting the
menu’s: quit, system settings, record settings, archiving,
and search.
! If it is set to <Off >, note that the ADMIN account is only eff ective
and access to all menus will be restricted.
> EXPIRED TERM OF PASSWORD: You will be prompted to
change the current password after a certainperiodoftime.
> AUTO LOGOUT: If there is no user input for a certain period of
time, you can set to log out automatically.
> WAIT TIME: Specify the waiting time for Auto Logout.
3. When done, press the [EXIT] button on the remote control or click
<CLOSE> in the lower screen to return to theprevious menu.
Page 48
45
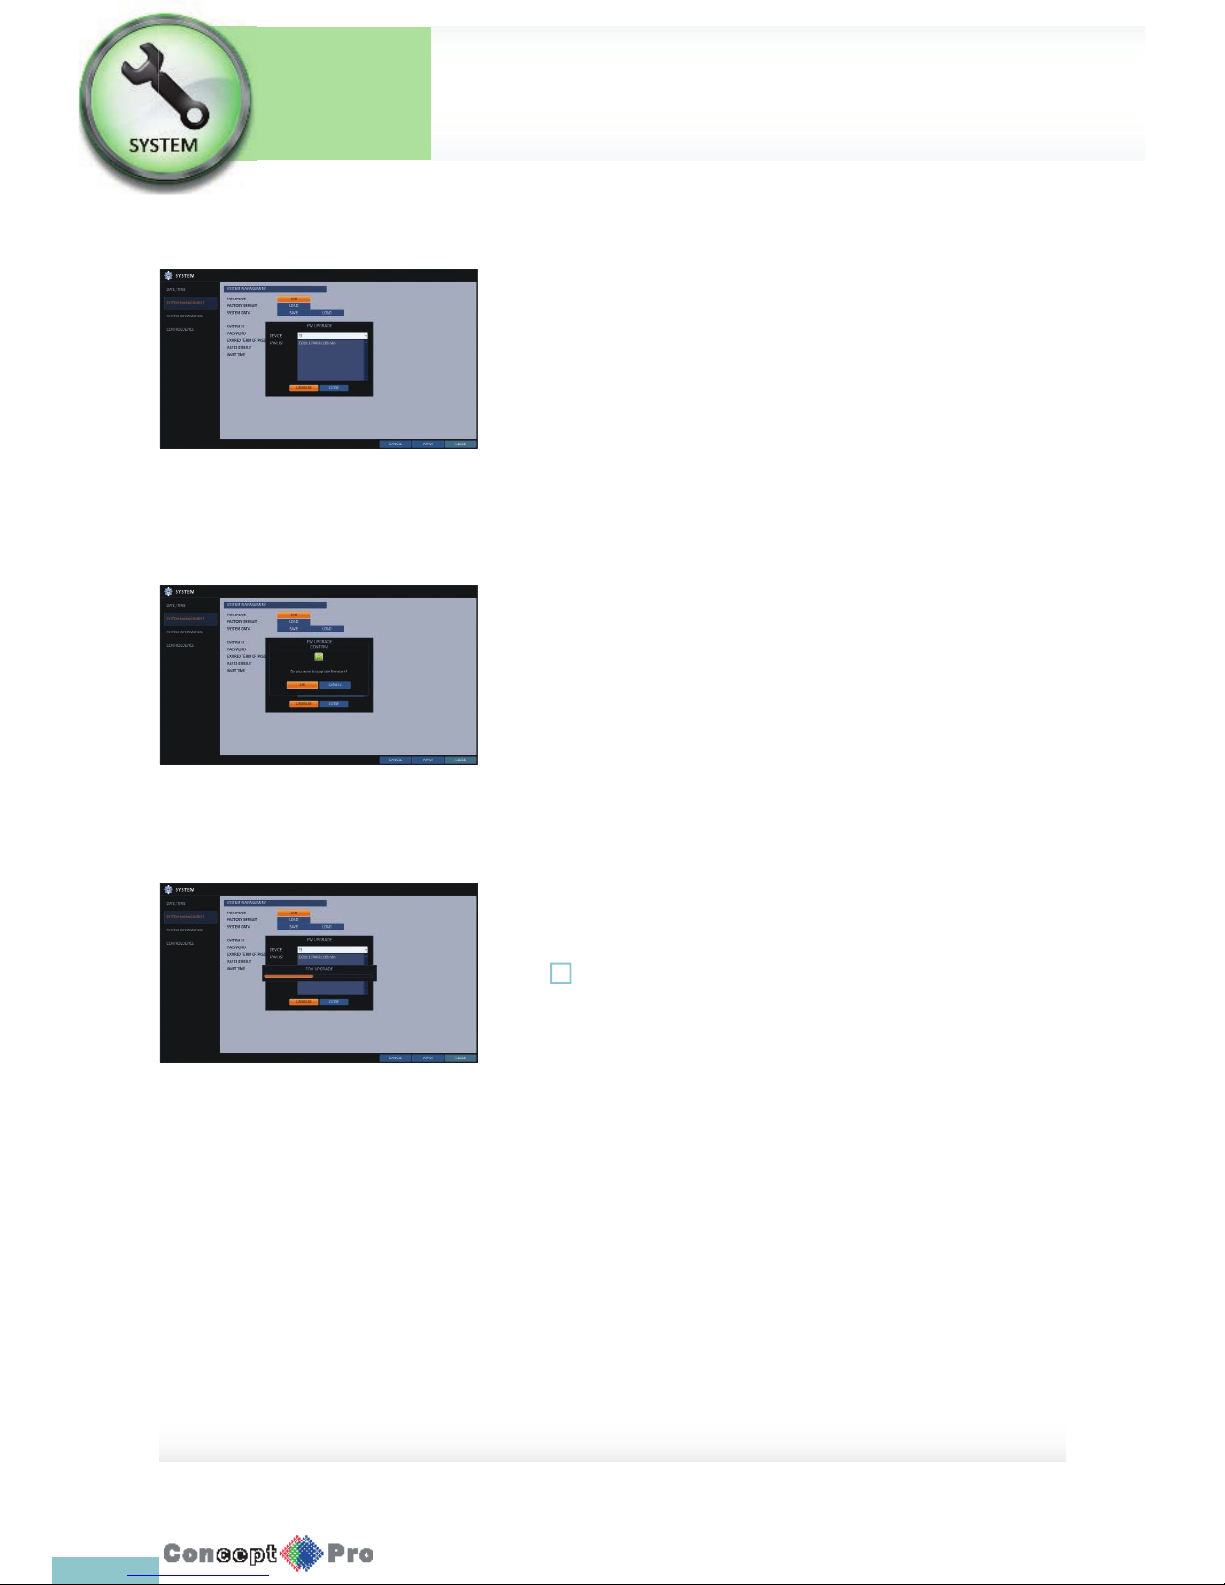
To perform the upgrade
You can check, update or reset the system information.
1. Connect the USB storage device that contains the
updatable les.
2. Click <USB>.
3. Select one(s) from the updatable les LIST listed in <F/W >.
4. Click <UPGRADE>.
5. When the con rmation message appears, click <OK>.
6. The progress bar displays the progress of the rmware upgrade process.
7. When the upgrade is complete, reboot the system.
! If the DVR is turned off while the rmware upgrade is in progress, this
can cause a serious damage to the DVR and it may not work correctly
when turned on again.
System Setup
System
Settings
Page 49
46
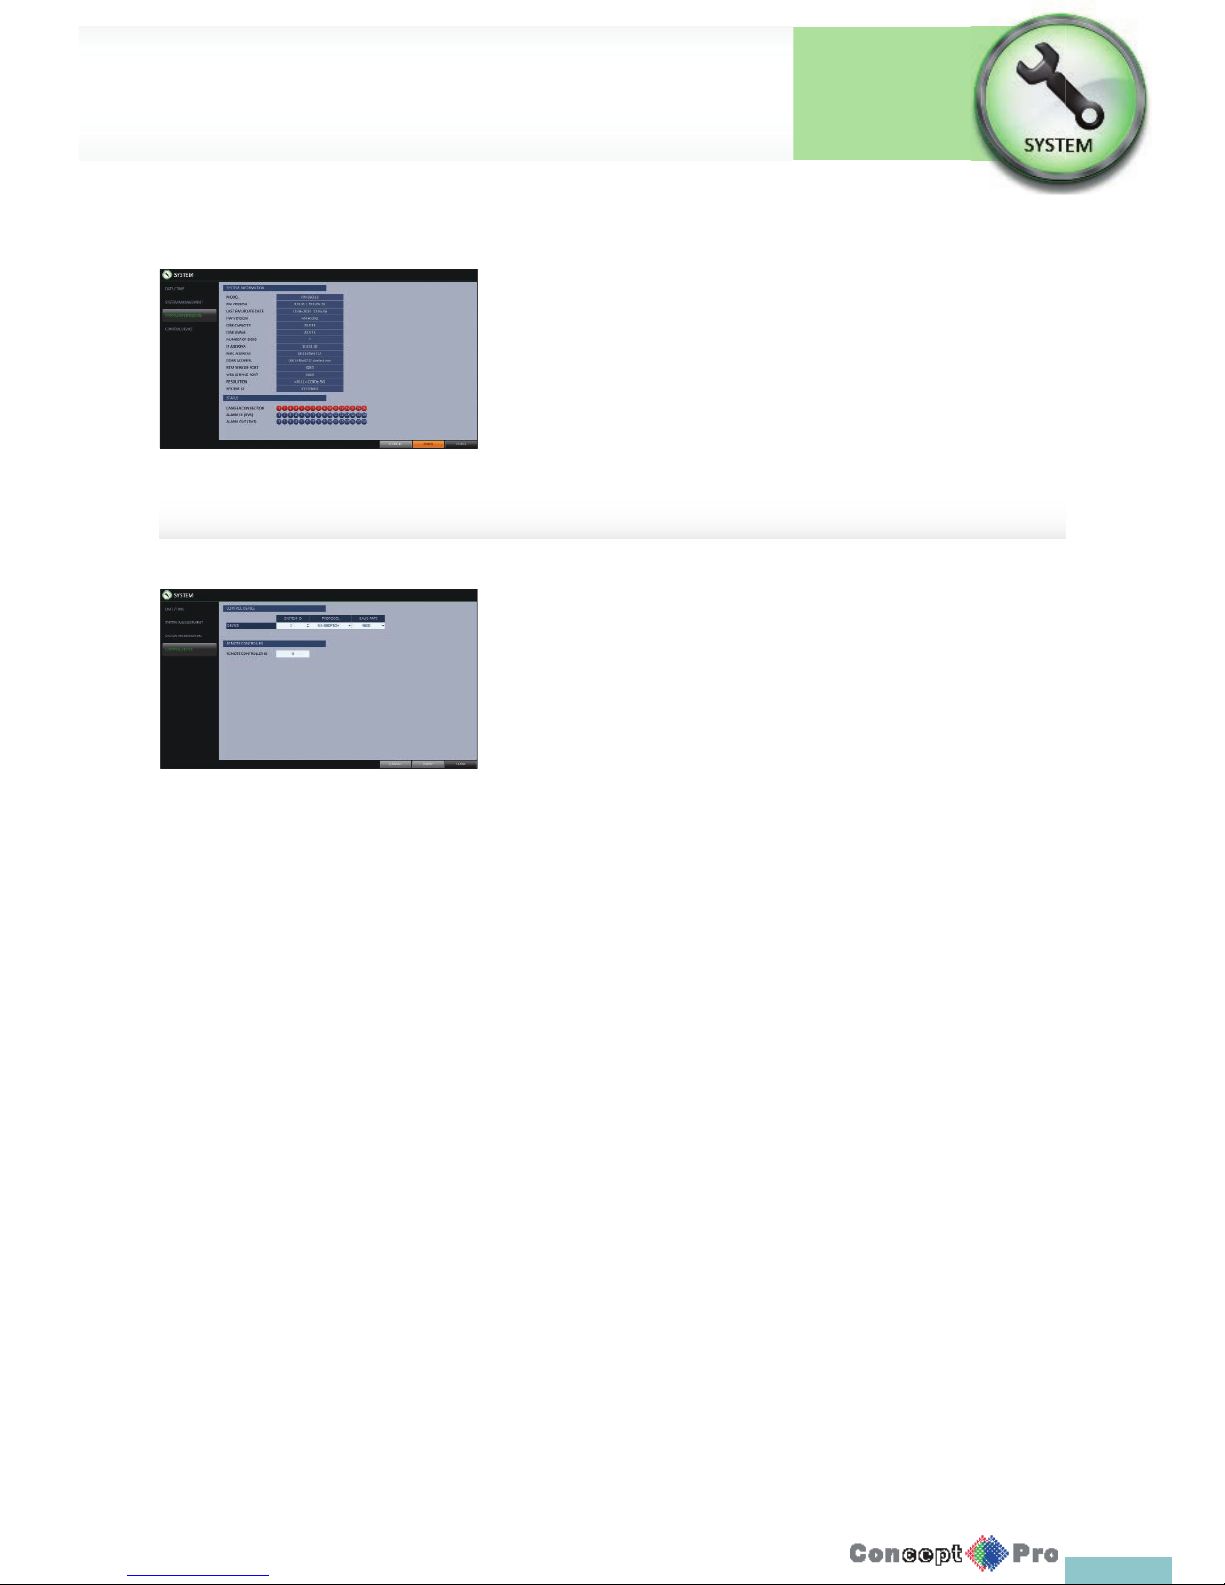
System Information
You can check the current system version and system-related settings.
1. From <SYSTEM SETUP> - <SYSTEM>, select
<SYSTEM INFORMATION>.
2. Check the status of the current system.
3. When done, press the [EXIT] button on the remote control or click
<CLOSE>. The con rmation message appears and you will return to
the previous menu.
Control Device
Con gure the settings of the remote control and keyboard controller.
R This function is provided for controlling individual DVR separately
to using a control device or remote control, in case the site has
multiple DVRs of the same model.
1. From <SYSTEM SETUP> - <SYSTEM>, select
<CONTROL DEVICE>.
2. Use the [pqtu/ENTER] buttons on the remote control
or use the mouse to set the connection options for the control device.
> SYSTEM ID: Set the ID of the VXH960 so that the keyboard
controller can control the correct VXH960.
> PROTOCOL: Set up the protocol of the keyboard controller.
> BAUD RATE: Specify the RS485 communication speed.
> REMOTE CONTROLLER ID: Set the ID of the remote control.
3. To apply the change, click <APPLY> in the bottom of the screen.
4. When done, press the [EXIT] button on the remote control or click
<CLOSE> in the lower screen. The con rmation message appears and
you will return to the previous menu
System Setup
System
Settings
Page 50
47
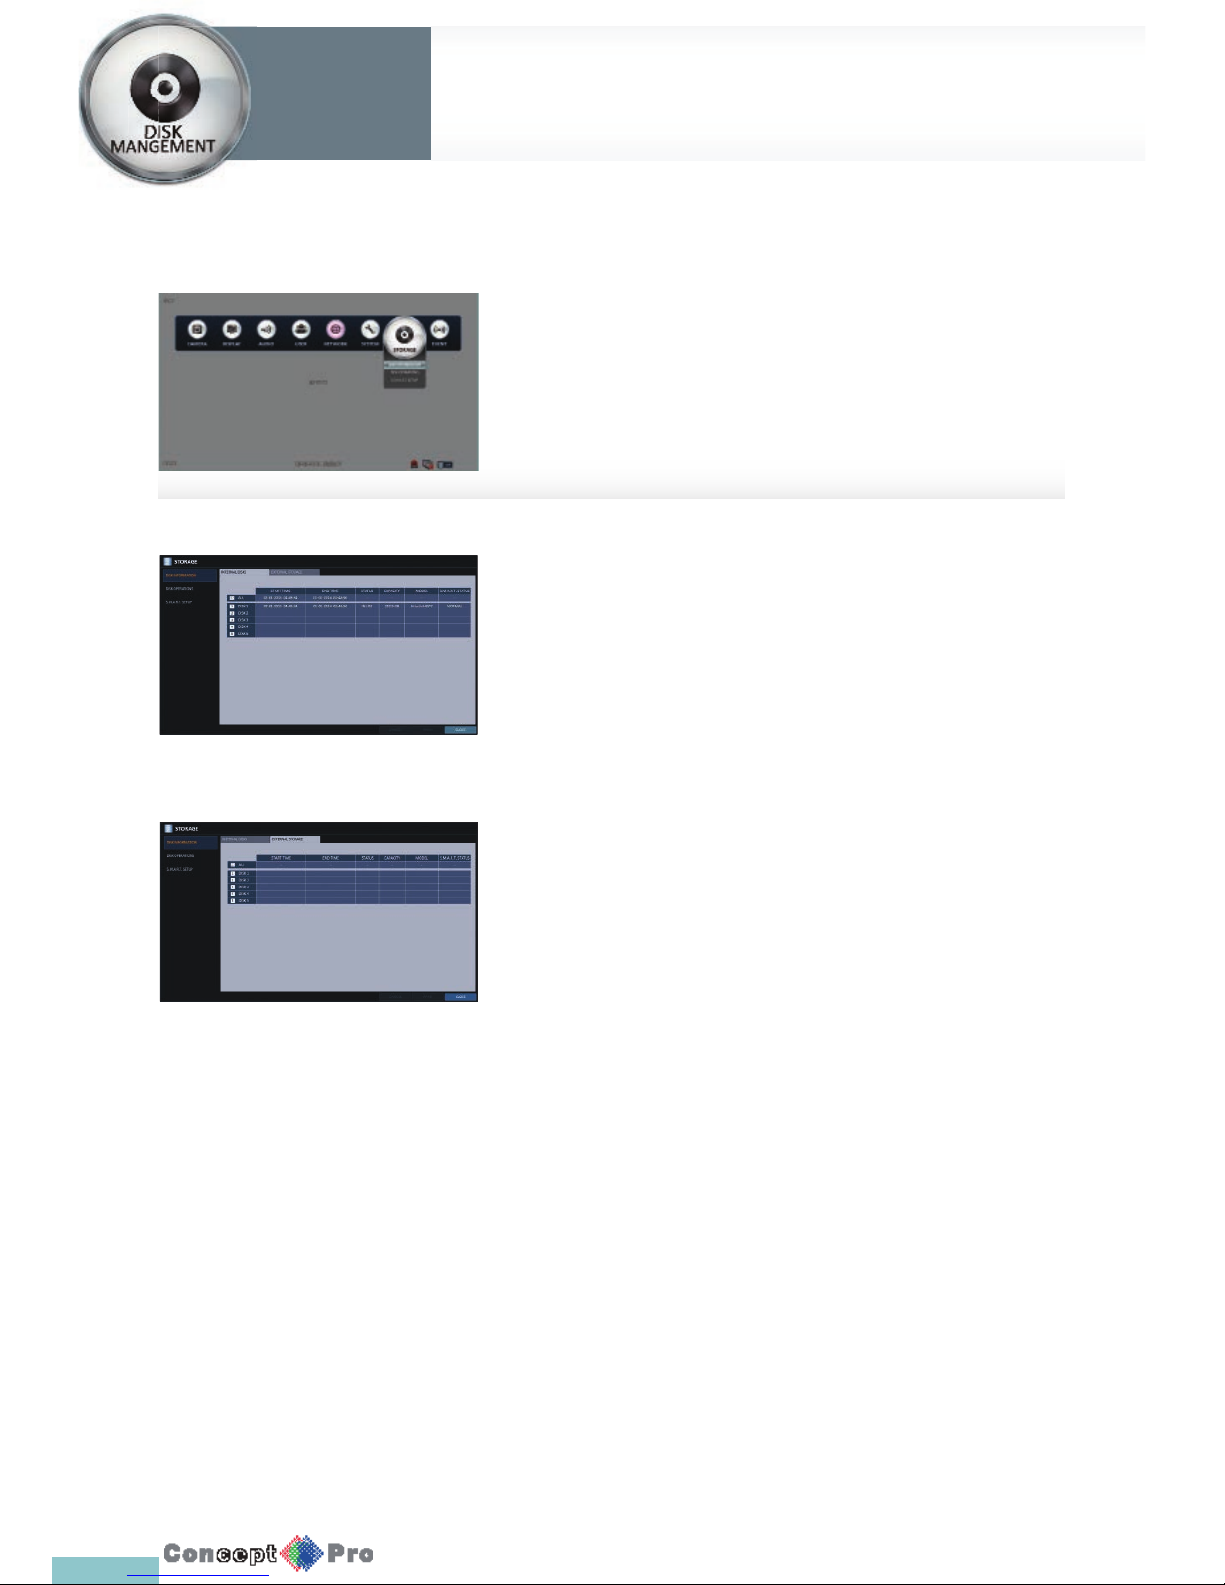
Disk Information
Show information about the connected HDDs.
1. From <SYSTEM SETUP> - <STORAGE>, select
<DISK INFORMATION >.
2. Use the [pqtu/ENTER] buttons on the remote control or use
the mouse to select either <INTERNAL DISKS> or <EXTERNAL
STORAGE>.
Please check the status for each connected device.
> START / END TIME: show the start time and end time of data
stored in each HDD.
> STATUS: Check if the connected HDD is being used by the
VXH960. If you encounter a problem with the HDD, the VXH960
will terminate the connection to the HDD and mark it as ‘Not In
Use’.
> CAPACITY: Show the capacity of the HDD.
> MODEL: Indicate the HDD model number
> S.M.A.R.T STATUS: Read the S.M.A.R.T information of the HDD
and check to display if the current HDD is in normal operation.
- NORMAL: The HDD is in a normal state.
- CHECK: The HDD has an error, contact your service provider.
It is recommended that you replace the HDD immediately
If you leave the problem unresolved, it may stop recording
- ERROR: The HDD fails or is unable to be used due to an
error of the HDD or the cable. The HDD should be replaced
immediately.
Contact your service provider immediately.
3. When done, press the [EXIT] button on the remote control or click
<CLOSE> in the lower screen to return to the previous menu.
You can con gure the settings and view the information of the disk and
external storage devices.
System
Settings
Storage
System
Settings
Page 51
48
Storage
System
Settings
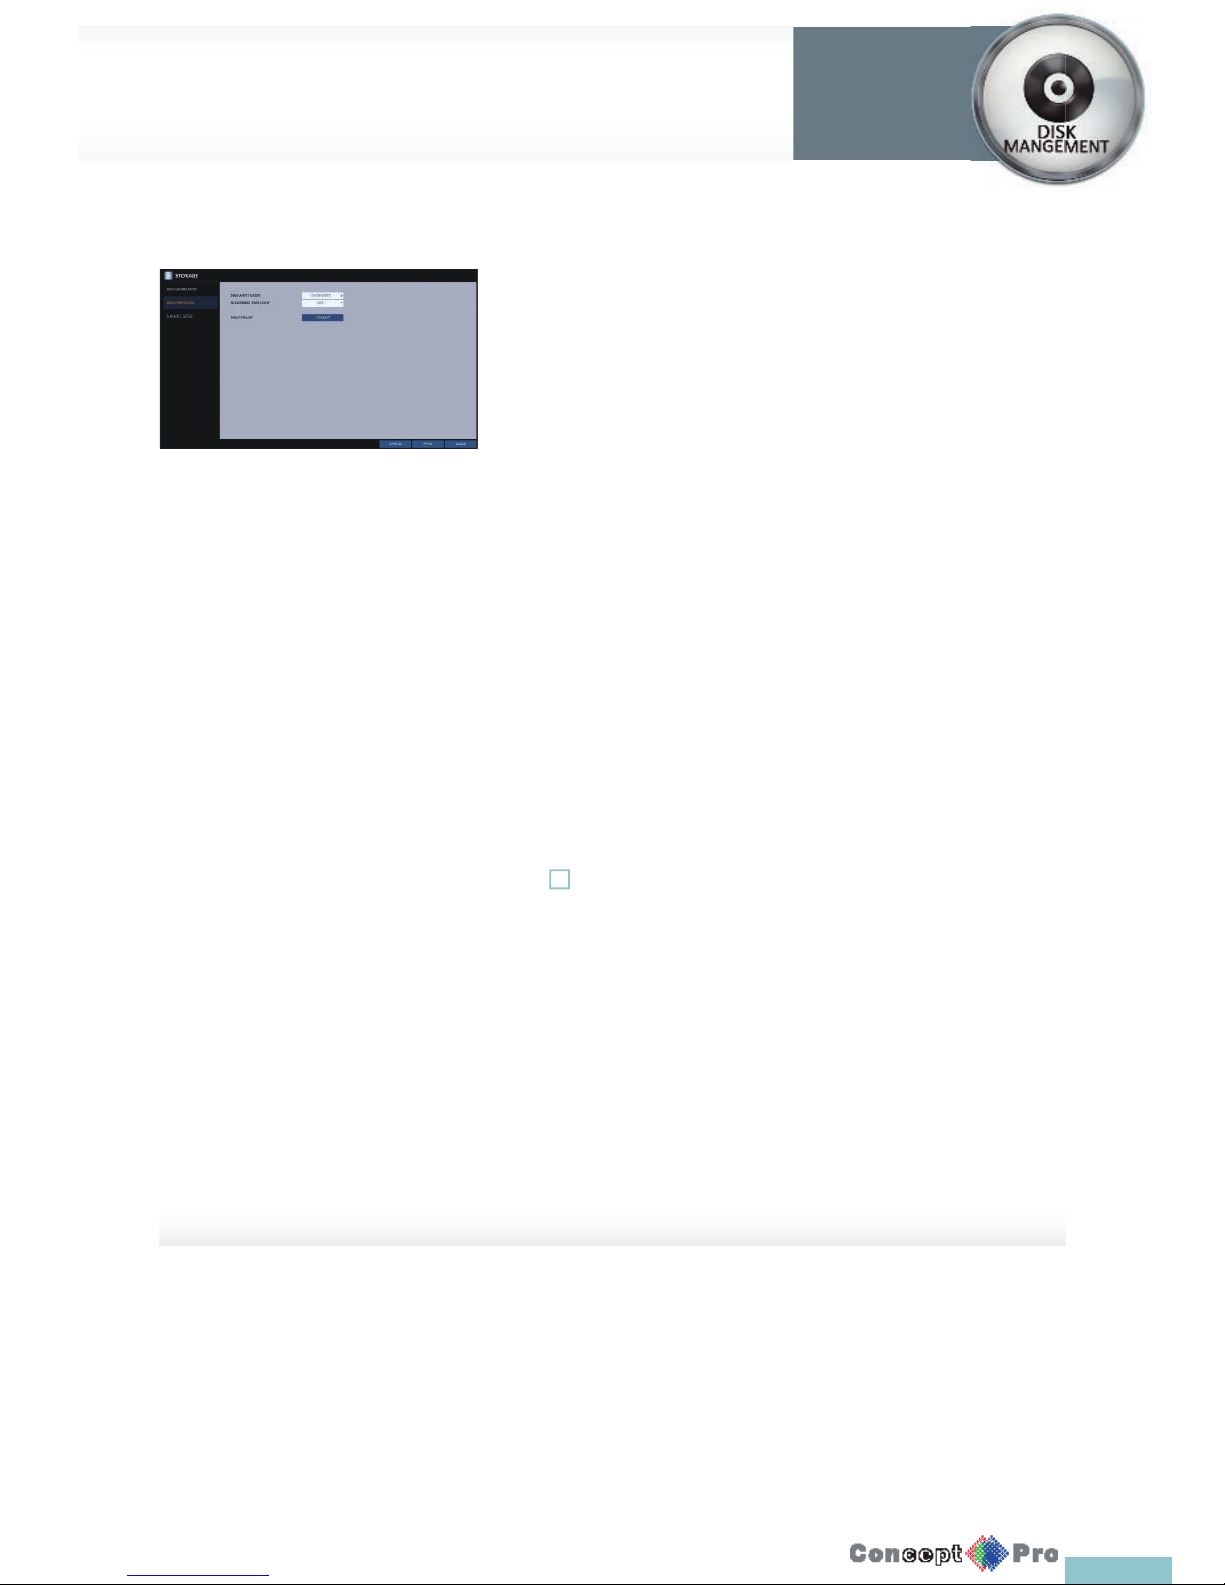
Disk Operations
You can set the disk’s write mode, recording time limit and format the HDD.
1. From <SYSTEM SETUP> - <STORAGE>, select <DISK OPERATIONS>.
2. Use the [pqtu/ENTER] buttons on the remote control or use the
mouse to set the operation conditions of the disk.
> DISK WRITE MODE
- If it is set to <OVERWRITE>, the existing data will be
overwritten by the new recording data, once the HDD
becomes full.
- If the option is set to <ONCE> and the HDD isfull, the DVR
will stop recording and output the beep or alarm that is
pre-de ned at <EVENT>.
> RECORDING TIME LIMIT: The recording data will be deleted
after a maximum speci c time. If it is set to <OFF>,
this function will be disabled.
R Record Time Limit: 1 day even if there is suffi cient free space
in the HDD, it records / keeps videos of the most recent 1 day
only.
> DISK FORMAT: format the hard disk.
! Note that formatting the HDD will delete all video data and logs.
3. To apply the change, click <APPLY> at the bottom of the screen.
4. When done, press the [EXIT] button on the remote control or click
<CLOSE> in the lower screen. The con rmation message appears and
you will return to the previous menu.
Page 52
49
System
Settings
Storage
System
Settings
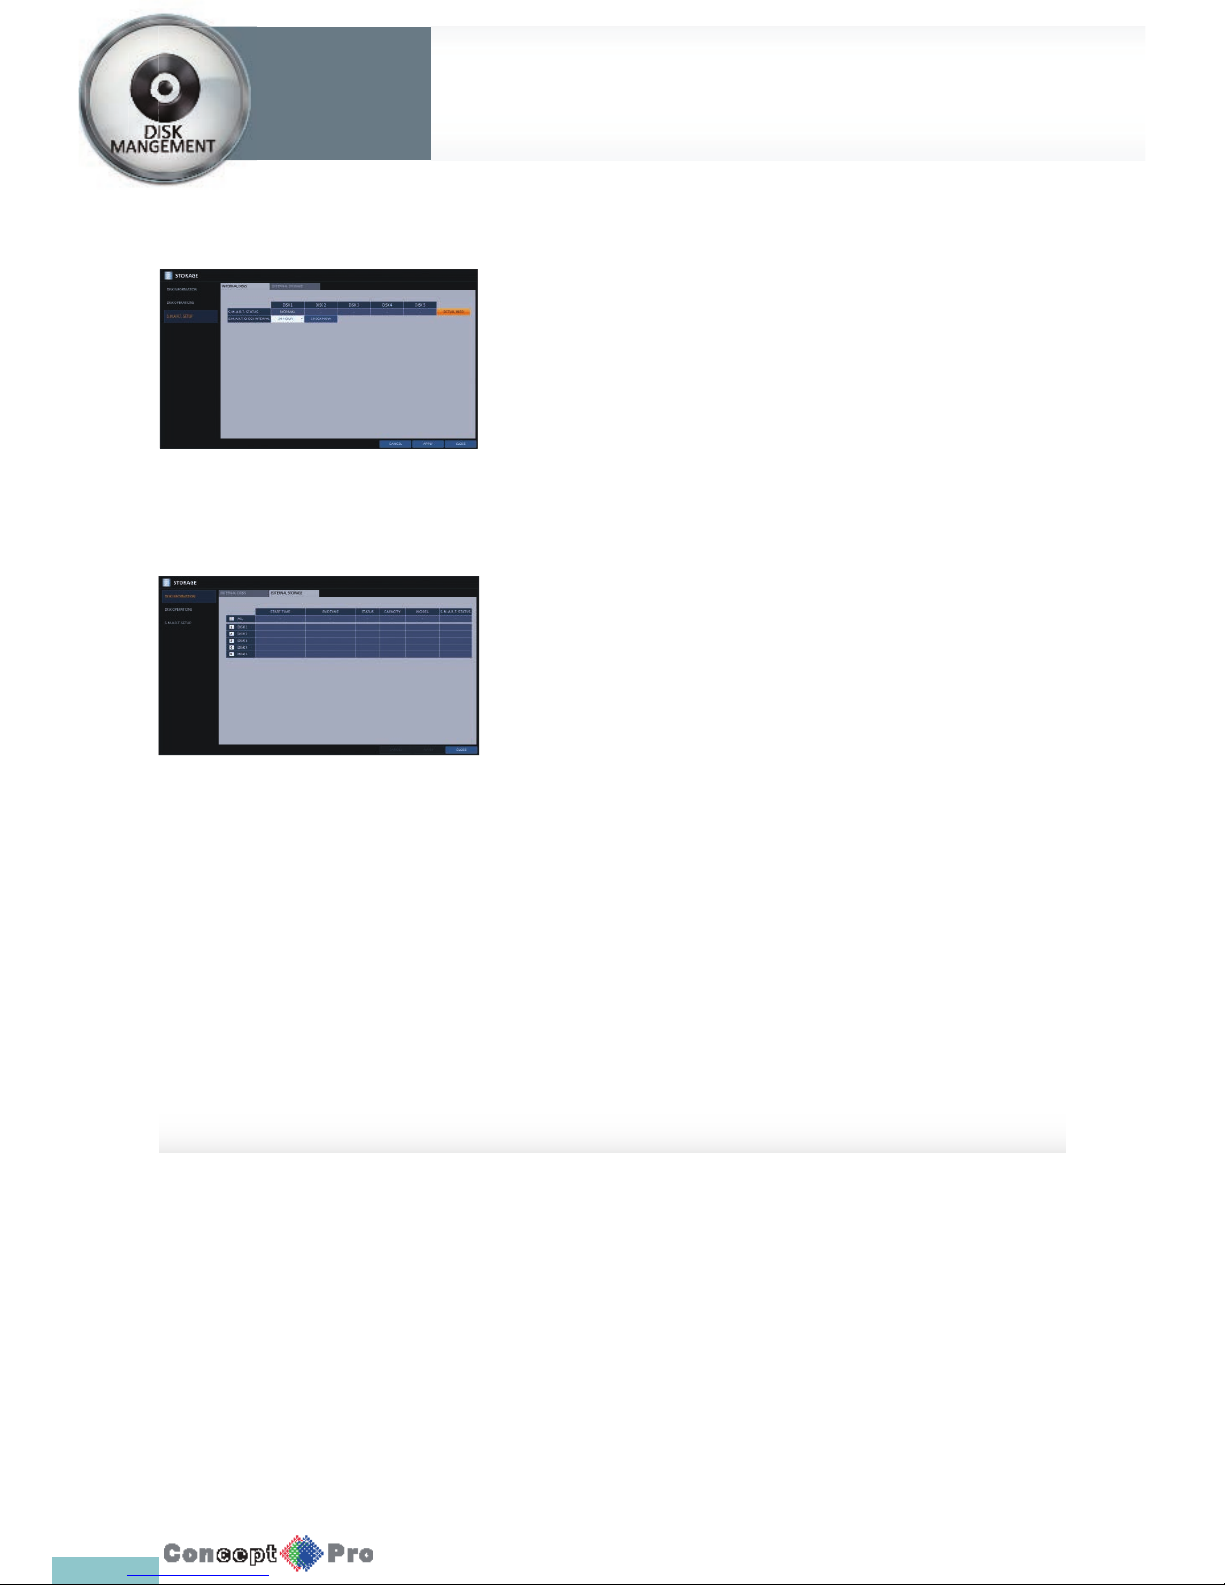
S.M.A.R.T settings
You can check the S.M.A.R.T information of the HDD and specify the check
frequency.
R What is S.M.A.R.T information? S.M.A.R.T (Self-Monitoring,
Analysis and Report Technology) is to detect a HDD that is likely
to cause any problems in the future with a warning message.
1. From <SYSTEM SETUP> - <STORAGE>, select<S.M.A.R.T. SETUP>.
2. Use the [pqtu/ENTER] buttons on the remotecontrol or use the
mouse to check the S.M.A.R.T operation and specify the check interval.
> S.M.A.R.T STATUS: Read the S.M.A.R.T information of the disk
and check to display if the current disk is in normal operation.
Click <DETAIL INFO> to view the details.
> NORMAL: The disk is in a normal state.
> CHECK: The disk has an error so that you need to check the disk
or the sata cable of the disk. If you leave the problem unresolved,
it may not record. It is recommended that you replace the disk
immediately.
> ERROR: The disk fails or is unable to use due to an error of the
disk or the cable. The disk and/or cable should be replaced
immediately. Contact the retailer or the customer service to
replace the disk.
> S.M.A.R.T CHECK INTERVAL: Specify the S.M.A.R.T check
interval. Click <CHECK NOW> to start checking.
3. To apply the change, click <APPLY> in the bottom of the screen.
4. When done, press the [EXIT] button on the remote control or click
<CLOSE> in the lower screen. The con rmationmessage appears and
you will return to the previous menu.
Page 53
50
Event Setup
System
Settings
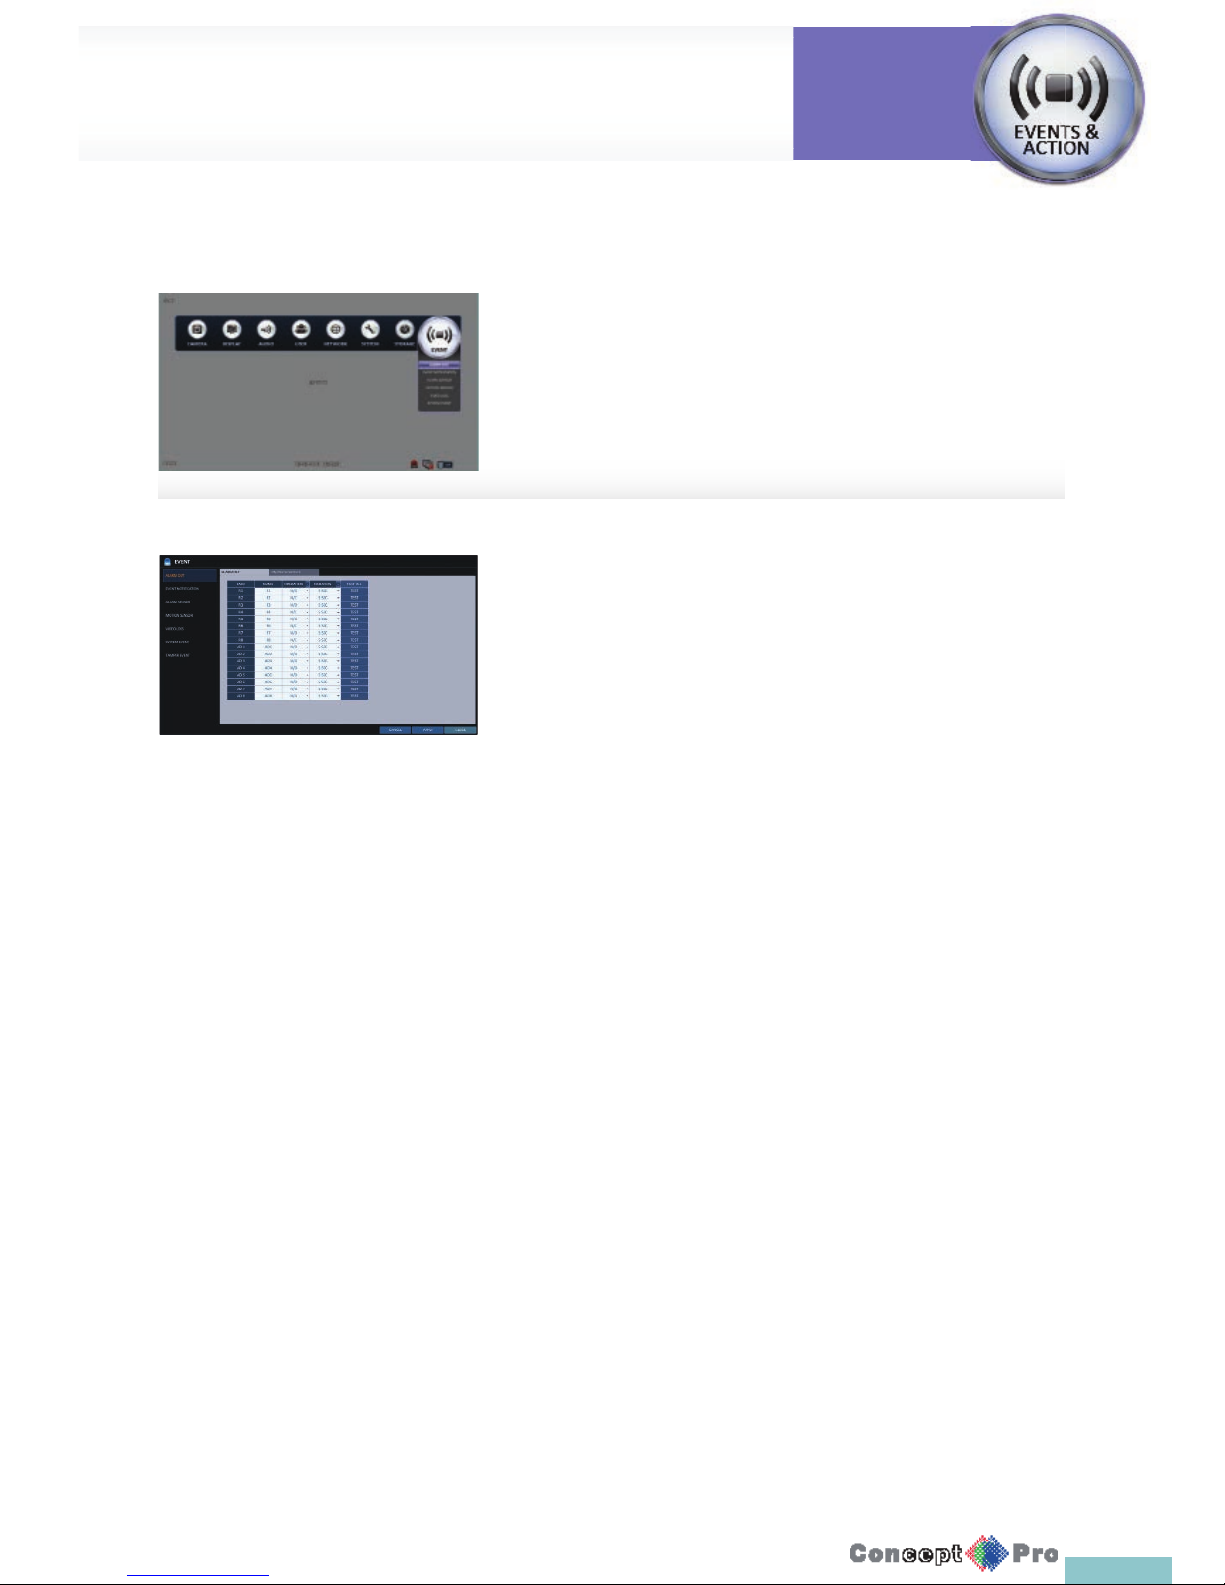
Alarm Out
Specify the alarm output conditions with the work schedule. (A supported
camera may be required to obtain all alarm out functions)
1. From <SYSTEM SETUP> - <EVENT>, select <ALARM OUT>.
2. Use the [pqtu/ENTER] buttons on the remote control or use the
mouse to select <ALARM OUT> and con gure the related settings.
> NAME: You can rename the alarm.
> OPERATION: Set the alarm output mode.
- N/O (Normal Open): It normally stays Open.
However, if an event occurs, it will switch to close.
- N/C (Normal Close): It normally stays Close.
However, if an event occurs, it will switch to Open.
> DURATION: Specify the duration of the alarm output.
- TRANSPARENT: Keep the alarm out for as much time as the
event lasts.
- UNTIL KEY: Keep the alarm out until a mouse or remote control
button is pressed.
- 5 ~ 300 SEC: Keep the alarm out for as long as speci ed.
> TEST: Forcibly output the alarm for test purposes.
3. To apply the change, click <APPLY> in the bottom of the screen.
4. When done, press the [EXIT] button on the remote control or click
<CLOSE> in the lower screen. The con rmation message appears and
you will return to the previous menu.
De ne various events, and specify the conditions to notify the user in
various ways.
Page 54
51
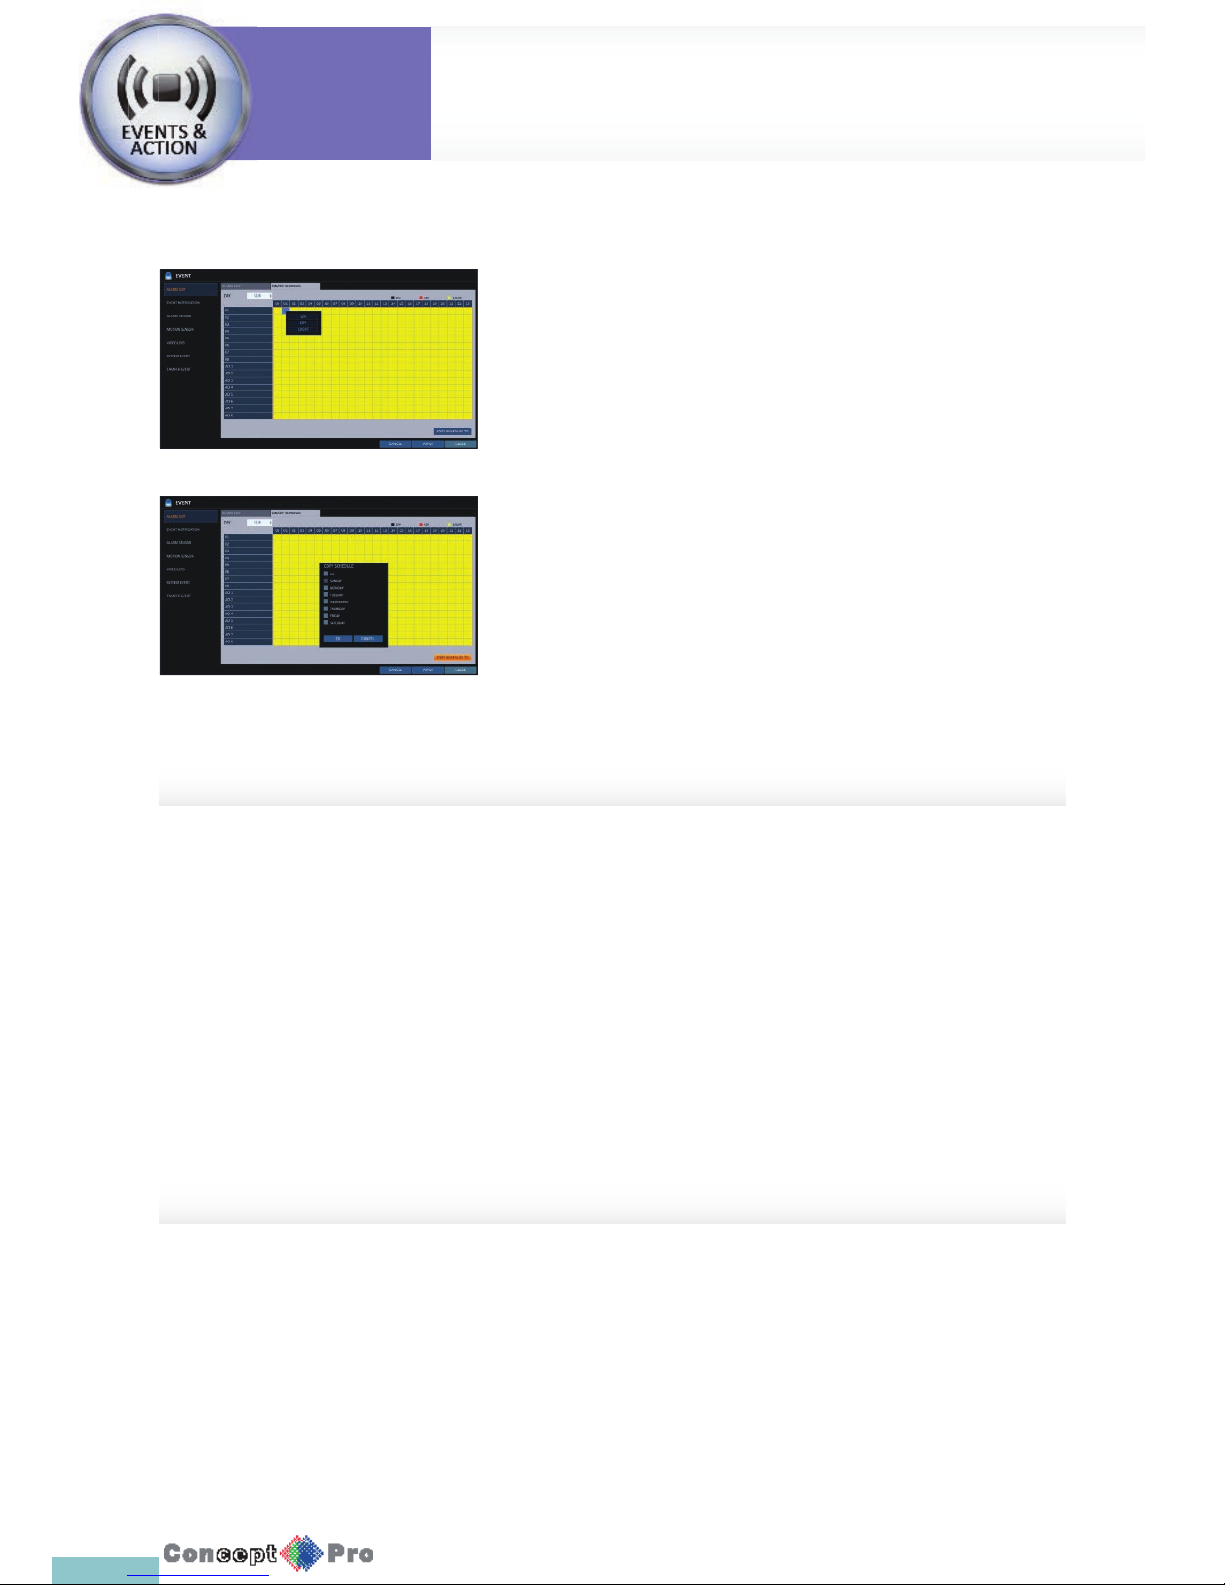
ON/OFF Schedule
You can activate or turn off the alarm output as scheduled.
1. Use the [pqtu/ENTER] buttons on the remote control or use the
mouse to select a <DATE> for the schedule.
2. Drag the mouse to resize the cell or use the on the [pqtu] buttons to
move to the cell, then press [ENTER].
3. Select a desired alarm output mode.
> ON: The alarm output is always turned on.
> OFF: The alarm output is always turned off .
> EVENT: Trigger the alarm output in sync with the event.
4. Click <COPY SHEDULE TO> to check the checkbox of the date that you
want to copy the schedule at.
5. When done, click <OK> to apply the settings.
6. To apply the change, click <APPLY> in the bottom of the screen.
7. When done, press the [EXIT] button on the remote control or click
<CLOSE> in the lower screen. The con rmation message appears and
you will return tothe previous menu.
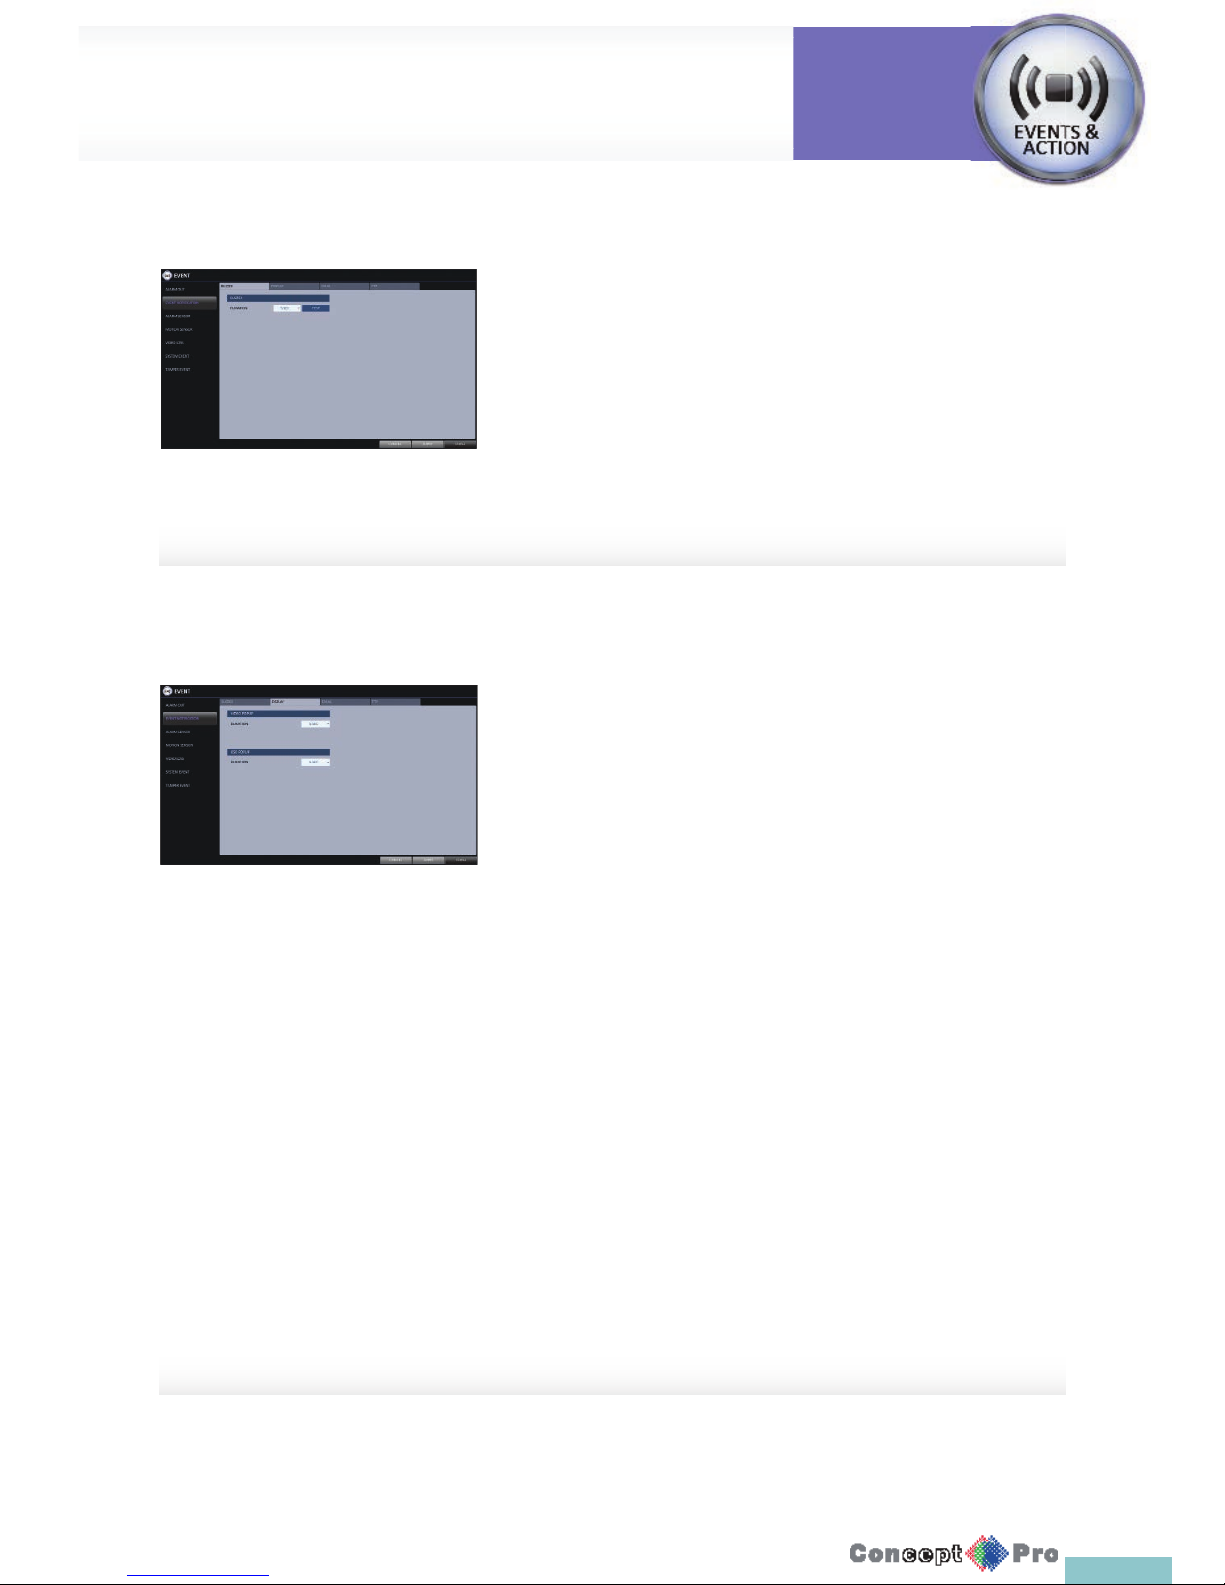
Event Notifi cation
Specify the methods of noti cation such as buzzer, video popup or email if an event occurs.
1. From <SYSTEM SETUP> - <EVENT>, select <EVENT NOTIFICATION >.
2. Use the [pqtu] buttons on the remote control or use the mouse to select one from <BUZZER>, <DISPLAY > and <EMAIL>.
3. Use the [pqtu/ENTER] buttons on the remote control or use the mouse to set the output method and duration.
4. To apply the change, click <APPLY > at the bottom of the screen.
5. When done, press the [EXIT] button on the remote control or click <CLOSE> in the lower screen. The con rmation
message appears and you will return to the previous menu.
System
Settings
Event Setup
System
Settings
Page 55
52
Buzzer output
You can notify the user of the event using the buzzer.
> DURATION
- TRANSPARENT: Keep the buzzer on for as much time as the
event lasts.
- UNTIL KEY: Keep the buzzer on until a mouse or remote
control button is pressed.
- 5 ~ 300 SEC: Keep the buzzer on for as long as speci ed.
> TEST: Forcibly output the alarm for test purposes
Display
If an event occurs, you can display the video screen or a popup message to
notify the user of the event.
> VIDEO POPUP: Display the video channel that is synchronized
with the event on a single split screen.
Set the DURATION of the single split screen.
- UNTIL KEY: Keep the video popup displayed until a mouse or
remote control button is pressed.
- 5 ~ 300 SEC: Keep the video popup displayed for as long as
speci ed.
R If multiple events occur at the same time, or if multiple event related
video channels exist, the video popup will be displayed
in the maximum split screen mode rather than the single split
screen mode.
> OSD POPUP: This will notify the user of the event with
a popup message if an OSD popup event occurs.
You can adjust the duration of the popup message.
- UNTIL KEY: Keep the OSD popup displayed until a mouse or
remote control button is pressed.
-5 ~ 300 SEC: Keep the OSD popup displayed for as long as
speci ed.
Event Setup
System
Settings
Page 56
53
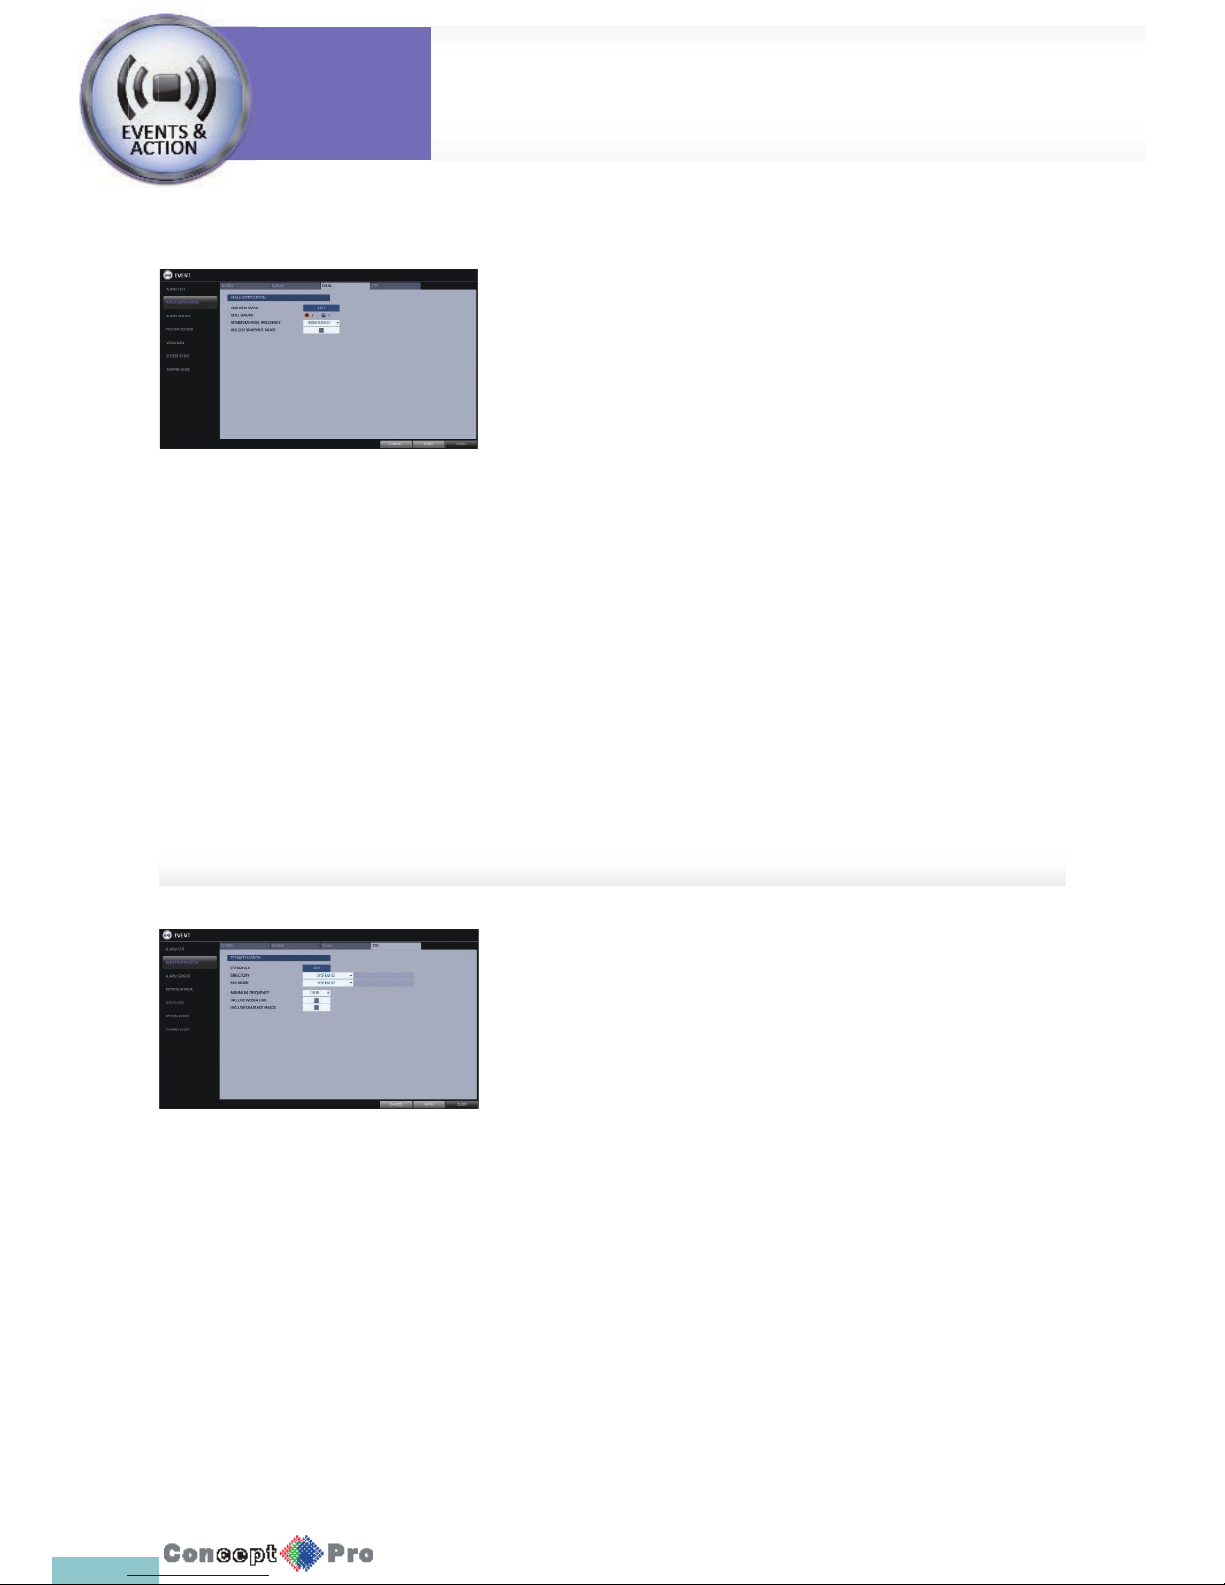
Email
If an event occurs, this will notify registered users of the event by email. If
you do not want to receive the email, uncheck the <EMAIL NOTIFY> option
in <MANAGEMENT>. (Page 37)
> ADD NEW EMAIL: If you want to add a new mail recipient beside
the existing ones, click <EDIT> to add the recipient.
> MINIMUM EMAIL FREQUENCY: Adjust the minimum frequency of
sending the email.
For example, even if you have set the minimum frequency to one
minute and another event occurs in less than one minute after the
last email sending, the email for the new event will be sent one
minute after.
R Some email servers can block the email sending if the email
delivery cycle is too short, and classify it as spam.
Contact your email service provider to adjust the minimum
delivery cycle so that the server does not classify the email as spam.
> INCLUDE SNAPSHOT IMAGE: Set whether to include snapshot
image of the event with the email noti cation.
FTP
Upon events, upload the event noti cation onto a FTP server.
> FTP SERVER: Enter the FTP server address for event transfer.
> DIRECTORY: Select or manually enter the destination folder of
the FTP for event transfer.
> FILE NAME: Select the uploading event le’s format or manually
set the le name.
> MINIMUM FREQUENCY: Sets the minimum recurrence delay for
uploading event noti cation onto the FTP server.
For example, when the minimum recurrence is set to 1 minute, the
next FTP event noti cation will be uploaded after 1 minute from
the last event, even if another event is detected within 1 minute
from the last one.
> INCLUDE WEBRA LINK: Select whether to include WEBRA link
address of the DVR, which can be accessed with
web browser (Internet Explorer).
> INCLUDE SNAPSHOT IMAGE: Set whether to include snapshot
(still image) or not with the email.
System
Settings
Event Setup
System
Settings
Page 57
54
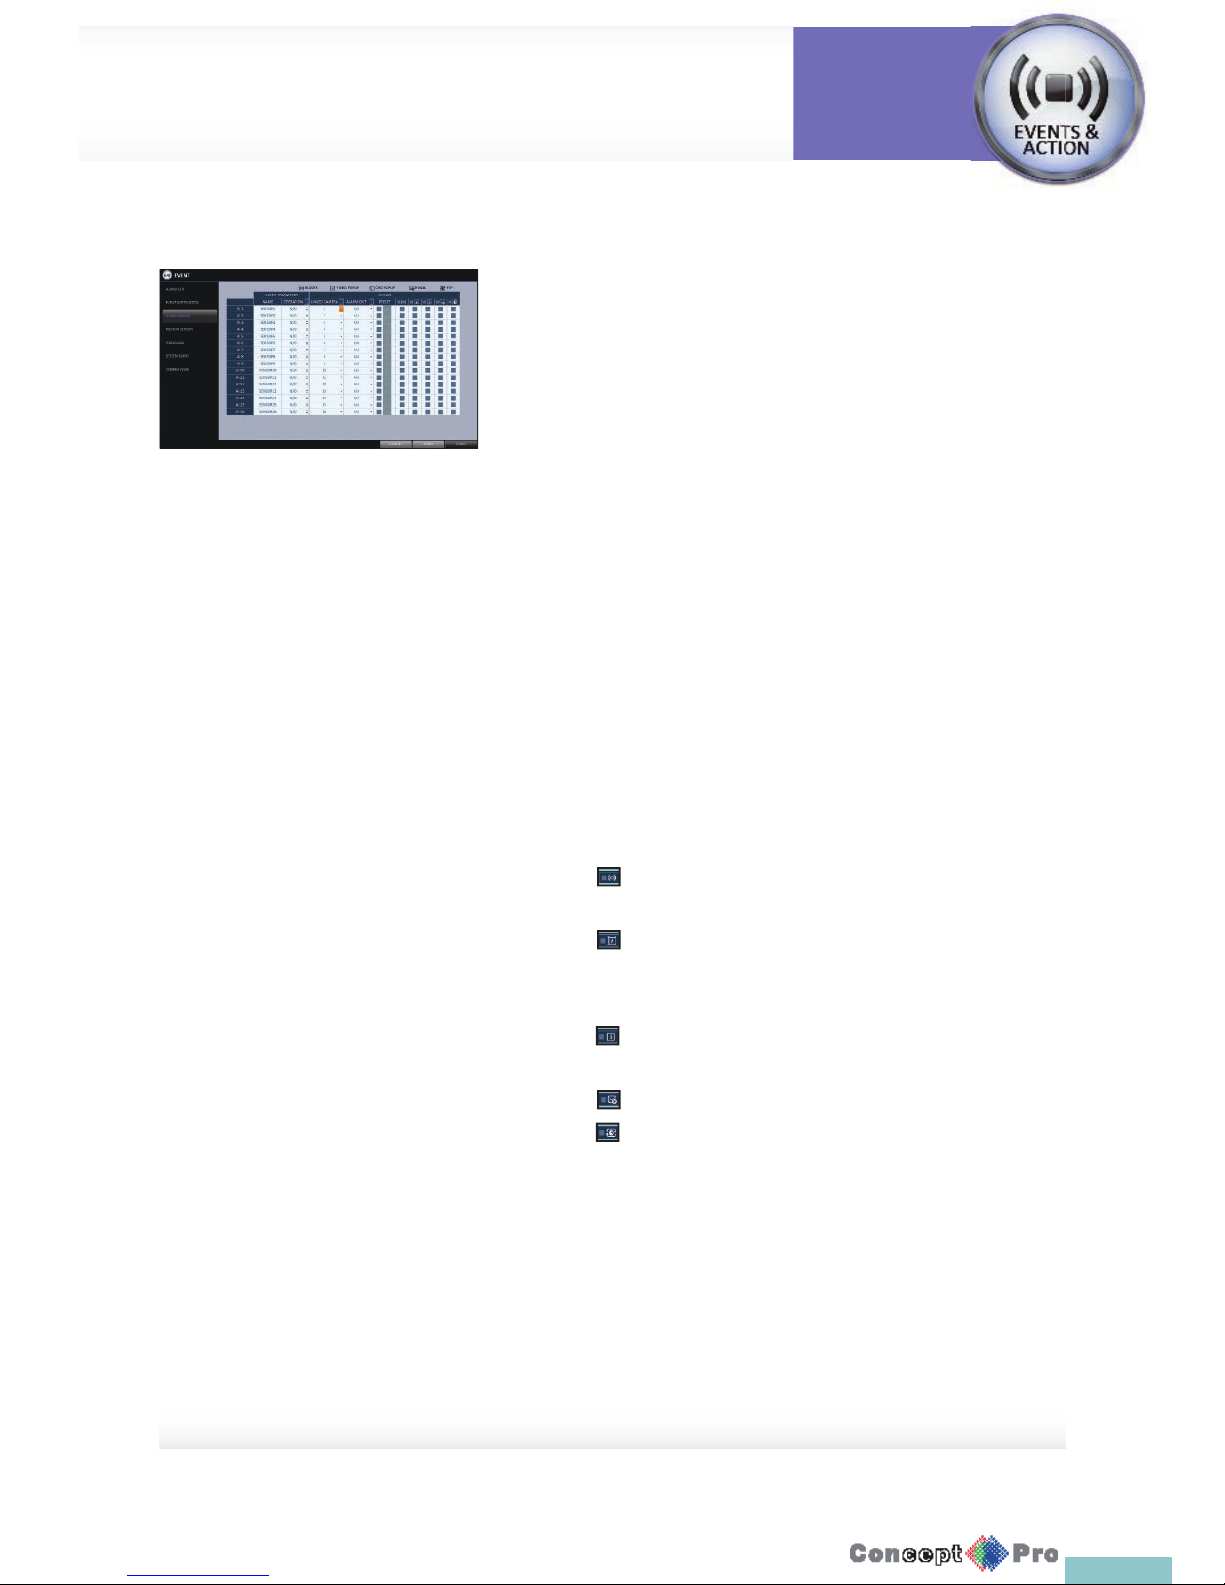
Alarm Sensor
You can con gure the settings of the alarm sensor and specify the operation
of the sensor if an event occurs.
1. From <SYSTEM SETUP > <EVENT>, select <ALARM SENSOR >
2. Use the [pqtu] buttons on the remote control or use the
mouse to specify the sensor input method and operation.
> NAME: You can specify the name of the alarm sensor.
> OPERATION: You can specify the type of the alarm sensor.
- N/O (Normal Open): Normally the sensor is left Open. If the
sensor switches to Close, an event will be triggered.
- N/C (Normal Close): Normally the sensor is left Close. If the
sensor switches to Open, an event will be triggered.
> LINKED CAMERA: Set the camera to sync with the alarm sensor
if it is triggered.
If you have set the alarm recording and the sensor detects the
recording, all synchronized cameras will start alarm recording.
> ALARM OUTPUT: Specify the alarm output channel if it is
detected by the alarm sensor. The alarm will be output to the
speci ed channel.
> Specify the output of the buzzer if an alarm is detected by the
alarm sensor
> Select to display the video popup if an alarm is detected by the
alarm sensor. If there exist multiple <LINKED CAMERA>, the video
popup will be displayed in the maximum split mode
> Select to display the OSD popup message if it is detected by the
alarm sensor.
> Select to send an email if detected by the alarm sensor.
> Select to send a noti cation to an FTP site if detected by the alarm
sensor.
3. To apply the change, click <APPLY> in the bottom of the screen.
4. When done, press the [EXIT] button on the remote control or click
<CLOSE> in the lower screen. The con rmationmessage appears and
you will return to the previous menu.
Event Setup
System
Settings
Page 58
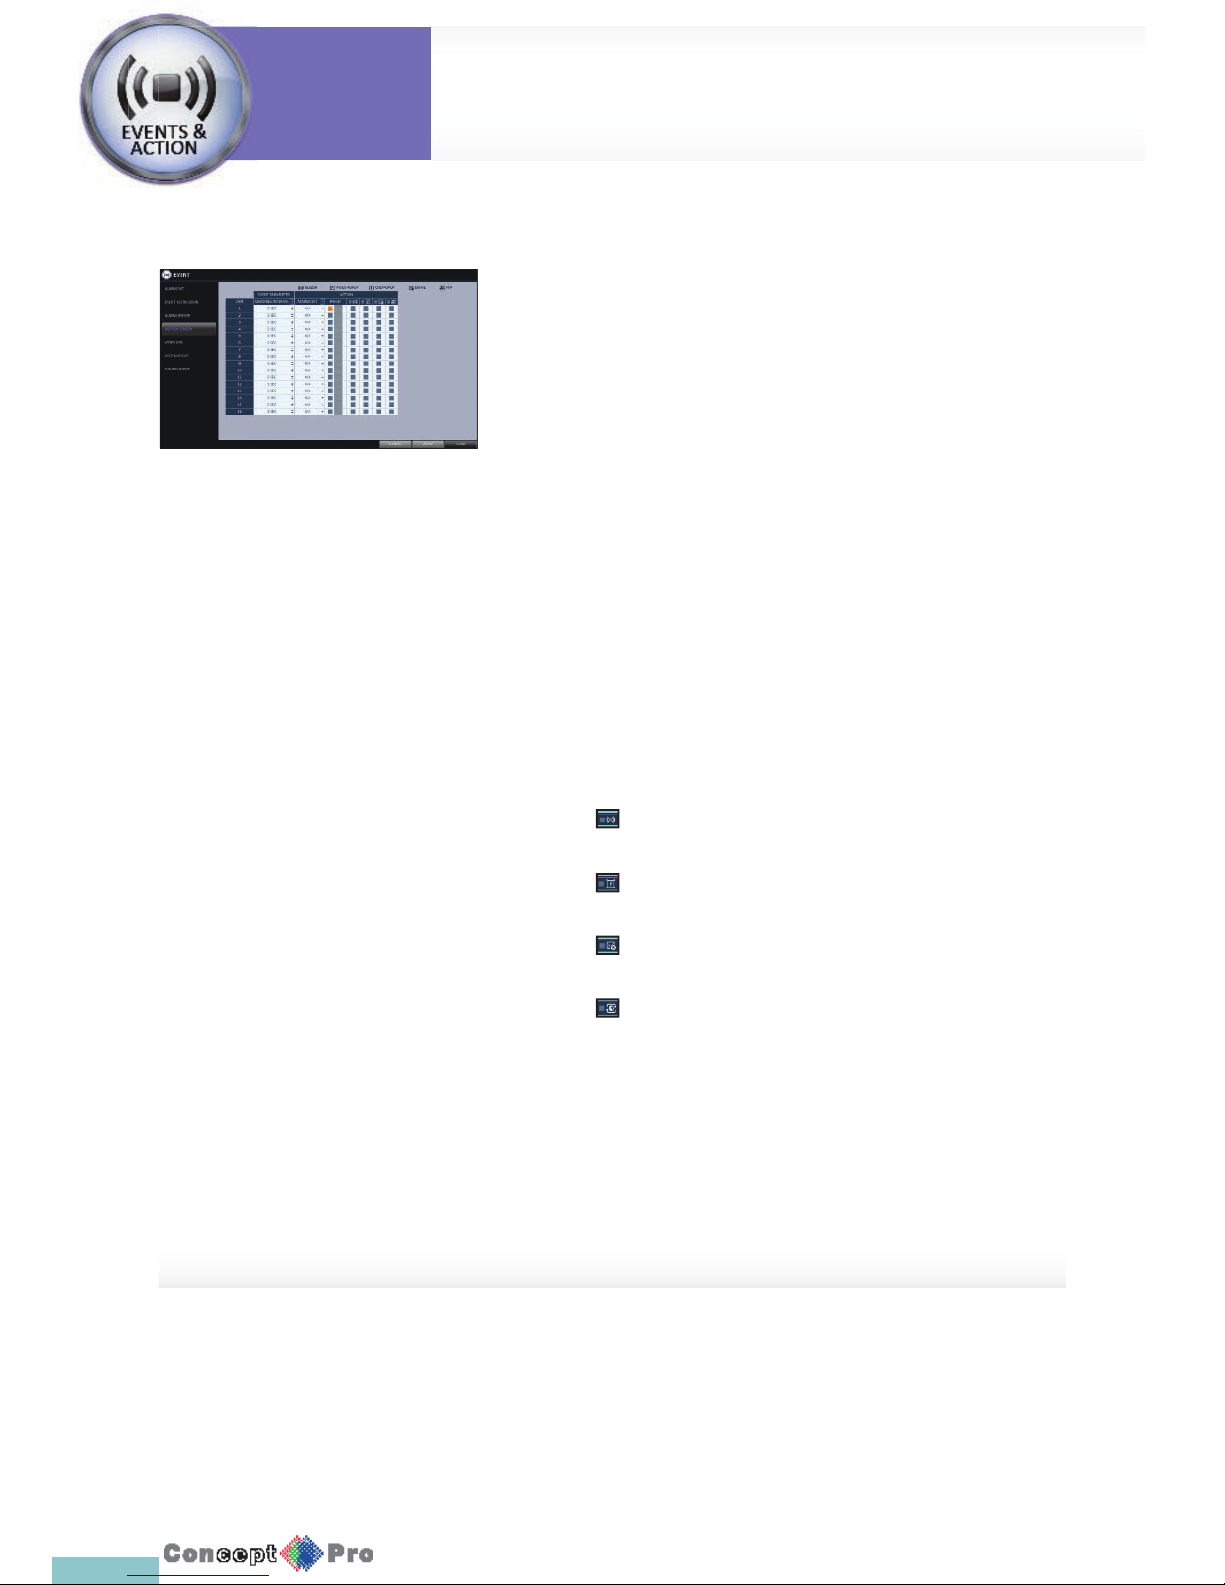
55
Motion Sensor
You can set an action to execute when a motion is detected. For the settings
of the motion sensor, move to <CAMERA SETUP>.
1. From <SYSTEM SETUP> - <EVENT>, select <MOTION SENSOR>.
2. Use the [pqtu buttons on the remote control or use
the mouse to specify the ignorance interval and operation.
> IGNORING INTERVAL: Specify the minimum interval of the motion
event occurrence.
For example, even if you have set the minimum frequency to
5 seconds and another motion event occurs in less than 5
seconds after the last motion event occurred, the new event will
be ignored. If too many motion events occur, adjust to shorten
the interval.
R Motion recording will be triggered immediately after the motion occurred
regardless of the above settings.
> ALARM OUTPUT: Specify the alarm output channel if a motion is
detected by the motion sensor.
> Specify the output of the buzzer if a motion is detected by the
motion sensor.
> Select to display the video popup if a motion is detected by the
motion sensor.
> Select to send an email if a motion is detected by the motion
sensor
> Select to send a noti cation to an FTP site if motion is detected
by the motion sensor.
3. To apply the change, click <APPLY> at the bottom of the screen.
4. When done, press the [EXIT] button on the remote control or click
<CLOSE> in the lower screen. The con rmation message appears and
you will return to the previous menu.
System
Settings
Event Setup
System
Settings
Page 59
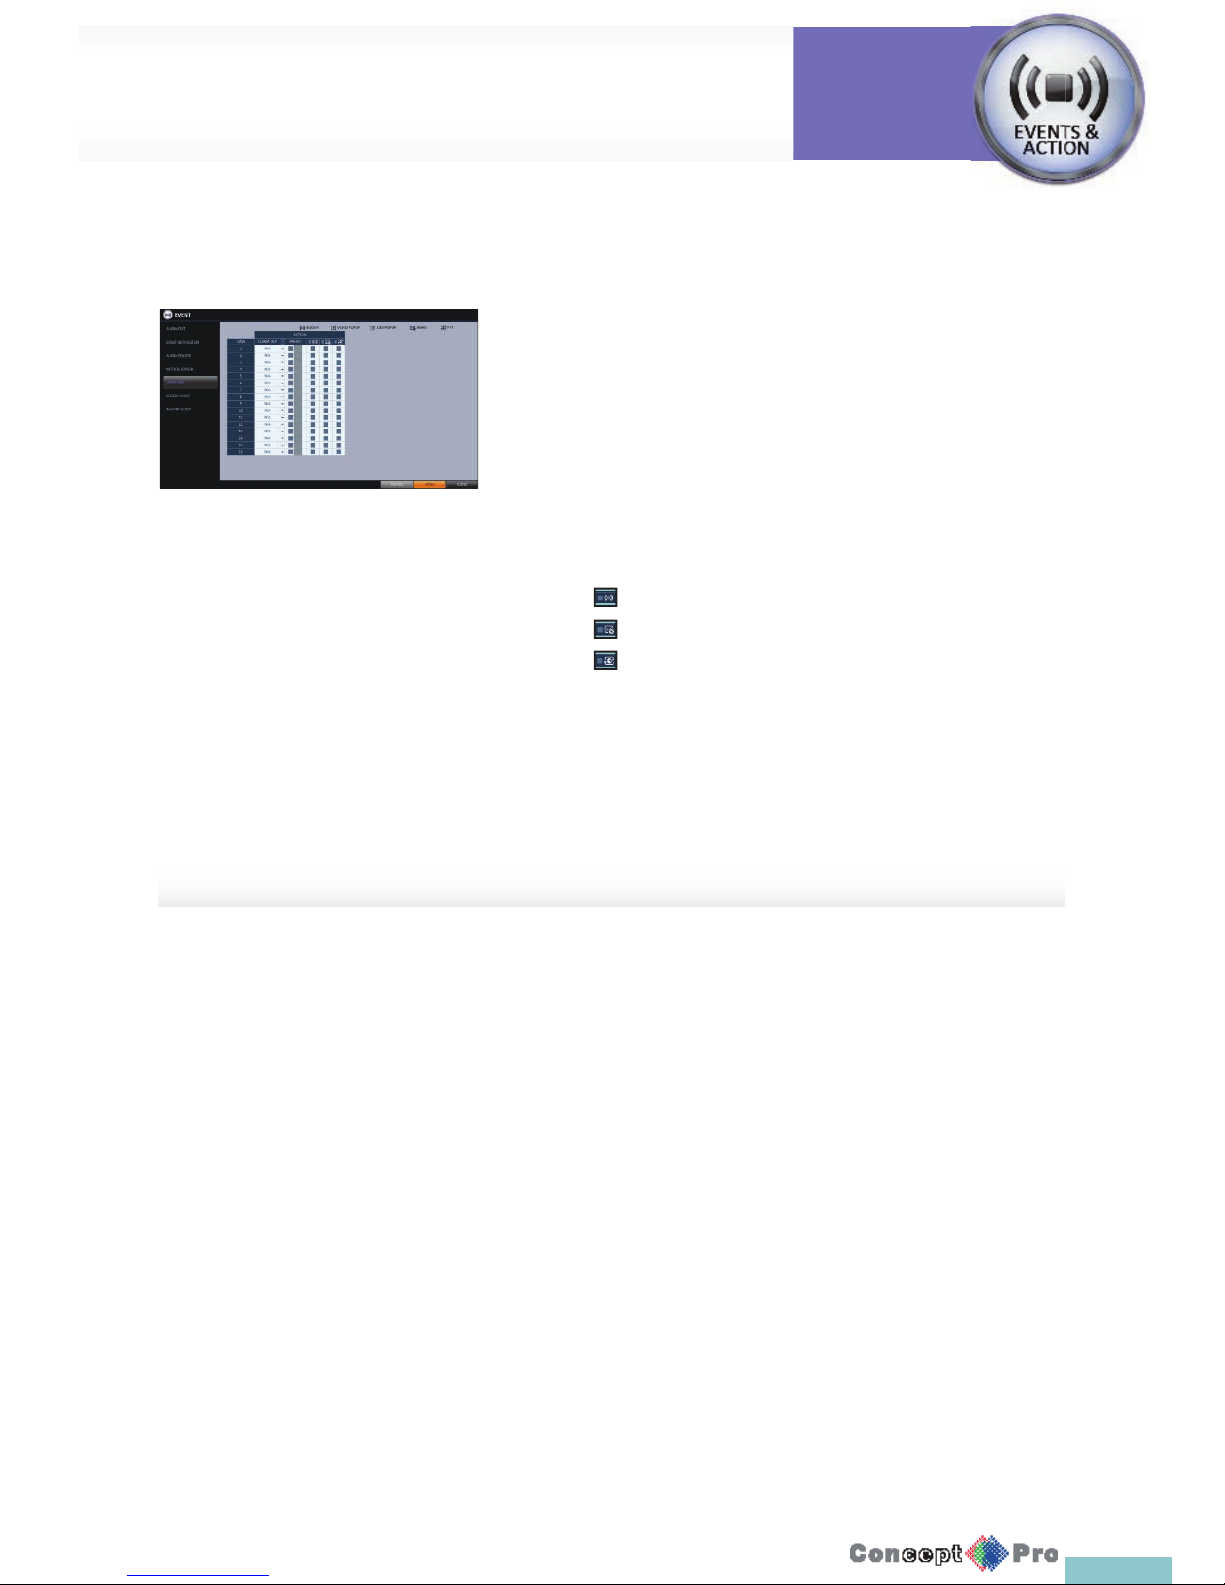
56
Video Loss
You can specify a reaction to the case where no video is received from the
camera.
1. From <SYSTEM SETUP> - <EVENT>, select <VIDEO LOSS>.
2. Use the [pqtu] buttons on the remote control or use the mouse to
specify the reaction to a video loss.
> ALARM OUTPUT: Specify the alarm output channel if a video loss
occurs.
> PRESET: Specify a preset position for a PTZ camera
> Specify the output of the buzzer if a video loss occurs.
> Select to send an email if a video loss occurs.
> Select to send a noti cation to an FTP site if video loss occurs.
3 To apply the change, click <APPLY> in the bottom of the screen.
4. When done, press the [EXIT] button on the remote control or click
<CLOSE> in the lower screen. The con rmation message appears and
you will return to the previous menu.
Event Setup
System
Settings
Page 60
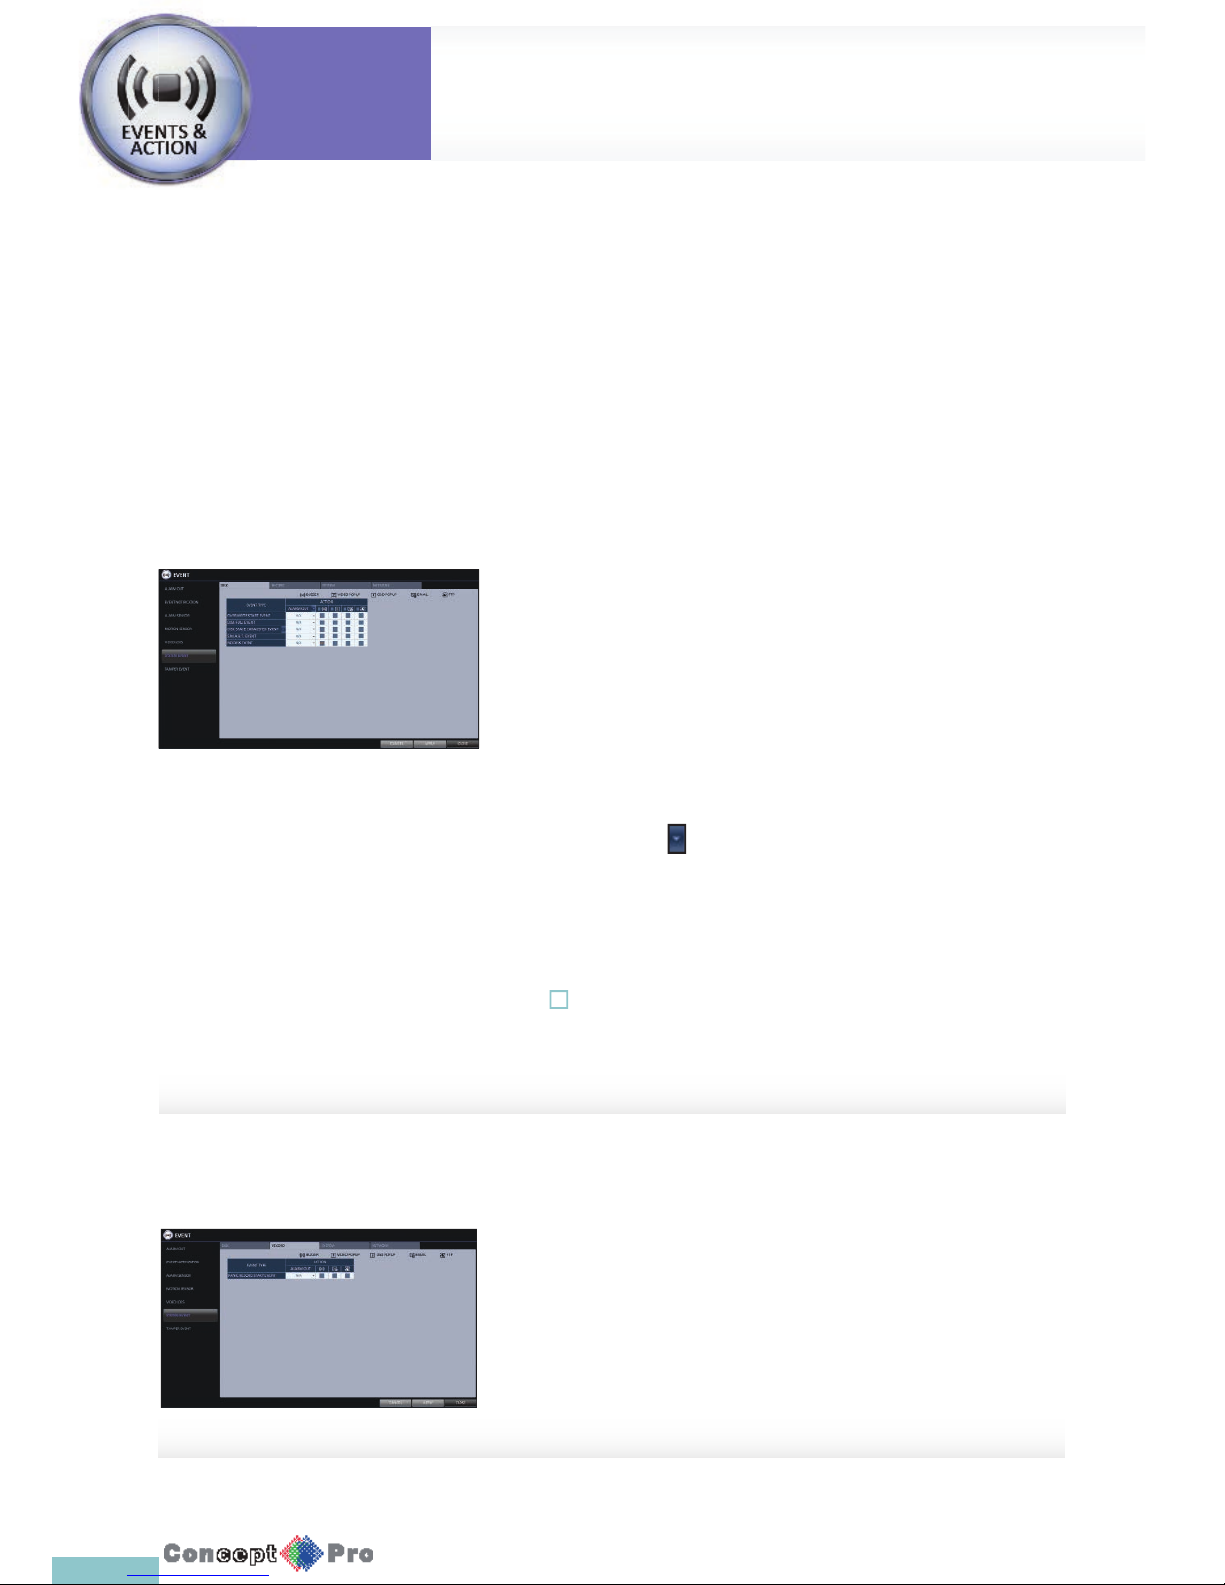
57
Record
> PANIC RECORD START EVENT: Specify the action to
perform when the panic recording begins.
System Event
You can set any action to an event related to the disk, recording, network or system. Like the other events, you may notify the event to
the user using the alarm/buzzer output,OSD pop-up or email.
1. From <SYSTEM SETUP> - <EVENT>, select <SYSTEM EVENT>.
2. Use the [pqtu] buttons on the remote control or use the mouse to specify the reaction to each event.
3. To apply the change, click <APPLY > in the bottom of the screen.
4. When done, press the [EXIT] button on the remote control or click <CLOSE> in the lower screen. The con rmation message appears
and you will return to the previous menu.
Disk
> OVERWRITE START EVENT: if you set the disk write mode to
<OVERWRITE>, this event occurs when the disk is full and the
overwriting begins accordingly.
> DISK FULL EVENT: if you set the disk write mode to <ONCE>,
this event occurs when the disk is full (100%).
> DISK SPACE EXHAUSTED EVENT: Event that is triggered if the
disk is almost full.
Click to specify the threshold percentage of usage to trigger
the event.
> S.M.A.R.T EVENT: Occurs if the disk causes the S.M.A.R.T error.
> NO DISK EVENT: Occurs if no disk is recognized after the booting
due to a disk failure or cable problem.
! To detect the disk error, it is recommended not to change the settings of
the S.M.A.R.T event, no disk event and buzzer output
System
Settings
Event Setup
System
Settings
Page 61
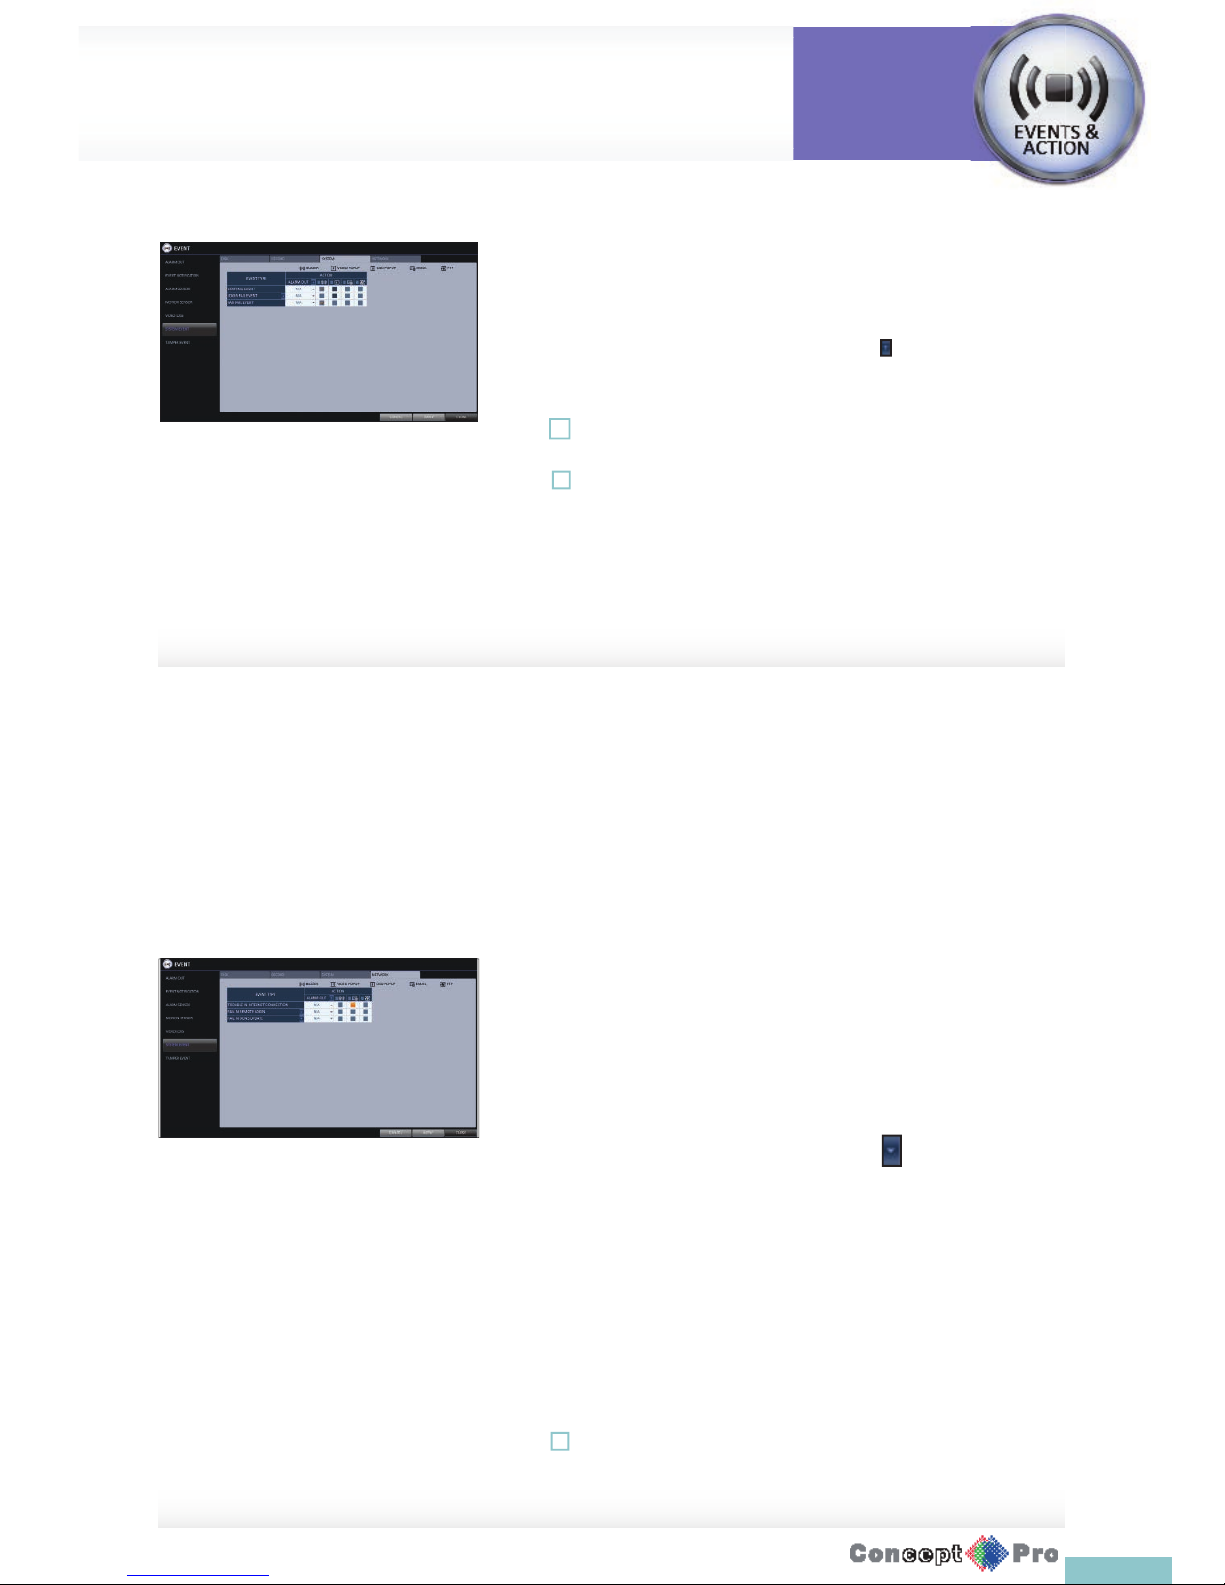
58
System
> BOOTING EVENT: This event occurs when the DVR is booting.
> LOGIN FAIL EVENT: This event occurs when a user enters the
incorrect password.
You can specify the times of clicking < > to trigger the event.
> FAN FAIL EVENT: This event occurs if the CPU cooling fan or
unit’s cooling fan does not work at all.
! If the fan fails, recording will stop. Please contact your service
provider.
! To monitor the normal operation of the DVR, it is recommended not to
change the buzzer output settings of the fan failure event.
Network
> TROUBLE IN INTERNET CONNECTION: Occurs if the Internet
connection to the VXH960 fails. If you do not want to connect the
VXH960 to the network, leave the <ACTION> item blank.
> FAIL IN REMOTE LOGIN: This event occurs if a remote client fails
to log in due to an invalid ID or password.
You can specify the times of clicking < > to trigger the event.
> FAIL IN DDNS UPDATE: This event occurs if the DVR tried to
update the DDNS address but failed
R If the DDNS address fails to be updated, the DVR may not connect
to a remote client.If this is thecase,enter theIP address from the
client side to allow access from the DVR. This is just a temporary
measure. For the IP address, move to and check <EXTERNAL IP
ADDRESS> from the <NETWORK> window. Note that the <EXTERNAL
IP ADDRESS> is subject to change if the DVR does not use a static IP.
! Note that the <EXTERNAL IP ADDRESS> can change at any time in a
dynamic IP environment.
Event Setup
System
Settings
Page 62
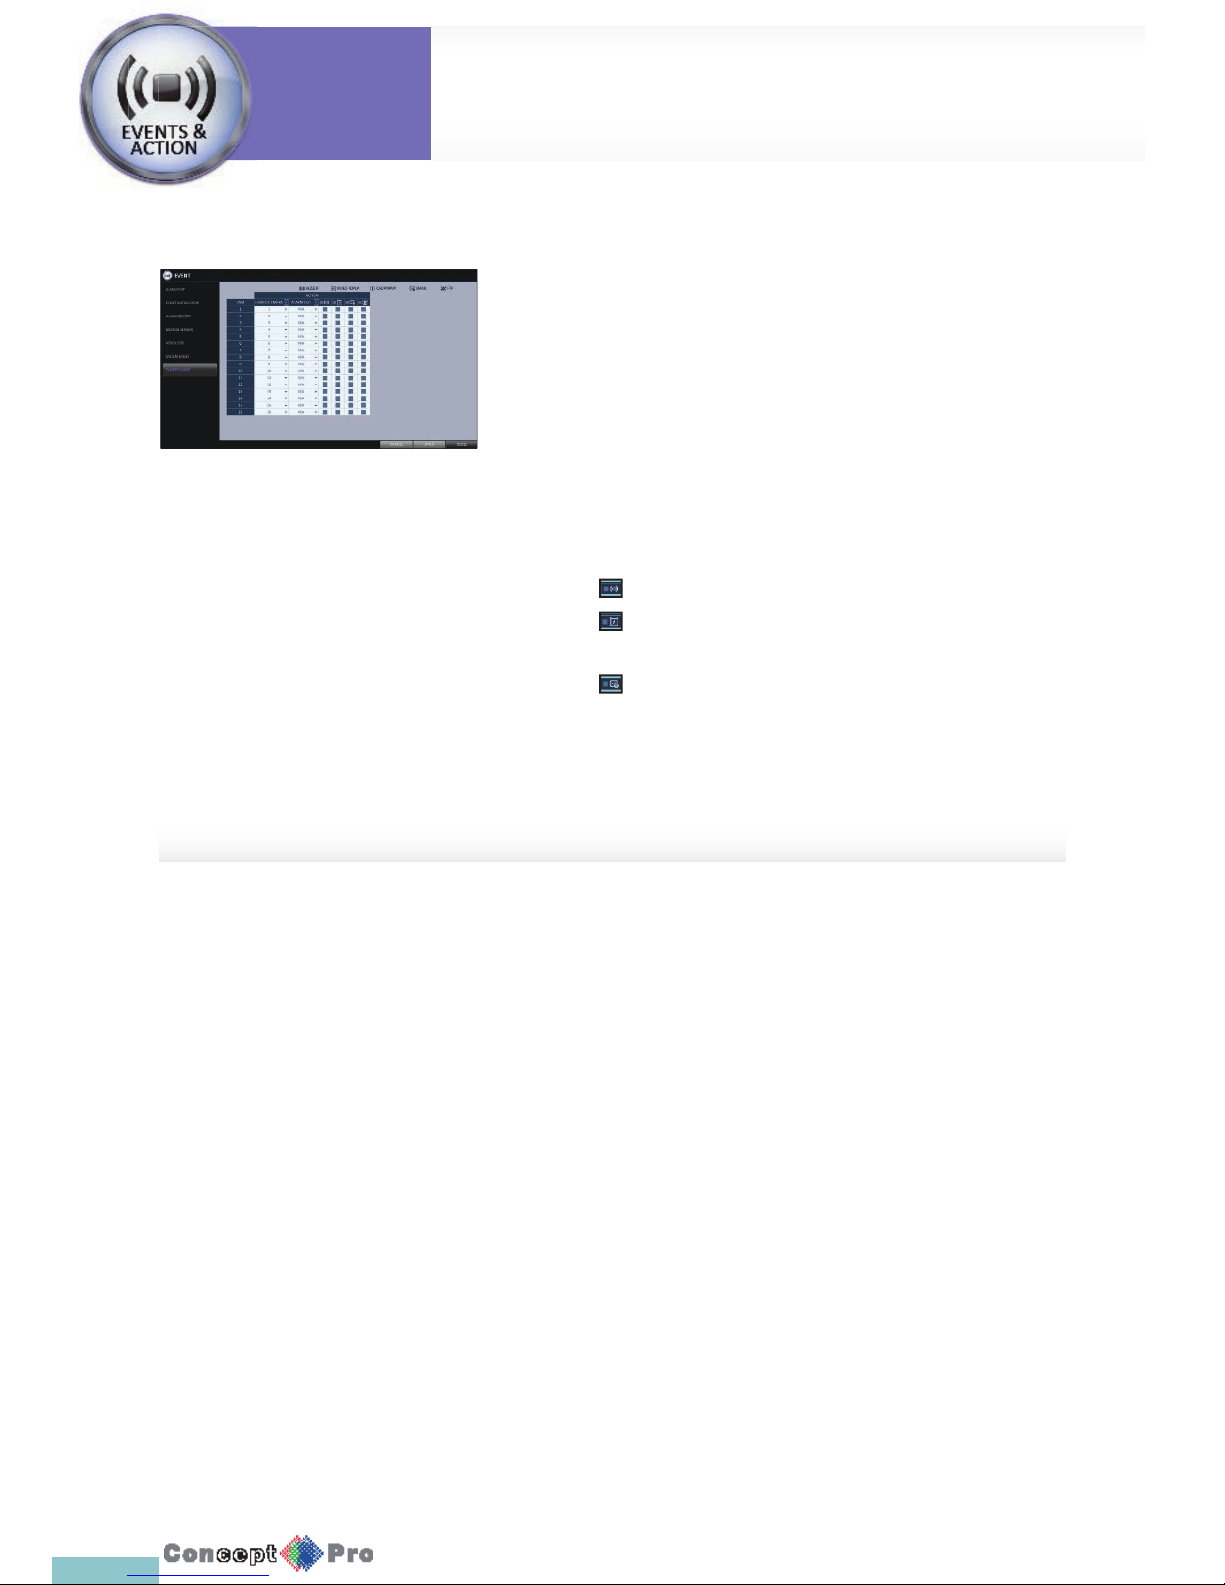
59
TAMPER EVENT
You can set how to react upon a detected tampering event.Set the
tampering event detection in<TAMPER DETECTION> for each channel.
1. From <SYSTEM SETUP> - <EVENT>, select<TAMPER EVENT>.
2. Use [pqtu] buttons on the remote or the mouse to set the detection
action.
> LINKED CAMERA: Select the camera to output the event action
upon a tampering detection.
> ALARM OUT: Set the alarm out channel for detected tampering
event.
> Sets whether to sound beeper upon a tampering detection.
> Sets whether to display a video pop-up up on a
tampering detection
> Sets whether to send an email noti cation upon a tampering
detection.
3. To apply the change, click <APPLY> in the bottom of the screen.
4. When done, press the [EXIT] button on the remote control or click
<CLOSE> in the lower screen. The con rmationmessage appears and
you will return to the previous menu.
System
Settings
Event Setup
System
Settings
Page 63
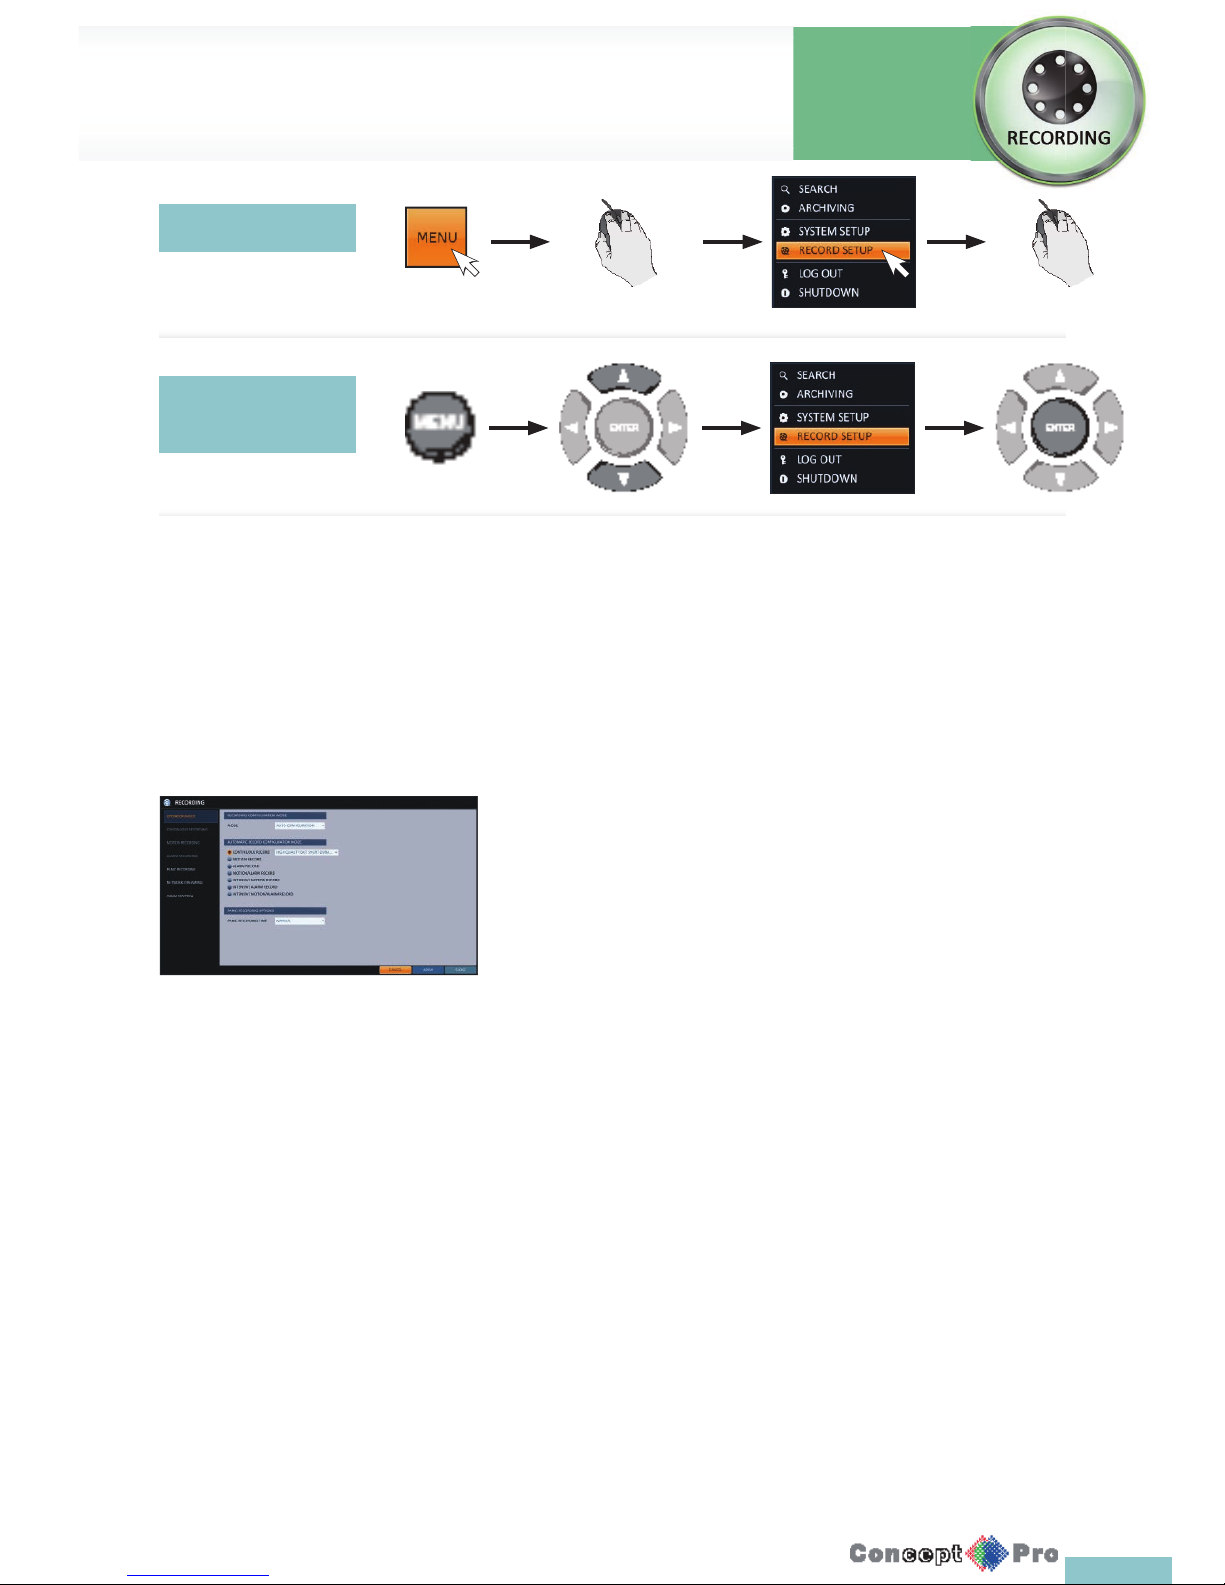
60
Using the mouse
Using the remote
control
Operation Mode
You can set the recording options for Auto or Manual mode.
1. From <RECORD SETUP> menu, select <OPERATION MODE>.
2. Use the [pqtu] buttons or use the mouse to set <RECORDING CONFIGURATION MODE> to <AUTO CONFIGURATION> or
<MANUAL CONFIGURATION >.
3. Set the recording options for each selected Record mode.
4. To apply the change, click <APPLY> at the bottom of the screen.
5. When done, press the [EXIT] button on the remote control or click <CLOSE> in the lower screen. The con rmation message appears
and you will return to the previous menu.
Auto Confi guration
If you choose your preferred record mode, the VXH960 will recommend you
the optimized settings for the selected record mode.
> ALWAYS HIGH VIDEO QUALITY: Recording will proceed in the
best quality regardless of the event at all times.
As this option will always make recording in the best quality, the
recording period is the shortest compared to the other record
modes.
> MOTION RECORD: Recording will proceed only if a motion is
detected.
> ALARM RECORD: Recording will proceed only if an alarm event
occurs.
> MOTION/ALARM RECORD: Recording will proceed only if motion
is detected or an alarm event occurs.
> INTENSIVE MOTION RECORD: Normally recording will be
performed in a normal quality.
However, the quality will switch to high if motion is detected.
> INTENSIVE ALARM RECORD: Normally recording will be
performed in normal quality. However, the quality will switch to
high if an alarm event occurs.
> INTENSIVE MOTION/ALARM RECORD: Normally recording will
be performed in normal quality. However, the quality will switch to
high if an alarm event occurs or motion is detected.
R Motion: Normally, it means the movement of an object. However, it
implies a change to the illumination in the context of the DVR.
Ex) Vehicle lights (headlights), illumination change, etc.
Record Setup
Record
Settings
Page 64
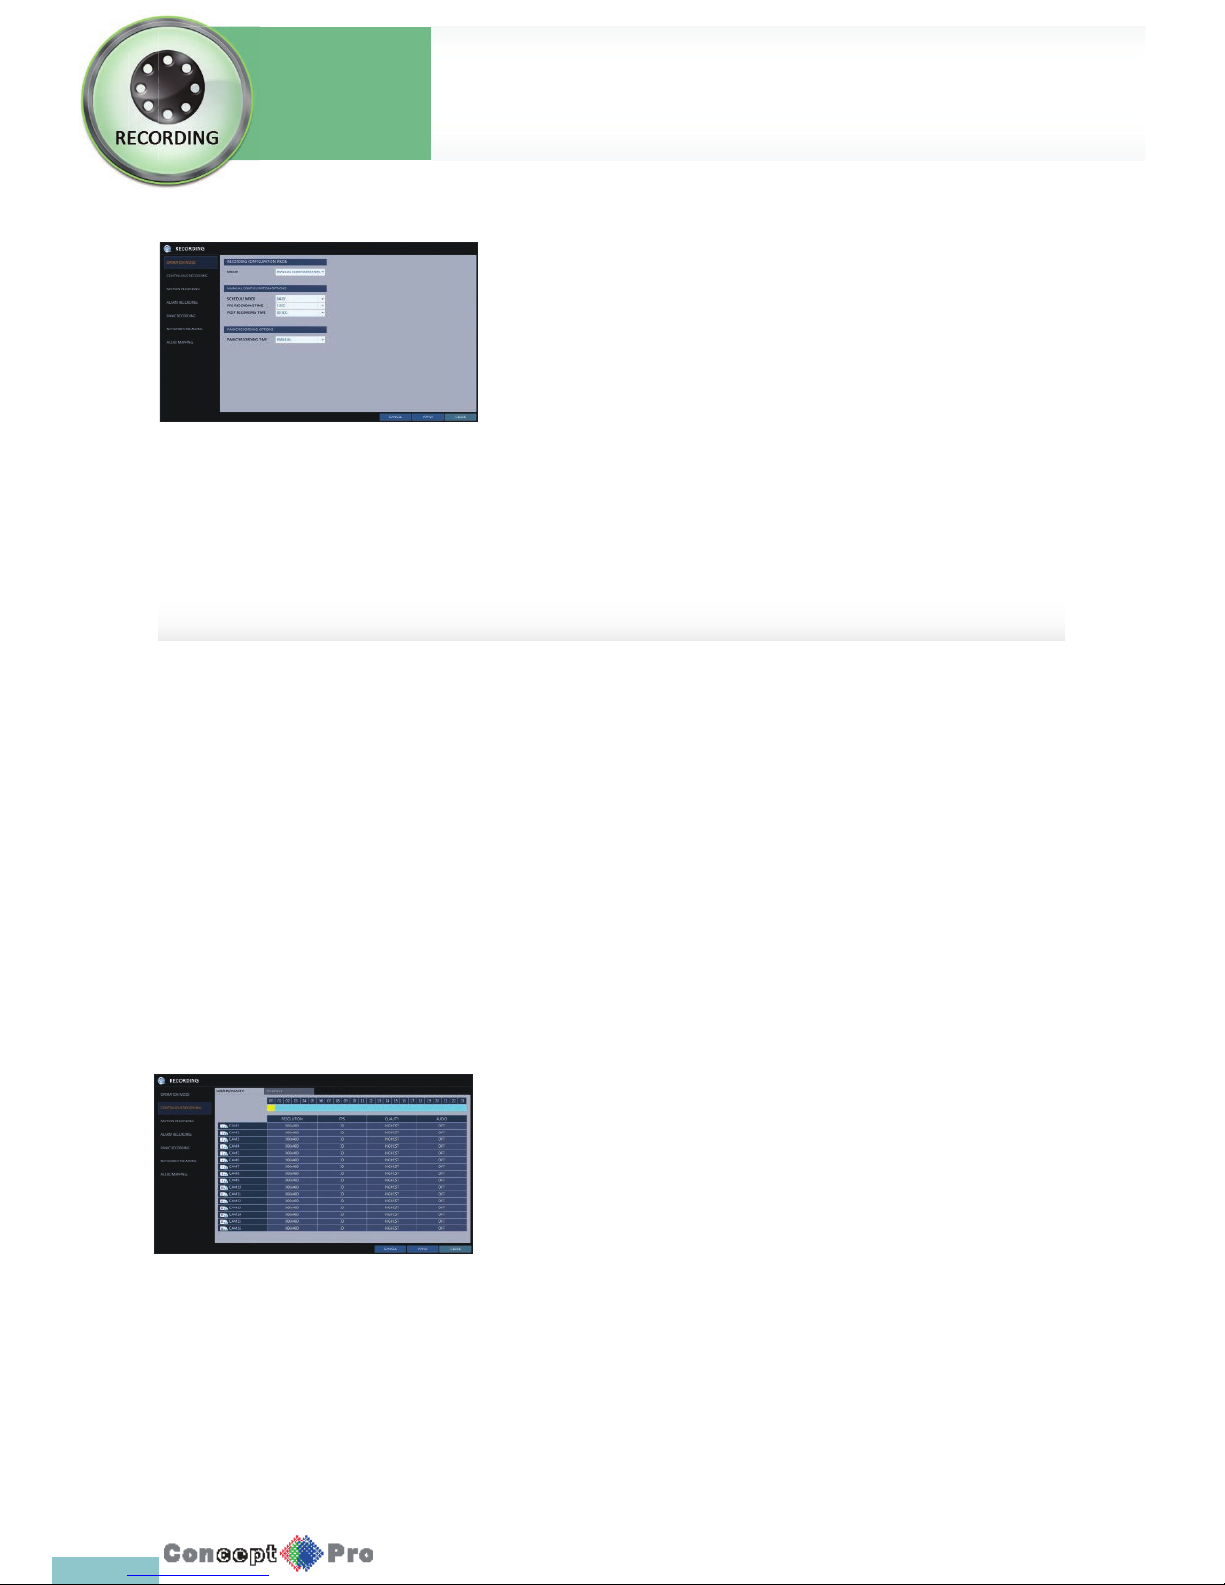
61
Manual Confi guration
If you set the record mode to <MANUAL CONFIGURATION>, the manual
con guration window will appear where youcan set the manual recording
and panic recording options.
> MANUAL CONFIGURATION OPTIONS: You can con gure the
recording settings by the time, date, and channel.
- SCHEDULE MODE: Set the recording schedule for a day (daily)
or for a week (weekly).
- PRE RECORDING TIME: Set the pre-recording time.
- POST RECORDING TIME: Set the post recording time.
> PANIC RECORDING OPTIONS: Set the panic recording duration.
If it is set to <MANUAL CONFIGURATION>, recording will continue
until you turn it off manually.
Size/FPS/Quality Setting
1. Please select the day of the week to perform the continuous recording.
From <OPERATION MODE>, you must set the <SCHEDULE MODE> of
the <MANUAL CONFIGURATION OPTIONS> to <WEEKLY> before you
can specify the <DAY>.
2. Click a time cell from which you want to edit the SIZE/FPS/Quality and
drag it to a desired cell.
Or use the [pqtu] buttons on the remote control to move to the
cell and press [ENTER]. Then, use the [pqtu] buttons to move to a
desired cell and press [ENTER] again.
Continuous Recording
You can con gure the settings of: continuous recording time, recording size, frame rate per second and quality.
1. From the <RECORD SETUP> menu, select <CONTINUOUS RECORDING>.
R From <OPERATION MODE>, you must set <RECORDING CONFIGURATION MODE> to <MANUAL CONFIGURATION>
before you can set the <CONTINUOUS RECORDING>.
2. Use the [pqtu] buttons on the remote control or use the mouse to select either <SIZE/FPS/QUALITY> or <SCHEDULE>.
System
Settings
Record Setup
Record
Settings
Page 65
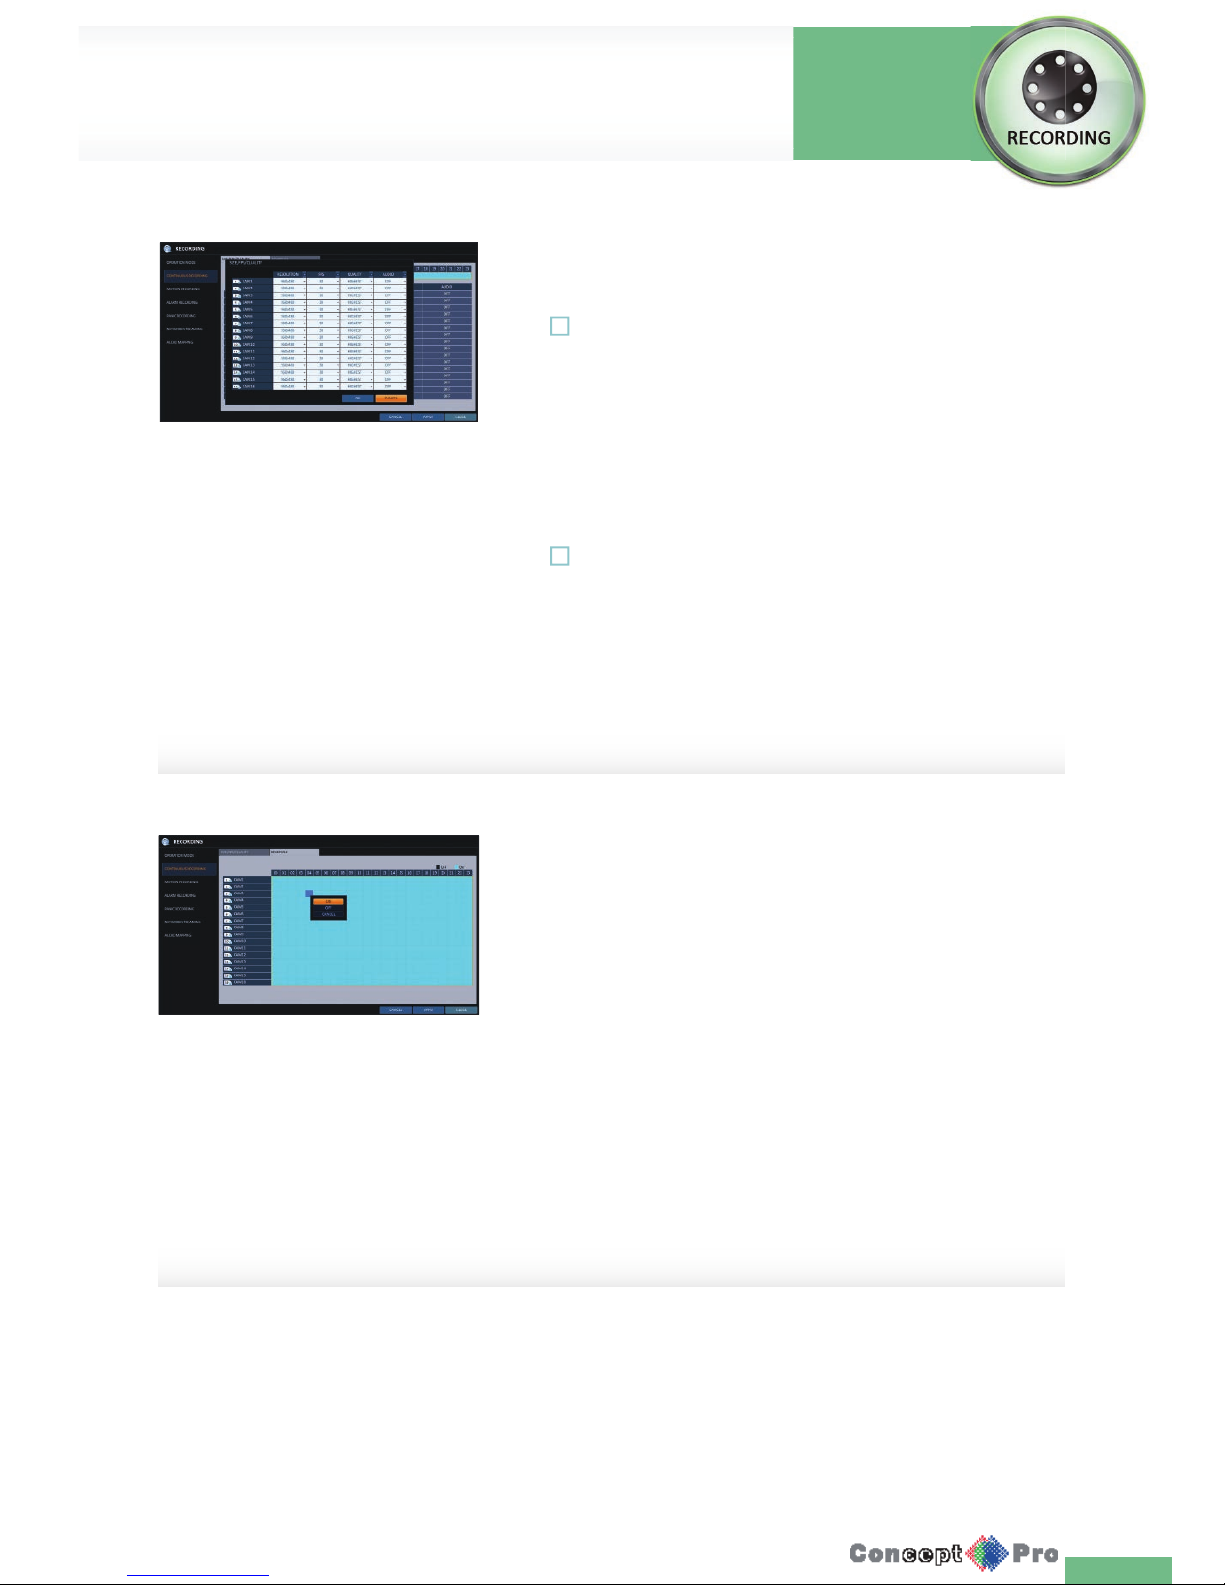
6262
Size/FPS/Quality Setting continued
3. When the cell selection is complete, the “SIZE/FPS/QUALITY” table
appears.
! Specify the <RESOLUTION>, <FPS>, <QUALITY> and use of the
<AUDIO> recording for each channel.
> RESOLUTION: set the size of the video recording.
> FPS: set the frame rate per second.
> QUALITY: set the recording quality.
AUDIO: specify the use of the audio recording.
4. When done, click <OK>.You can check the recording size in the size
table underthetimeselectionbar.
! The video resolution and the FPS option may diff er depending on the
speci cation of the camera.
Schedule Setting
1. Select a start day of the week on the schedule.
2. Click a time cell from which you want start to make the schedule and
drag it to the nsih time cell. Or use the [pqtu] buttons on the remote
control to move to the cell and press [ENTER]. Then, use the[pqtu]
buttons to move to a desired cell and press [ENTER] again.
3. When the time selection is complete, you will be prompted to specify the
use of recording in the Record Setup window.
4. To apply the change, click <APPLY> in the bottom of the screen.
5. When done, press the [EXIT] button on the remote control or click
<CLOSE> in the lower screen. The con rmation message appears and
you will return to the previous menu.
Record Setup
Record
Settings
Page 66
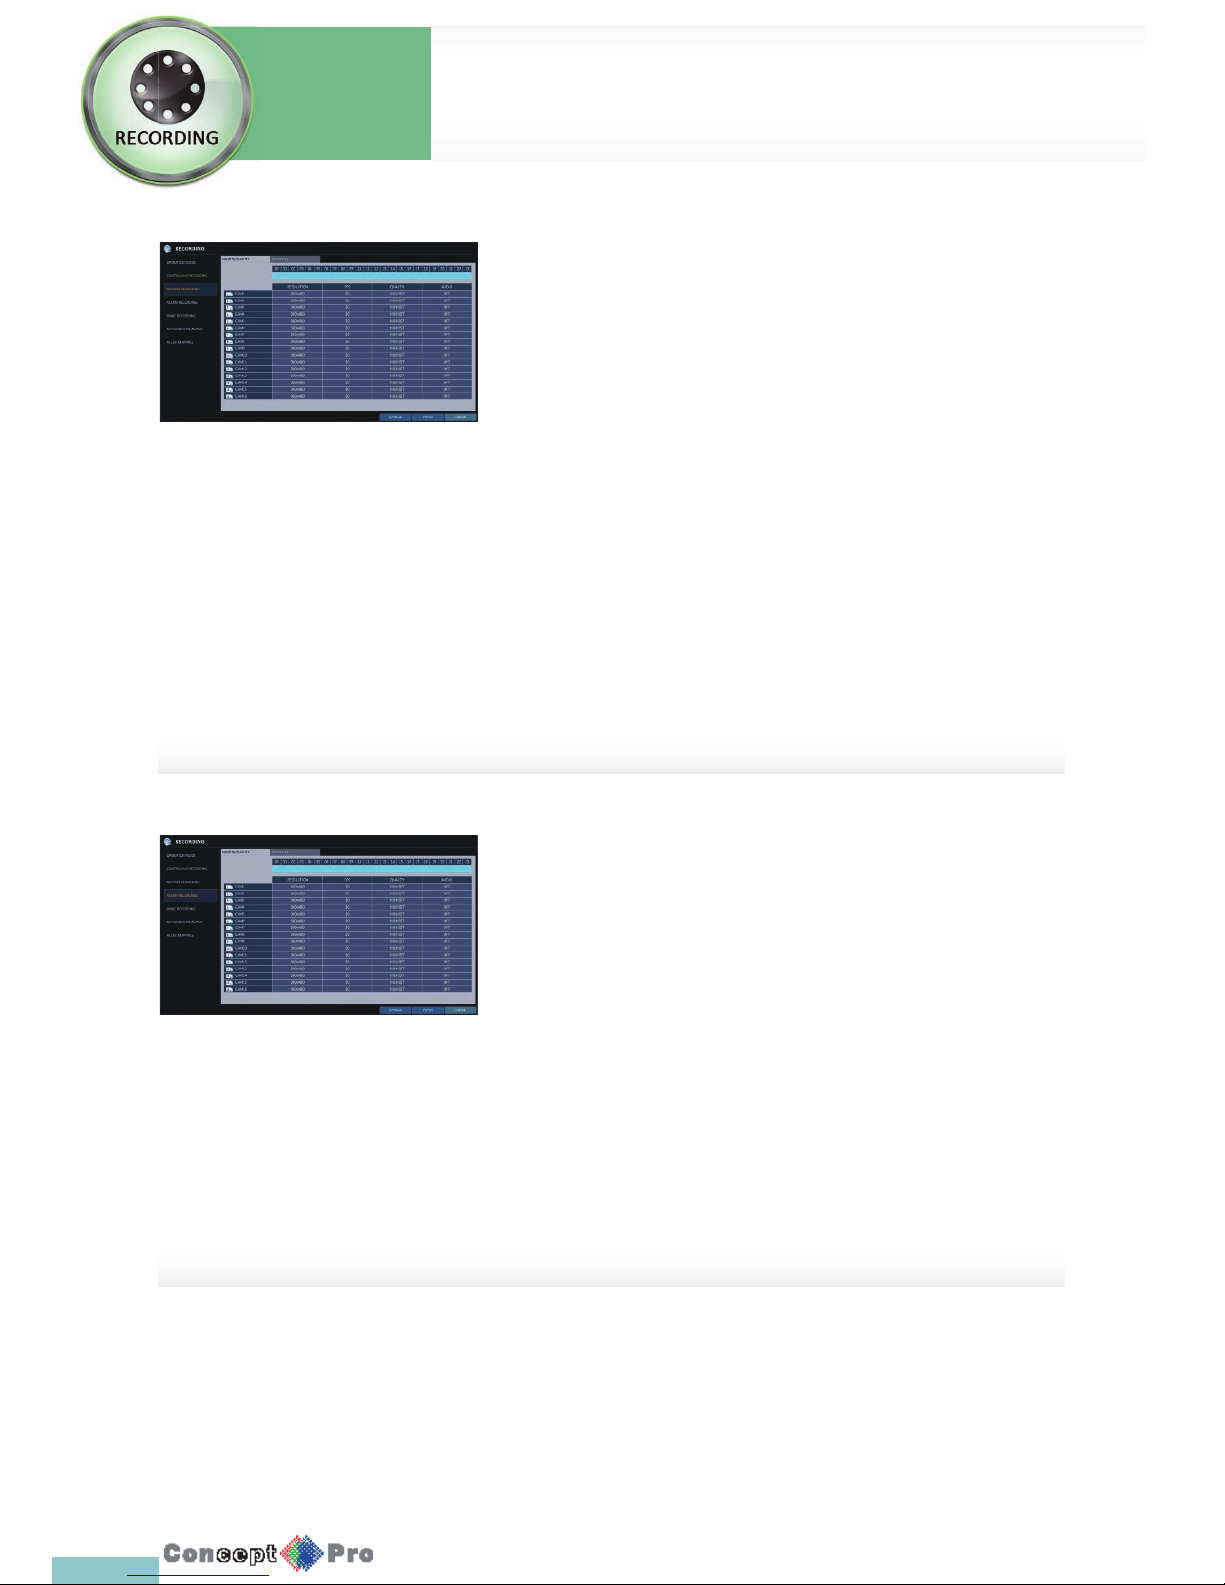
63
Motion Recording
Specify the recording size of the motion event if it occurs and make schedule
for that recording
1. From the <RECORDING> menu, select <MOTION RECORDING>.
2. Use the [pqtu] buttons on the remote control or use the mouse to
select either <SIZE/FPS/QUALITY> or <SCHEDULE>.
3. Set each item of <RESOLUTION>, <FPS>, <QUALITY> and use of the
<AUDIO> for the motion recording
R For more information, see the “Continuous Recording”. (page 61)
4. To apply the change, click <APPLY> in the bottom ofthe screen.
5. When done, press the [EXIT] button on the remote control or click
<CLOSE> in the lower screen. The con rmation message appears and
you will return to the previous menu.
Alarm Recording
Specify the recording size of the alarm event if it occurs and make schedule
for that recording.
1. From the <RECORDING> menu, select <ALARM RECORDING>
2. Use the [pqtu] buttons on the remote control or use the mouse to
select either <SIZE/FPS/QUALITY> or <SCHEDULE>.
3. Set each item of <RESOLUTION>, <FPS>, <QUALITY>and use of the
<AUDIO> for the alarm recording
R For more information, see the “Continuous Recording”. (page 61)
4. To apply the change, click <APPLY> in the bottom ofthe screen.
5. When done, press the [EXIT] button on the remote control or click
<CLOSE> in the lower screen. The con rmationmessage appears and
you will return to the previous menu.
System
Settings
Record Setup
Record
Settings
Page 67
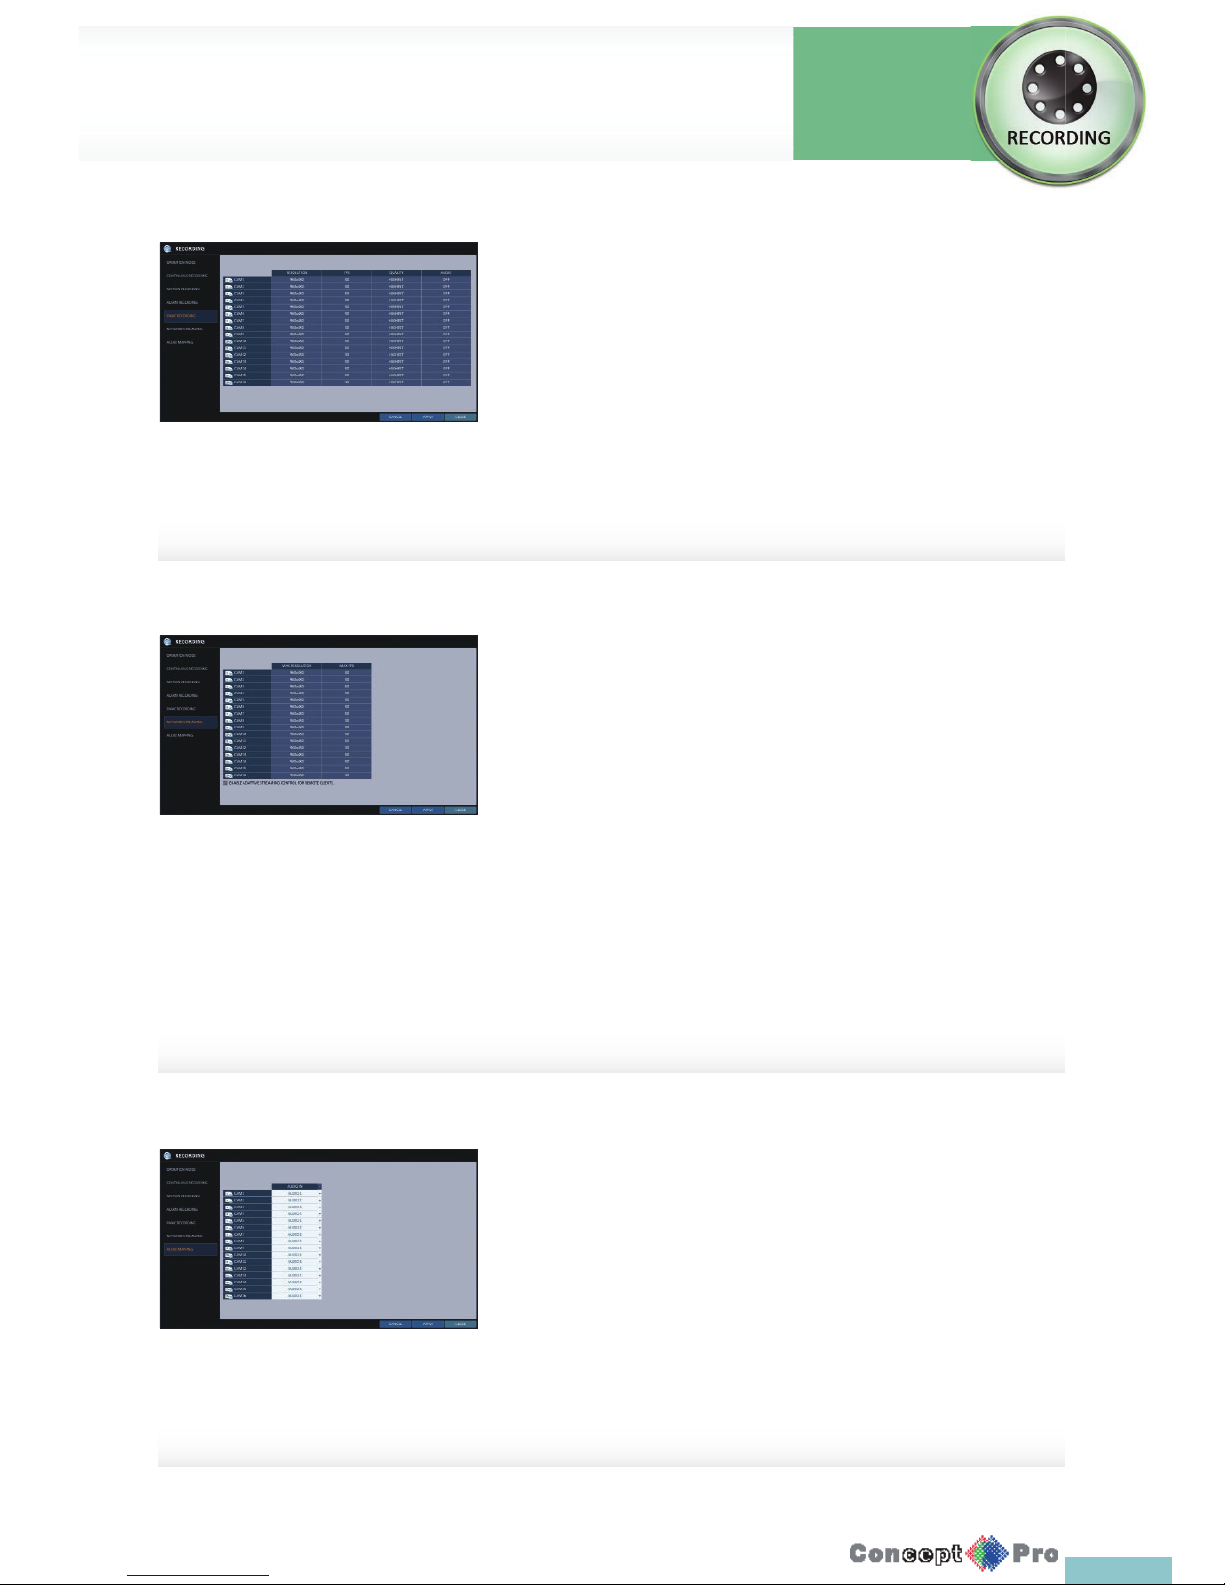
64
Panic Recording
In panic recording mode, you can specify the recording size and quality of
the video.
1. From the <RECORDING> menu, select <PANIC RECORDING>.
2. Set each item of <RESOLUTION>, <FPS>, <QUALITY>and use of the
<AUDIO> for the panic recording
R For more information, see the “Continuous Recording”. (page 61)
3. To apply the change, click <APPLY> in the bottom ofthe screen.
4. When done, press the [EXIT] button on the remotecontrol or click
<CLOSE> in the lower screen. The con rmation message appears and
you will return to the previous menu.
AUDIO MAPPING
1. From the <RECORDING> menu, select <AUDIO MAPPING>
2. Set the <AUDIO IN> of the AUDIO MAPPING.
3. To apply the change, click <APPLY> in the bottom ofthe screen.
4. When done, press the [EXIT] button on the remotecontrol or click
<CLOSE> in the lower screen. The con rmation message appears and
you will return to the previous menu.
Network Streaming
You can specify the maximum size of network streaming for remote users
and set the FPS.
R Even if you set the resolution and FPS to high for the network streaming,
the DVR will reduce the size or FPS according to the network status
(speed) before transferring the recording video.
1. From the <RECORDING> menu, select <NETWORK STREAMING>.
2. Use the [pqtu/ENTER] buttons on the remote control or use the
mouse to select an item that you want to edit.
3. Set the <MAX RESOLUTION> and <MAX FPS> for each channel.
4. When done, click <OK>.
5. To apply the change, click <APPLY> in the bottom of the screen.
6. When done, press the [EXIT] button on the remote control or click
<CLOSE> in the lower screen. The con rmation message appears and
you will return to the previous menu.
Record Setup
Record
Settings
Page 68
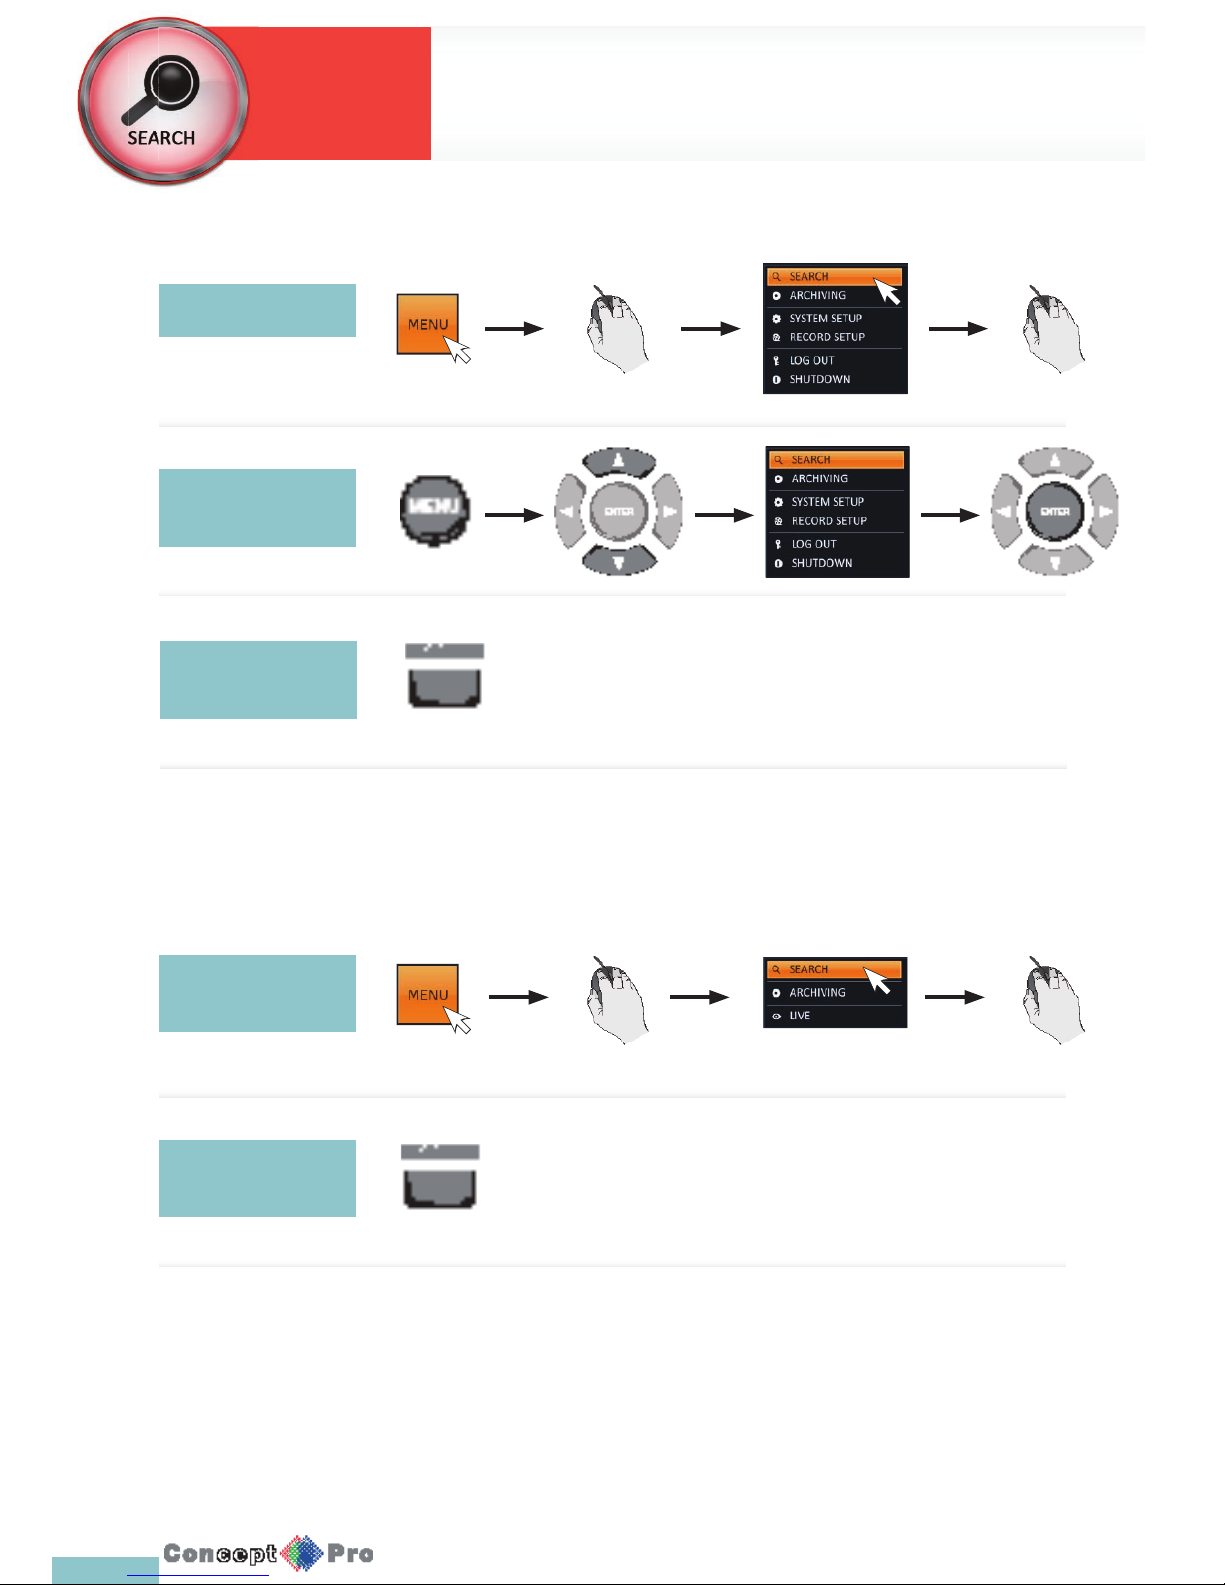
65
To move to the Search menu while in monitoring mode
To move to the Search menu while in playback mode
Using the mouse
How to use the
mouse
Using the remote
control
How to use the
remote control
Using the remote
control 2
System
Settings
Search
Page 69
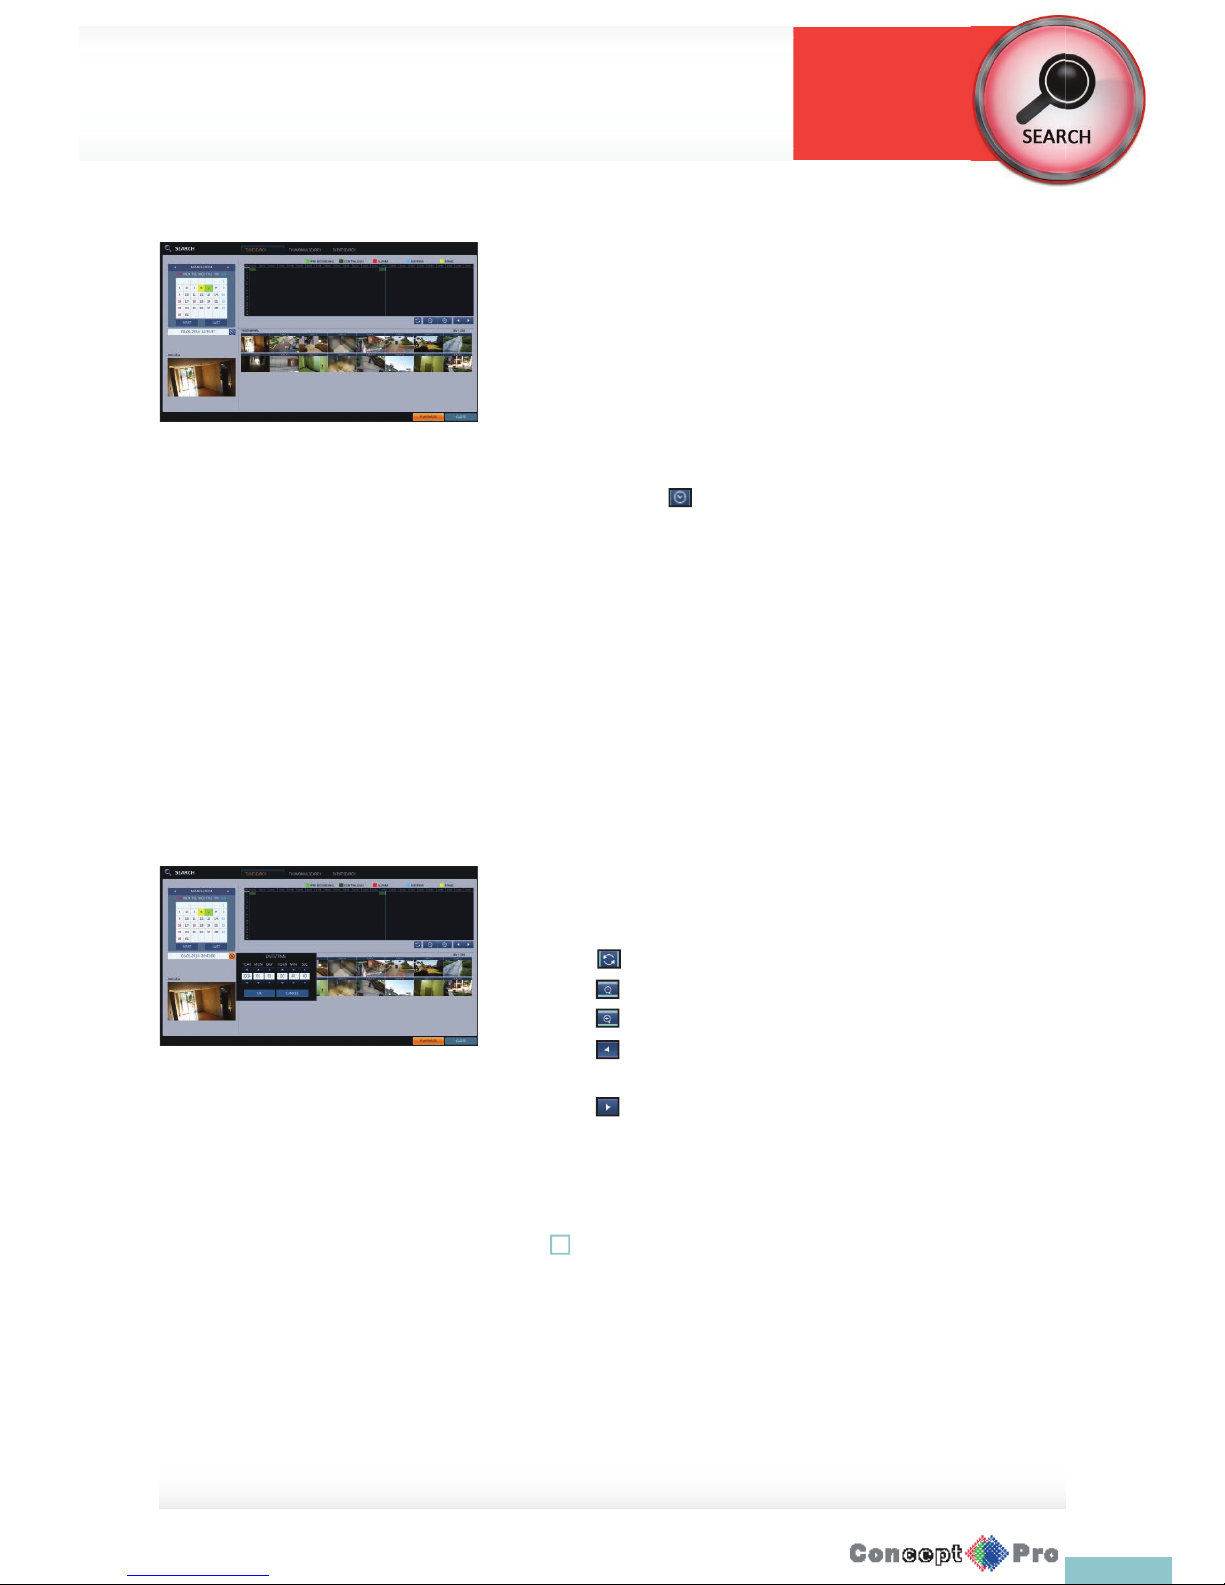
66
Time Search
With the calendar, you can search for the recording data by the recorded
date.
1. From the <SEARCH> menu, select <TIME SEARCH>.
2. Use the [pqtu] buttons on the remote control or use the mouse to
specify the search date and time from the calender on the left corner of
the screen.
> FIRST: The rst date of recording is automatically selected.
> LAST: The last date of recording is automatically selected.
> Press to display the time selection menu where you can
specify the time and date.
3. You can identify the type of recording data in the colour bar:
> Yellow green (Pre recording): The pre-recording is performed
on the recording data after you set the <PRE RECORDING TIME>
from <OPERATION MODE>.
> Green (Continuous): The continuous recording is performed on the
recording data.
> Red (Alarm): The alarm event recording is performed on the
recording data.
> Blue (Motion): The motion event recording is performed on the
recording data.
> Yellow (Panic): The panic manual recording is performed on the
recording data.
4. Click to move to a desired start time in the time bar or use
the buttons at the botom of the satus bar to search
> Recall the recording data.
> Expand the timeline of the time bar to a greater unit of time
> Collapse the timeline of the time bar to a smaller unit of time.
> Use this to move to a previous time that is hidden in the
timebar as it is expandedt o a greater time unit
> Use this to move to a next time that is hidden in the time bar as it
is expanded to a greater time unit.
5. Click a thumbnail channel or use the [pqtu] buttons on the remote
control to move to a desired channel and press [ENTER]. You can check
the video in <PREVIEW>.
! Click to move to a desired time, or simply double-click a desired time in
the time bar to play the video data on that time.
6. Press the [ENTER] button again on the remote control with the mouse, or
simply double-click on the channel.You will move to the playback screen.
7. If you want to stop playing and return to the search screen, press [EXIT]
or [SEARCH] on the remote control. You can also click <MENU> in the
lower left corner and select a desired menu.
Search Settings
Search
Page 70
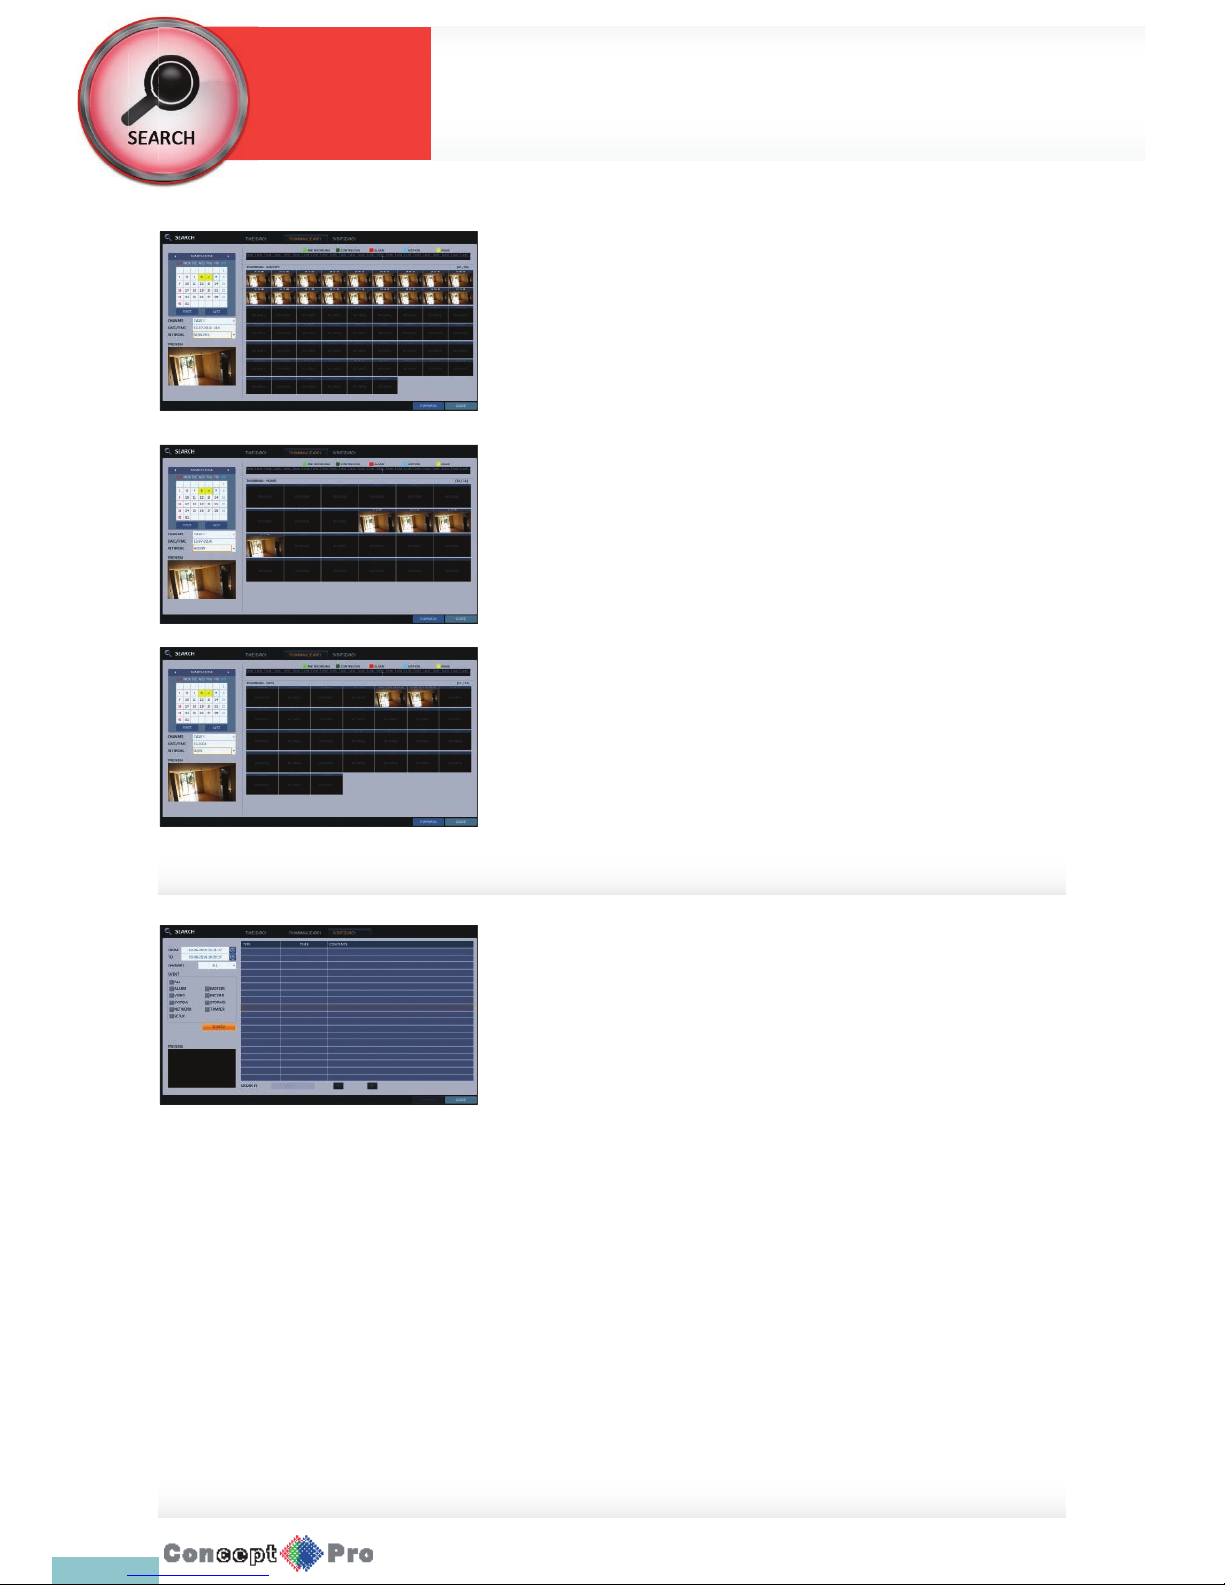
67
Thumbnail Search
To improve your search, you will be provided with a list of thumbnails. Select
Day,Hour or Minute to narrow down the search results.
1. From the <SEARCH> menu, select <THUMBNAILSEARCH>.
2. Use the [pqtu] buttons on the remote control or use the mouse to
specify the search date and time from the calender on the left corner of
the thumbnail search screen.
> FIRST: The rst date of recording is automatically selected.
> LAST: The last date of recording is automatically selected.
> CHANNEL: Select a channel to search for.
> DATE/TIME: Specify the search date and time.
R The menus available diff er depending on the selected interval mode.
> INTERVAL: Select a time interval of the thumbnail view.
3. Double-click a desired play time in the recording data bar, or double-
click a desired time image from the thumbnail list. You will move to the
playback screen.
4. If you want to stop playing and return to the search screen, press [EXIT]
or [SEARCH] on the remote control. You can also click <MENU> in the
lower left corner and select a desired menu.
Event Search
Search for events that occurred at the speci ed time and select an event to
play from the list.
1. From the <SEARCH> menu, select <EVENT SEARCH>.
2. Use the [pqtu] buttons on the remote control or use the mouse to
specify the <START> and <END> times in the left of the event search list.
3. Select a channel to search.
4. Mark the checkbox of the event to search from the <EVENT> list.
5. Press the <SEARCH> button.The search results will be listed as shown.
> TYPE: displays the event type.
> TIME: displays the recording start time.
> CONTENTS: shows the details of the event found.
> ORDER BY: If you select <OLDEST>, the list will be sorted with
the earliest one on top.
6. Double-click a desired event or click <PLAY> in the lower right corner to
move to the play screen.
7. If you want to stop playing and return to the search screen, press [EXIT]
or [SEARCH] on the remote control. You can also click <MENU> in the
lower left corner and select a desired menu.
System
Settings
Search
Search Settings
Page 71
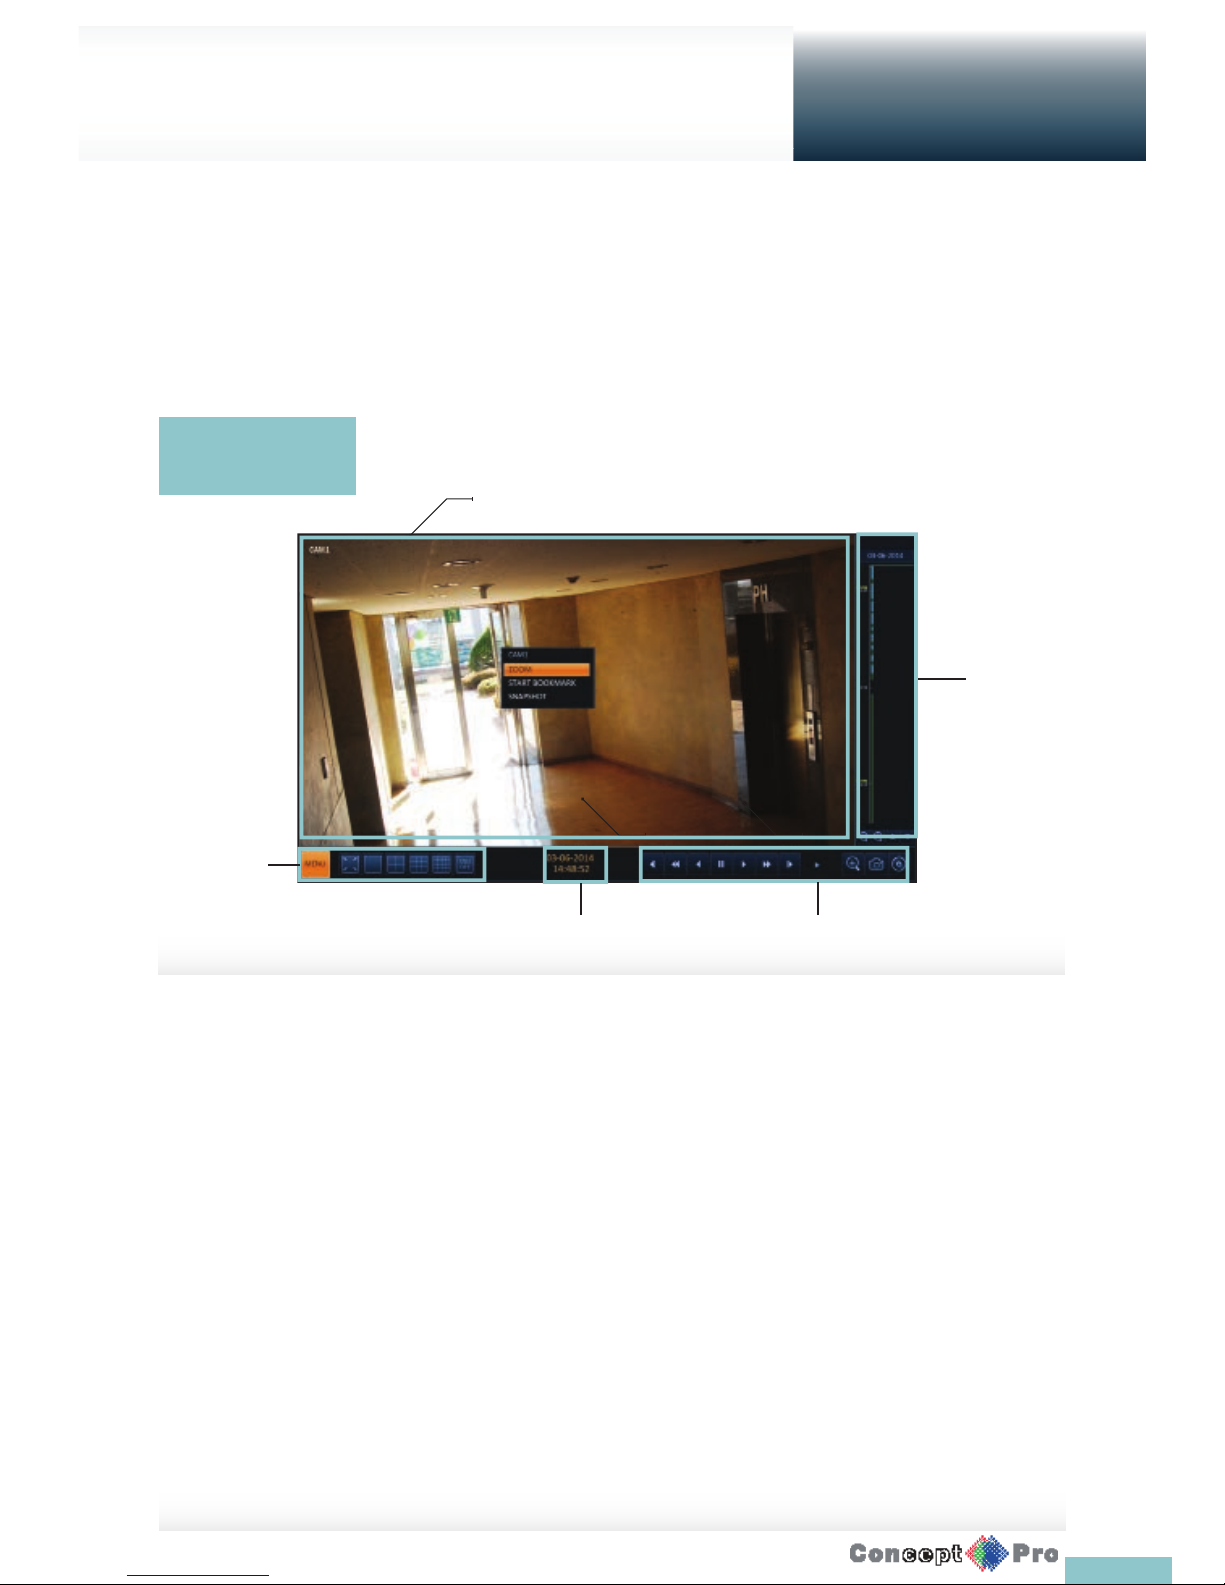
68
Playing back
Playback
Video Window
Displays the current video
Timeline
Displays the type of recording data.
The horizontal bar in the timeline indicates the current point of playback. Double-click a desired point in the timeline to start playing the
video from that point. If you drag to specify an area, you can perform a backup or event search of that area.
Menu/split-screen selection menu
For more information about how to use each button, refer to “Using the status bar in the live mode”. (page 17)
Play Bar
You can start playing, stop playing or change the play speed of the current video.
Playback screen
confi guration
Video
Window
Timeline
Play Time
Menu/splitscreen
selection menu
Play bar
1. To play the searched data
You can search for and play the recorded data.
2. To play with the live viewer
Simply double-click a desired time point in the right corner of the play screen.
R If you move the cursor to the right most, the “Timeline” bar will be displayed.
Select a desired channel on the live screen and right-click to select <PLAYBACK> in the context menu. Then, select a
desired play time.
Page 72
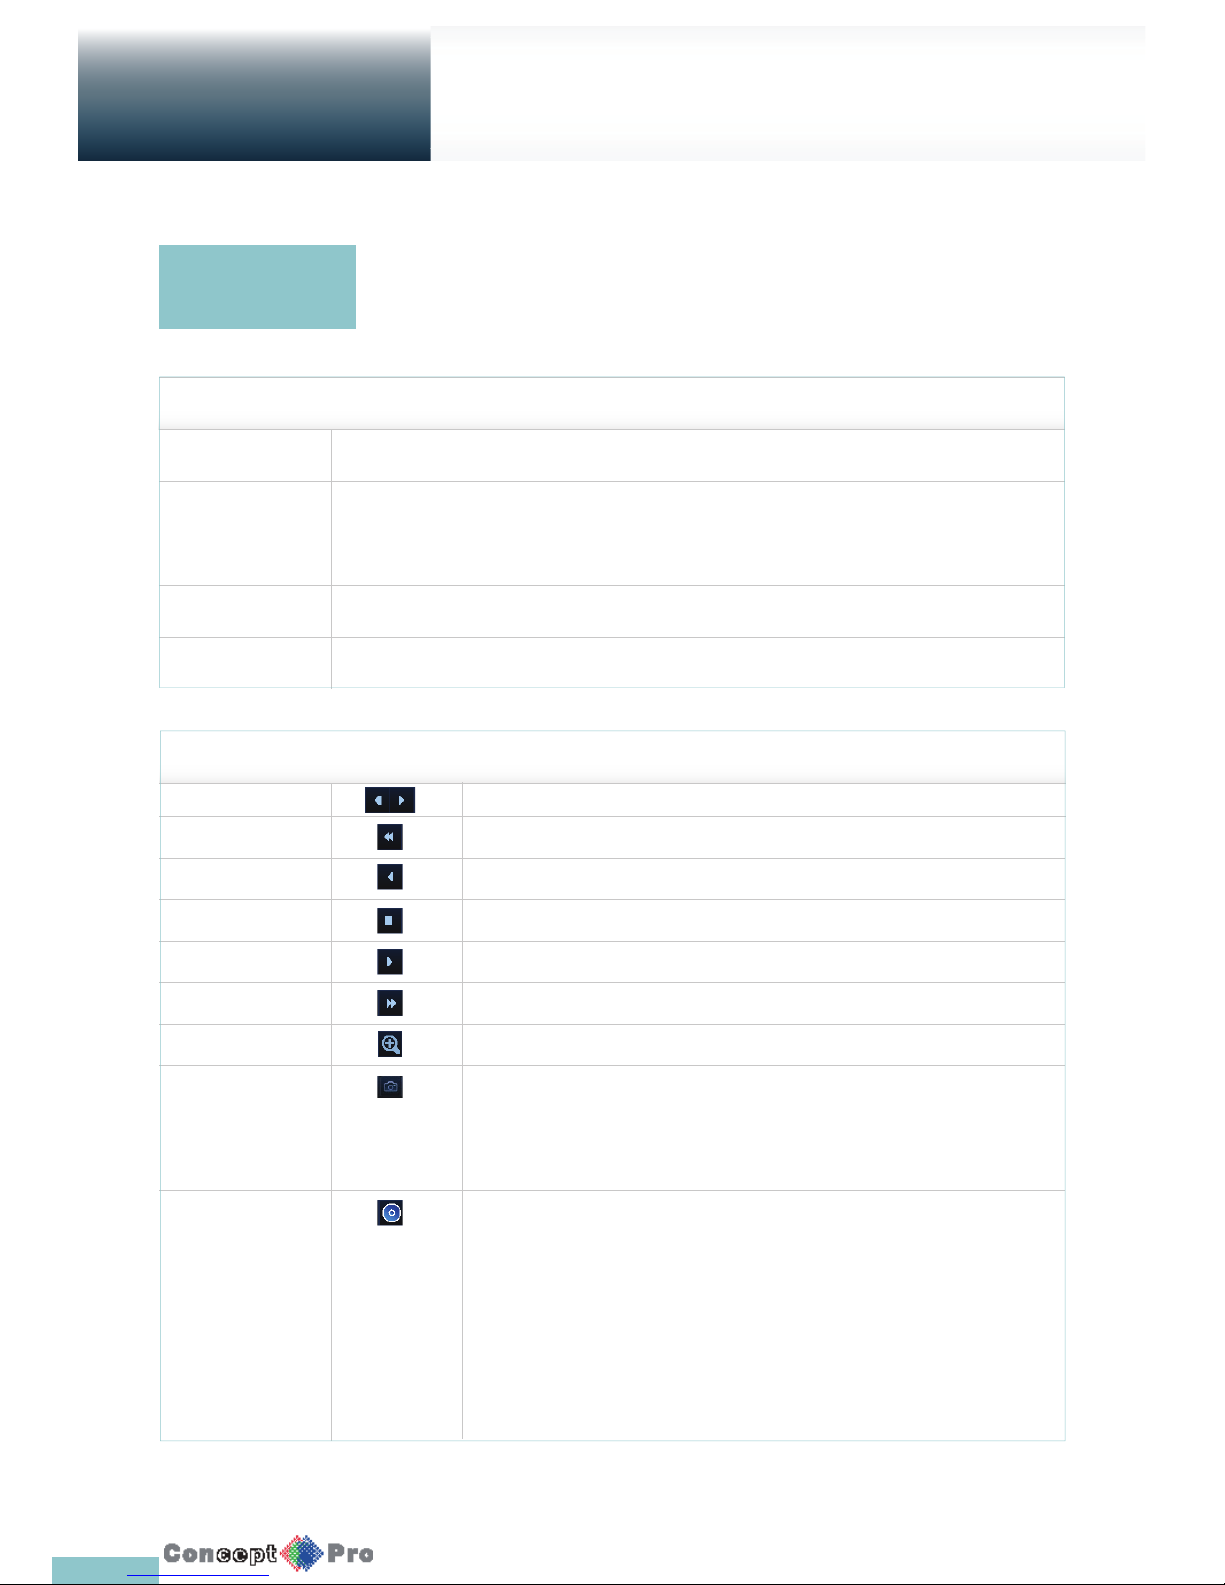
69
ITEM Description
CAM1 Display the title of the selected channel.
ZOOM Zoom the video of the selected channel.
(The zooming function is active only in single camara screen view.)
START BOOKMARKING The “BOOKMARK SETUP” popup appears, and you can bookmark a play point for the backup purpose.
SNAPSHOT Capture the current live video and save it in the .jpeg format.
ITEM Description
Jump Move forward or backward.
Reverse Fast Play The video will be reversely played at the speed of x2 x4 x8 x16 x32 x64 in this order.
Reverse Play Play the video in the reverse direction.
Pause Stop playing forward or playback temporarily.
Play Play the video forward.
Fast Forward The video will be played forward at the speed of x2 x4 x8 x16 x32 x64 in this order.
Zoom Move to the zoom in/out screen of the selected channel.
Snapshot Capture the current live video and save it in the .jpeg format. Then, you can save the captured
video in the HDD or export it to an external USB memory device. While you perform the snapshot,
the current video will stop playing.
Start/end bookmark Add a bookmark for the current playback screen. Press this to display the “BOOKMARK SETUP”
window. Provide each entry and click Start. The arrow in the bookmark button blinks to indicates
that the bookmarking is in process.
If you press the Bookmark button again, the bookmarking stops and the current settings will be
reserved. Then, the reserved data can be backed up in Archive menu or can be played in the
“RESERVED DATA MANAGEMENT” menu.
Playback channel
selection menu
Playing back
Playback
Page 73
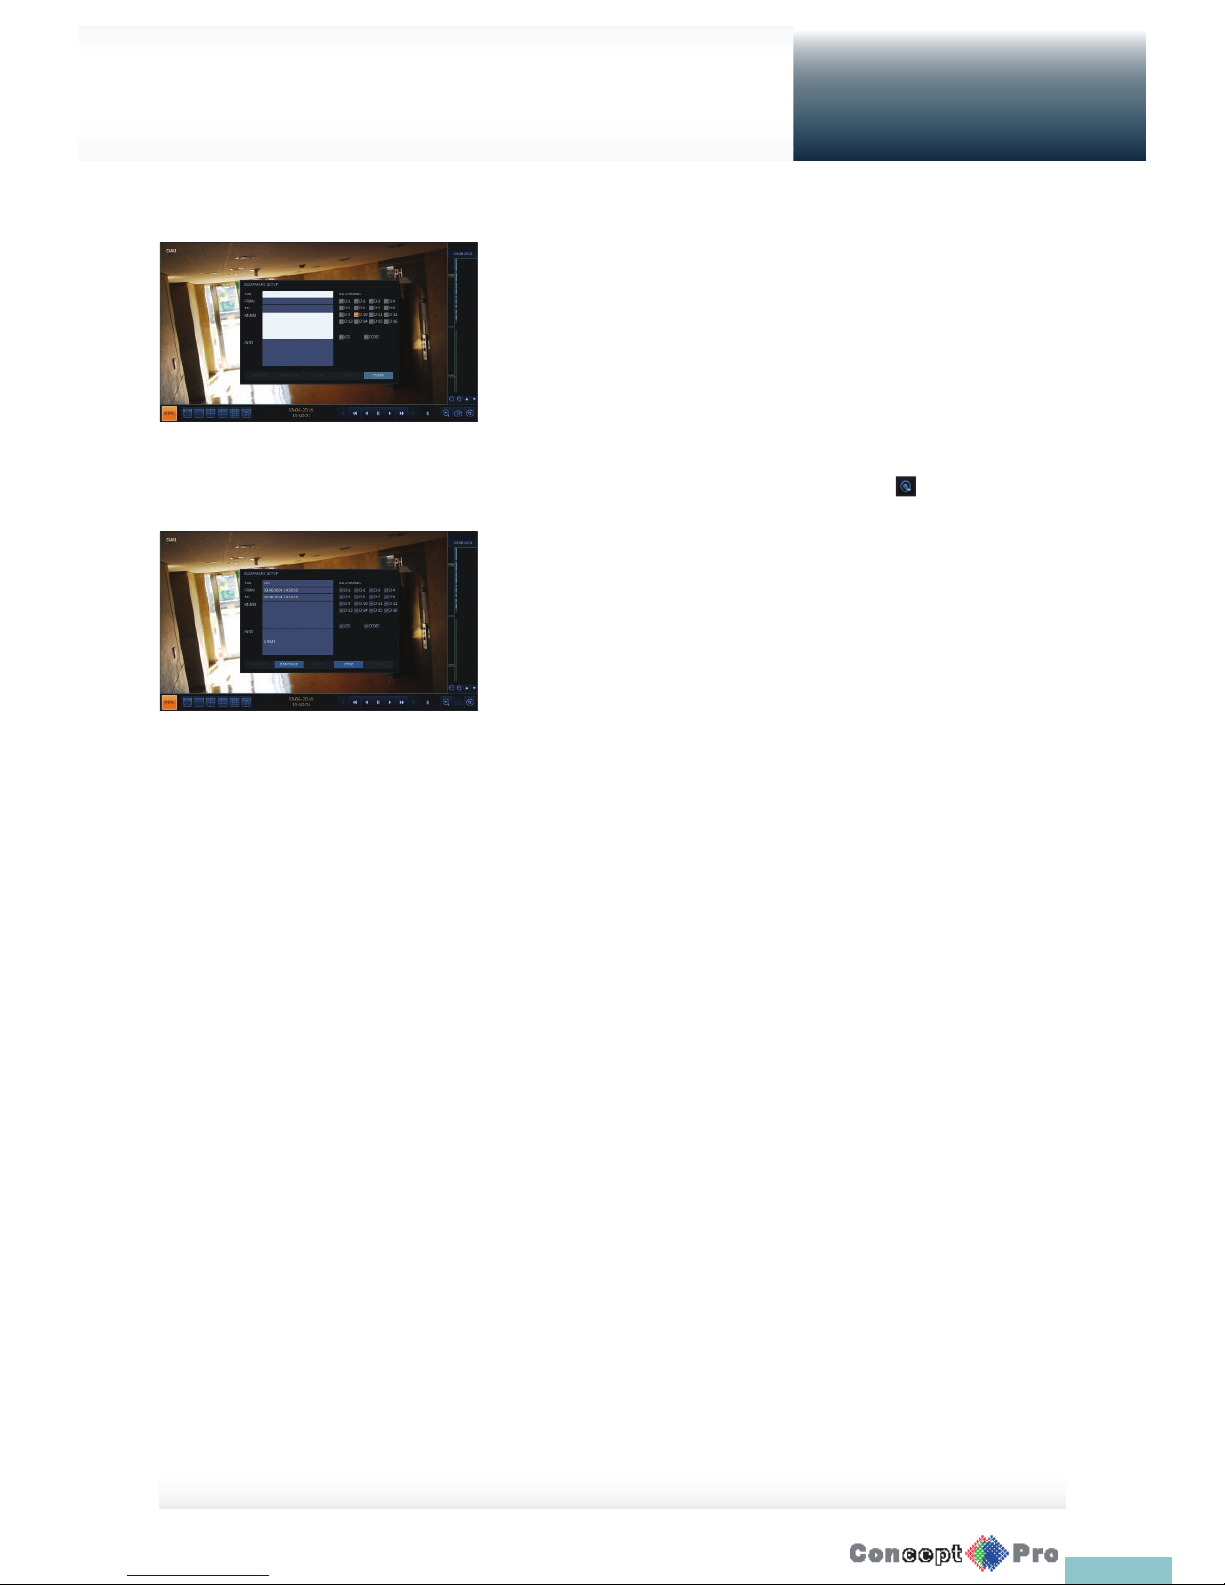
70
Playing back
Playback
Bookmarking
During playback, you can add a bookmark for reserving the video data.
You can view the bookmarked data in the Archive menu, which can be
saved to a connected device for the backup
purpose.
1. Provide a tag in the <TAG> item for data reservation.
2. Provide the details of the reserved data in the <MEMO> input box.
3. Click <START>.
You will return to the play screen with the backup progress.
4. To stop the bookmarking, click <BOOKMARK ( )>.
5. To quit the bookmarking, click <STOP>.
To continue with bookmarking, just click <CONTINUE>.
6. Click <RESERVE>.
You can export the reserved data to a connected storage device using
the <ARCHIVE> menu.
R What is the <RESERVE> function?
With the <RESERVE> function, you can reserve data even in overwrite
mode. This is useful if you want to backup data but you have no backup
device available such as USB memory.
If you use “Reserve”, the recording days will be compromised. When
you have backed up the reserved data to an external device, it is
recommended to delete the internal reserved data.
Page 74
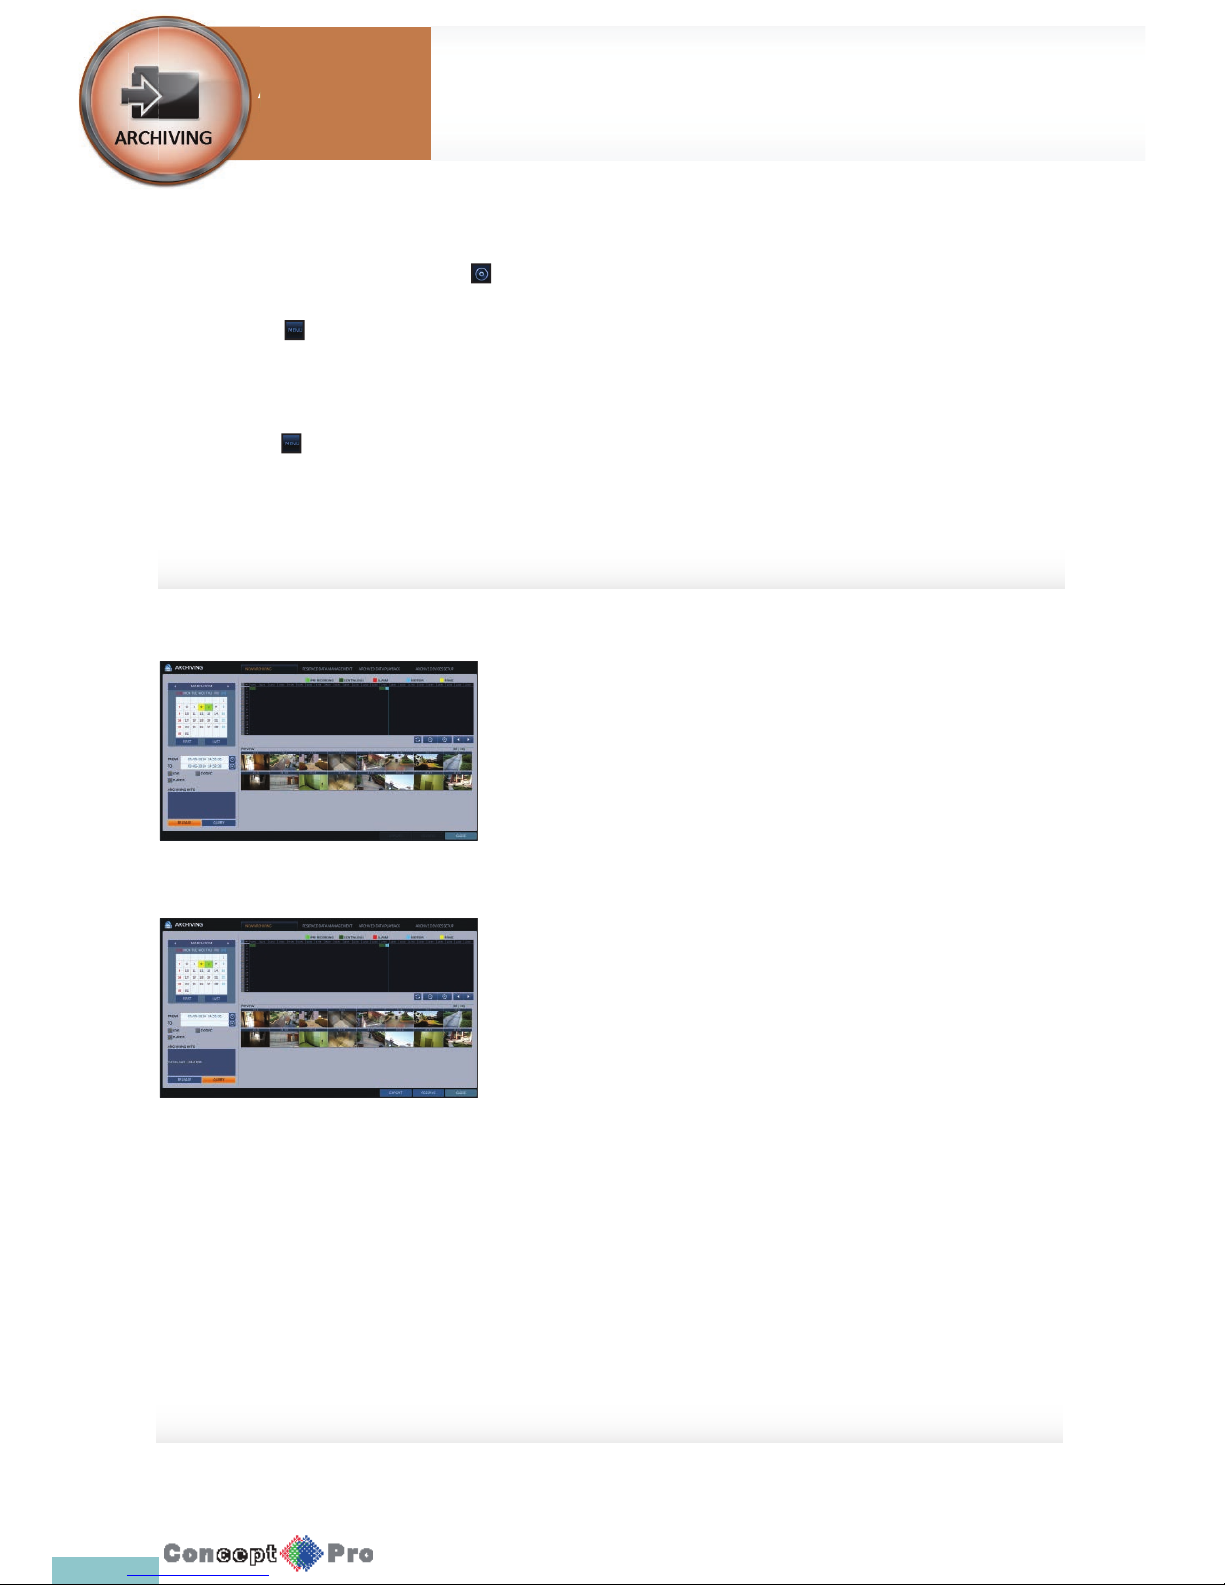
71
Using the Archive menu during playback
1. During the playback, click <NEW ARCHIVE( )>.
2. The “ARCHIVING SETUP” window appears where you can reserve the data.
3. Click <MENU( )> in the lower left corner and select the <ARCHIVE> menu.
4. Press the [ARCHIVE] button on the remote control.
Using the Archive menu during monitoring
1. Click <MENU( )> in the lower left corner and select the <ARCHIVE> menu.
2. Press the [ARCHIVE] button on the remote control.
Archive
You can archive the searched data or reserve it.
1. From the <ARCHIVE> menu, select <NEWARCHIVING>.
2. Select a date for the archive from the calendar in the left
R The date containing recording data will be marked in a coloured
box.
- FIRST: The rst date of recording is automatically selected.
- LAST: The last date of recording is automatically selected.
3. Check the <START> and <END> times
R Drag the timeline to specify the start and end time.
4. Mark the <LOG> and <CODEC> checkboxes and select to include the
archiving.
5. Click <QUERY>. The results will be listed in <ARCHIVING INFO>
R The maximum backup capacity for one time is 20GB
R If the archiving request exceeds 20GB, the end time will be
adjusted to within 20GB.
6. If you want to import to a storage device, connect it to the DVR and click
<EXPORT>.
7. If you just want to reserve the data, click <RESERVE>. If the
<TAG NAME> dialog appears, enter the name and click <OK>.
Click <RESERVE> to save it to the HDD
R Using <RESERVE> will compromise the recording days available.
When you have archived the reserved data to anexternal device, it
is recommended to delete the internal reserved data.
8. To exit the Archive menu, click <CLOSE>.
System
Settings
To start the Archive
Archiving
Page 75
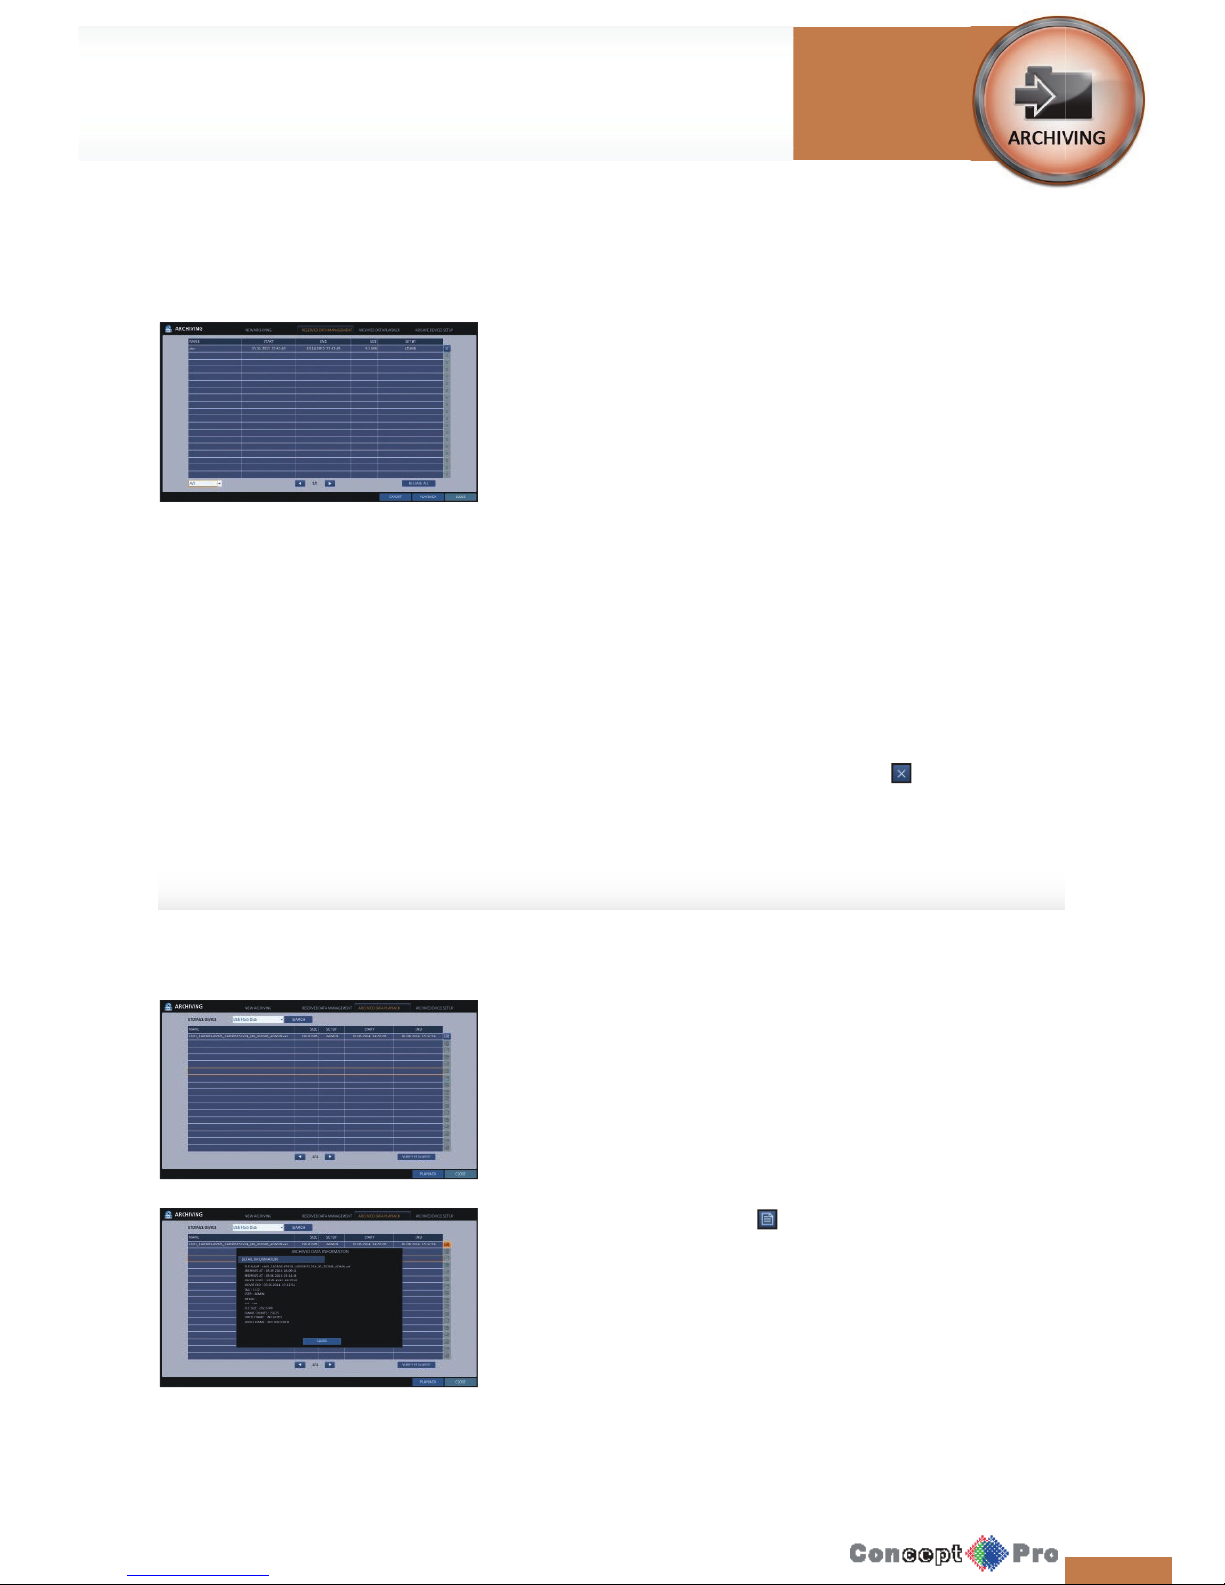
7272
Reserved data management
You can search for the reserved data and delete or import it to a storage
device.
1. From the <ARCHIVE> menu, select <RESERVED DATA
MANAGEMENT>. The reserved data will be listed.
2. Select a data type from <AVI > and <SNAPSHOT>. (Bottom left of
screen)
> AVI: Searches AVI video les stored in the DVR
> SNAPSHOT: Searches captured snapshots stored in
the DVR.
R If selecting<Snapshot Capture>, the <Play> button will be
disabled.
3. If you want to play the data, double-click a desired data item or click it
and select <PLAYBACK >.
4. If you want to export it to a storage device, connect it to the DVR and
click <EXPORT>.
5. If you want to delete the reserved data, click < > next to the list. Click
<RELEASE ALL> to delete all the reserved data at once.
6. To exit the Archive menu, click <CLOSE>.
Playing the archived data
You can search the storage device for the archived data and check the
details or play it.
1. Connect the storage device containing the archived data.
2. When the storage device is recognized, click <SEARCH>.
3. To view the details, click < > next to the list.
R Click <VERIFY INTEGRITY> to check if the data is complete or
incomplete.
4. Select an item to play from the list and click <PLAYBACK>.
5. To exit the Archive menu, click <CLOSE>.
To start the Archive
Archiving
Page 76
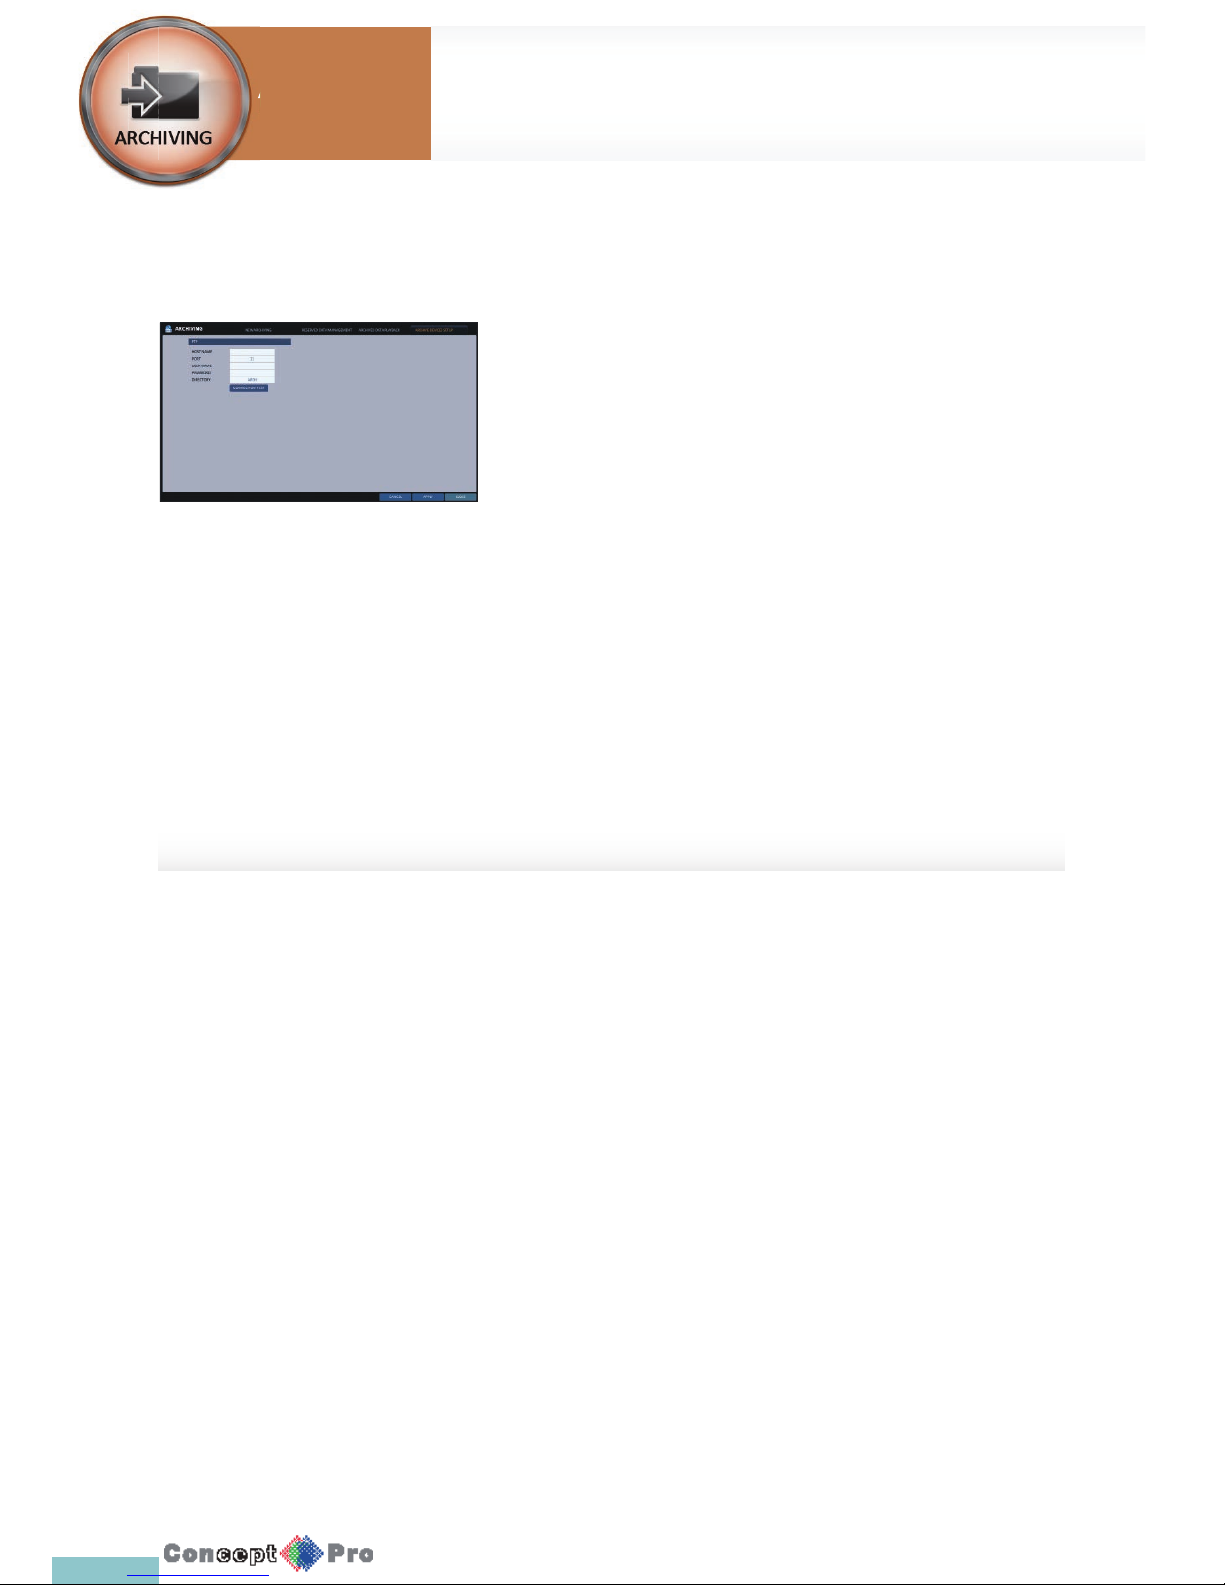
73
Archive Devices Setup
Provide the FTP server information for archiving data in the HDD before
testing the transfer.
1. From the <ARCHIVING> menu, select <ARCHIVE DEVICES SETUP>.
2. Move to the FTP information box.
3. Fill in each item using a virtual keyboard.
> HOST NAME: enter the address at which you can access the
server.
> PORT: enter the port number to which you can access the server.
> USER NAME: enter the user ID with which you can
access the server.
> PASSWORD: enter the connection password.
> DIRECTORY: specify the archiving path.
4. When all information is lled, click <CONNECTION TEST> to check the
connection status.
5. To apply the change, click <APPLY> in the bottom of the screen.
6. When done, press the [EXIT] button on the remote control or click
<CLOSE> in the lower screen. The con rmation message appears and
you will return to the previous menu.
System
Settings
To start the Archive
Archiving
Page 77
74
What is the web viewer?
Web Viewer
Connection
Open a browser and enter the IP address of DVR, or type the URL in the
address bar.
To connect to the VXH960 from inside
> Check the “Network Status” and verify the <IP ADDRESS> and
<WEB SERVICE PORT> of the DVR (page 42)
> Enter the IP address and web service port in the address bar of
the browser. Ex) http://192.168.1.200:8080
To connect to the VXH960 from outside
Using the IP address
> Check the “Network Status” and verify the <EXTERNAL IP ADDRESS> and <WEB SERVICE PORT> of the DVR. (page 42)
> If using a xed (external) IP, enter the external IP that is speci ed in the DVR in the address bar of the web browser.
Ex) “http://222.112.4.48:8080”
Using the URL
> Check the “Network Status” and verify the <DDNS ADDRESS> and <WEB SERVICE PORT> of the DVR. (page 42)
> Enter the DDNS address and web service port in the address bar of the browser. Ex) http://00115f123456.dvrlink.net:8080
R In the router network, you have to set the “Port Forwarding” and “DMZ Setting” to allow access from outside.
R For the necessary settings of the router, refer to the user manual of the router or contact the manufacturer of the router
Web RA is a user-friendly software application that enables you to control the video data in connection with a remote DVR.
The following is the minimum hardware and operating system requirements to run Web RA.
ITEM Description
Operating System Windows XP Professional , Windows Vista Home Basic / Premium, Window 7
Web browsers: Internet Explorer 7.0 or later/Mozilla Firefox 3.6/Google Chrome 4.1/Opera 10
Some web browsers other than Internet Explorer may not fully function.
CPU Intel Pentium 4 / 2.0 GHz
Memory 512 MB
Display 16-bit 1024 x 768 High Color
Hard Disk Drive 50MB (space required for installing the web viewer)
* Additional HDD space is required for saving your recordings. The le size of your recording may diff er depending
on the speci ed quality.
System
Requirements
Page 78
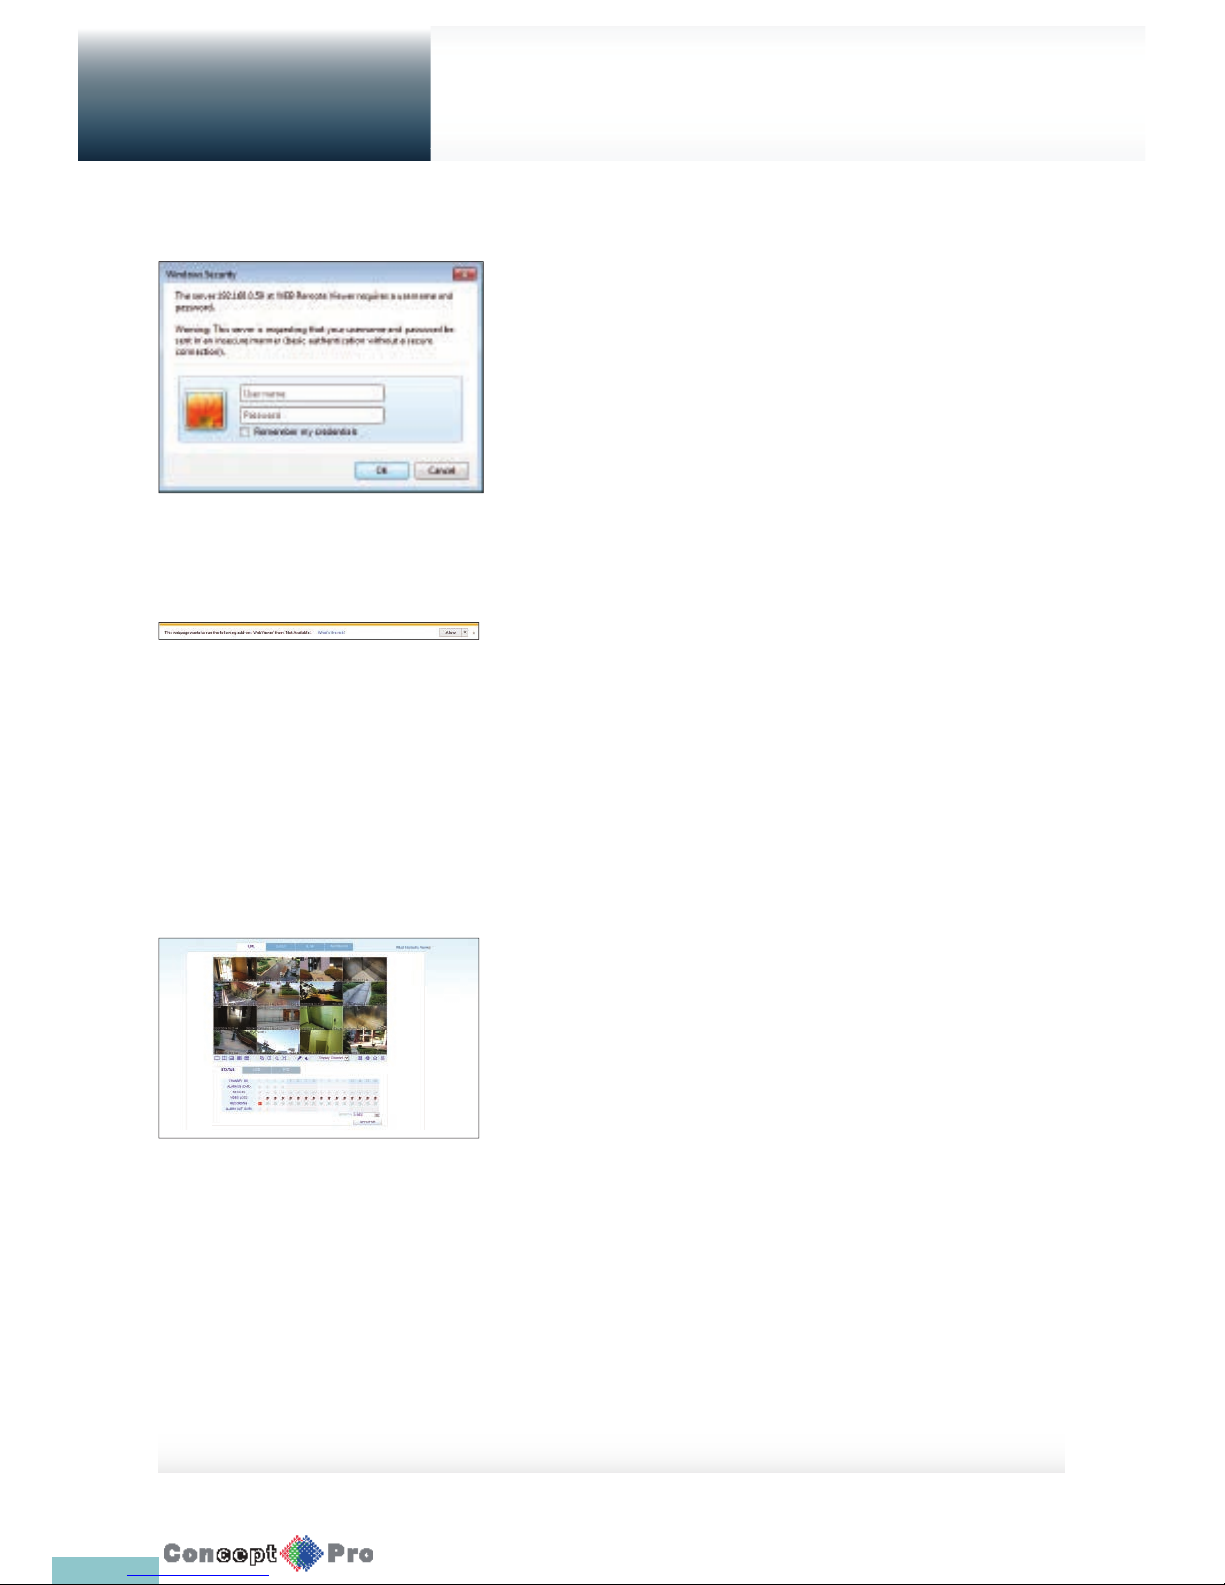
75
1. Provide the user ID and password.
R The default user name: ADMIN; the default password is 1234.
2. Click the lower warning bar to install the ActiveX.
R If you fail to download the ActiveX control, move to Tools; Internet
Options; Security; Custom Level; Download unsigned ActiveX
control, and change its setting from “Disable (recommended)” to
“Enable”, and then click OK.
3. Click <Install>
4. When the installation is complete, you will see the live screen.
What is the web viewer?
Web Viewer
Page 79
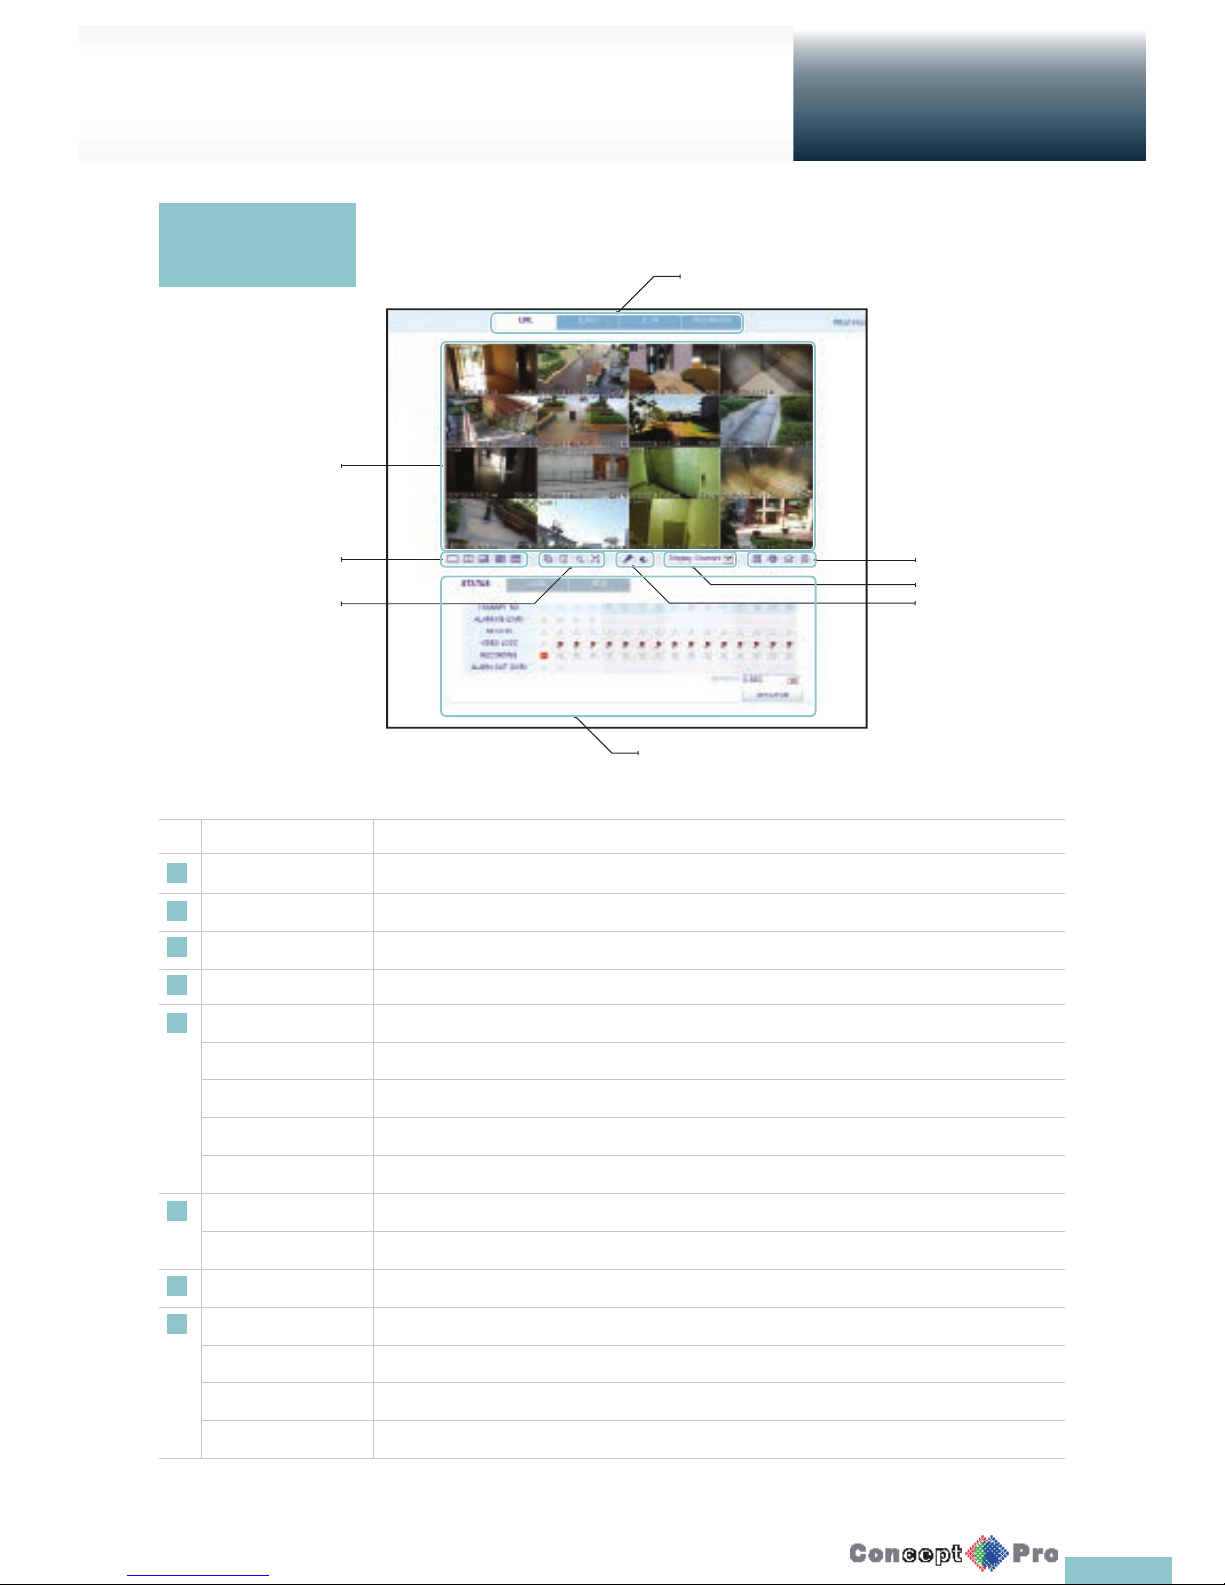
76
No. Name Description
1 View selection tab You can switch between the live, search, setup and information.
2 Live Display the live screen of the currently connected VXH960.
3 Split Mode Select and switch to a desired split-screen mode.
4 Sequence, Zoom Set the sequence mode, switch to the next camera, zoom the screen or select the full screen mode.
5 Status Show the connection status of each channel.
Log Show the log.
Refresh Time Set the interval at which the DVR Status is refreshed.
Refresh Refresh the DVR status immediatley
PTZ To control a PTZ
6 Voice transmission With the microphone, your voice will be transmitted to the DVR, or you can turn on or off the output
of the voice signal.
7 Channel Select a channel listed in the screen.
8 Save Save the live video on the screen.
Print Print out the current screen.
Capture Capture the selected image.
ActiveX Settings Con gure the ActiveX settings or specify the saving path of the captured image.
Live
Web Viewer
Live Screen at a
glance
5
6
4
7
8
3
2
1
Page 80
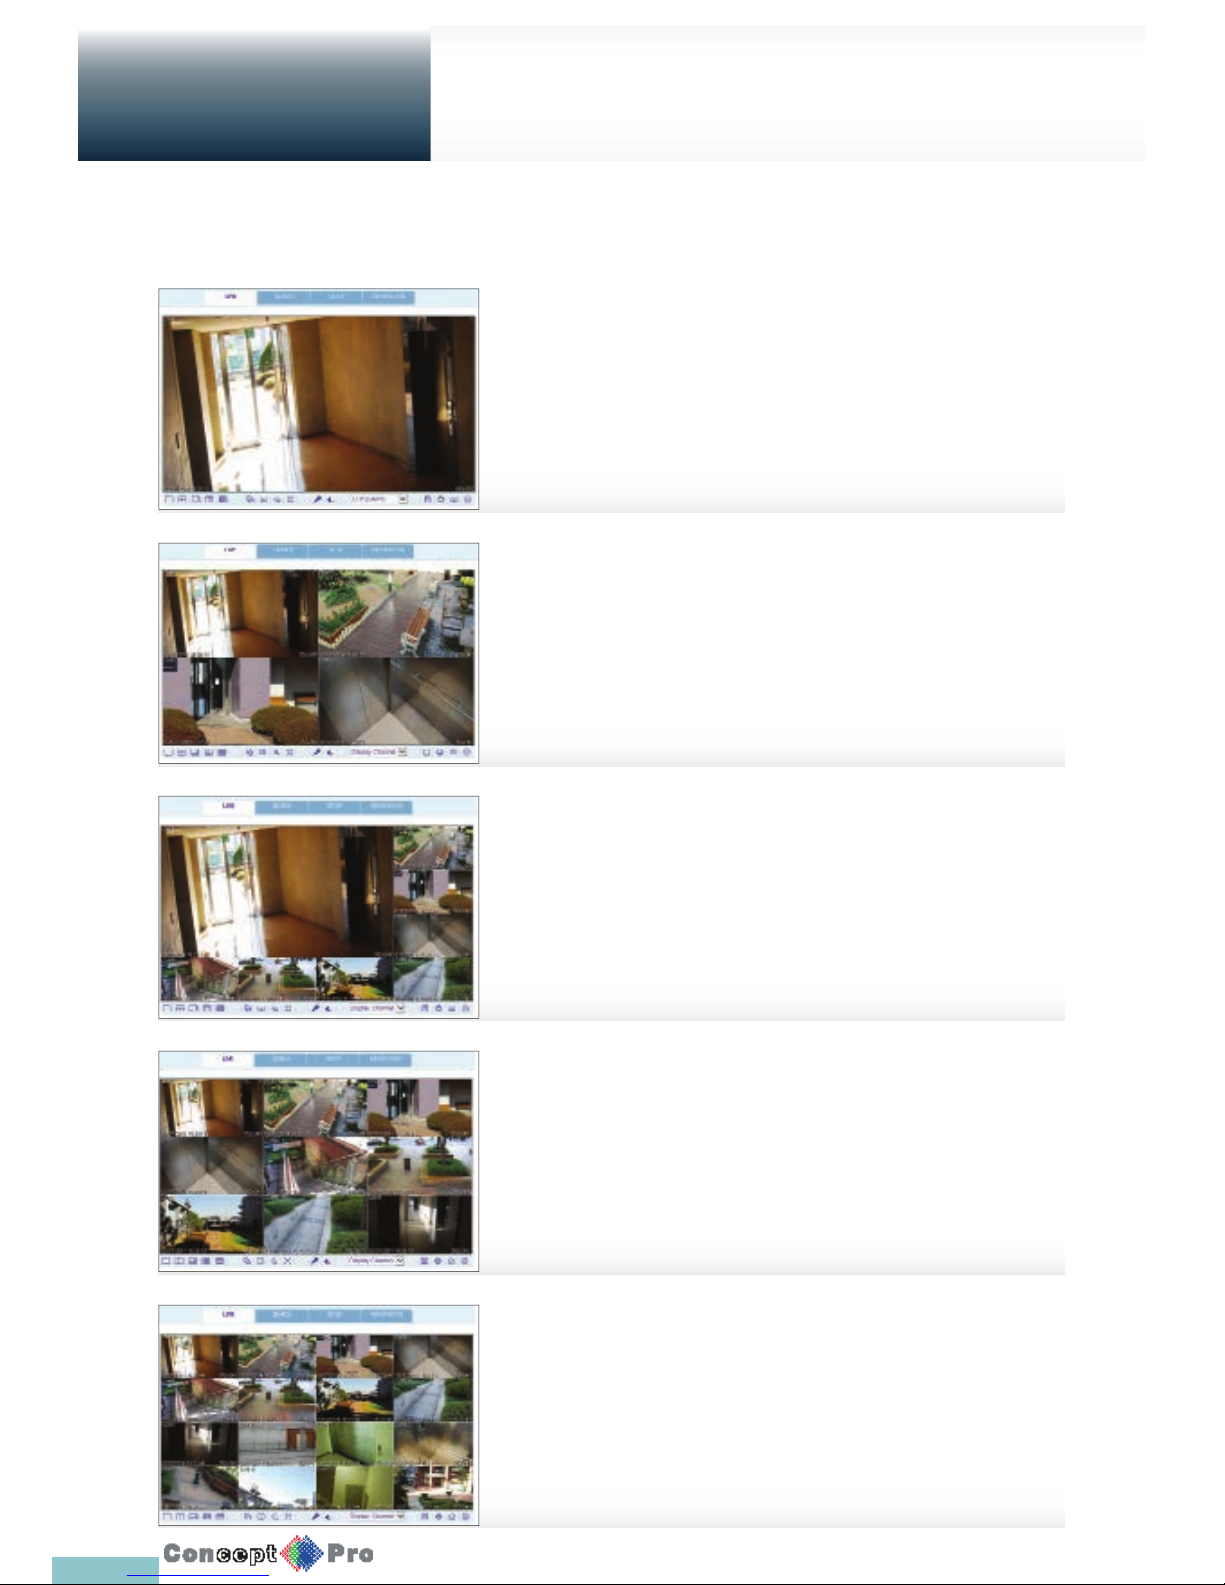
77
Live
Web Viewer
Switching the split mode
Click the Switch button to switch the mode as follows
<1-split Mode>
<4-split Mode>
<8-split Mode>
<9-split Mode>
<16-split Mode>
Page 81
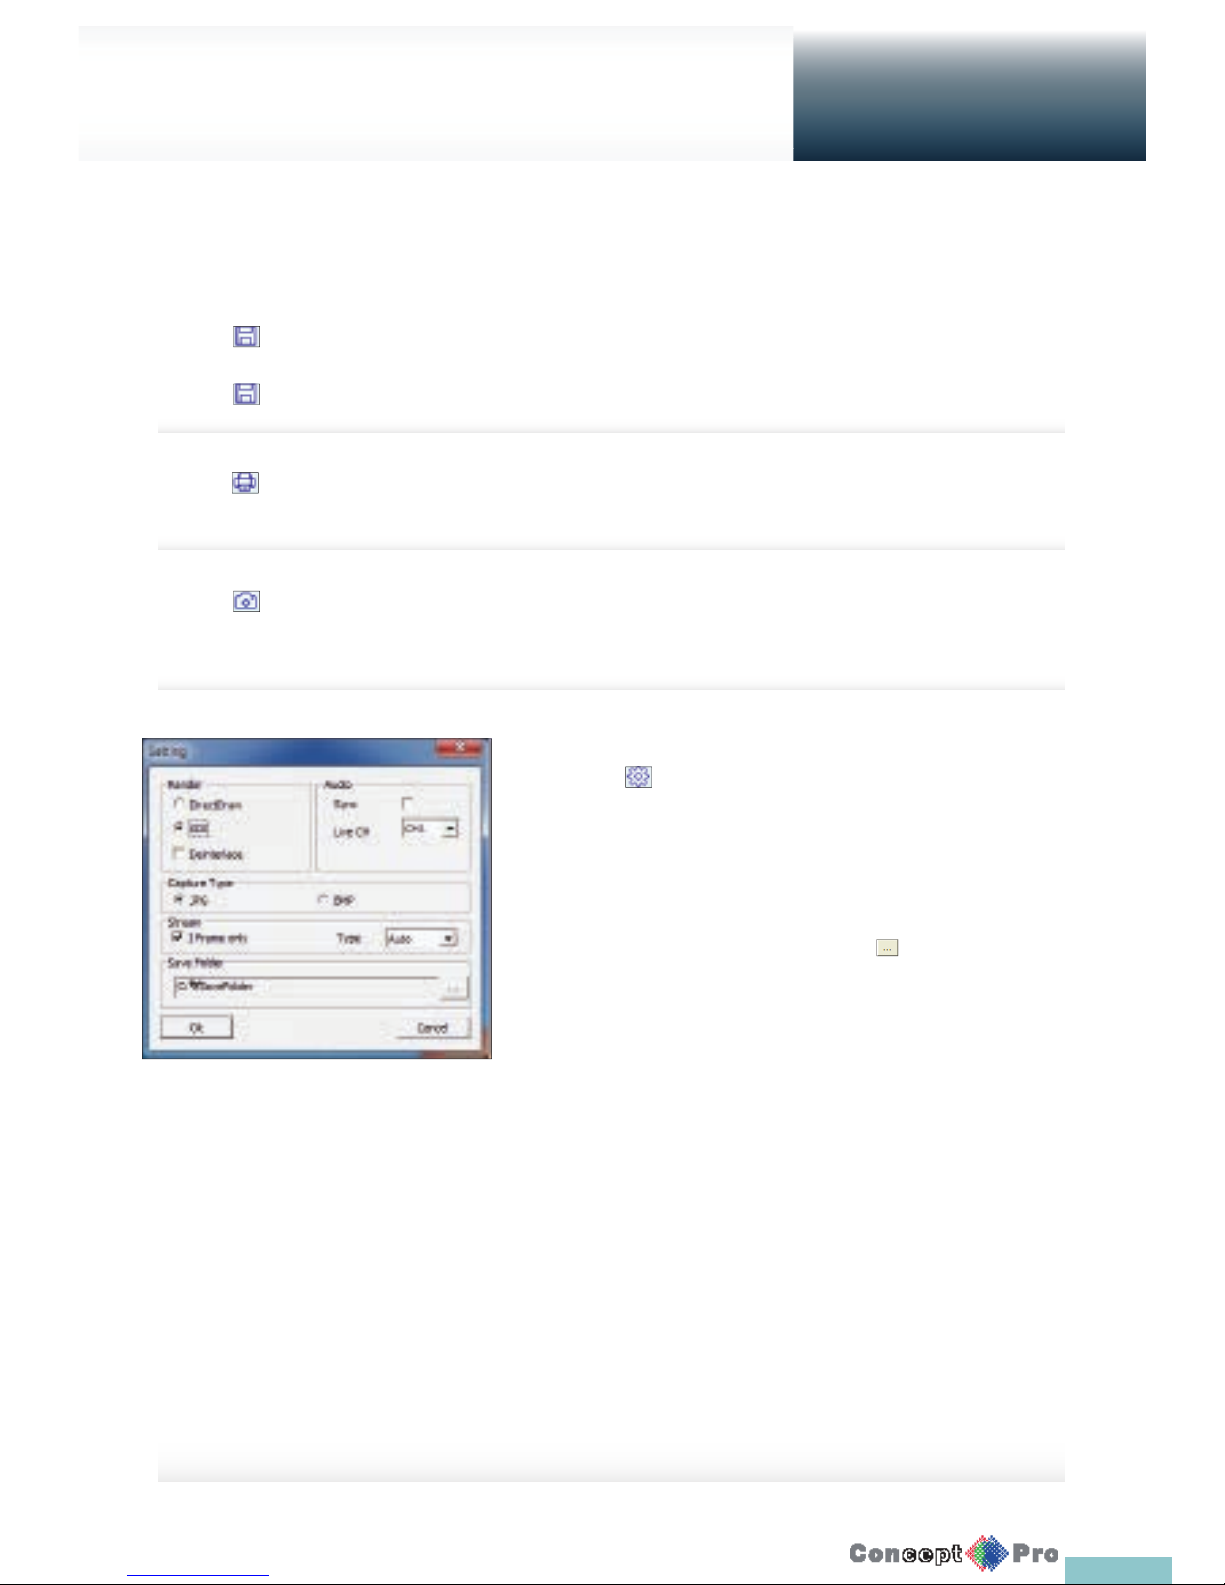
78
Live
Web Viewer
To save the video
1. Click < > to start saving.
2. The video from the selected channel will be saved to the PC in the AVI format. (Default path: C:\SaveFolder)
Click < > again to stop saving. Click < ActiveX Setting > to display the context menu where you can change the saving path.
Print
1. Click < >.
2. The current screen will be printed with the printer connected to the PC
Screen capture
1. Click < >.
2. The current screen of the selected channel will be saved to the path speci ed in the PC. (Default path: C:\SaveFolder) Click <ActiveX
Setting> to display the context menu where you can change the saving path.
ActiveX Settings
1. Click < >.
2. When the setup screen appears, you can change the settings of the
render type, audio, capture and saving path as well as the video
streaming.
> Render: DirectDraw is recommended in order to enable the
hardware acceleration.
3. If you want to change the saving path, click < > (Save Folder) and
specify a new path.
Windows Vista users cannot change the saving path.
4. Change the streaming settings according to the PC speci cation and
network environment. Auto mode is recommended.
> Sync: If this option is set, the audio signal will be synchronized
with the video signal. However, you may encounter a delay due to
buff ering for the synchronization.
> Live CH: Set the audio signal to use in live monitoring mode.
> I Frame Only: Only the I frames (key frames) will be transferred.
> Type
- Auto: The DVR will optimize the quality and FPS to the
network status and speci cation of the connected PC before
transferring the data.
- Main: The video will be transferred in high de nition (HD).
- Second: The video will be transferred in a medium de nition(SD).
5. When done, click <OK> to save your settings.
Page 82
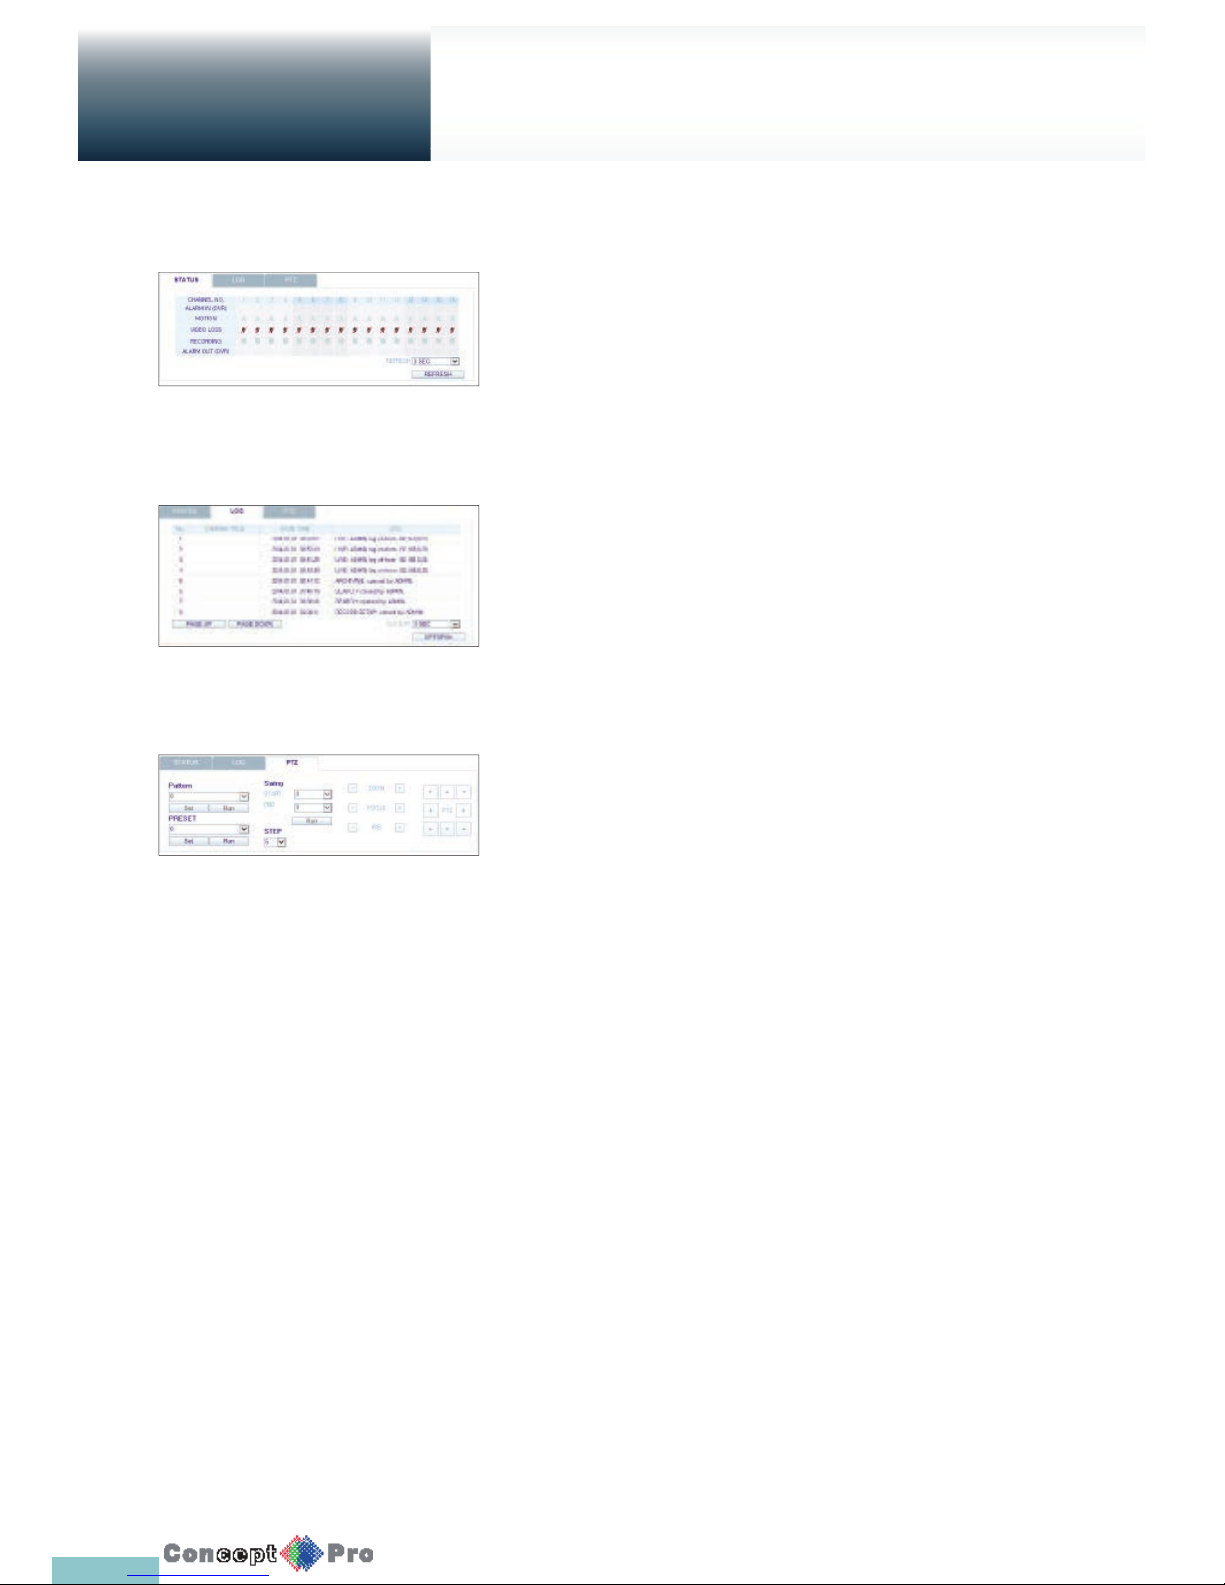
79
Live
Web Viewer
Status tab
Click <Status> at the bottom of the screen.
You can check the event occurrence for each channel of the
connected DVR.
Log tab
Click <Log> at the bottom of the screen.
You can check the log of the connected DVR.
PTZ tab
Click <PTZ> at the bottom of the screen.
You can control the operations of a PTZ camera.
Adjust the focus, zooming and iris of the camera.
You can use the arrow buttons to control the operations of the camera.
> Pattern: You can con gure various settings of the
camera including the zooming and movement. (Applied to some
PTZ cameras only)
> Preset: Move the camera to a prede ned direction.
> Swing: The camera will move back and forth to a set position
Page 83
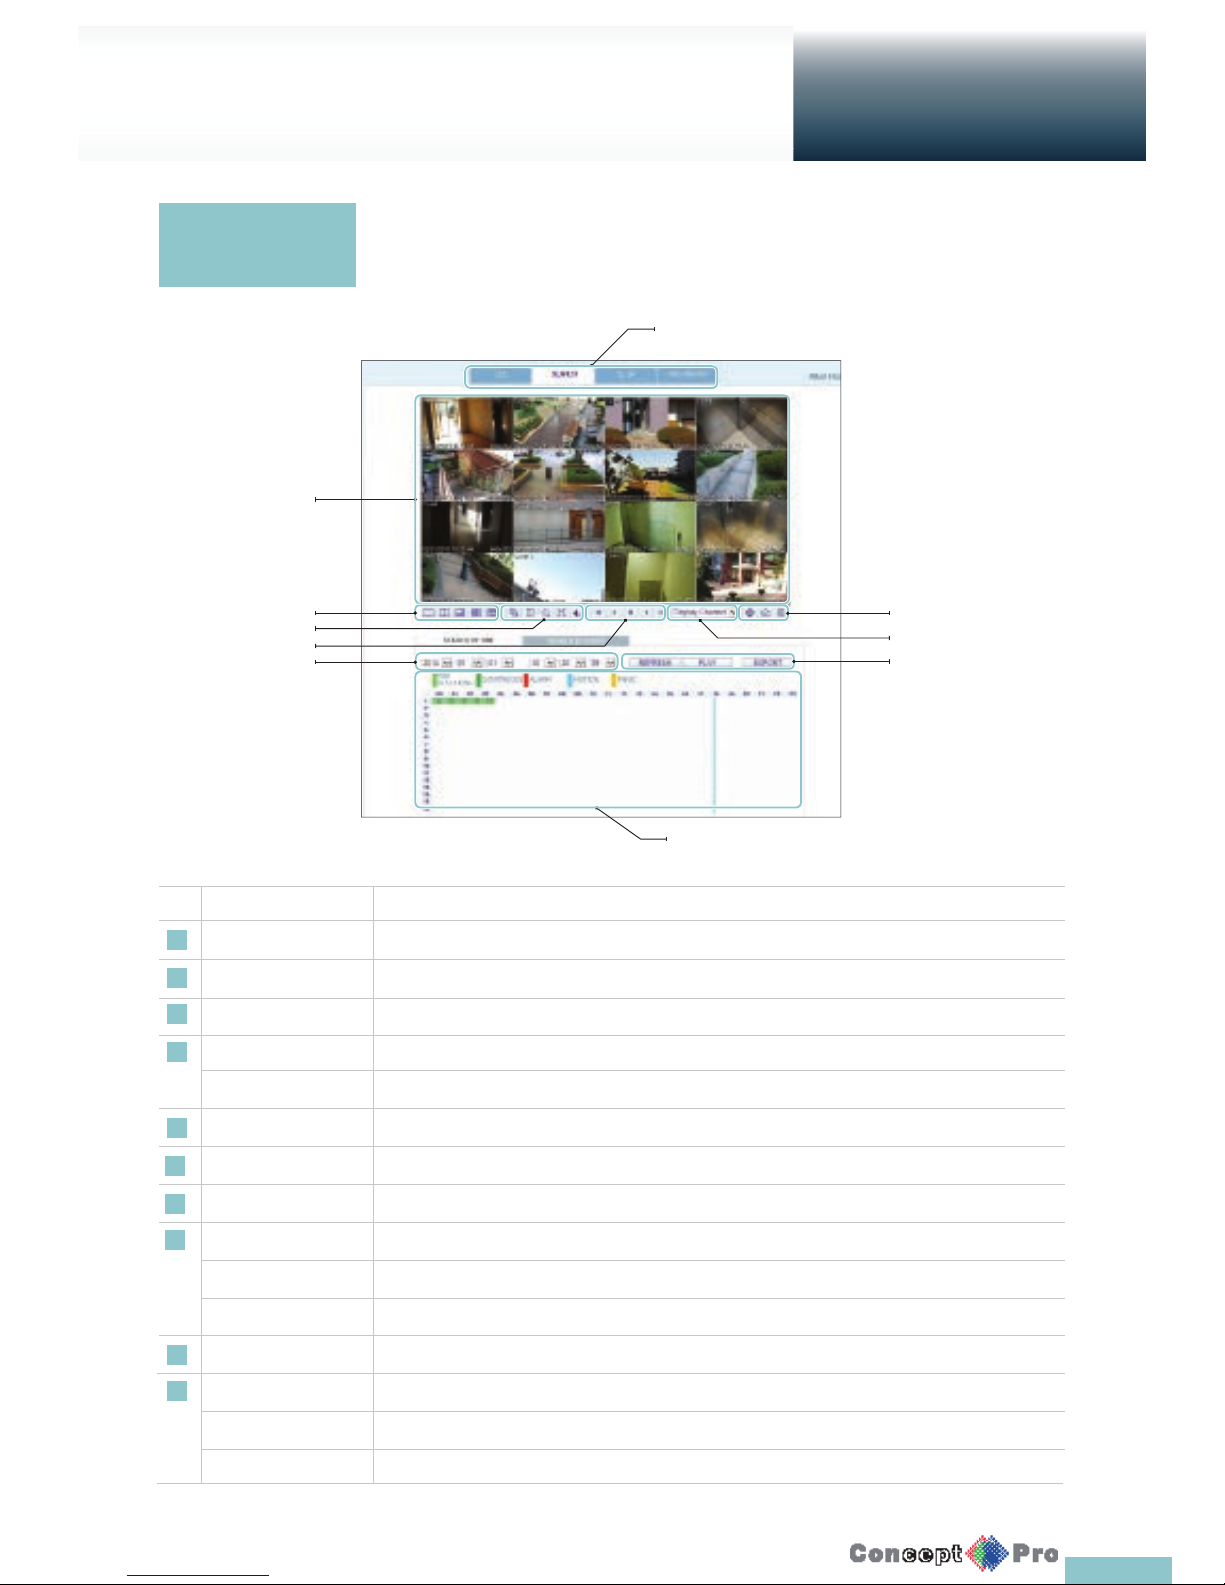
80
Search
Web Viewer
No. Name Description
1 View selection tab You can switch to the live, playback and setup screen and check the provided information.
2 Playback Screen Play the recording data.
3 Split Mode Select and switch to a desired split-screen mode.
4 Sequence , Zoom Set the sequence mode, switch to the next camera, zoom the screen or select the full screen mode.
Voice Transfer Youcan turn on/off the voice signal.
5 Play button bar You can control the playback screen.
6 Time Selection Specify the start time of playback.
7 Time Line Indicates the status of the recorded data.
8 Refresh Reload the time line.
Play Play the video that satis es your search criteria.
Export Archive the video that satis es your search criteria
9 Channel Selection Select a channel listed in the screen.
10 Screen Print out the current screen.
Image Capture Capture the selected image.
ActiveX Settings Con gure the ActiveX settings or specify the saving path of the captured image.
Search viewer at
a glance
Click <SEARCH> to display the remote control screen for the DVR.
5
4
3
6
1
2
7
8
9
10
Page 84
81
Search
Web Viewer
Search by time
Use the timeline to search for the data recorded on the DVR.
1. Select a date that you want to search.
2. Click <REFRESH>.
3. Check the recording data in the bottom time line and specify the time
range for your search.You can specify the start time by moving
the time bar.
4. Click <PLAY>.
> REFRESH: If your changes are not applied to the current screen,
reload the changes.
> PLAY: Play the searched video.
> Export: Archive the recorded video
Search by event
You can sort the recording data items by event to help your search.
1. Mark the checkbox of the event that you want to search for.
2. Specify the start and end dates and times for your log search.
3. Set the display order of the items found.
> LATEST: The most recent event will be listed on top.
> OLDEST: The earliest event will be listed on top.
4. Click <SEARCH>.
You can check the log for your search at the bottom of the screen.
5. Select a log to play the recording data.
Page 85
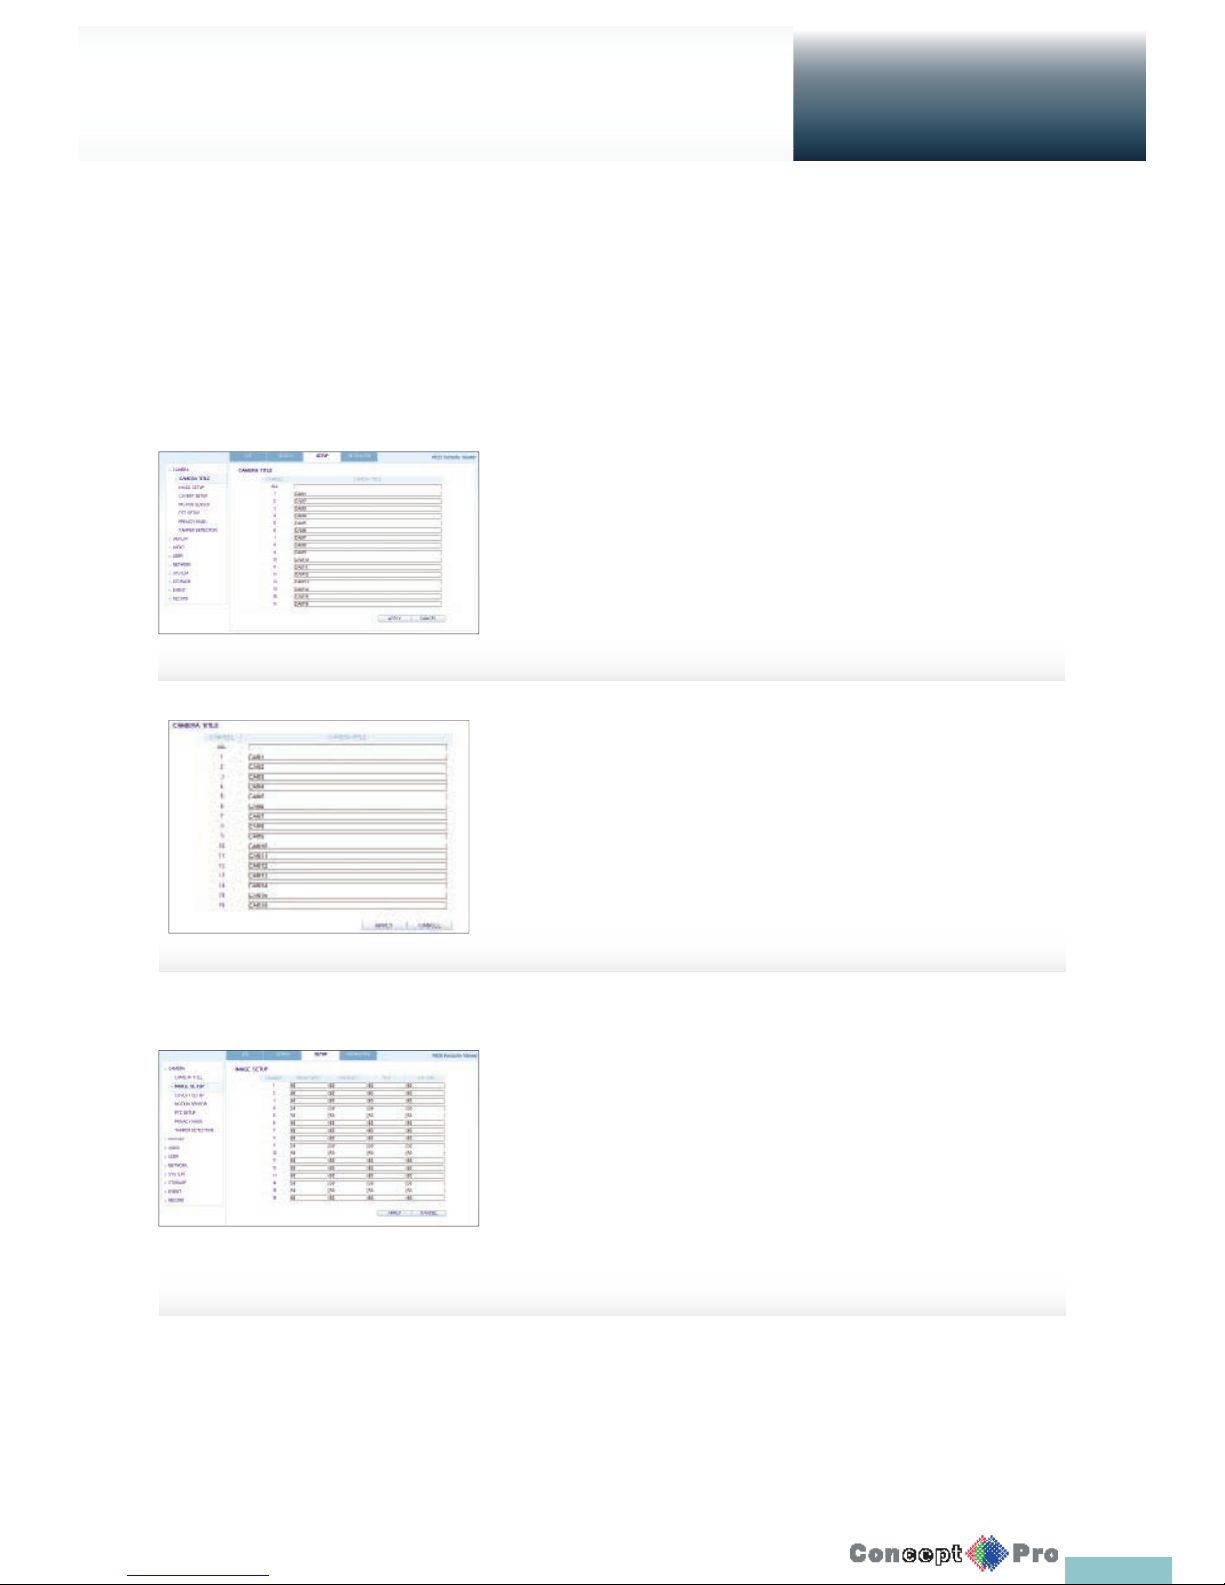
82
Setup
Web Viewer
Setup Viewer at a Glance
Click <SETUP> to display the remote control screen for the DVR.
When done, click <APPLY > to apply the changes to the remotely connected DVR.
R If the VXH960 is in system or record settings then the remote control setup via the web browser will be disabled.
CAMERA
To name the camera title
You can name the camera title that is displayed on each channel screen.
Select a channel to name and provide a new title. Then, click <APPLY > to
apply it.
R You can enter up to 9 alphanumeric characters for the
camera title.
Image Setup
You can set the brightness, contrast, tint, and colour of each channel.
When done, click <APPLY> to apply the changes.
R The default value is 50.
Page 86
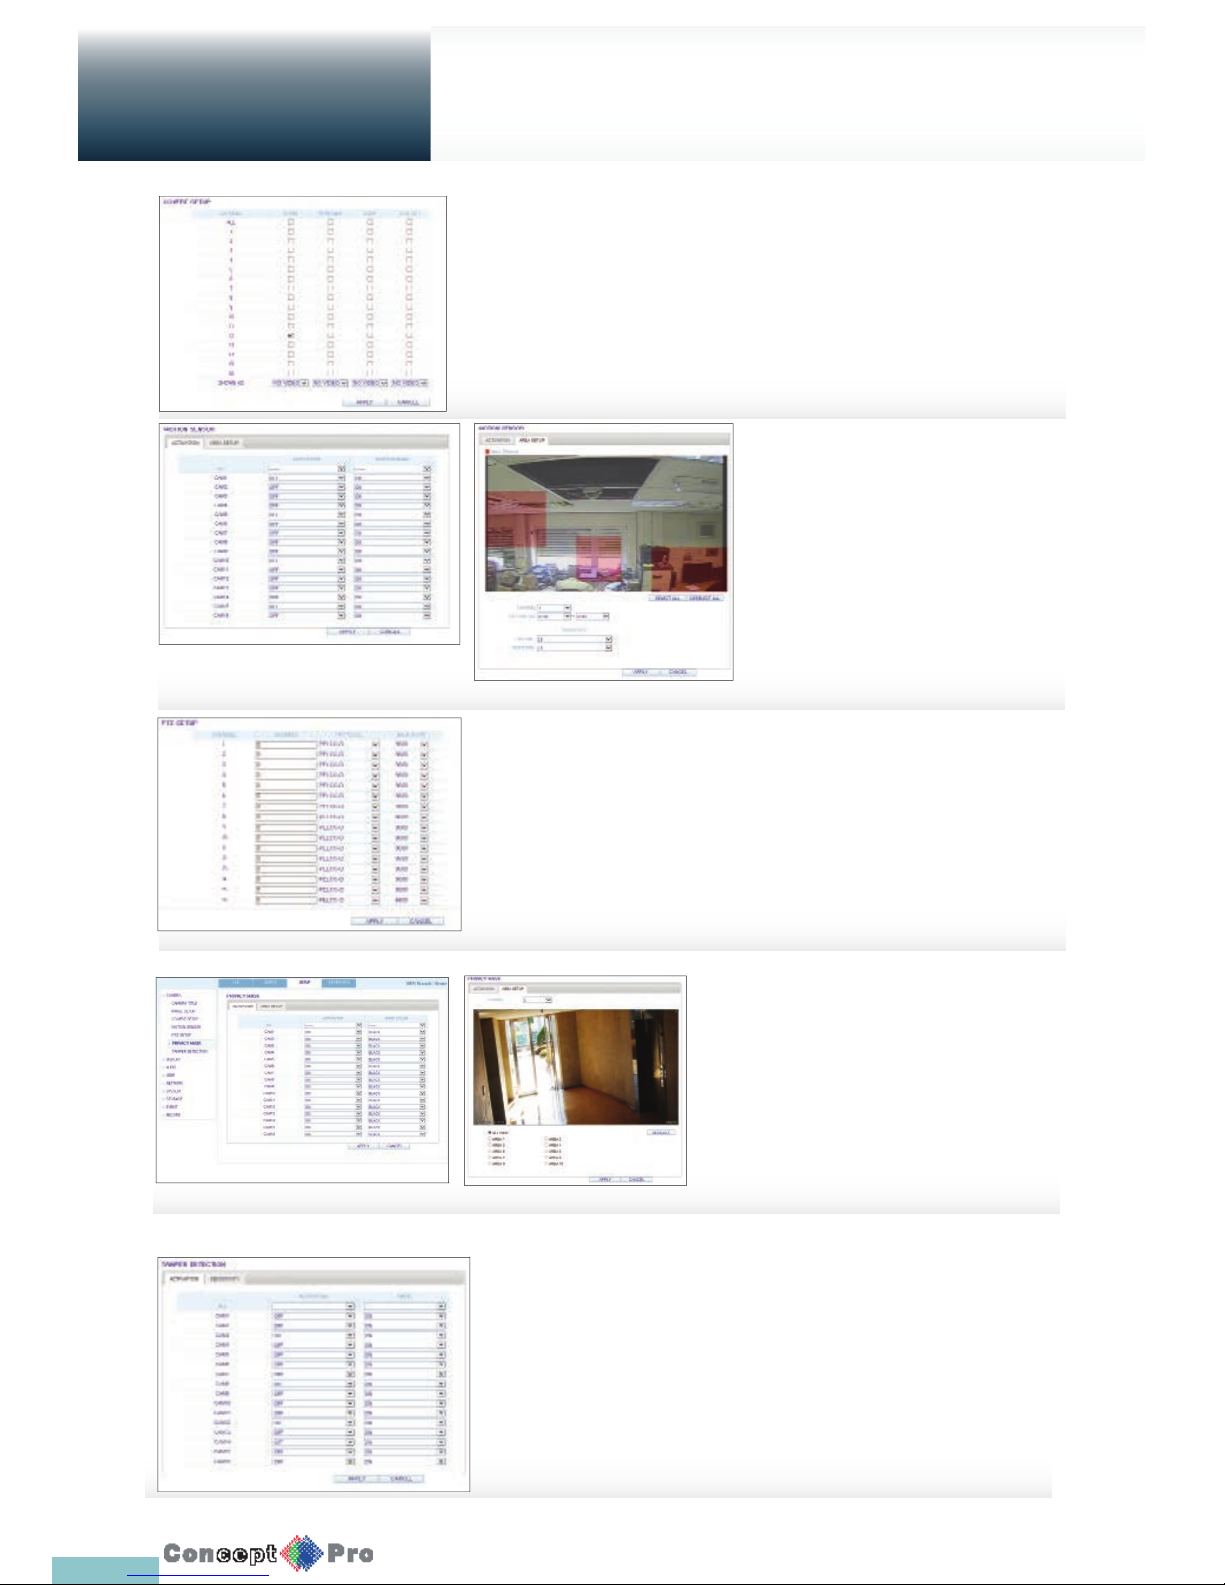
83
Setup
Web Viewer
Covert Setting
To to hide the video of a speci c camera from a speci c user group tick
the check box against the channel in the correct user group column. When
done, click <APPLY> to apply the changes.
PTZ Setting
You can set the camera ID, protocol, baud rate and data transmission speed
for each channel.
R For information about how to set the PTZ, refer to “PTZ Settings”.
(page 30)
Privacy Mask
To set the privacy mask activate the channel
and then select an area of where the mask
is needed.
R For more information on Privacy Mask
refer to “PRIVACY MASK.” (Page 30)
Motion Setting
To set each camera’s motion detection,
day and night time. Select a channel. Set
the mask area, activation and specify the
daytime range. When done, click <APPLY >
to apply the changes.
R For information about how to set the
motion area, refer to “Motion Area Setup”.
(page 29)
TAMPER
To detect a tampering attempt on the installed camera, change the settings
here.
R For information about how to set the TAMPER, refer to “TEMPER
DETECTION”. (page 31)
Page 87
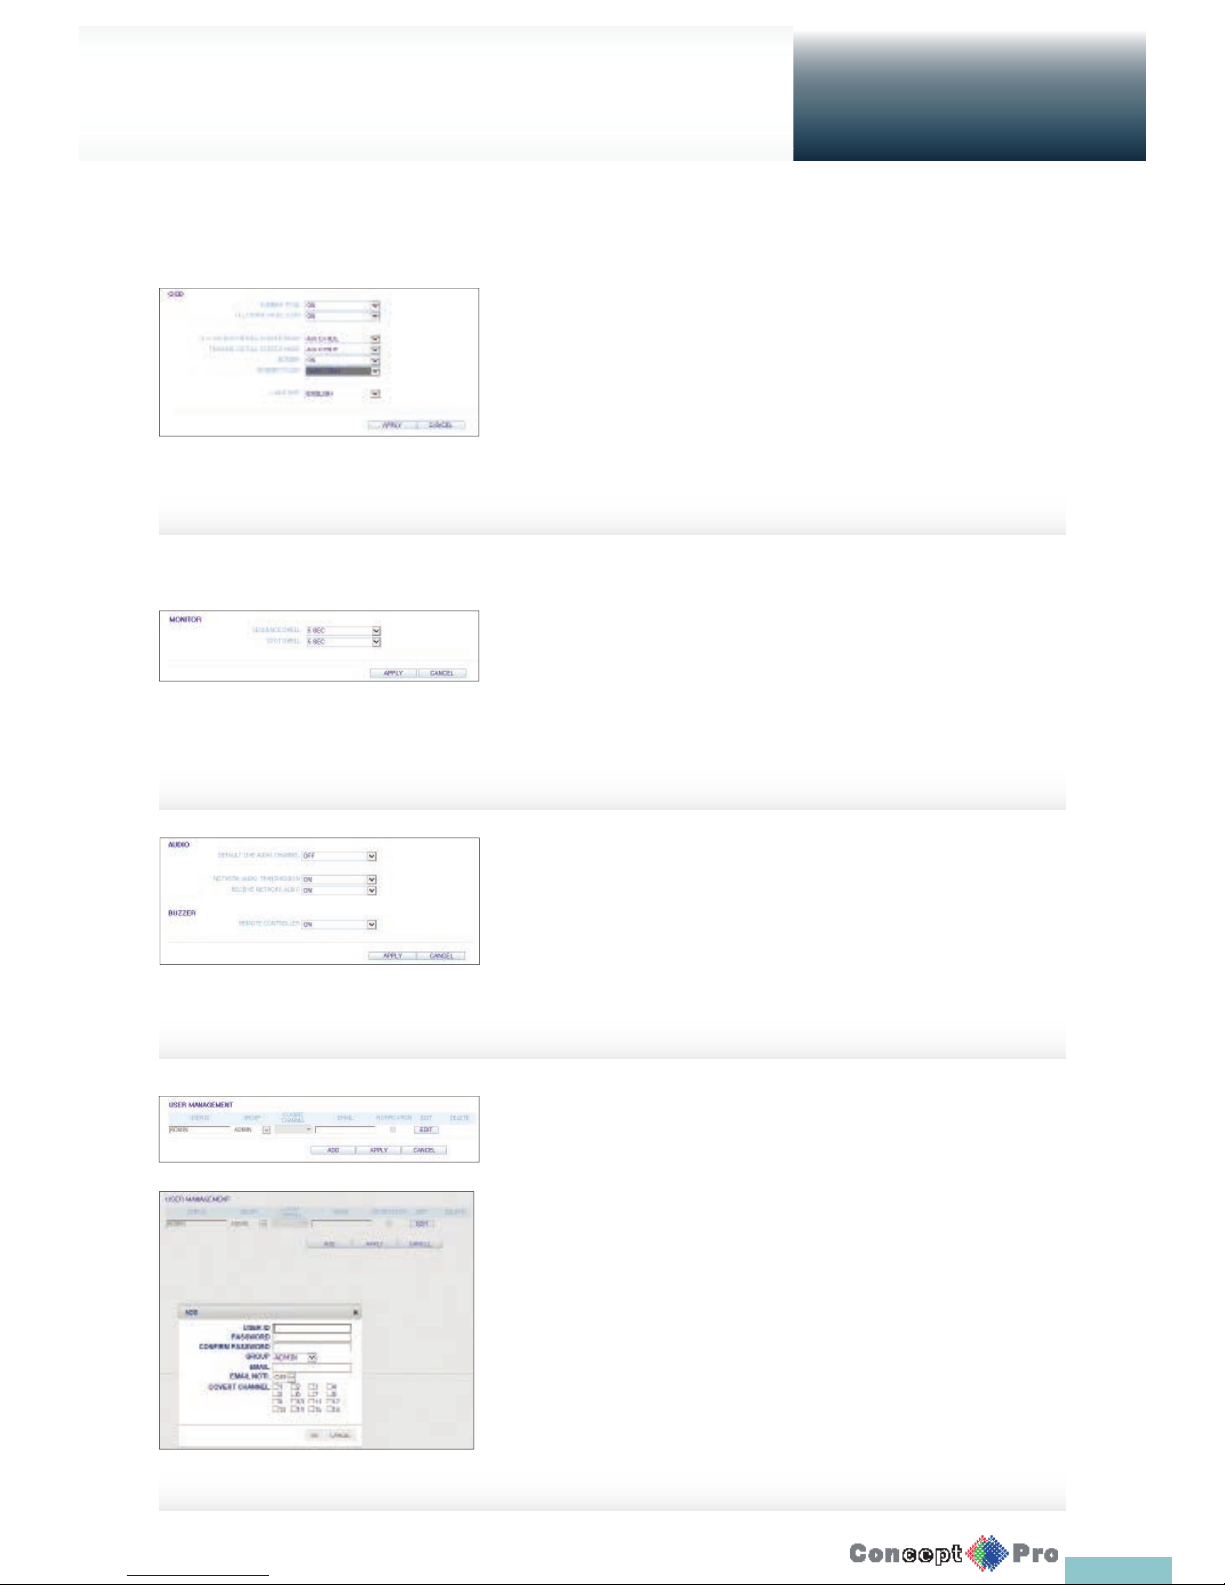
84
Setup
Web Viewer
DISPLAY
OSD Setting
Con gure the settings for the time, title, boarder line, icon and language
that will be displayed on the screen. Make changes to each item of the OSD
menu and click <APPLY> to apply the changes.
R For details about each displayed item, refer to “OSD”. (page 32)
AUDIO
Audio/Buzzer
You can con gure the settings of the voice and audio signal.
R For details about each displayed item, refer to “Audio Setup”.
(page 36)
USER
User Management
To add a user account and change the password.
R For details about each displayed item, refer to “User Setting”.
(page 37)
To add a user, click <ADD> and provide the user information.
If you want to delete the user click <DELETE> next to it.
When done, click <APPLY> to apply the change.
Monitor Settings
To set the interval of an active sequence. Specify the interval and click
<APPLY> to apply it.
> Sequence Dwell: Switching time from one channel to the next
channel in single screen mode.
> SPOT DWELL: It means the interval between the view types when
displaying the SPOT Out monitoring screen.
Page 88
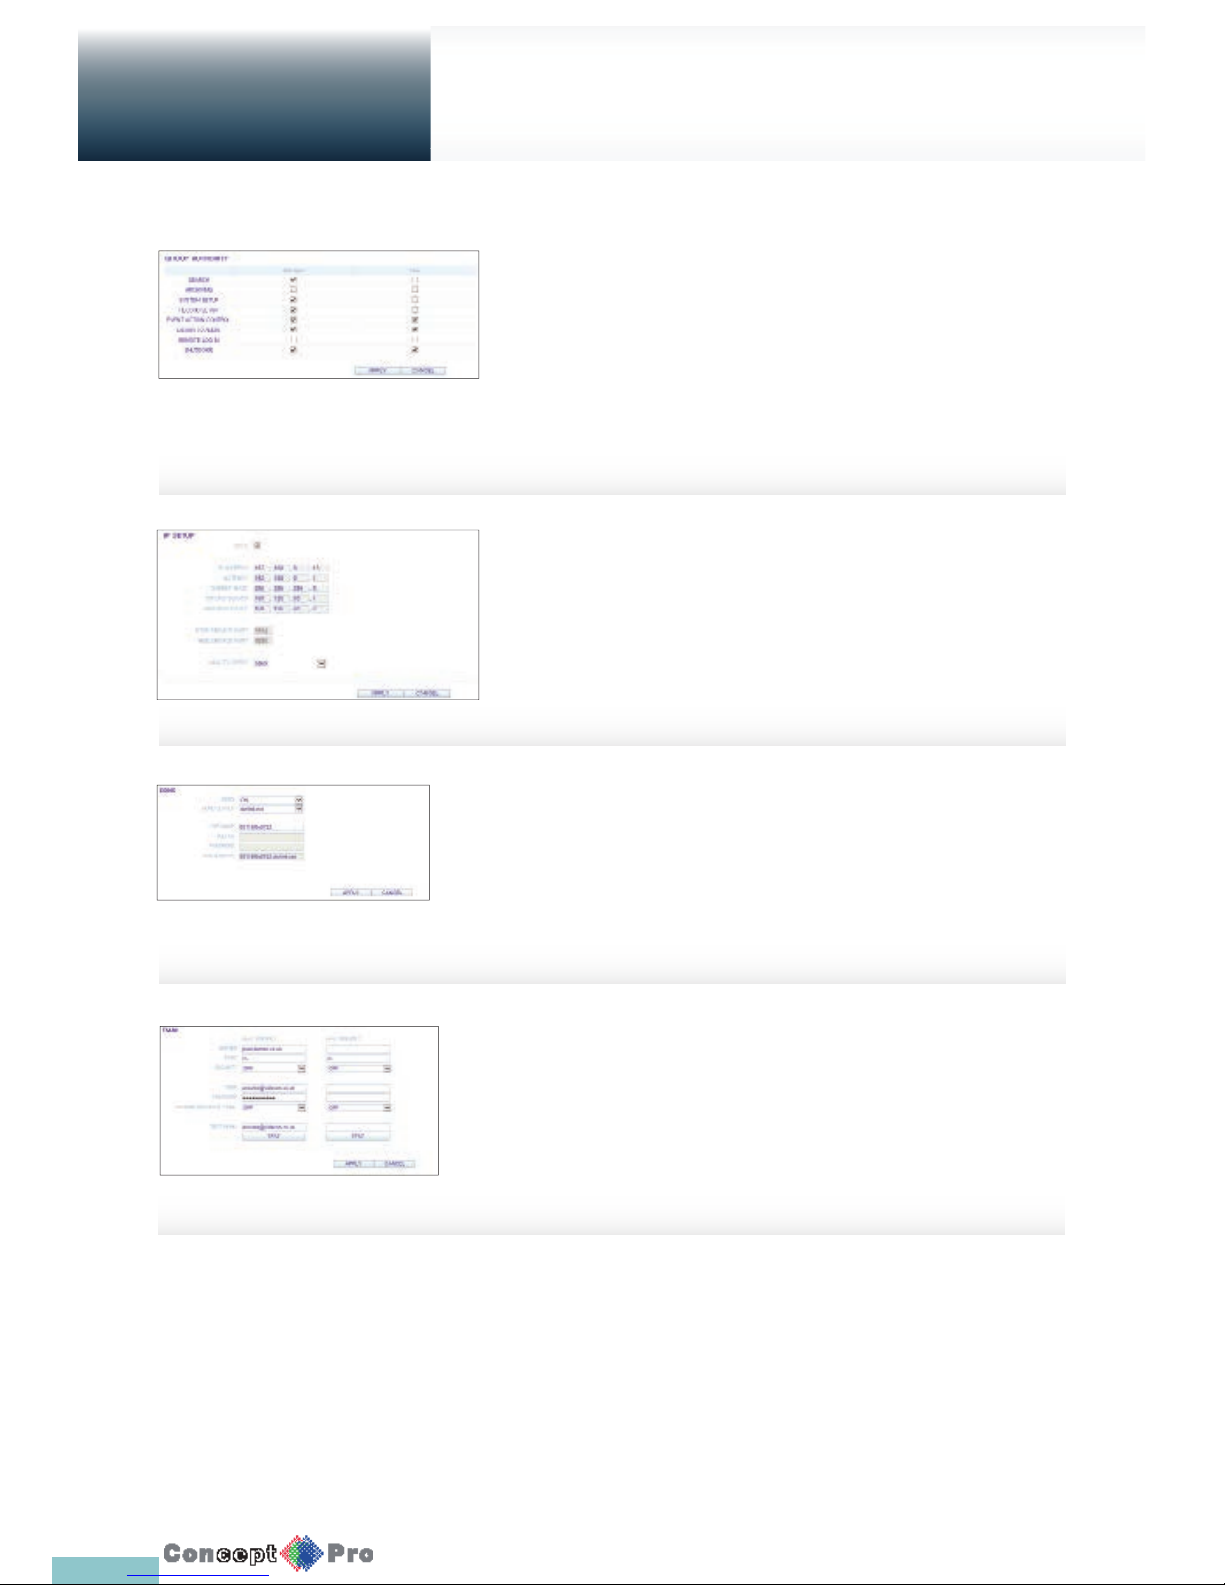
85
Setup
Web Viewer
Group Permission Setting
To grant diff erent user groups diff erent permissions to a
speci c menu.
Mark the checkboxes of the menu items accessible by the
user group.
When done, click <APPLY> to apply the changes.
R For more information about the accessible menu items, refer
to “Group Authority”. (page 38)
DDNS Setting
You can con gure the DDNS settings so that remote users
who are connected to the network can access it remotely.
Change the DDNS settings and click <APPLY> to apply the
changes.
R For more information, refer to DDNS (Page 40)
Email Setting
You can register and test an email address so that an email
noti cation is delivered at a speci c interval or if an event
occurs.
Provide the necessary information and click <APPLY> to
apply the chnages.
R For more information, refer to “Email”. (page 41)
NETWORK
IP Setting
To check the network connection status and to the change the IP address.
When done, click <APPLY> to apply the change.
R For more information about each network entry, refer to “IP Setup”.
(page 39).
Page 89
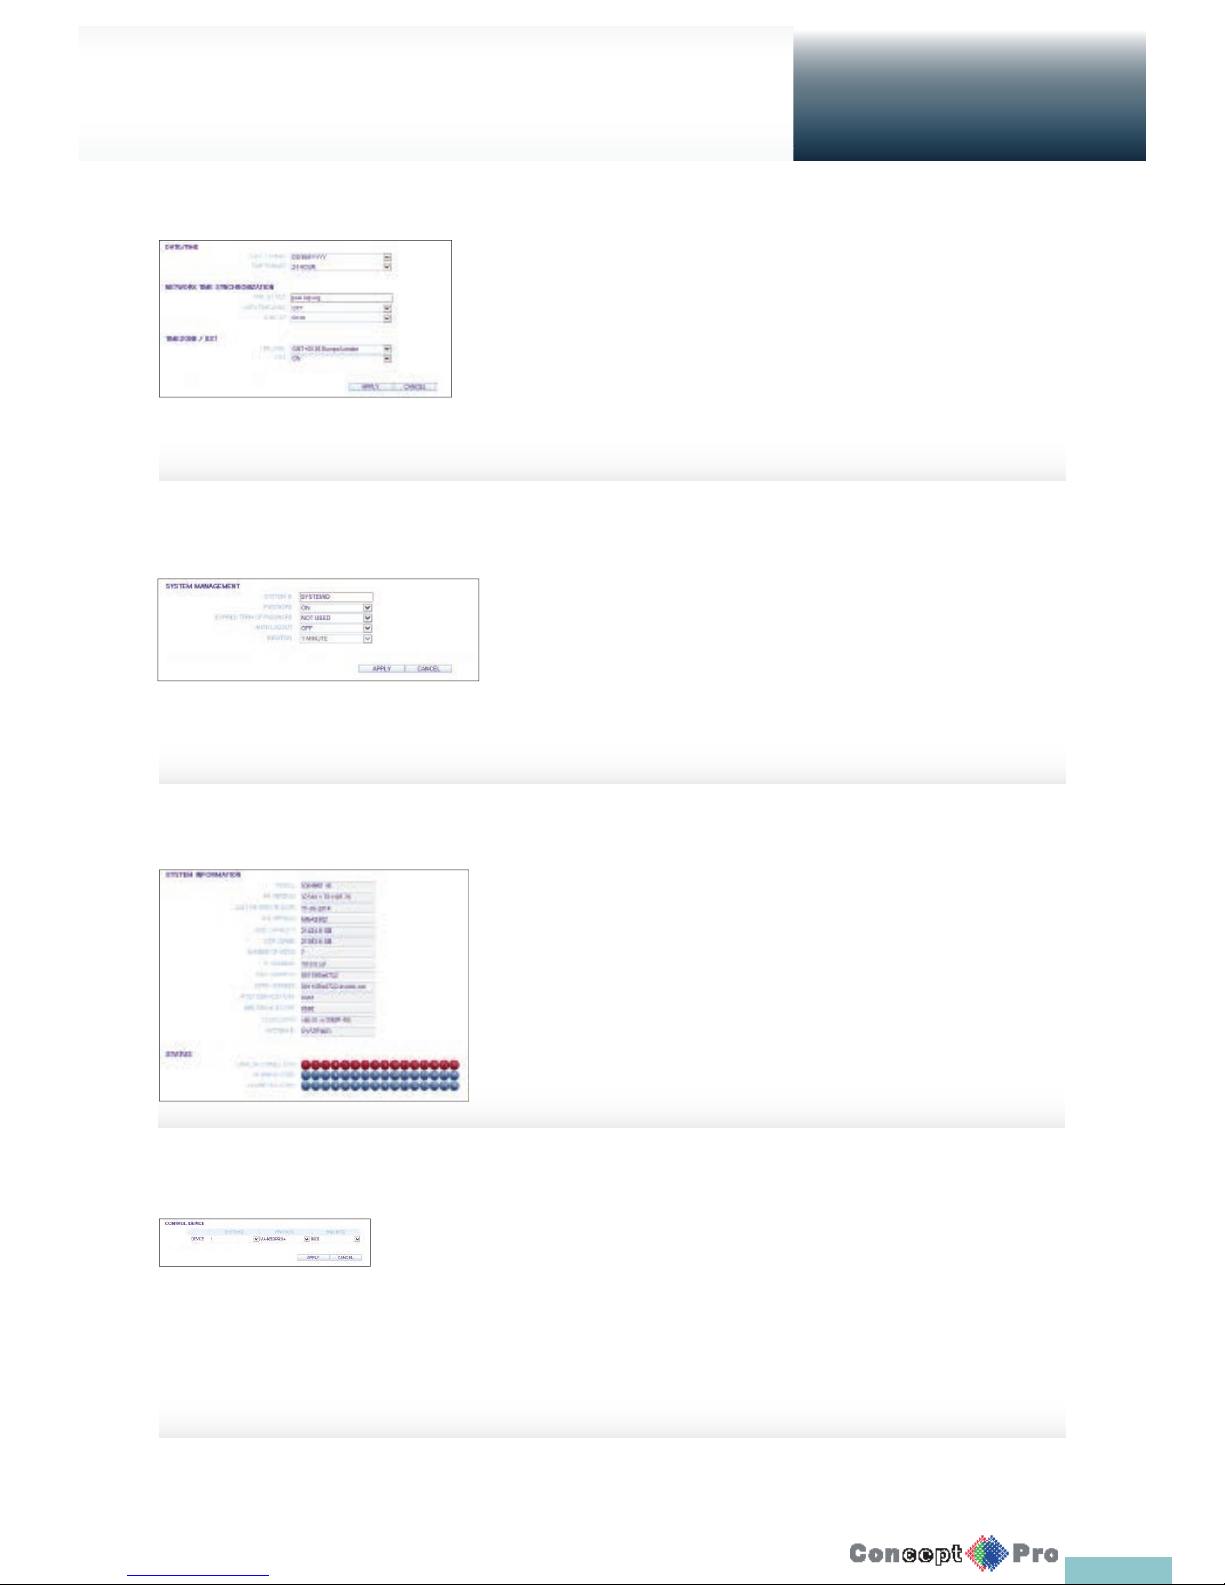
86
SYSTEM
Date/Time Setting
Specify the current date and time.
When done, click <APPLY> to apply the changes.
R For more information about each of the time and date settings, refer to
“Date/Time”. (page 43)
System Information
You can check information of system rmware version, disk
space, and network settings, as well as the status information
of network connection and alarm I/O.
Control Device Setting
Set the connection of both the remote control and the keyboard control.
Changethecommunication settings and click <APPLY>to apply the changes.
R For more information about each communication item, refer to “Control
Device”. (page 46)
System Management
You can con gure the System ID, the access settings of: log in, log out, and
auto logout.
R For more information about system management refer to “System
Management”. (Page 44)
Setup
Web Viewer
Page 90
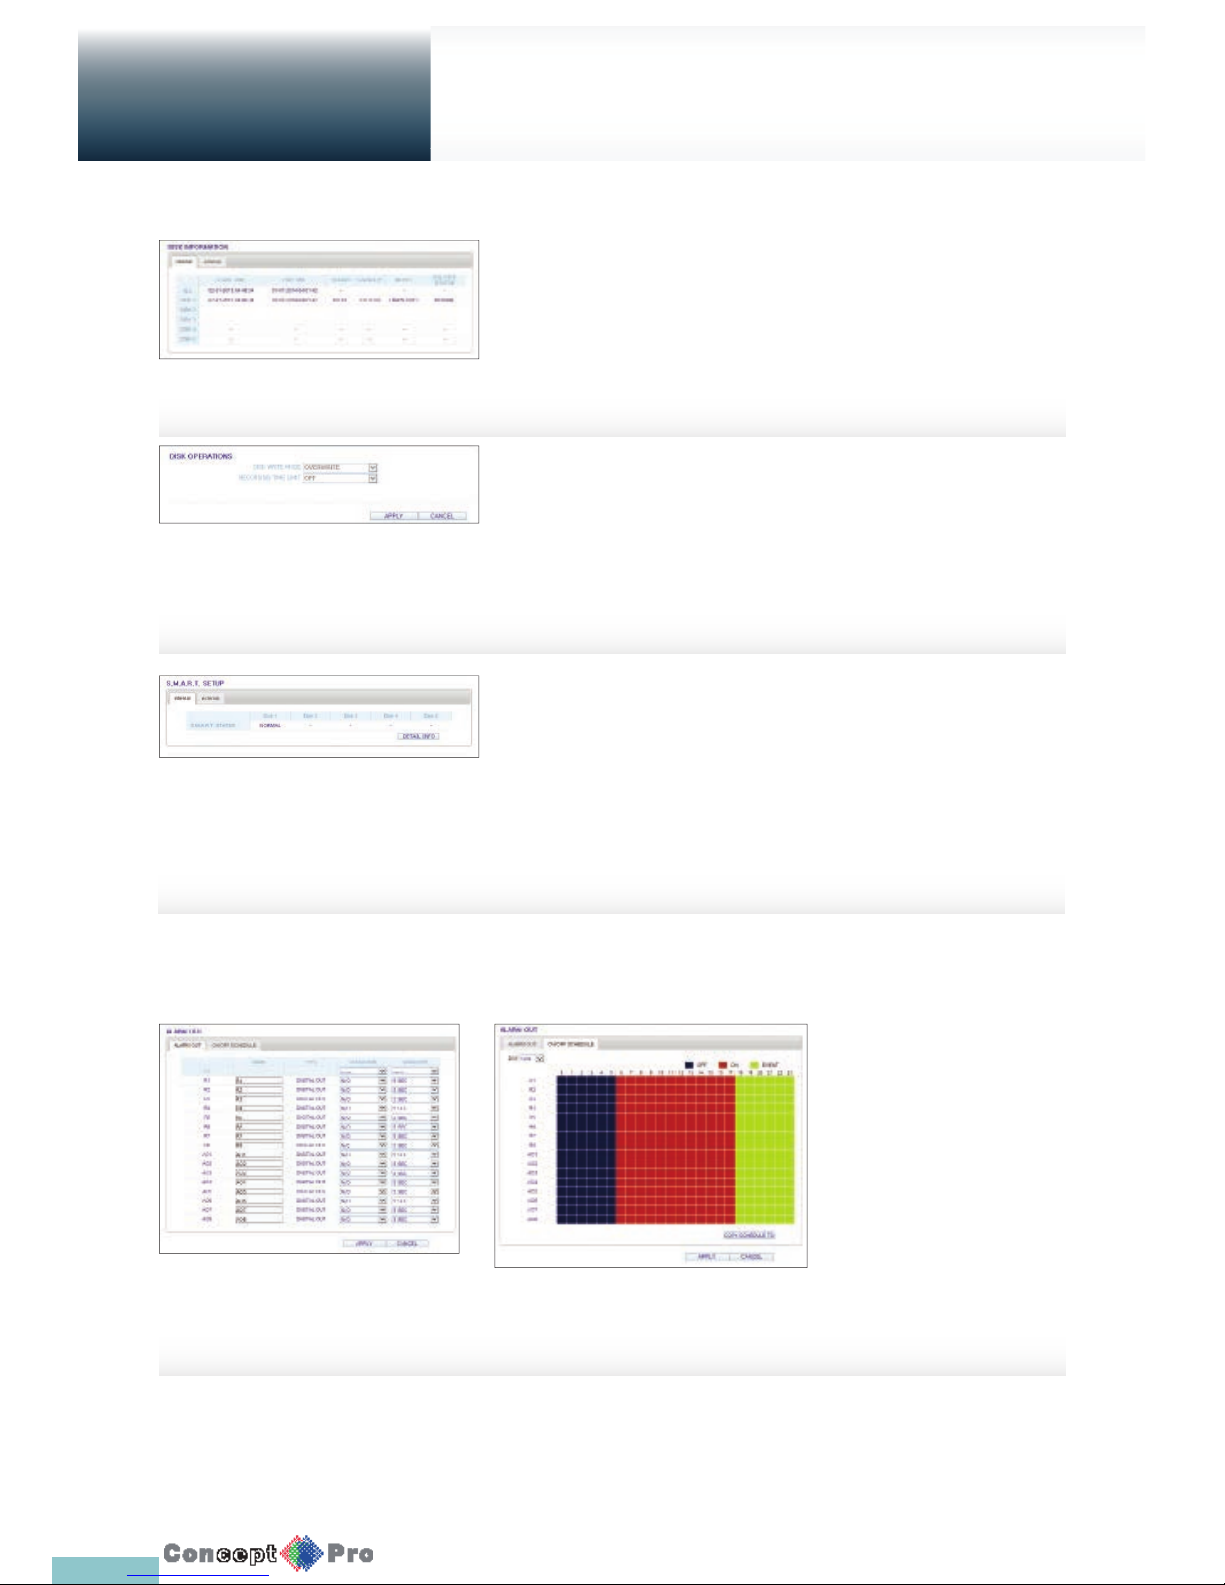
87
Setup
Web Viewer
STORAGE
Device Information
You can check a list of internal/external storage devices connected to the
VXH960 as well as the recording time information of each device.
R For more information on Storage refer to “Storage”. (page 47)
Disk Operations
To check the disk write mode and the recording time limit.
R For more inforation about Disk Operations refer to “Disk Operations”.
(Page 48)
S.M.A.R.T Status
You can check the S.M.A.R.T status for each of the internal
and external devices.
R What is S.M.A.R.T?
S.M.A.R.T. (Self Monitoring, Analysis, and Report Technology) is to
detect a HDD that is likely to cause problems in the future with a warning
message. For more information about S.M.A.R.T. refer to “S.M.A.R.T
Settings”. (Page 49)
Alarm Output
Specify the alarm output conditions
with the work schedule. When done,
click <APPLY> to apply the changes.
R For more information about
the alarm output and ON/OFF
schedule, refer to “Alarm Out”.
(page 50)
EVENT
Page 91
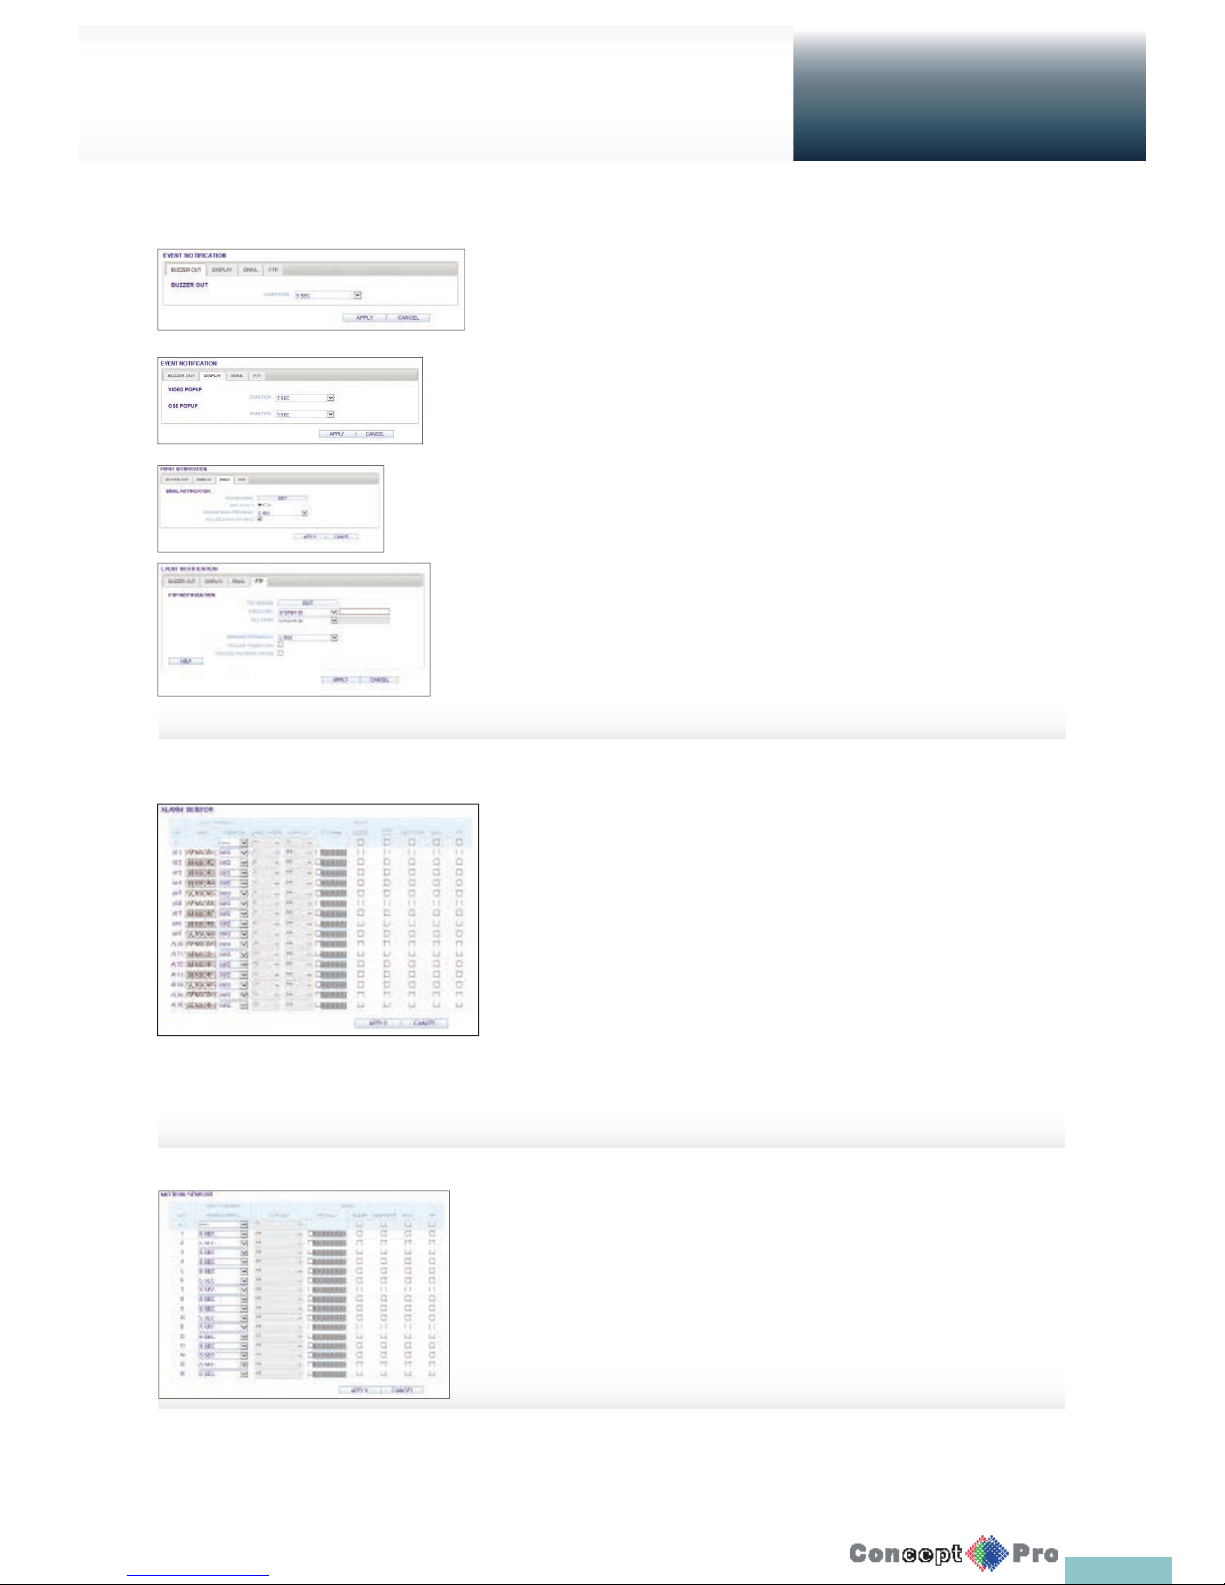
88
Event Notifi cation
Specify the noti cation method using either the <BUZZER OUT>,
<DISPLAY>, <EMAIL> and <FTP> against the event alarm that occurs
Specify the buzzer output time, video popup time, email noti cation and FTP
noti cation. Click <APPLY> to apply the changes.
R For more information about the event noti cation, refer to
“Event Noti cation”. (page 51)
Alarm Sensor
You can con gure the settings of the alarm sensor and
specify the operation of the sensor if an event occurs.
When done, click <APPLY> to apply the changes.
R For more information about each of the alarm sensor actions,
refer to “Alarm Sensor”. (page 54)
Motion Sensor
You can set an action to execute when motion is
detected.
When done, click <APPLY> to apply the changes.
R For more information about how to set the motion sensor,
refer to “Motion Sensor”. (page 55)
Setup
Web Viewer
Page 92
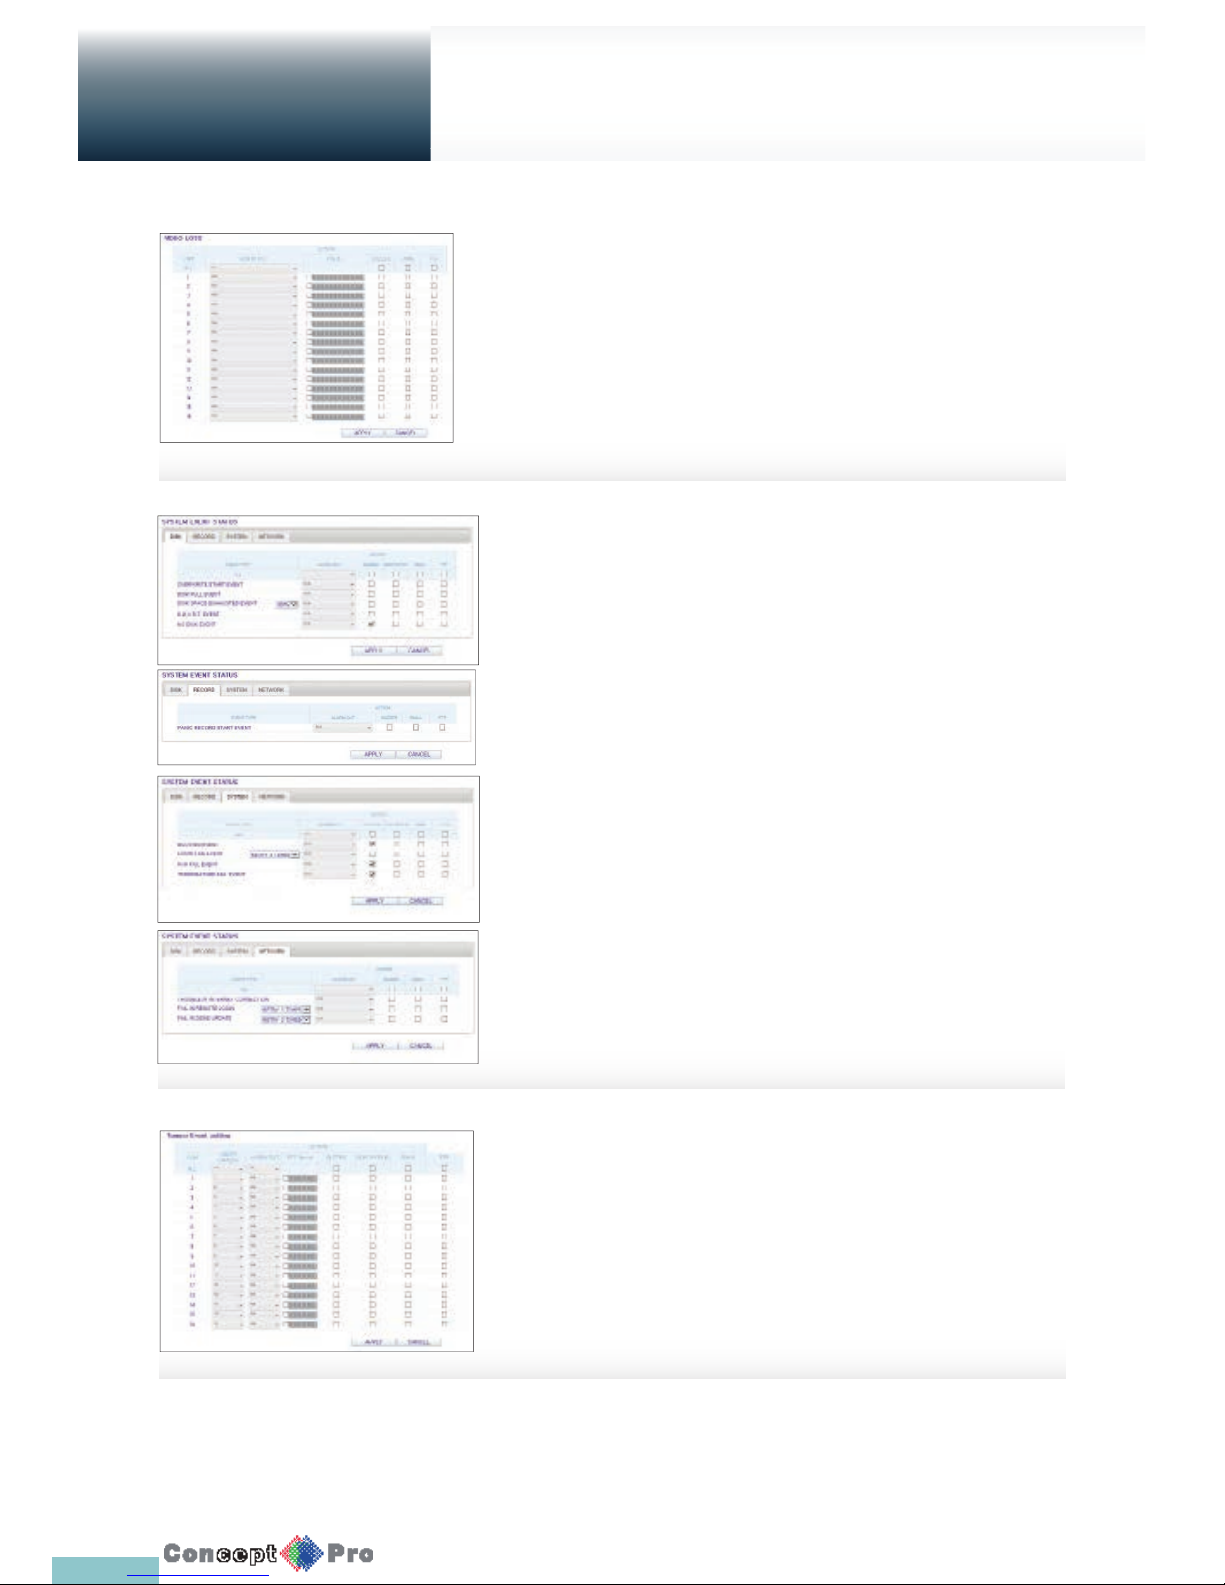
89
Setup
Web Viewer
Video Loss
You can select an action for <BUZZER>, <EMAIL> and <FTP> and
determine what to do on the alarm output port if no video is received from
the camera. When done, click <APPLY> to apply the changes.
System Event
You can set which action to perform if an event related to
the disk, recording, system or network happens.
You may want to notify the user of the event using the
alarm output, buzzer, OSD popup, email and FTP.
When done, click <APPLY> to apply the changes.
R For more information about how to set the system event,
refer to “System Event”. (page 57)
Tamper Event settings
You can set how to react upon a detected tampering event.
When done, click <APPLY> to apply the changes.
R For more information about how to set the Tamper Event,
refer to “TAMPER EVENT”. (page 59)
Page 93
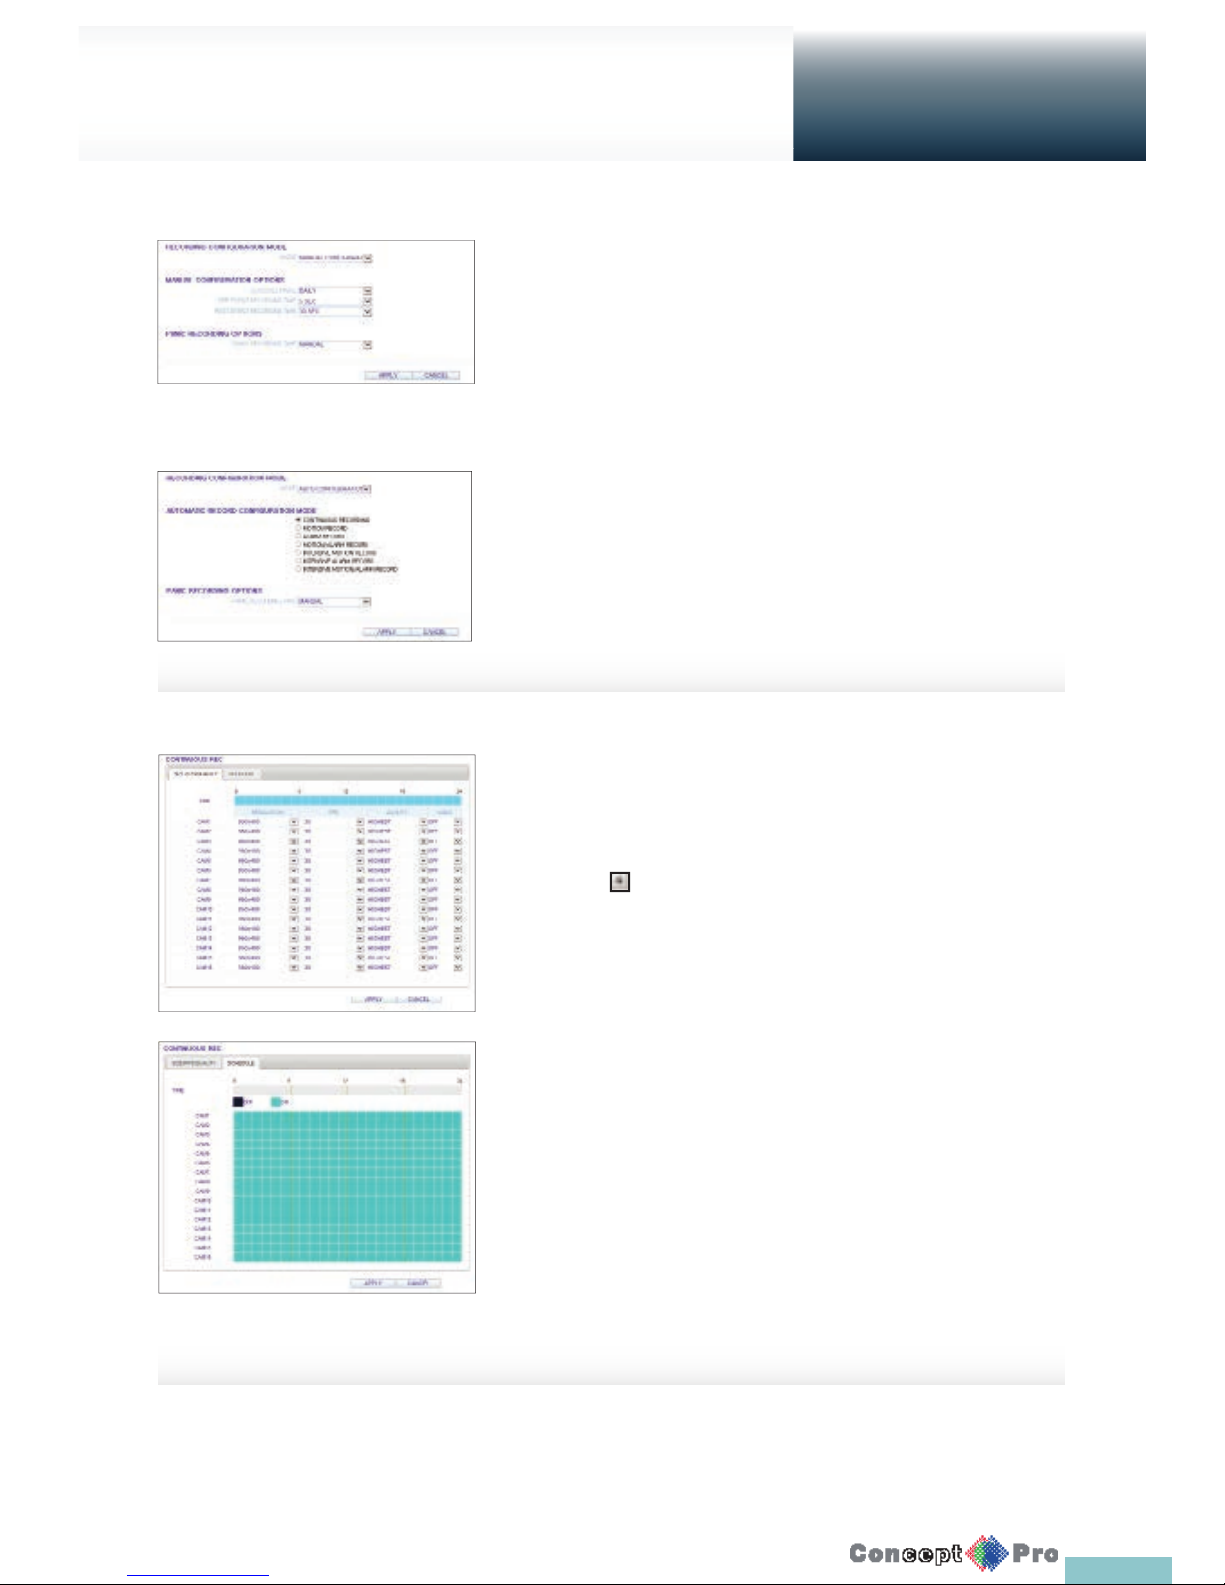
90
RECORD SETUP
Record Setting
You can set the recording options for Auto or Manual mode.
When done, click <APPLY> to apply the changes.
R For more information about how to set each mode, refer to
“Operation Mode”. (page 60)
Continuous Recording
You can con gure the settings of: continuous recording time,
recording size, frame rate per second and quality.
Click < > next to each item to display the list of values
available.
When you complete the recording size and schedule settings,
click <APPLY> to apply your settings.
R For more information about the continuous recording size and
schedule, refer to “Continuous Recording”. (page 61)
Setup
Web Viewer
Page 94
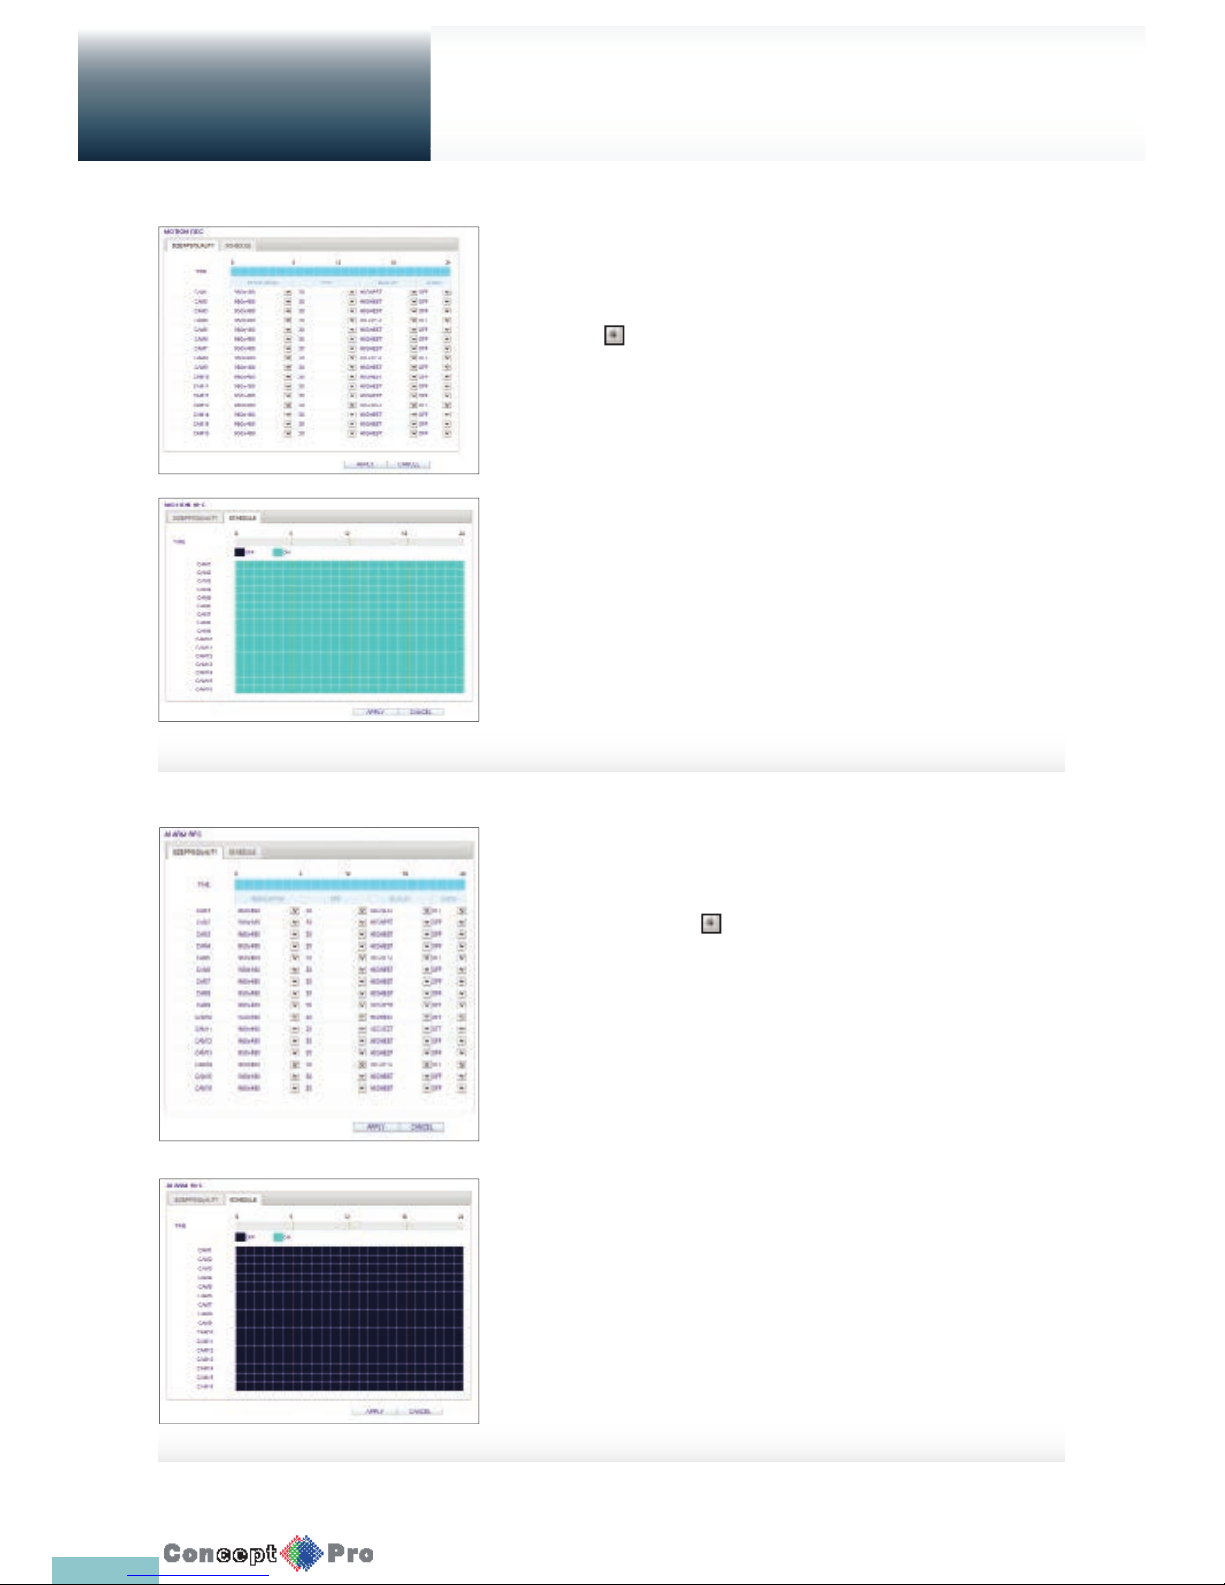
91
Setup
Web Viewer
Motion Recording
Set the <SIZE/FPS/QUALITY/AUDIO> and the <SCHEDULE> to apply if a
motion event occurs.
Click < > next to each item to display the list of values
available.
Complete setting the <SIZE/FPS/QUALITY/AUDIO> for the motion recording
as well as the <SCHEDULE>, and click <APPLY> to apply the changes.
R For more information about the motion recording size and
schedule, refer to “Motion Recording”. (page 61)
Alarm Recording
Set the <SIZE/FPS/QUALITY/AUDIO> and the <SCHEDULE> if an alarm
event occurs. Click < > next to each item to display the list of values
available.
Complete setting the <SIZE/FPS/QUALITY/AUDIO> for the alarm recording
as well as the <SCHEDULE>, and click <APPLY > to apply the changes.
R For more information about the alarm recording size and schedule, refer
to “Alarm Recording”. (page 61)
Page 95
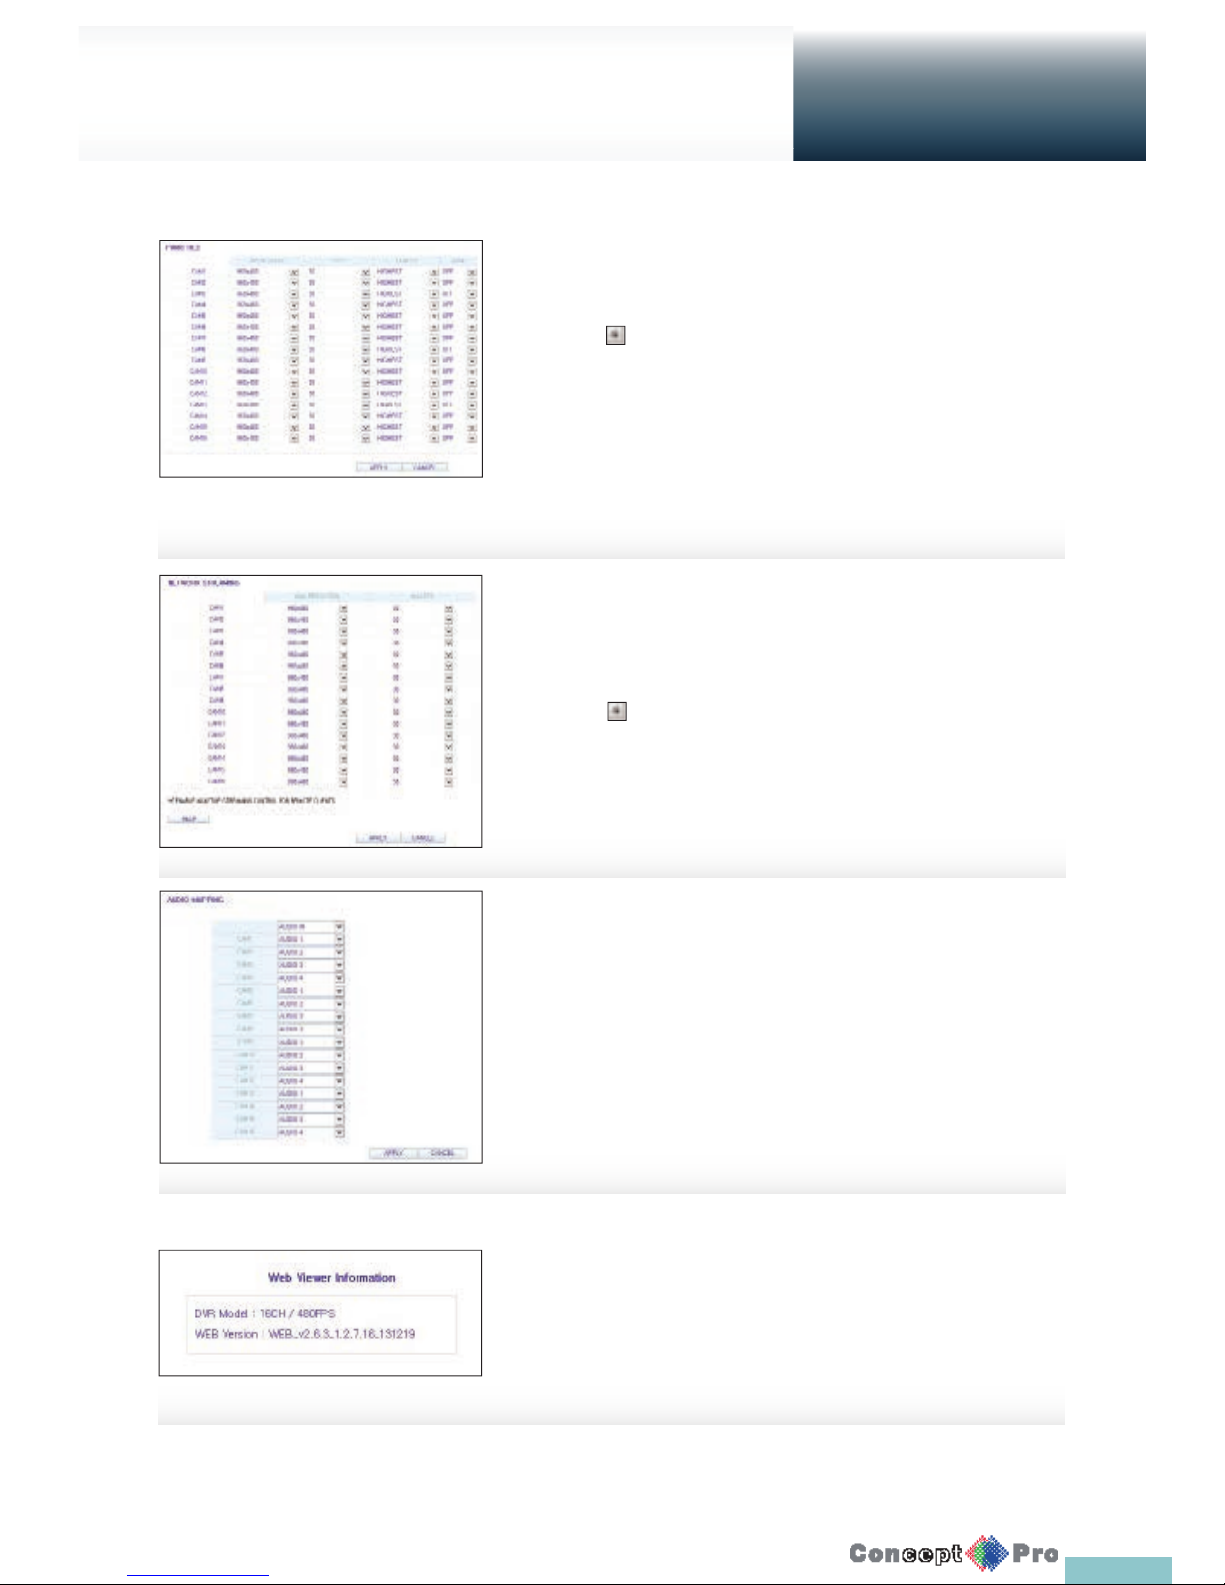
92
Panic Recording
From the <PANIC RECORD> menu, you can set the resolution, FPS, quality
and audio settings to your preference.
Click < > next to each item to display the list of values available.
When you have completed the manual record settings, click <APPLY> to
apply the changes.
R For more information about the manual record settings, refer
to “Panic Recording”. (page 64)
Network Streaming
You can specify the maximum size of network streaming and video resolution
for remote users and change the FPS.
Click < > next to each item to display the list of values
available.
When done, click <APPLY> to apply the settings.
R For more information about Network streaming, refer to
“Network Streaming”. (Page 64)
About
Click the <INFORMATION> tab to check the model name of
the VXH960 as well as the web viewer version.
Audio Mapping
You can specify the audio channel for each video channel.
R For more information on Audio Mapping refer to “AUDIO MAPPING”.
(Page 64)
Setup
Web Viewer
Page 96
93
VXH264 Pro
Mobile
Viewer
OS Minimum specifi cation Recommended specifi cation
Android Phone Processor:800 MHz or higher
Flash: 512 MB or higher
RAM: 512 MB or higher
SD Card: 4 GB or higher
OS: 2.0 or higher
iPhone iPhone 3G,
iPod touch 3rd Generation
iPhone OS 3.1.3 or higher
Processor: 1 GHz or higher
Flash: 512 MB
RAM: 512 MB
SD Card: 16 GB or higher
OS: 2.1 or higher
iPhone 3GS or higher
iPhone OS 3.2 or higher
VXH264 Pro
Specifi cation
You can use the VXH264PRO App to monitor the network on a remote site and play the monitoring
video anytime anywhere
Minimum/ recommended specifi cation
Page 97
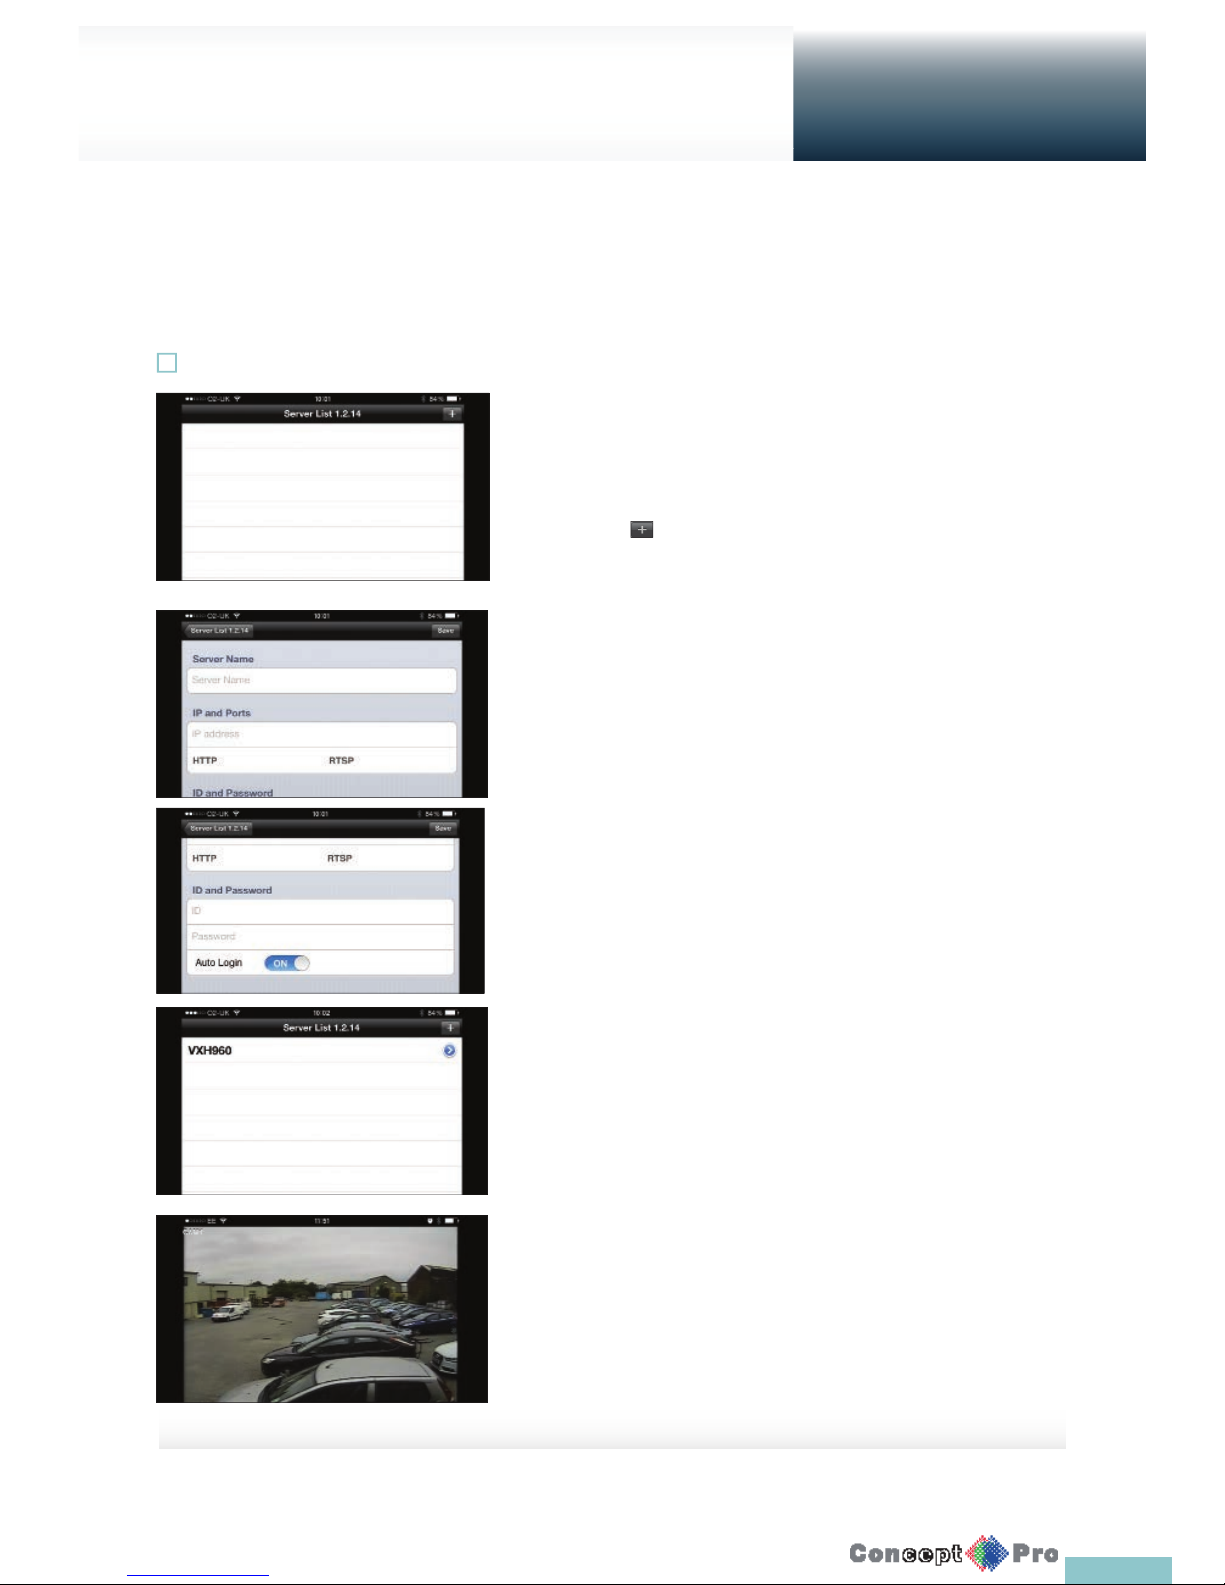
94
Setup
Mobile
Viewer
4. Select the site that you added in the server List.
5. Try to access the DVR.
If connected successfully, you will see the screen as shown.
To connect to DVR with VXH264 Pro
1. Select and run the VXH264 Pro.
2. Press < > in the top right corner of the DVR List to
select and add a site to the list.
3. Enter the server name, IP address, HTTP port number, RTSP port
number, ID and password then click <save>.
USING THE VXH264 PRO ON IPHONE
How to download the iPhone-dedicated application
From your iPhone, access the App Store.
Enter “VXH264 Pro” in the search bar to nd. Download and install the application on your iPhone.
R The VXH264 Pro supports the 1/4 split screen mode.
! With the VXH264 Lite, you cannot: check the log, control the PTZ operations or change the system settings.
Page 98
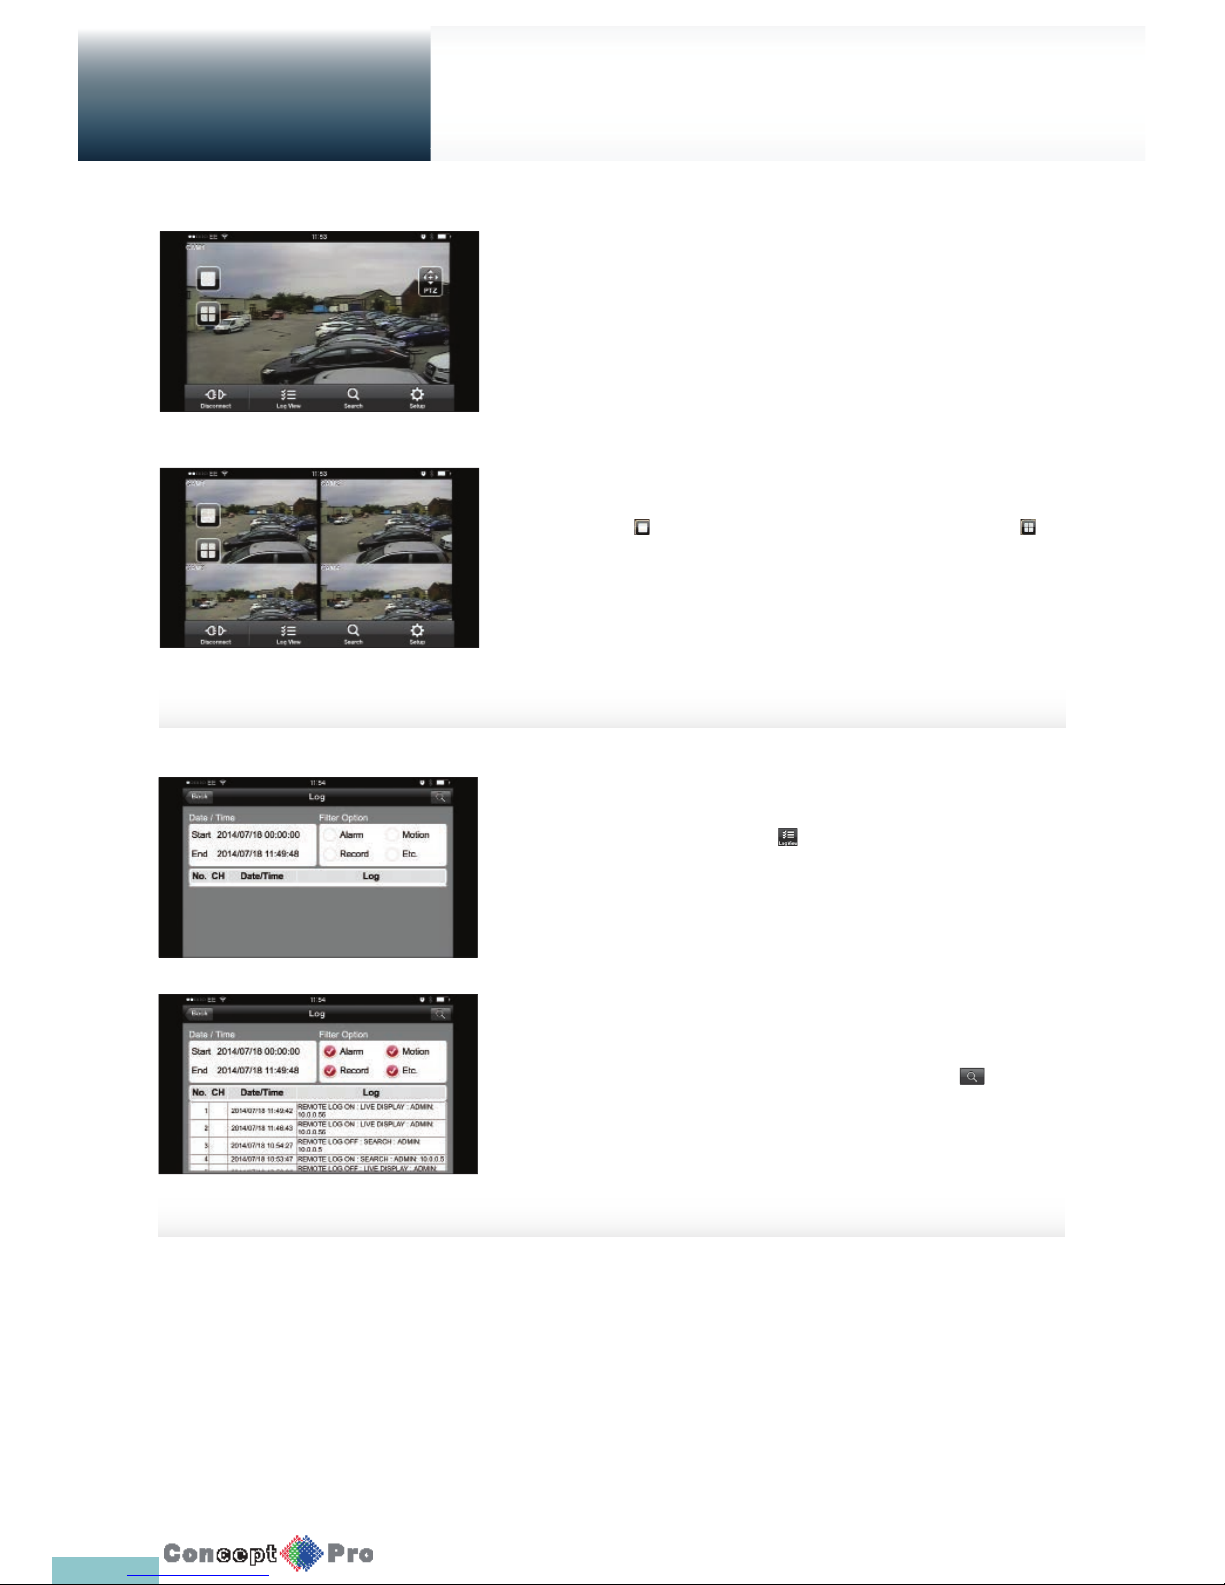
95
Setup
Split Mode
1. Press any area on the screen.
The main menu appears at the bottom of the screen.
2. Press < > in the top left corner to switch to 1-split mode; click < >
to switch to 4-split mode.
R swipe screen left or right to change the camera channel.
Using the Log View
1. From the main menu, press < >.
You can check the log of the data stored.
2. Select one from Alarm, Motion, Record, Etc. and press < >.
You will view the log of related items.
Mobile
Viewer
Page 99
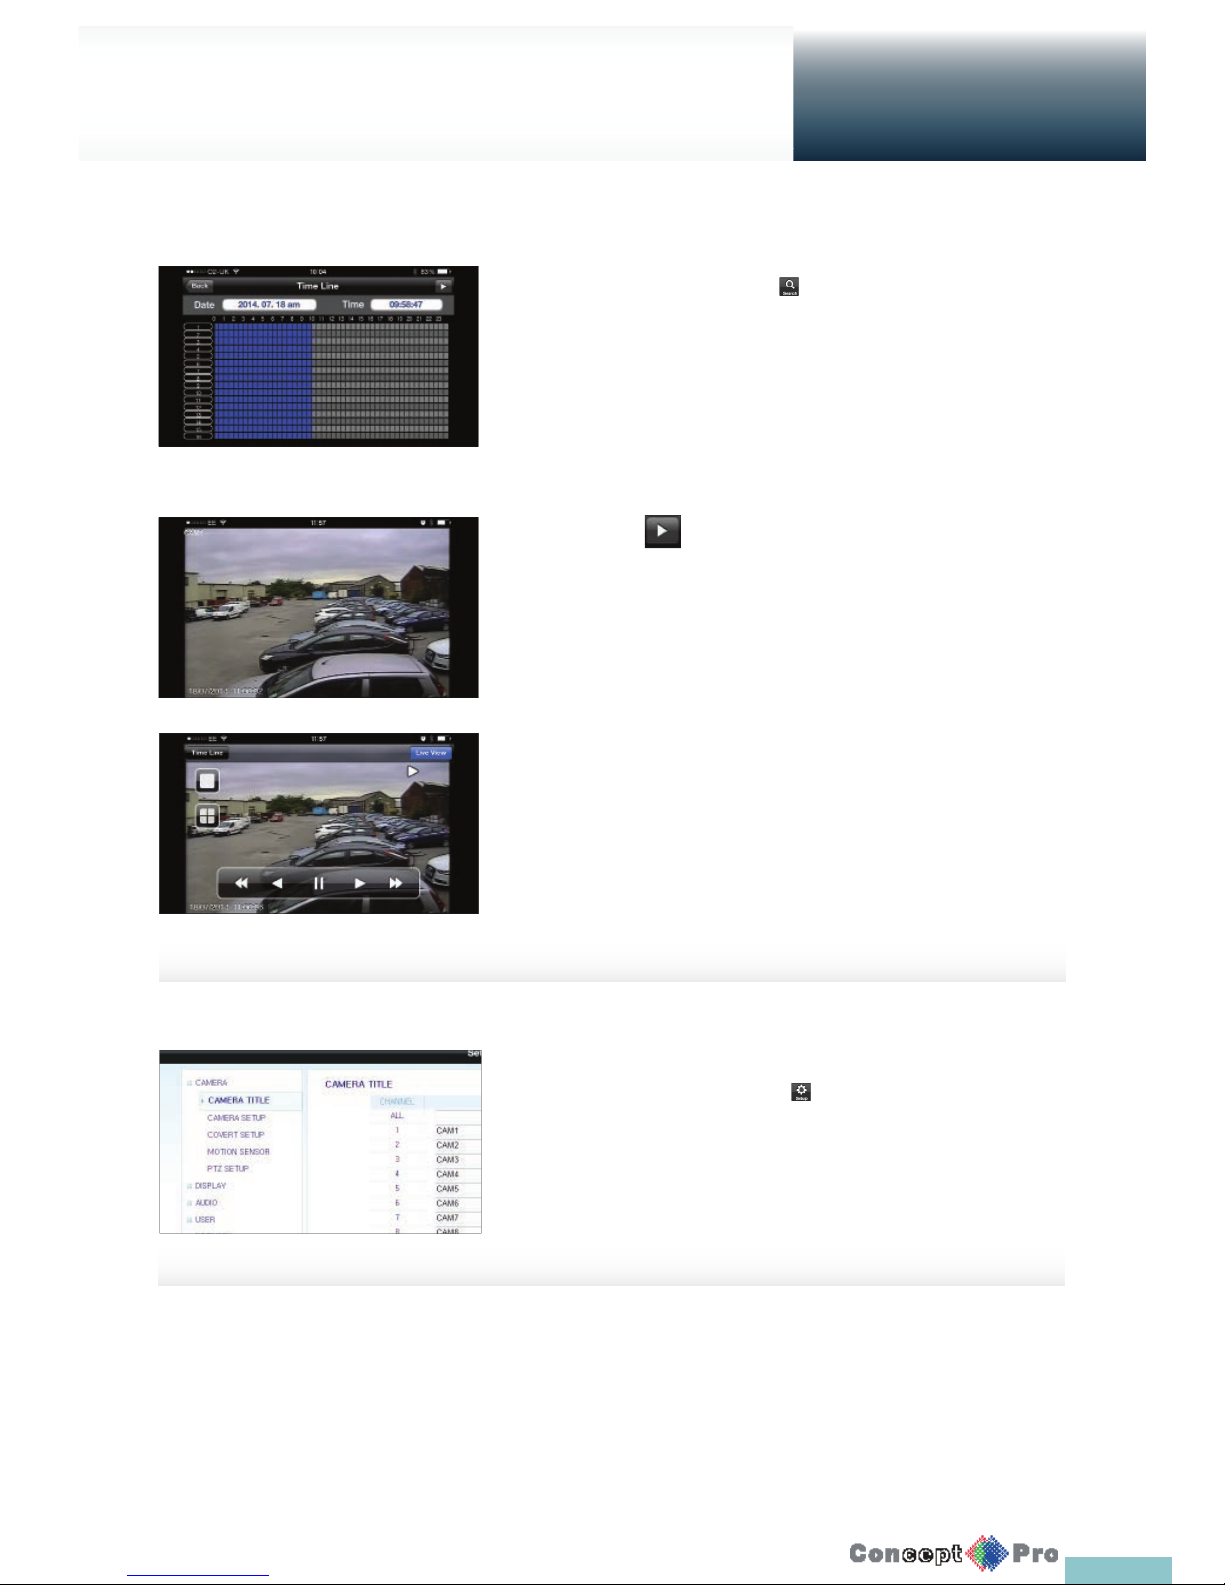
96
Using the Search function
1. From the main menu, Press < >.
You can view the history of the data stored.
2. Select a desired time and date.
You can use the vertical time bar to specify the start time.
3. Press < > to play the video recorded at the speci ed time.
4. Press any area to display the play bar with which you can
control the playing direction and speed of the video.
Using the Setup function
From From the main menu, press < >.
You will be connected to the web viewer site.
R For details about each displayed item, refer to “Setup”.
(page 76)
Setup
Mobile
Viewer
Page 100
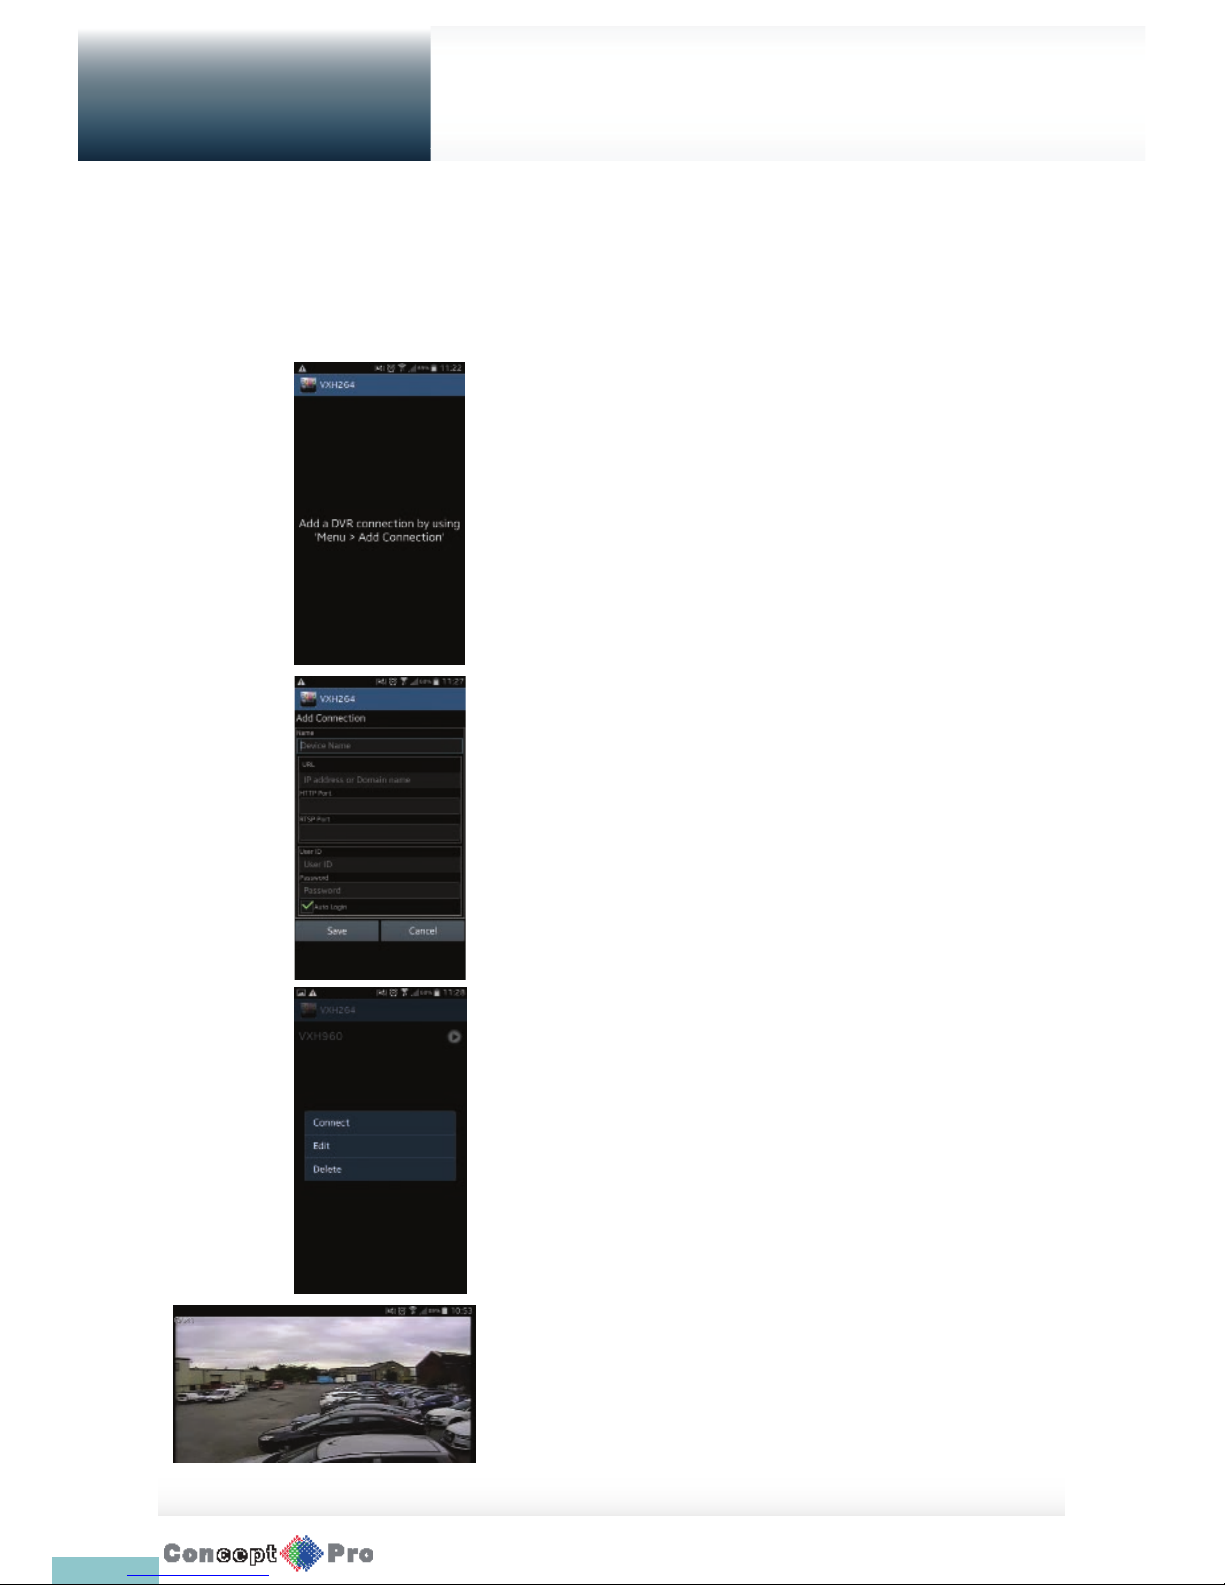
97
Setup
To connect to DVR with VXH264 Pro
1. Select and run the VXH264 Pro.
2. Use the Add button to select and add a site to the list.
3. Please enter a Name.
4. Provide the IP address, HTTP port number, RTSP port number, and
click <Save>.
5. Provide the access ID of the DVR as well as the password.
6. Select whether or not to save the ID and PW.
7. Press <Save>
8. Select the site that you added in the DVR List.
Press and hold the connection button to display the pop-up window.
9. Select <Connect> and try to access.
If connected successfully, you will see the screen as shown.
USING THE VXH264 PRO WITH ANDROID
How to download the Android-dedicated application
From your smart phone, access the Google Play.
Enter “VXH264” in the search bar to nd it. Downloading and install the application on your Smart Phone.
Mobile
Viewer
 Loading...