

Page 1
Mini Home Security camera
MODEL NO: WFA01
USER MANUAL
Please ensure that you read the complete user manual
carefully before using any part of the product.
- Keep this copy safe for future reference in case of
operational difficulties.
-
Page 2

- The camera should be used for legal purpose
only. Check and follow the laws provided in
your country regarding the use of camera and
other video recording devices.
- The Car Camera is NOT waterproof or dustproof,
so don’t use it outdoors, in adverse environments
or during rain.
- In order to avoid any damage to the device, the
risk of electric shock to you or starting a fire,
use original DC power supply.
- You are forbidden from doing any unauthorized
disassembling or dismantlement of this device,
or replacement of its parts. The device’s
manufacturer will not take responsibility or pay
liabilities for any loss caused by such actions.
- To avoid explosions, damages or bodily injuries,
never put this device into an oven, microwave
oven or direct fire.
- Owing to version changes, this user manual may
vary a little from our real product currently on the
market. In such a case, please take the standard
to be the real product.
- By following the above safety instructions, we
hope that it will be enjoyable to own and use this
product!
1
Safety Instructions
Page 3
2
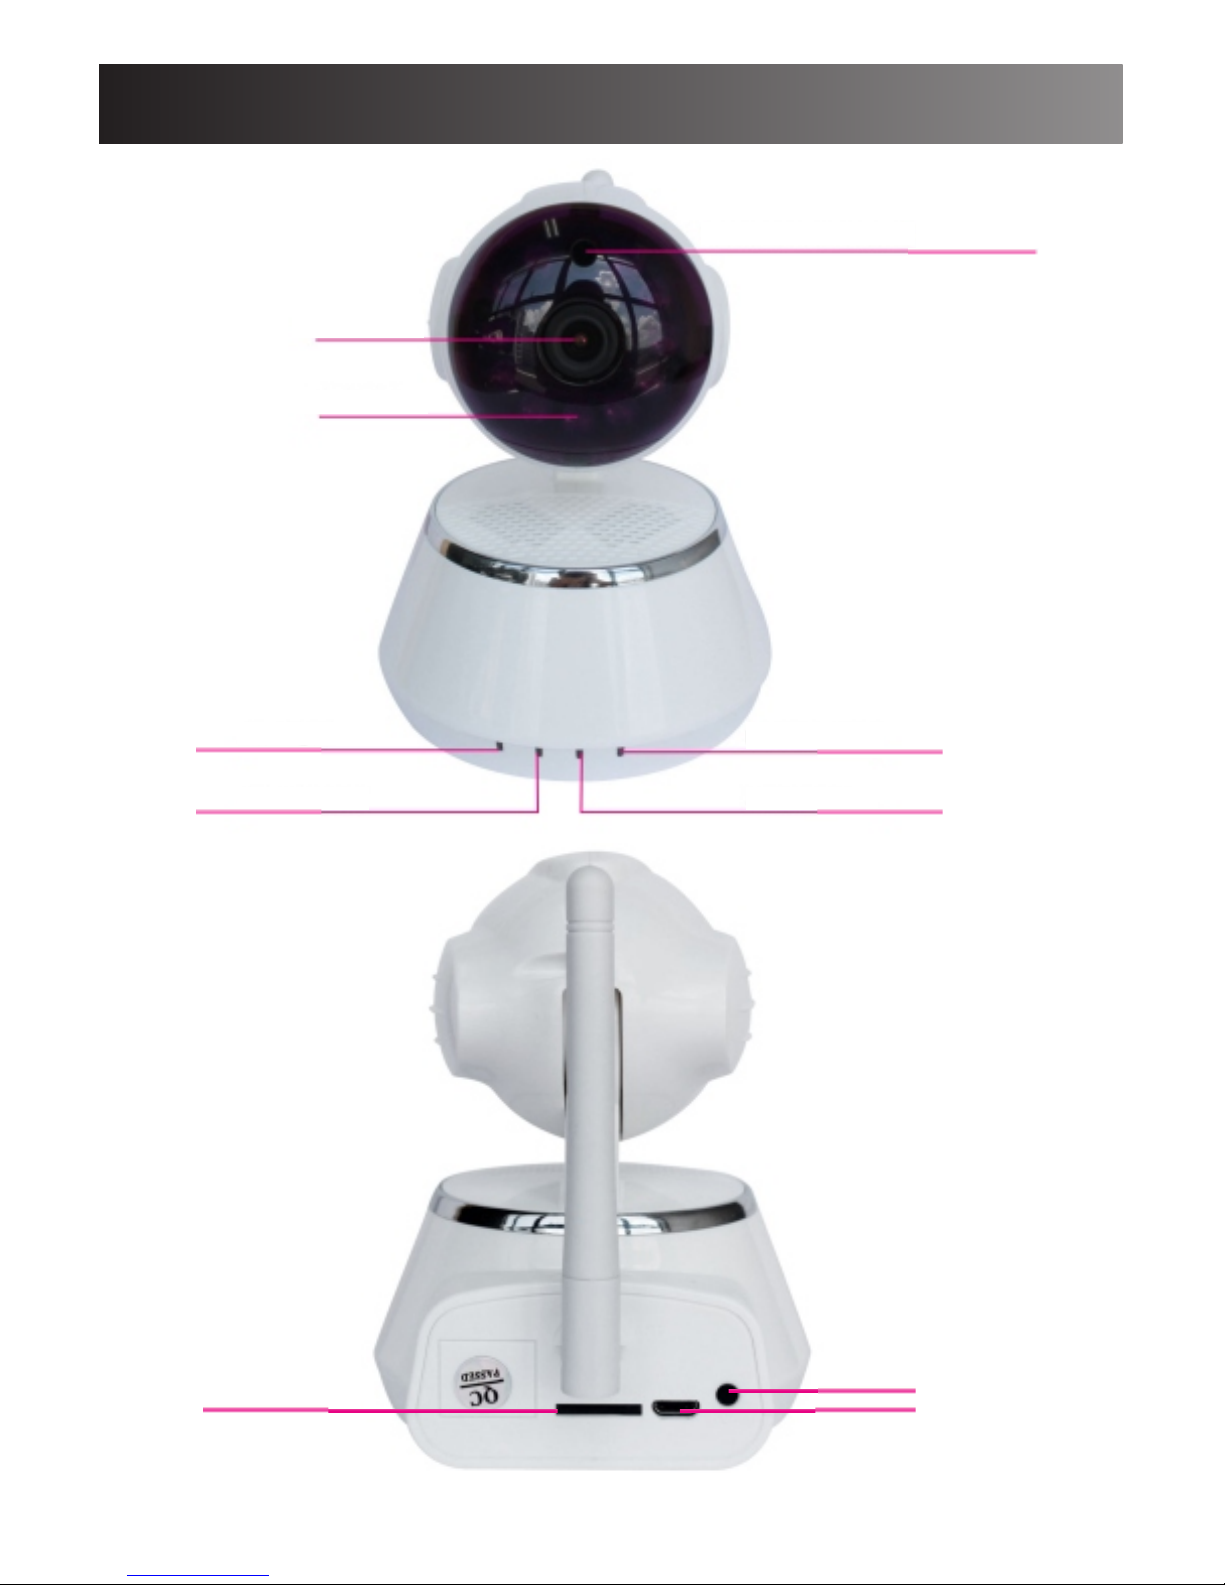
Structure
Record light
Array IR
Lens
Photosensitive sensor
Arm light
Alarm light
Network light
MICRO SD
IN 5V
Reset
Page 4
3
Quick Guide
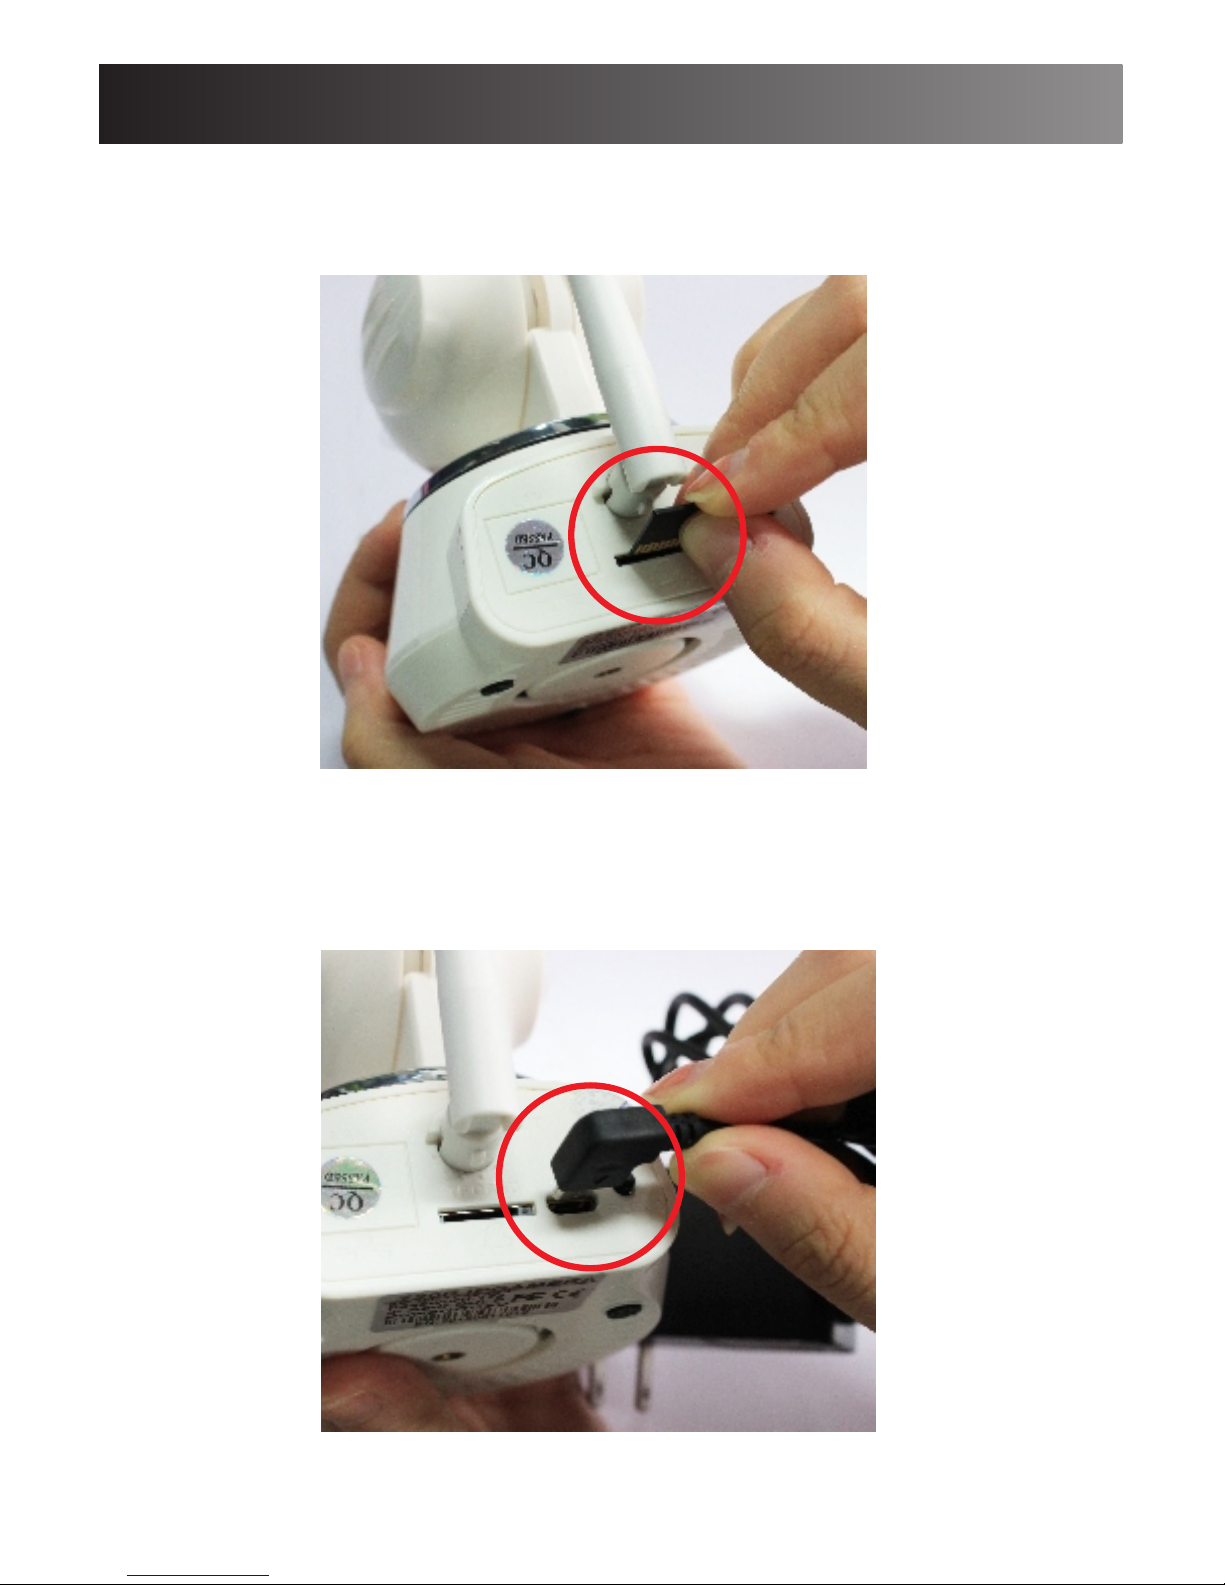
1. Insert the Micro SD card into the camera.
2.Power on the camera using the provided Adapter.
Page 5
4
Quick Guide
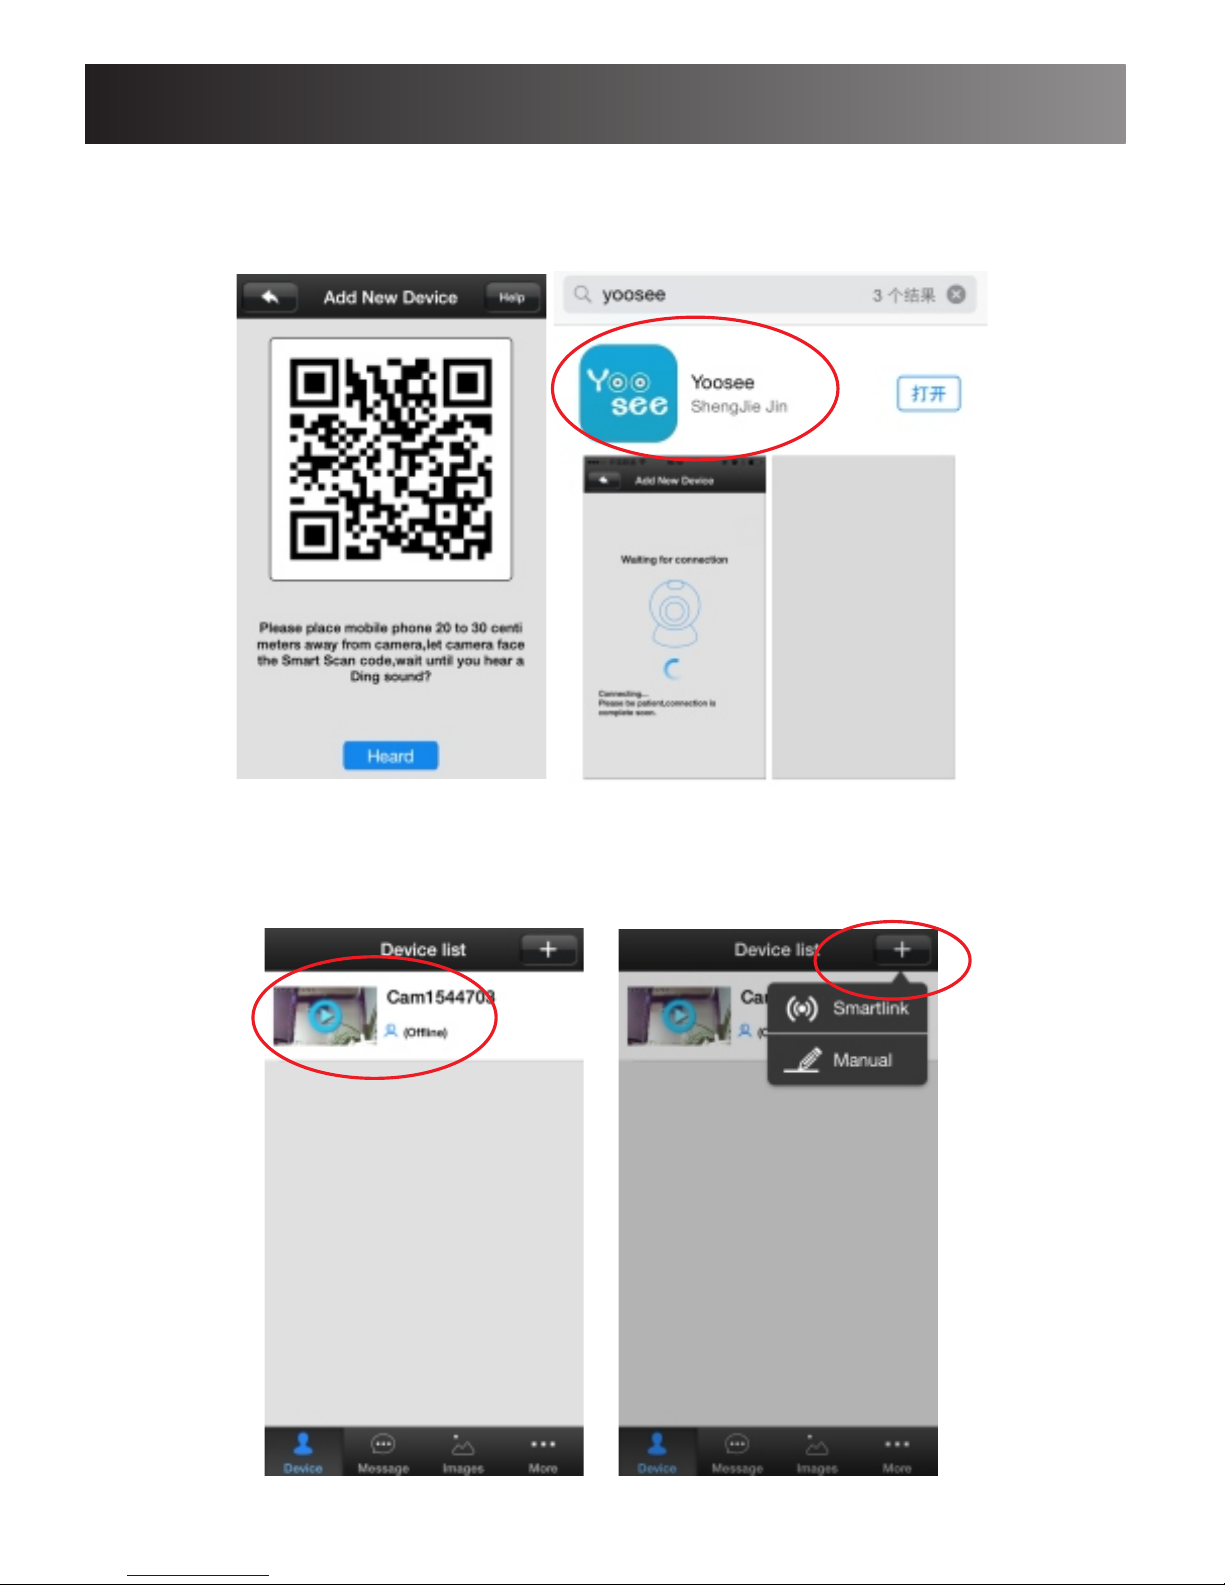
3.Down load APP : Yoosee from App store or google
play or Scan the QR code below.
4.Open the APP and Click on the “+” and then
click smartlink to add the camera.
Page 6
5
Quick Guide
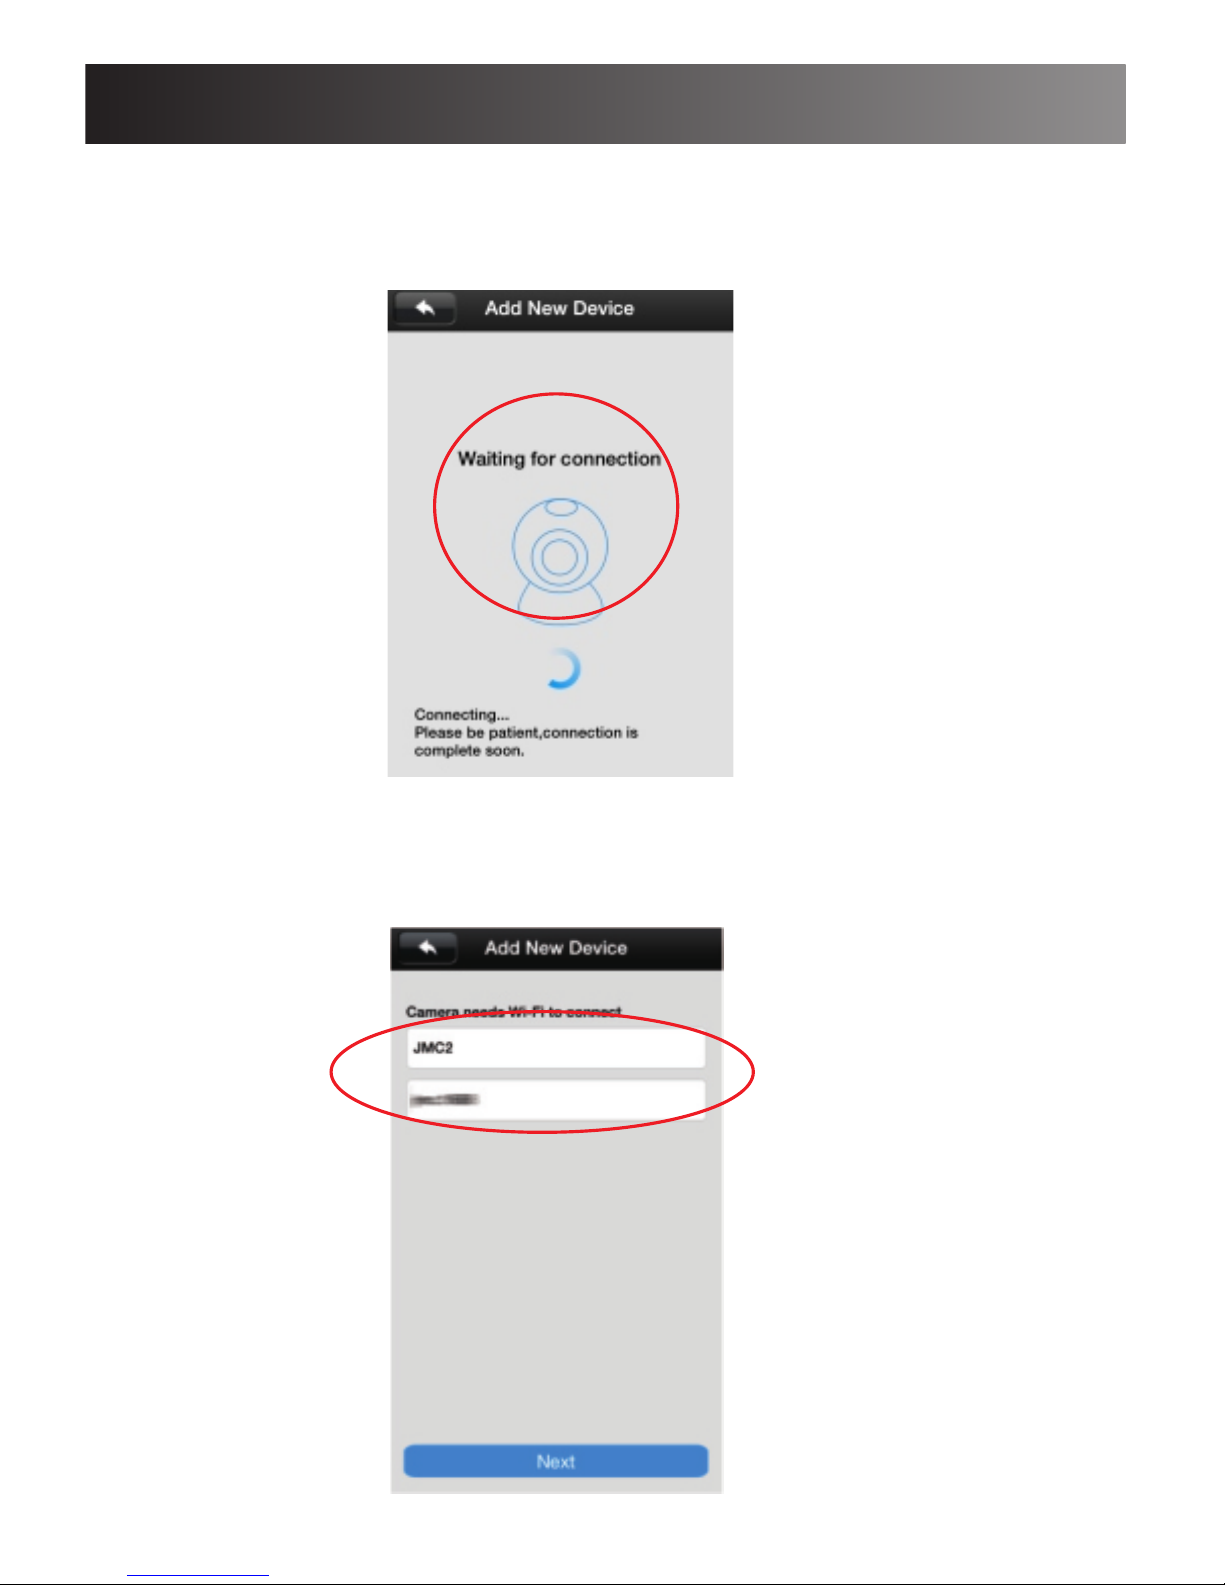
5.The camera will automatically recognize the
Wifi SSID which your mobile connected with.
6.Input the password and Click Next,Follow the
instruction to connect the camera with your wifi
network
Page 7
6
Quick Guide
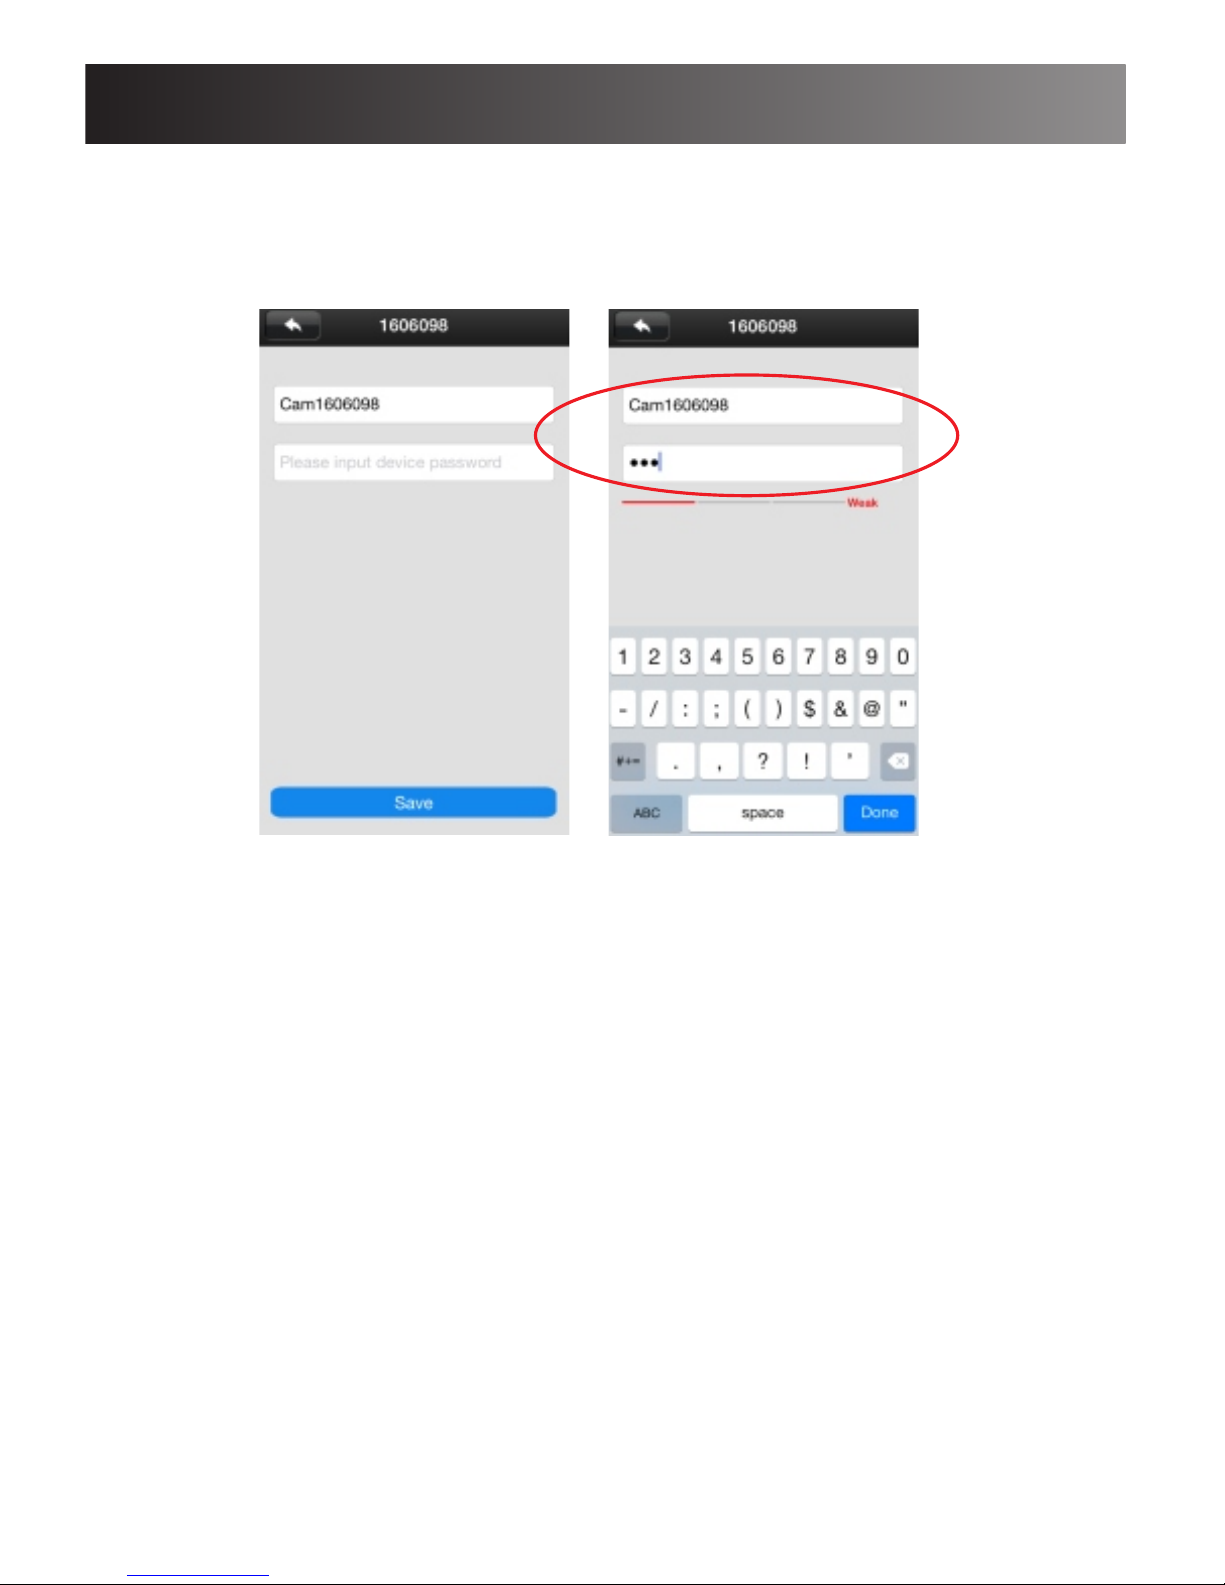
7.Waiting for the connection to be completed and
then input the camera default password: 123.
-Pls confirm your mobile wifi connection is 2.4G
WIFI,this camera doesn’t support 5G network
-If you can not set up the camera successfully.Pls
reset the camera and put the camera as near as
to your router.
Important Notice
Page 8

7
1.Enter "www.yoosee.co" in the browser,
download "CMS"
2.Set the user name and password, and add the
camera.
3.The default user name : admin password:
00000000. The user name and password for
remote access is same as the mobile APP.
Important Notice:
"CMS" support add a camera by LAN search, you
can also manually enter the 3C ID and password
to add the camera. 3C ID at the bottom of the
camera, it’s 7 Arabia digits, and the default
password is "123".
If you can not add the camera successfully,pls
move your camera as near as to your router to
try it again.
Computer User installation Quick Gude
Page 9
8
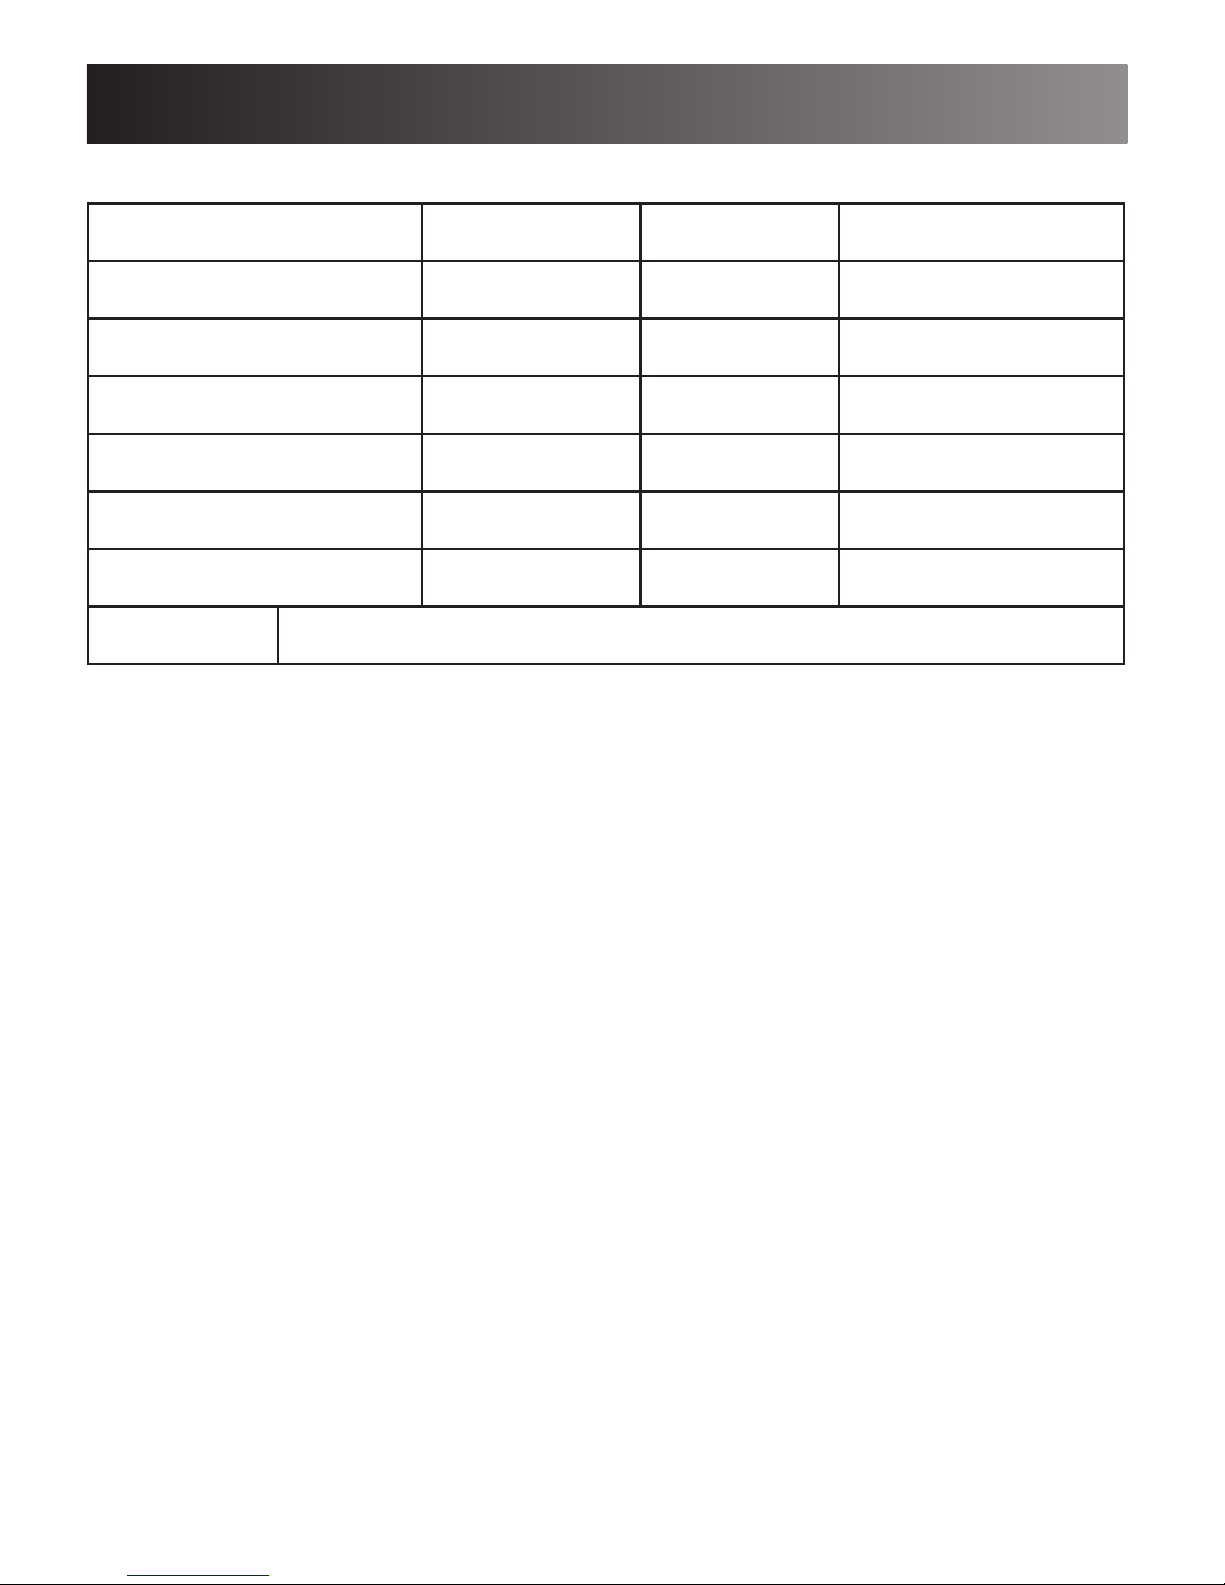
Indicator meaning
On F lashing Off
Alarm light Alarm ----- N o Alarm
Arm light Arm ----- Disarm
Network light Networking Monitoring No network
Record light Detect SD card Recording
Double color light(Blue) Networking Monitoring No network
Double color light(Pink) Detect SD card Recording
PIR Infrared detector (5 meters, enable this function in “Alarm setting”)
No micro sd card
No micro sd card
Page 10
9
Camera Menu Instruction
Open the APP,click on the camera icon on the left
side of the device list to access to the camera
monitoring screen.
Click the camera name in the device list,the menu
will show up as : Playback / setting / Edit”
1.Playback:
click the “playback “on the menu, it will play back
the videos in the SD card
2.Settings:
Set the camera functions and parameters
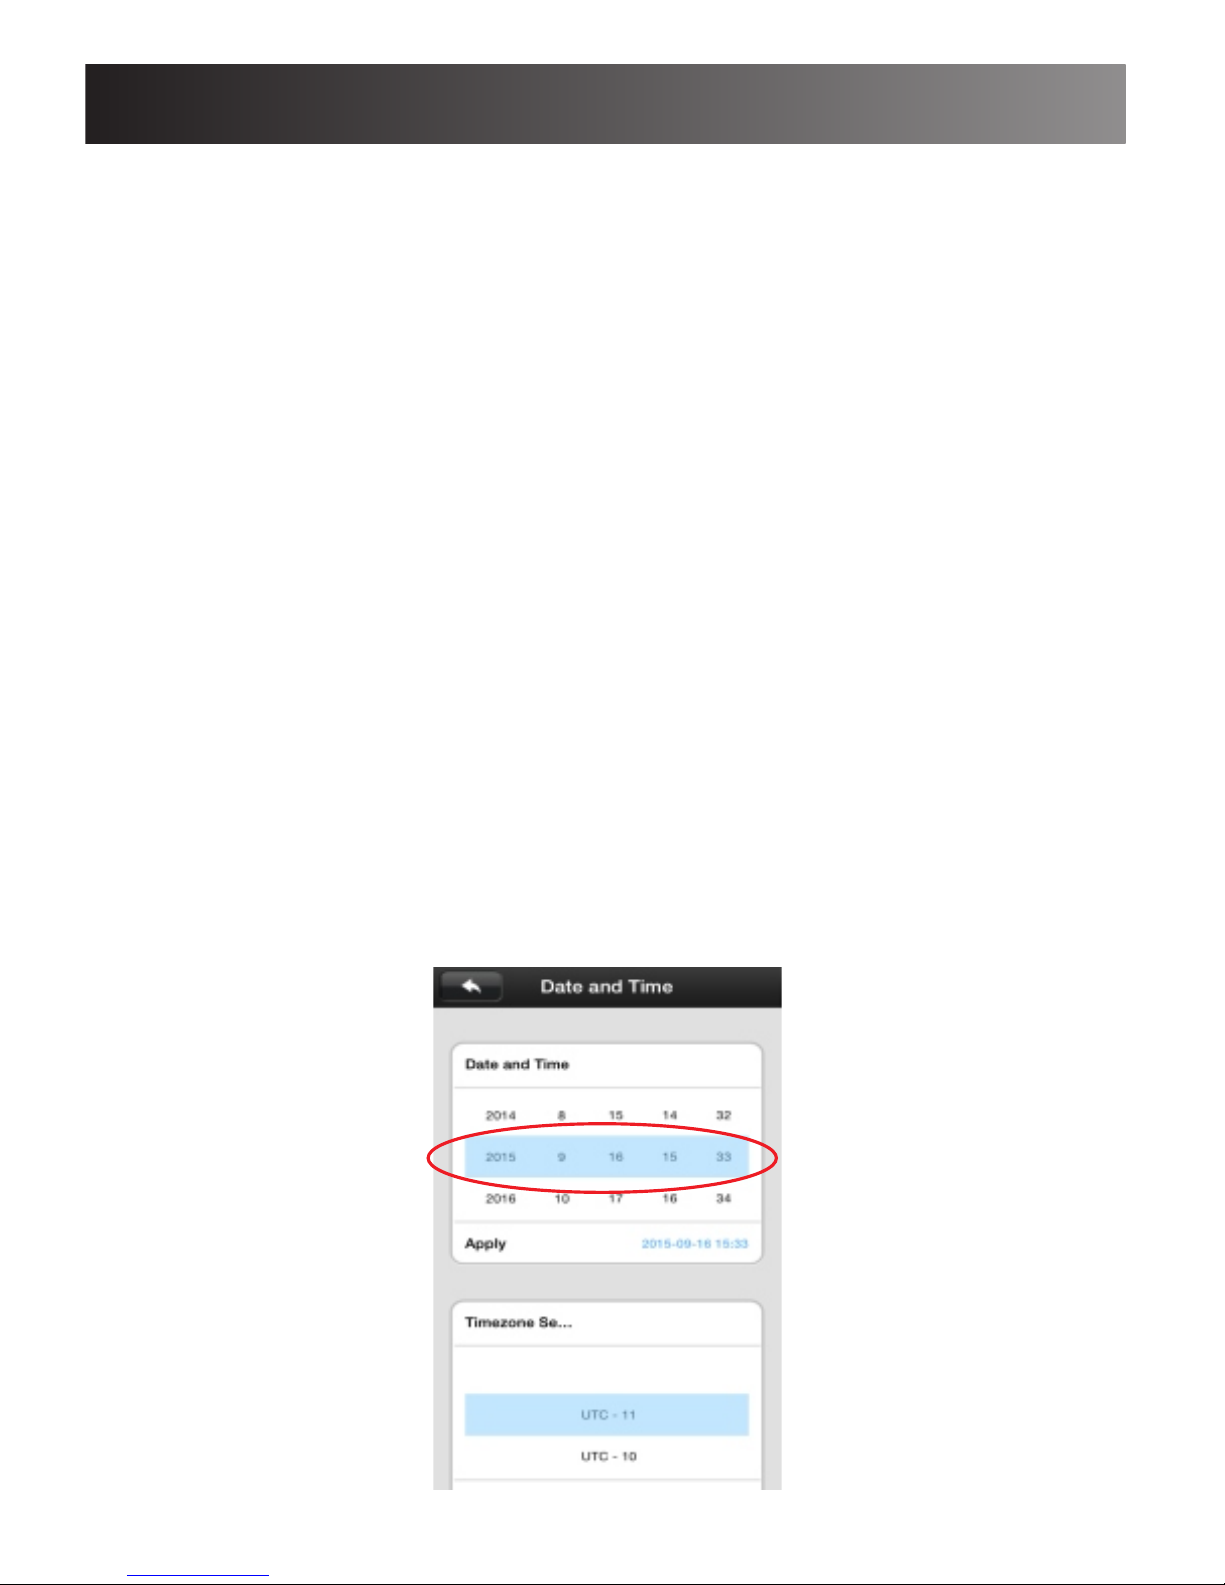
2.1) Date and Time:
Choose the right time and time zone and then
apply to enable the update.
Page 11
10
Camera Menu Instruction
2.2)Media Settings:
Set the proper video format and volume.
Set Image reverse : ON or OFF
2.3)Security Settings:
Set password to protect your camera to be
accessed by someone else.
Or Enable guest password to agree your guest to
access the camera.
2.4)Network Settings:
For this model,it’s defaulted as WIFI.
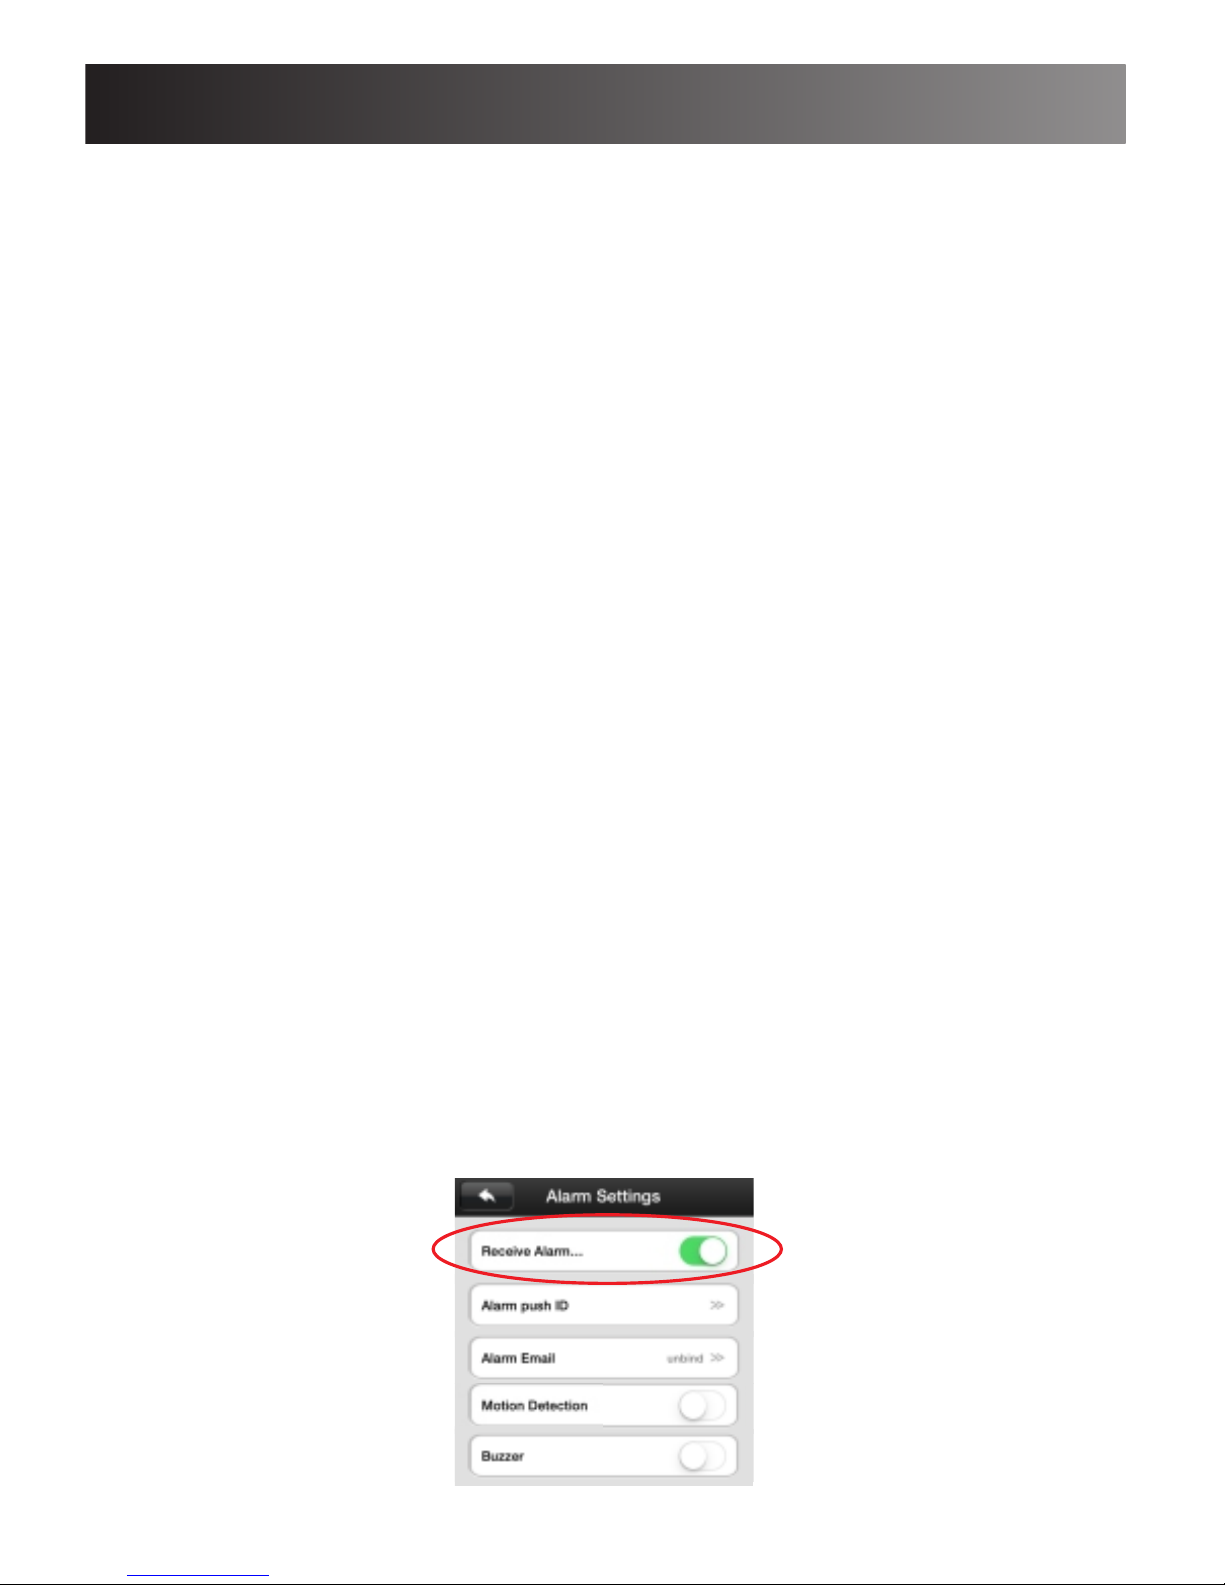
2.5) Alarm Settings:
Click the Lock icon on the right side of Device name
on the mobile APP (Yoosee).
After arming the alarm, the camera will send the
alarm signal to APP once any alarm triggered.
Meanwhile,send the captured picture to the alarm
push email address.
Page 12
11
Camera Menu Instruction
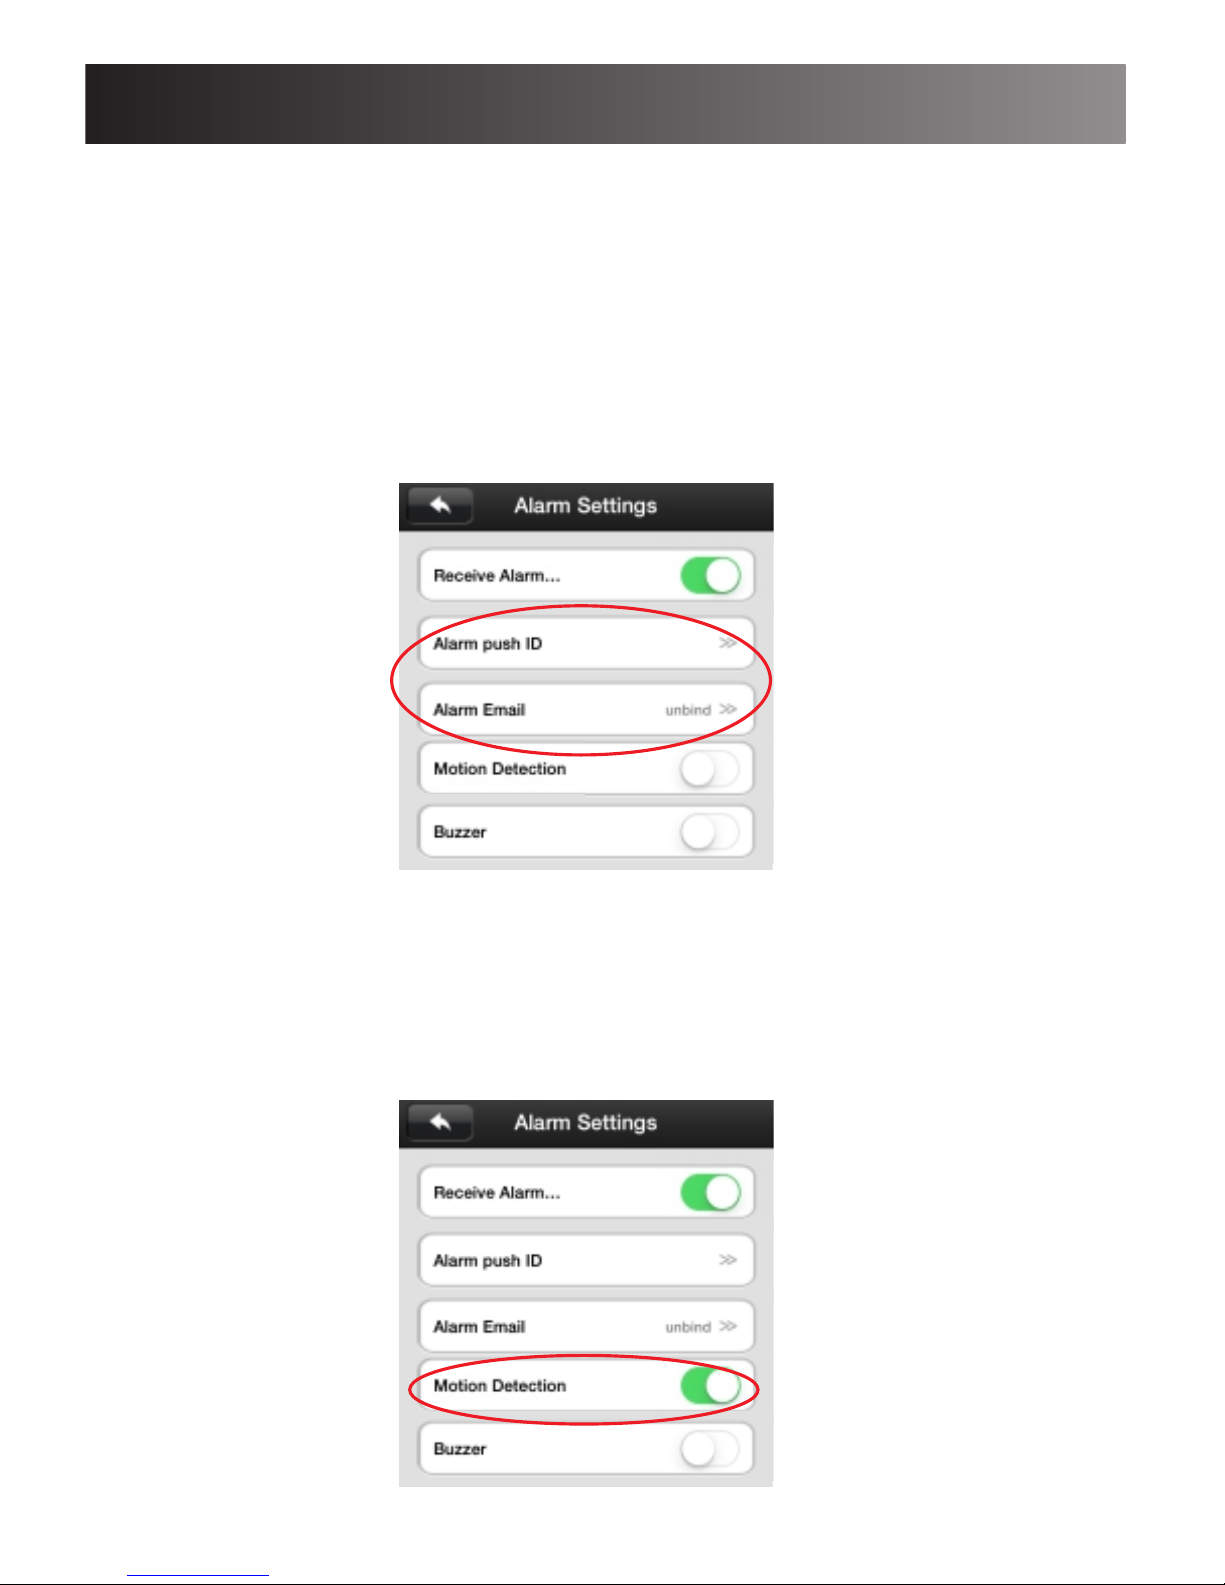
2.5.1) Set the Alarm push ID / Alarm Email :
Click the Device name on the APP, "playback /
Settings/ Edit" menu will pop up, then access to the sub
menu“setting/Alarm setting”. Then switch ON the
“Receive alarm message “ .And input the email
address to receive the alarm message on the “ alarm
Email”
2.5.2)Motion Detection:
Switch ON the “Motion Detection”. Then the camera
will send alarm message to your email set above once
any motion triggered.
Page 13
12
Camera Menu Instruction
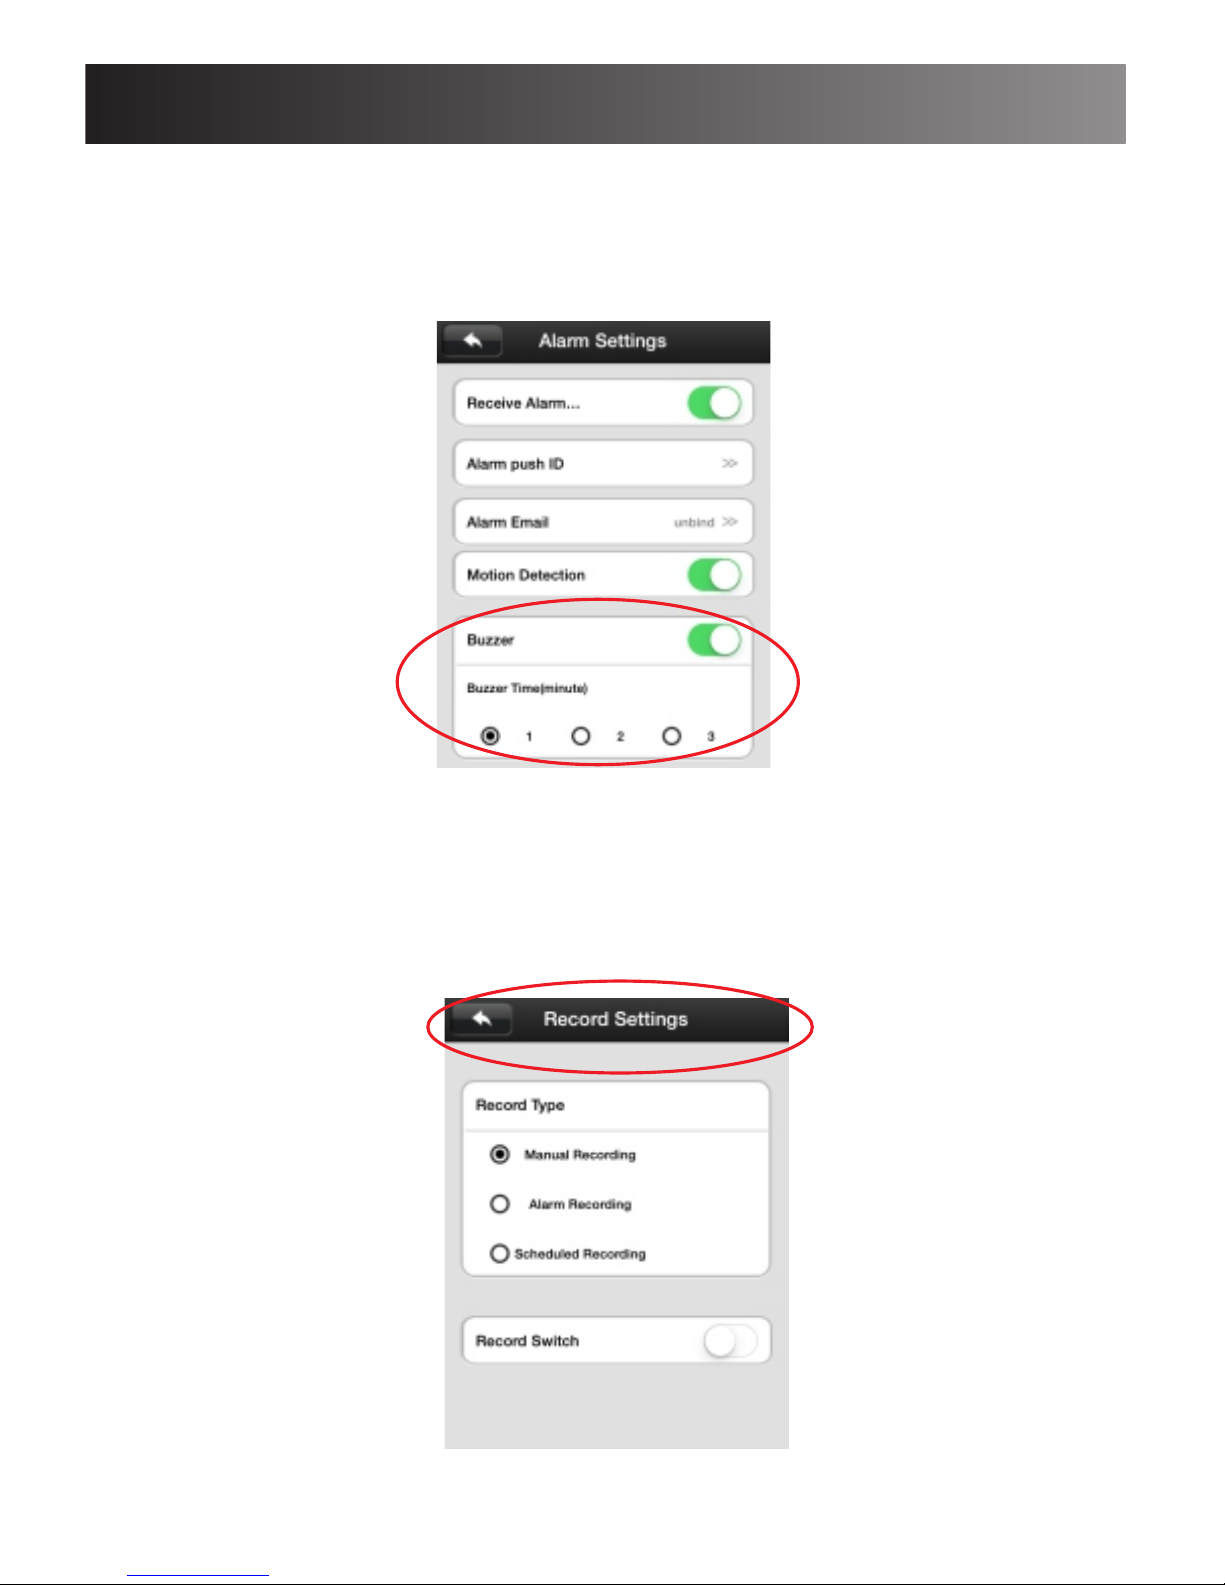
2.5.3) Buzzer:
Switch on the “Buzzer” to enable the buzz time for any
alarm triggered.
2.6) Record Settings:
Choose the record type and Enable the record or not by
switch on the “Record Switch”
Page 14

13
Camera Menu Instruction
2.7) Defense Area Settings:
This model support 433MHZ defense setting.
2.8) Storage information:
Check the micro sd card information or format it.
2.9) Device Update:
Click to update the camera to be latest.
Page 15

14
Reset to default
Reset will clear all the setting: include WIFI ,
password, alarm setting, etc.
Operation as below:
Press the RESET button on the bottom of the
camera. After hear the sound of “Di-”,press
another 3 seconds till heard one sound ”reset to
default setting…” . All the indicators turn on ,
means the camera RESET successfully .
 Loading...