

Page 1
- Please ensure that you read the entire User Manual
carefully before using any part of the Starlight Mini-PIR
Camera.
- Keep this copy in a safe place for future reference or in
case of operational difficulties.
User Manual
WORLD'S FIRST
Starlight Mini-PIR Camera
Page 2

General Overview
2
This User Manual is specifically meant for the Starlight
Mini-PIR Camera.
The Mini-PIR Camera features a maximum of 1 year
battery stand-by when fully charged. This provides
many hours of capturing any motion around the clock.
Connecting the Camera to an external separate power
source enables it to record for months without turning
it on or off.
The Camera's small size enables the user to place it
in any favorable location or position.
Main Features
-The Camera has a High Definition (HD) PIR feature
for accurate motion detection and video recording
ability.
-The Camera has the ability to record people movement
perfectly without distractions.
- The Camera's small size makes it easy to conceal in
many locations.
- It has easy to use features. As an example, motion
detection recording is activated with a single press of
the MD button.
The PIR feature is a passive infrared sensor
that measures infrared (IR) light radiating from
objects in the camera's field of view.
-The rotating Camera lens and LEDs allow you to rotate
the lens for greater placement options. The PIR
detector must not be covered or it will not be able to
detect motion.
Page 3

General Overview
Important Notice
- Please read the entire User Manual before using the
Starlight Mini- PIR Camera.
- Test your selected placement and angle, by recording
and playing back a video in advance. This ensures
you will capture the visual you want.
- Please do not use this Camera for illegal purposes. It
is important to follow the laws in your country/state.
- We cannot be responsible for missing any video record
due to incorrect operation, Micro-SD malfunction or
Camera angle limitations.
3
Page 4
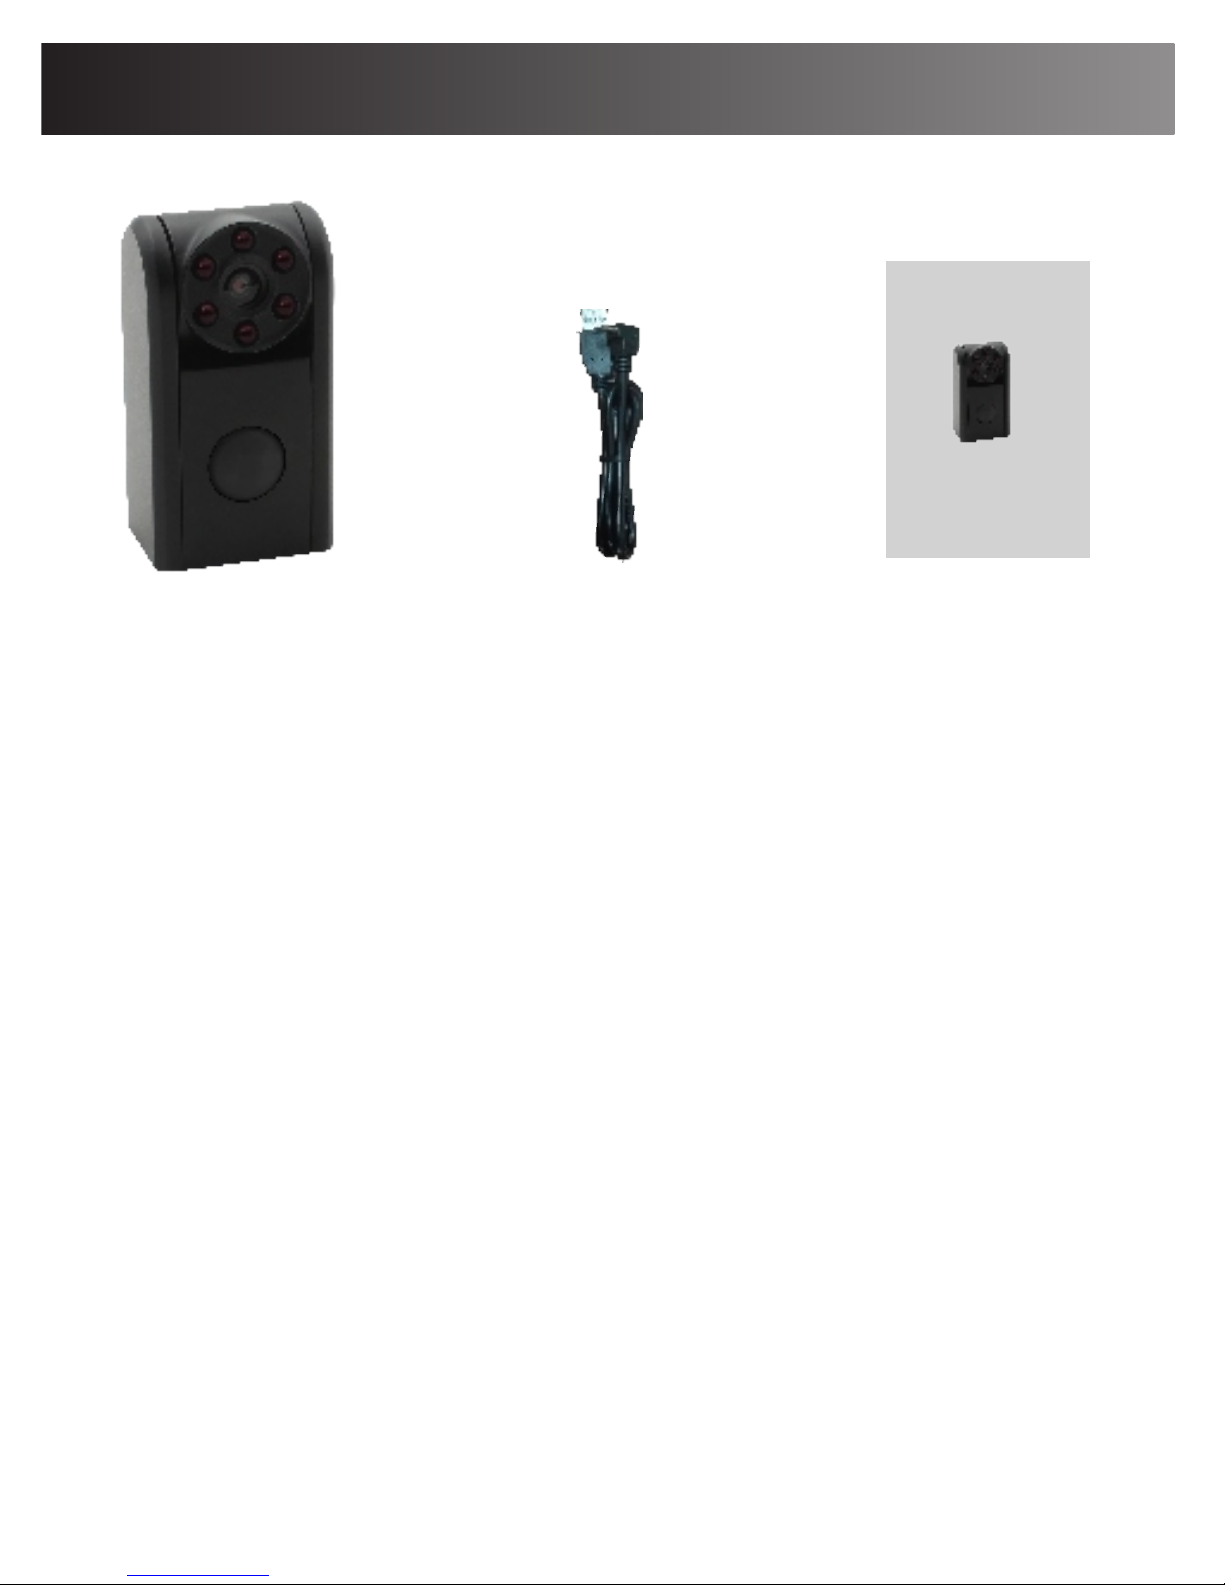
Note: If there is anything missing, please contact us
immediately at [email protected]. Not included
are a power adapter, a Micro-SD card and a card
reader. The power adapter, Micro-SD card and reader
are needed for charging the Camera and for recording
and viewing videos.
Product Accessories Included
4
USB cable
Manual
Camera
Ple ase en sure t hat y ou rea d the c ompl ete u ser ma nual
car eful ly be fore u sing a ny pa rt of th e pro duct .
- Kee p this c opy s afe fo r fut ure re fere nce i n case o f
ope rati onal d iffi cul ties .
-
Use r Manua l
WORLD' S FIRST
Starlight mini camera
Page 5
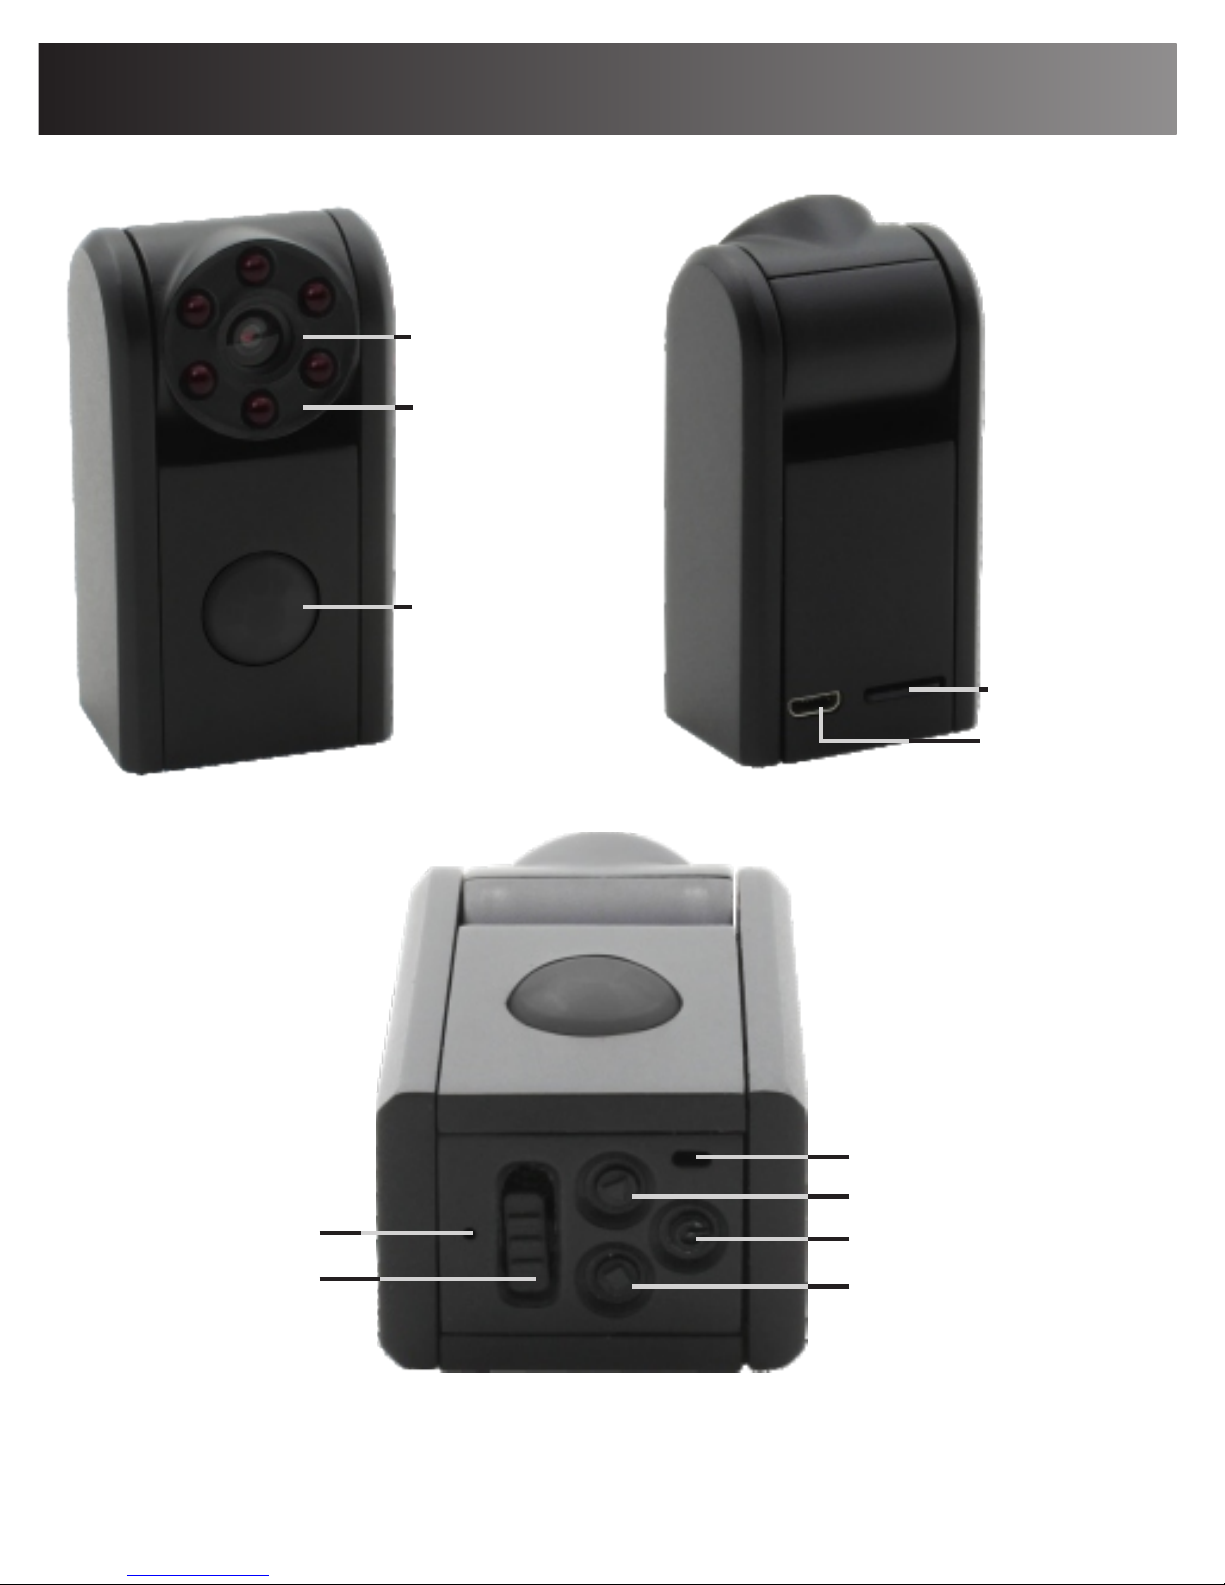
Product structure
5
LED
Camera lens
PIR
Micro-SD
USB
Indicator
Audio(on/off)
Recording
MD
Reset
Power
Page 6
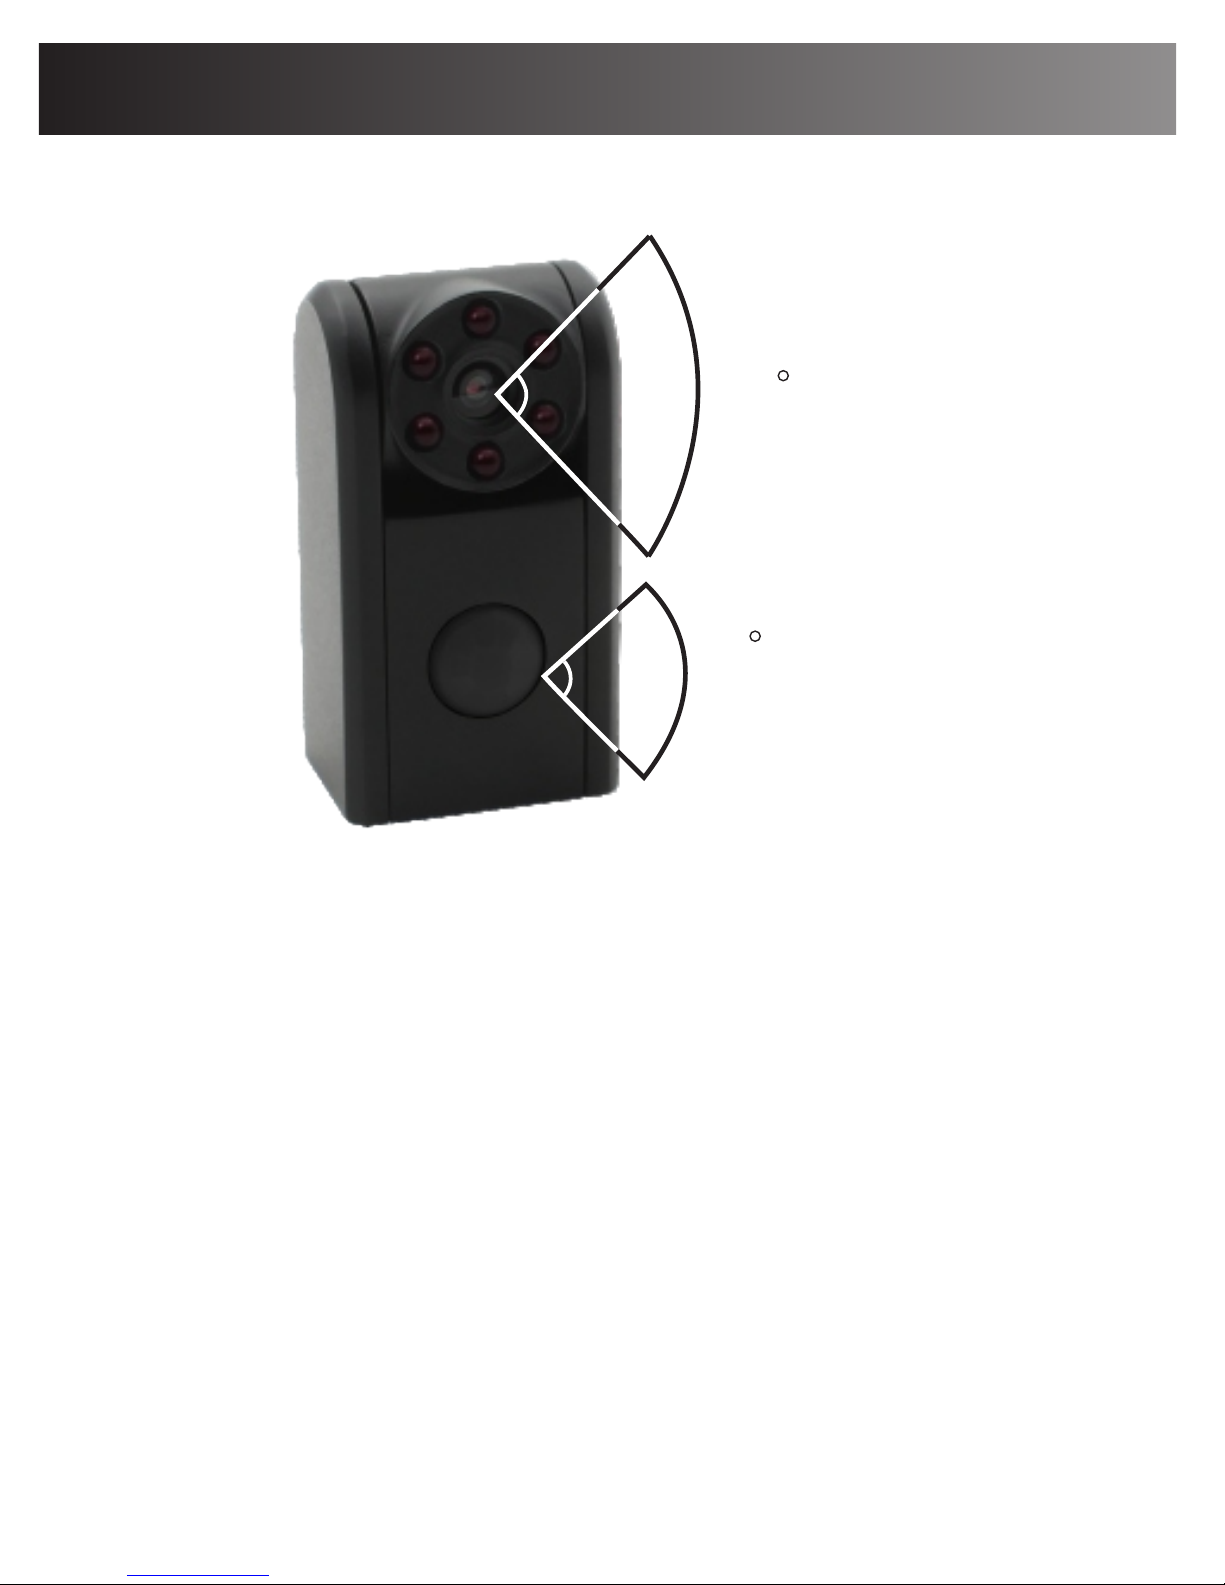
Detection Ability
Important Notices:
- When using the Camera, it should be placed in a
perpendicular direction relative to the people passing by.
- Avoid using the Camera in extreme temperatures that may
reduce the motion-detection accuracy.
- Once the fully charged Camera is switched to MD (PIR
motion detection mode), at each activation, there will be
about 1.8 seconds delay before recording starts.
PIR angle 60 degrees.
Camera angle 120 degrees.
Motion detection distance: 5-8 meters or nearly 16
to 23 feet.
6
Camera angle
120
Detection angle
60
5-8 meters
MODE 1: PIR motion detection and record
Page 7
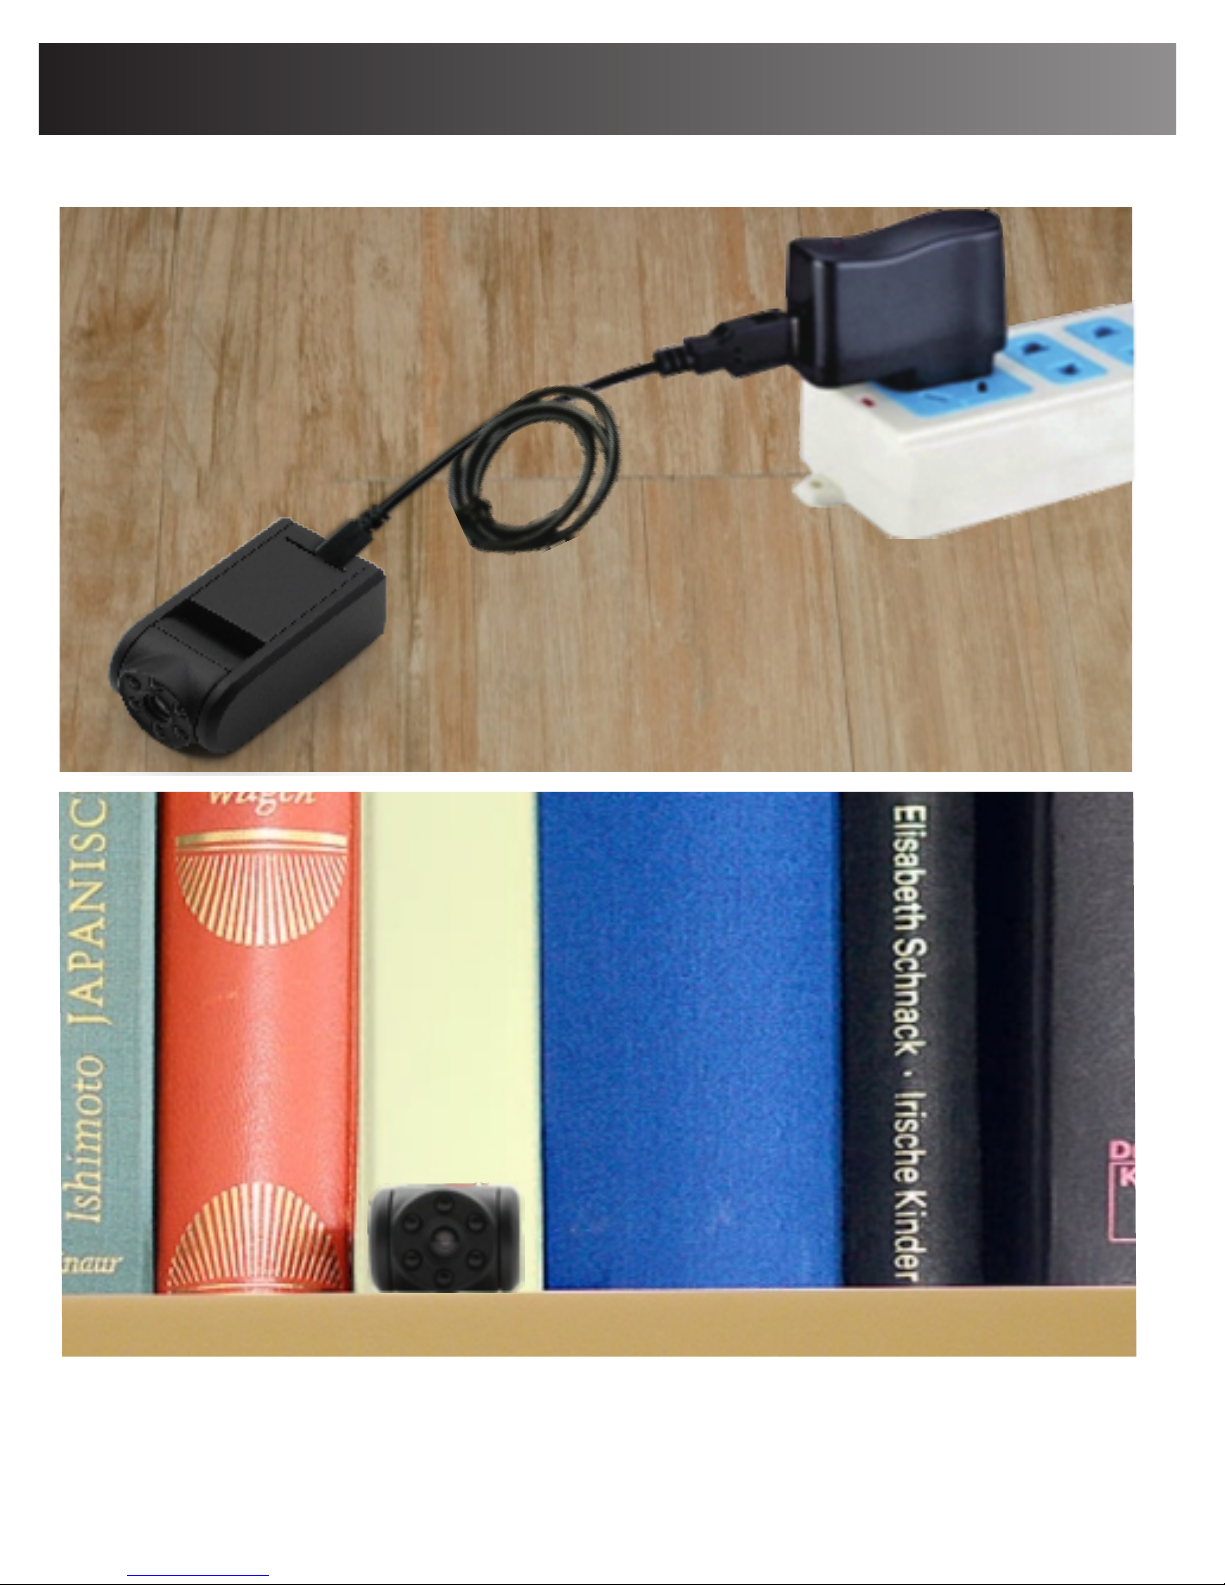
MODE 2: Continuous recording
Connect the USB power adaptor to a power adaptor
for continuous recording. See power adaptor
recommendations below.
7
Detection Ability
Page 8
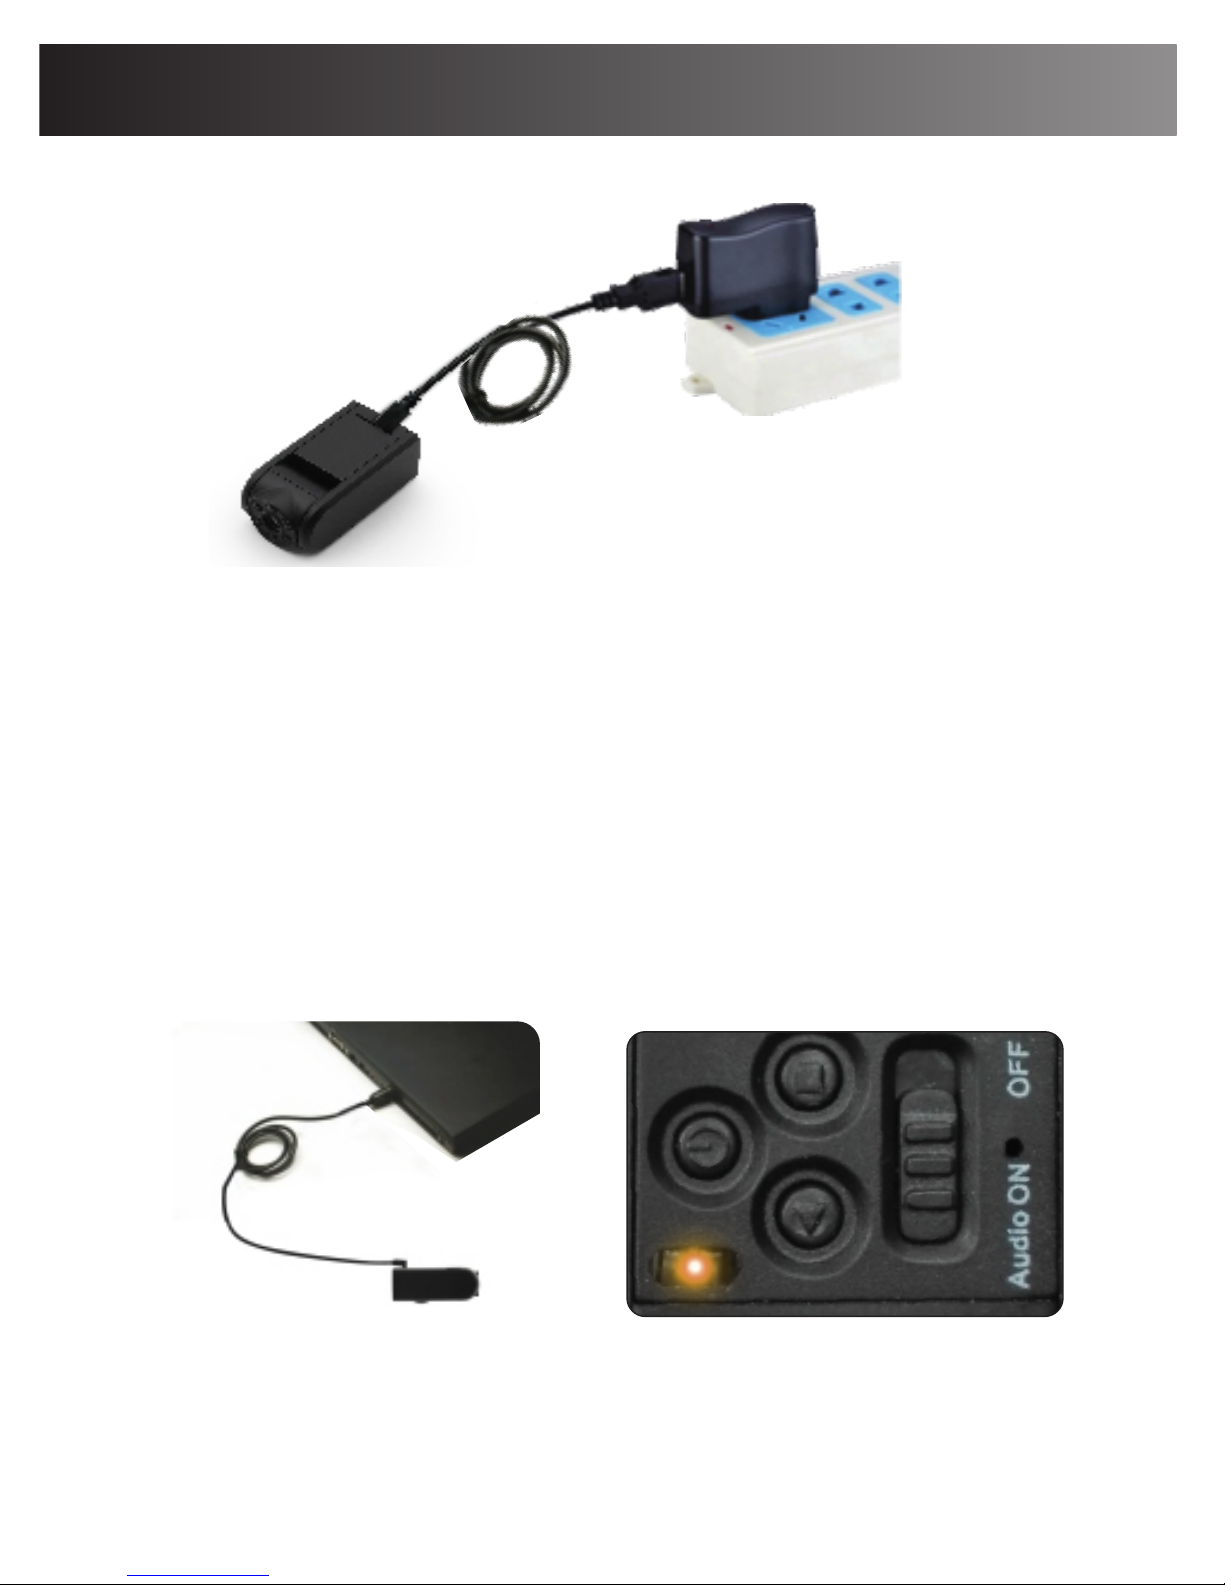
Charging Information
It is recommended to use a 2A USB power adaptor when
using the USB cable provided in the original package.
- If there is not sufficient battery power, the red and blue
LED indicators will flash for 10 seconds and the Camera
will power off automatically.
- During charging, the yellow LED indicator will be on.
When the Camera is fully charged the yellow LED will
go off.
2.Charging the Camera with a PC.
It is recommended you turn Off the Camera during charging.
During charging, the yellow LED indicator will stay on. Once
it is fully charged, the yellow LED indicator will go Off.
1.Charging using the adapter
8
Page 9
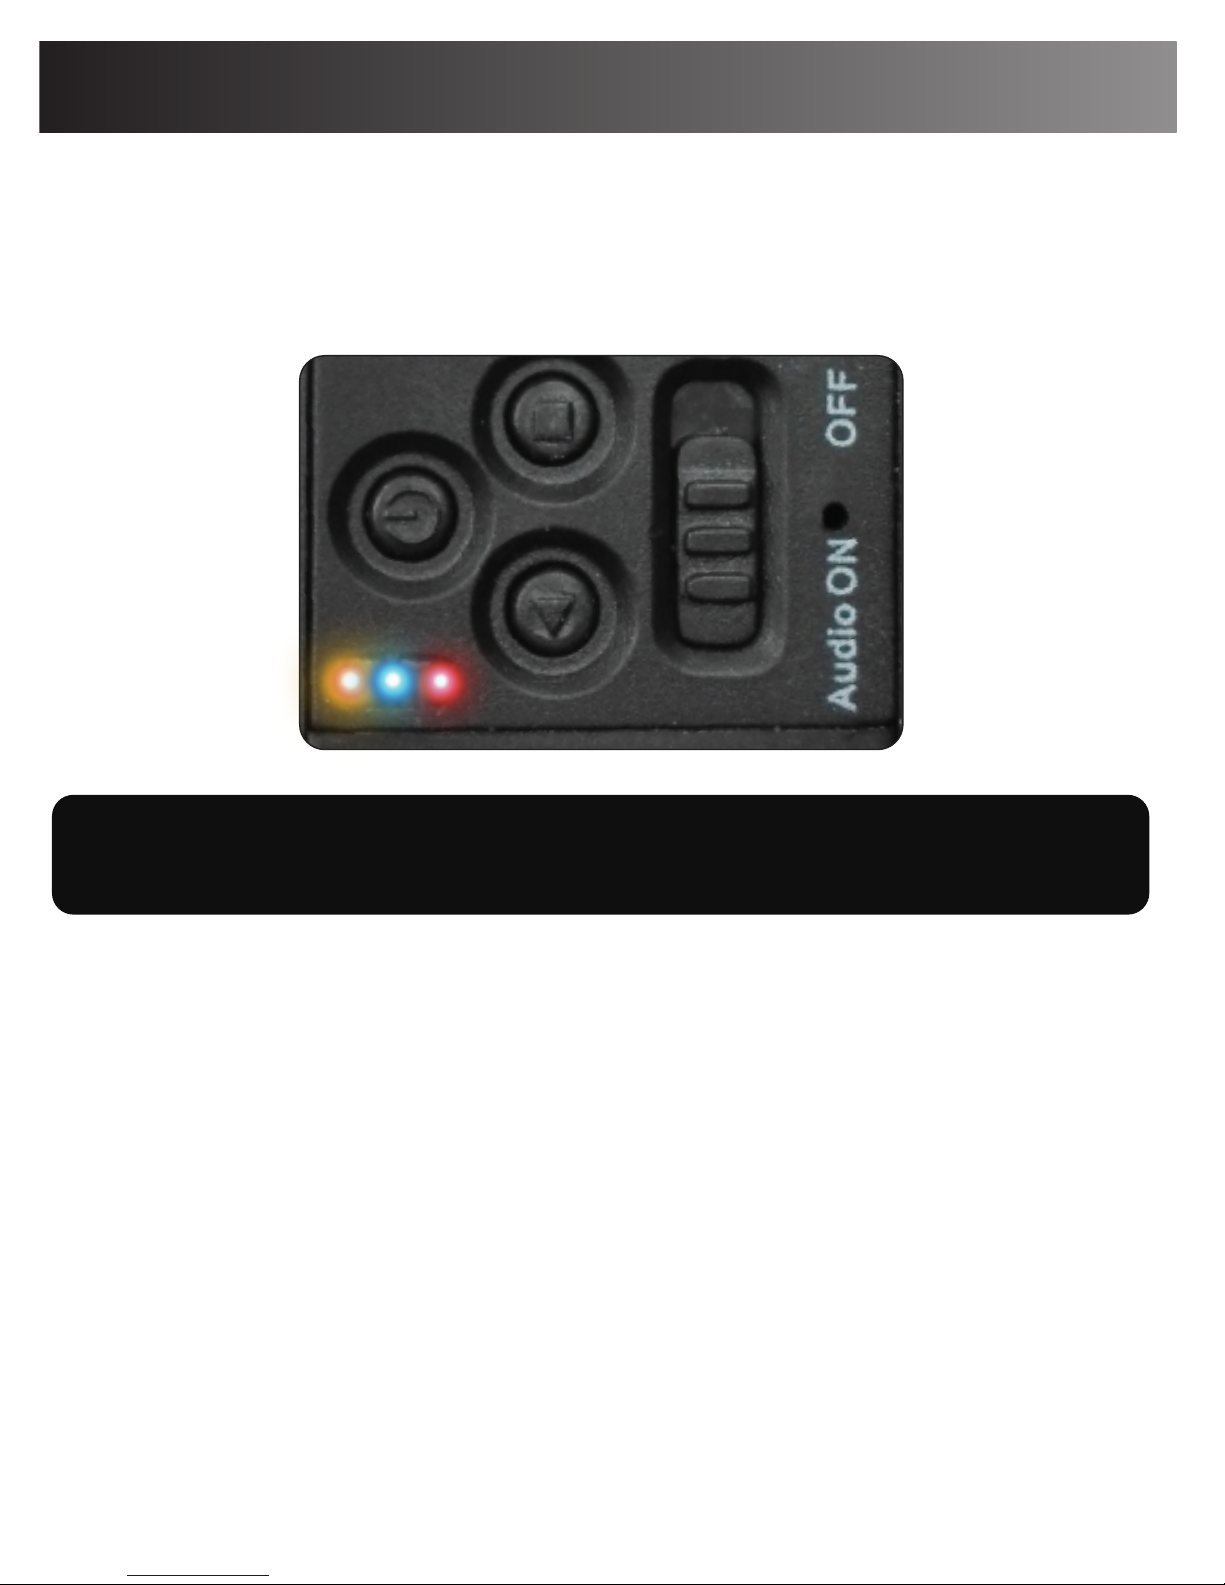
Charging Information
9
3. Connect with your PC as a U-disk
Please turn on the Camera first, then connect the Camera to
your computer via the USB cable.
The yellow and blue LED indicators will stay on, the red
LED indicator will flash.
Page 10
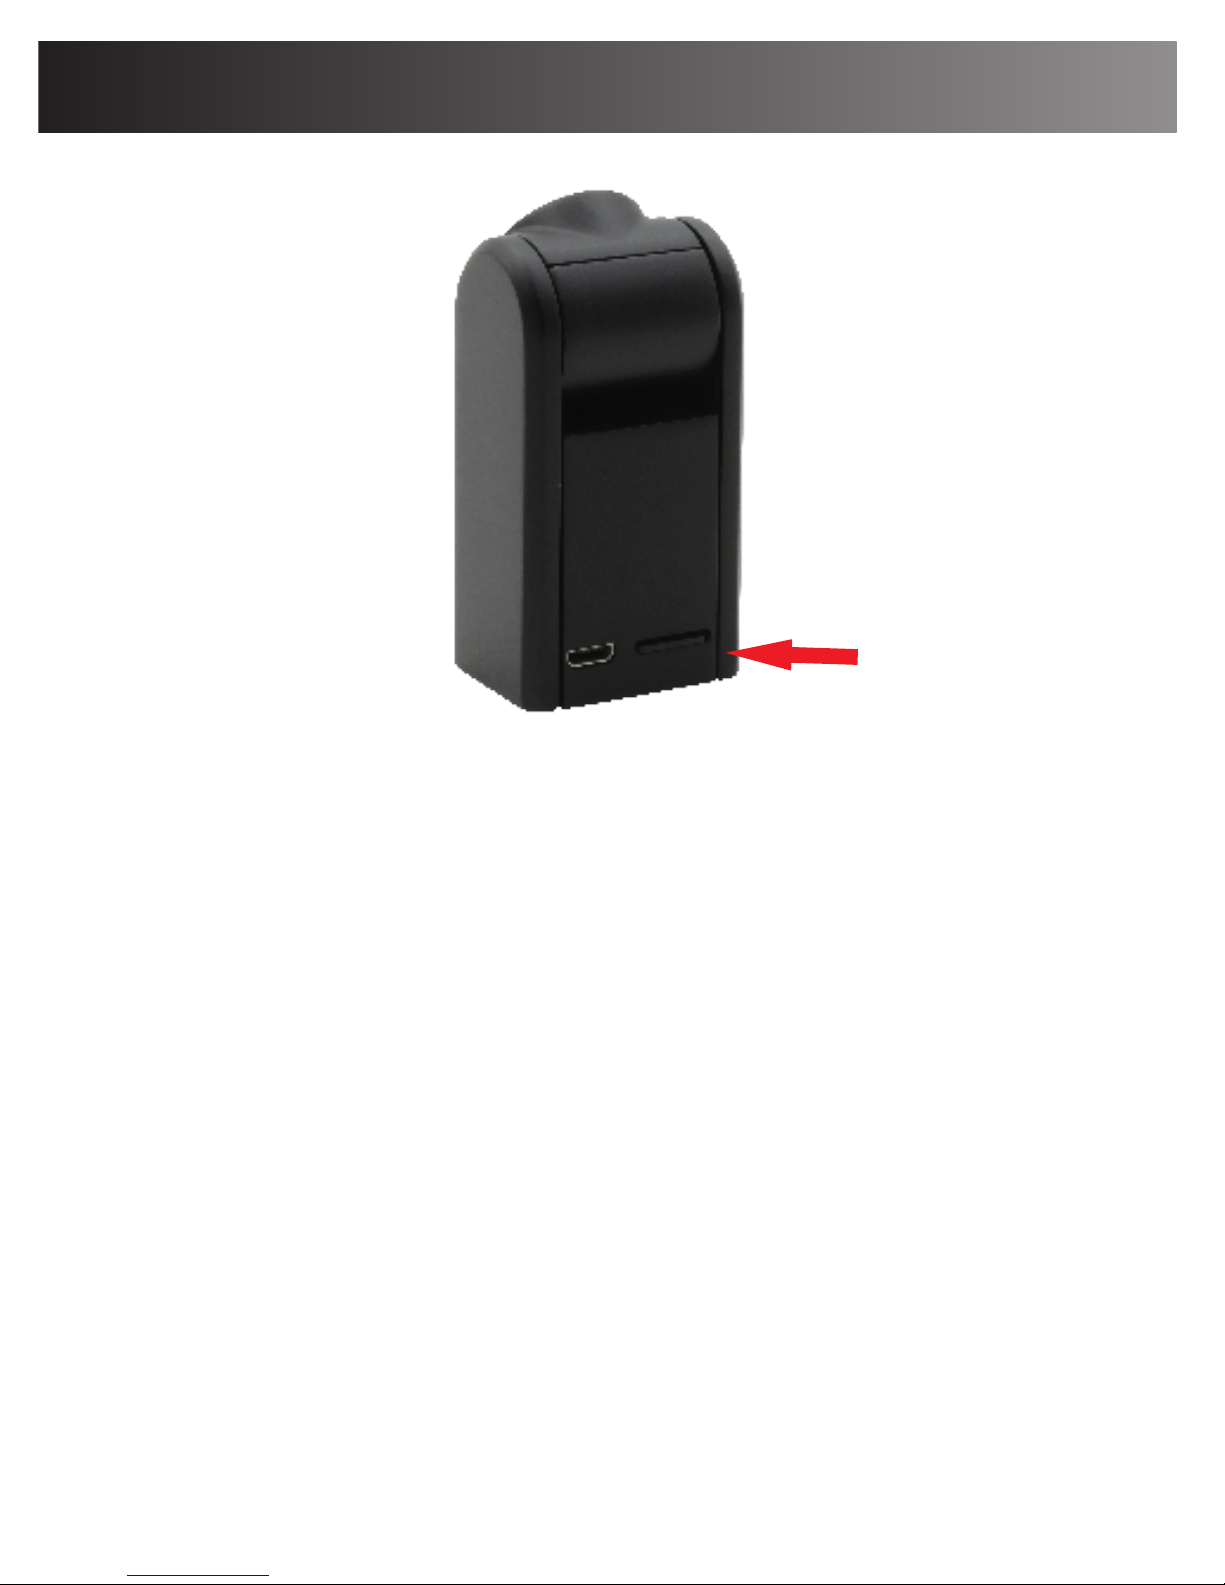
How to insert and take out Micro-SD card
Installing the Micro-SD card: Please insert the
Micro-SD card correctly into the Camera card slot.
The Micro-SD card must be in the slot to record video
and audio.
Removing the Micro-SD card: Please use your
fingernail to push the card slightly into the slot until it
“sets”. When you want to remove the Micro-SD card,
use your fingernail again to lightly push in on the card
and then the card will pop out automatically.
DO NOT remove the Micro-SD when the camera is
either powered On or when it is connected to a
computer. This can cause damage to the Micro-SD or
the entire camera.
Insert Micro-SD card
10
Page 11

How to insert and take out Micro-SD card
is either powered ON or connected to a computer. This
may cause damage to Micro-SD or the entire camera.
- Please ensure that minimal effort is applied to the
Micro-SD when inserting it in or removing it from the
Camera. Use of force may damage the Micro-SD or
the product parts.
- Before using the product for the first time, ensure that
the Micro-SD is formatted. Please check for any saved
data in the Micro-SD to avoid unexpected loss.
Conbrov is not liable or responsible for malfunctions
that result from failure to follow these directions.
11
The Camera records video only when Micro-SD is
inserted.
- DO NOT insert or remove Micro-SD when the camera
Page 12
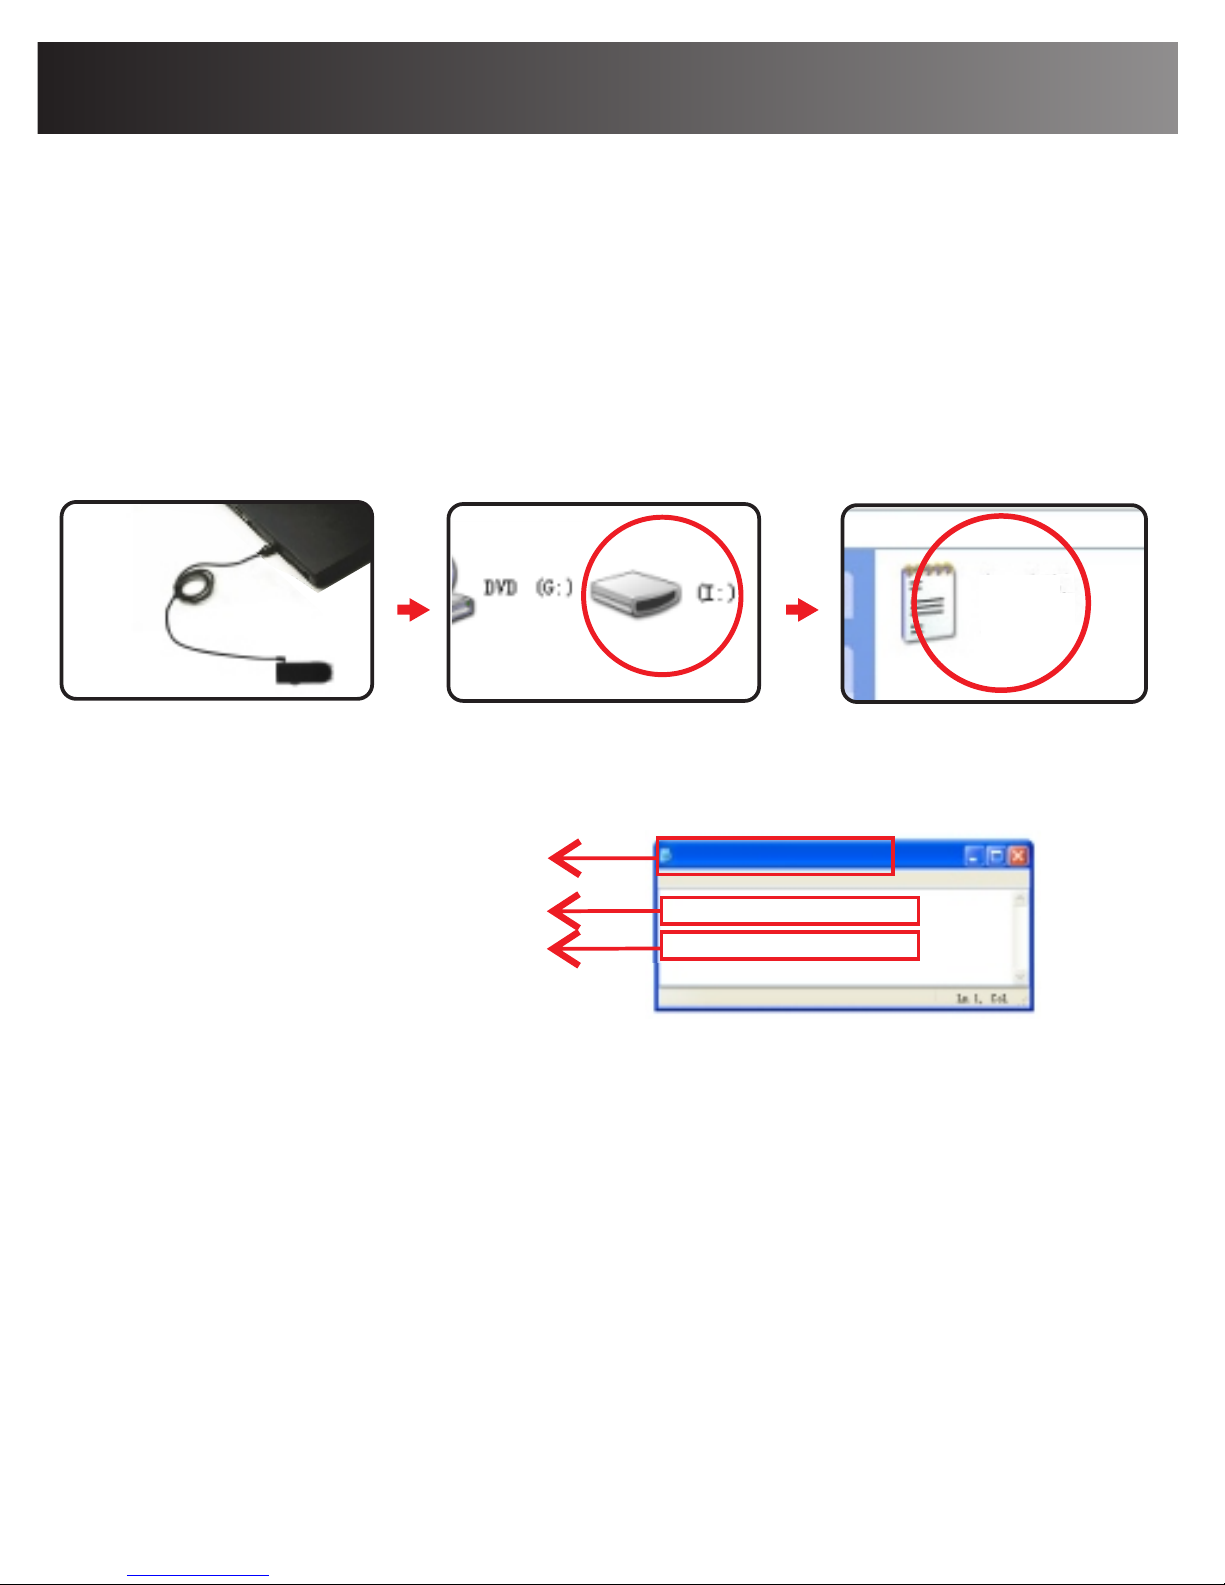
It may be necessary to change the Camera's preset
time and date setting to reflect your local time. To
change the time and date:
Step 1: Power on the Camera, and connect it with a
PC using the USB cable in the package. after about
12 seconds, the disc icon will open on your computer.
Then please open SETTIME.TXT.
Time and Date Setting
12
SETTIME. TX T
file Ed it F or ma t Vie w He lp
File name
yyyy-mm-dd,hh:mm:ss
2016-07-15,
yes
23:15:12
SETT IM E. TXT
Step 2: Please change the time and date. Select yes
for auto recycling or no to prevent recycling.
Step 3: Disconnect the Camera from the PC and power
on the Camera. The time/date setting is complete and
you will find the time & date watermark in the video
recordings.
yes:auto-recycle the SD
no:no auto-recycling
SPECIAL NOTES:
- Please remember to SAVE the file you recorded before
exiting or the change will not be saved.
- Please do not add any blank space or characters to
change the existing file format.
Page 13
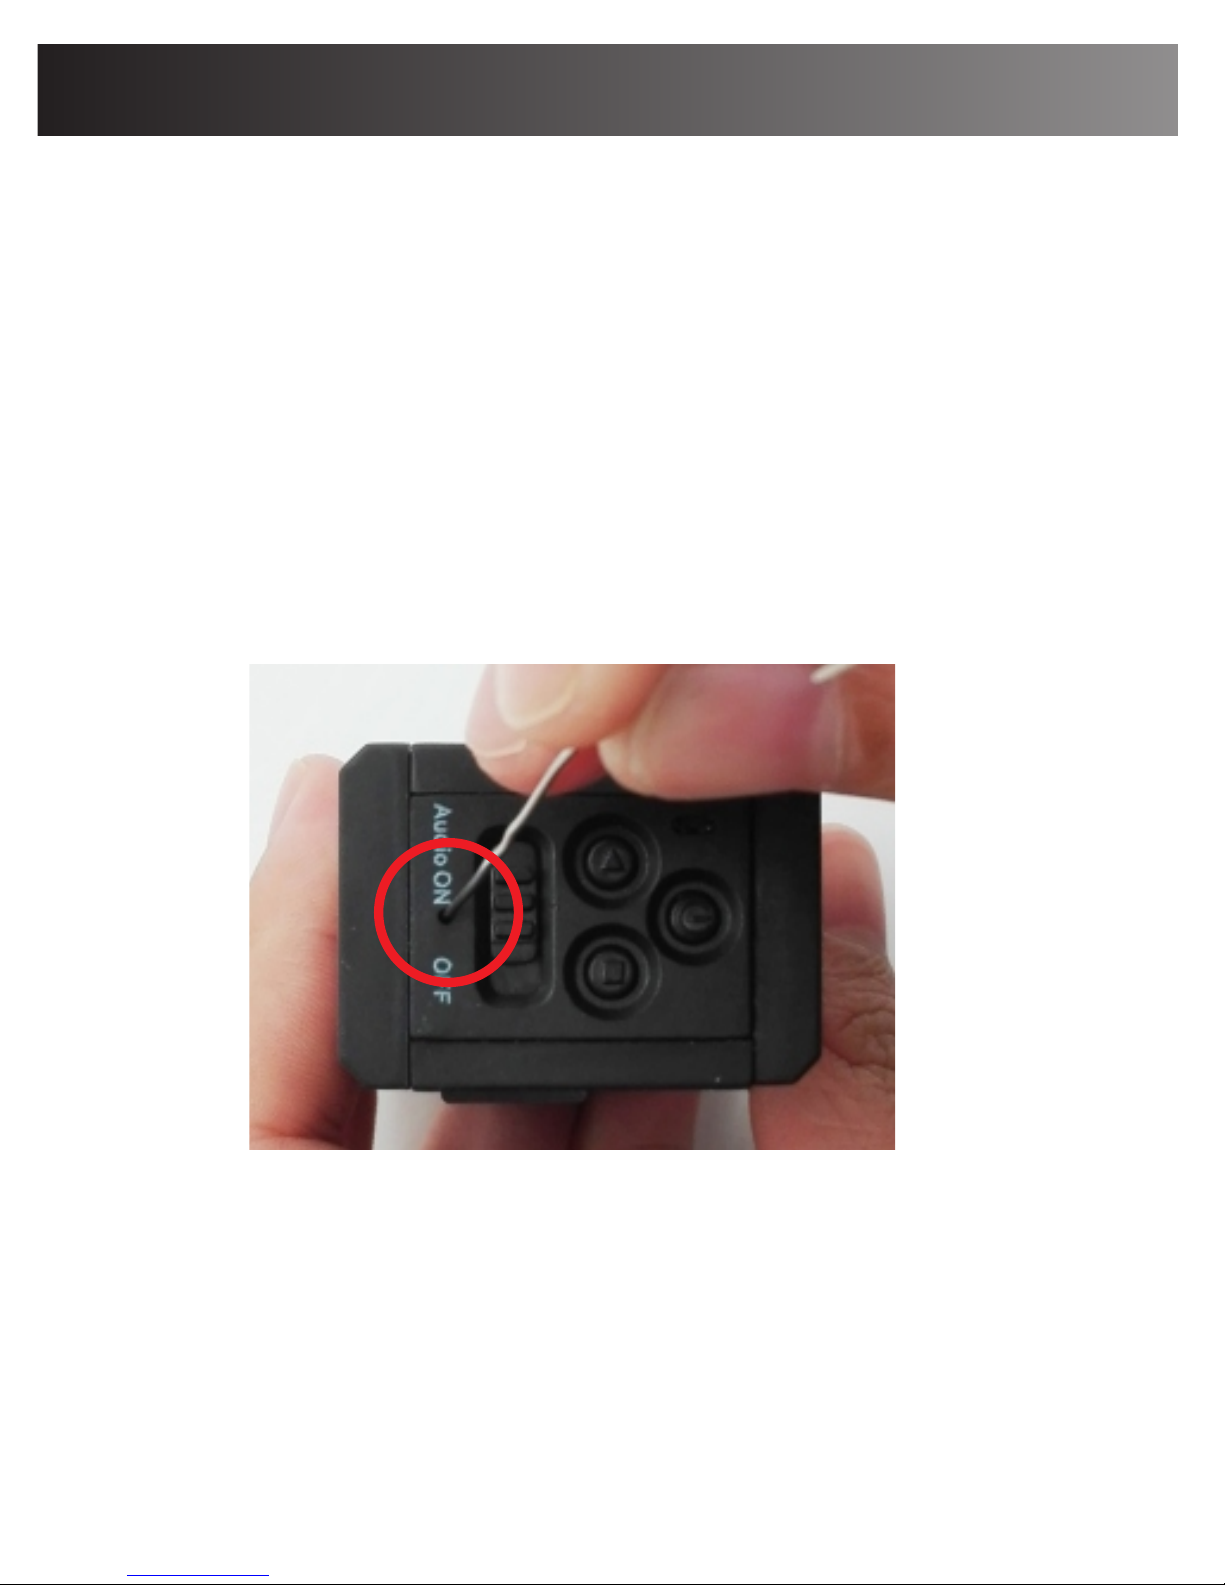
Operation guide
Important Note:
1.If you didn't find the file when you open the
Micro-SD card from your computer,Pls record a video clip
using the camera to activate the card and then try to set the
date and time again.
2.The amended date and time will not change unless the
battery is running out for long time.
3.When your camera is malfunction or wrong operation,pls
using a toothpick to hold on the reset hole to reset the
camera.
SETTIME.TXT.
4.When you find your camera power off automatically,there're
two reasons for that:
1) The power is too low,you need to recharge the camera.
2) No memory card installed or memory card is full when
camera set to no loop recording.
13
Page 14
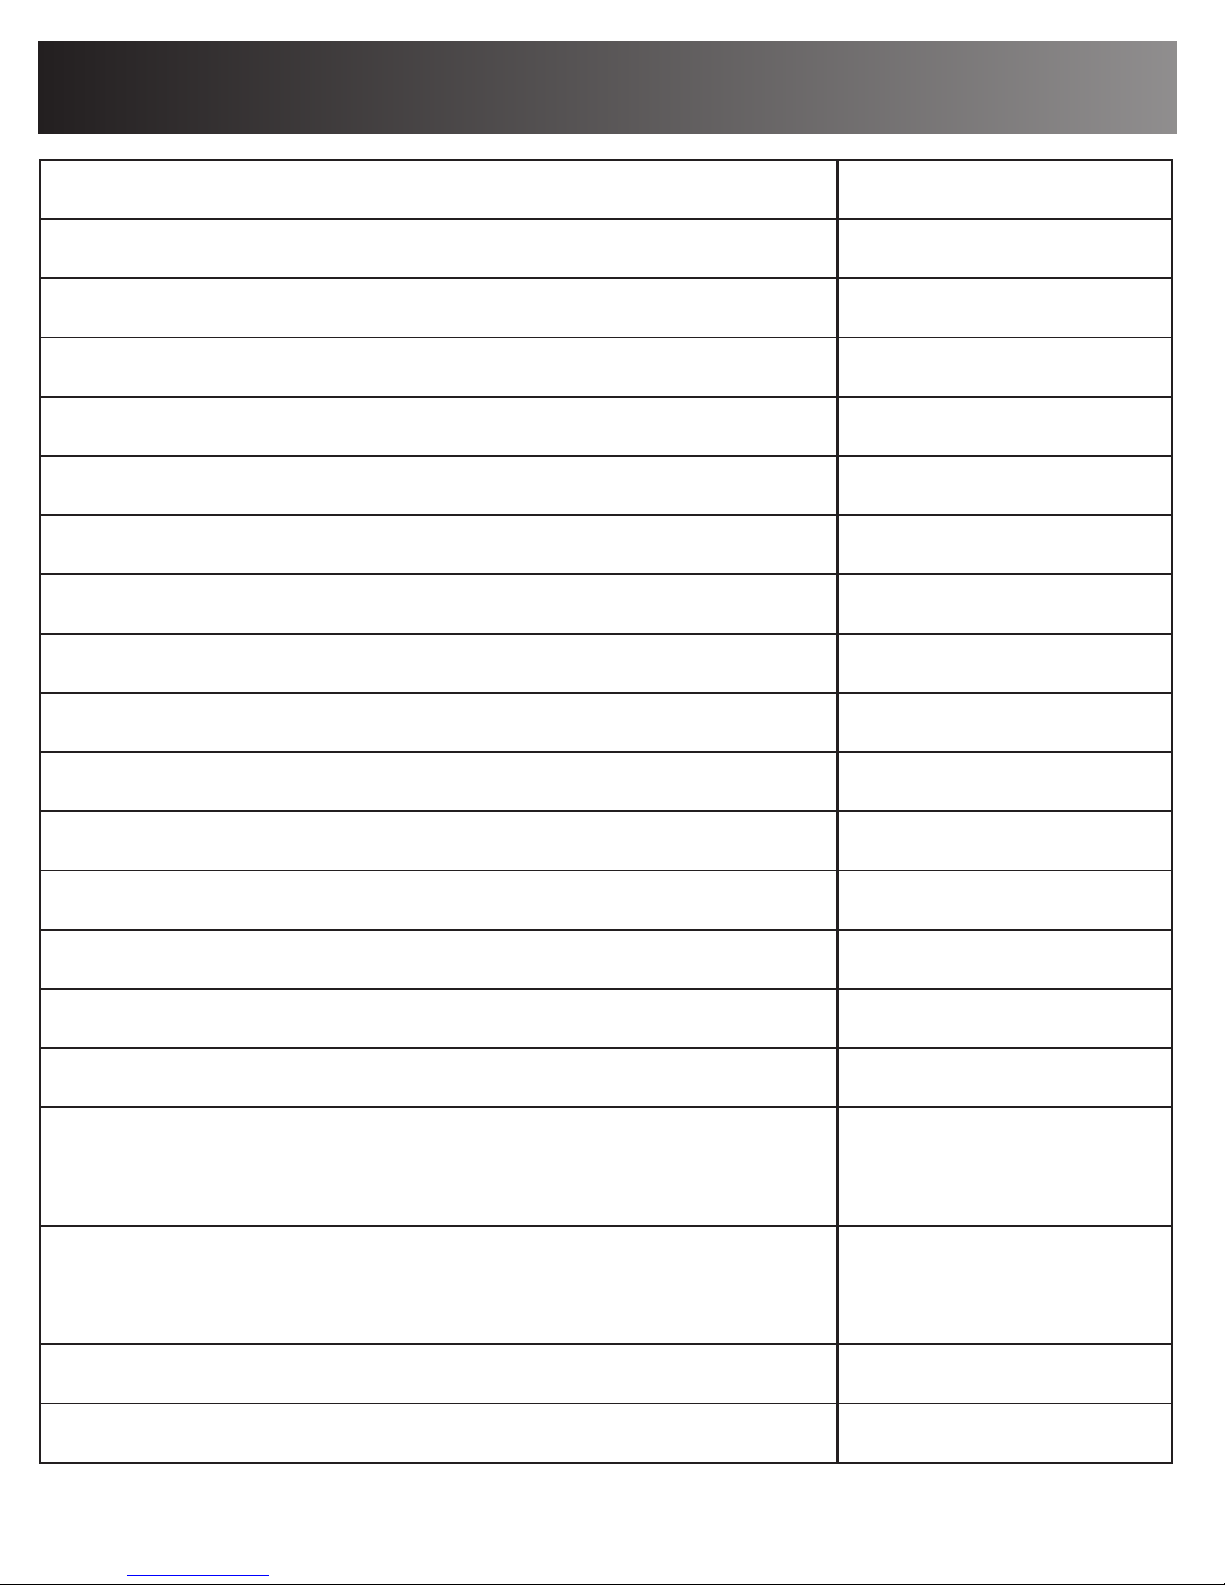
ParameterItem
size 65x35x28mm
Product net weight 53g
Battery LiPo
Stand-by power consumption 10uA
PIR detection angle 60 degrees
PIR detection distance 5-10 meters
Camera angle 120 degrees
Max PIR stand-by time 1 year
Day time recording power consumption 220mA
Max day time recoridng time 4 hours
Night vision recording power consumption 650mA
Max night vision continuously recording time 1 . 5 hours
3 . 5 hours
Resolution 720P
FPS 30FPS
about 1 minute
PIR MD video record
Record continuously
Max SD storage 32GB
Loop recording optional
Detailed parameters
14
Full-Charging time
per file
about 10 minutes
per file
Page 15
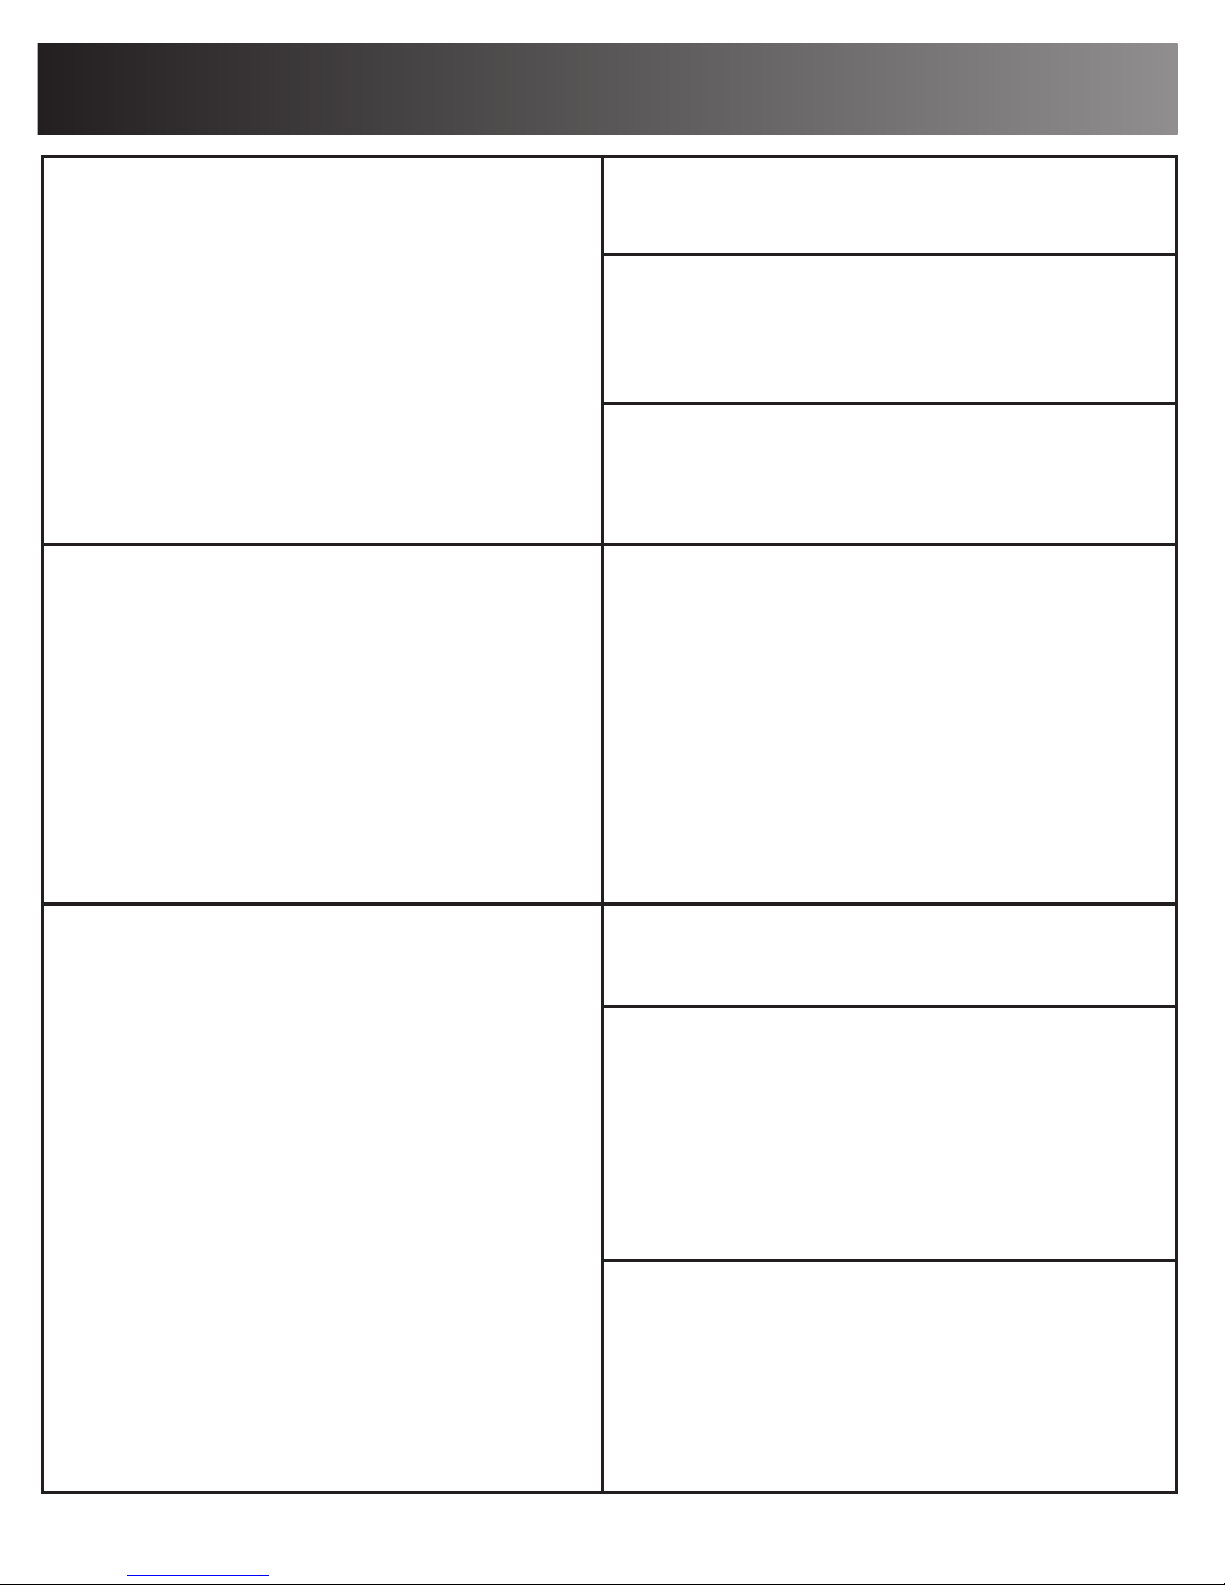
Indicator status and meanings
Power on
(by holding on power
button for 2 seconds)
Normally the blue LED
indicator will stay on.
15
If no SD, the blue will flash
for 10 seconds and the
Camera powers off.
The Camera powers off
after 60 seconds if there is
no selection of an operation.
Record continuously
(Press REC after the
Camera is powered on)
Press REC, the blue LED
will flash for 3 seconds and
then goes off, it will record
automatically for 10 minutes
per record file. Or press
REC again, the blue will be
on, and it saves the present
video and stops recording.
MD
(Press MD after powered
on)
Red LED indicator will
always on.
When there is movement,
the blue LED will flash then
goes off and the red LED
stays on. Now the Camera
will record the motion and
save to SD card.
Press MD again, the blue
and red LEDs will flash and
go off. The camera will save
the current video, quit MD
and power off.
Page 16

Indicator status and meanings
Important reminders: do not remove the Micro-SD card
during recording as it can Possibly cause damage the
card.
When the battery is running low, the Camera will save
the last videofile and Power off.
To learn about other Conbrov security products, please
visit our website at www.Conbrov.com.
16
Charging using 2A USB
adaptor
The yellow LED will stay on
during charging. Once full
charged, it will go off.
Power off by press the
power button
The red and blue LED will
be on for 2 seconds, and
the Camera powers off.
 Loading...