

Page 1
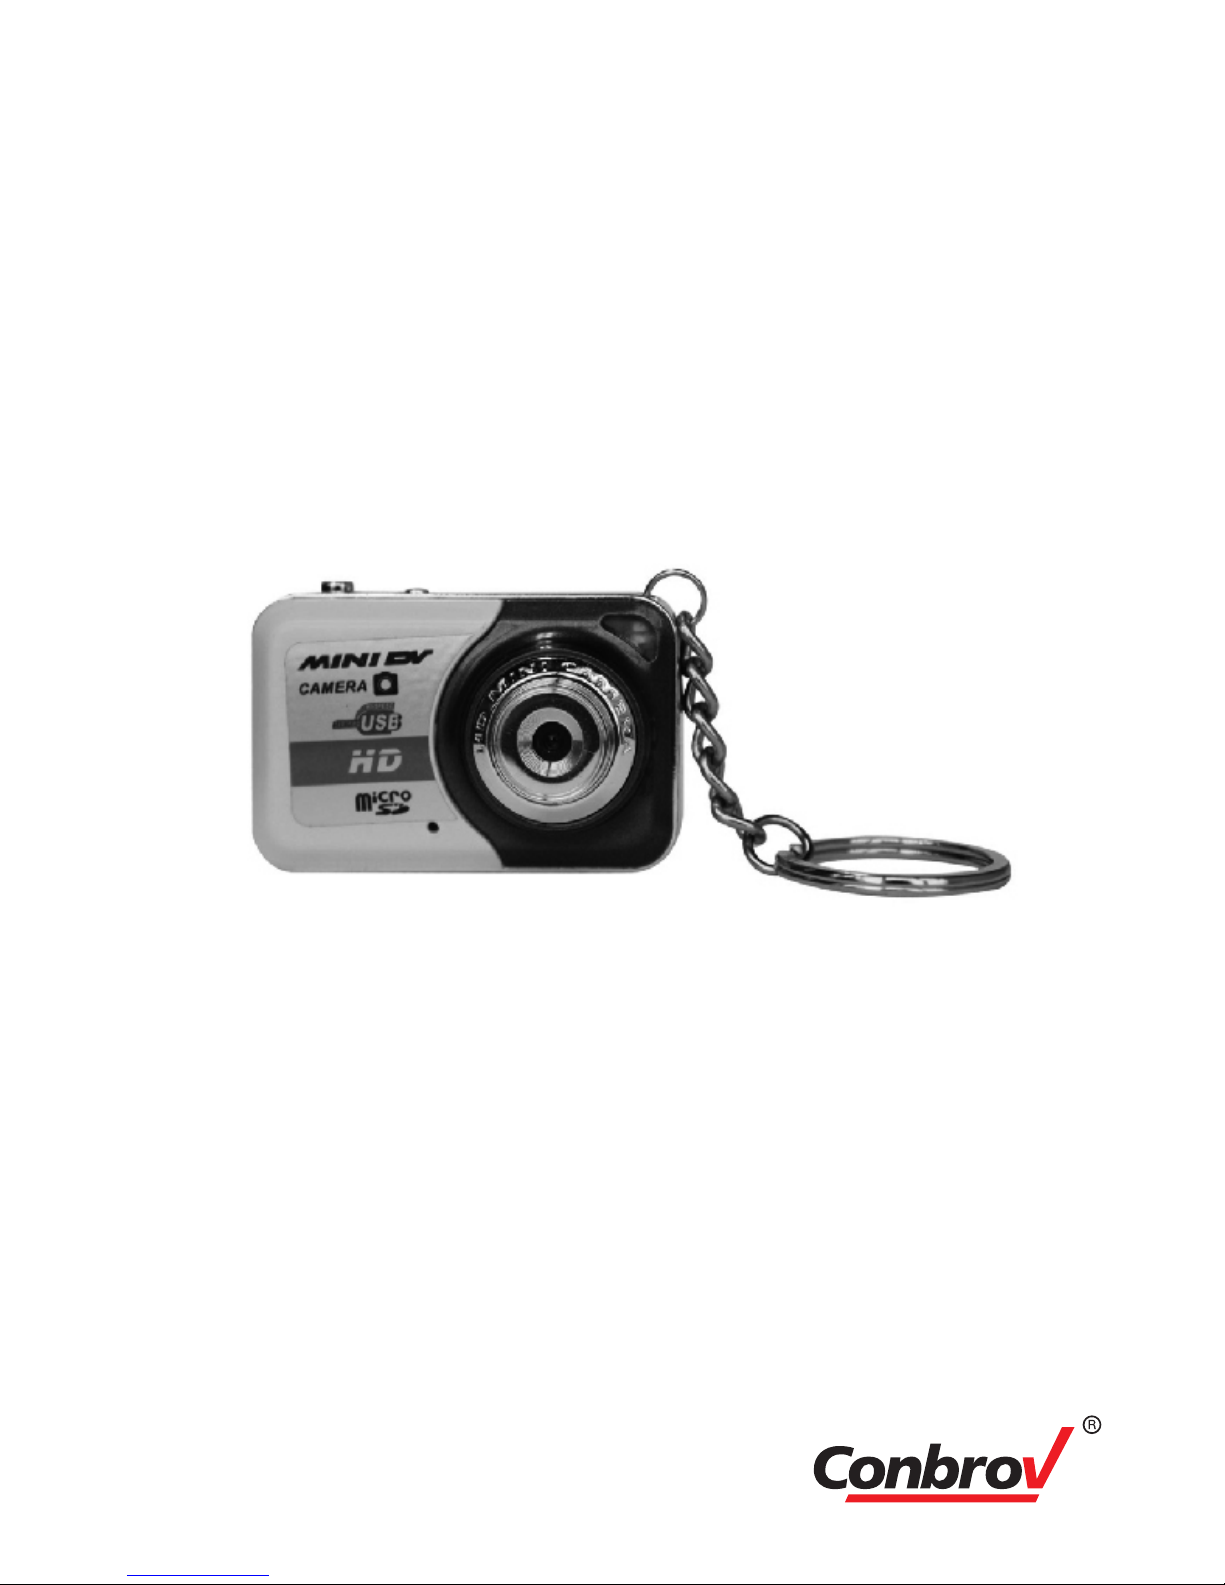
HD Mini key chain Camera
User Manual
Model: DV086
Important Notice
- Please ensure that you read the complete user manual
carefully before using any part of the product.
- Keep this copy safe for future reference in case of
operational difficulties.
Page 2

Safety Instructions
2
Please read the following instructions before using the
camera:
- The camera should be used for legal purpose only.
Check and follow the laws provided in your country
regarding the use of camera and other video recording
devices.
- The Mini Cam is NOT waterproof or dustproof, so don’t
use it outdoors, in adverse environments or during rain.
- In order to avoid any damage to the device, the risk of
electric shock to you or starting a fire, use original DC
power-supply.
- You are forbidden from doing any unauthorized
disassembling or dismantlement of this device, or
replacement of its parts. The device’s manufacturer
will not take responsibility or pay liabilities for any loss
caused by such actions.
- To avoid explosions, damages or bodily injuries, never
put this device into an oven, microwave oven or direct fire.
- Owing to version changes, this user manual may vary a
little from our real product currently on the market. In
such a case, please take the standard to be the real product.
By following the above safety instructions, we hope that it
will be enjoyable to own and use this product!
Page 3
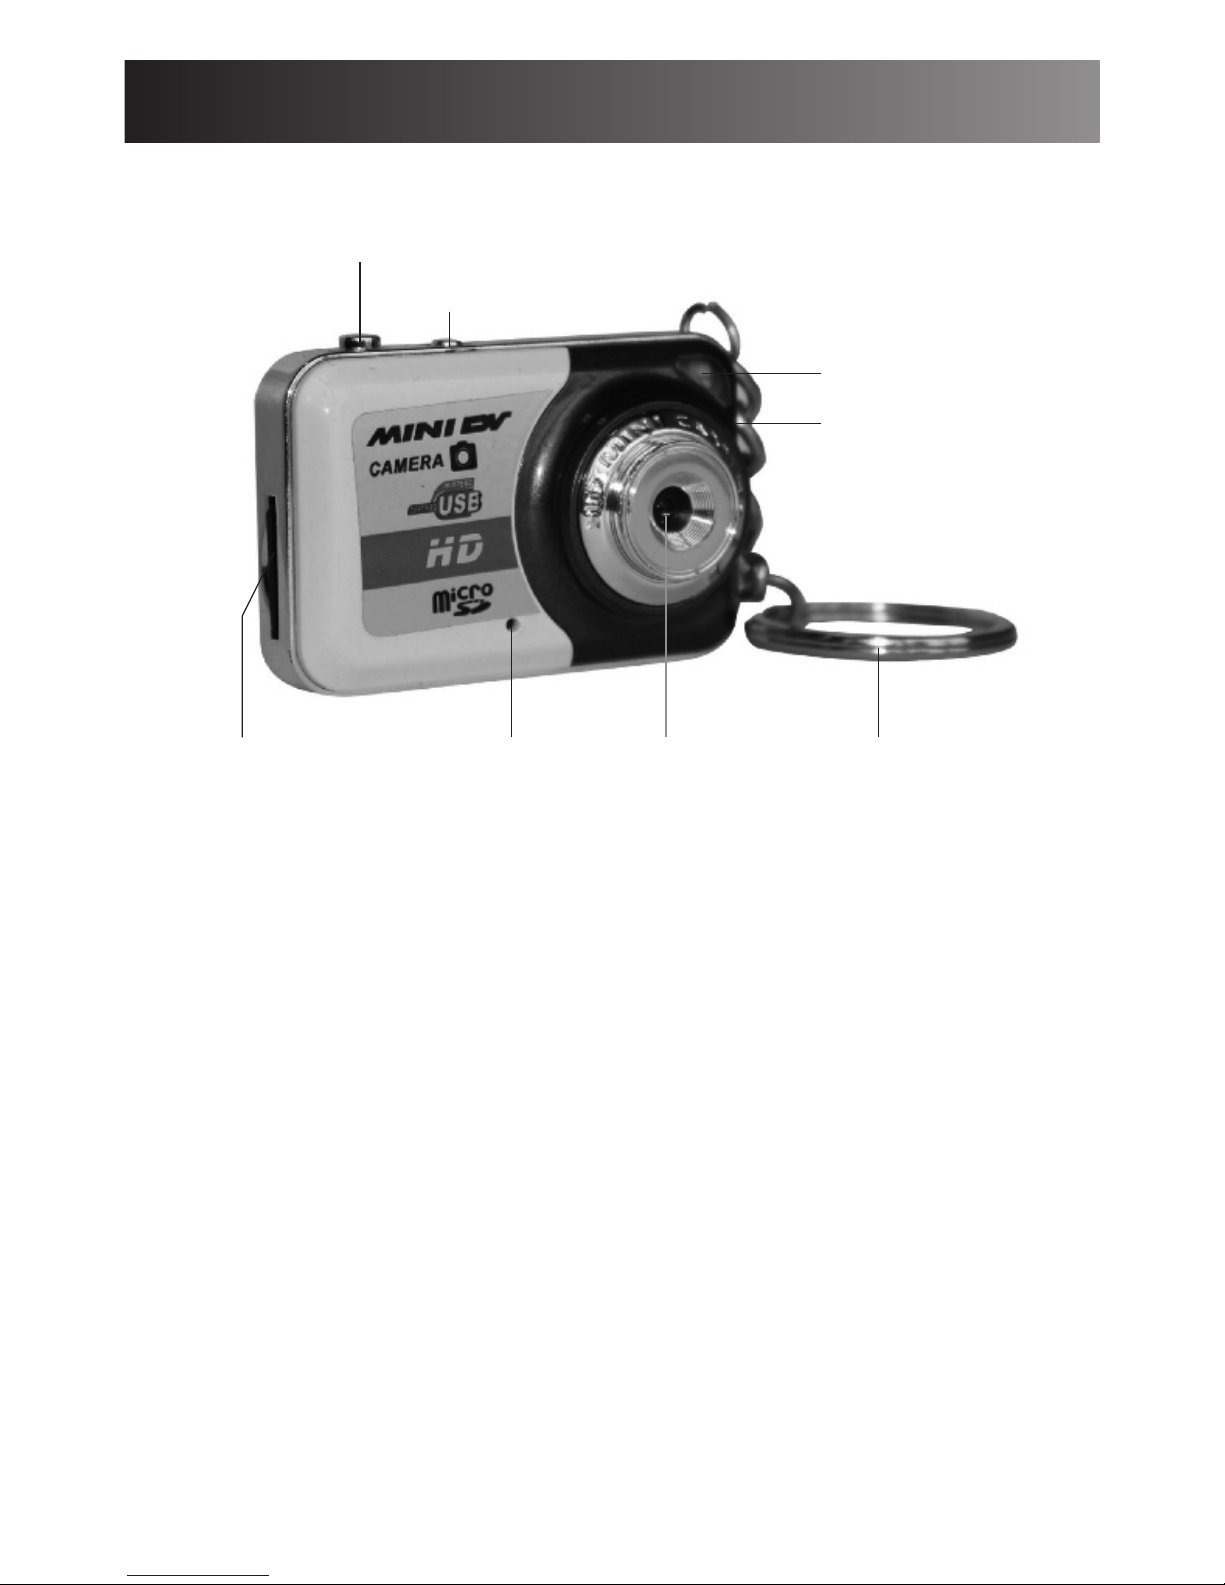
Product Structure
3
Mini USB port
Key Chain
Indicator
Mode button
Power button
Micro SD card slot
Microphone
Camera Lens
It is important to note that:
If there is anything missing in your product package and
it is not included in the above list of accessories, contact
us as soon as possible at: [email protected]
Page 4
4
Quick Guide
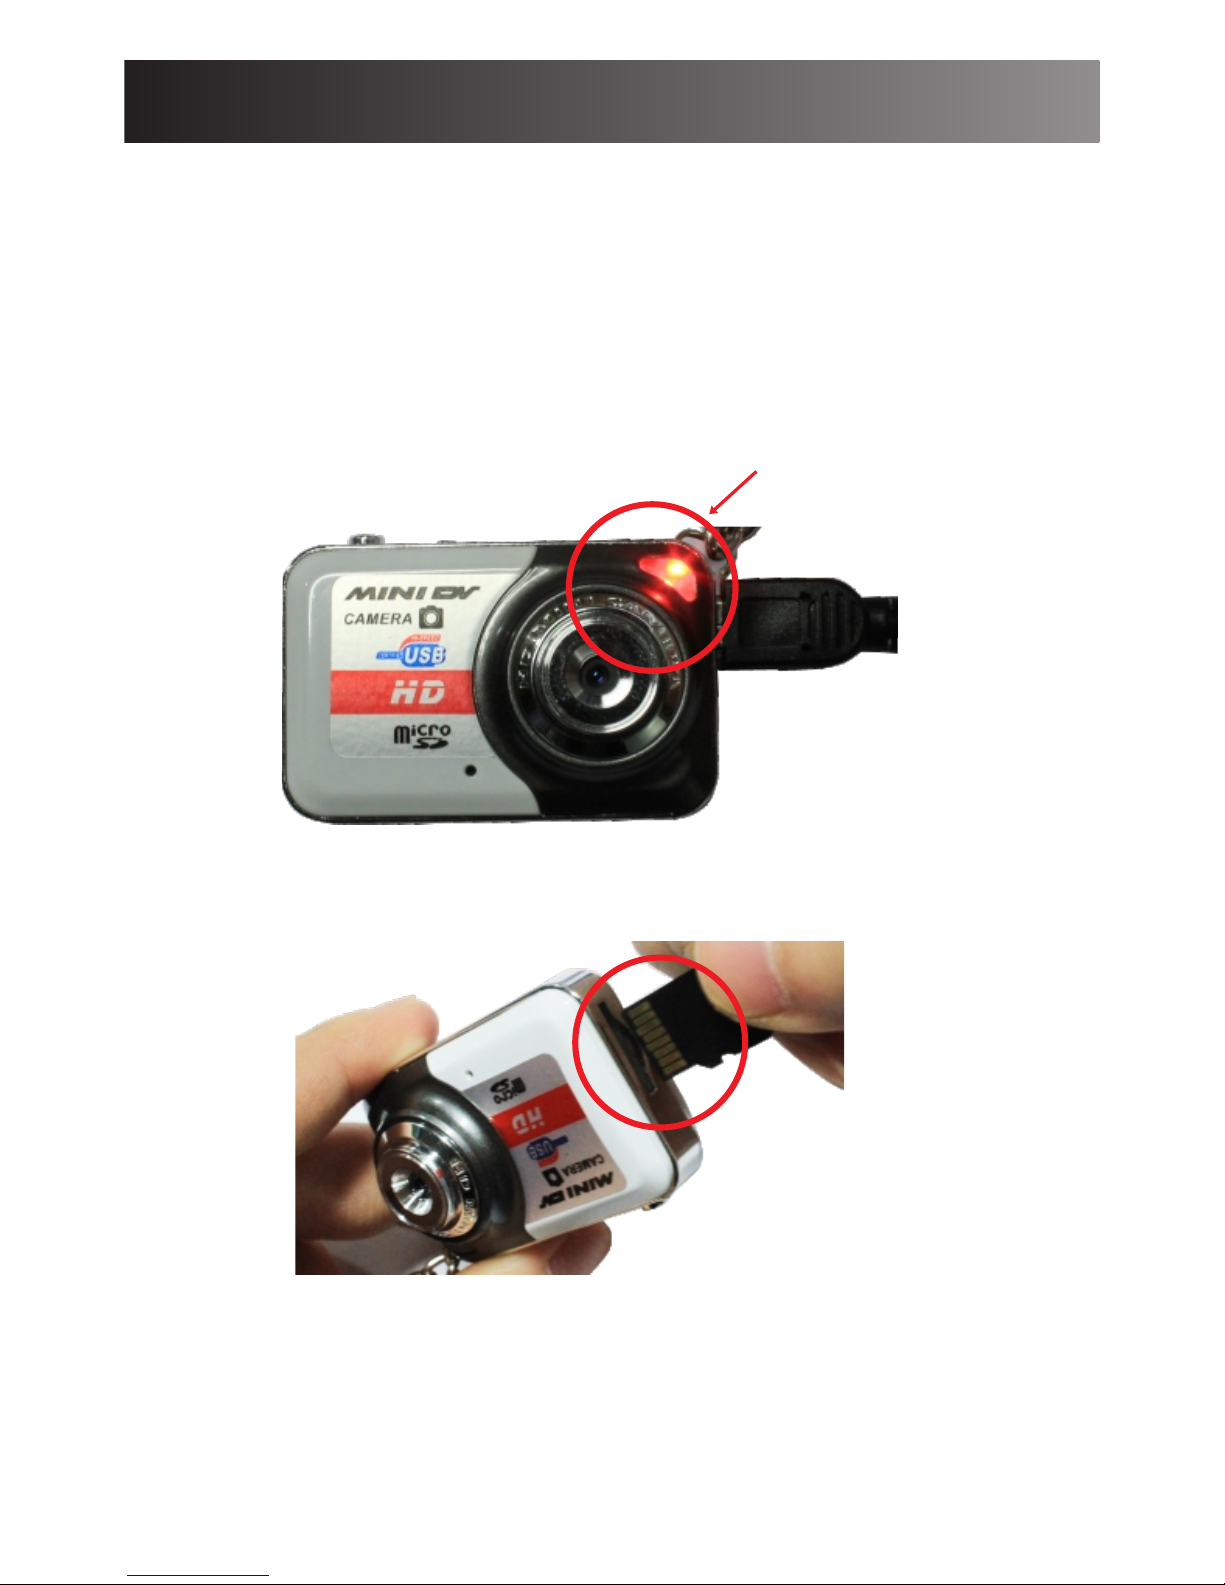
1.Charge the camera.
Use the provided USB cable to charge the camera by
Computer or AC adaptor (5v 1-2A ) During charging,
the red indicator will flash, The indicator will be always
on when the camera fully charged.
Charging time:2-3 hours by computer. 1 hour by ac
adaptor (5v 1A)
2.Insert the Micro SD card.
Red indicator
Page 5
5
Quick Guide
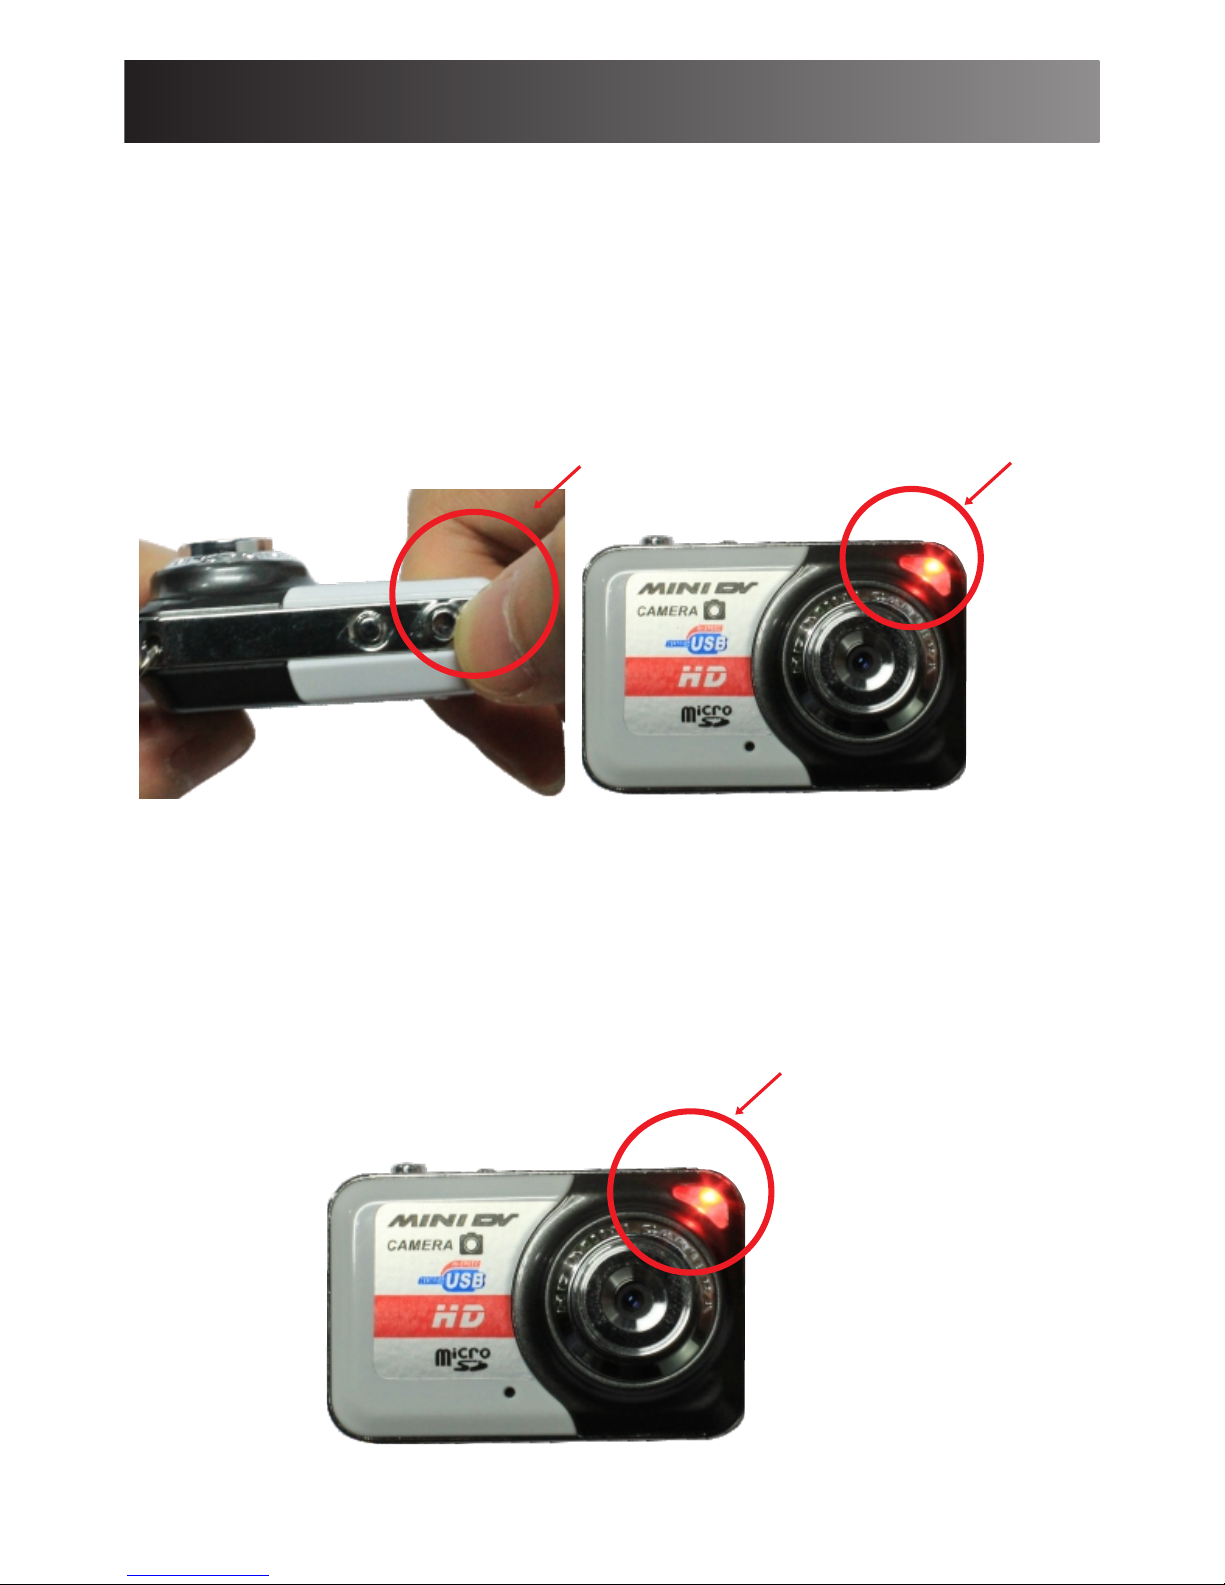
3.Power on the camera.
Hold on the Power button until you see the blue
indicator is on to power on the camera.
When the Red indicator is always on, the camera enters
into standby mode.
Hold on the power button for 3 second to power off the
camera.
4.Taking video
Short press on Power button to take videos, the red
indicator will flash slowly.
Another short press to stop the recording.
Red indicator
Red indicator
Power button
Page 6
6
Quick Guide
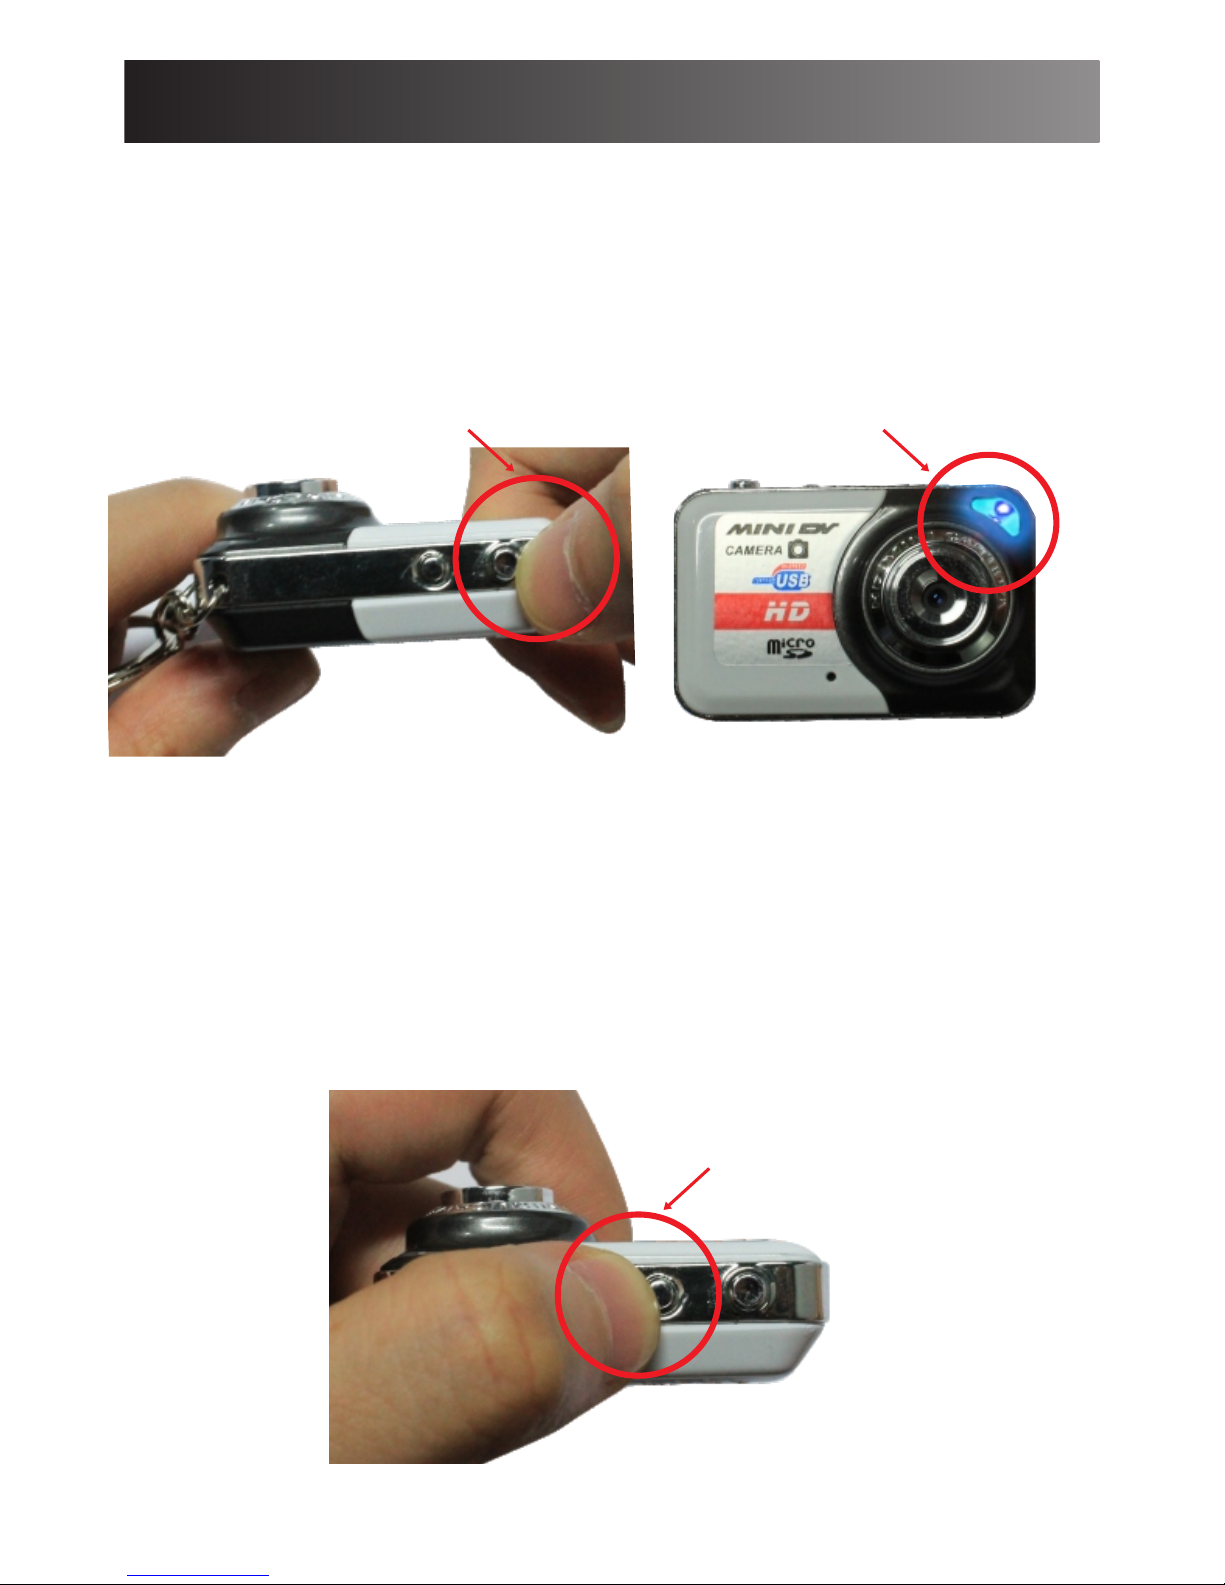
5.Taking Photo.
Short press on Mode button to switch into photo mode.
The blue indicator will be always on.
Short press on Power button to take one photo. The
blue indicator will flash once after taking one photo.
6. Voice recording.
Short press on Mode button to switch into Voice
recording mode.
The Blue and Red indicators will be both on.
Short press on Power button to start voice recording.
The Red indicator will stay on and Blue indicator will
flash slowly.
Blue indicator
Mode button
Power button
Page 7
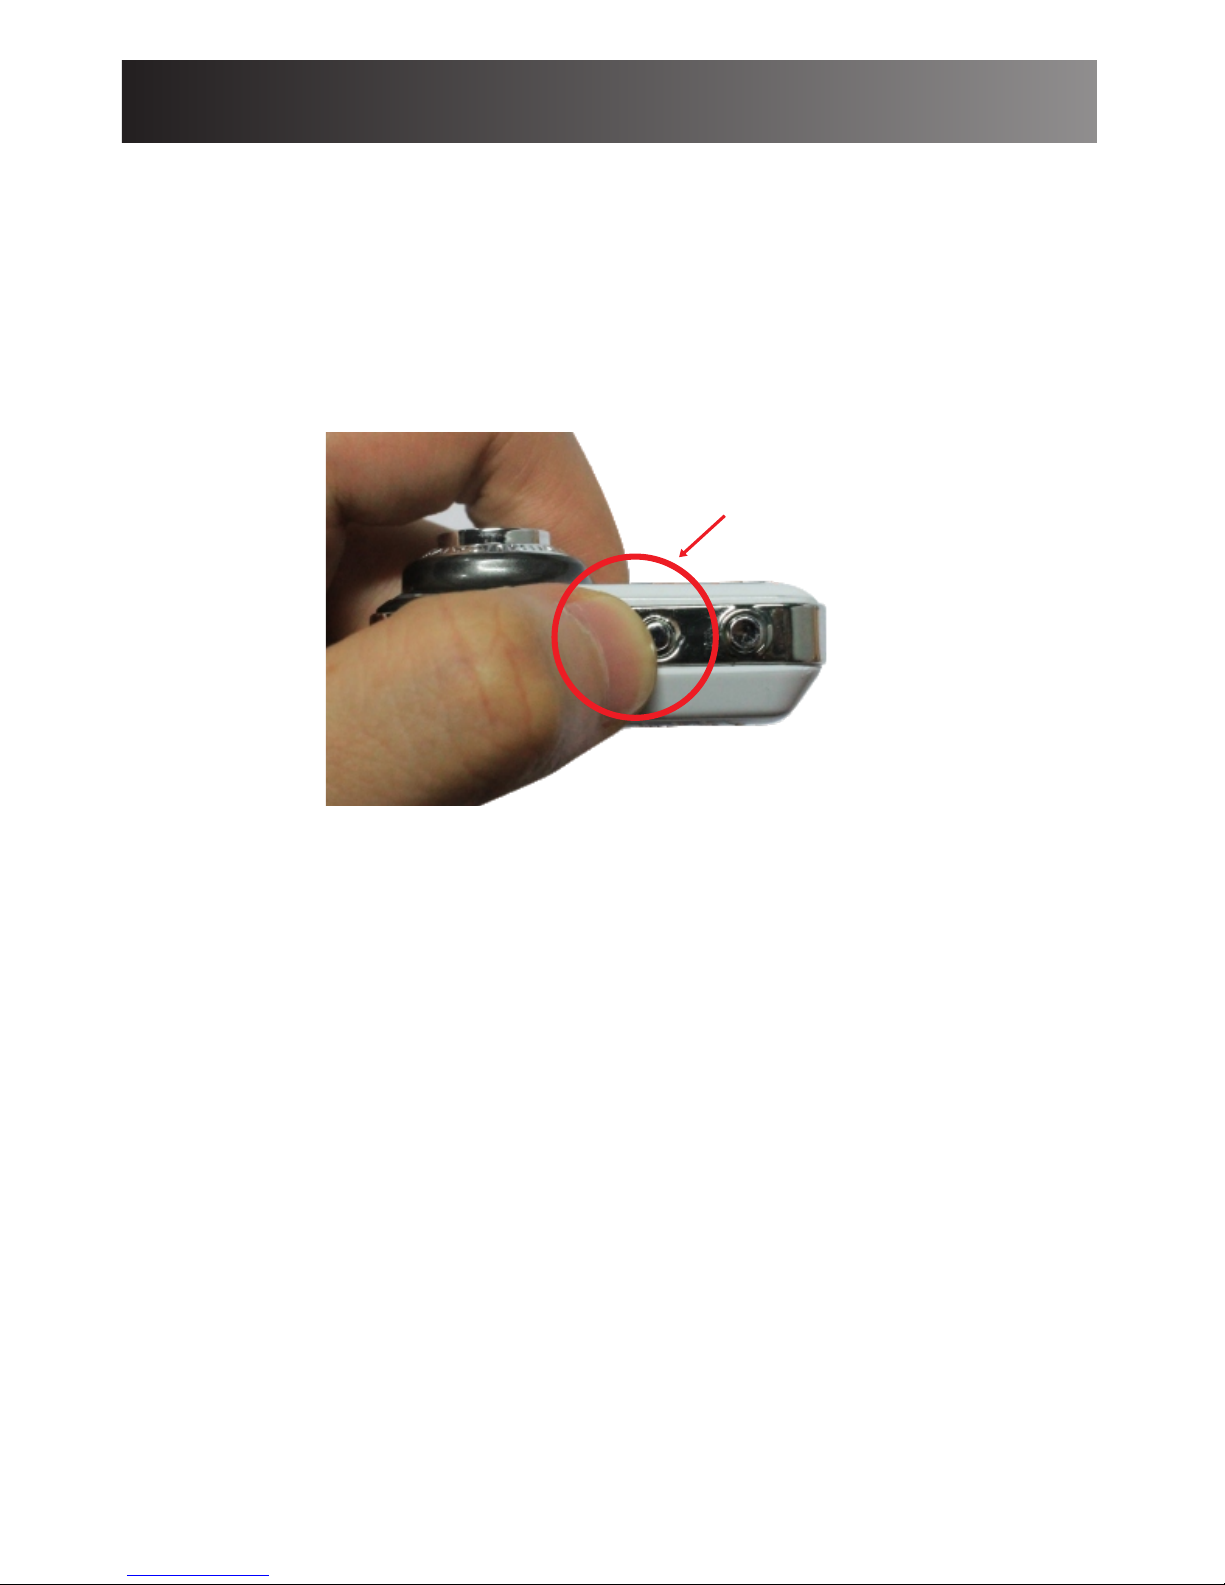
7. Motion detection.
Hold on Mode button for 3 second to enter into Motion
detection standby mode.
The Blue and Red indicators will be both on.
When there’s a motion, the Blue indicator will stay on
and Red indicator will flash slowly.
Important notice:
-The activated motion is about 60 seconds per file.
-When there’s no more motion, the camera will be back
into motion detection standby mode. The blue and red
indicators will be both on.
Quick Guide
Mode button
7
Page 8
Special function
8
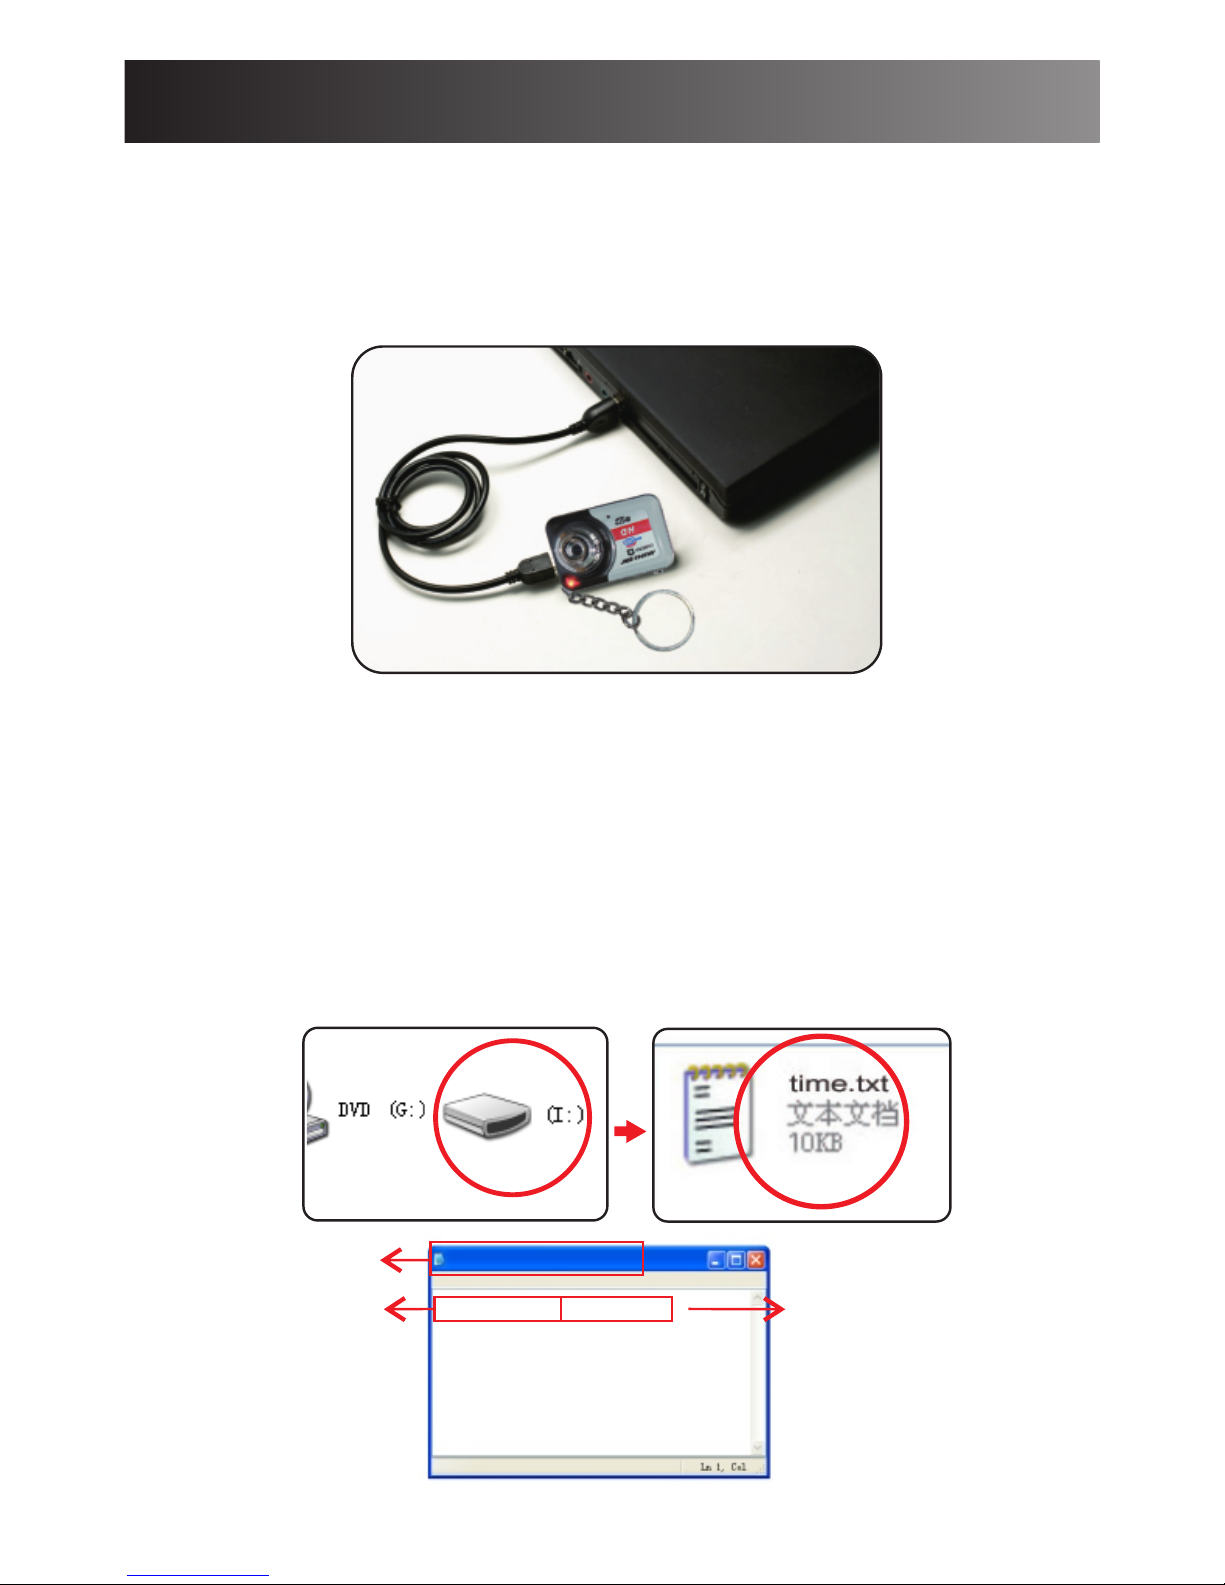
1.Record during charging.
Hold on Mode button to connect the camera with the
provided USB cable during charging.
The camera will enter into video taking standby mode.
2.Time setting.
-Insert Micro SD card into the camera ,and connect it to
your computer, find a text file: TIME.TXT under the
root directory.
-2011-01-0123:59:59
-Open TIME.TXT, modify the date and time exactly
according to file and format.
-Reboot the camera to enable the updated date and time.
Tim e. tx t
fil e Edit Fo rmat Vi ew H elp
File name
Year/Month/Day
Hour/Minute/Second
2011-01-01 23:59:59
Page 9

Special function
3.Auto power off .
- Battery is exhausted.
- Micro SD card is full.
- No any operation in 45 seconds in standby mode.
4.PC Camera
Connect the camera to computer using the provided
USB cable.
Press any button to switch it into PC camera mode.
5.Reset Camera
Hold on Power and Mode button for 5 second to reset
the camera.
Important Notice:
- When you connect the camera to your computer, if
the camera cannot be identified, please try to
connect again.
- It is suggested to copy the video files into computer
for a smoothly
9
Product accessory
1 x DV086 key chain Camera
1 x USB cable
1 x User manual
Page 10
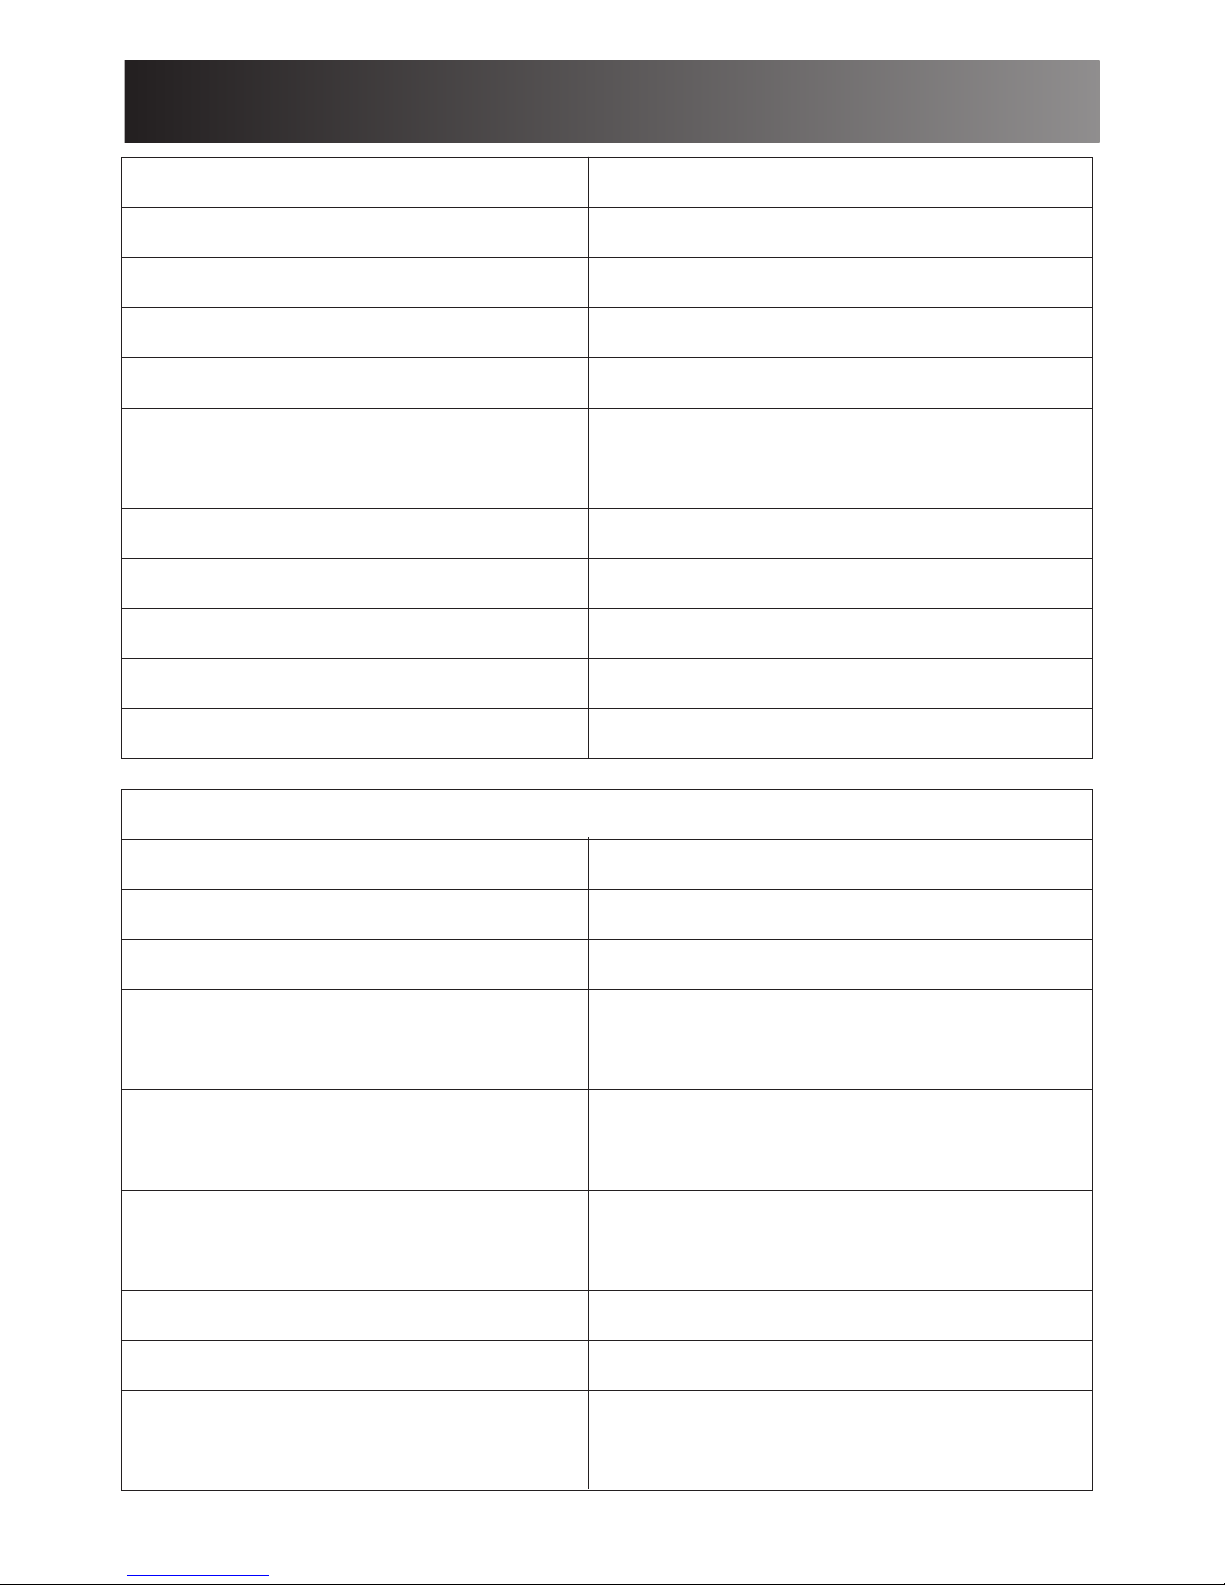
Specification
10
Camera size 46mm x 30mm x 15mm
Video file format AVI
Photo file format JPEG
Voice file format WAV
Camera resolution 1280x960 @ 30fps
Computer Operating
Windows
Systems supported
USB type Mini 5 Pin
Camera memory storage
Micro-SD up to 32GB
Battery type High capacity Li-battery
Motion detection distance 6-8M / 18-24 feet
Video file size 40M/min
Indicator Status and their meanings
Stand-by Red indicator is ON
Taking video Red indicator flash slowly
Taking photo Blue indicator flash once
Red indicator is ON, Blue
Red and Blue indicators are
Blue indicator is ON, Red
Charging Red indicator flashing slowly
Fully charged Red indicator is ON
Blue and red indicators flash
indicator flash slowly
indicator flash slowly
ON
and goes OFF
Voice Recording
Motion detection standby
Motion activated
No Micro-SD inserted
 Loading...