

Conairphone SW207 Owner's Manual
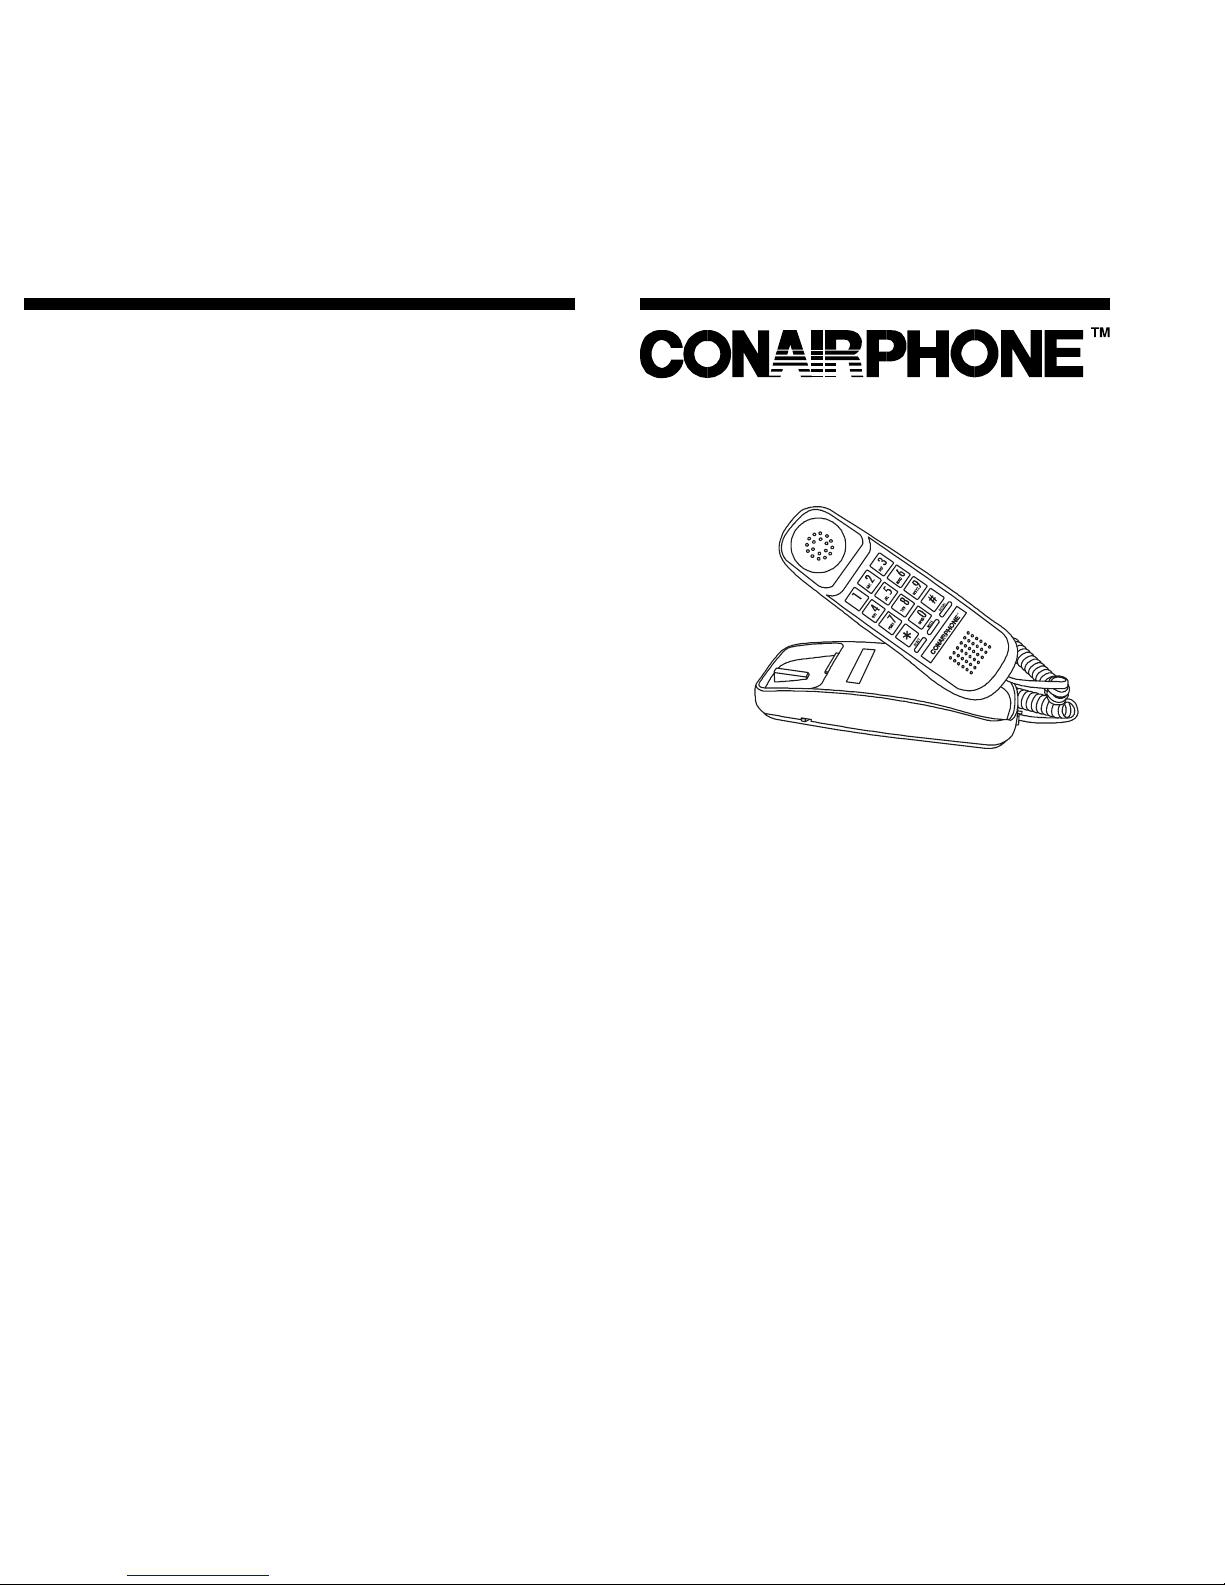
Model SW207
SLIM DESIGN TELEPHONE
OWNER’S MANUAL
Véase el reverso para la versión en español.
Thank you for purchasing the CONAIRPHONETM telephone
Model SW207. You’ve selected a telephone manufactured to exacting performance and durability specifications. Your CONAIRPHONE
TM
is built with dedication to quality to ensure trouble free
use. It performs as a direct replacement for your existing phone,
or as a perfect addition.
Please read this owner’s manual before connecting your new
CONAIRPHONE
TM
telephone, and retain for future reference.
Before setting up the unit, carefully read through this manual to
familiarize yourself with the features and design layout. Then follow the easy step-by-step instructions to install and operate.
Your CONAIRPHONE
TM
telephone is designed for use with telephone systems using modular connections. If your home or office uses four prong or hard wired systems, your retailer may
offer a complete line of convenient “do it yourself” modular conversion accessories.
Your telephone is FCC approved for connection to your telephone
line. For future reference, enter the date code of your unit and
the date purchased in the spaces provided below. You can find
your phone’s date code on the bottom of the unit.
IB-3925A NLM007Y1
7475N. Glen Harbor Blvd, Glendale, AZ 85307
SerSer
SerSer
Ser
vice Centervice Center
vice Centervice Center
vice Center
CONAIR CORPORATION
GARANTÍA LIMITADA DE UN AÑO
A nuestra opción, Conair reemplazará o cambiará su teléfono
(por un modelo de igual valor) durante un período de un año a
partir de la fecha de compra si la unidad tiene un defecto de
fabricación o en los materiales.
Para obtener servicio bajo esta garantía, devuelva el aparato
defectuoso al centro de servicio indicado abajo junto con su recibo
de compra y US$5.00 para gastos de manejo y envío. Los
residentes de California sólo necesitan proporcionar una prueba
de compra y deben de llamar al 1-800-366-0837 para
instrucciones de envío. También podrá tener otros derechos bajo
la garantía que varían de un estado a otro.
TODAS LAS GARANTÍAS IMPLÍCITAS APLICABLES,
INCLUYENDO AQUELLAS DE CALIDAD O ADECUACIÓN
PARA UN USO EN PARTICULAR, A LAS CUALES TIENE
USTED DERECHO BAJO LA LEY, ESTÁN LIMITADAS POR
LA DURACIÓN DE ESTA GARANTÍA. BAJO NINGUNA
CIRCUNSTANCIA PODRÁ CONAIR SER RESPONSABLE
POR CUALQUIER DAÑO INCIDENTAL O CONSIGUIENTE.
Debido a que algunos estados no permiten la exclusión o la
limitación de daños incidentales o consiguientes, podrá no ser
aplicable a su caso la limitación arriba descrita. Esta garantía le
ofrece derechos legales específicos, y también podrá tener otros
derechos los cuales varían de un estado a otro.
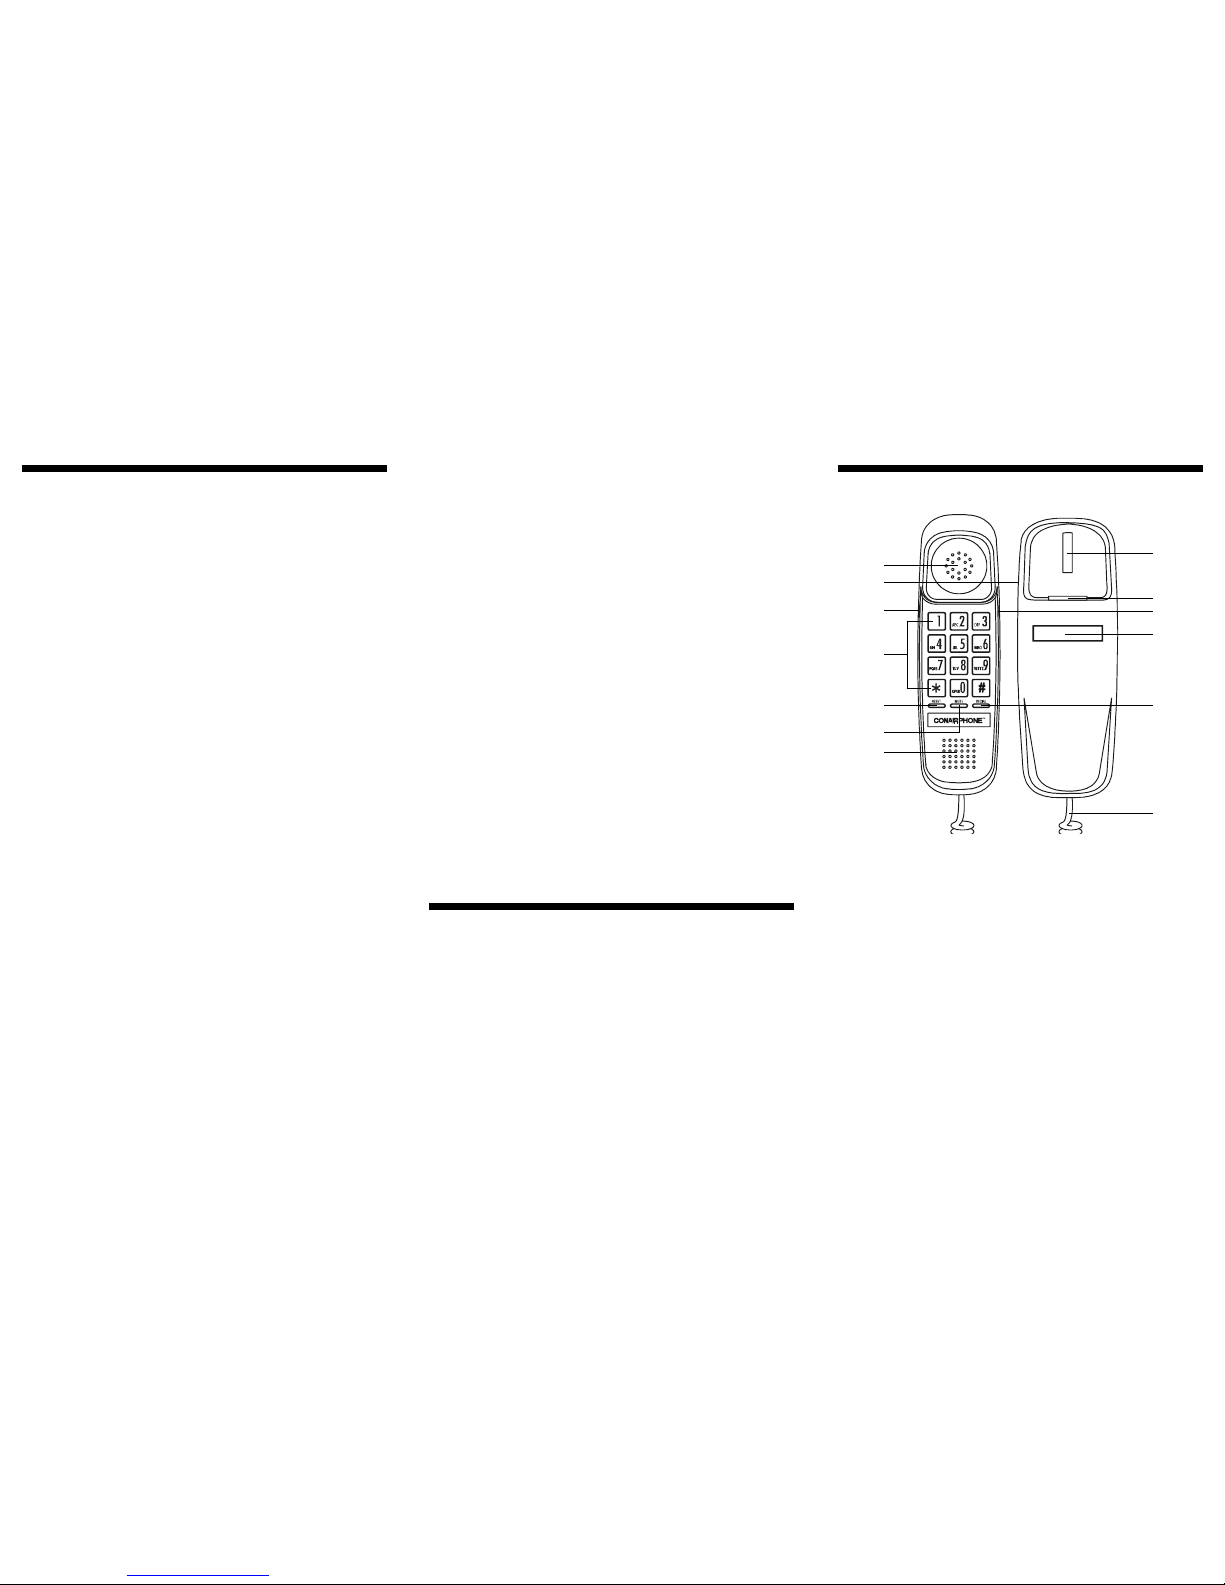
1. Receiver
2. Ringer On/Off Switch
3. Receiver Volume Control
4. Universal Compatible Keypad (tone or push button rotary)
5. Dial Tone Reset Key
6. Mute Key
7. Transmitter
8. Hook Switch
9. Wall Mount Hook
10. Tone / Pulse Switch
11. Telephone Number Insert
12. Last Number Redial Key (on tone or pulse)
13. Coil Cord
IMPORTANT SAFETY INSTRUCTIONS
When using your telephone equipment, basic safety precautions
should always be followed to reduce the risk of fire, electric shock
and injury to persons, including the following:
1. Read and understand all instructions.
2. Follow all warnings and instructions marked on the
product.
3. Unplug this product from the wall outlet before cleaning.
Do not use liquid cleaners or aerosol cleaners. Use a
damp cloth for cleaning.
4. Do not use this product near water, for example, near a
bath tub, wash bowl, kitchen sink, or laundry tub, in a
wet basement, or near a swimming pool.
5. Do not place this product on an unstable cart, stand, or
table. The product may fall, causing serious damage to
the product.
6. Slots and openings in the cabinet and the back or bottom
are provided for ventilation, to protect it from overheating.
These openings must not be blocked or covered. The
openings should never be blocked by placing the product
on a bed, sofa, rug, or other similar surface. This product
should never be placed near or over a radiator or heat
register. This product should not be placed in a built-in
installation unless proper ventilation is provided.
7. Never push objects of any kind into this product through
cabinet slots as they may touch dangerous voltage
points or short out parts that could result in the risk of
fire or electric shock. Never spill liquid of any kind on
the product.
8. To reduce the risk of electric shock, do not disassemble
this product, but take it to a qualified serviceman when
some service or repair work is required. Opening or
removing covers may expose you to dangerous voltages
or other risks. Incorrect reassembly can cause electric
shock when the appliance is subsequently used.
9. Unplug this product from the wall outlet and refer
servicing to qualified service personnel under the
following conditions:
a. When the power supply cord or plug is damaged or
frayed.
b. If liquid has been spilled into the product.
c. If the product has been exposed to rain or water.
d. If the product does not operate normally by following
the operating instructions. Adjust only those controls
that are covered by the operating instructions
because improper adjustment of other controls may
result in damage and will often require extensive work
by a qualified technician to restore the product to
normal operation.
e. If the product has been dropped or the cabinet has
been damaged.
f. If the product exhibits a distinct change in
performance.
10.Avoid using a telephone (other than a cordless type)
during an electrical storm. There may be a remote risk
of electric shock from lightning.
11.Do not use the telephone to report a gas leak in the
vicinity of the leak.
SAVE THESE INSTRUCTIONS
INSTALLATION INSTRUCTIONS
1. Never install telephone wiring during a lightning storm.
2. Never install telephone jacks in wet locations unless
the jack is specifically designed for wet locations.
3. Never touch uninsulated telephone wires or terminals
unless the telephone line has been disconnected at the
network interface.
4. Use caution when installing or modifying telephone lines.
GET TO KNOW YOUR CONAIRPHONE
TM
1
2
3
4
5
7
8
10
11
12
6
9
13
123
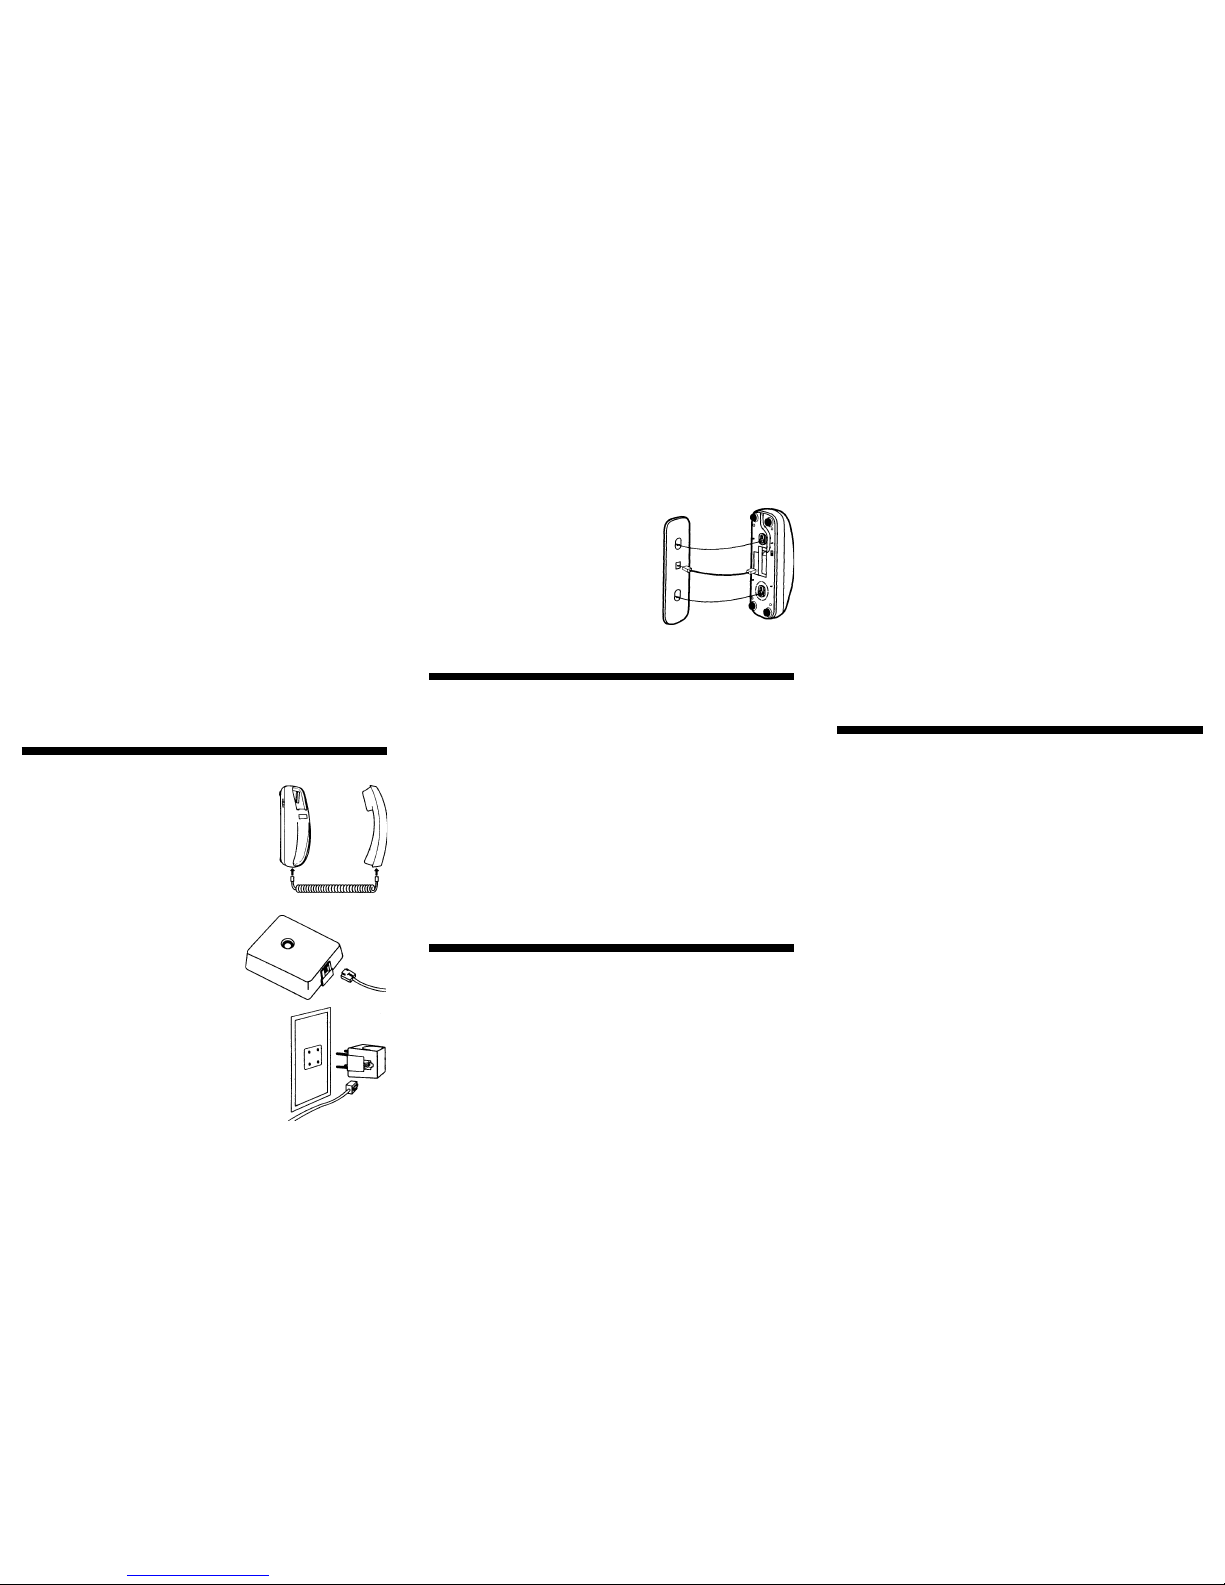
This Carton Contains:
• Handset
• Base
• One 6 ft. Fully Modular Line Cord
• One 7 ft. Fully Modular Coil Cord
• Owner’s Manual/Warranty Information
• One 5 inch Fully Modular Line Cord
Important Notice
Your SW207 will operate on all systems, true tone or rotary.
1. If your home is wired for rotary service, move the TONE/PULSE
switch to PULSE position.
2. If your home is wired for Tone service, move the switch to the
TONE position.
3. If you are unsure of the type of service you have, position
TONE/PULSE switch to TONE. If dialing cannot be done, set
to PULSE.
INSTALLATION
Coil Cord Connection
Insert coil cord into modular
jack located on side of housing.
Connect the other end into the
modular jack located on the
handset (see Diagram B).
Line Cord Connection
With a modular telephone
system, connect the long
telephone line cord to the
modular jack located on the
bottom of the base. Insert the
other end of cord into a modular
wall jack. Make sure all plugs
snap firmly in place (see
Diagram C).
With a four prong style jack,
simply use a plug in a modular
adapter (see Diagram D).
Wall Mount
Your SW207 is also designed to
mount on a wall surface over a
modular wall jack. Connect the short
telephone line cord to the modular
jack located on the bottom of base.
Insert the other modular plug into the
wall jack, making sure it snaps firmly
in place. Position the wall mount slots
on the bottom of the base over the
two studs of the wall plate. Pull down
to lock in place (see Diagram E).
OPERATION
Receiving a Phone Call
When your phone rings, pick up the handset and use like any
basic telephone. Hang up the handset to release the telephone
line when conversation is completed.
Dialing a Call
NOTE: Before dialing, make sure the TONE/PULSE switch is
correctly positioned for your type of service.
Pick up phone, wait for a dial tone, press the keys for the number
you want. Your SW207 (pulse setting) uses electronic pulses to
stimulate dialing action. You might hear pulsing for a second or
two after the last button has been pressed.
NOTE: Your SW207 features a lighted keypad for dialing in a
darkened room.
KEY FEATURES
Last Number Redial
Your SW207 remembers the last number dialed. If the number
you dial is busy or not being answered, hang up. To automatically
redial the last number, press the REDIAL button.
NOTE: You can redial the same number as many times as needed.
However, once you dial another number, the previous number is
erased.
Ringer On/Off
Your SW207 features a harmonic tone ringer. When you don’t
want to disturbed, slide the switch to the “OFF” position. Now you
can still make outgoing calls without being disturbed by incoming
calls.
Receiver Volume Control
The Receiver Volume Control is located on the side of your
handset. This enables you to adjust the receiver volume on your
telephone handset from normal to high for a more comfortable
listening level.
Mute
To talk to someone on your end of the phone without the caller
hearing your conversation, press and hold the MUTE key. Release
the MUTE key to return to your telephone conversation.
TROUBLE SHOOTING GUIDE
Problem: No dial tone
• Check all modular plugs to be sure they have clicked into place.
• Are cords damaged in any way?
• Try another phone jack. If your SW207 works on another jack,
there may be a problem with your wiring.
Problem: I hear my phone dialing, but I can not get past the dial
tone.
• Check the tone/pulse switch. If positioned in TONE mode,
switch to PULSE. You may have pulse dialing service.
Problem: Phone doesn’t ring.
• Is ringer switch set to the “OFF” position.
• How many extensions are connected to your line? If more
than five telephones are installed on the same line, you may
need to contact your local telephone company to determine
the maximum number of extensions for your calling area.
Problem: The sound volume is too low.
• Is another extension off hook? If so, hang up extension.
Diagram B
Diagram C
Diagram D
Diagram E
456
 Loading...