

Page 1
IMPORTANT SAFETY
INSTRUCTIONS
THIS APPLIANCE IS INTENDED FOR HOUSEHOLD
USE. WHEN USING ELECTRICAL APPLIANCES,
BASIC SAFE TY PRECAUTIONS SHOU LD ALWAYS
BE TAKEN, INCLUDING THE FOLLOWING:
READ ALL
INSTRUCTIONS
BEFORE USING
KEEP AWAY
FROM WATER
DANGER – To reduce the ri sk
of electrocution:
1. Always unplug this appliance immediately
after using.
2. Do not use while bathing.
3. Do not place or store applianc e where it can fall
or be pulled into a tub or sink.
4. Do not place in or drop into w ater or other
liquid.
5. Do not reach for an appli ance that has fallen
into water. Unplug im mediately.
WARNING – To reduce the risk of burns,
electrocution, f ire, or injury to persons:
1. Read all instructions be fore using the
appliance.
2. To protect against electrical ha zards, do not
use while bathing or in the sho wer.
3. Close supervision is nec essary when any appliance is used by or near children o r by individuals with certain d isabilities.
4. Unplug the appliance from outl et when not in
use and before cleaning. D o not leave
appliance unattend ed when it is plugged in.
Keep cord away from heate d surfaces.
5. Do not operate th is appliance with a dam-
aged cord or plug, o r if the appliance malfunctions or has been dropped or damaged
in any manner. Return a ppliance to nearest
service facility for examination, electrical or
mechanical adj ustment, or repair. No repa irs
should be attempted by the consumer.
6. Use appliance only for intended u se as described
in this instructio n book. The use of attachment s
not recommended or sold by C onair may cause
hazards.
7. Do not use outdoors or operate where ae rosol
(spray) products ar e being used, or where oxygen is being administered.
8. Do not use on a soft sur face such as a bed,
where openings may be blocked.
9. Do not place or store appliance w here it can
fall or be pulled into a tub or sink .
10. Do not place in or drop into water or othe r
liquids.
11. If an appliance falls into water, unplug it
immediately. Do not rea ch into the water.
12. Plug the adapter into the main outlet af ter checking that the voltage mat ches the listed technical
data for he main outlet t o be used (Input: 100240V AC 50/6 0HZ, Output: 3.0V DC 1000 m A).
The adapter is intended t o be correctly oriented
in a vertical or floo r mount position. For connection to a supply not in the U SA, use an attachment plug adapter of the pro per configuration for
the power outlet.
13. The adapter complies with Par t 15 of the FCC
Rules. Operation is s ubject to the following
two conditions: (1) the ad apter may not cause
harmful interfer ence, and (2) the adapter must
accept any interfer ence received, including
interference that may cause undesired
operation.
SAVE THESE
INSTRUCTIONS
OPERATING
INSTRUCTIONS
Your Conair True GlowTM All-In-One N ail Care Center
operates on an AC adap ter. Adapter can be plugged
into the housing to oper ate the nail dryer or to charge
the power handle. The adap ter can also be used to
operate the power handl e directly. Your Conair True
GlowTM All-In-One N ail Care Center should be charged
using only the charger supplied.
CHARGING
Ensure that the swit ch on the power handle is in the
OFF position. C onnect the appliance to the charger
by inserting the small plu g at the end of the charger
lead into the corresp onding socket in the end of the
handle. Plug the charger int o wall outlet and allow
unit to charge for 16 hours prio r to initial use. To
ensure the longest life o f the rechargeable cells, do
not leave the appliance char ging for more than 24
consecutive hours .
CORDED USE
1. Ensure the power handle is switc hed off.
2. Insert the small plug a t the end of the charger
lead into the corresp onding socket on the end of
the power handle.
3. The power handle has two interchangeable heads.
The rotary hea d works with round attachmen ts that
spin in a circular motion and t he linear head works
with rectangular p lates that move in a back-andforth motion. T he rotary head is already at tached to
the power handle. Pull power ha ndle up to remove
from the tray att achment.
4. To change heads: twist the head in a co unterclockwise motion a nd pull up; head comes off.
Gently push other hea d onto plastic base and twist
slightly with clock wise motion until head clicks into
secure position.
5. To attach discs, plates or co nes to the rotary head,
insert metal po st of disc into the white
plastic tube on head an d gently push down.
To attach plates to the linea r head, match up
rounded end of plate wit h round end of head and snap
plate onto head. To remove att achments,
simply pull off.
6. Your All-in-One Nail Car e Center contains a number
of attachment s. The coarser discs and plates ar e
ideal for shaping and eliminat ing ragged edges for
a clean finish. The finer co nes and plates smooth
unsightly ridges. Th e polishing cone and disc
provide the flawless , smooth surface needed for
nail polish application a nd help polish nails to a
healthy-looking luster.
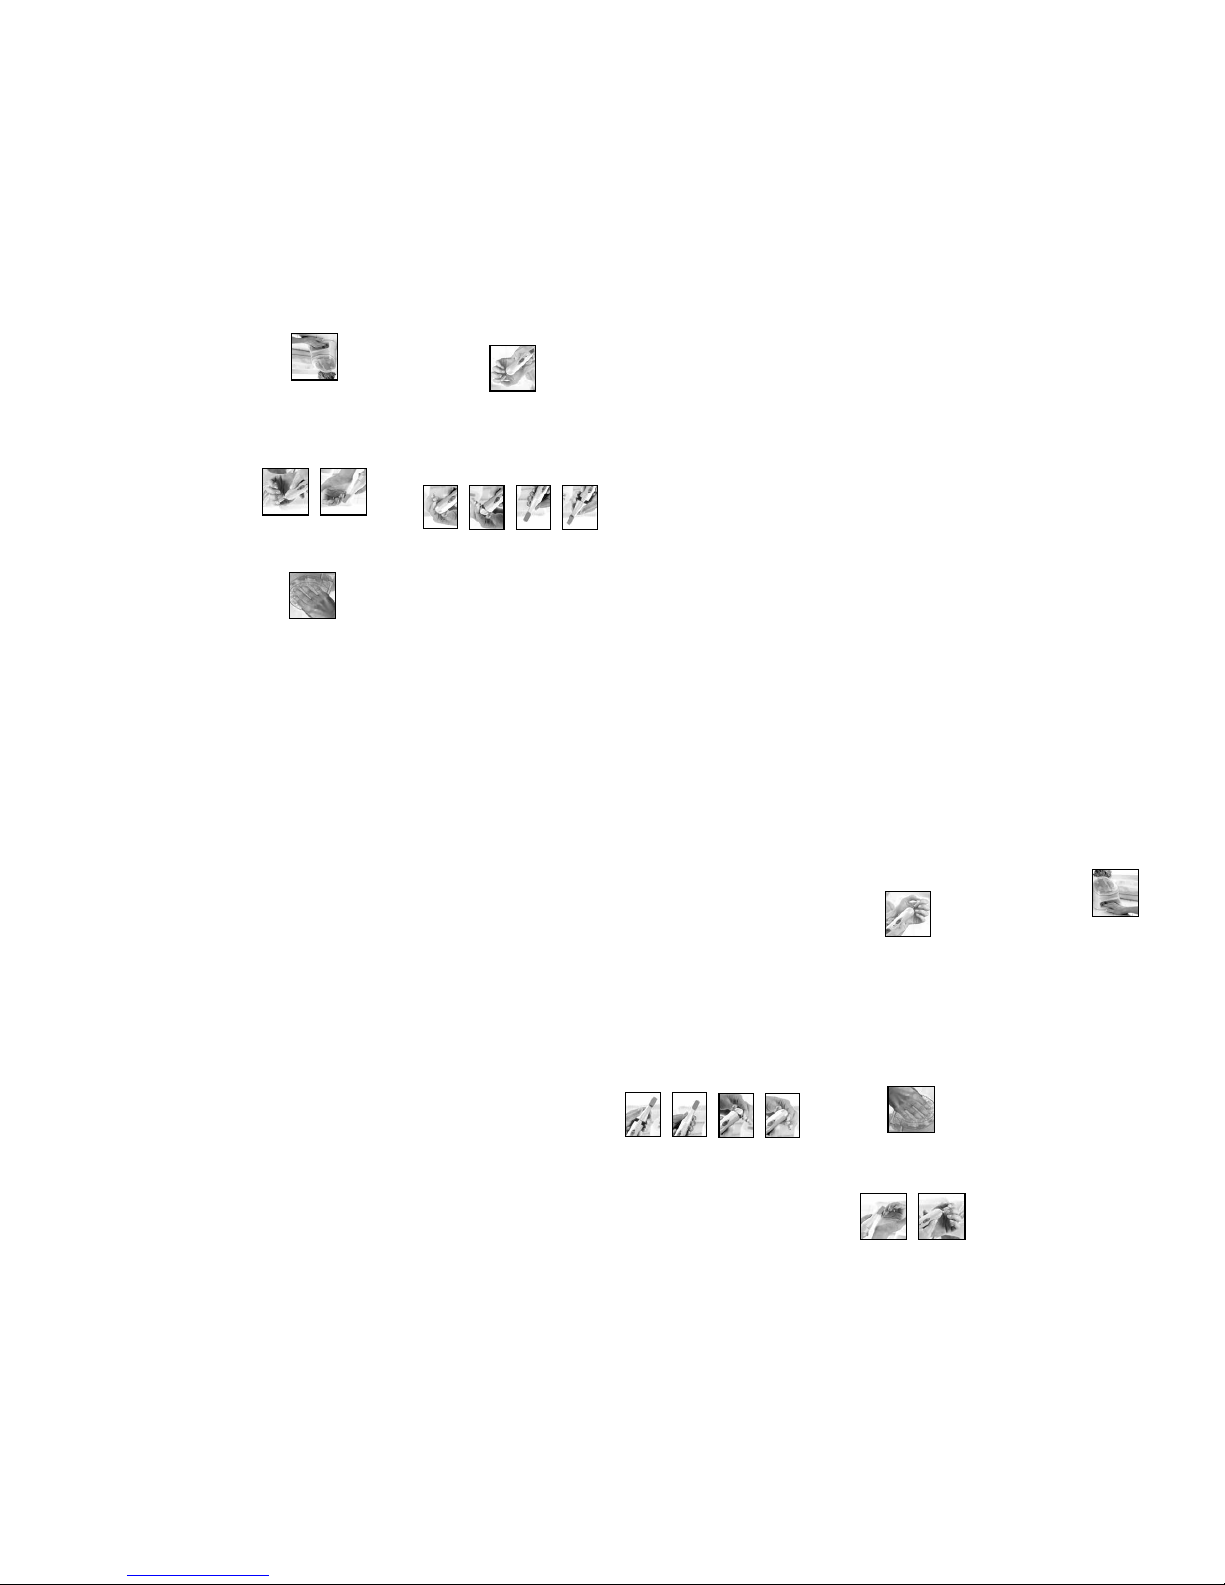
7. To softe n nails and cuticles before a manicure,
pull out the manicurist ’s soap dish, fill it with warm,
soapy water and soak yo ur finger tips for a few
minutes. Dry your hands thoroughly before
using the power ha ndle and attachment s.
8. After you have att ached a head and an appropriate
attachment to the p ower handle, turn the power
handle ON and carefull y start shaping, smoothing
or polishing your nails.
9. Your All-in-One Nail Car e Center has a nail dryer
that will help shorten f resh nail polish drying time.
Simply insert your hand in to the nail dryer, pushing
down slightly. That will sta rt the nail dryer. Check
nails after a few minutes t o see if polish is dry.
10. After using the Nail Care C enter several times, you
will find the attachme nt and speed combinations
that give you the result s you desire.
MANICURE
1. Soak your nails in warm soapy water using you r
manicurist's soap dis h, then dry thoroughly.
2. Decide on the nail shape you want. T he three
most common nail shapes a re round, square,
or square with rounde d edges.
3. Use the Smoothing Disc/ Plate to smooth the
edges of each nail. Then use t he rounded end
of the Cuticle Shaper t o gently push the cuticles
away from the nail plate. If de sired, massage
lotion or cream into the c uticle to help soften
cuticle and promote hea lthy nails. Unwanted
rough or hard skin can be r educed by using
the Smoothing Disc. In c ases where ridges and
grooves are present , the Smoothing Disc/Plate
can be used to gently and c arefully reduce the
unevenness, using shor t intermittent strokes.
This is not reco mmended more than once
every eight wee ks.
4. To give nails a healthy, natural look, use the
Polishing Disc or Cone,* ma ximum of 30 seconds per nail, taking ca re to avoid the cuticle.
5. Finish your manicure by using a moistur izing
lotion or cream.
*Cones can be us ed on acrylic nails.
MEDIDAS DE
SEGURIDAD
IMPORTANTES
PARA USO DOMÉSTICO SOLAMENTE. SIEMPRE
QUE USE APARATOS ELÉCTRICOS, DEBE TOMAR
PRECAUCIONES BÁSICAS DE SEGURIDAD, ENTRE
LAS CUALES LAS SIGUIENTES:
LEA TODAS LAS
INSTRUCCIONES ANTES
DE USARLO
MANTÉNGALO ALEJADO
DEL AGUA
PELIGRO –
Para reducir el riesgo de
electrocución:
1. Desconecte el aparato inmediatamente después
del uso.
2. No lo use en el baño o la ducha.
3. No coloque ni guarde el aparato donde pueda
caer o ser empujado a una bañera o un lavabo.
4. No coloque este producto ni lo deje caer al agua
u otro líquido.
5. No trate de alcanzar el aparato después de que
hubiese caído al agua. Desconéctelo
nmediatamente.
ADVERTENCIA – Para reducir el
riesgo de quemaduras, electrocución, incendio
o heridas:
1. Lea todas las instrucciones antes de usarlo.
2. Para reducir el riesgo de electrocución, no lo use en
el baño o la ducha.
3. Supervise el uso de este aparato cuidadosamente
cuando esté usado por o cerca de niños o personas
con alguna discapacidad.
4. Desconecte el aparato cuando no esté en uso y
antes de limpiarlo. No deje el aparato desatendido
mientras esté conectado. Mantenga el cable alejado
de superficies calientes.
5. No utilice este aparato si el cable o la clavija
estuviesen dañados, después de que hubiese
funcionado mal o que se hubiese caído o si
estuviese dañado. Regrese el aparato a un centro
de servicio autorizado para su revisión, reparación
o ajuste. No trate de repararlo.
6. Utilice este aparato únicamente con el propósito
para el cual fue diseñado y solamente según las
instrucciones. El uso de accesorios no
recomendados o vendidos por Conair puede ser
peligroso.
7. No lo utilice en exteriores, ni lo haga funcionar
donde se estén usando productos en aerosol
(spray) o donde se esté administrando oxígeno.
8. No lo haga utilice sobre una superficie blanda,
como una cama, donde las entradas se puedan
obstruir.
9. No coloque ni guarde el aparato donde pueda caer
o ser empujado a una bañera o un lavabo.
10. No coloque este producto ni lo deje caer al agua u
otro líquido.
11. Si el aparato cayera al agua, desconéctelo
inmediatamente. No toque el agua.
12. Enchufe el adaptador en una toma de corriente
después de haberse cerciorado que el voltaje
usado corresponda al voltaje indicado sobre el
adaptador (Entrada: 100–240V C.A. 50/60 Hz;
Salida: 3.0V C.C. 1000 mA). El adaptador siempre
debe usarse en posición vertical. Puede que sea
necesario utilizar un adaptador de enchufe (no
incluido) para conectar el aparato fuera de los
Estados Unidos.
13. Este adaptador cumple con la Sección 15 de la
Normativa FCC. Su funcionamiento está sujeto a
las dos condiciones siguientes: 1) Este adaptador
no puede causar ninguna interferencia perjudicial,
y 2) Este adaptador debe aceptar cualquier
interferencia recibida, incluso alguna interferencia
que pudiera ocasionar una operación no deseada.
GUARDE ESTAS
INSTRUCCIONES
INSTRUCCIONES
DE OPERACIÓN
Su nuevo sistema de manicura/pedicura
multifunción True Glow™ de Conair funciona con
un adaptador sector. Este adaptador puede
conectarse al secador de uñas o al mango, sea
para cargar éste o para usarlo con cable.
Solamente utilice el adaptador provisto para cargar
el sistema de manicura/pedicura multifunción True
Glow™ de Conair.
INSTRUCCIONES DE CARGA
Asegúrese de que el bot ón de encendido/apagado
esté en la posición "OF F". Conecte el adaptador
al mango. Enchufe el adapt ador en una toma de
corriente y permit a que la unidad cargue durante
16 horas antes del primer uso. P ara máxima vida
útil de la pila recargable, n o cargue el aparato
durante más de 24 horas c onsecutivas.
USO CON CABLE
1
.Asegúrese de q ue el aparato esté apagado (OFF ).
2.Conecte el adaptador al mango.
3. El accesorio de manicura/pedicura cuenta con
dos cabezales intercambiables. El cabezal
giratorio es compatible con los accesorios
rotativos y el cabezal lineal es compatible con
las placas rectangulares que mueven de atrás
hacia adelante. El cabezal giratorio viene
sujetado al mango. Jale el mango para retirarlo
del soporte de los accesorios.
4. Para cambiar el cabezal: gire el cabezal en
sentido antihorario y jálelo hacia arriba para
retirarlo. Instale el otro cabezal sobre la base de
plástico, presionando suavemente, y gírelo en
sentido horario para sujetarlo.
5. Para conectar los discos y los conos al cabezal
giratorio, introduzca la guía de metal del acceso-
rio en el tubo de plástico blanco del cabezal, pre-
sionando suavemente. Para conectar las placas
al cabezal lineal, haga coincidir la extremidad
redondeada de la placa con la parte redondeada
del cabezal y presione para sujetar. Para retirar
los accesorios, simplemente jálelos.
6.
Su sistema de manicura/pedicura incluye varios
accesorios. El disco y la placa de grano grueso son
ideales para dar forma e igualar las uñas, logrando
un acabado nítido. Los conos y la placa de grano
fino suavizan los contornos, para un aspecto más
estético. El cono y el disco pulidores suavizan la
superficie de la uña para facilitar la aplicación del
esmalte y proporcionar un brillo sano.
7.
Para suavizar las uñas y las cutículas antes de la
manicura, remoje las yemas de los dedos en agua
jabonosa tibia durante unos minutos, usando la
bandeja de remojo. Séquese bien las manos
antes de usar el mango y los accesorios.
8. Tras haber instalado el cabezal y el accesorio
deseados sobre el mango, encienda el aparato y
empiece a dar forma, suavizar y pulir
suavemente la uñas.
9. Su sistema de manicura/pedicura cuenta con un
secador de uñas que le permitirá secar el
esmalte rápidamente. Simplemente introduzca la
mano en la abertura del secador, presionando
suavemente hacia abajo. Esto activará el secado.
Inspeccione las uñas después de varios minutos
para averiguar si el esmalte está seco.
10. Después de usar su sistema de manicura/
pedicura varias veces, encontrará la combinación
de accesorios/velocidad ideal para conseguir los
resultados deseados.
MANICURA
1. Remoje las yemas de los dedos en agua
jabonosa tibia, adentro de la bandeja de remojo,
y luego séquelas bien.
2. Decida cuál forma dar a las uñas. Las tres
formas más comunes son: redondas, cuadradas
y con bordes redondeados.
3. Utilice el disco/la placa pulidora para suavizar los
bordes de las uñas. Después, utilice la
extremidad redondeada del empujador de
cutículas para empujar suavemente las cutículas
hacia arriba. Si desea, masajee las cutículas con
loción o crema para suavizarlas y promover uñas
sanas. Elimine suavemente la piel dura o seca
con el disco pulidor. Si las uñas presentan
rugosidades o ranuras, también puede usar el
disco/la placa pulidora para suavizar
cuidadosamente la superficie de la uña, usando
movimientos intermitentes cortos. Esto no se
recomienda más de una vez cada ocho
semanas.
4. Para dar a las uñas un brillo sano y natural,
utilice el disco o el cono pulidor* durante un
máximo de 30 segundos sobre cada uña,
teniendo cuidado de no tocar la cutícula.
5. Termine la manicura con su loción/crema
hidratante favorita.
*Los conos pueden usarse sobre las uñas acrílicas.
Page 2
LIMITED ONE YEAR WARRANTY
Conair will repair or replace (at our option) your
unit free of charge for 12 months from the date of
purchase if the appliance is defective in
workmanship or materials.
To obtain service under this warranty, return the
defective product to the service center listed on
back that is nearest you, together with your
purchase receipt and $3.00 for postage and
handling. California residents need only provide
proof of purchase and should call
1-800-3-CONAIR for shipping instructions. In the
absence of a purchase receipt, the warranty
period shall be 12 months from the date of
manufacture.
ANY IMPLIED WARRANTIES, OBLIGATIONS, OR
LIABILITIES, INCLUDING BUT NOT LIMITED TO
THE IMPLIED WARRANTY OF
MERCHANTABILITY AND FITNESS FOR A
PARTICULAR PURPOSE, SHALL BE LIMITED IN
DURATION TO THE 12-MONTH DURATION OF
THIS WRITTEN, LIMITED WARRANTY. Some
states do not allow limitations on how long an
implied warranty lasts, so the above limitations
may not apply to you.
IN NO EVENT SHALL CONAIR BE LIABLE FOR
ANY SPECIAL, INCIDENTAL, OR CONSEQUENTIAL
DAMAGES FOR BREACH OF THIS OR ANY OTHER
WARRANTY, EXPRESS OR IMPLIED,
WHATSOEVER. Some states do
not allow the exclusion or limitation of special,
incidental, or consequential damages, so the
above limitation may not apply to you. This
warranty gives you specific legal rights, and you
may also have other rights, which vary from state
to state.
BATTERY DISPOSAL
This appliance contains a nickel metal hydride
battery. To protect the environment, this appliance
and its battery must be disposed of safely. At the
end of its life, please take this appliance to
a recycling center where the internal rechargeable
battery should be removed by a professional and
recycled separately. For more information about
the recycling of electrical and battery-operated
appliances, please contact your local recycling or
environmental protection office or your household
waste disposal service. For specific enquiries
regarding the replacement of batteries in this
product, please contact our Conair Customer
Care Line.
ALWAYS UNPLUG
SMALL APPLIANCES
STORAGE
Disconnect from electrical outlet. Place nail care
center in cool, dry area out of reach of children,
where it will not be damaged. Handle cord
carefully for longer life; do not jerk or strain at
plug connections, or wrap cord around unit for
storage. This could cause damage to the cord or
a short circuit. To store unit, coil cord loosely.
PEDICURE
1. Soak your fe et for five minutes in warm,
soapy water and dry t horoughly.
2. Us e the Smoothing Disc/Plate to red uce the
length of the nail. Toenails should be f iled
straight acros s to avoid ingrown toenails.
Use a fine Smoothing Dis c/Plate on a low
speed as a finishing touch to t he edges.
3. To reduce callu ses or rough or hard skin, use
the Sapphire Cones o r a Smoothing Disc/Plate.
The thickness or dea d skin can be reduced by
using the side of the Sapphire Cones. Where
ridges and furrows ar e present, the Smoothing
Disc can also be used to g ently and carefully
reduce the unevenness, u sing short
intermittent strokes.
This is not reco mmended more than once
every eight wee ks.
4. Finis h your pedicure by using a moisturizing
lotion or cream.
MAINTENANCE
Your Nail Care Center is de signed for household
use and is virtually ma intenance free. No
lubrication is needed.
If cleaning becomes nece ssary, disconnect the
appliance from the power s ource and wipe
exterior with a clot h.
If any abnormal condit ion occurs, unplug the nail
care center, allow it to cool, an d return it to an
authorized service center for repair.
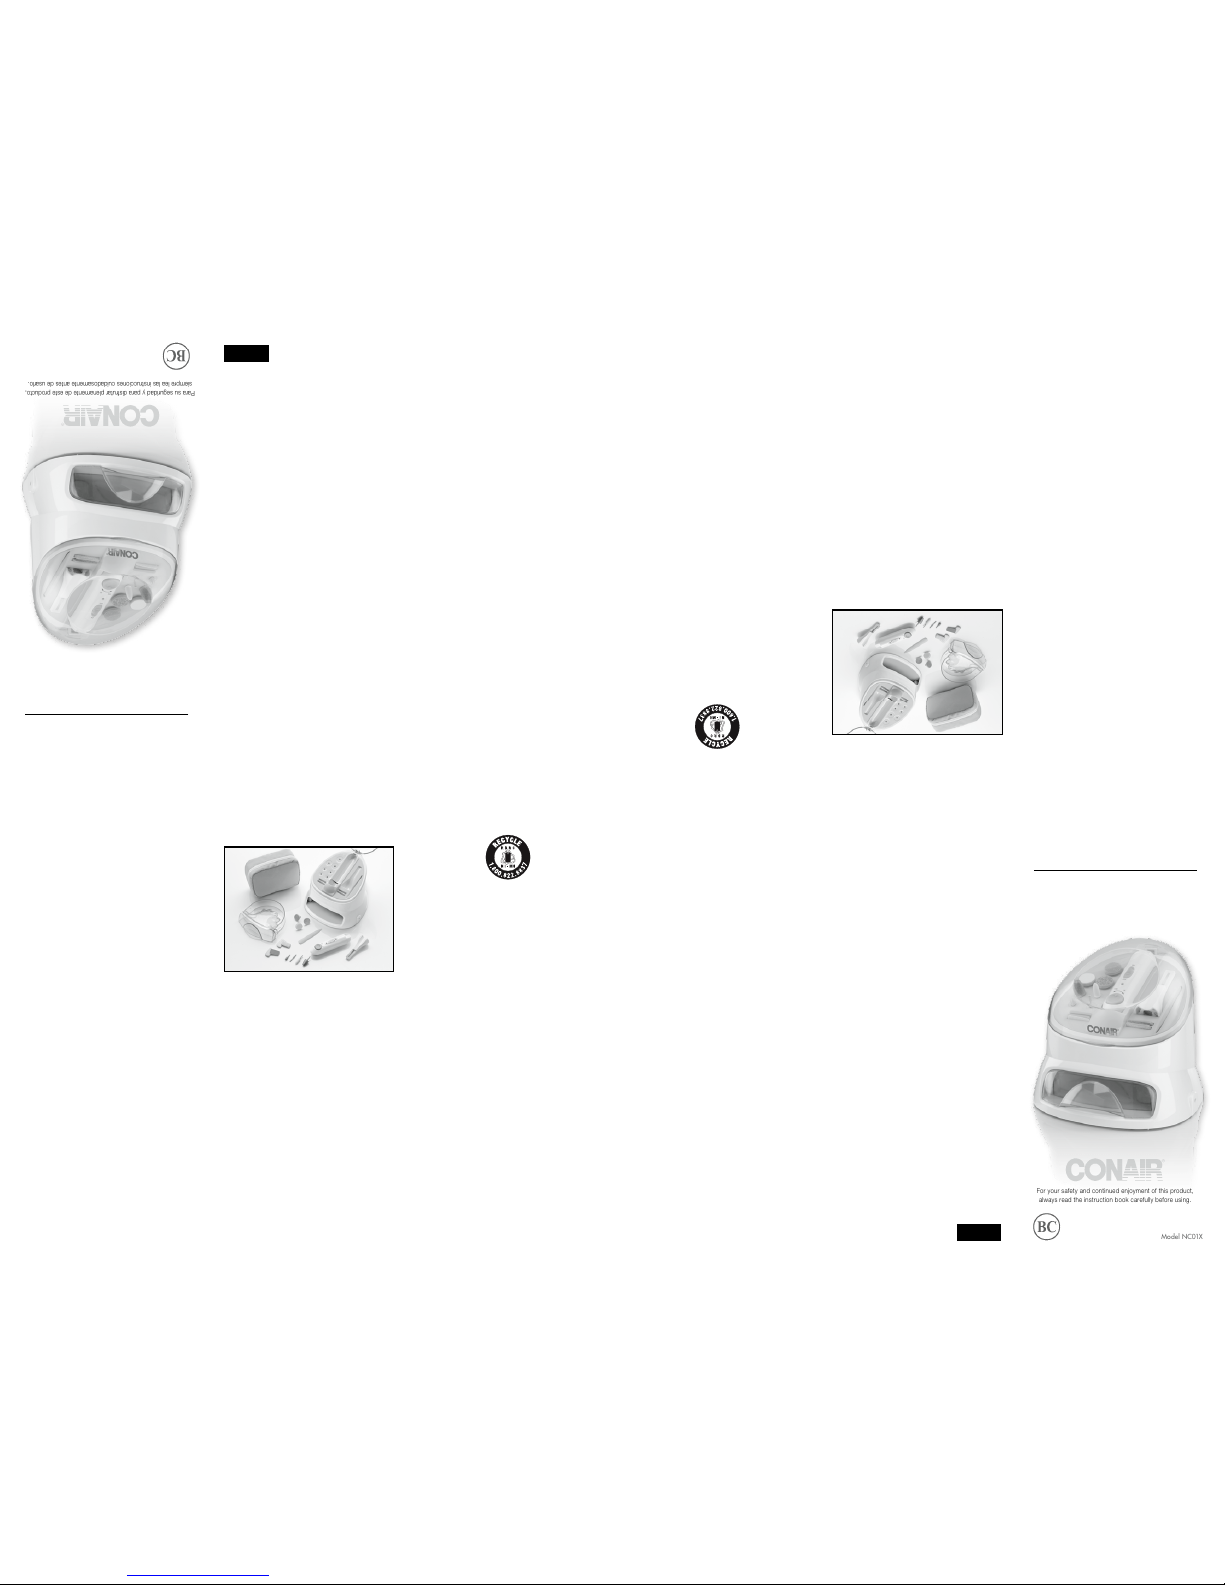
GETTING TO KNOW YOUR
ALL-IN-ONE NAIL CARE CENTER
1. Rechargeable Powe r Handle works corded
or cordless
2. Variable Speed C ontrol
3. Nail Dryer
4. Manicurist’s Dish
5. Cuticle Shaper
6. Linear Head
7. Rotary Head
8. Metal Smoot hing Plate
9. Metal Shaping Pl ate
10. Buffing Pl ate
11. Smoothing Plate
12. Medium Stone C one
13. Buffing D isc
14. Travel Bag Included
15. Smoothing Disc
16. Shaping Disc
17. Small Sapphire Cone*
18. Medium Sapphire Con e*
19. Large Sapphire Cone*
* for acrylic nails
IB -12456
For your safet y and continued enjoy ment of this product,
always read the instruction book carefully before using.
Mod el NC 01X
Service Centers:
Conair Corporation
Service Department
150 Milford Road
East Windsor, NJ 0 8520
Conair Corporation
Service Department
7475 N. Glen Harbor Blvd.
Glendale, AZ 8 5307
©2013 Conair Corporation
150 Milford Road, Eas t Windsor, NJ 08520
7475 N. Glen Harbor Blvd. Glendale, A Z 85307
13PS145472
All-in-One Na il Care System,
for professional manicure results.
true glow
™
GARANTÍA LIMITADA
DE UN AÑO
Conair reparará o remplazará (a su opción) su
aparato sin cargo por un período de 12 meses a
partir de la fecha de compra si presentara
defectos de materiales o fabricación.
Para obtener servicio técnico bajo esta garantía,
regrese su aparato al Centro de Servicio indicado a
continuación, junto con su recibo de compra y un
cheque o giro postal de US$3.00 por gastos de
manejo y envío. Los residentes de California sólo
necesitan dar una prueba de compra y deben
llamar al 1-800-3-CONAIR para recibir
instrucciones de envío. En ausencia del recibo de
compra, el período de garantía será de 12 meses a
partir de la fecha de fabricación.
CUALQUIER GARANTÍA, OBLIGACIÓN O
RESPONSABILIDAD IMPLÍCITAS, INCLUYENDO
PERO NO LIMITADAS A LA GARANTÍA
IMPLÍCITA DE COMERCIABILIDAD Y APTITUD
PARA UN PROPÓSITO ESPECÍFICO, ESTARÁN
LIMITADAS POR LOS 12 MESES DE LA
PRESENTE GARANTÍA ESCRITA. Algunos Estados
no permiten limitaciones sobre la duración de una
garantía implícita, de modo que las limitaciones
mencionadas pueden no regir para usted.
CONAIR NO SERÁ RESPONSABLE, EN NINGÚN
CASO, POR NINGÚN DAÑO ESPECIAL,
INCIDENTAL O CONSECUENTE DEBIDO AL
INCUMPLIMIENTO DE ESTA O CUALQUIER OTRA
GARANTÍA, EXPRESA O IMPLÍCITA. Algunos
Estados no permiten la exclusión o limitación de
daños especiales, incidentales o consecuentes, de
modo que las limitaciones mencionadas pueden
no regir para usted.
Esta garantía le otorga derechos legales
específicos y usted puede tener otros derechos
que varían de un Estado a otro.
PEDICURA
1. Remoje los pies en agua jabonosa caliente
durante cinco minutos, y luego séquelos bien.
2. Utilice el disco/la placa pulidora para limar las
uñas. Para evitar las uñas encarnadas, lime las
uñas del pie de manera recta, de un lado a
otro. Utilice el disco/la placa pulidora de grano
fino a velocidad baja para dar el acabado.
3. Para suavizar los callos y la piel áspera o dura,
utilice los conos de zafiro o el disco/la placa
pulidora. La piel muerta puede eliminarse con
el costado de los conos de zafiro. Si las uñas
presentan rugosidades o ranuras, también
puede usar el disco/la placa pulidora para
suavizar cuidadosamente la superficie de la
uña, usando movimientos intermitentes cortos.
Esto no se recomienda más de una vez cada
ocho semanas.
4. Termine la pedicura con su loción/crema
hidratante favorita.
MANTENIMIENTO
Este aparato ha sido diseñado para uso doméstico
y requiere poco mantenimiento. No necesita
lubricación.
Cuando sea necesario limpiarlo, desenchúfelo y
limpie la superficie exterior con un paño limpio.
En caso de mal funcionamiento, desconecte el
espejo, permita que enfríe y regréselo a un centro
de servicio autorizado.
FAMILIARÍCESE CON SU
SISTEMA DE MANICURA/PEDICURA
1. Mango recargable para uso con/sin cable
2. Control de velocidad
3. Secador de uñas
4. Bandeja de remojo
5. Empujador de cutículas
6. Cabezal lineal
7. Cabezal giratorio
8. Placa de metal para suavizar
9. Placa de metal para dar forma
10. Placa pulidora
11. Placa para suavizar
12. Cono de fieltro grande
13. Disco pulidor de fieltro
14. Bolso de viaje
15. Disco para suavizar
16. Disco para dar forma
17. Cono de zafiro pequeño*
18. Cono de zafiro mediano*
19. Cono de zafiro grande*
* para las uñas acrílicas
Para su seguridad y para disfrutar plenamente de este producto,
siempre lea las instrucciones cuidadosamente antes de usarlo.
Sistema de manicura/
pedicura multifunción,
para resultados profesionales.
Modelo NC01X
CENTROS DE SERVICIO:
Conair Corporation
Service Department
150 Milford Road
East Windsor, NJ 08520
Conair Corporation
Service Department
7475 N. Glen Harbor Blvd.
Glendale, AZ 85307
©2013 Conair Corporation
150 Milford Road, East Windsor, NJ 08520
7475 N. Glen Harbor Blvd. Glendale, AZ 85307
13PS145472
IB -12456
RECICLAJE DE LA BATERÍA
Este aparato contiene baterías de níquel e hidruro
metálico (NiMH). Para proteger el medio ambiente,
esta batería y el aparato deben reciclarse según
las leyes vigentes al final de su vida útil. Al final
de su vida útil, lleve el aparato a un centro de
reciclaje donde un profesional removerá la batería
recargable para reciclarla por separado. Para más
información acerca del reciclaje de los aparatos
eléctricos y de las baterías, comuníquese con las
autoridades locales en materia de reciclaje y
eliminación de desechos. Para más información
sobre el reemplazo de las baterías, comuníquese
con nuestro servicio de atención al cliente.
SIEMPRE DESENCHUFE
LOS APARATOS PEQUEÑOS
ALMACENAJE
Desconecte el cable de la toma de corriente.
Guárdelo en un lugar seco, fresco y seguro, fuera
del alcance de los niños. Manipule el cable con
cuidado para prolongar su vida útil. No lo tironee
ni lo retuerza, especialmente al nivel del enchufe.
No lo enrolle alrededor del aparato. Esto podría
dañar el cable o provocar un cortocircuito. Para
guardar el aparato, enrolle el cable sin apretar al
lado del mismo.
true glow
™
1
2
3
4
5
6
7
9
10
11
13
8
14
15
16
18
17
1912
1
2
3
4
5
6
7
9
10
11
13
8
14
15
16
18
17
1912
 Loading...