

Page 1
Installation Guide
Internet
Page 2
Package Contents
3
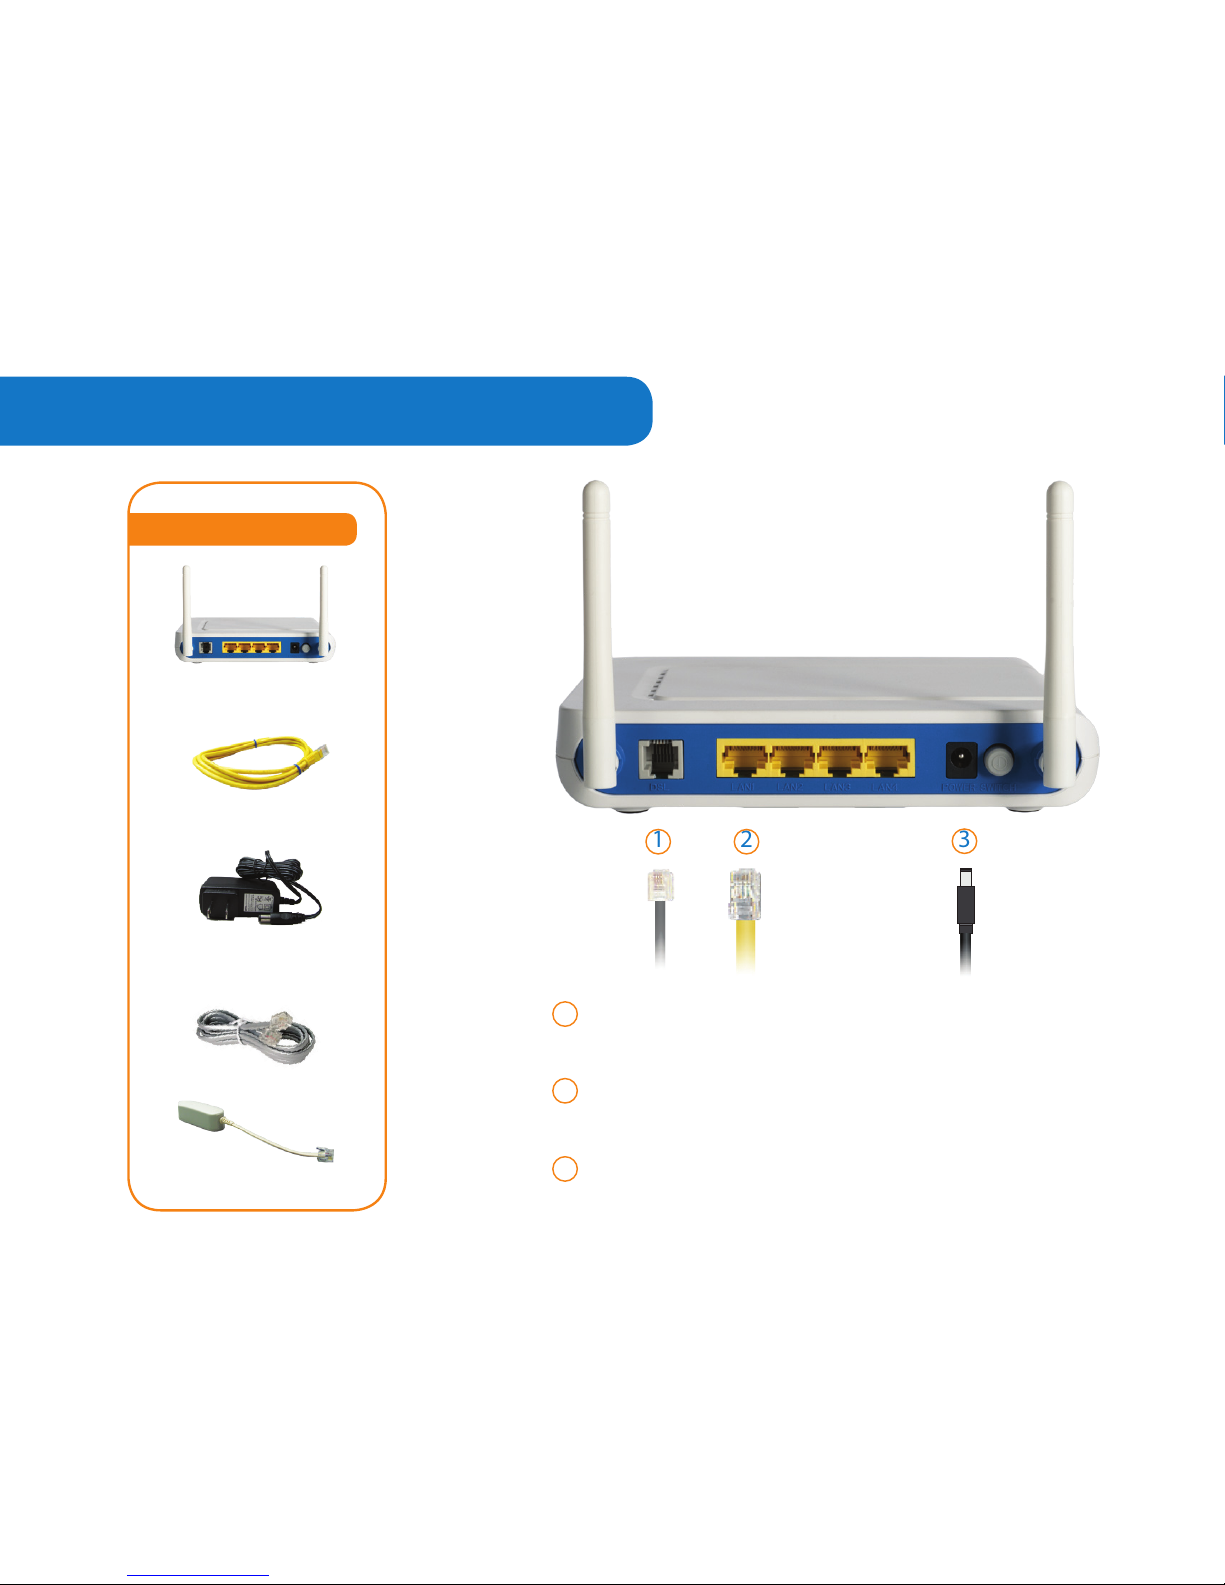
DSL Used to connect your Internet Modem to your
Internet Line using the Telephone Cord supplied.
LAN Used to connect to your computer using the
Ethernet Cable supplied.
DC 12V Used to connect to a power source using the
Power Adapter supplied.
1 2
1
2
3
COMWAVE SR35ON
INTERNET MODEM
ETHERNET CABLE
Package Contents
POWER ADAPTER
OUTPUT: 12V
TELEPHONE CORD
2 x INTERNET FILTER
Page 3
LED Light Indicators
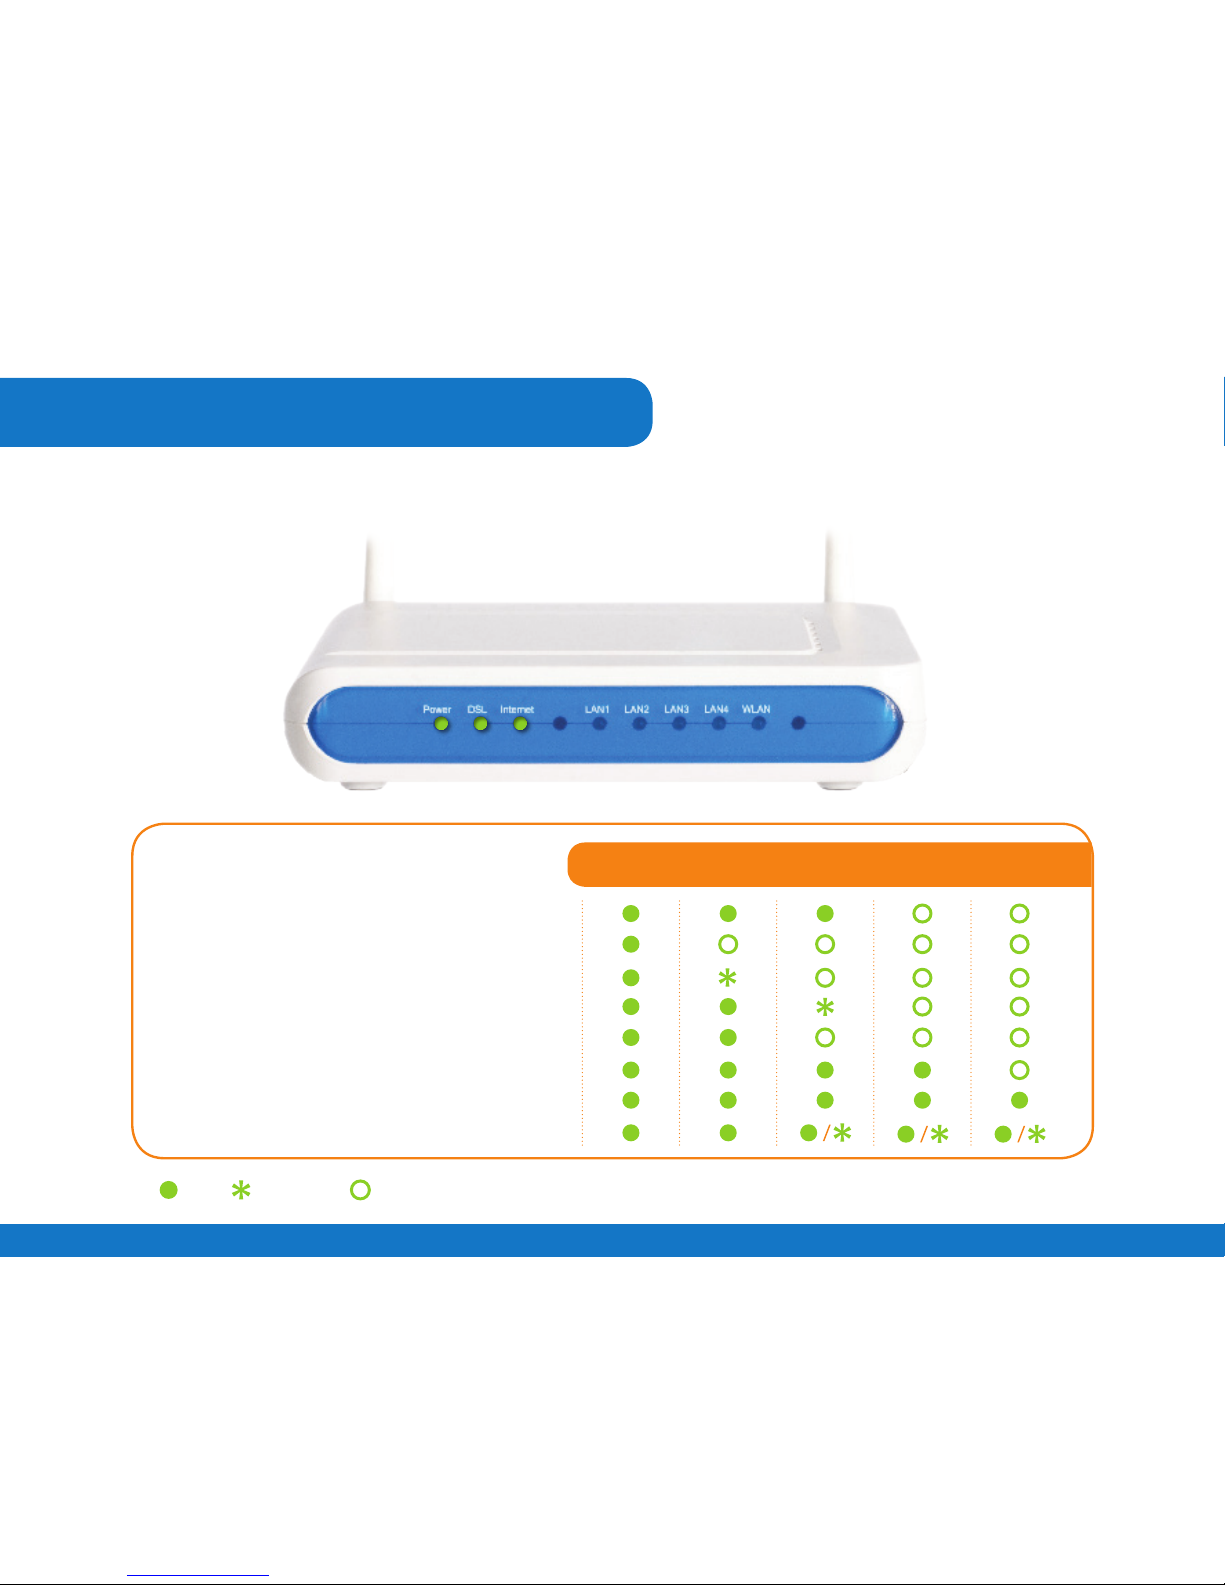
LED lights on the front panel of the DSL Modem can assist you in better
understanding the current state of your Comwave DSL Modem:
On Blinking O
DSL Sync Acquired and Modem Authenticated
No Sync to DSL Line
DSL Sync in progress
Modem Authentication in Progress
Modem Authentication / IP Failure
LAN Device on Network Connected
Wi-Fi enabled on Modem
PC / Network Activity / Data Transfer
POWER DSL INTERNET LAN 1-4 WLAN
Page 4
Installation
Power Outlet
Comwave
VoIP Adapter
(optional)
Phone Jack
Internet
Line
Internet
Modem
2
step
3
step
4
step
Continue to
1
step
Telephone
Computer
Page 5
Can’t access the Internet?
4
5
6
1
2
3
Unplug the power to your
Comwave Internet Modem and
shut down your computer.
Wait 30 seconds and then plug
your Modem’s Power Cord back
into the power outlet. Wait 3
minutes for your Modem to
sync back with Comwave’s
network.
Wait for the lights on your
Comwave Modem to become
solid green (Power, DSL and
Internet)
Restart your computer
Open your browser and start
surng the web
Still unable to surf the internet?
Call us at 1-866-210-9149
We’ll get you back
up online!
1
step
2
step
3
step
4
step
5
step
6
step
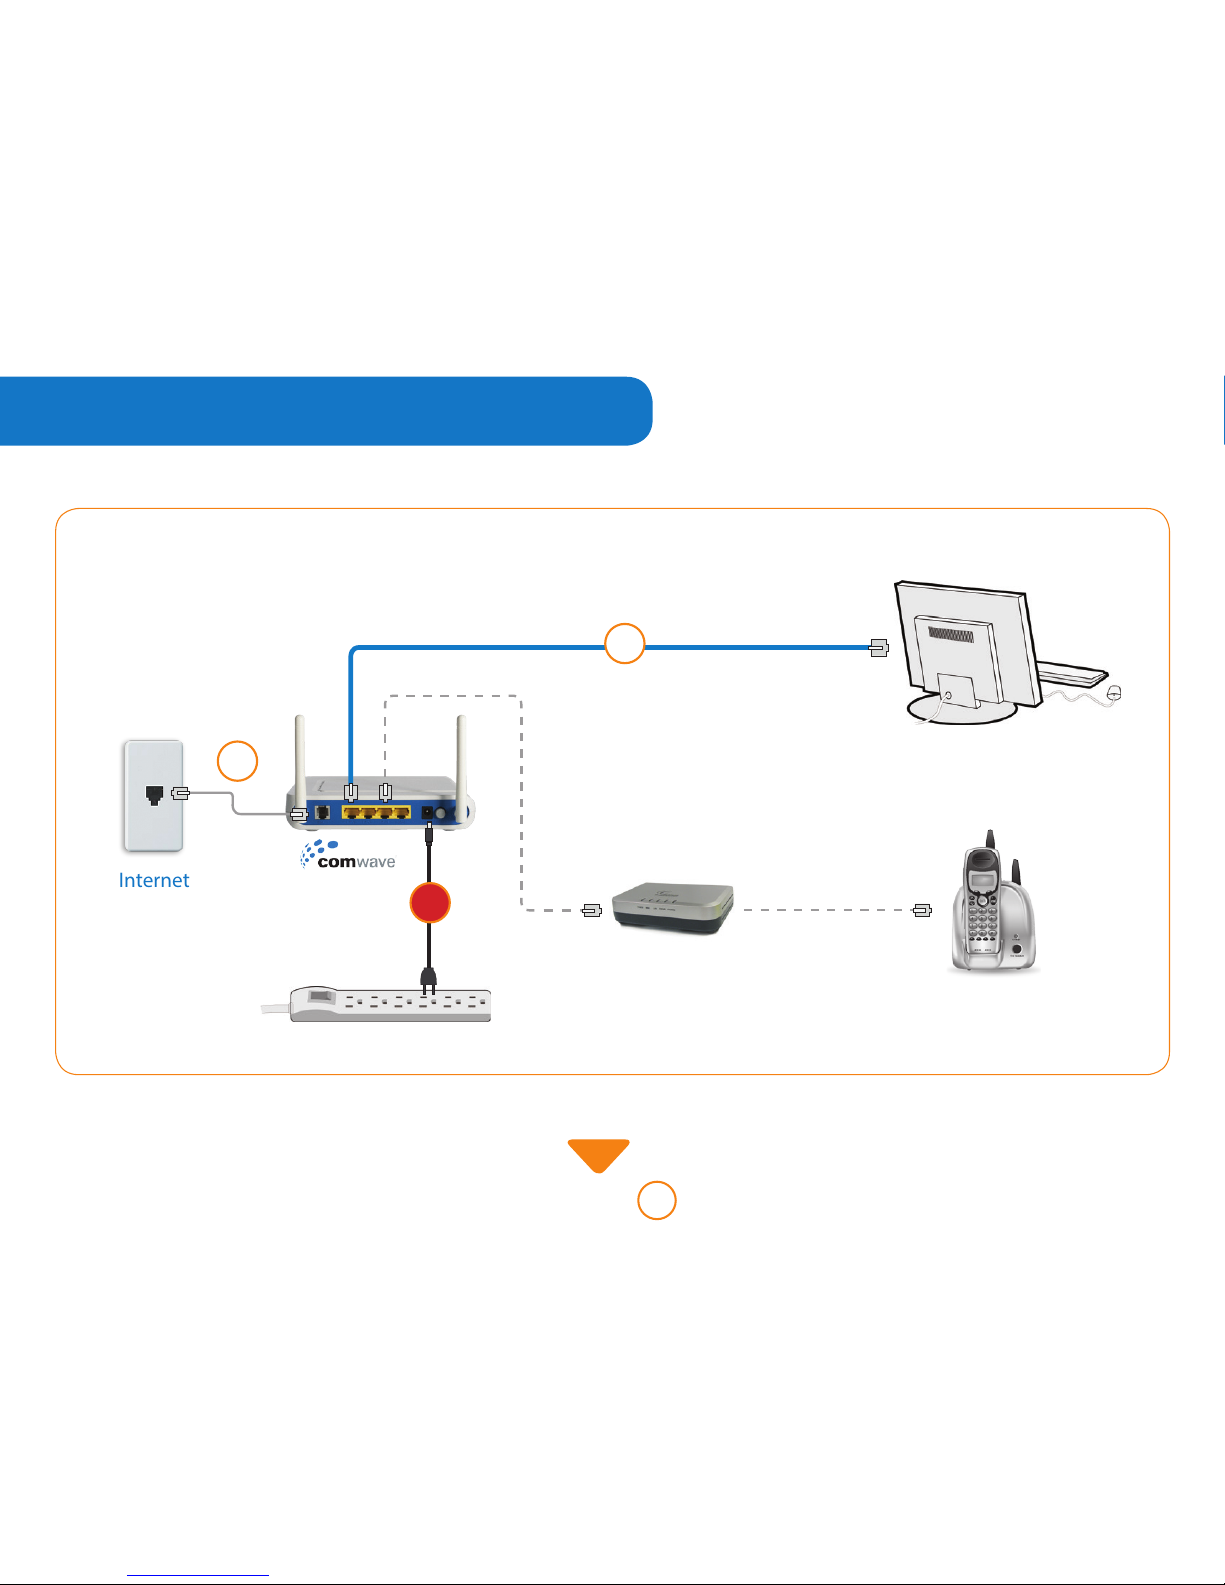
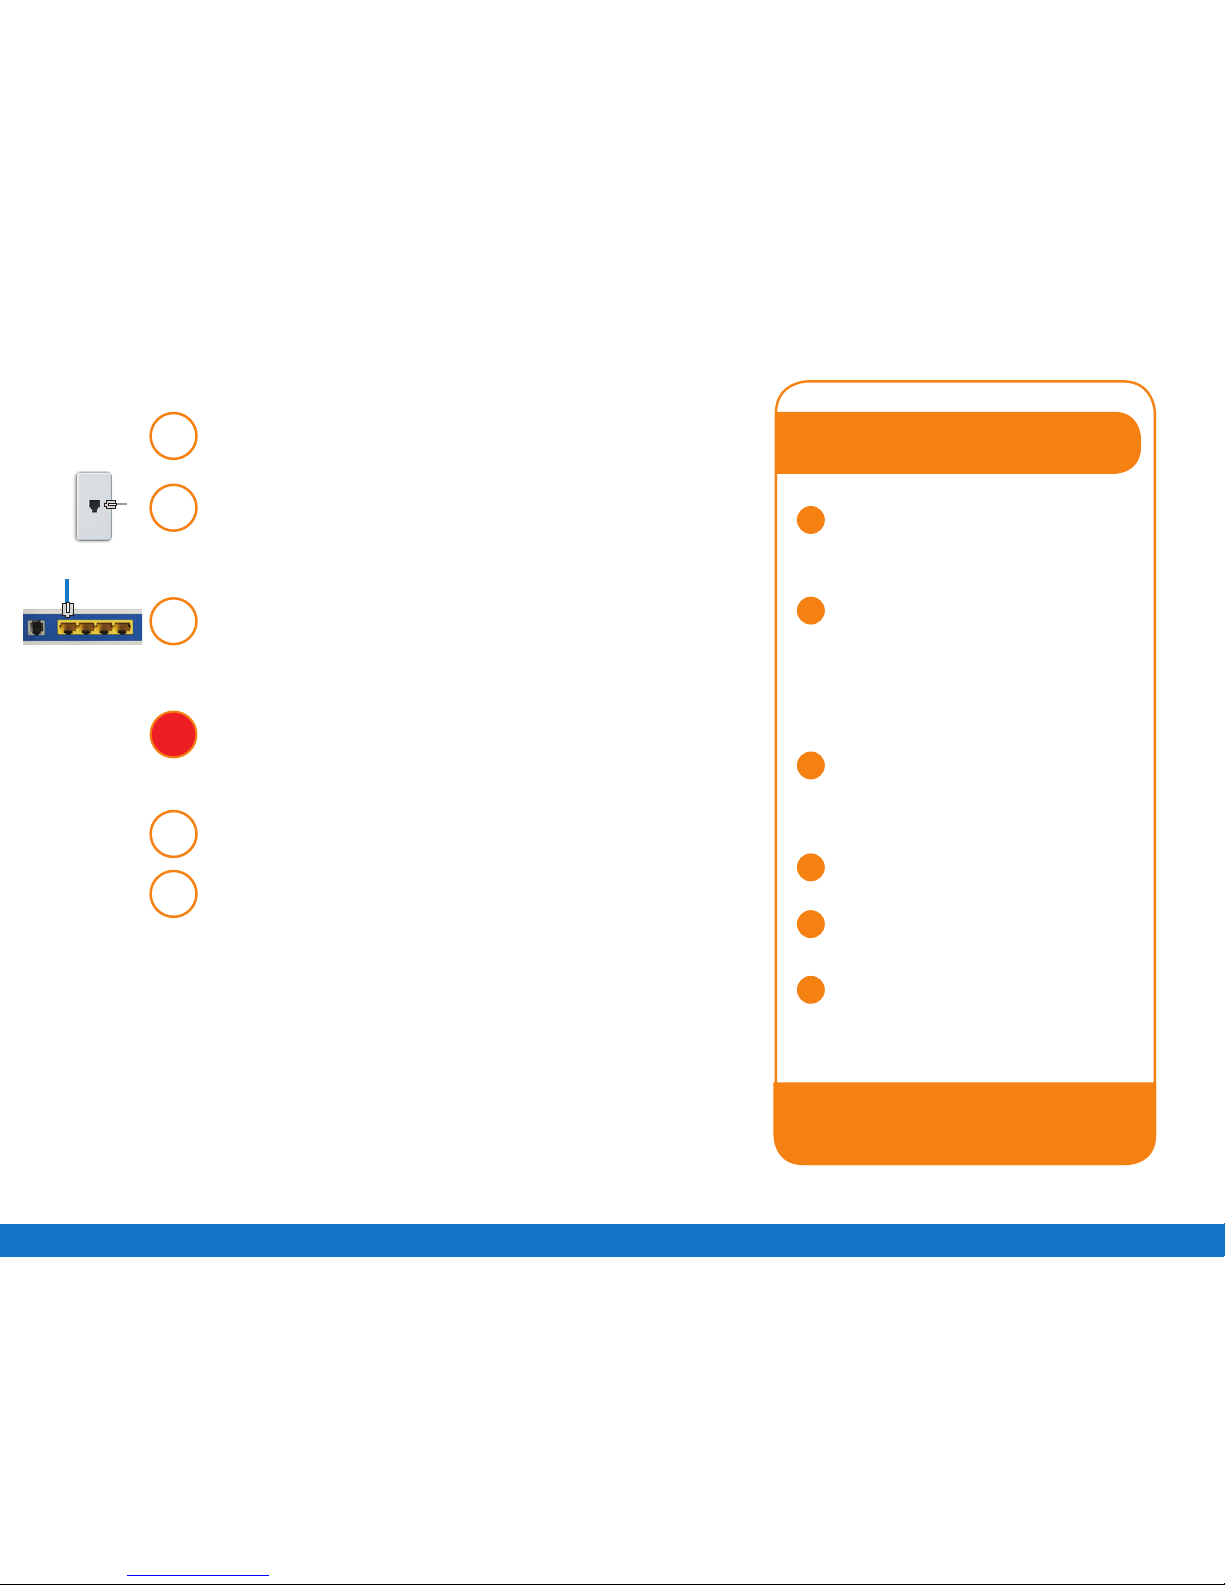
To begin installation, shut down your computer.
Connect the supplied Telephone Cord from your
phone jack on the wall to the Comwave Internet
Modem.
Connect the supplied Ethernet Cable from the
LAN port of the Comwave Internet Modem to your
computer.
Connect the Internet Modem to a power outlet
Note: Please wait 3 minutes before continuing to
the next step.
Start your computer.
You should be able to browse the internet instantly.
Page 6
Wi-Fi Settings
Your Modem is already Wi-Fi enabled by
Comwave. We do not recommend making
any changes to the default settings. Only
advanced users should attempt to make
changes or shut o the Wi-Fi settings by
following the steps below.
1
step
2
step
3
step
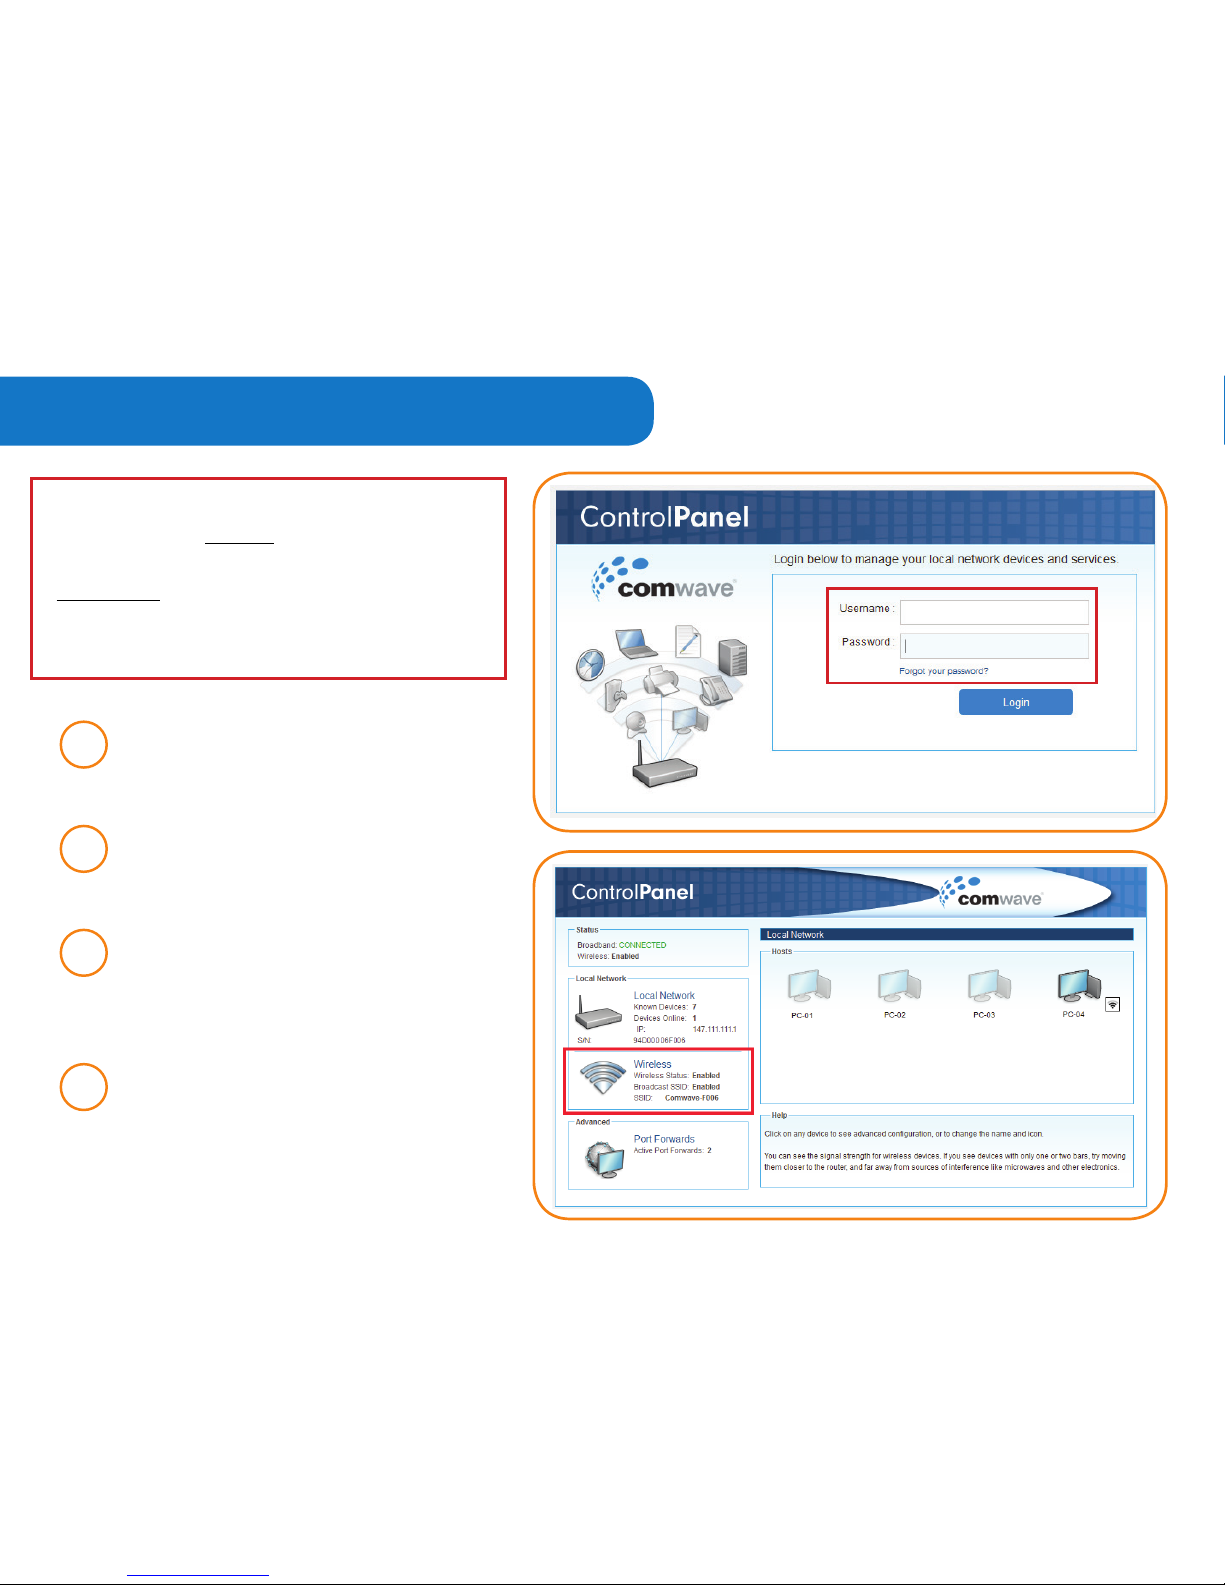
Ensure your PC is directly
connected to your Internet
Modem before you begin.
Open your Internet browser and
type http://192.168.17.1 in the
address bar.
Enter your Username and
Password. This was provided in
your Welcome Letter by email.
Click “Login” to proceed.
Click on Wireless in the Local
Network menu box on the left of
the Control Panel.
4
step
Page 7
6
step
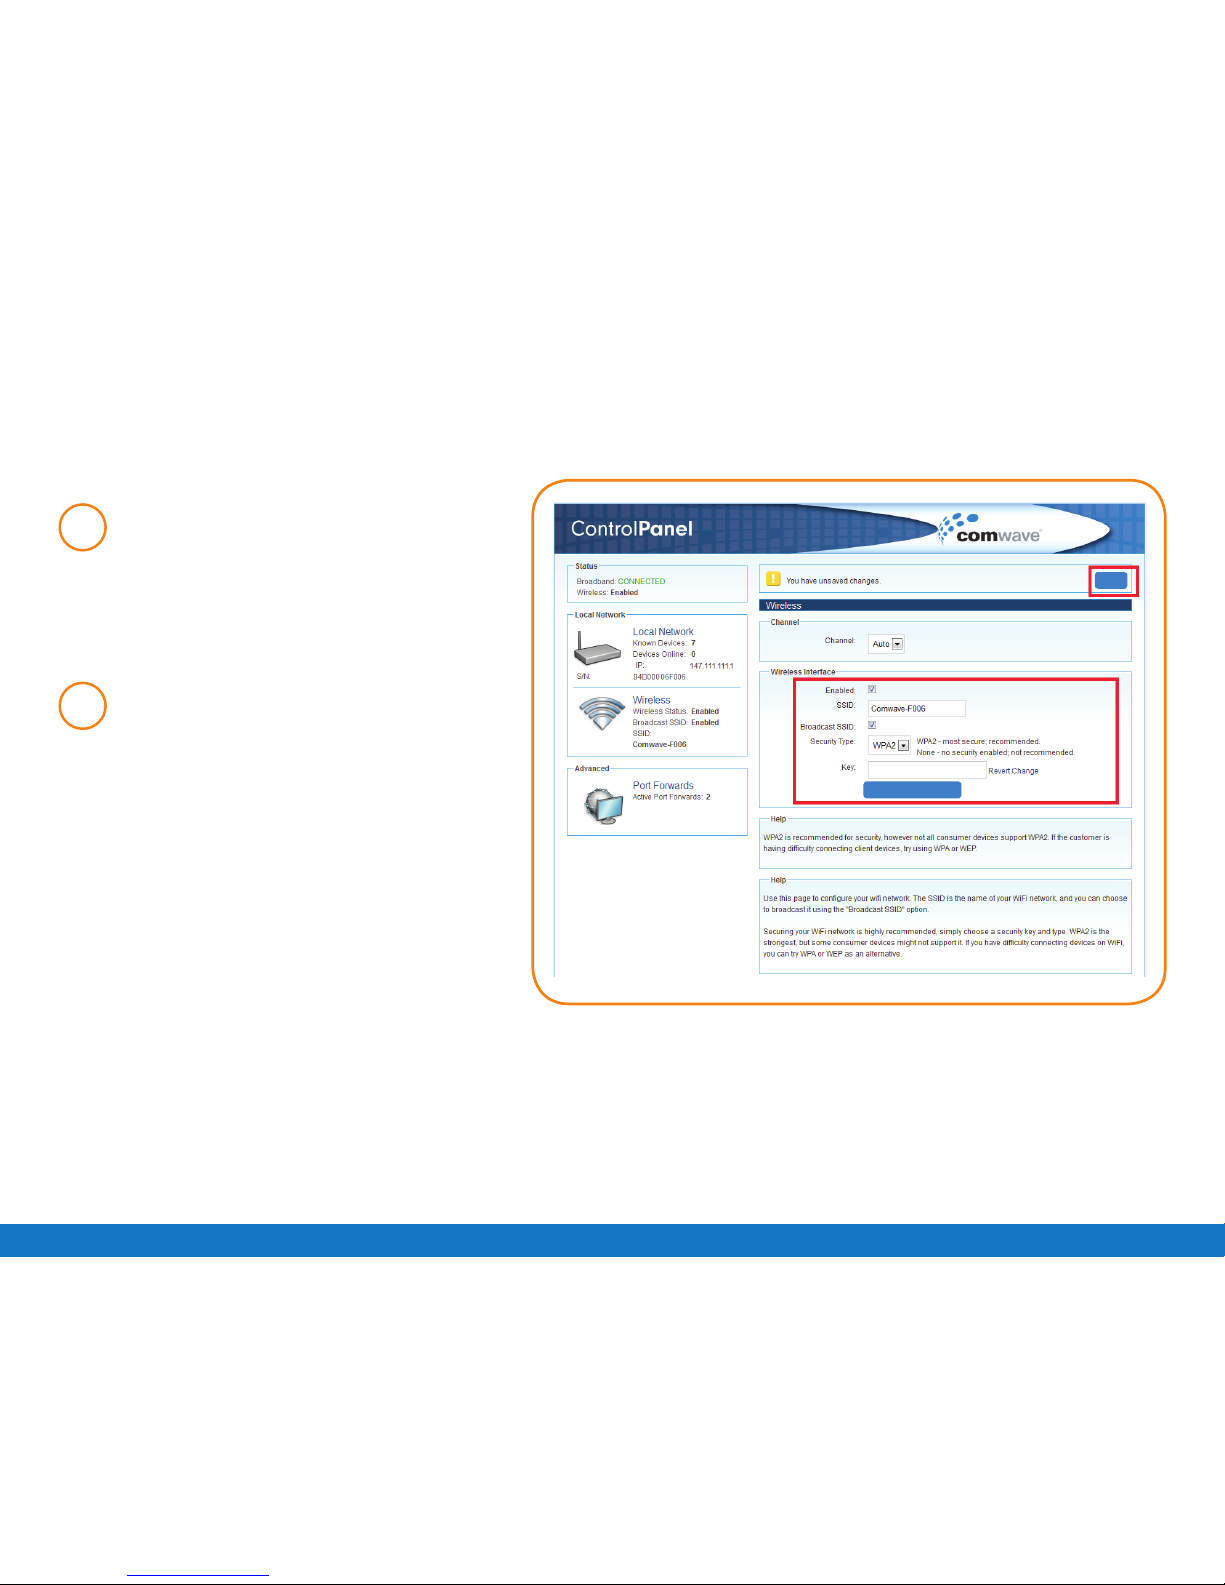
You may now make the following
changes:
• Disable your Wi-Fi
• Change your SSID
*
• Change your Security Type
• Choose your Wireless Key
Click Save.
5
step
*
SSID (Service Set Identier) is the name of your Wireless Network
Generate Wireless Key
Save
Page 8

Have more questions?
Let us help 1-866-210-9149
SR350N
 Loading...