

Page 1
Set up an account, download free maps and GO!
os.uk/gpssetup
Power
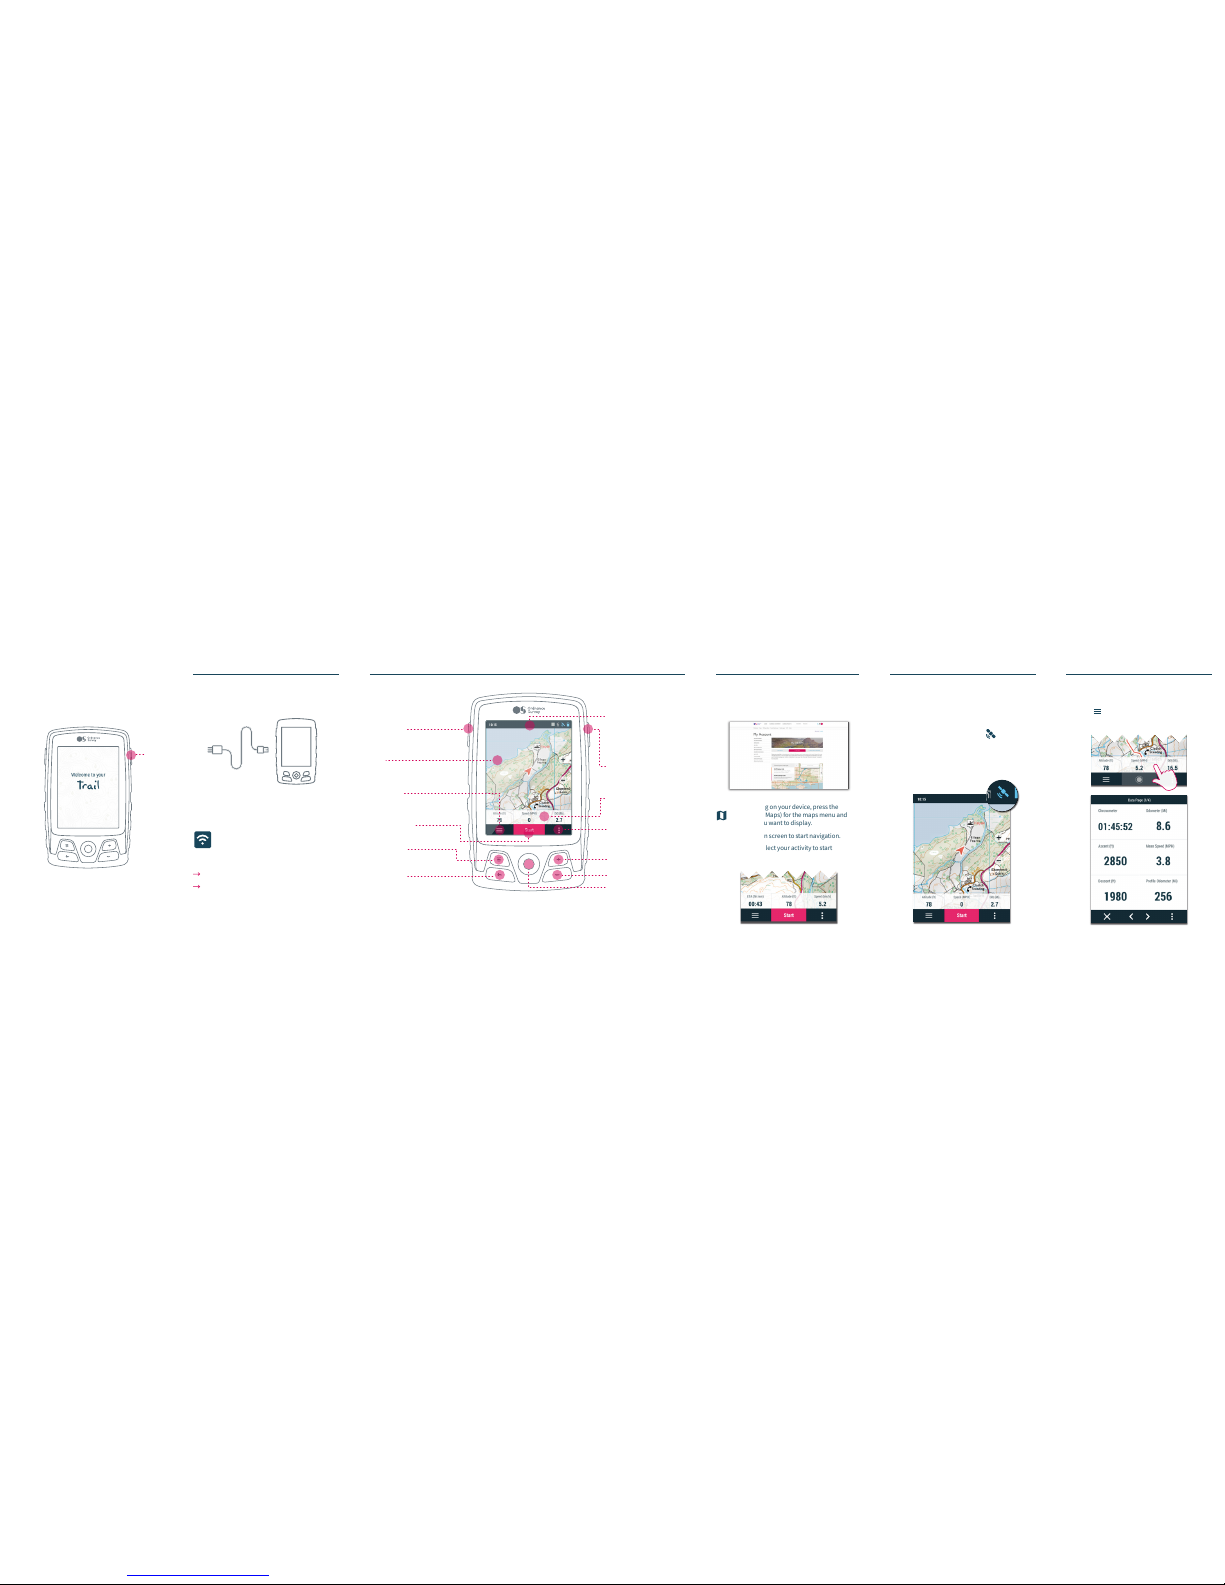
Get to know your Trail
Get started
It’s important that you connect your
device to your Wi-Fi network so it can
automatically carry out two important
processes:
When the unit is charged long press the Power
button to turn it on.
Update soware
Synchronize data
Charge the device by connecting it to the charger
with the supplied USB cable.
Initial boot-up
Map:
Press on the map to activate
the tools
Main menu:
Manage the files and
settings on your device.
Activity control:
Start, pause and finish an activity.
Contextual menu:
Press to access options
available for the current page
Joystick:
Move: Move map / menu
Short press: Press to select
Data bar:
Press to access the data pages
Status menu:
Press to check the status
of the most frequently used
features of the device
(sensors, GPS...)
ZOOM- key: Zoom out map
Lock button:
Short press: Lock/Unlock GPS
Power button:
Long press: Turn GPS on /
Turn GPS off
Back button:
Short press: ‘Back’ in menus/
‘Re-centre’ in map
Long press: Show map
Page button:
Short press: Show next data page
Long press: Show main menu
ZOOM+ key: Zoom in map
Device layout
Choose map tiles for your device by going to your
My OS GPS account in the OS Shop, clicking the Buy
maps tab and following the on-screen instructions.
Mapping
To access mapping on your device, press the
icon (Menu > Maps) for the maps menu and
select the tiles you want to display.
Return to the main screen to start navigation.
Press Start and select your activity to start
navigation.
It’s important to make sure you have a good GPS
signal before you start.
Stand outside in an open area to connect to as many
satellites as possible.
When the connection is ready, the icon will
show as blue in the top menu.
Be patient as this can take a few minutes.
Get going Data on the move
Your device tracks route and activity data in
real-time.
Press the button or any data field on your map
screen to see your data screens. The first shows your
key route information.
Page 2
Made in Spain
Manufactured by:
COMPEGPS TEAM SL
Tr a i l
More data
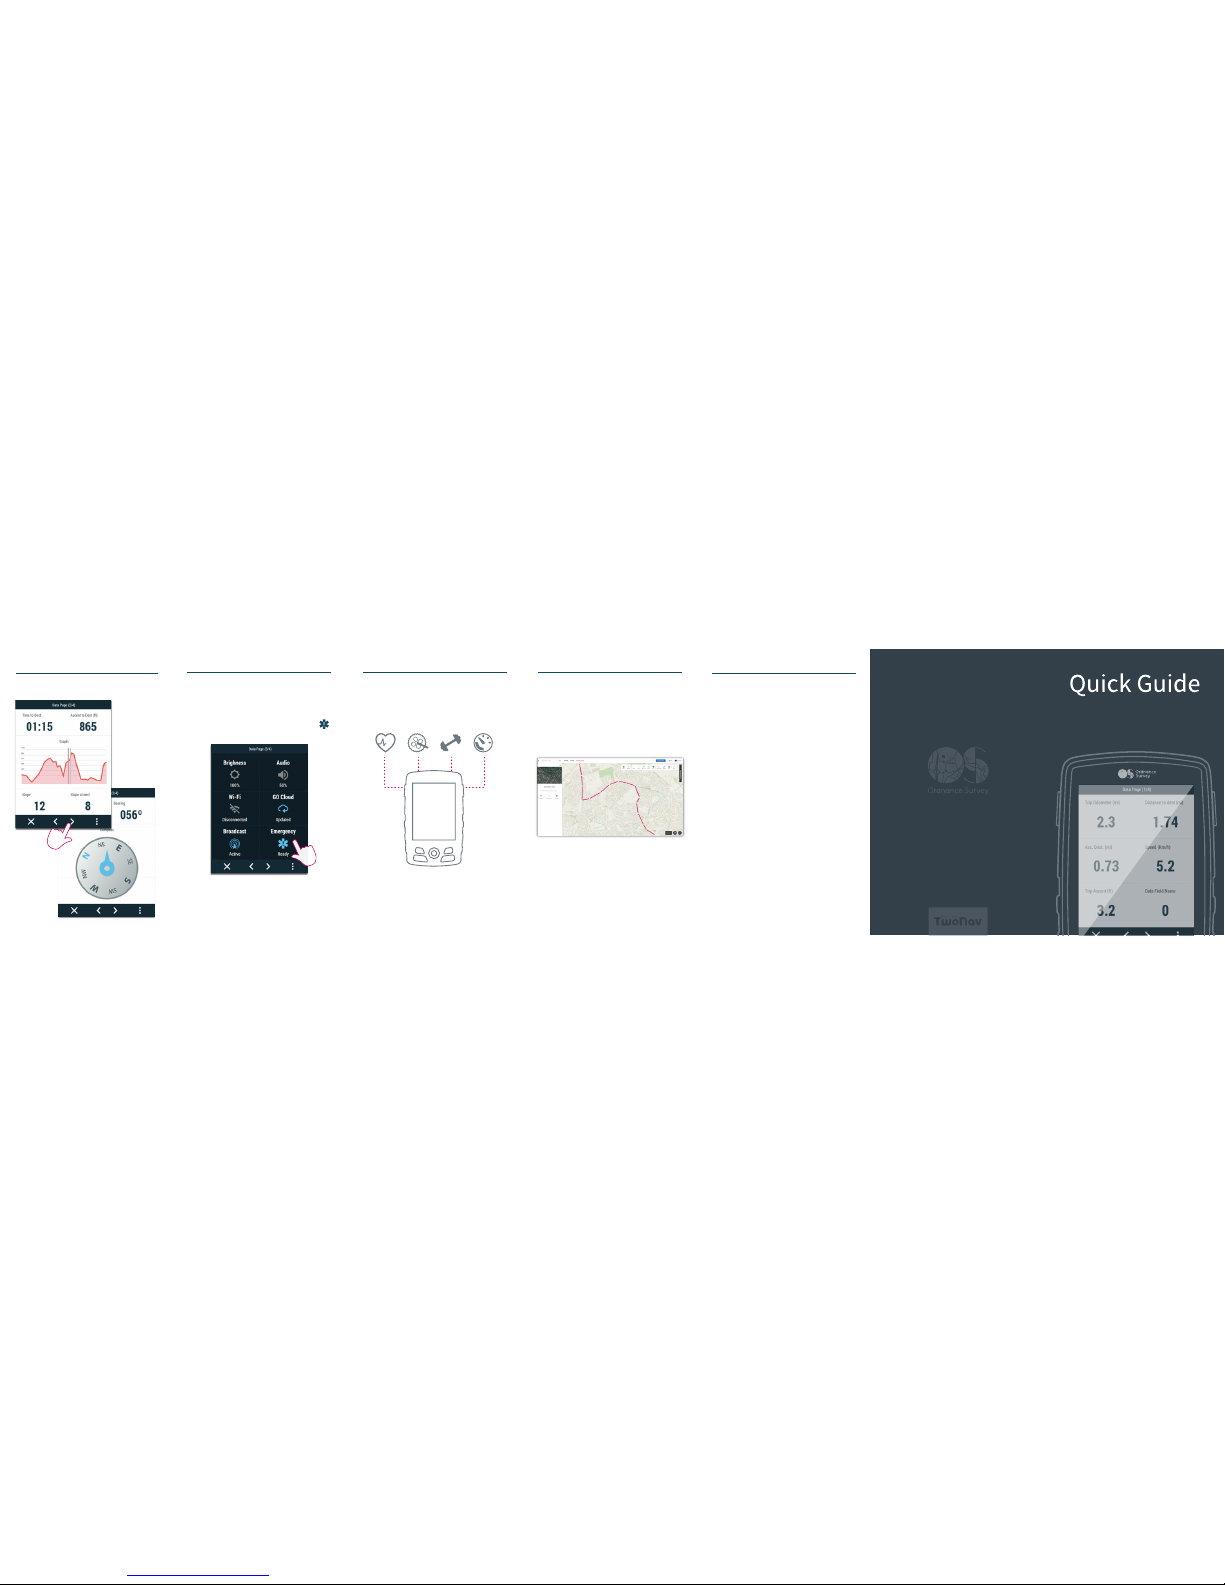
Scroll forward to access more detailed information.
Redeem your free 3-year subscription to OS Maps
using the voucher code inside your box.
Use OS Maps to find inspiration and plot new routes
on your desktop and mobile, then sync them with
your GPS device. Plus, see GB in stunning 3D and find
out what’s around you with Augmented Reality.
To synchronise your OS Maps account with your
device, go to Settings on the device, select My
Accounts and enter your OS Maps details.
Then, whenever you create a new route and are
connected to WIFI, your device will update shortly
aer with the new route.
Get your OS Maps subscription
SeeMe’s I.C.E. (In Case of Emergency) function will
send an SMS and email to your emergency
contacts from anywhere in the world if you get into
trouble.
To access it, press the Status menu and hit the
icon.
With Live Tracking, your friends can track your
trips in real-time by logging into GO. To set up
GO, go to your My OS GPS account in the OS
Shop, click on the SeeMe link (under My devices)
and follow the on-screen instructions.
SeeMe
Heart Rate Cadence Power Speed
You can use additional sensors to get more insight
on your activities.
To see all OS accessories for your device, go to
os.uk/gpsaccessories
Get even more from your GPS
Support & warranty
Thank you for purchasing your Trail from Ordnance
Survey. Now that you’ve set up your device, you’re
ready to start adventures with a GPS device that
gives you the freedom to go further.
For a full set of instructions, or if you’ve
encountered any problems setting up your Trail, the
following support is available:
Full manual (PDF download)
os.uk/gpssupport
FAQs
os.uk/gpssupport
Ordnance Survey Customer Service Centre:
Phone
03454 560420
Email
Your Trail comes with a 24 months manufacturer’s
warranty provided by COMPEGPS TEAM SL. For
information about your warranty please visit our
website:
os.uk/gpssupport
 Loading...