

COMP Cams 9673T9 LS Timing Sets User Manual
1
COMP Cams
®
LS Timing Sets
Part Numbers: 3154, 3158KT, 3167KT, 3172KT, 3173KT, 7102, 7105, 7106, 7106-5, 7107,
9158KT, 9167KT, 9172KT, 9672T3, 9658T3, 9658T9, 9667T3, 9672T3, 9672T9, 9673T3, 9673T9
Thank you for choosing COMP Cams® products; we are proud to be your manufacturer of choice.
Please read this instruction sheet carefully before beginning installation, and also take a moment to
review the included limited warranty information.
We recommend the chain and sprockets be pre-assembled before final assembly of the motor to check
for any interference between the block and the timing set. During installation again observe for any
interference between the timing set and the engine block, if found, remove or grind until adequate
clearance is obtained. Also, look for any interference between the timing chain cover and oil pump
upon reinstallation. Some aftermarket oil pumps and double roller timing chain setups will require
timing chain cover clearance for proper fitment.
Check the following points to ensure the proper timing chain has been selected for
your application:
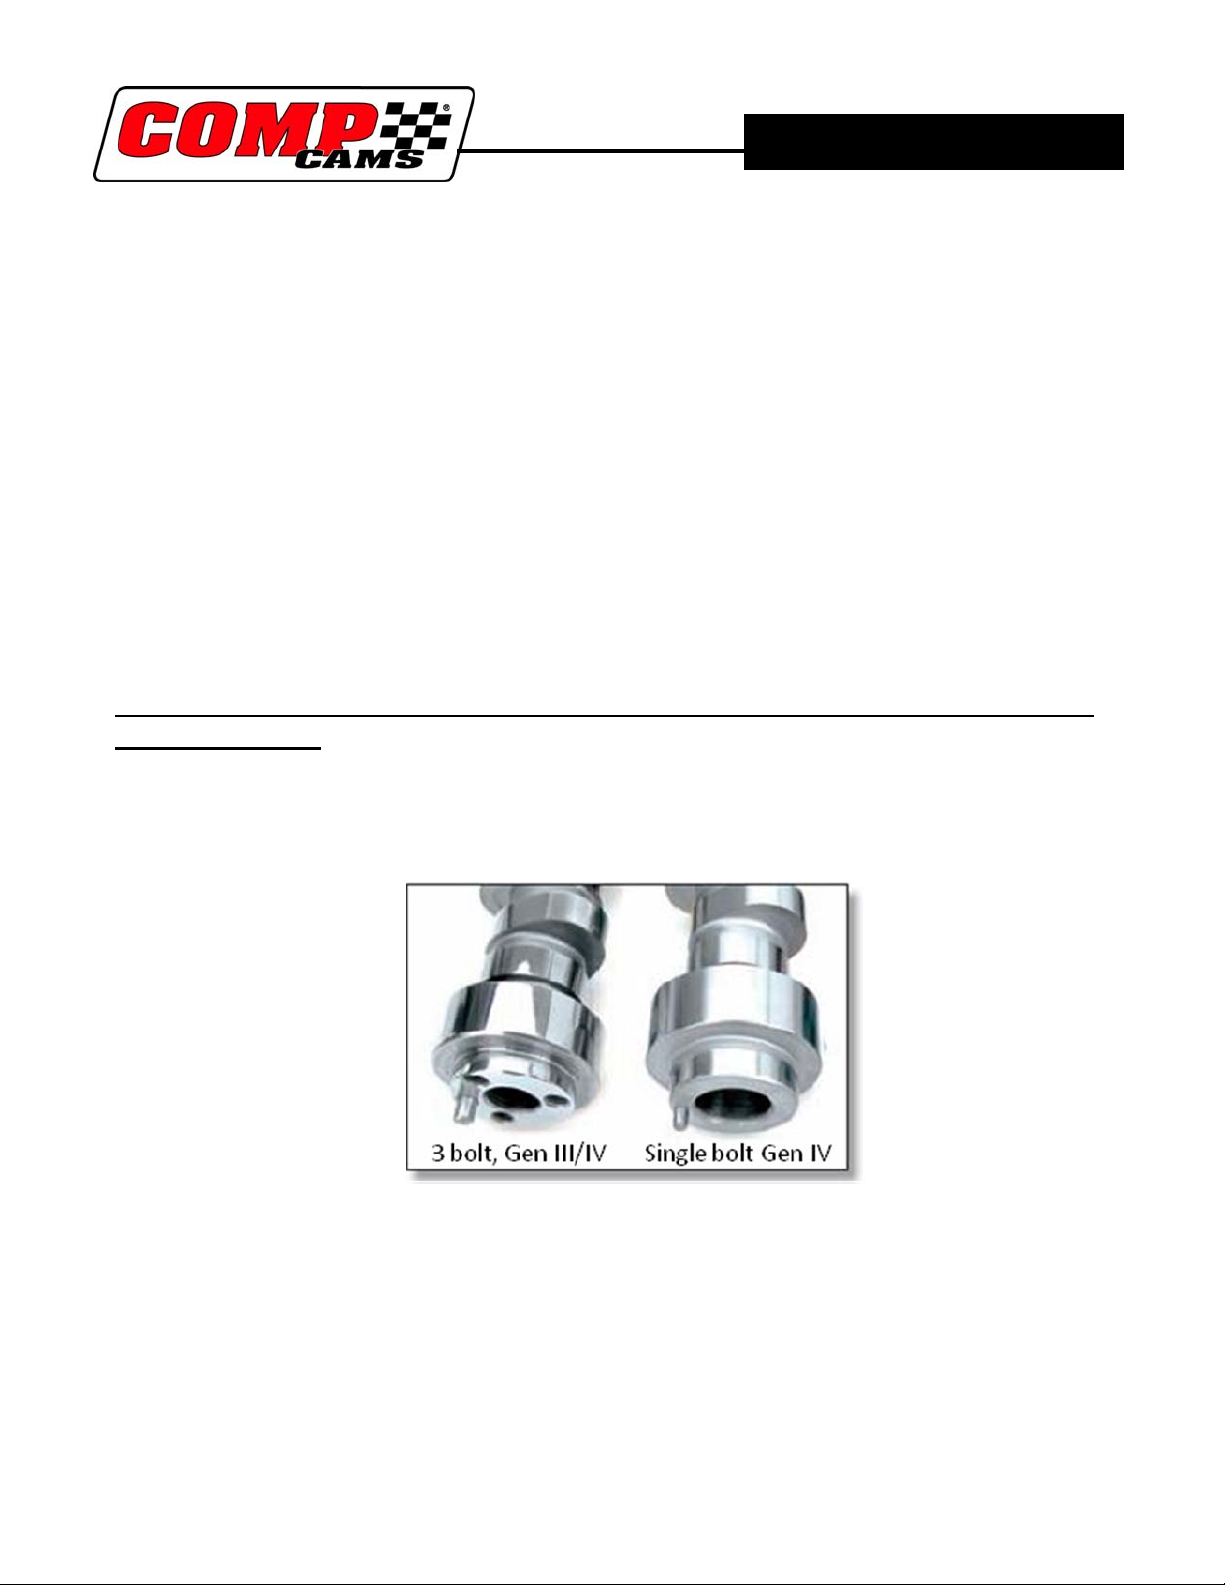
1. Number of camshaft bolts − There are single bolt camshafts and three bolt camshafts. Refer
to pages 186-187 of the COMP Cams 2010 Master Catalog if you do not know which style
your application requires.
INSTRUCTIONS
Toll Free: 1.800.999.0853
www.compcams.com
COMP Cams®
3406 Democrat Rd.
Memphis, TN 38118
Phone: 901.795.2400
Part #COMP4-134
Revised 6/24/13
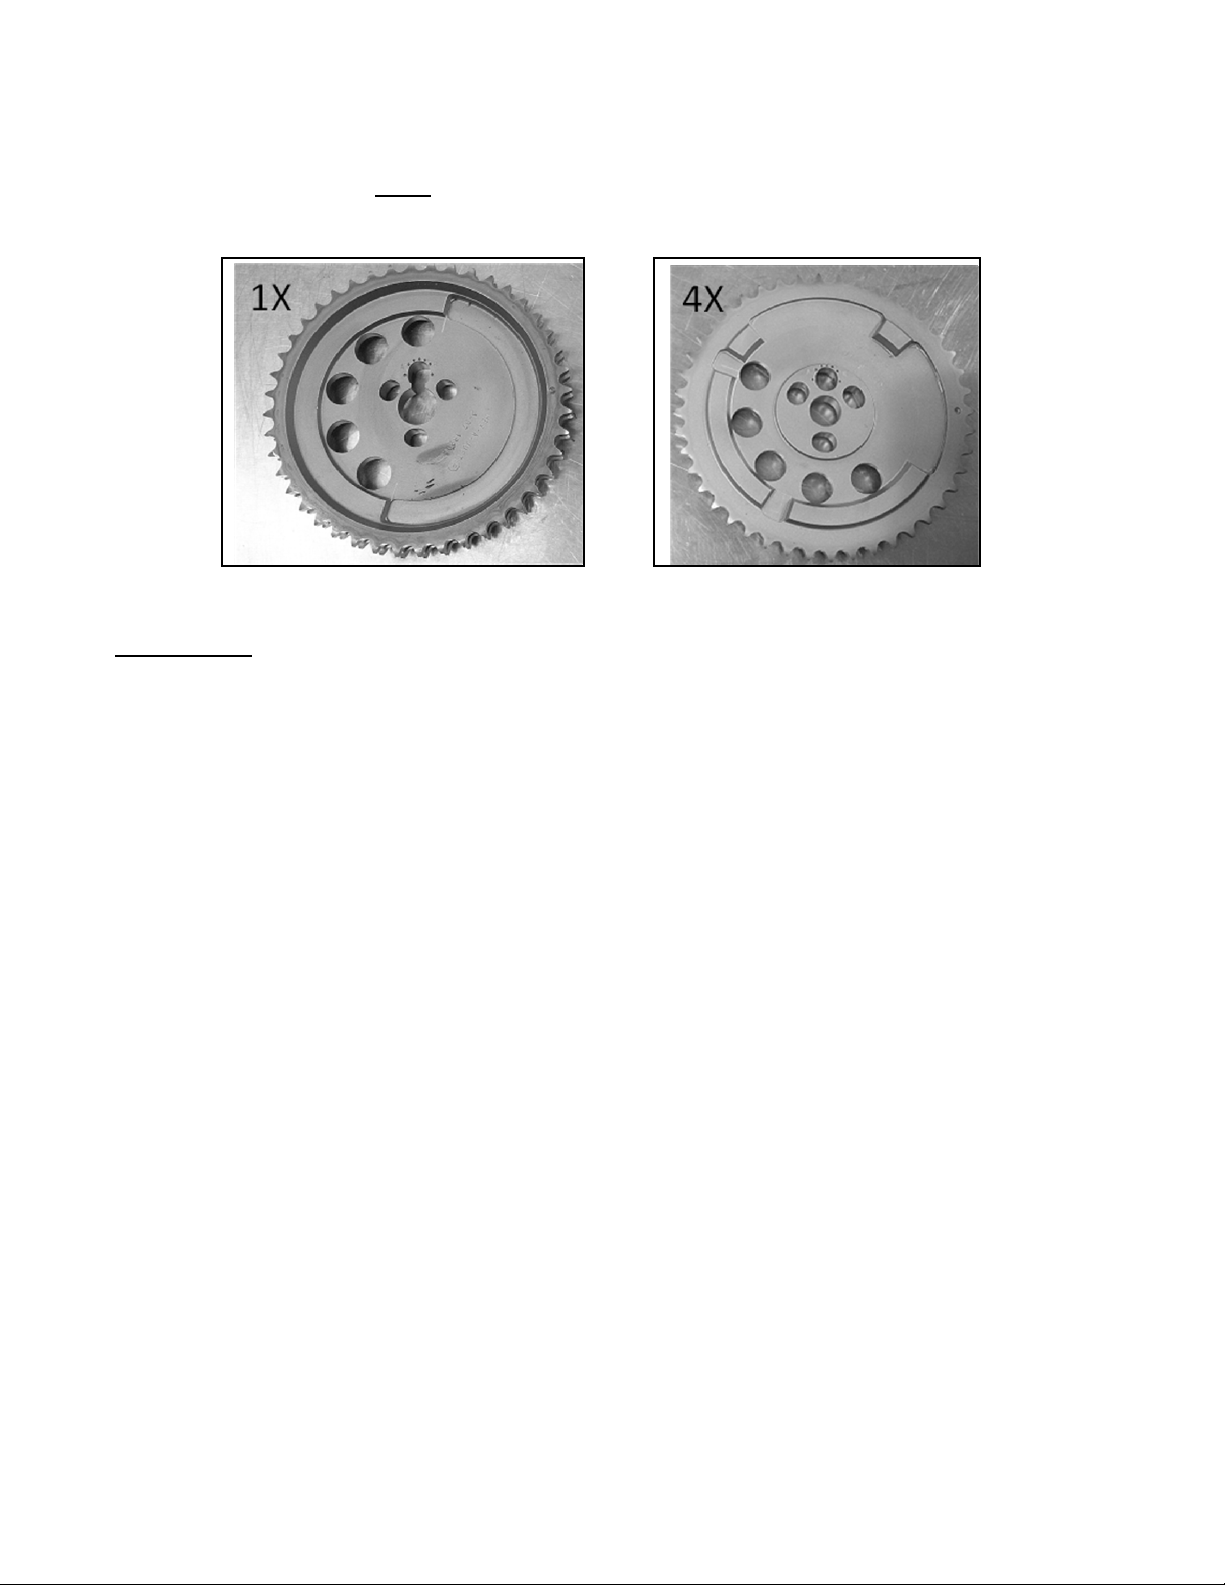
2. Camshaft positioning sensor reluctor is correct − There are three styles of cam position
sensors, 1X on early Gen IV engines and 4X on later version Gen IV engines which can not
be interchanged. Note: Gen III (LS1/LS6) engines will not be affected by camshaft timing
gear, as they use a rear camshaft sensor built into the camshaft.
Installation
:
1. Prepare for installation disassembling the front of your LS engine by removing the water
pump, timing cover. Then roll your engine over until your engine is at TDC using the
markings on your current timing set. This can easily be done by using COMP Cams® LS
crank turning socket #4914.
2. Remove loosen or remove the oil pan, and remove the oil pump by first carefully removing
the oil pickup tube bolt, ensuring it does not drop into your oil pan. Next, remove the four
bolts holing the oil pump to the engine block and remove the oil pump assembly.
3. Loosen your camshaft bolt(s) and remove the camshaft timing gear.
4. Loosen your rocker arms to allow the camshaft to rotate freely. Rotate 360 degrees to capture
the lifters in the guides.
5. Using a proper puller, remove the existing crank gear and oil pump drive.
6. Make sure to clean the mounting surfaces on the clock and your new COMP Cams® timing
sets, failure to do so may reduce chain and bearing life
7. Select the desired crankshaft keyway and install the crankshaft sprocket until fully seated,
using a sleeve to protect the sprocket. Make sure your corresponding timing mark is correct
and pointing in the 12:00 position. Use a marker to mark your selected timing mark as this
may help you remember later which of the timing marks is the one you have selected to use.
Notes: There are various demarcations depending on which timing set you have selected to
use. (Refer to pages 4-5 to see your specific timing chain options.)
Toll Free: 1.800.999.0853
www.compcams.com
COMP Cams®
3406 Democrat Rd.
Memphis, TN 38118
Phone: 901.795.2400
Part #COMP4-134
Revised 6/24/13
2
 Loading...