

Page 1
™
CHAT
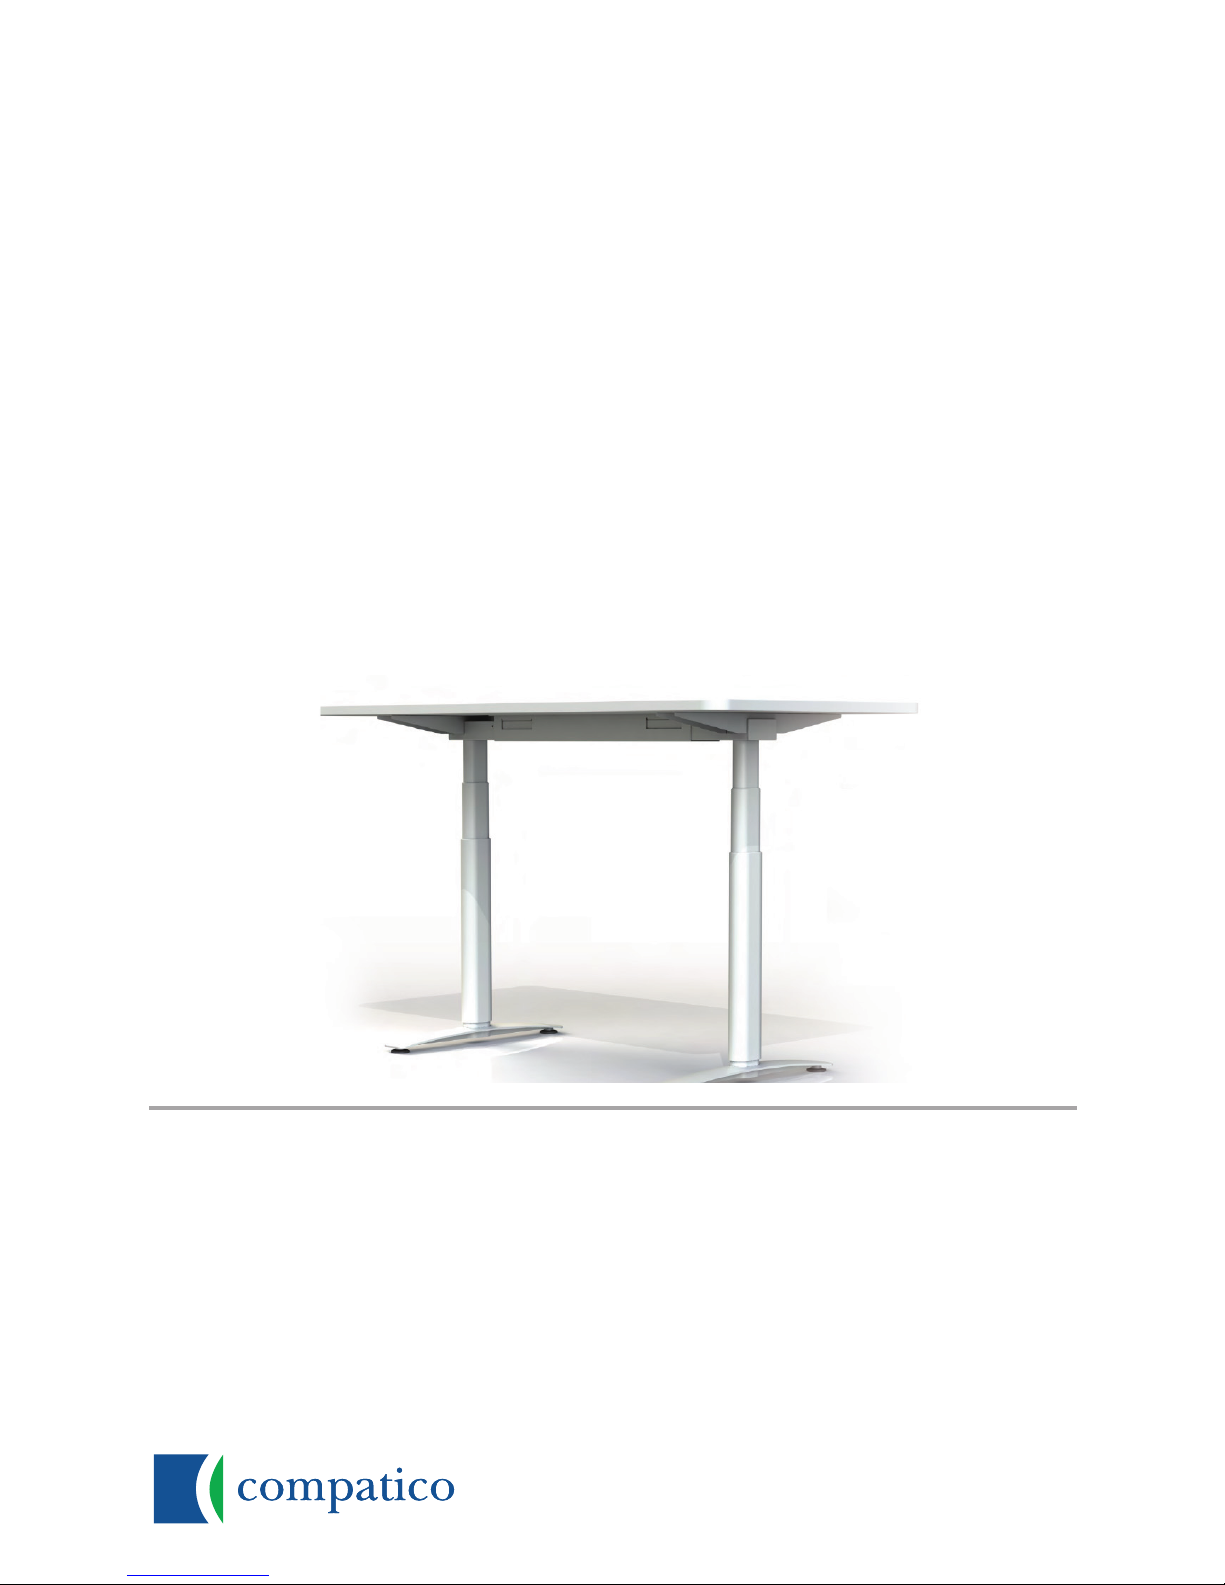
Compatico Height Adjustable Table
Installation Instructions for 2-Leg Base
Page 2
caUtion / inforMation
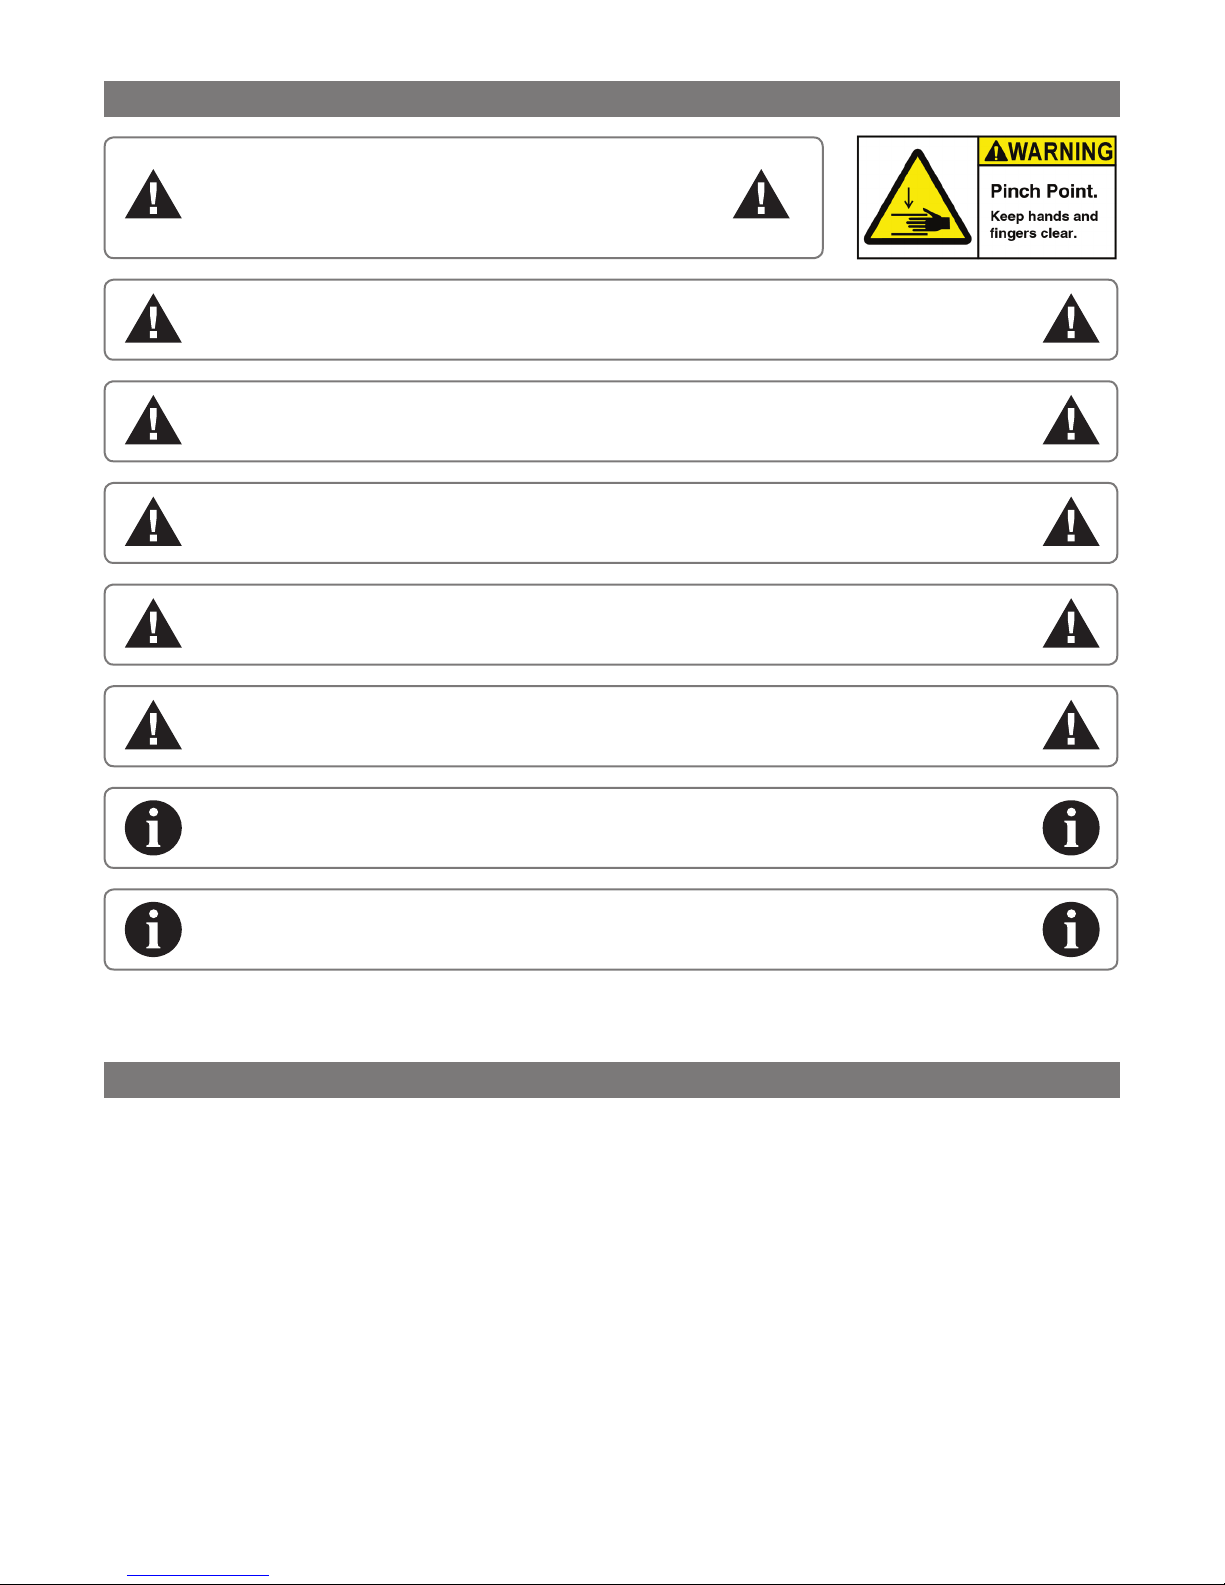
Make sure no obstacles are in the desk’s path.
Make sure the desktop is not touching any walls.
Make sure all cords are appropriate length to
accommodate the change in height.
Keep children away from electric height-adjustable desks, control
units and handsets. There is a risk of injury and electrical shock.
Do not place any objects taller than 20” underneath the desk.
Keep all electrical components away from liquids.
Do not sit or stand on the desk frame.
Do not crawl or lie under the desk frame.
Use / liaBilitY
This height adjustable desk has electric motors and is designed for use in dry work areas only.
The desk height is adjustable so that it can be positioned at the most ergonomically suitable height
Under no circumstances does the manufacturer accept warranty claims or liability claims for damages
Do not open any of the components - the Legs, Control Box or Switch.
There is a danger of electric shock.
This product is designed with a duty cycle of 10%
(2 min. on, 18 min. off ).
In the event of a power outage or if the power cord is unplugged,
a manual reset may be necessary - see USE section.
Any other use is at user’s risk.
caused from improper use or handling of the desk frame.
If this desk is sold, please provide this manual to the buyer.
IMPORTANT:
Please read this manual carefully.
Page 3
CHAT Assembly Instructions (2-Leg)
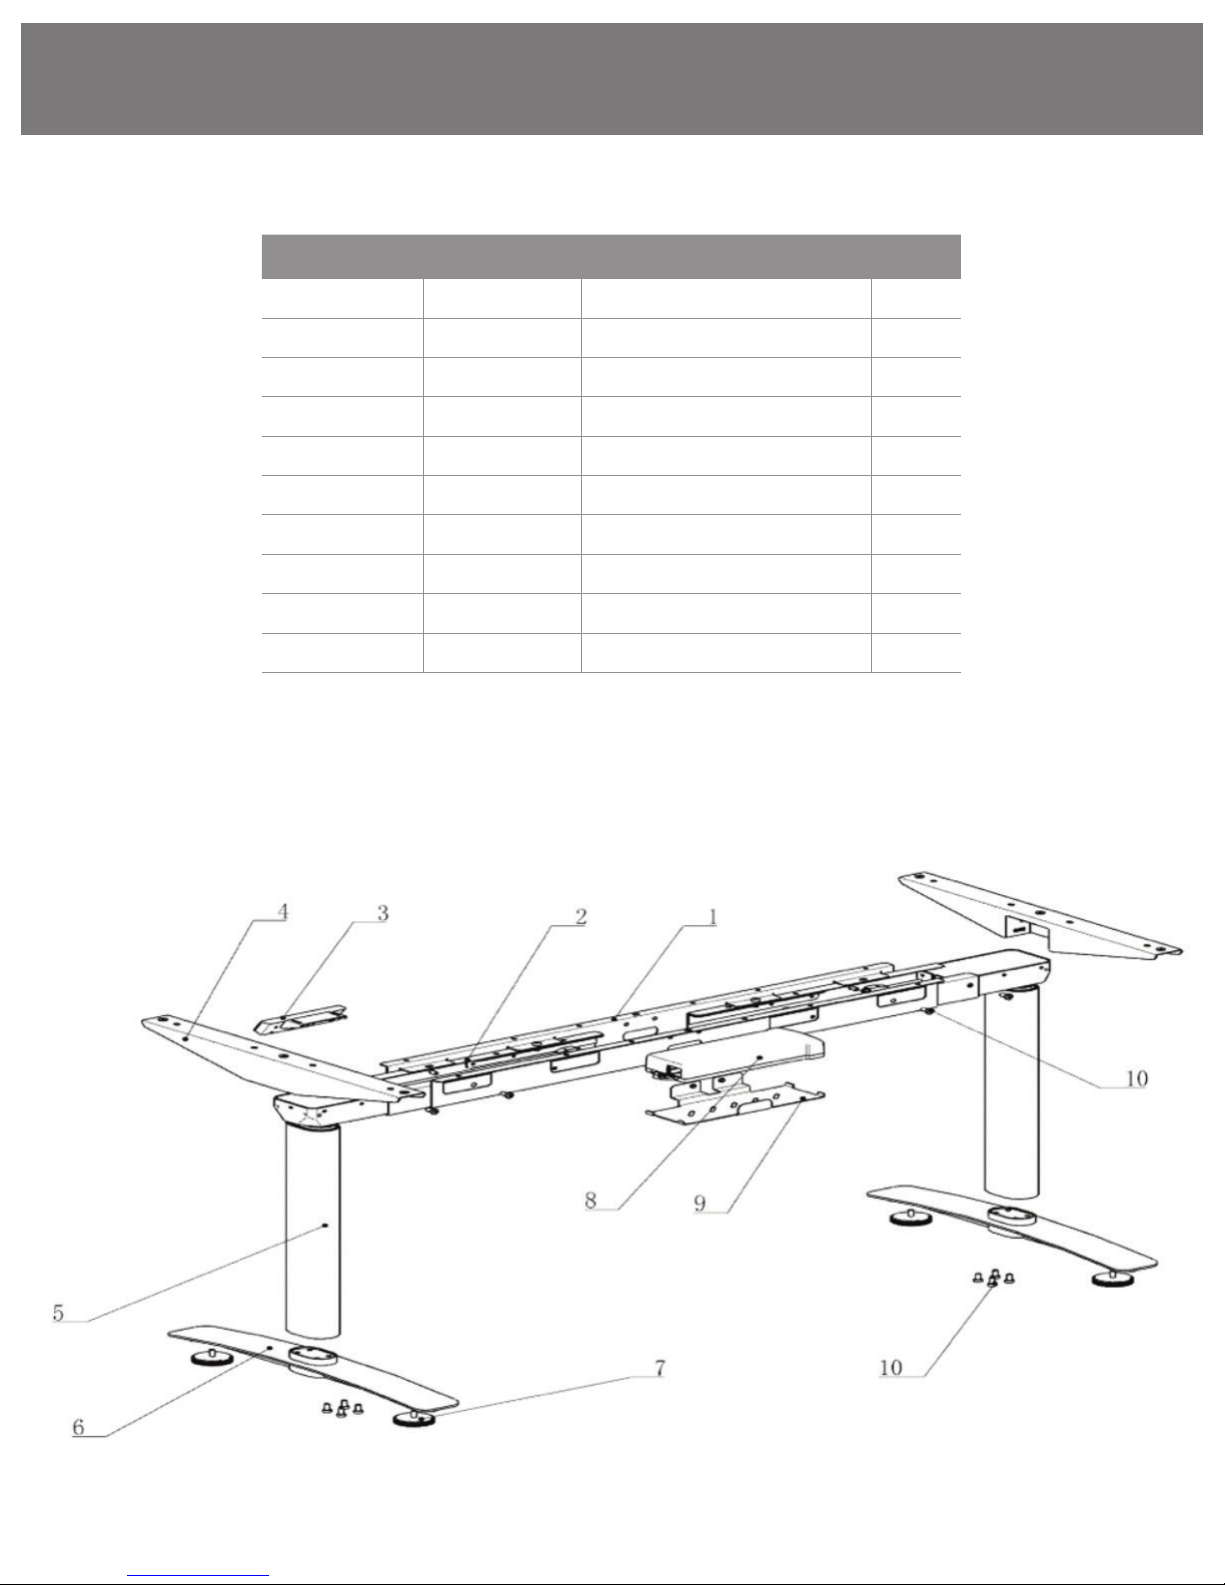
Parts & tools list
NO. PART # DESCRIPTION
1 HA-OMXTB-251.4 Crossbeam 1 1
2 HA-OMXTB-251.3 Slide Crossbeam 2
3 Handset 1
4 HA-TSB-263.2 Side Bracket 2
5 HA-TSB-263.1 Column Leg 2
6 HA-RLF-294 Foot 2
7 Glide 4
8 HA-CB-250 Control Box 1
9 HA-USCT-245 Control Box Bracket 1
10 OBS-SCREW-124 Machine Screw 34
QTY
Page 4
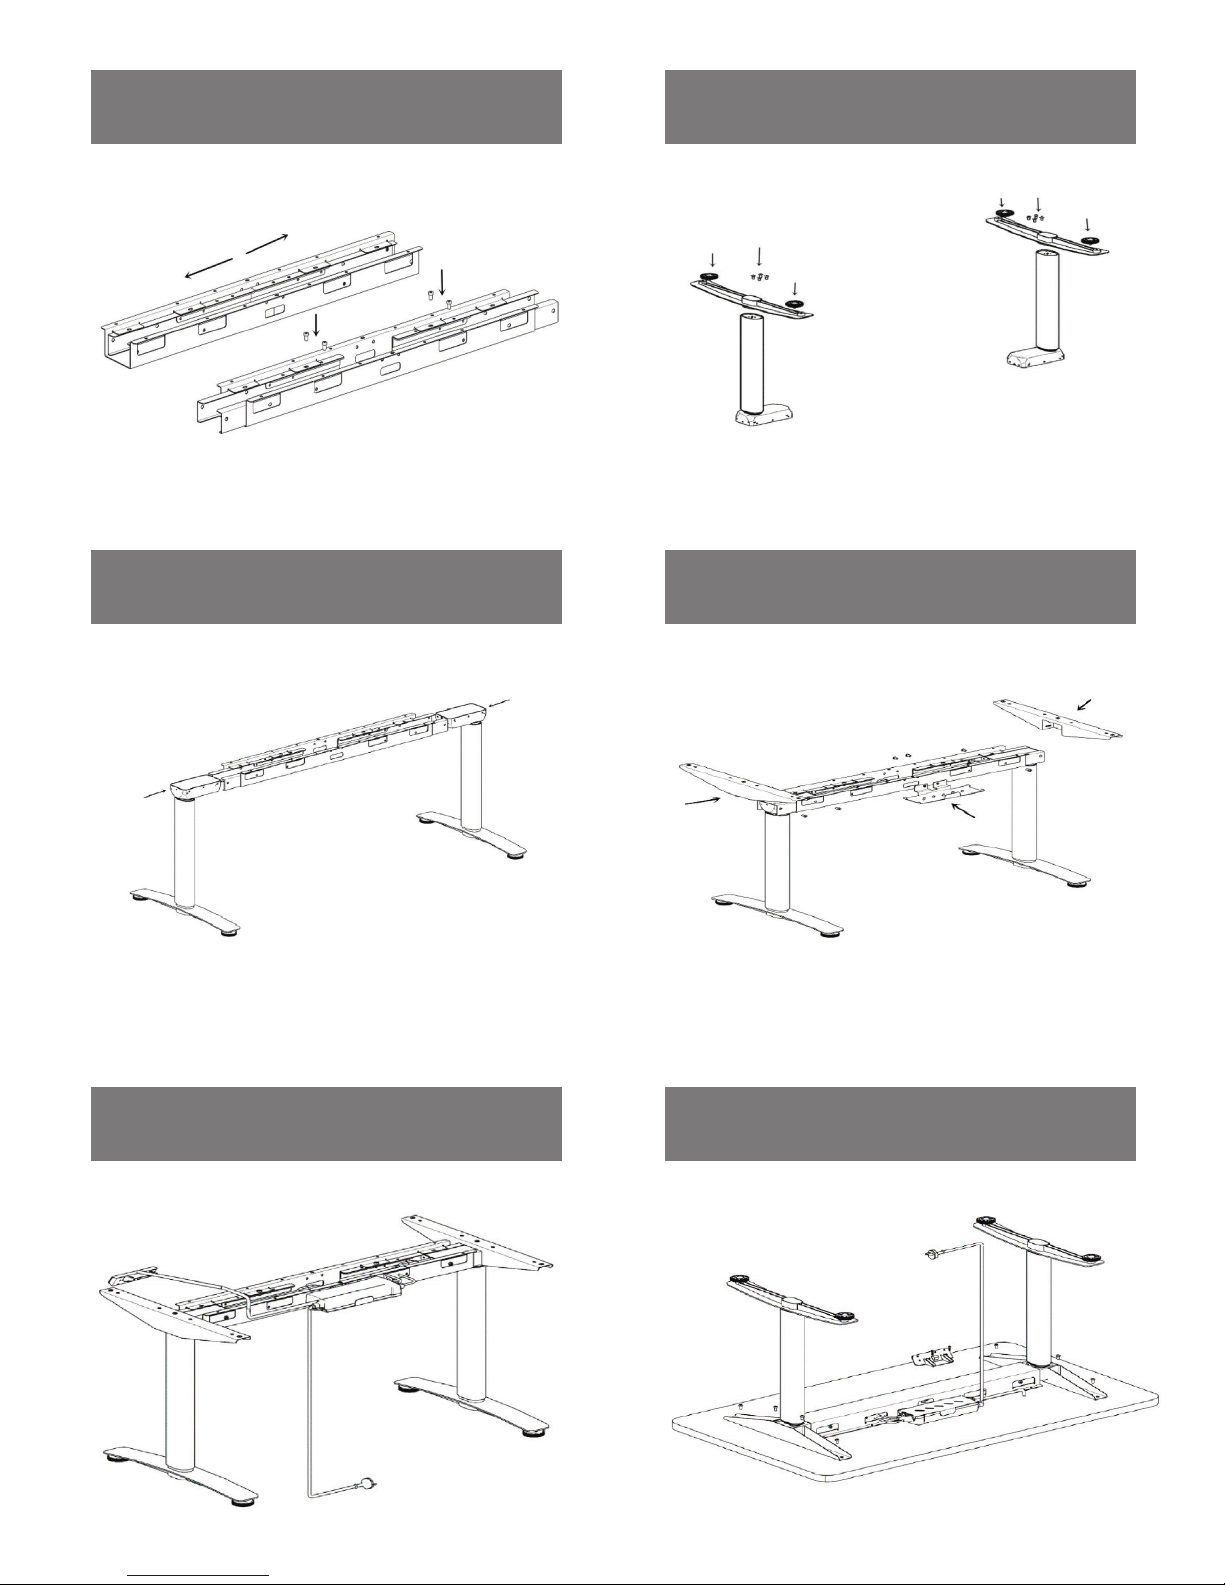
STEP 1
STEP 2
Fix HA-OMXTB-251.4 and HA-OMXTB-251.3 together with
four OBS-SCREW-124
STEP 3
Just insert the HA-OMXTB-251.3 into the HA-OMXTB-251.4
and fix together with OBS-SCREW-124.
Eight OBS-SCREW-124, two HA-TSB-263.1, two HA-RLF-294,
and four Glides
STEP 4
Two HA-TSB-263.2, HA-USCT-245 and ten OBS-SCREW-124.
STEP 5
Electrical connection as shown
STEP 6
Fix table and HA-TSB-263.2 together with eight
OBS-SCREW-124
Page 5
CHAT Assembly Instructions (2-Leg)
IMPORANT! DO NOT ATTEMPT ANY OF THE BELOW STEPS BEFORE COMPLETING THE BELOW:
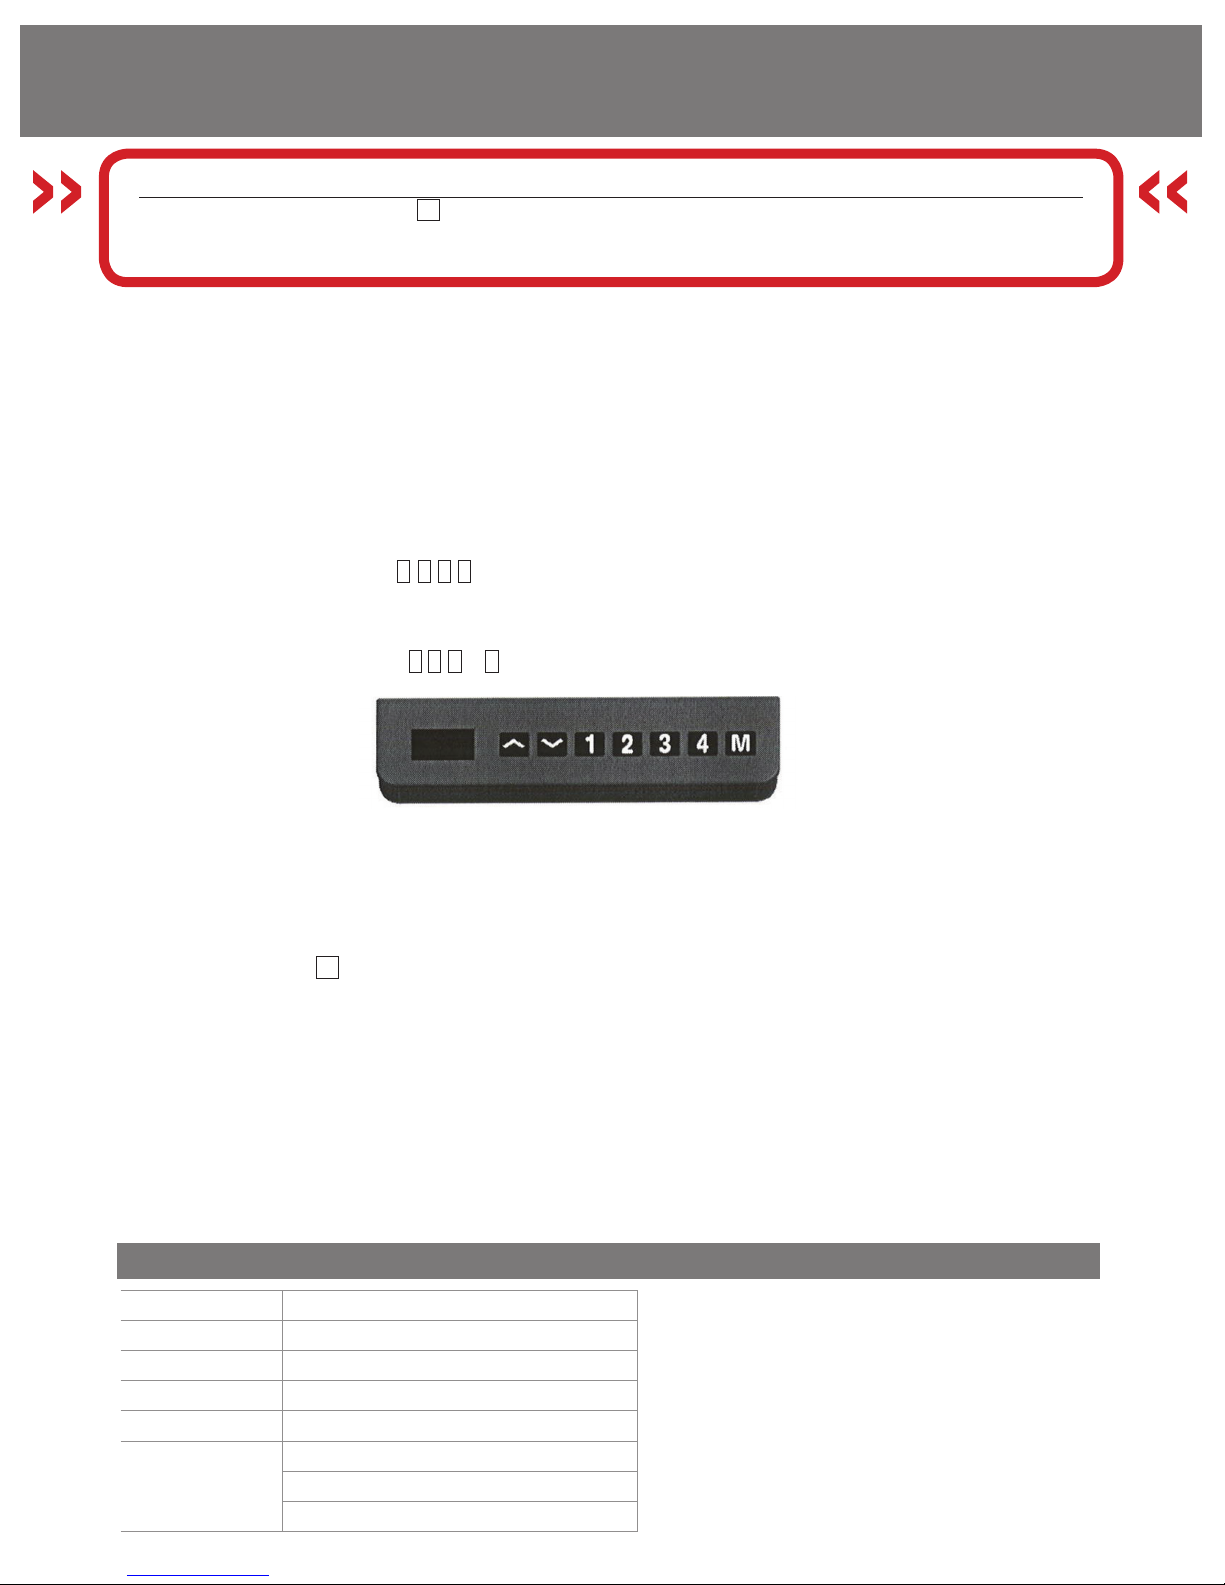
First-time set (manual reset): Press M button, the display will ash, then press DOWN button and display will show
“CAL” until the desk reaches minimum height, slightly bounced and stopped. “SUC” will be shown on display. Your
desk is ready to use now.
Please follow the instructions below for proper installation and initialization.
a.) Ensure that all leg cables are connected to the control box.
b.) Ensure the handset is connected to the control box.
c.) Plug the power cord into control box (ensure it is 110/120 Volt)
d.) To activate the calibration mode, press the M button, the press the DOWN button until the desk reaches
Store a memory position
Four small buttons with numbers 1, 2, 3, 4 are used to store an electric desk with up to four storage heights
Step 1: Raise or lower the desk to the height you want to store
Step 2: Press M button, the display will ash
Step 3: Press one numbers button 1, 2, 3 or 4 and the position will be stored at this button
minimum height, slightly bounces and stops. Both legs are at the lowest position, the table is ready to
use now.
Error Codes & Notes
a.) Please stop working and check the wires are properly connected when “E01” and “E02” appears on the
handset
b.) Please stop working and check the wires are properly connected or reduce the load when “E04”, “E05” or
“E07” appears on the handset.
c.) Please check wire connection and remove all the loads, then follow these steps if an unknown error or
strange behavior occurs:
Step 1: press M button, and then press DOWN button.
Step 2: please do nothing until the desk reaches the lowest height, slightly rebounds and stops.
Step 3: if the desk still doesn’t work after Step 1 and 2, unplug the power plug, wait a minute, re-plug and
repeat Steps 1 and 2 again.
d.) Ensure continuous operation does not more than 2 minutes. Long term use may cause motor to overheat
or temporarily stop working. This phenomenon is the self-protection of the circuits. If this happens, wait for
18 minutes and allow motor to reset or unplug the power cord. If it still doesn’t work properly, please unplug
the plug and wait a minute to re-plug the power. The settings should be restored to normal. Make sure the
desk is reset to the lowest position.
Note: Please contact us immediately if you have any other questions or concerns.
sPecifications
Height Range
Base Width
Travel Speed
Load Capacity
Duty Cycle
25.2”-50.3”
44” min. - 60.8” max.
1.5” per second (no load)
1000N
10% max. 2 mins on, 18 mins off
Soft start/stop
Adjustable leveling studs
4 Memory presets (some models)
Page 6

5005 Kraft Ave SE, Suite A | Grand Rapids, MI 49512
01.2018
P: 80 0.3 36.1772
[email protected] | www.compatico.com
 Loading...