

Page 1
Phone (M1)
804N provides you with the voice call and video
call services. This section guides you how to make/
receive a voice/video call through the following step
by step:
• Making a voice call
• Receiving a Voice Call
• During a Voice Call
• Making a Video Call
• Receiving a Video Call
• During a Video Call
• Call Logs
2 Video call is only available in 3G coverage.
2 When using the headset, you can start/end a voice call
using the switch on the microphone.
2 When the USIM card installed in your 804N supports the
SIM toolkit, the USIM card menu icon is displayed
instead of the Phone.
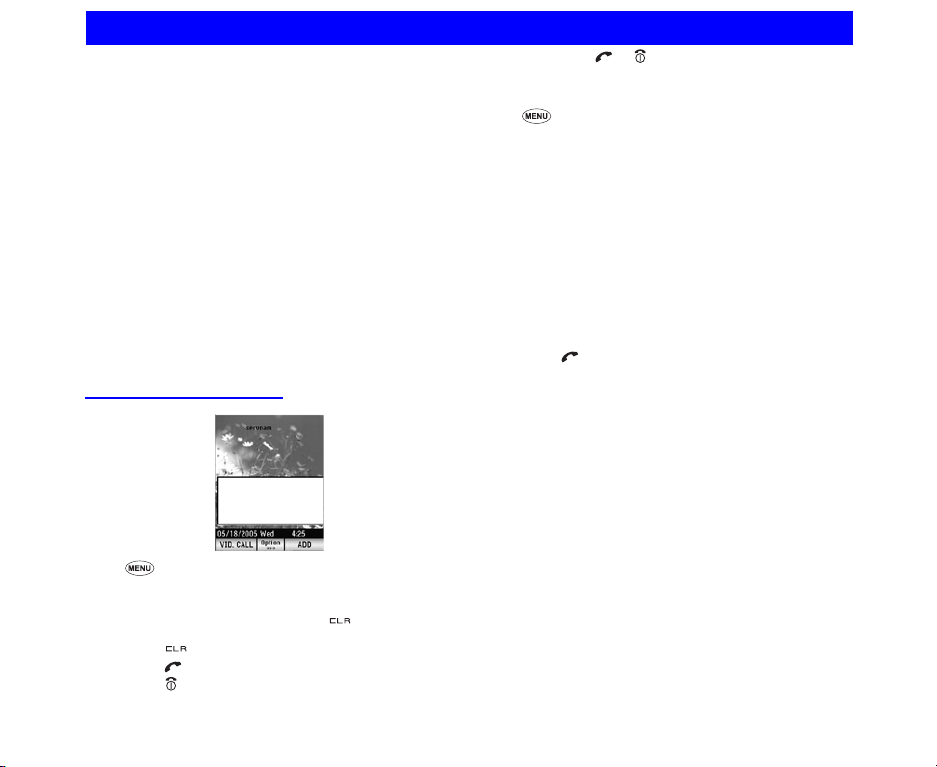
Making a voice call
☛ 1 (Phone) or press the phone number on the
Home screen.
☛ Enter the phone number using the keypad.
2To correct mistakes, press the key briefly to
delete the last number or press and hold
the key to clear all the numbers.
☛ Press to start the call.
☛ Press to end the call.
2Pressing or is the final operation to start or
end the call for every steps in this section.
To make a call using the Contact list
☛
5 (Contacts) to display the contact list. Search
and select the addressee's phone number.
2You can press the Down key on the Home screen
as well.
2See Contacts (M5) for details.
To make a call from Incoming calls list
☛
Press the Left key on the Home screen to display
Incoming calls.
☛ Select the phone number on the list.
2You can also press Options on the Home screen,
and press 5 (Call logs), then 2 (Incoming calls).
See Incoming calls (page 23) for deta ils.
To make a call from Outgoing calls list
☛
Press on the Home screen to display Outgoing
calls. Select the phone number on the list.
2You can also press Options on the Home screen,
and press 5 (Call logs), then 1 (Outgoing calls).
See Outgoing calls (page 23) for details.
To make a call from Missed calls list
☛
Press the Right key on the Home screen to display
Missed calls. Select the phone number on the list.
2You can also press Options on the Home screen,
and press 5 (Call logs), then 3 (Missed calls).
2See Missed calls (page 23)for details.
For emergency calls
Even if the phone is locked, you can make emergency calls
only to the designated numbers. Follow the steps below to
make emergency calls while the key lock is set. Your 804N
is unlocked temporarily for the emergency call. (For details
about the key lock, see Locking your 804N (page 14) or
Security (M86) (page 53).)
When the Keypad lock is turned on,
18 Phone (M1)
Page 2
☛ Enter the emergency number 112 and the
confirmation screen is displayed.
☛ Press SK1 (YES) to make an emergency call or SK2
(NO) to cancel a call.
, The screen below is displayed until you enter the
designated emergency number correctly.
When the Dial lock or Auto lock is turned on,
☛ Enter the emergency number 112 and the emergency
call screen is displayed.
☛ Press SK1 (SEND) or the Enter key to make an
emergency call, or SK2 (CANCEL) to cancel a call.
☛ Besides 112 input, pressing SK2 (EMRGCY) and SK1
(YES) is also available on the Home screen.
For speed call
☛
Enter a contact memory number from 2 to 99 and
press to call the phone number registered for the
memory number in the main unit (not the USIM card).
☛ To turn on/off the speed dial function, press to
select Settings, Calls, Advanced settings, and then
select Speed dial.
2If more than one phone number is registered for a
memory number, the first number is used to make
a call.
2See the Calls (M83) (page 50) section in Settings
(M8) for details.
For one touch dial
☛
Pressing and holding a key from 2 to 9 calls the
number registered in the One touch dial list.
☛ To register or edit the number in the One touch dial
list, press to select 5 (Contacts), 7 (Settings),
and 1 (One touch dial). You can register phone
numbers to 2 to 9 in the list. Voicemail number is
preset as 1 and cannot be moved or deleted.
For pause dial
☛
Enter the phone number, then press and hold # to
insert a pause (displayed as P).
☛ Input the numbers to call, inserting pauses where
necessary. Press to dial the input numbers. When
the other party answers the call, the next number is
automatically dialed in 3 seconds. Then, all
succeeding numbers are automatically dialed every 3
seconds.
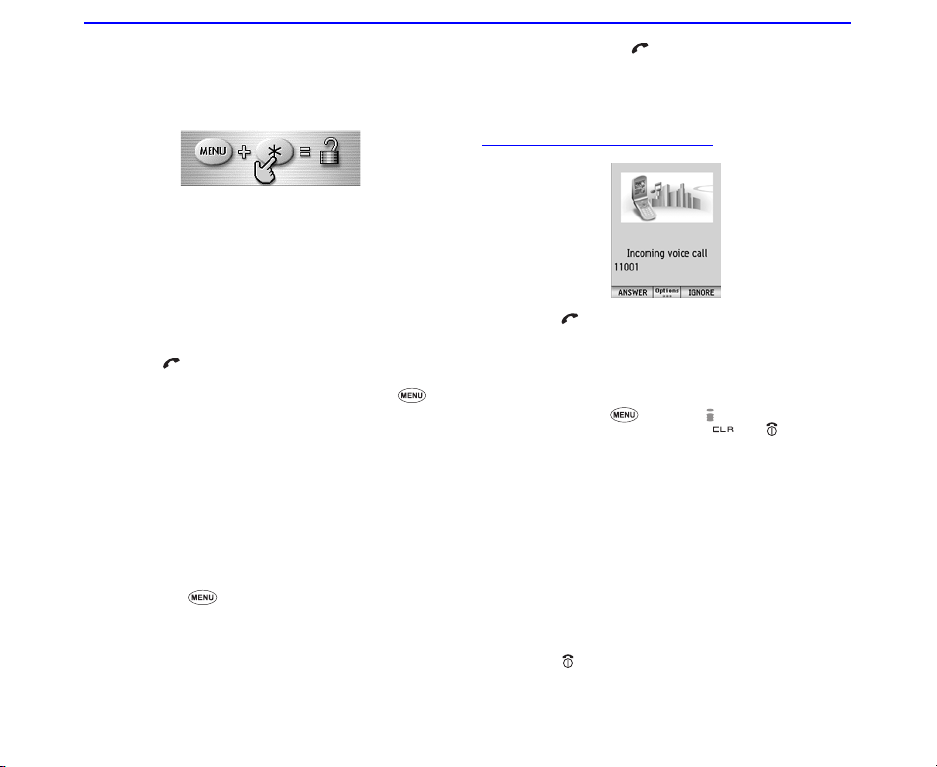
Receiving a Voice Call
☛ Press or SK1 (ANSWER) when you receive a
voice call.
2You can also answer a call by pressing Options
and 1 (Answer call) when receiving a voice call
2When Any key answer function is activated, you
can press any key to answer the call except SK2
(IGNORE), , i-mode () key, Up or Down key
(including the side key), the key, and
Options. (See the section of Calls (M83)
(page 50); Any key answer: (page 50) for details.)
2When Active flip function is activated, you can
answer the call only by opening your 804N. (See
the section of Calls (M83); Active flip: (page 50)
for details.)
2When the Calling Line Identification (CLI) function
has been activated by the caller, the registered
image is displayed. (See the section of Calls
(M83); Portrait Display: (page 52) for details.)
2When the headset is connected, pressing the
headset switch also answers the call.
To reject the call
☛
Press , SK2 (IGNORE) or 2 (Ignore call) in the
Options menu while receiving a call.
19 Phone (M1)
Page 3
When you miss a call
If you miss a call, it is shown as a missed call by an icon
2
on the Home screen. The missed call is saved to the
Missed calls list. When you display Missed calls, the icon
disappears.
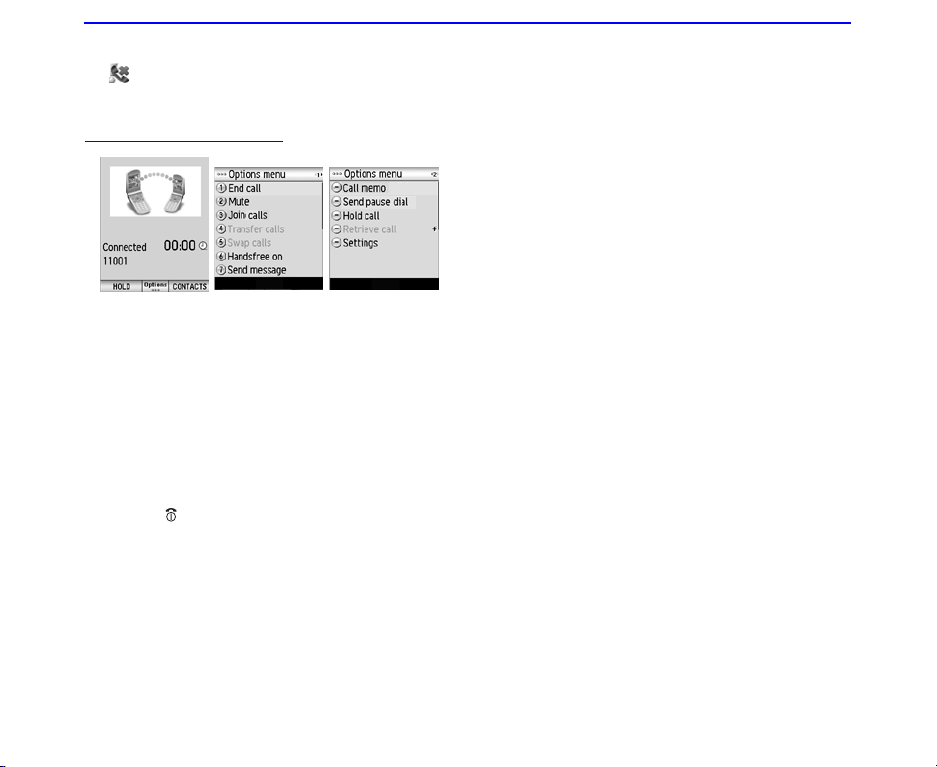
During a Voice Call
, Depending on the conditions, some options may
be greyed out and not be available
To Switch to a Grouptalk
(When there are six calls on-line and 7th call are
held call)
☛ Press Options and Join calls.
2Press Options, Drop or Split Call. Pressing the
SK1 (SPLIT) splits the selected caller from the
Grouptalk and the SK2 (DROP) drops the selected
caller from the Grouptalk.
To end the call
☛ Press to end the call.
2Pressing Options to select 1 (End call) is available.
To put a call on hold
☛ Press SK1 (HOLD) or press Options, while talking, to
select Hold call. The call will be put on hold.
2Options menu contains 2 pages. Use the Right/
Left key to go to the other page.
☛ To retrieve the call, press SK1 (RETRIEVE) or press
Options, while holding, to select Retrieve call.
To search the contact list
☛
Press SK2 (CONTACTS) to display the Contacts list.
2See Contacts (M5) for details.
To mute the microphone
☛
Press Options and select 2 (Mute).
2To adjust the earpiece volume, press the Up and
Down key (including the side key) to adjust the
volume while on a call.
To disconnect from a call waiting service
☛
Press Options and select 4 (Transfer calls).
2If you have two lines connected (one is active and
another one is holding), using this function enables
you to disconnect two lines and to connect for these
two lines.
To switch between the active line and the
holding line
☛
Press SK1 (SWAP) or select 5 (Swap calls) from the
Options menu.
2You can switch between the active line and the
holding line.
To talk handsfree
☛
Press Options and select Handsfree on.
The speaker turns on and you can talk handsfree.
To send a message
☛
Pressing Options and select 7 (Send message)
enables you to send the message.
To record a Call memo
☛
Press Options and select Call memo to start
recording the conversation.
☛ To stop the recording, press the Enter key.
2Both your voice and the other party's voice are
recorded. (20 seconds max.) Five call memos can
be recorded in the phone. A call memo is displayed
with its date and time of recording
, Always ask the other party's permission to record.
2You cannot attach call memos to messages.
Phone (M1) 20
Page 4
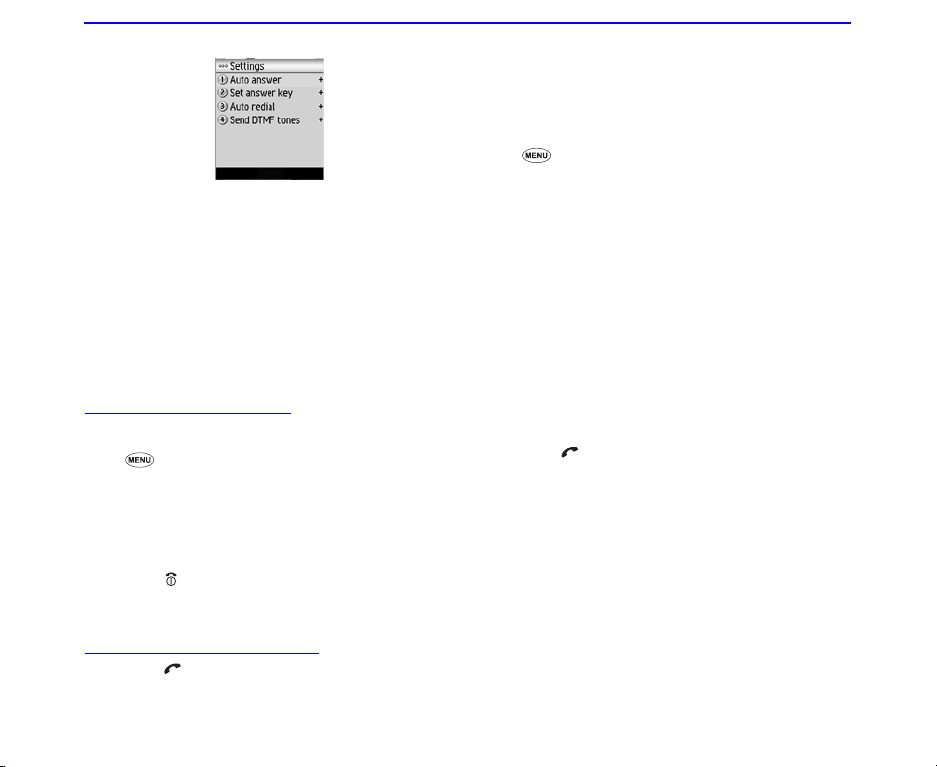
To activate Settings
☛
Press Options and select Settings to change the
following functions during talking:
• Auto answer :
Sets On or Off for automatic answering.
• Set answer key:
Selects 1 (Use any key) or 2 (Send key only) as
the call answering key.
• Auto redial :
Sets On or Off for automatic redial.
• Send DTMF tones:
Sets On or Off for sending the Dual Tone Multi
Frequency (DTMF) signals.
Making a Video Call
When making a Video Call to a Video Capable phone,
follow the steps below:
☛ 1 (Phone) on the Menu screen or to enter the
phone number and press SK1 (VID. CALL).
2You can enter the phone number on the Home
screen as well.
☛ Hold the camera towards you and talk. Adjust the
camera position if necessary.
2Handsfree is set by default for video calls.
☛ Press to end the call.
2 For setting the options of video calls, see Video calls
(page 51).
Receiving a Video Call
☛ Press or SK1 (ANSWER) to answer and send the
captured image from the active camera to the other
party.
2You can also answer a video call by pressing
Options and 2 (Answer (video)) or 3 (Answer (no
video))
2To answer the video call without sending your
image, press the SK2 (NO VIDEO). The alternative
photo is sent to the other party.
To make a video call using the contact list
☛ 5 (Contacts) on the Menu screen to display the
Contact list.
2You can press the Down key on the Home screen
as well.
☛ Search and select the addressee's phone number.
☛ Press SK1 (VID. CALL) to dial the phone number.
To Make a video call from Incoming calls
list
☛
Press the Left key on the Home screen to display
Incoming calls.
2You can also press Options on the Home screen,
and press 5 (Call logs), then 2 (Incoming calls).
☛ Search and select the addressee's phone number.
☛ Press SK1 (VID. CALL) to dial the phone number.
To Make a video call from Outgoing calls
list
☛
Press on the Home screen to display Outgoing
calls.
☛ Search and select the addressee's phone number.
☛ Press the SK1 (VID. CALL) to dial the phone number.
(However, only a voice call is made for emergency
numbers.)
To Make a video call from the Missed calls
list
☛
Press the Right key on the Home screen to display
Missed calls.
2You can also press Options on the Home screen,
and press 5 (Call logs), then 3 (Missed calls).
☛ Search and select the addressee's phone number.
☛ Press SK1 (VID. CALL) to dial the phone number.
21 Phone (M1)
Page 5
To Reject the incoming video call
☛
Press or press Options and select 1 (Ignore).
During a Video Call
To set the handsfree mode
☛
Press Options, Other settings and select
Handsfree on or Handsfree off.
☛ When the handsfree option is on, the microphone
sensitivity increases, and the other party's voice can
be heard from the speaker.
To zoom in/out
☛
Press the Right key to zoom in or the Left key to
zoom out.
To turn the microphone on/off (send/not
send your voice to the other party)
☛
Press SK1 (MUTE/UNMUTE) to switch the
microphone on and off.
☛ Alternatively, press Options, Other settings and
Mute settings. Select Mute or Unmute.
To turn your camera on/off (send/not send
your image to the other party)
☛
Press SK2 (Show me) to switch the camera on. When
the camera is on, press SK2 (IN/OUT) to switch the
camera direction.
☛ Alternatively, press Options, and then select either
Use live video or Use photo instead (whichever is
displayed).
To change the screen display mode
☛
Press Options, Other Settings and then Screen
mode. Select My side is smaller (to display your
image on the smaller window), My side is larger (to
display your image on the larger window), Other side
only (to display only the other party's image) or My
side only (to display only your image).
2Pressing SK2 (IN/OUT) is also available to change the
screen mode during a video call.
To ch a ng e the picture quality
☛
Press Options and Picture quality. Select
Standard, Better picture (image quality has the
priority) or Faster movement (capturing movement
has the priority).
To change the night mode
☛
Press Options and Night mode on or off.
To set the contrast mode
☛
Press Options and Contrast settings. Select any
from the following:
• Much brighter
• Brighter
•Standard
• Darker
• Much darker
To set the lighting mode
☛
Press Options and Lighting settings. Select Sunny,
Cloudy, Automatic or Indoors.
To set the call time duration information
☛
Press Options, Other settings and Show call timer.
Select Show call timer or Do not show.
To adjust the speaker volume
☛
Press the Up and Down keys.
Phone (M1) 22
Page 6
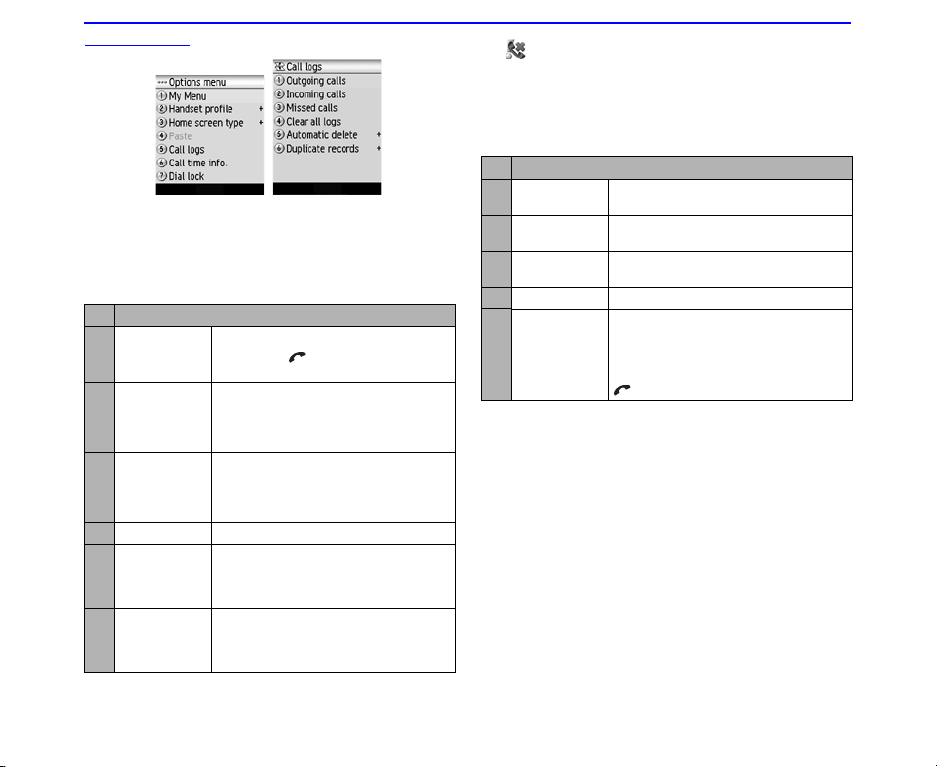
Call Logs
☛ Press Options on the Home screen to select 5 (Call
logs).
Call logs are lists of call records such as incoming/
outgoing/missed calls. Up to 20 entries are saved in each
call log. You can make a call using these logs, and do the
following from Call logs on the Options menu.
No Call logs
1 Outgoing
calls
2 Incoming
calls
3 Missed calls Displays the calls you missed.
4 Clear all logs Deletes all the call log data.
5 Automatic
delete
Duplicate
records
Displays the calls you made.
2 Pressing on the Home screen is
also available to see this menu.
Displays the calls you received.
2 Pressing the Left key on the Home
screen is also available to see this
menu.
2 Pressing the Right key on the Home
screen is also available to see this
menu.
Sets the automatic deletion function
Enable/Disable. This function
automatically deletes the call logs
when you switch off the phone.
Selects whether to allow multiple
records to/from the same number to
be made on the log or not.
Select Allow or Do not allow.
2 If you miss a call, it is shown as a missed call by an icon
on the Home screen. After you display Missed calls
the icon disappears.
, Depending on the conditions, some options may
be greyed out and not be available
You can do the following operations when displaying the call
records (outgoing/incoming/missed calls). On a call record,
press Options.
No Options menu
1 Send
message
2 Delete
this record
3 Clear
this log
4 Clear all logs Deletes all the call log data.
5 Use number Enters the phone number of the
, Depending on the conditions, some options may
be greyed out and not be available
Activates the message function.
Delete the highlighted call record.
Deletes all the call records on the log.
record you select on the Home
screen. You do not need to press the
same number again. You can make a
call to the phone number by pressing
.
23 Phone (M1)
Page 7
Text Entry
This section describes how to enter and edit text.
There are four types of text entry:
• Multitap Text (ABC) Input: Where you press each key
as many times as needed to display the character you
want.
• Numeric Input: Where you enter numbers.
®
Text Input: Where intuitive texting predicts the word
•T9
you are trying to enter.
• Symbol Input: Where you enter symbols, Greek
characters, or characters with accents.
®
2 T9
Text Input is covered by the United Kingdom Pat. No.
2238414B, Euro. Pat. No. 0 842 463 (96927260.8) and
other patents pending.
2 The maximum number of characters allowed in an item
or a field is defined as the number of single-byte
characters that can be input. When entering double byte
characters such as accents (ë, î, ô, etc.) or triple byte
characters such as the Euro symbol (€), the maximum
number of characters varies accordingly.
To start messaging
☛
Press any one of the following keys
• SK1 (MAIL) on the Home screen.
• 2 (Messages).
• i-mode ( ) key on the Home screen and 2 (Mail).
☛ Choose SMS or iMail/iMMS using SK1. (See
Messages (M2) for details.)
☛ Select the text entry field and press the Enter key to
start inputting text.
iMail/iMMSSMS
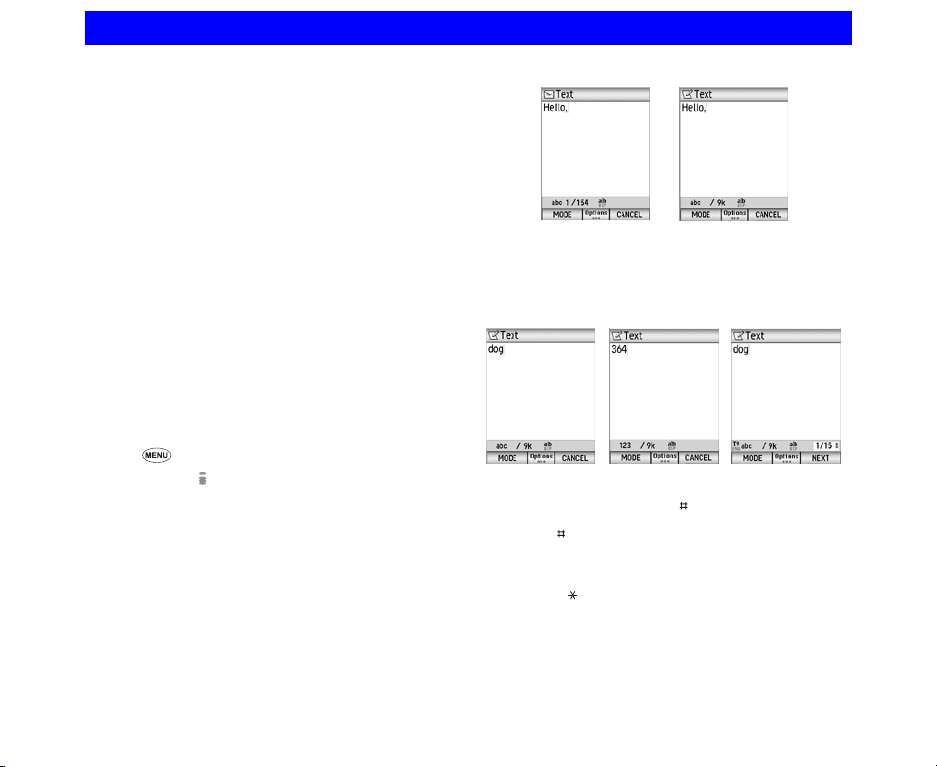
To change the input mode
☛
Every SK1 (MODE) you press changes the text entry
mode to Multitap Text Input, Numeric Input and T9®
Text Input in order.
Multitap Text Input Numeric Text Input
2 To insert symbols, press the key to switch to the Insert
symbols screen to use Symbol input menu, or press and
hold the key to use Multi symbol input menu.
Pressing Options, 1 (Insert object) and 1 (Insert
symbols) is also available for Multi symbol input menu.
(See Symbol Input in this section for details.)
2 Press the key to switch lower case, upper case (shift)
and Caps lock.
T9® Text Input
63 Text Entry
Page 8

Multitap Text (ABC) Input
The following example shows how to enter the word “dog” in
a text message:
1 To enter “d”:
Press the (3DEF) key once, then “d” appears.
2 To enter “o”:
Press the (6MNO) key three times, then “o” appears.
3 To enter “g”:
Press the (4GHI) key once, then “g” appears.
2 Press the Right key to move to the next character
position.
2 Enter the 0 key to select and insert a space.
Numeric Input
Here is the example to enter “364” in a text message after
changing to the Numeric Input mode.
1 To enter “3”:
Press the (3DEF) key; then “3” appears.
2 Enter “6”:
Press the (6MNO) key; then “6” appears.
3 Enter “4”:
Press the (4GHI) key; then “4” appears.
2 You can also enter numbers using the multitap and the
®
T9
text input modes by pressing and holding the keys.
T9® Text Input
In the T9® text Input mode, you press each key only once,
even if the character you want is not the first character on
the key.
When you press the keys, different words are suggested. If
the word you want is not suggested, you can edit the word
and register it in the dictionary for access the next time.
The following example shows how to enter the word
“fog” in a text message:
1 To enter “fog”:
Press the (3DEF) (6MNO) (4GHI) keys.
The word "dog" should appear.
2 To convert and select the word you want:
Press the Up and Down keys until the word "fog"
appears. Then press the Right or Enter key to enter the
displayed word or the 0 key to select and insert a space.
3 If the word you want is not suggested, edit the word and
register it by using the Multitap Input Mode:
Switch to the Multitap Input Mode by pressing SK1
(MODE) and enter “fog”. The word is registered in the
dictionary.
If you enter the (3DEF) (6MNO) (4GHI) keys in T9 Text
Input Mode the next time, you can select the word fog.
2 When the last word candidate is displayed, the SK1 key
is changed to Spell. If you could not find the word you
want to enter from the candidates, you can display the
text entry screen in the Multitap Input Mode by pressing
the SK1 (SPELL) key and can register the word you want
to add to the candidates.
2 The T9
®
word prediction is a feature that helps you type
faster and easier. It suggests words you have already
used. To accept a predicted word, press the Right or
Enter key.
Text Entry 64
Page 9

Symbol Input
To input symbol(s), two menus are available: Symbol input
menu and Multi symbol input menu.
By using the Symbol input menu, you can quickly select a
symbol and return to text editing, while in the Multi symbol
input menu, you can select up to 12 symbols at a time.
Symbol input
menu
Symbol input menu
To open the Symbol input menu, press the key in any
input modes.
The Symbol input menu is displayed as follows:
☛ Highlight the line in which the symbol you want is
located. You can move the highlighted line by using
the 4-way navigation key.
☛ Find the keypad number displayed above the symbol
and press the key. The temporary symbol menu
disappears after inserting a symbol.
2 You can cancel the temporary symbol menu by pressing
the key.
Multi symbol input menu
To open the Multi symbol input menu, press and hold
the key in any input modes.
Input one or more symbols using the same operation as in
the Symbol input menu as described in
menu
above. To complete symbol input and return to text
editing, press SK1 (OK). To cancel symbol input, press SK2
(CANCEL).
Multi symbol input
menu
Symbol input
Options
☛ Press Options on the Text entry field and the
following functions are available.
No Settings
1 Insert object Inserts the symbols or pictographs.
1 Inser t
symbols
2 Inser t
pictograph
2 Input method Selects the input mode.
1T9 (Refer to Multitap Text (ABC) Input,
2 ABC
3 123
3 Copy/cut/other You can copy, cut, delete or replace a
(Refer to Symbol Input in this
section.)
Inserts the pictographs.
Numeric Input and T9® Text Input
in this section.)
block of text.
2 Before performing this function,
move the cursor to the starting
point using the 4-way navigation
key to specify the starting point
on the text entry field.
2 Pressing and holding the key
also starts this function.
2 After the block of text is
selected, pressing SK1 to copy
or SK2 to cut the block is
available.
2 You can also use Options to
choose the functions from
Copy, Cut, Delete, Replace or
New selection.
2 Pressing Options and Replace
allows you to replace the
selected text by the text on the
clip board.
65 Text Entry
Page 10

No Settings
4 Paste You can paste cut/copied text after
5 Editing
options
6 New line Inserts a new line in the text.
7 T9 language Selects a language for T9® Tex t
, Depending on the conditions, some options may
be greyed out and not be available
using the Copy or Cut function.
2 Before performing this function,
move the cursor using the 4way navigation key to a specific
point.
2 Pressing and holding the key
enables use of SK2 (PA ST E) to
paste cut/copied text
2 You can paste copied/cut text
into other applications.
Sets Write mode (Insert/Overwrite)
and Clear mode (Backspace or
Delete).
2 In Backspace mode, you can
delete characters before the
cursor. In Delete mode, you can
delete characters after the
cursor.
2 Before performing this function,
move the cursor to the insertion
point of the new line.
2 Pressing the key twice also
inserts a new line.
Input. Seven types of language are
available (English, Italian, German,
French, Spanish, Greek and Dutch).
Text Entry 66
Page 11

Contacts (M5)
This section describes how to work with Contacts.
Contact Entries
Up to 500 entries can be registered in the handset contact
list. Up to 254 entries can be read from the USIM contact
list, depending on your USIM card.
To add a new entry to the contact list
☛ Press 1 (Add contact) on the Contacts screen.
2You can also open the Add contact screen by
pressing Options on the Handset contacts or
USIM contacts screen.
☛ To start Handset contacts or USIM contacts,
press 2 (Handset contacts) or 3 (USIM
contacts) on the Contacts screen
☛ Or press Down on the Home screen, then
Options and select Add contact.
☛ Fill in data on the displayed Add contact screen and
press SK1 (OK). The data you entered is saved as a
contact entry.
2Add contact provides the following fields to be
entered:
• Folder field to be stored:
Handset contacts (500 entries max.)
USIM contacts (254 entries max.)
Own no. (10 entries max.) for your phone number
Mailbox (4 entries max.) for voice/video mail
centre
Ignored (100 entries max.) for call rejection
Fixed (30 entries max.) for call restriction
• Name field
• Phone number and type field
• Email address field
To edit an entry stored
☛
Press 2 (Handset contacts) or 3 (USIM contacts) on
the Contacts screen.
2You can also choose the folders from 6 (Other
folders) which provides Own no., Mailbox,
Services, Ignored and Fixed.
☛ Select the entry and press Options.
2Pressing the Enter key twice is also available after
selecting the entry.
☛ Edit the profile and press SK1 (OK).
To edit a contact group
☛ Press 5 (Contact groups) on the Contacts screen
and select a contact group name to press SK1 (EDIT).
, You can edit data only when containing one or
more entries in one group.
☛ Fill in the profile data.
36 Contacts (M5)
Page 12
2You can edit the group name, set a group image
and select ringtones, illumination color and
vibration patterns for incoming voice calls, video
calls or messages from a member of that group.
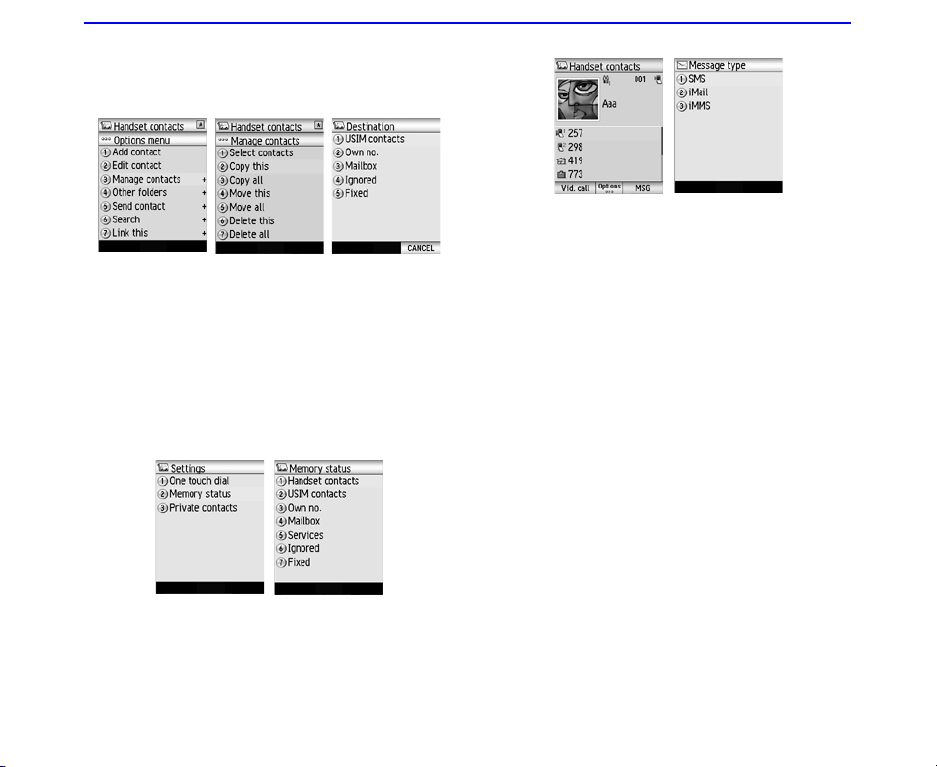
To Copy, Move or Delete the entries
☛
Choose the folder (Handset contacts, USIM
contacts or other folders) containing the entry to be
handled, and select it to press Options.
☛ Select 3 (Manage contacts) and choose any one you
want to perform from 2 to 7.
☛ Select the destination folder to copy or move the
entry, and press the Enter key.
2If you want to perform Copy all, Move all or Delete
all, pressing 4 (Manage contacts) is also
available.
To display the contact memory status
☛ Press 7 (Settings) and select 2 (Memory status).
☛ Select any one you want to check the status from 1 to
7.
To write a message from a contact list
☛
Select the entry then press the Enter key.
☛ Highlight the phone number or email address and
press SK2 (MAIL). You can send the message by
SMS, iMail or iMMS.
37 Contacts (M5)
Page 13

To send the Contact data
☛ Select the entry.
☛ Press Options to select 5 (Send contact), and
choose a message type you want to send from 1 to 4.
, You can only send contact data which is stored on
the Handset contacts list.
The following shows the data that you can enter under a
name in the Handset contacts or USIM contacts lists
2 Upper and lower cells describe Handset contacts and
USIM contacts, respectively.
No Add contact
1 Name (32 single-byte characters max.)
Can be registered, edited and
deleted.
2 Nickname (32 single-byte characters max.)
-
3 Image One image file
-
4 Phone
number
5 Email Up to 3 email addresses
6 URL One homepage address (256 single-
7 Handset
groups
Up to four phone numbers (32 digits
max. for each)
Up to 33 digits can be entered per
phone number when it includes the
international code "+".
One or two phone numbers
(This item can be registered, edited
and deleted.)
2 Though an email address can
contain up to 90 single-byte
characters when you register the
Contact entry, it is limited to 50
single-byte characters when you
send video calls.
Only one email address with up to 90
single-byte characters
byte characters max).
-
Choose from 16 groups
-
Contacts (M5) 38
Page 14
Multimedia centre (M6)
This section describes how to use multimedia centre
on your 804N to capture and play back multimedia
files. You can also use it to play back files that have
been downloaded or sent to you.
Capture
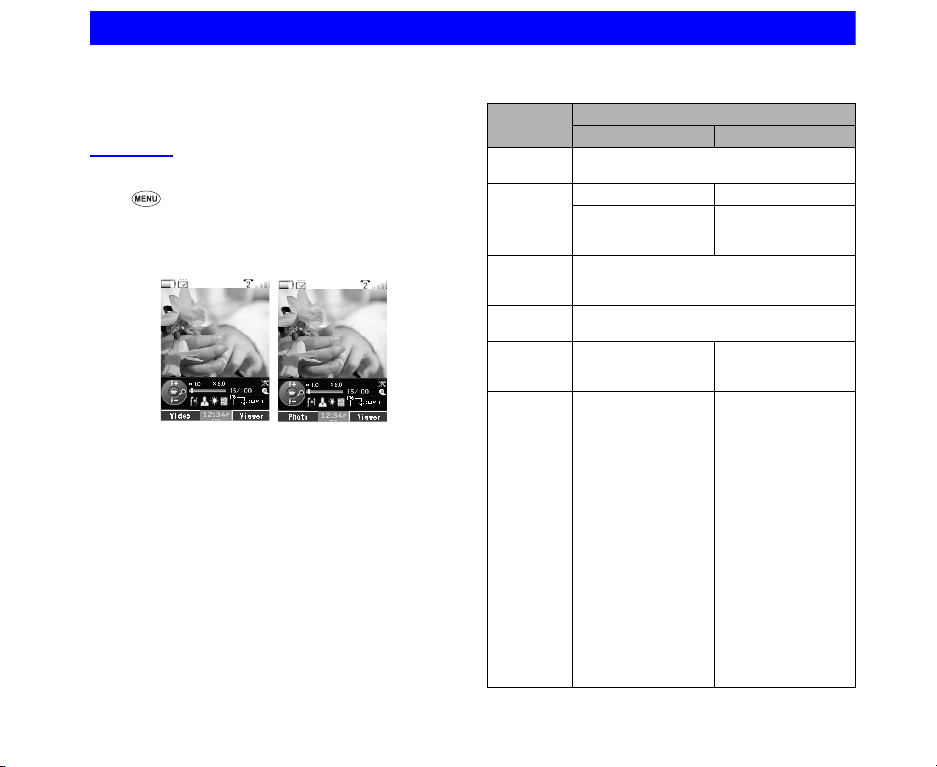
To take a photo/make a video
☛
6 (Multimedia centre) or press SK2
(CAMERA) on the Home screen.
☛ Press 1 (select Take photo) to take a photo, or press
2 (select Make video) to make video.
2Press SK1 to switch between Photo and Video
Take photo
☛ To start recording, press the Enter key.
2To turn the zoom function on/off, press the Right or
Left key.
2To adjust the exposure rate, press the Up or Down
key.
☛ To stop recording, press the Enter key again.
2The capture complete screen appears. You can do
the following from this screen.
• Press SK1 (SEND) to send the file attached to
iMail/iMMS.
• To return to the capture preview to take a new
photo or make a new video, press SK2 (BACK).
2you can use the options of Send as message,
Rename and Delete.
Make video
To understand the Option settings for your 804N’s camera,
read the following table.
Setting
items
Recording
mode
Zoom OFF/ON OFF/ON
8 levels max. 8 levels max.
Exposure
compensation
Camera
direction
File size
limit
Size (Capture size)
(File size)
300KB
Unlimited
QCIF (176 x 144)
Camera function
Video Photo
PHOTO
VIDEO
(zooming available
while shooting)
+2, +1, 0, -1, -2
IN (Inward camera)
OUT (Outward camera)
(Capture size)
Inward camera:
• CIF (352 x 288)
• QCIF (176 x 144
• CLI and icon
(160 x 160)
• SQCIF(128 x 96)
• Wall Paper
(240 x 270)
Outward camera:
• SXGA
(1280 x 1024)
• VG A (640 x 480
• CIF (352 x 288)
• QCIF (176 x 144)
• CLI and icon
(160 x 160)
• SQCIF (128 x 96)
• Wall Paper
(240 x 270)
39 Multimedia centre (M6)
Page 15

Setting
items
Picture
quality
Night
mode
Lighting
settings
Self timer - Self timer on
Sound
settings
Display
size
Memory
location
Shutter
sound
High
Standard
Economy
Video with sound
Video only
Camera function
Video Photo
High
Standard
Economy
OFF
ON
Sunny
Cloud
Automat ic
Indoors
(10 sec fix.)
Self timer off
-
Do not enlarge
enlarge
Handset
Card
Shutter sound 1
Shutter sound 2
Shutter sound 3
Recording sound
The voice recorder feature allows you to record a message
while you are not online. The recording time is 180 seconds
(or 300KB). The recorded voice is automatically saved as
an AMR file which can be attached to iMail/iMMS.
To use the voice recorder
☛
Press 3 (Record sound).
☛ To start recording, press the Enter key
☛ To stop recording, press the Enter key again.
☛ After the recording complete screen appears, press
SK1 (SEND) to send the recorded voice file attached
to a message or the SK2 (BACK) to go back to the
start recording screen.
2If 804N stores several recorded files, pressing SK2
(PLAY) plays sound sequentially from the latest file.
Multimedia centre (M6) 40
Viewing an image
The image viewer function of Multimedia centre allows you
to view JPEG, GIF, PNG, BMP, WBMP and SWF image
files. The image files can be captured by the phone,
downloaded from a browser or received attached to a
message. 804N allows you to view all the files in a selected
file.
To use the image viewer
☛
Press 4 (View images) or select View images on the
Multimedia screen
The following Options menu are available for View images.
No Options menu
1 Set as
wallpaper
2 Visual
effects
3 Edit name Edits the file name.
4 Delete Deletes the selected file.
5 Playlist Selects the playlist.
6 File
properties
Sets the selected image as wallpaper.
All supported image files are available
for setting.
Apply visual effects to the displayed
image. Select Negative image, Sepia
tone, Mirror image, Soften image,
Sharpen image or Emboss. If the
animation GIF is displayed or the
slideshow is set to ON, this option
cannot be selected.
Press SK1 (SAVE) to save the
change to the image or SK2 (UNDO)
to cancel the change.
2 Visual effects is available only when
the SQCIF (128x96) and QCIF
(176x144) size images are
displayed.
Displays information about the file
Page 16

No Options menu
7 Image
settings
Display settings:
Selects to display the image in
Default size or Fit to screen.
Slideshow timing:
Sets the interval between each
image for one to 30 seconds. The
Enter key is available to pause or
play a slideshow.
Repeat settings:
Turns the repeat function on/off and
selects the repeat target. Select
Repeat on or Repeat off. This
function repeats the playlists on the
View image. This function is also
valid for slideshows.
Slideshow:
Turns on/off the slideshow function
that displays all images in the folder.
Select Slideshow on or Slideshow
off.
Play again:
Replays from the first frame when
selected (only when the Flash file
(.swf) is playing).
To view an image file
☛
Display the image file list screen from View images.
☛ Select an image file from the file list. To select a
playlist, select an image file from the file list and select
Playlist from the Options menu.
☛ Use the Right key (next) or Left key (previous) to
display the file.
☛ Using the Up key enlarges the screen in full scale
mode. Using the Down key returns to the normal
scale.
2Full scale mode is only available when setting the
Slideshow function to Slideshow off.
☛ To attach the file to a message, press SK1 (SEND).
2SK1 (SEND) is not displayed when the attached file
is larger than 299KB file or is prohibited for transfer.
☛ To edit the file name, press Option to select 2 (Edit
name).
☛ To end View image, press Clear.
Playing video and audio
You can play the following type of files captured by the
phone, downloaded from a browser or received attached to
a message. 804N allows you to play all the files in a
selected file.
• Video files; MPEG4, WMV and H.263
• Audio files; AAC, WMA, MP3, WAV (PCM), MIDI and
AMR
2 If you download a file using the browser or receive/send
a message while playing video/audio, the sound may be
interrupted.
To play a video or audio file
☛
Press 5 (select Play video) or 6 (select Play music)
to display the video or audio file list screen.
☛ To select a playlist, select a video or audio file from the
file list and select Playlist from the Options menu.
☛ Do any of the following:
• To pause the file, press the Enter key.
• To stop the file, press and hold the Enter key while
playing.
41 Multimedia centre (M6)
Page 17

• To fast forward, press and hold the Right key while
playing or pausing.
• To rewind, press and hold the Left key while
playing or pausing.
• To skip to the next or previous file, press the Right
key (next) or Left key (previous).
• To repeat, press Options to select Repeat
settings and Repeat on.
• To control the sound volume, press the Up or
Down key, and the side key as well.
• To send the file as a message, press SK1 (SEND).
2SK1 (SEND) is not displayed when the attached
file is larger than 299KB file or is prohibited for
transfer.
2Some files may be with copyrighted settings and
thus cannot be sent out of the phone.
• To replay a file from the beginning after you start
playing, press the Left key.
2 Note that you can only do this if the play time is two
seconds or more.
The following Options menu are available for Playing video
and audio.
No Options menu
1 Ringtone Changes the ringtone settings for
2 Mute
settings
3 Rename Edit name: Edits the file name.
4 Delete Deletes the selected file.
5 Playlist Selects the playlist.
each phone mode: Standard profile,
Meeting profile, Outdoor profile and
Car profile. Ringtones are available
in each mode for Voice call,
Message received and Video call.
Turns the mute function on/off. This
function turns off 804N's speaker and
the headset.
Use title as name: If the file has its
own title, you can use it as a file
name.
No Options menu
6 File
properties
7 (For video
files)
Video
settings
(For audio
files)
Music
settings
Displays information about the file
Fit mode: You can enlarge the video
size to fit on the video frame.
2 When enlarging the video size,
stop the video first and change
the setting.
Repeat settings: Turns the repeat
function on/off and selects the file to
be repeated. Select Repeat on or
Repeat off.
Play all videos: Sequential plays all
video files in the folder.
Repeat settings: Turns the repeat
function on/off and selects the file to
be repeated. Select Repeat on or
Repeat off.
Play all music: Sequential plays all
audio files in the folder.
Change animation: You can choose
and select an animation from 4 items.
Multimedia centre (M6) 42
Page 18

Playlists
You can create a list of images, video or audio files to play
successively and save them as a playlist. You can create 20
playlists, each containing up to 20 files in the phone
memory and 50 playlists, each containing up to 100 files in
the memory card. You can add a new playlist by pressing
SK1 (ADD).
The following operations are available for the playlists under
View image, Play video, Play music and Play sound.
No Options menu
1 Add
new playlist
2 Edit playlist Adds a file to a playlist or deletes a file
3 Switch
memory
4 Edit playlist
name
5 Delete Deletes the selected playlists. If no
6 Delete all Deletes all the playlists. If no playlist is
In addition, the following submenus are available for
playlists in each of the options above: Add file, File
properties (displaying the file information depending on the
file type), Sort playlist files (ascending or descending
order By name
file, Delete and Delete all.
2 You can store the Playlist data. Using SK2 or Options
menu switches between Handeset and Card.
Adds a new playlist when you press
SK1 (ADD) or select Add new
playlist from the Options menu.
from a playlist. Select Edit playlist
from the Options menu and press
SK1 (ADD) to add a file or SK2
(DELETE) to delete a file.
Switches between the handset
memory and the memory card.
Edits the highlighted file name in the
playlists.
playlist is available, Delete cannot be
selected.
available, Delete all cannot be
selected.
↑/↓, By date ↑/↓ and By size ↑/↓), Move
43 Multimedia centre (M6)
Page 19

File manager (M3)
You can manage all of your captured and
downloaded files from the File manager function.
You can run files that have supported formats, copy,
move, delete and sort them as well as previewing
image files (thumbnails), showing file properties,
creating shortcut and attaching files to messages. In
addition, you can create uniquely-named folders to
manage the files.
Memory/Memory card
The following shows the folders under Memory or Memory
card (TransFlash memory card) and the information that
may help your file management.
2 804N provides two memory storage places, Memory
and Memory card, and each has the following folders.
No Memory/Memory card
1 Video files Stores the downloaded and captured
2 Image files Stores the downloaded and captured
3 Music files Stores the downloaded audio files.
4 Sound files Stores the downloaded and captured
video files. Five user folders can be
created under Video files with up to
100 files.
My videos is the default folder.
image files. Five user folders can be
created under Image files with a total
of 100 files.
My photos is the default folder.
Five user folders can be created
under Music files with up to 100 files.
voice files.
No Memory/Memory card
5 Other files Stores the downloaded files with
To manage your files, the following options are available.
No Options menu
1 Send
as message
2 New folder Creates a new folder in the selected
formats other than the above four
types of files. Text files are stored
here too. (You can activate the viewer
by selecting a text file.) Up to 100 files
can be stored under this folder. No
user folders can be created in this
folder. vCalendar and vCard files are
also stored in Other files.
Sends the highlighted file attached to
a message.
2 Downloaded files with copyrighted
settings cannot be sent from the
phone.
folder: Video files/Image files/Music
files/Sound files/Other files. The
default folder name starts "NEW".
2 Folder names must be unique.
3 Rename Renames the file/folders. Two options
4 Copy Copies the highlighted file/multiple
are available; one can be edited by
users and the other can automatically
be renamed with the contents title for
the audio/video files.
2 Up to 127 single-byte characters
can be used for a file name. For a
folder name, up to eight single-byte
characters can be specified.
2 You cannot rename files that are
with copyrighted settings.
files/folders to another folder.
2 Up to 100 files can be selected at
one time.
32 File manager (M3)
Page 20

No Options menu
5 Move Moves the highlighted file/multiple
6 Delete Deletes the highlighted file/multiple
7 File
properties
8 Switch
memory
9 Sort files Sorts the files in order of file name
10 Thumbnails Switches to/from list display (Show
11 Memory
status
12 link this Create shortcut on the Home screen
, Depending on the conditions, some options may
be greyed out and not be available
files/ to another folder.
2 Maximum of 100 files can be
selected at one time.
files/folders.
2 Up to 100 files can be selected at
one time.
2 When an open file is included in the
selected files to delete, the delete
operation does not complete.
Displays the file information of the
highlighted file: date, size, title
(displayed if any), file name (always
displayed), attribute, copy permission,
message transfer permission and play
restriction information.
Switches between Handset and
Memory card.
(By name), date (By date) and file
size (By size). (Files are displayed in
file name order by default.)
list) or thumbnail (Show thumbnail)
display.
Displays the amount of free/used
memory space in the handset in
bytes.
and in the My Menu list. Select Add
to Home or Add to My Menu.
Pressing SK1 (LINK THIS) on the list
screen also creates a shortcut for the
selected file.
33 File manager (M3)
Page 21

Radio Frequency (RF) Signals
THIS MODEL PHONE MEETS THE U.S. GOVERNMENT’S
REQUIREMENTS FOR EXPOSURE TO RADIO WAVES.
Your wireless phone contains a radio transmitter and
receiver. Your phone is designed and manufactured not to
exceed the emission limits for exposure to radio frequency
(RF) energy set by the Federal Communications
Commission of the U.S. Government. These limits are part
of comprehensive guidelines and establish permitted levels
of RF energy for the general population. The guidelines are
based on standards that were developed by independent
scientific organizations through periodic and thorough
evaluation of scientific studies.
The exposure standard for wireless mobile phones employs
a unit of measurement known as the Specific Absorption
Rate (SAR). The SAR limit set by the FCC is 1.6W/kg.*
Tests for SAR are conducted using standard operating
positions accepted by the FCC with the phone transmitting
at its highest certified power level in all tested frequency
bands. Although the SAR is determined at the highest
certified power level, the actual SAR level of the phone
while operating can be well below the maximum value. This
is because the phone is designed to operate at multiple
power levels so as to use only the power required to reach
the network. In general, the closer you are to a wireless
base station antenna, the lower the output.
Before a phone model is available for sale to the public, it
must be tested and certified to the FCC that it does not
exceed the limit established by the U.S. governmentadopted requirement for safe exposure. The tests are
performed on position and locations (for example, at the ear
and worn on the body) as required by FCC for each model.
The highest SAR value for this model phone as reported to
the FCC when tested for use at the ear is 0.906 W/kg, and
when worn on the body, is 0.157 W/kg. (Body-worn
measurements differ among phone models, depending
upon available accessories and FCC requirements). While
there may be differences between the SAR levels of various
phones and at various positions, they all meet the U.S.
government requirement.
The FCC has granted an Equipment Authorization for this
model phone with all reported SAR levels evaluated as in
compliance with the FCC RF exposure guidelines. SAR
information on this model phone is on file with the FCC and
can be found under the Display Grant section at http://
www.fcc.gov/oet/fccid after search on FCC ID
GKRKMP7N2H1.
For body worn operation, this phone has been tested and
meets the FCC RF exposure guidelines when used with an
accessory designated for this product or when used with an
accessory that contains no metal and that positions the
handset a minimum of 1.5 cm from the body.
* In the United States, the SAR limit for wireless mobile
phones used by the public is 1.6 watts/kg (W/kg) averaged
over one gram of tissue. SAR values may vary depending
upon national reporting requirements and the network band.
Radio Frequency (RF) Signals
Page 22

FCC Regulations:
zThis mobile phone complies with part 15 of the FCC Rules. Operation is subject to the
following two conditions: (1) This device may not cause harmful interference, and (2) this
device must accept any interference received, including interference that may cause undesired
operation.
zThis mobile phone has been tested and found to comply with the limits for a Class B digital
device, pursuant to Part 15 of the FCC Rules. These limits are designed to provide reasonable
protection against harmful interference in a residential installation. This equipment generates,
uses and can radiated radio frequency energy and, if not installed and used in accordance with
the instructions, may cause harmful interference to radio communications. However, there is
no guarantee that interference will not occur in a particular installation If this equipment does
cause harmful interference to radio or television reception, which can be determined by
turning the equipment off and on, the user is encouraged to try to correct the interference by
one or more of the following measures:
-Reorient or relocate the receiving antenna.
-Increase the separation between the equipment and receiver.
-Connect the equipment into an outlet on a circuit different from that to which the receiver is
connected.
-Consult the dealer or an experienced radio/TV technician for help.
Changes or modifications not expressly approved by the party responsible for compliance
could void the user‘s authority to operate the equipment.
 Loading...