

Page 1

CNFE10MS QIG
(7) 10/100TX + (3) 100Mbps RJ-45 / 100FX SFP
Industrial Fast Ethernet Managed Switch
Quick Installation Guide
V1.00 www.comnet.net
Page 2
2
Introduction
The ComNet CNFE10MS is a managed industrial Ethernet Switch, equipped with (7) 10/100TX ports and (3)
Fast Ethernet Copper / SFP-100FX combo ports. It has a rugged aluminum case and can operate over a wide
temperature range. The software supports full L2 management features, ring redundancy, network control,
security and alert features. The ComNet CNFE10MS also supports RS-232 console for out of band
management.
Hardware Installation
1. Unpack the box, you will find
ComNet CNFE10MS Industrial Managed Switch
RS-232 DB9 to RJ-45 console cable
Quick Installation Guide
CD User Manual
Wall Mount plate and Mounting kit
Power Supply
2. Mounting the unit - You can mount the din-rail clip on the rear of ComNet CNFE10MS on the DIN rail.
3. Power the unit and connect to network
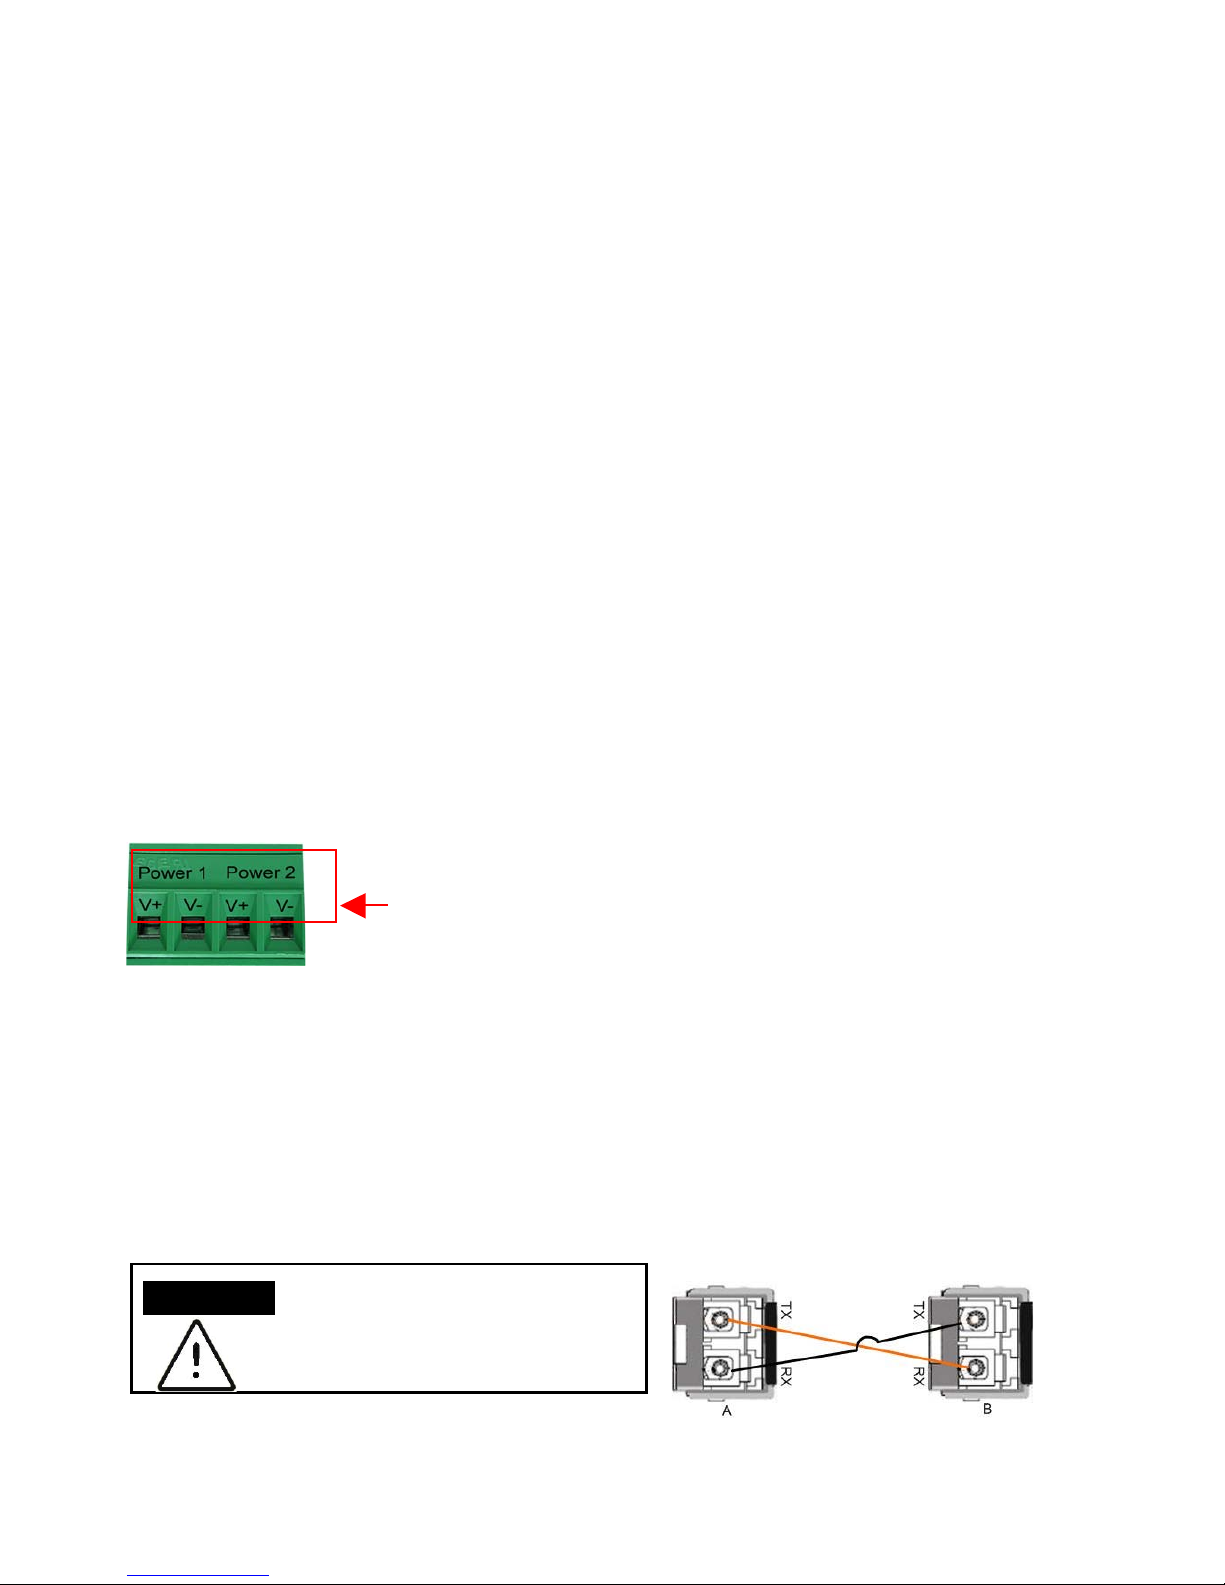
3.1 Connect the PWR1 / PWR2, and the unit will power on. PWR1 / PWR2 LED will turn Red to show unit
booting up. When the unit is ready, the LED turns Green.
3.2 Connect the 10/100M Ethernet Port: Connect the network nodes to the ComNet CNFE10MS with
2/4-pair CAT5 UTP cable. The 10/100M interfaces support auto MDI/MDIX.
3.3 Connect the 100Mbps RJ-45 combo ports: Connect the network node to the ComNet CNFE10MS with
2/4-pair CAT-5 UTP or STP cable. The 100Mbps RJ-45 combo ports only support 10Mbps in full duplex,
100Mbps in full or half duplex mode.
3.4 Connect the SFP transceiver: Plug in SFP fiber transceiver. We recommend using ComNet certificated
SFP mini GBIC transceiver. Cross-connect the transmit channel at each end to the receive channel at the
opposite end as illustrated in the figure below.
Accept 12~24AWG wire. ComNet CNFE10MS provides reverse polarity protection.
This is a Class 1 Laser/LED product.
Don’t stare at the Laser/LED Beam.
ATTENTION
Page 3
3
3.5 Should you need to connect the Digital Input or Relay Output, please refer to the wiring method
introduced in the manual.
Device Management
ComNet CNFE10MS Industrial Managed Switch provides both in-band and out-band configuration methods. You can
configure the switch via the RS232 console with the attached console cable or remotely manage the switch via network
by telnet, web browser interface.
1. Preparation for console management: Attach the RS-232 DB9 connector to your PC’s COM port. Connect the RJ-45
connector to the console port of the ComNet CNFE10MS.
1.1 Go to Start -> Program -> Accessories -> Communication -> Hyper Terminal
1.2 Give a name to the new console connection.
1.3 Choose the COM name, and select the correct serial settings. The serial settings of the CNFE10MS are as
below:
Baud Rate: 9600 / Parity: None / Data Bit: 8 / Stop Bit: 1
1.4 After connected, you can see Switch login request. Type the username and password then you can login.
The default username is “admin”, password is “admin”.
1.5 Follow the manual to configure the software features.
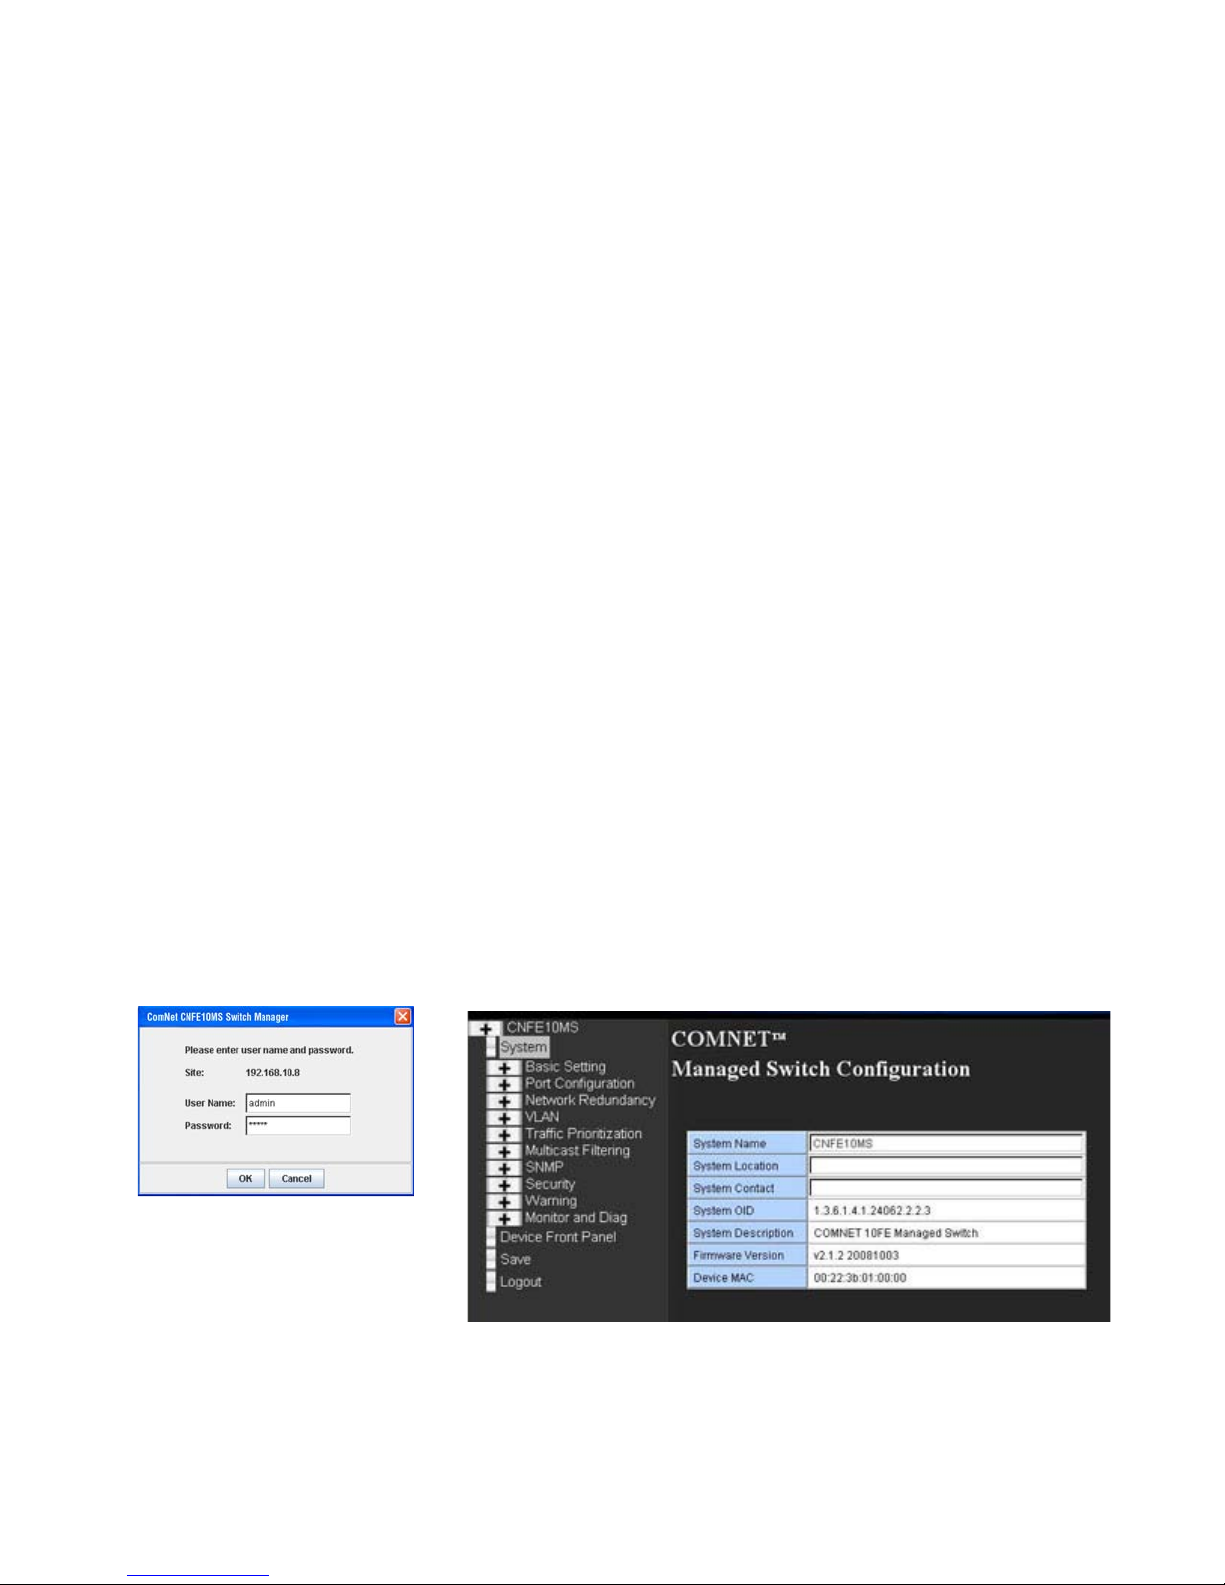
2. Preparation for Web management: Before you attempt to use the embedded web interface to manage switch
operation, verify that your CNFE10MS is properly installed on your network and that every PC on this network can
access the switch via the web browser.
2.1 Launch the web browser (Internet Explorer or Mozila Firefox) on the PC.
2.2 Type http://CNFE10MS_IP_Address (The default IP address is 192.168.10.1.) then press Enter.
2.3 The login screen will appear next. Key in the user name and the password. The default user name and
password is admin/admin.
2.4 Click OK, and then the welcome page of the web-based management interface will appear.
2.5 At the left column of the web management interface are the software features, the right column will list the
available settings.
3. Should you need to manage the switch by Telnet/SSH, please refer to the chapter 3 of ComNet CNFE10MS
manual.
Page 4

4
ComNet Customer Service
Customer Care is ComNet Technology’s global service center, where our professional staffs are ready to
answer your questions at any time. Email address of ComNet Global Service Center:
Communication Networks
3 Corporate Drive
Danbury, CT 06810
T 203 796-5300
F 203 796-5303
888 678-9427 Tech Support
© 2008 Communication Networks, LLC
All rights reserved.
The COMNET logo is a registered trademark of Communication Networks Corporation
Additional Company and product names may be trademarks or registered trademarks of the individual
companies and are respectfully acknowledged and do not imply endorsement.
Page 5
5
 Loading...