

Page 1
Instruction Guide
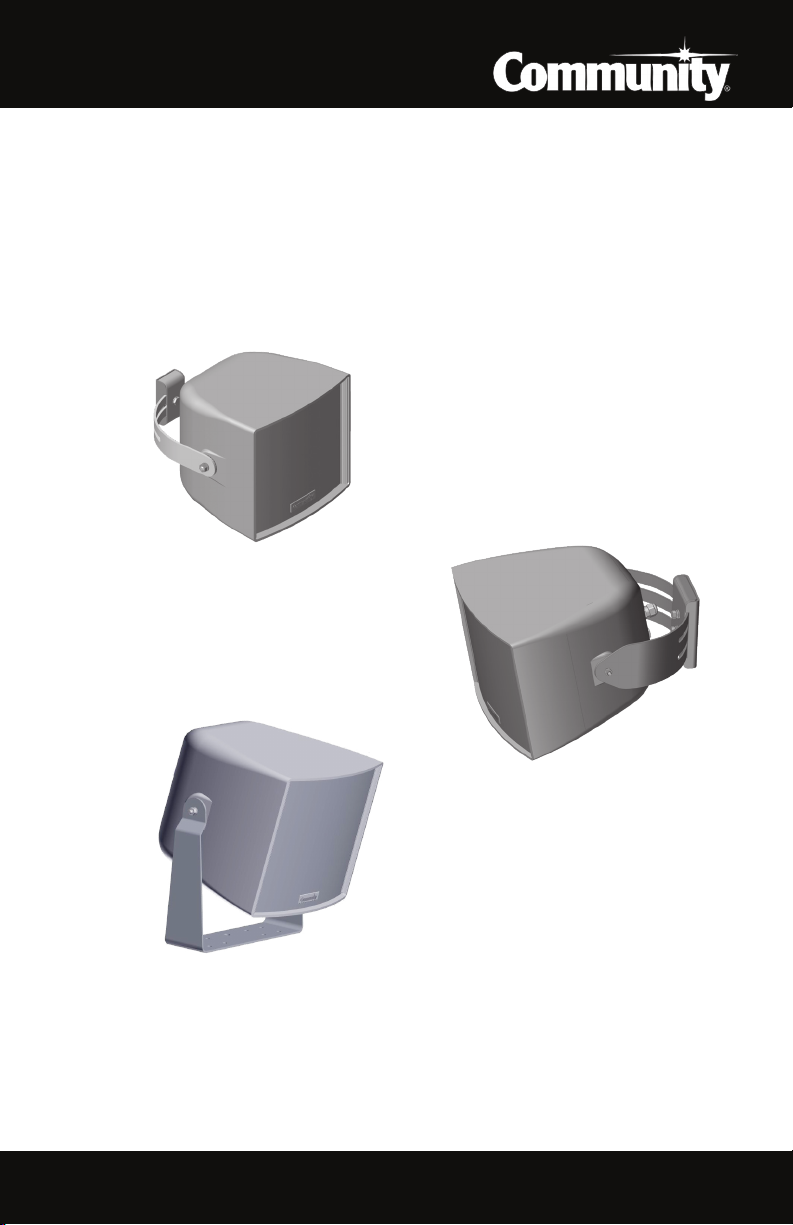
ACCESSORY YOKES
R-VTY15, R-VTY35, R-FRY35
R-VTY15
Vari-Tilt™ yoke for R.15COAX
R-VTY35
Vari-Tilt™ yoke for
R.35COAX and R.35-3896
R-FRY35
Full rotation yoke for
R.35COAX and R.35-3896
ABOUT INSTALLATION
The wiring and installation of the loudspeakers is not discussed in this guide. Please refer to the
R.15/R.35 Installation and Operation Manual for complete information.
Page 2
TOOLS / MATERIALS NEEDED:
• R.15 or R.35 Loudspeaker
• Accessory Yoke
• Metric Wrench/Socket (13mm, 16mm)
• Mounting hardware appropriate for surface (installer must supply)
INSTALLATION
q Install Vari-Tilt™ wall mount plate or full rotation yoke with hardware rated for the
mounting surface. See Caution below. Fully tighten all hardware.
q For Vari-Tilt™ yokes, follow appropriate illustration (Figure 1 or 2) to secure yoke
between the pinch plate. Snug tighten pinch plate hardware.
q Attach loudspeaker to yoke per instructions in the R.15 / R.35 Loudspeaker
Installation Guide, or per Figure 3. Ensure that the rubber gasket is between the yoke
and enclosure. The hardware to attach the yoke to the loudspeaker is supplied with
the loudspeaker.
q Aim the loudspeaker to the intended audience, set the angle, and tighten all
mounting hardware.
WARNING: Be careful not to over- or under-tighten fasteners. Sufcient torque must be applied to
ensure a secure assembly. Over-tightening can lead to damaged fasteners, thus weakening the
component mounting. Either scenario can lead to risk of assembly separation leading to injury,
death, or property damage.
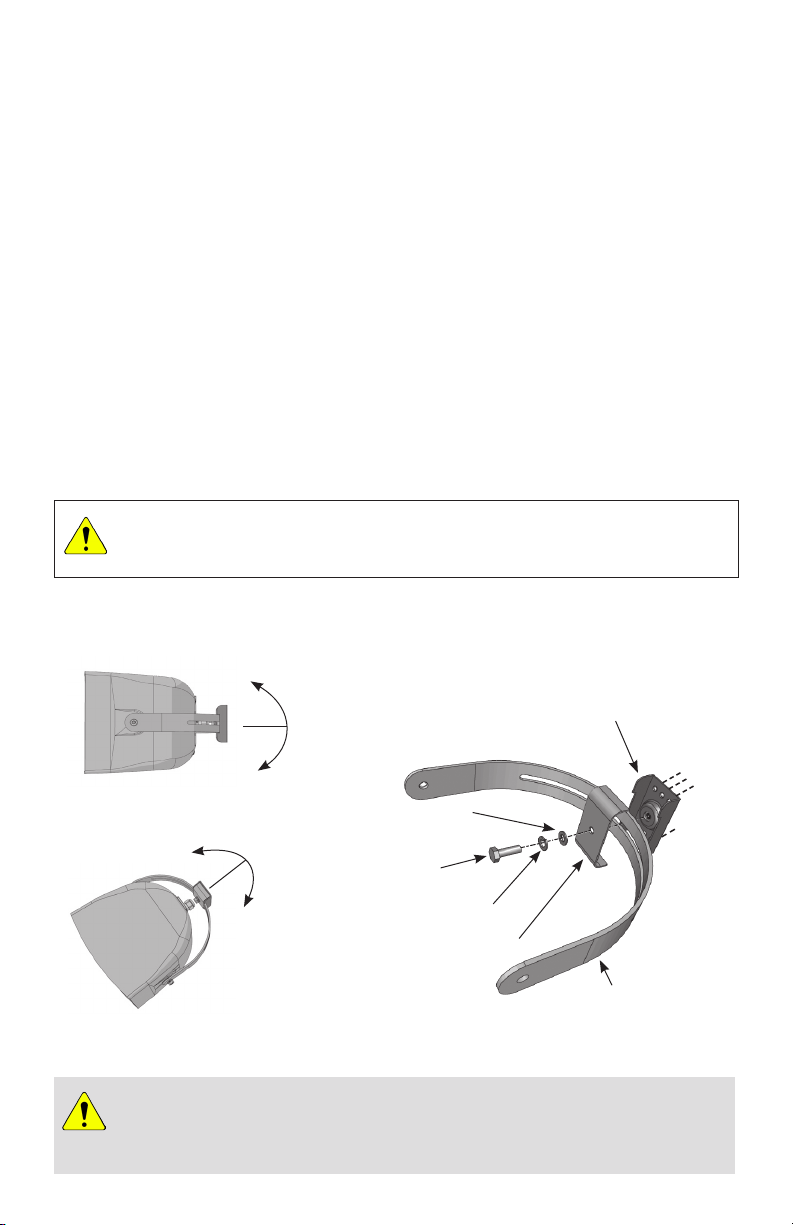
R-VTY15 Vari-Tilt™ Yoke
Attach wall mount plate to sur face -
78°
78°
Range of rotation from center
63°
63°
8x25 mm Hex Bolt
Installer must supply appropriate hardware
Wall Mount Plate
8mm Flat Washer
8 mm Lock Washer
Wall Mount Pinch Plate
Figure 1. R-VTY15 installation
CAUTION: Installation of R-Series loudspeakers should only be performed by trained
and qualied personnel. It is strongly recommended that a licensed and certied
professional structural engineer approve the mounting design. Severe injury and/or
loss of life may occur if this product is improperly installed.
Vari -Tilt Yoke
Page 3

R-VTY35 Vari-Tilt™ Yoke
74°
74°
Range of rotation from center
47°
47°
10 x 35 mm H ex Bolt
Figure 2. R-VTY35 installation
R-FRY35 Full Rotation Yoke
Installer must supply appropriate hardware
Pinch Plate
10 mm Lock Washer
Enclosure
Attach wall mount plate to sur face -
Wall Mount Plate
10 mm Flat Washer
8 x 32 mm SS Stud
(leave 3/4" sticking out)
Vari -Tilt Yoke
2" OD
Rubber Gasket
360°
8 mm SS
Hex Nut
R.35 loudspeaker can fully
rotate in the yoke
Yok e
Mount yoke to the surface using holes aligned with large center hole as primary mounting
points - these are aligned with the center of gravity. Use other holes as secondar y
reinforcement. Orient angled side to the front of the loudspeaker if the yoke is mounted
below the enclosure.
Hardware to attach all accessory yokes to the enclosure is supplied with the loudspeaker.
8 mm SS
Lock Washer
8mm SS Flat Washer
Figure 3. Yoke attachment to loudspeaker (R-FRY35 shown)
Page 4

WARRANTY INFORMATION
TRANSFERABLE WARRANTY “(LIMITED)" VALID IN THE USA ONLY
The R-Series Loudspeaker Systems are designed and backed by Community
Professional Loudspeakers. For complete warranty information within the USA please visit
www.communitypro.com/warranty. Please call 610-876-3400 to locate your nearest Authorized
Field Service Station. For Factory Service call 610-876-3400. You must obtain a Return
Authorization (R/A) number prior to the return of your product for factory service.
WARRANTY INFORMATION FOR COUNTRIES OTHER THAN THE USA
To obtain specic warranty information and available service locations for countries other than the
United States of America, contact the authorized Community Distributor for your specic country
or region.
SHIPPING DAMAGE / CLAIMS
If the product is damaged during transit you must le a damage claim directly with the freight
company. It’s very important to contact the freight company as soon as possible after receiving
your shipment, as most freight companies have a short time limit within which they will investigate
claims. Be sure to save the carton and packing materials, as damage claims can be denied if
these materials are not retained. If evidence of physical damage exists upon arrival, be cautious
before signing the delivery acceptance receipt. Often, the ne print will waive your right to le a
claim for damage or loss after you sign it. Make sure that the number of cartons shown on the
freight documents have actually been delivered.
Note: Every effort has been made to insure that the information contained in this manual was complete and
accurate at the time of printing. However, due to ongoing technical advances, changes or modications may
have occurred that are not covered in this manual. Visit Community at http://www.communitypro.com for the
latest version of this document and the most recent product information.
©2013 Community Professional Loudspeakers
Community Professional Loudspeakers
333 East Fifth Street, Chester, PA 19013-4511 USA
Phone: (610) 876-3400 • Fax: (610) 874-0190
www.communitypro.com
# 113008 6SEPT2013
 Loading...